
Butterfinger Balls

Delicious Butterfinger Balls dessert made with chocolate and peanut butter.

There’s something truly magical about the combination of chocolate and peanut butter that takes us back to our childhood. I still remember the first time I bit into a Butterfinger candy bar; the crunchy, peanut-buttery goodness exploded in my mouth, leaving a lasting impression. Now, imagine transforming that classic candy into bite-sized wonders that you can make at home! Butterfinger Balls bring back those nostalgic flavors in an easy-to-make treat that everyone will love.

Why Make This Recipe

Butterfinger Balls are simple to prepare and require no baking. They are perfect for sharing at family gatherings, potlucks, or holiday parties. Plus, they’re incredibly delicious and satisfying, who doesn’t love the combination of chocolate, peanut butter, and the crunchy goodness of Butterfinger? They are also fun to make with kids, allowing them to get involved in the kitchen and create a tasty treat that they can enjoy.

How to Make Butterfinger Balls

Ingredients:

  • 4 tablespoons of softened butter (equivalent to ½ stick)
  • 1 teaspoon of vanilla extract
  • 8 ounces of chocolate bark or chocolate chips
  • ½ cup of crushed Butterfinger bars
  • 1 cup of powdered sugar
  • 1 cup of peanut butter (avoid using all-natural varieties)
  • ¾ cup of graham cracker crumbs
  • Optional garnishes: more crushed Butterfinger bars, festive sprinkles, or coarse sea salt

Directions:

  1. Ensure all ingredients are ready before you start.
  2. Use a ziplock bag and a rolling pin to crush the Butterfinger bars into fine grounds.
  3. In a mixing bowl, blend the softened butter, peanut butter, powdered sugar, vanilla extract, and graham cracker crumbs until you achieve a smooth mixture.
  4. Roll the dough into walnut-sized pieces and place them on a baking sheet lined with parchment paper.
  5. Melt the chocolate bark or chocolate chips in a double boiler or microwave, stirring often to prevent burning.
  6. Once melted, coat each ball in the chocolate and place them back on the baking sheet.
  7. Refrigerate for about an hour to allow them to set.

How to Serve Butterfinger Balls

Serve Butterfinger Balls chilled or at room temperature. You can place them in a festive bowl or on a decorative platter. For a fun twist, sprinkle some extra crushed Butterfinger bars, colorful sprinkles, or coarse sea salt on top before serving.

How to Store Butterfinger Balls

Store any leftover Butterfinger Balls in an airtight container in the refrigerator. They will stay fresh for up to one week. For longer storage, you can freeze them for up to three months. Just be sure to separate the layers with parchment paper to prevent sticking.

Tips to Make Butterfinger Balls

  • Make sure your butter is softened for easier mixing.
  • Use a good quality chocolate for coating to enhance the flavor of the balls.
  • If the mixture feels too sticky, you can add a little more graham cracker crumbs to help with rolling.
  • Have fun with the toppings! Get creative with different decorations to suit any occasion.

Variation

For a twist on the classic Butterfinger Balls, try adding a pinch of sea salt to the chocolate coating. You can also mix in other crushed candies or nuts for added flavor and texture.

FAQ SECTION

1. Can I use natural peanut butter for this recipe?
No, it’s best to avoid all-natural peanut butter as it can have a different texture and consistency that affects the dough.

2. How can I make these gluten-free?
You can use gluten-free graham crackers or crushed gluten-free cookies as a substitute for graham cracker crumbs.

3. Can I make Butterfinger Balls ahead of time?
Absolutely! You can make them a few days in advance and store them in the fridge or freezer until you’re ready to serve them.

With this easy recipe, you can impress family and friends with a delightful treat that’s sure to bring back sweet memories! Enjoy making and sharing your Butterfinger Balls.

[tasty-recipe id=”3297″]

Butterfinger Balls

A delightful no-bake treat that combines chocolate and peanut butter in bite-sized pieces, reminiscent of the classic Butterfinger candy bar.

Main Ingredients

  • 4 tablespoons softened butter (½ stick)
  • 1 teaspoon vanilla extract
  • 8 ounces chocolate bark or chocolate chips
  • ½ cup crushed Butterfinger bars
  • 1 cup powdered sugar
  • 1 cup peanut butter (Avoid using all-natural varieties)
  • ¾ cup graham cracker crumbs

Optional Garnishes

  • more crushed Butterfinger bars (For topping)
  • festive sprinkles (For topping)
  • coarse sea salt (For topping)

Preparation

  1. Ensure all ingredients are ready before you start.
  2. Use a ziplock bag and a rolling pin to crush the Butterfinger bars into fine grounds.
  3. In a mixing bowl, blend the softened butter, peanut butter, powdered sugar, vanilla extract, and graham cracker crumbs until you achieve a smooth mixture.
  4. Roll the dough into walnut-sized pieces and place them on a baking sheet lined with parchment paper.

Coating

  1. Melt the chocolate bark or chocolate chips in a double boiler or microwave, stirring often to prevent burning.
  2. Once melted, coat each ball in the chocolate and place them back on the baking sheet.

Setting

  1. Refrigerate for about an hour to allow them to set.

Serve chilled or at room temperature. Store any leftovers in an airtight container in the refrigerator for up to one week, or freeze for up to three months. Use parchment paper to separate layers when freezing. Tips include ensuring butter is softened for easier mixing and using good quality chocolate for coating.
Dessert, Snack
American
Butterfinger Balls, Chocolate and Peanut Butter, Easy Desserts, Kid-Friendly Treats, No-Bake Treats

Healthy Peanut Butter Banana Muffins

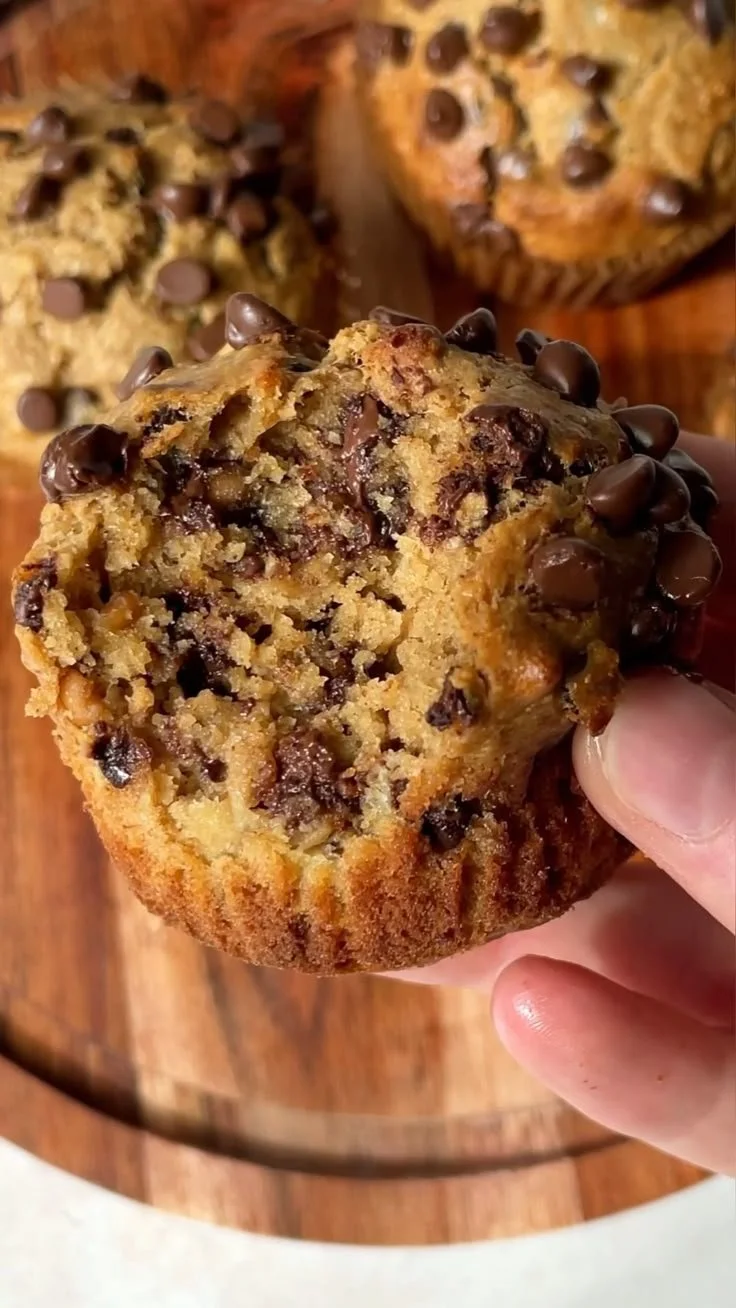
Healthy peanut butter banana muffins fresh out of the oven.

Peanut Butter Banana Muffins fit busy mornings, and this do just that. They are soft, nutty, and sweet from ripe bananas. The muffins make a great breakfast, snack, or lunchbox treat. This recipe is simple, uses real food, and pleases a crowd. You will love the peanut butter flavor with banana, and how easy they are to make. Ready to bake something warm and comforting, that still feels good to eat?

How to prepare Peanut Butter Banana Muffins

Yield: about 12 muffins, Bake time: 18 to 22 minutes, Oven: 350°F (175°C)

Ingredients

  • 3 ripe bananas, mashed
  • 1/2 cup peanut butter, smooth or crunchy
  • 1/3 cup honey or maple syrup
  • 2 eggs, room temperature
  • 1/4 cup milk, dairy or plant milk
  • 1 tsp vanilla extract
  • 1 cup whole wheat flour or oat flour
  • 1 tsp baking powder
  • 1/2 tsp baking soda
  • 1/4 tsp salt
  • 1/3 cup rolled oats or chopped nuts, optional
  • 1/4 cup dark chocolate chips, optional

Directions

  1. Preheat your oven to 350°F, line a muffin tin with paper cups or grease it lightly.
  2. In a big bowl, mash the bananas with a fork until smooth. Add peanut butter, honey, eggs, milk, and vanilla, mix well.
  3. In another bowl, stir together the flour, baking powder, baking soda, and salt.
  4. Pour the dry mix into the wet mix, stir until just combined, do not overmix. Fold in oats or nuts and chocolate chips if you like.
  5. Spoon the batter into the muffin cups, fill each about two thirds full.
  6. Bake 18 to 22 minutes, until tops are golden and a toothpick comes out clean.
  7. Let muffins cool in the tin for 5 minutes, then move to a rack to cool more. Enjoy warm or room temperature.

Healthy Peanut Butter Banana Muffins

Why You’ll Love Peanut Butter Banana Muffins

  • They use ripe bananas, so you get natural sweetness and moist muffins.
  • Peanut butter adds protein and rich flavor, making them filling and tasty.
  • They work as a quick breakfast, snack, or lunchbox treat.
  • You can make them with whole wheat or oat flour for a healthier twist.
  • They are easy to make, and kids usually love them.

Tips for success

  • Use very ripe bananas, they give the best taste and moisture.
  • Do not overmix the batter, a few lumps are okay, this keeps muffins soft.
  • If you want less sugar, use less honey or skip the chocolate chips.
  • For a gluten free option, use certified gluten free oat flour.
  • Check muffins at 18 minutes, ovens vary, and you do not want them dry.

Serving Suggestions

  • Serve warm with a thin spread of peanut butter on top.
  • Pair with yogurt and fruit for a quick breakfast.
  • Pack them in a lunch box with fresh apples or carrot sticks.
  • Crumble over plain yogurt for a simple parfait.

Healthy Peanut Butter Banana Muffins

FAQs

Q: Can I freeze these muffins?
A: Yes, cool them fully, wrap in foil or put in a freezer bag, freeze up to 3 months. Thaw at room temperature or warm in the oven.

Q: Can I make these without eggs?
A: Yes, use flax eggs, mix 2 tablespoons ground flax with 6 tablespoons water, let sit 5 minutes, then use in place of 2 eggs.

Q: Are these muffins high in protein?
A: They have more protein than plain banana muffins because of the peanut butter and eggs, but they are not a protein bar. Add Greek yogurt or extra peanut butter for more protein.

Q: Can I use almond butter instead of peanut butter?
A: Yes, almond butter or any nut butter works, the flavor will change slightly but they stay very good.

Q: Can I make mini muffins?
A: Yes, bake mini muffins 10 to 14 minutes, check often as they cook faster.

Conclusion

If you want one more simple reference for a similar version, you can find a good recipe example at Healthy Peanut Butter Banana Muffins – Broma Bakery.

Healthy Peanut Butter Banana Muffins

These soft, nutty, and sweet muffins are easy to make and perfect for a busy morning. Enjoy them as a breakfast, snack, or lunchbox treat!

Main Ingredients

  • 3 pieces ripe bananas, mashed (Use very ripe bananas for the best taste and moisture.)
  • 1/2 cup peanut butter, smooth or crunchy (Can substitute with almond butter or other nut butters.)
  • 1/3 cup honey or maple syrup (Use less if you prefer a less sweet muffin.)
  • 2 pieces eggs, room temperature (Optional: can use flax eggs as a substitute.)
  • 1/4 cup milk, dairy or plant milk
  • 1 tsp vanilla extract
  • 1 cup whole wheat flour or oat flour (For gluten-free, use certified gluten-free oat flour.)
  • 1 tsp baking powder
  • 1/2 tsp baking soda
  • 1/4 tsp salt
  • 1/3 cup rolled oats or chopped nuts, optional
  • 1/4 cup dark chocolate chips, optional

Preparation

  1. Preheat your oven to 350°F (175°C) and line a muffin tin with paper cups or grease it lightly.
  2. In a big bowl, mash the bananas with a fork until smooth. Add peanut butter, honey, eggs, milk, and vanilla, then mix well.
  3. In another bowl, stir together the flour, baking powder, baking soda, and salt.
  4. Pour the dry mix into the wet mix and stir until just combined. Do not overmix. Fold in oats or nuts and chocolate chips if desired.
  5. Spoon the batter into the muffin cups, filling each about two thirds full.
  6. Bake for 18 to 22 minutes, until tops are golden and a toothpick comes out clean.
  7. Let muffins cool in the tin for 5 minutes, then transfer to a rack to cool more. Enjoy warm or at room temperature.

For serving suggestions, enjoy warm with a thin spread of peanut butter, pair with yogurt and fruit, or crumble over yogurt for a parfait. Muffins can be frozen for up to 3 months.

Breakfast, Snack
American
Baking, Easy Breakfast Recipe, Healthy Muffins, Nutty Muffins, Peanut Butter Banana Muffins