Chickpea Feta Avocado Salad

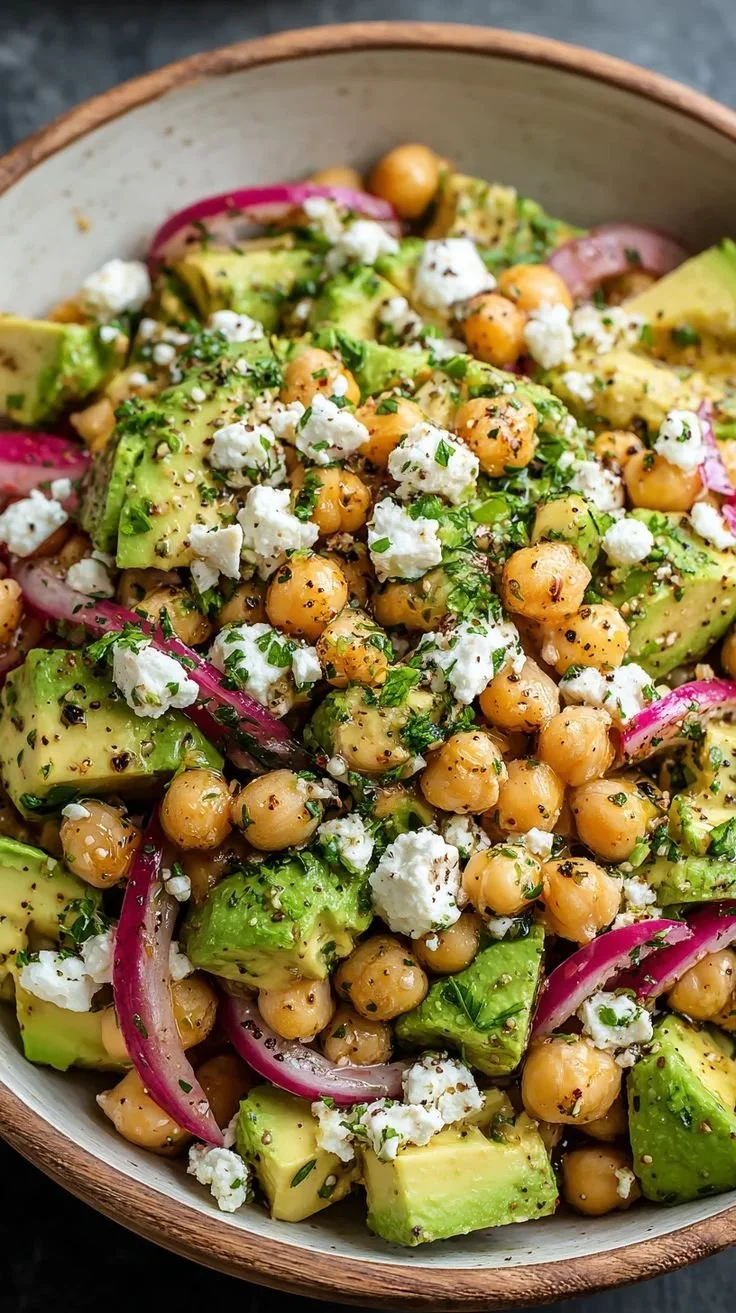
Chickpea Feta Avocado Salad with fresh ingredients in a vibrant bowl.

This Chickpea Feta Avocado Salad is bright, fresh, and very easy to make. It mixes creamy avocado, salty feta, and hearty chickpeas for a tasty and healthy dish. You get protein from the chickpeas, healthy fat from the avocado, and a fresh crunch from veggies. This salad works as a quick lunch, a light dinner, or a side for a picnic. If you want the full set of measurements and notes, see the SavoryLine recipe page. You will love how simple it is, and it will please a crowd, every time.

How to prepare Chickpea Feta Avocado Salad

  1. Rinse and drain two cans of chickpeas, then pat dry.
  2. Cut 2 ripe avocados into cubes, and squeeze a little lemon to slow browning.
  3. Halve 1 cup cherry tomatoes, dice 1 cucumber, and finely chop 1 small red onion.
  4. Crumble 1 cup feta cheese and chop a handful of fresh parsley.
  5. In a large bowl, combine chickpeas, avocado, tomatoes, cucumber, onion, and parsley.
  6. Make a simple dressing, whisking 3 tablespoons olive oil, 2 tablespoons lemon juice, 1 teaspoon Dijon mustard, salt, and pepper.
  7. Pour the dressing over the salad and toss gently to coat, try not to mash the avocado.
  8. Taste and adjust salt, pepper, or lemon juice, serve right away or chill for 20 minutes to blend flavors.

Chickpea Feta Avocado Salad

Why You’ll Love strawberry-salad

  • It is quick to make, ready in about 15 minutes.
  • The salad has a mix of textures, creamy avocado, crumbly feta, and firm chickpeas.
  • It is healthy and filling, perfect for a light lunch or side dish.
  • The flavors are bright, lemony, and a little salty from the feta, very refreshing.
  • You can change it easily, add herbs or spices for a new taste.

Tips for success

  • Use ripe but firm avocados, they hold shape better when tossed.
  • Pat the chickpeas dry to avoid a watery salad.
  • Add salt slowly, feta adds salt too.
  • Toss gently to keep avocado pieces whole.
  • If you need to make ahead, keep avocado and dressing separate and add just before serving.

Serving Suggestions

  • Serve over greens like baby spinach or arugula for a fuller salad.
  • Spoon onto toasted pita or whole grain bread for a sandwich.
  • Pair with grilled chicken or fish for a complete meal.
  • Bring to picnics or potlucks, it travels well if dressed lightly.

Chickpea Feta Avocado Salad

FAQs

Q: Can I make this salad ahead of time?

A: Yes, you can prep the chickpeas and veggies ahead. Keep the avocado and dressing separate and combine them right before serving.

Q: Is this salad gluten free?

A: Yes, the basic salad is gluten free, just check any added sides or bread.

Q: Can I swap the feta for a dairy-free option?

A: Yes, use a vegan cheese or skip the cheese and add extra herbs for flavor.

Q: How long will leftovers keep?

A: Keep leftovers in an airtight container in the fridge for 1 to 2 days, best eaten the same day to keep avocado fresh.

Q: Can I add other beans or grains?

A: Yes, try adding cooked quinoa, farro, or white beans for more bulk.

Conclusion

This Chickpea Feta Avocado Salad is simple, fresh, and full of flavor, a great go-to for many meals. For another version and extra ideas, check Two Peas & Their Pod’s Chickpea, Avocado, & Feta Salad.

Chickpea Feta Avocado Salad

This bright and fresh salad combines creamy avocado, salty feta, and hearty chickpeas for a tasty and healthy dish, perfect for lunch, dinner, or a side at a picnic.

Salad Ingredients

  • 2 cans canned chickpeas, rinsed and drained (Pat dry to avoid a watery salad.)
  • 2 pieces ripe avocados, cubed (Use ripe but firm avocados for better texture.)
  • 1 cup cherry tomatoes, halved
  • 1 piece cucumber, diced
  • 1 small red onion, finely chopped
  • 1 cup feta cheese, crumbled (Can substitute with dairy-free cheese if desired.)
  • 1 handful fresh parsley, chopped

Dressing Ingredients

  • 3 tablespoons olive oil
  • 2 tablespoons lemon juice (Freshly squeezed is best.)
  • 1 teaspoon Dijon mustard
  • Salt and pepper to taste (Add salt slowly, as feta adds salt too.)

Preparation

  1. Rinse and drain the canned chickpeas, then pat dry.
  2. Cut the ripe avocados into cubes and squeeze a little lemon juice to slow browning.
  3. Halve the cherry tomatoes, dice the cucumber, and finely chop the red onion.
  4. Crumble the feta cheese and chop a handful of fresh parsley.

Combine Ingredients

  1. In a large bowl, combine the chickpeas, avocado, tomatoes, cucumber, onion, and parsley.

Make Dressing

  1. In a separate bowl, whisk together olive oil, lemon juice, Dijon mustard, salt, and pepper.

Final Steps

  1. Pour the dressing over the salad and toss gently to coat, taking care not to mash the avocado.
  2. Taste and adjust salt, pepper, or lemon juice as needed.
  3. Serve right away or chill for 20 minutes to blend flavors.

This salad is quick to make, healthy, and filling. You can serve it over greens like baby spinach or arugula, spoon it onto toasted pita or whole grain bread, or pair it with grilled chicken or fish. It travels well for picnics or potlucks.
lunch, Salad, Side Dish
Healthy, Mediterranean
Avocado Salad, Chickpea Salad, Feta Salad, Healthy Salad, Quick Salad

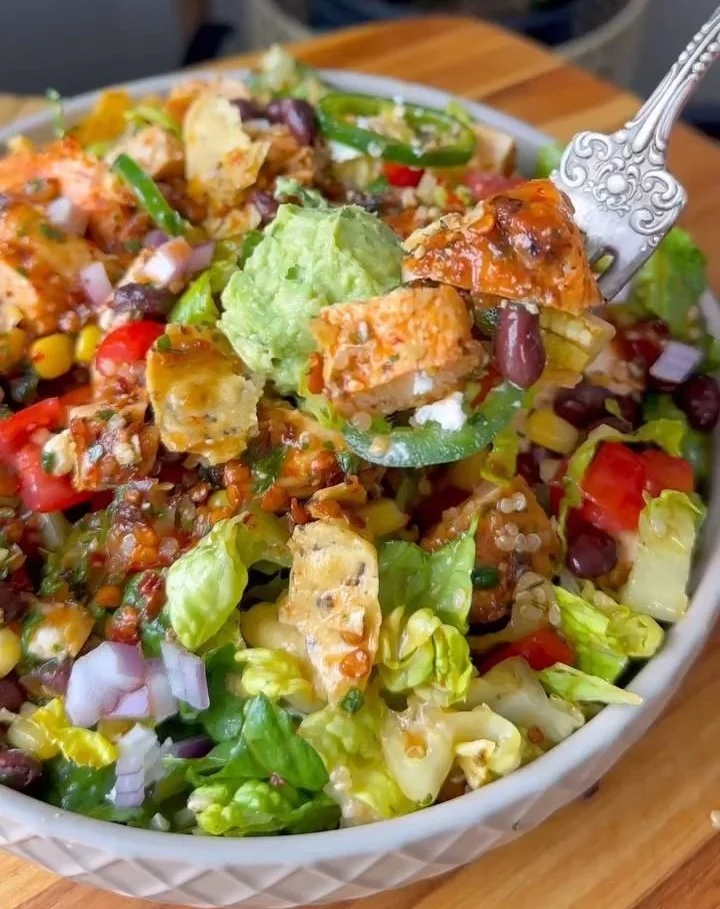
Santa Fe Salad

Colorful Santa Fe Salad with fresh ingredients and vibrant flavors

Santa Fe Salad feels bright, fresh, and a little spicy. It mixes crunchy greens, creamy avocado, sweet corn, and smoky spices. This featured Santa Fe Salad is a crowd-pleaser. It hits salty, tangy, and fresh notes in each bite. If you like simple, bold salads, try my chickpea cucumber feta salad for another easy meal that uses similar fresh flavors. Get ready to toss this together and enjoy a lively, colorful plate that makes weeknight dinners fun.

How to prepare Santa Fe Salad

Ingredients

  • Romaine lettuce or mixed greens, washed and chopped
  • Cooked chicken breast, sliced, or black beans for a vegetarian option
  • Canned black beans, drained and rinsed
  • Corn, fresh or thawed frozen
  • Cherry tomatoes, halved
  • Avocado, diced
  • Red onion or green onion, thin sliced
  • Shredded cheddar or pepper jack cheese
  • Tortilla strips or crushed tortilla chips
  • Fresh cilantro, chopped
  • Lime wedges

Simple dressing

  • Olive oil
  • Fresh lime juice
  • Cumin
  • Chili powder
  • Salt and pepper
  • A little honey or plain yogurt, optional

Directions

  1. Season the chicken with salt, pepper, cumin, and chili powder, then grill or pan sear until done. Let rest, then slice. For a vegetarian salad, skip the chicken and use extra black beans.
  2. Warm the corn in a pan or microwave, if you like it warm. Let it cool a bit.
  3. In a small bowl, whisk olive oil, lime juice, cumin, chili powder, salt, and a touch of honey or yogurt to make a bright dressing.
  4. In a large bowl, add lettuce, black beans, corn, tomatoes, onion, avocado, and cheese.
  5. Toss with a few tablespoons of dressing until the salad looks coated. Add more dressing if you like.
  6. Top with sliced chicken, tortilla strips, and chopped cilantro.
  7. Serve with lime wedges on the side.

Santa Fe Salad

Why You’ll Love Santa Fe Salad

  • It mixes warm and cool textures, like grilled chicken and fresh avocado.
  • The flavors are bold, with cumin, lime, and cilantro that make a southwest salad taste.
  • It is easy to make ahead, the dressing keeps the salad bright.
  • You can make it vegetarian with black beans and still feel full.
  • It looks great on the table, with bright corn, tomatoes, and greens.

Tips for success

  • Dry the lettuce well, so the dressing does not make it soggy.
  • Add avocado last, just before serving, to keep it green.
  • Warm the chicken or corn slightly for a nice contrast with cool greens.
  • Keep tortilla strips separate until you serve, so they stay crunchy.
  • Taste the dressing and adjust lime or salt, until it feels bright and lively.

Serving Suggestions

  • Serve with warm corn tortillas or crusty bread.
  • Pair with a chilled lager or iced tea for a casual meal.
  • Add a side of salsa or pickled jalapeños for more heat.
  • Make bowls for lunches, adding rice or quinoa for more bulk.

Santa Fe Salad

FAQs

Q: Can I make this salad ahead of time?

A: Yes, you can chop ingredients and make the dressing up to a day ahead. Keep avocado and tortilla strips separate until you serve.

Q: What can I use instead of chicken?

A: Use black beans, grilled shrimp, or tofu for a great swap.

Q: How do I keep the salad from getting soggy?

A: Dress the salad just before serving and keep crunchy toppings separate until the end.

Q: Is this salad spicy?

A: It can be mild to medium. Add more chili powder or jalapeño if you want more heat.

Conclusion

For another take on a lively southwest-style salad, check this recipe for inspiration, Santa Fe Salad – Nourished by Nic.

Santa Fe Salad

A bright and fresh salad featuring crunchy greens, creamy avocado, sweet corn, and smoky spices, perfect for a lively dinner.

Salad Ingredients

  • 1 head Romaine lettuce or mixed greens, washed and chopped (Choose your preferred green.)
  • 1 cup Cooked chicken breast, sliced, or black beans for a vegetarian option (Chicken or black beans can be used based on dietary preference.)
  • 1 can Canned black beans, drained and rinsed (Optional for additional protein.)
  • 1 cup Corn, fresh or thawed frozen (Can be warmed if desired.)
  • 1 cup Cherry tomatoes, halved (Gives sweetness and color.)
  • 1 medium Avocado, diced (Add just before serving to prevent browning.)
  • 1/4 cup Red onion or green onion, thin sliced (For a mild onion flavor.)
  • 1 cup Shredded cheddar or pepper jack cheese (Choose based on your spice preference.)
  • 1 cup Tortilla strips or crushed tortilla chips (Add crunch to the salad.)
  • 1/4 cup Fresh cilantro, chopped (Adds freshness.)
  • 2 pieces Lime wedges (For serving.)

Dressing Ingredients

  • 1/4 cup Olive oil (Base for the dressing.)
  • 2 tablespoons Fresh lime juice (Adjust to taste.)
  • 1 teaspoon Cumin (Adds warm flavor.)
  • 1 teaspoon Chili powder (For some spice.)
  • 1/2 teaspoon Salt (Enhances taste.)
  • 1/2 teaspoon Pepper (To taste.)
  • 1 teaspoon Honey or plain yogurt, optional (For a touch of sweetness.)

Preparation

  1. Season the chicken with salt, pepper, cumin, and chili powder, then grill or pan sear until done. Let rest, then slice.
  2. For a vegetarian salad, skip the chicken and use extra black beans.
  3. Warm the corn in a pan or microwave, if you like it warm. Let it cool a bit.

Make the Dressing

  1. In a small bowl, whisk together olive oil, lime juice, cumin, chili powder, salt, and a touch of honey or yogurt to make a bright dressing.

Assemble the Salad

  1. In a large bowl, add lettuce, black beans, corn, tomatoes, onion, avocado, and cheese.
  2. Toss with a few tablespoons of dressing until the salad looks coated. Add more dressing if you like.
  3. Top with sliced chicken, tortilla strips, and chopped cilantro.
  4. Serve with lime wedges on the side.

Dry the lettuce well to prevent the dressing from making it soggy. Add avocado last to keep it green. Keep tortilla strips separate until serving for crunch. Adjust lime juice and salt to taste.

Main Course, Salad
Southwestern
Easy Recipe, Healthy Salad, Meal Prep, Santa Fe Salad, southwest flavors

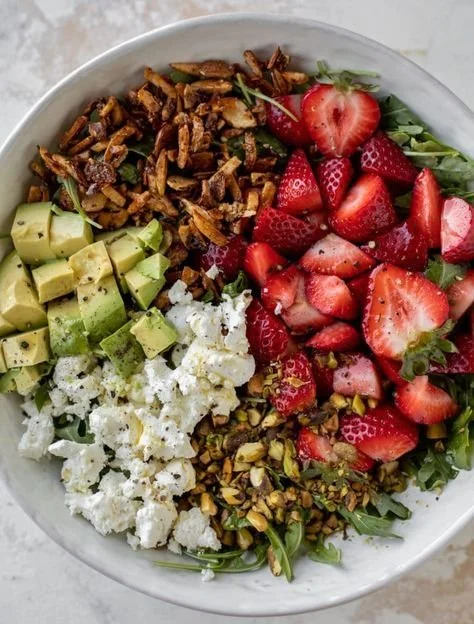
Strawberry Crunch Salad with Champagne Vinaigrette

Delicious Strawberry Crunch Salad topped with Champagne Vinaigrette

How to prepare Strawberry Crunch Salad with Champagne Vinaigrette

Start with clean, dry greens like romaine or mixed baby greens. Hull and slice fresh strawberries. Toss the greens and strawberries in a large bowl. Add a crunchy element, such as toasted sliced almonds, crispy noodles, or thin tortilla strips. If you like, add thinly sliced red onion or scallions for a mild bite.

Make the champagne vinaigrette by whisking together champagne vinegar, olive oil, a little honey, Dijon mustard, salt, and pepper. Taste and adjust the sweetness or acidity.

Pour the vinaigrette over the salad just before serving, toss gently, then sprinkle the crunchy topping on last so it stays crisp. Serve right away for the best texture and bright flavor.

Strawberry Crunch Salad with Champagne Vinaigrette

introduction

This strawberry crunch salad feels light, bright, and fresh. It mixes sweet berries with a tangy champagne vinaigrette and a crunchy topping. People love it at picnics, potlucks, and weeknight dinners because it looks pretty and tastes great. If you enjoy simple summer salads, you might also like a cucumber feta salad with lemon Greek vinaigrette for another fresh side.

This featured recipe is a real crowd-pleaser, with juicy strawberries, crisp greens, and a shiny, mild vinaigrette. The crunch keeps each bite fun, the dressing adds a light tang, and the fruit brings a sweet balance. You will want to make it again and again, and that is the best kind of recipe to have, try it and smile.

Why You’ll Love Strawberry Crunch Salad with Champagne Vinaigrette

  • Bright, fresh flavor from ripe strawberries and a mild champagne vinegar dressing.
  • Fun texture, with soft fruit, crisp greens, and a crunchy topping.
  • Easy to make, with simple ingredients you can find most places.
  • Great for warm weather, light lunches, or as a side at parties.

Tips for success

  • Use very fresh strawberries for the best taste.
  • Dry the greens well, excess water thins the dressing and makes crunch soggy.
  • Toss the dressing and salad just before serving, keep the crunch separate until the end.
  • Taste the vinaigrette and add a bit more honey if your berries are tart.
  • If you need extra flavor, add fresh herbs like basil or mint.

Serving Suggestions

  • Serve with grilled chicken or shrimp for a light main dish.
  • Put it next to roasted pork or fish as a fresh side.
  • Add crumbled feta or goat cheese for a salty, creamy contrast.
  • Make a big bowl for a picnic, the salad looks colorful on the table.
  • Pair with crusty bread to round out the meal.

Strawberry Crunch Salad with Champagne Vinaigrette

FAQs

Q: How long does this salad stay fresh?
A: Keep the components separate. The greens and strawberries last in the fridge for a day, but once dressed, eat within a few hours for best texture.

Q: Can I make the dressing ahead of time?
A: Yes, make the champagne vinaigrette up to 3 days in the fridge. Shake or whisk well before using.

Q: What can I use instead of champagne vinegar?
A: Use white wine vinegar or apple cider vinegar, add a little extra honey if needed to balance the taste.

Q: Is this salad gluten-free?
A: Yes, if you skip crunchy noodles that contain wheat, or use a certified gluten-free crunchy topping.

Conclusion

This Strawberry Crunch Salad with Champagne Vinaigrette is a simple, pretty, and tasty choice for many meals, and you can find the original recipe and exact measurements at Strawberry Crunch Salad with Champagne Vinaigrette.

Strawberry Crunch Salad with Champagne Vinaigrette

A light and fresh salad combining juicy strawberries, crisp greens, and a tangy champagne vinaigrette topped with a crunchy element for texture.

Salad Ingredients

  • 4 cups clean, dry mixed baby greens or romaine (Use fresh greens for best flavor.)
  • 2 cups fresh strawberries, hulled and sliced (Look for very fresh strawberries.)
  • 1 cup toasted sliced almonds or crispy noodles or thin tortilla strips (This adds the crunchy element.)
  • 1/4 cup thinly sliced red onion or scallions (Optional for a mild bite.)

Champagne Vinaigrette

  • 1/4 cup champagne vinegar (Can be substituted with white wine vinegar.)
  • 1/2 cup olive oil
  • 1 tablespoon honey (Adjust based on the sweetness of the strawberries.)
  • 1 teaspoon Dijon mustard
  • 1/2 teaspoon salt
  • 1/4 teaspoon black pepper

Preparation

  1. Start by cleaning and drying the mixed greens.
  2. Hull and slice the strawberries.
  3. In a large bowl, toss together the greens and sliced strawberries.
  4. Add your chosen crunchy element, and thinly sliced red onion or scallions if desired.

Making the Vinaigrette

  1. In a separate bowl, whisk together the champagne vinegar, olive oil, honey, Dijon mustard, salt, and pepper.
  2. Taste and adjust the sweetness or acidity as needed.

Serving

  1. Pour the vinaigrette over the salad just before serving.
  2. Toss gently and sprinkle the crunchy topping on last to keep it crisp.
  3. Serve immediately for the best texture and flavor.

For best results, keep the components separate until just before serving to ensure the greens stay crisp. You can add fresh herbs for extra flavor.

Salad, Side Dish
American, Healthy
Champagne Vinaigrette, Crunch Salad, Easy Salad, Fresh Salad, Strawberry Salad

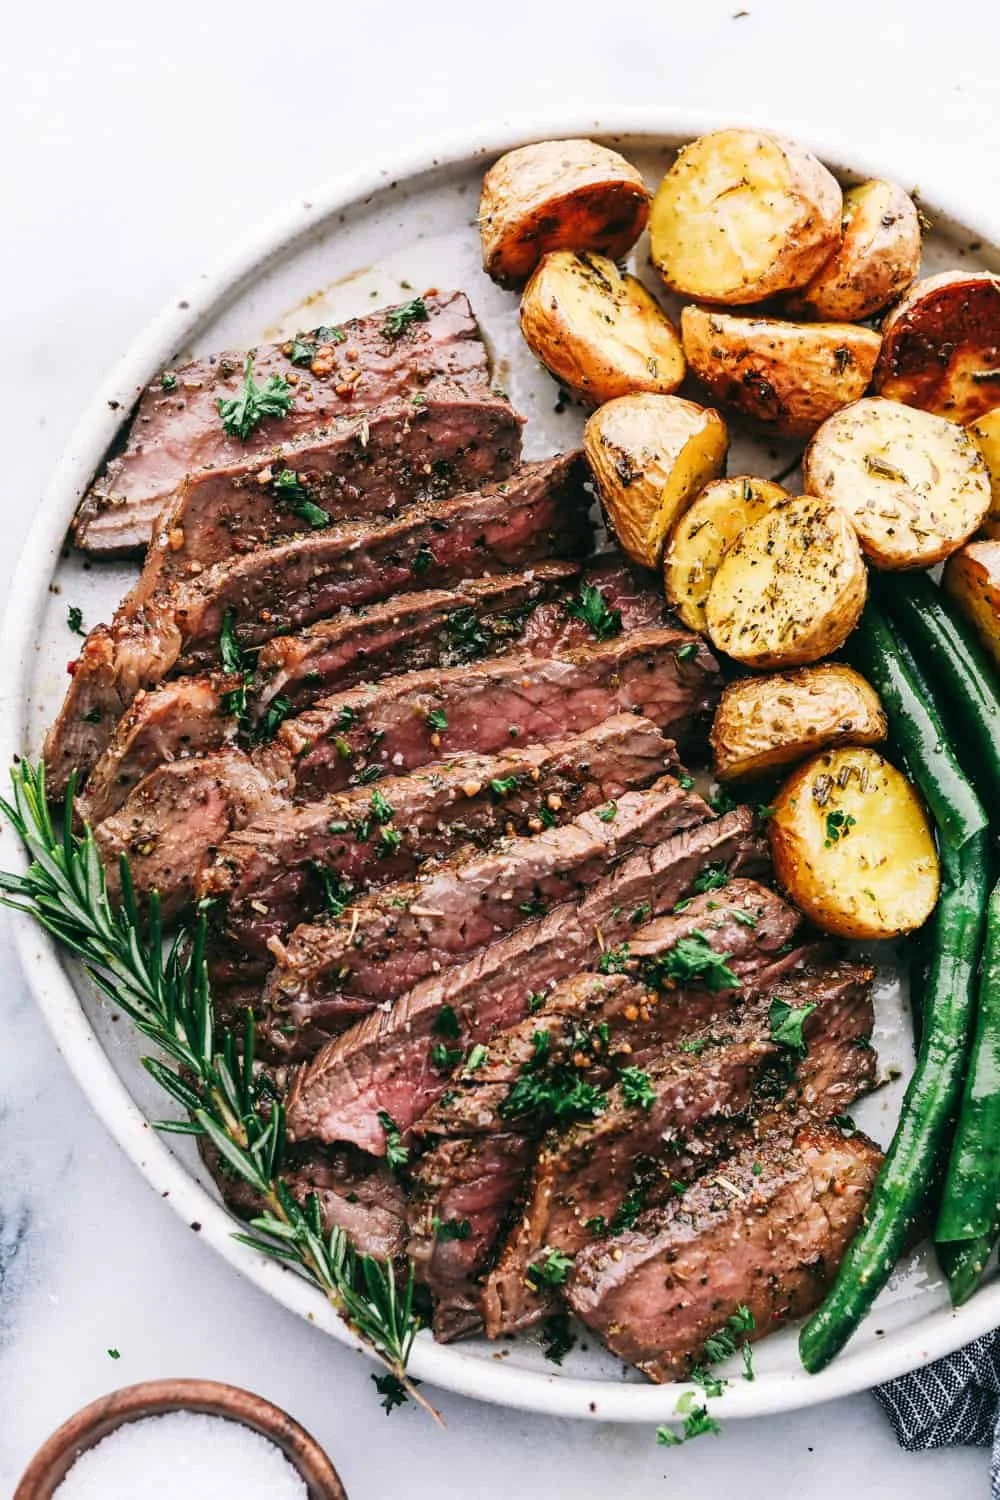
Tender and Juicy London Broil

Tender and juicy London Broil sliced and ready to serve

London broil is a simple, tasty way to feed a group without fuss. It gives you a big, flavorful slice of beef with a nice crust and a tender inside when you cook it right. This Tender and Juicy London Broil recipe is a real crowd-pleaser, with a bright, garlicky marinade and a quick sear that locks in juices. It tastes savory, a little sweet, and lightly tangy, and it looks great on the plate too. If you want a small, simple dessert after, try a 3-ingredient banana oatmeal muffins to keep things easy and homemade. Get ready to enjoy a juicy steak dinner that friends and family will ask for again.

How to prepare Tender and Juicy London Broil

Ingredients

  • 2 to 2.5 lb flank steak or top round
  • 1/3 cup soy sauce
  • 1/4 cup olive oil
  • 2 tablespoons Worcestershire sauce
  • 2 tablespoons brown sugar or honey
  • 3 cloves garlic, minced
  • 1 tablespoon balsamic vinegar or lemon juice
  • 1 teaspoon black pepper
  • 1 teaspoon salt, or to taste

Directions

  1. Mix soy sauce, olive oil, Worcestershire, brown sugar, garlic, balsamic, pepper, and salt in a bowl. This is your marinade.
  2. Put the steak in a zip bag or shallow dish and pour the marinade over it. Press out air and seal, or cover.
  3. Chill and marinate at least 4 hours, up to 24 hours, turning once if you can.
  4. Remove steak from fridge 30 minutes before cooking, let it come toward room temperature.
  5. Preheat your grill or broiler to high. Oil the grates or pan lightly to stop sticking.
  6. Sear the steak 4 to 6 minutes per side for medium-rare, or a little longer for medium. Use a meat thermometer if you like, 130°F to 135°F for medium-rare.
  7. Move steak to a cutting board and rest 8 to 10 minutes. Resting keeps the meat juicy.
  8. Slice thin across the grain, against the lines you see in the meat. This makes each bite tender.
  9. Serve right away with any pan juices spooned over the top.

Tender and Juicy London Broil

Why You’ll Love Tender and Juicy London Broil

  • It feeds many people without a big cost, great for weeknights or company.
  • The marinade gives rich flavor and helps break down the meat for tenderness.
  • Quick to cook, you get a great meal in under an hour once the steak is marinated.
  • Slices are attractive and easy to plate, good for salads, sandwiches, or main plates.

Tips for success

  • Marinate longer for more flavor, but not more than 24 hours.
  • Use a thermometer to avoid overcooking, aim for medium-rare to medium.
  • Always slice thin, across the grain, to keep pieces tender.
  • Pat the steak dry before searing, for a better crust.
  • Let it rest after cooking, do not cut right away.

Serving Suggestions

  • Serve with roasted potatoes and a green salad for a simple dinner.
  • Use sliced London broil in steak sandwiches with crunchy onions.
  • Top warm slices with chimichurri, garlic butter, or a light pan sauce.
  • Add grilled vegetables on the side for color and balance.

Tender and Juicy London Broil

FAQs

Q: What cut is best for London broil?

A: Flank steak or top round works best. They are lean and slice well after marinating.

Q: Can I make this in the oven?

A: Yes, broil on high for the same time, watching closely to avoid overcooking.

Q: How long should I marinate the steak?

A: At least 4 hours. For best flavor, marinate overnight but no more than 24 hours.

Q: How do I reheat leftover slices?

A: Warm gently in a skillet with a little beef broth or wrap in foil and heat in a low oven. Do not overheat, or the meat will dry out.

Conclusion

Try this Tender and Juicy London Broil for an easy, satisfying meal that feels special but is simple to make, and for another take on a tender result see this Perfectly Tender London Broil – The Recipe Critic.

Tender and Juicy London Broil

This simple and tasty London broil recipe features a flavorful marinade that makes for a juicy, tender steak perfect for feeding a crowd.

For the Marinade

  • 1/3 cup soy sauce
  • 1/4 cup olive oil
  • 2 tablespoons Worcestershire sauce
  • 2 tablespoons brown sugar or honey (Use brown sugar for a rich, caramelized flavor.)
  • 3 cloves garlic, minced (Freshly minced garlic provides the best flavor.)
  • 1 tablespoon balsamic vinegar or lemon juice (Balsamic will add sweetness, lemon juice adds acidity.)
  • 1 teaspoon black pepper
  • 1 teaspoon salt (Adjust according to your taste.)

For the Steak

  • 2 to 2.5 lb flank steak or top round (Choose flank steak or top round for the best results.)

Preparation

  1. Mix soy sauce, olive oil, Worcestershire sauce, brown sugar, garlic, balsamic vinegar, black pepper, and salt in a bowl to create the marinade.
  2. Put the steak in a zip bag or shallow dish and pour the marinade over it. Press out air and seal, or cover.
  3. Chill and marinate for at least 4 hours up to 24 hours, turning once if you can.
  4. Remove the steak from the fridge 30 minutes before cooking to bring it closer to room temperature.

Cooking

  1. Preheat your grill or broiler to high. Lightly oil the grates or pan to prevent sticking.
  2. Sear the steak for 4 to 6 minutes per side for medium-rare, or slightly longer for medium. A meat thermometer should read 130°F to 135°F for medium-rare.
  3. Move the steak to a cutting board and let it rest for 8 to 10 minutes to keep it juicy.
  4. Slice the steak thin across the grain to ensure tenderness.
  5. Serve immediately, spooning any pan juices over the top.

Marinate longer for more flavor, up to 24 hours. Use a thermometer for perfect cooking. Always slice thin across the grain for tenderness.

Dinner, Main Course
American
Beef Recipe, grilling, London Broil, Marinated Steak, Steak Recipe

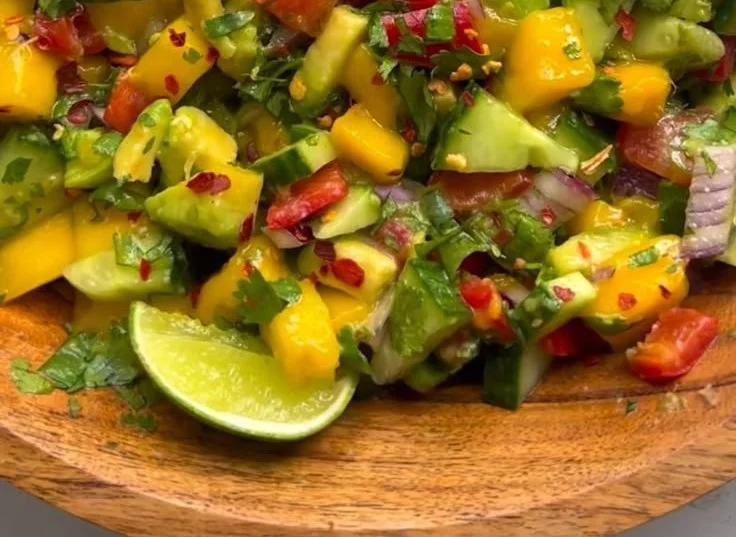
Mango Avocado Salad

Colorful Mango Avocado Salad with fresh ingredients and vibrant presentation.

This Mango Avocado Salad is bright, fresh, and easy to make. It mixes sweet mango, creamy avocado, and crisp greens for a simple dish that tastes like summer. The flavors are clean, the textures are fun, and it works as a light lunch, a side, or a picnic pick. If you like avocado dishes, you might also enjoy the Chickpea Feta Avocado Salad recipe, it has a similar fresh vibe with more protein. This Mango Avocado Salad is a crowd-pleaser, full of fresh mango flavor and smooth avocado, and it makes people smile. You will want to make it again and again.

How to prepare Mango Avocado Salad

Ingredients

  • 2 ripe mangoes, peeled and diced
  • 2 ripe avocados, peeled and diced
  • 1 small red onion, thinly sliced
  • 1 red bell pepper, diced
  • 4 cups mixed salad greens or baby spinach
  • 1/4 cup fresh cilantro, chopped
  • Juice of 1 lime
  • 2 tablespoons olive oil
  • Salt and black pepper to taste
  • Optional, 1 small jalapeño, seeded and minced
  • Optional, 1 tablespoon honey or agave for extra sweet balance

Directions

  1. Wash the greens and pat them dry. Put greens in a large bowl.
  2. Add the diced mango, diced avocado, red onion, and red bell pepper. Toss gently so the avocado does not mash.
  3. In a small bowl, whisk lime juice, olive oil, salt, pepper, and honey if you use it. Taste and add more lime or salt if needed.
  4. Pour the dressing over the salad and toss gently until all pieces get light dressing.
  5. Sprinkle cilantro on top and serve right away to keep the avocado fresh.

Mango Avocado Salad

Why You’ll Love Mango Avocado Salad

  • Fresh and bright, the salad feels light but filling.
  • The mango gives sweet, tropical flavor, and the avocado gives a rich, creamy contrast.
  • It comes together in about 10 to 15 minutes, so it is a quick salad for busy days.
  • It works for summer meals, potlucks, or a healthy lunch.
  • The colors look beautiful, making it a pretty dish for guests.

Tips for success

  • Use ripe mango and avocado, they should give a little when you press them.
  • Cut ingredients into similar size pieces, so every forkful has balanced taste.
  • Add salt slowly, salt brings out the mango sweetness.
  • Dress the salad right before serving, to keep avocado from browning.
  • If you must make ahead, keep avocado and dressing separate until serving.
  • For more crunch, add toasted pumpkin seeds or chopped nuts.

Serving Suggestions

  • Serve on a bed of mixed greens, or as a topping for grilled fish or chicken.
  • Add cooked quinoa or chickpeas to make it a full meal.
  • Pair with simple grilled shrimp for a bright summer plate.
  • Serve with tortilla chips for a fresh salsa style snack.
  • Try a scoop on top of tacos for a fresh twist.

Mango Avocado Salad

FAQs

Q, Can I make the salad ahead of time?

A, You can prep mango and onion ahead, but add avocado and dressing just before serving to keep fresh color.

Q, What can I use instead of cilantro?

A, Use fresh mint or parsley for a milder, green flavor.

Q, Is this salad vegan?

A, Yes, the basic salad is vegan, just use agave instead of honey if you want it sweet.

Q, Can I add protein?

A, Yes, add grilled chicken, shrimp, or drained chickpeas to make it more filling.

Q, How do I keep avocado from turning brown?

A, Keep avocado pieces in lime or lemon juice and dress the salad right before serving, or make just before you eat.

Conclusion

This Mango Avocado Salad is a quick, tasty, and healthy choice for any meal, it brings fresh mango and creamy avocado together in a bright mix that most people love. For another quick version you can compare with the 15 Minute Mango Avocado Salad – Urban Farmie, it has a nice twist you may like.

Mango Avocado Salad

A bright, fresh salad featuring sweet mango, creamy avocado, and crisp greens, perfect for a light lunch or side dish.

Main Ingredients

  • 2 ripe mangoes, peeled and diced (Use ripe mango for sweetness.)
  • 2 ripe avocados, peeled and diced (Select avocados that yield slightly when pressed.)
  • 1 small red onion, thinly sliced (Add for sharpness.)
  • 1 medium red bell pepper, diced (For color and sweetness.)
  • 4 cups mixed salad greens or baby spinach (A base of greens is essential.)
  • 1/4 cup fresh cilantro, chopped (Adds a fresh flavor.)
  • 1 juice lime (Use fresh lime juice.)
  • 2 tablespoons olive oil (For dressing.)
  • to taste Salt and black pepper (Season to preference.)
  • 1 small jalapeño, seeded and minced (Optional for heat.)
  • 1 tablespoon honey or agave (Optional for sweetness.)

Preparation

  1. Wash the greens and pat them dry. Put greens in a large bowl.
  2. Add the diced mango, diced avocado, red onion, and red bell pepper. Toss gently so the avocado does not mash.

Dressing

  1. In a small bowl, whisk lime juice, olive oil, salt, pepper, and honey if using. Taste and adjust seasoning.
  2. Pour the dressing over the salad and toss gently until all pieces get light dressing.

Serving

  1. Sprinkle cilantro on top and serve right away to keep the avocado fresh.

Dress the salad right before serving to avoid avocado browning. For added crunch, include toasted pumpkin seeds or chopped nuts.

lunch, Salad, Side Dish
American, Mexican
Avocado Salad, Fresh Salad, Healthy Recipe, Mango Salad, Quick Salad

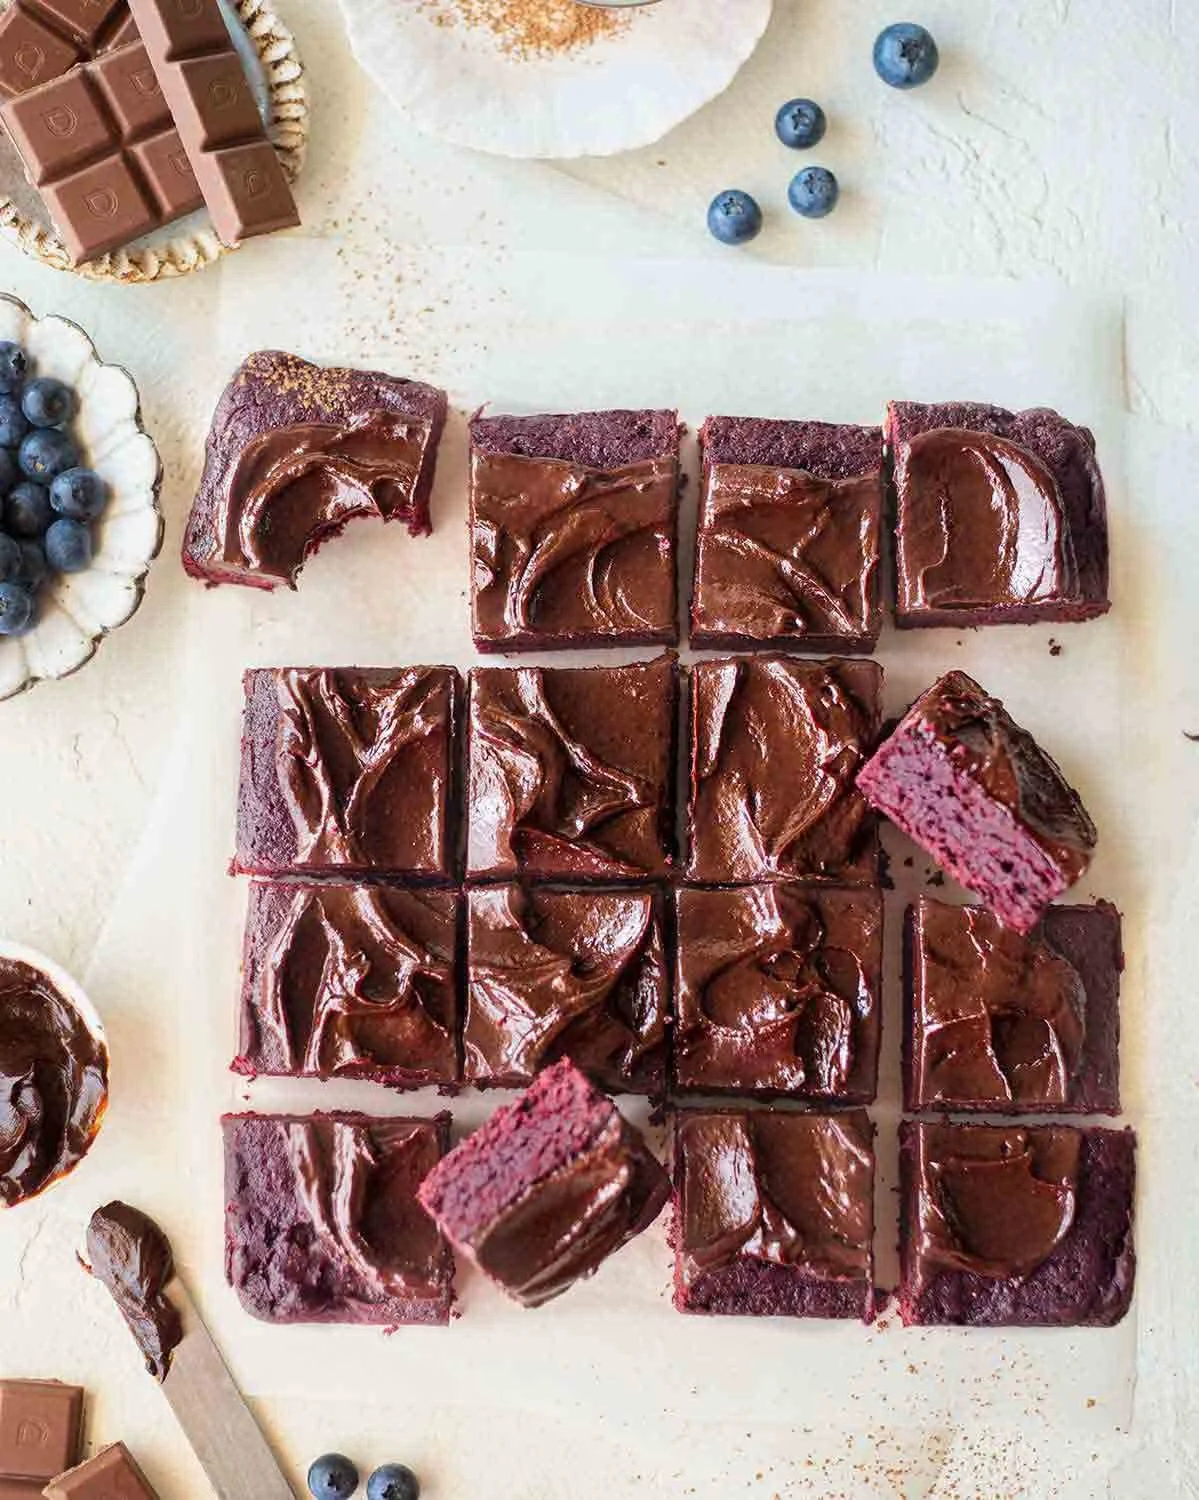
Beetroot Brownies with a Chocolate Avocado Frosting

Delicious beetroot brownies with chocolate avocado frosting on a plate

Beetroot brownies are a tasty way to sneak in veggies and still enjoy a rich chocolate treat. These brownies use cooked beetroot for natural color and moisture, and a chocolate avocado frosting for a creamy, dairy-free finish. The result is fudgy, moist, and a bit earthy, with a deep chocolate taste that most people will love. If you like trying both sweet and healthy twists on dessert, you might also enjoy a bright salad like the creamy chickpea feta avocado salad for a light meal with these brownies. This recipe is a crowd-pleaser, simple to make, and fun to share, so get ready to bake and smile.

How to prepare Beetroot Brownies with a Chocolate Avocado Frosting

Ingredients:

  • 1 cup cooked beetroot, mashed (about 2 medium beets)
  • 1/2 cup coconut oil, melted or mild vegetable oil
  • 1 cup brown sugar or coconut sugar
  • 2 large eggs (or flax eggs for vegan)
  • 1 teaspoon vanilla extract
  • 3/4 cup all-purpose flour
  • 1/2 cup cocoa powder, unsweetened
  • 1/2 teaspoon baking powder
  • 1/4 teaspoon salt
  • 1/2 cup dark chocolate chips (optional)

Frosting:

  • 1 ripe avocado
  • 1/4 cup cocoa powder, unsweetened
  • 1/4 cup maple syrup or honey
  • 1 teaspoon vanilla extract
  • Pinch of salt

Directions:

  1. Preheat oven to 350°F (175°C). Line an 8×8 inch baking pan with parchment paper.
  2. Put cooked beetroot in a bowl and mash until smooth. A blender or food processor works well.
  3. In a large bowl, mix mashed beetroot, melted oil, sugar, eggs, and vanilla. Stir until even.
  4. In another bowl, whisk flour, cocoa powder, baking powder, and salt.
  5. Add dry mix to the wet mix and stir until just combined. Fold in chocolate chips if you like.
  6. Pour batter into the prepared pan and spread it smooth.
  7. Bake 25 to 30 minutes, or until a toothpick near the center comes out with a few moist crumbs. Do not overbake.
  8. Cool in the pan for 15 minutes, then move to a wire rack to cool completely before frosting.

Frosting steps:

  1. Scoop avocado flesh into a bowl. Add cocoa, maple syrup, vanilla, and salt.
  2. Blend or mash until very smooth and creamy.
  3. Spread frosting over cooled brownies. Chill for 20 minutes to set, then cut and serve.

Beetroot Brownies with a Chocolate Avocado Frosting

Why You’ll Love Beetroot Brownies with a Chocolate Avocado Frosting

These brownies are rich and fudgy, yet they use beetroot for natural moisture and color. The avocado frosting is smooth, creamy, and adds healthy fat without dairy. The taste is deep chocolate with a hint of earth from the beetroot, and most people will love the texture. They are great for parties, school snacks, or a cozy night in.

Tips for success

  • Use well-cooked beets, soft enough to mash smooth, to avoid lumps in the batter.
  • Measure flour with a spoon and level, to keep brownies moist.
  • Do not overmix the batter, mix until just combined.
  • Check baking time at 20 minutes, ovens vary, and pull when a few moist crumbs stick to a toothpick.
  • For vegan brownies, use flax eggs (1 tablespoon ground flax + 3 tablespoons water per egg) and maple syrup instead of honey.
  • Make the frosting just before serving to keep its bright color and fresh taste.

Serving Suggestions

  • Serve warm with a scoop of vanilla or coconut ice cream for a lovely contrast.
  • Pair with fresh berries or sliced oranges to cut the richness.
  • Offer small squares as a party bite, dusted lightly with cocoa powder.
  • Pack them for lunchboxes or picnics, they travel well when chilled.

Beetroot Brownies with a Chocolate Avocado Frosting

FAQs

Q: Do these brownies taste like beets?

A: You may notice a mild earthy note, but the chocolate is the main flavor. Most people taste chocolate first.

Q: Can I freeze these brownies?

A: Yes, freeze unfrosted brownies in an airtight container for up to 3 months. Thaw and add frosting after thawing.

Q: Can I use raw beets?

A: No, cook beets first by roasting or boiling until soft. Raw beets are too firm and will not mash well.

Q: Is the frosting really avocado? Will it taste like avocado?

A: The avocado gives creaminess, but with cocoa and sweetener the avocado flavor is very mild. It tastes mostly like chocolate.

Q: Can I make these nut-free and gluten-free?

A: For nut-free, avoid almond flour and stick to wheat or gluten-free flour. For gluten-free, use a 1-to-1 gluten-free flour blend.

Conclusion

If you want a tasty, slightly healthier chocolate treat that surprises and delights, try this Beetroot Brownies with a Chocolate Avocado Frosting recipe. For another take on beetroot brownies and tips from a trusted source, see Vegan Beetroot Brownies with Chocolate Avocado Frosting.

Beetroot Brownies with Chocolate Avocado Frosting

These fudgy beetroot brownies are rich in chocolate flavor and paired with a creamy chocolate avocado frosting for a delightful treat.

Brownie Ingredients

  • 1 cup cooked beetroot, mashed (about 2 medium beets) (Use well-cooked beets for better texture.)
  • 1/2 cup coconut oil, melted or mild vegetable oil (Can use vegetable oil as an alternative.)
  • 1 cup brown sugar or coconut sugar (Adjust based on sweetness preference.)
  • 2 large eggs (Use flax eggs for a vegan option.)
  • 1 teaspoon vanilla extract
  • 3/4 cup all-purpose flour (To keep brownies moist, measure correctly.)
  • 1/2 cup cocoa powder, unsweetened
  • 1/2 teaspoon baking powder
  • 1/4 teaspoon salt
  • 1/2 cup dark chocolate chips (optional) (Can add for extra richness.)

Frosting Ingredients

  • 1/4 cup cocoa powder, unsweetened
  • 1/4 cup maple syrup or honey (Use maple syrup for a vegan option.)
  • 1 teaspoon vanilla extract
  • pinch of salt

Brownie Preparation

  1. Preheat oven to 350°F (175°C). Line an 8×8 inch baking pan with parchment paper.
  2. Put cooked beetroot in a bowl and mash until smooth using a blender or food processor.
  3. In a large bowl, mix mashed beetroot, melted oil, sugar, eggs, and vanilla until even.
  4. In another bowl, whisk together flour, cocoa powder, baking powder, and salt.
  5. Add the dry mix to the wet mix and stir until just combined. Fold in chocolate chips if using.
  6. Pour batter into the prepared pan and spread it smooth.
  7. Bake for 25 to 30 minutes, or until a toothpick near the center comes out with a few moist crumbs. Do not overbake.
  8. Cool in the pan for 15 minutes, then transfer to a wire rack to cool completely before frosting.

Frosting Preparation

  1. Scoop avocado flesh into a bowl. Add cocoa, maple syrup, vanilla, and salt.
  2. Blend or mash until very smooth and creamy.
  3. Spread frosting over cooled brownies. Chill for 20 minutes to set.
  4. Cut and serve.

Great for parties, school snacks, or a cozy night. Adjust baking time based on your oven.

Dessert, Snack
American, Vegan
Beetroot Brownies, Chocolate Frosting, Fudgy Brownies, Healthy Dessert, Vegan Brownies

Matcha Tiramisu Recipe

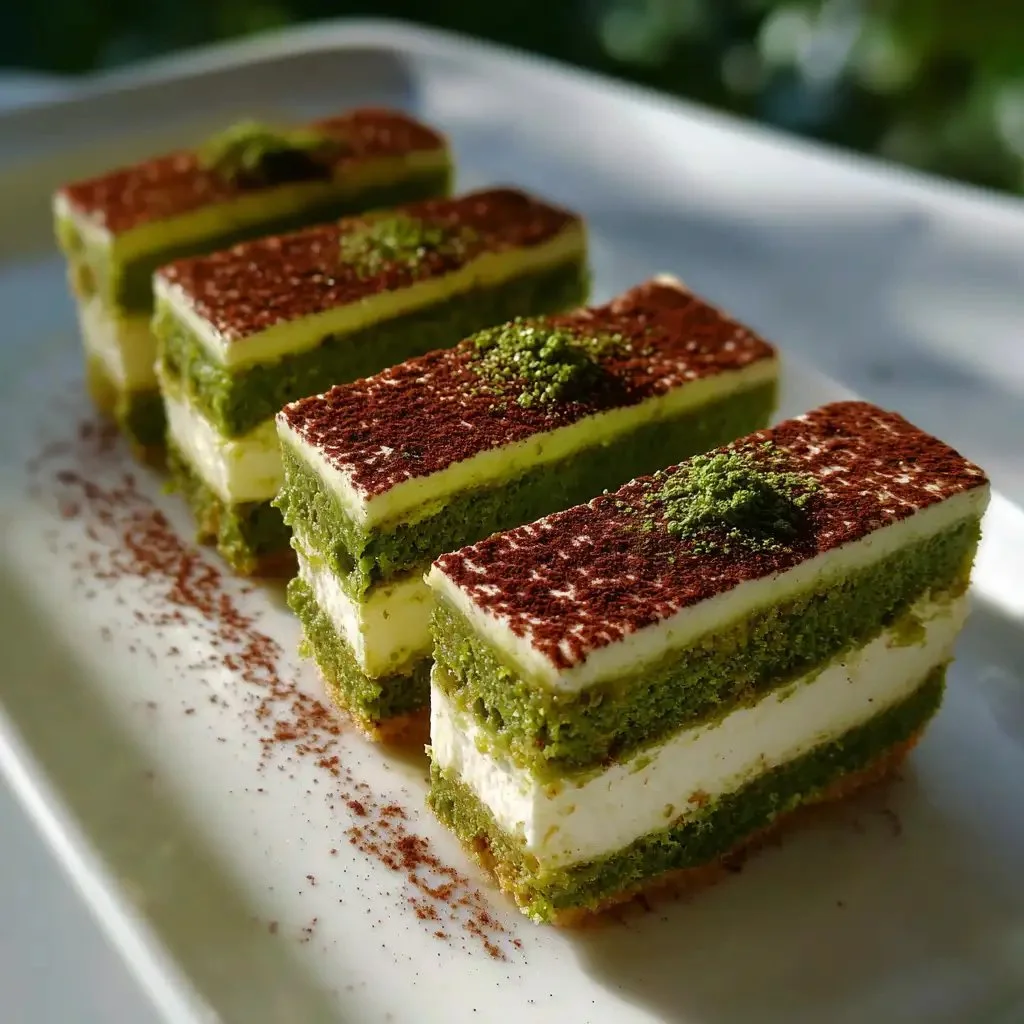
Delicious Matcha Tiramisu served in a beautiful dish with a dusting of matcha powder

Matcha Tiramisu is smooth, indulgent, and full of flavor, featuring delicate layers of green tea-soaked ladyfingers paired with a fluffy mascarpone cream. It offers a fresh Japanese-inspired take on the traditional Italian dessert, with its striking green color making it a standout at any gathering. For a quick snack idea to enjoy with a slice, try a two-ingredient cottage cheese flatbread for a light bite before dessert, it pairs well and keeps things simple. Get ready, this recipe will make you smile in the kitchen, and you may want to make it again the next week.

How to prepare Matcha Tiramisu.

Ingredients

  • 1 cup strong green tea, cooled
  • 2 tablespoons matcha powder, sifted
  • 8 oz mascarpone cheese, room temperature
  • 1 cup heavy cream, cold
  • 1/3 cup sugar, adjust to taste
  • 1 teaspoon vanilla extract
  • 24 ladyfinger cookies
  • Cocoa powder or extra matcha, for dusting

Directions

  1. Whisk matcha powder into the cooled green tea until smooth, set aside.
  2. In a bowl, beat mascarpone with sugar and vanilla until smooth.
  3. In a separate bowl, whip cold heavy cream to soft peaks.
  4. Fold the whipped cream into the mascarpone mix gently, keep it light.
  5. Dip each ladyfinger briefly into the matcha tea, do not soak.
  6. Arrange a layer of dipped ladyfingers in a dish. Spread half of the mascarpone mix over them.
  7. Repeat with another layer of dipped ladyfingers and the rest of the mascarpone mix.
  8. Smooth the top, then dust with cocoa powder or sifted matcha.
  9. Chill for at least 4 hours, or overnight, so the flavors set.

Matcha Tiramisu Recipe

Why You’ll Love Matcha Tiramisu.

This matcha tiramisu blends soft cream with the clean, earthy taste of matcha powder. It is less sweet than many desserts, so the tea notes shine. The texture is creamy and light, with tender ladyfingers that soak up the green tea. It looks pretty with a pale green layer and a light dusting of matcha, great for guests or a calm treat at home.

Tips for success

  • Use good quality matcha for a bright, fresh flavor.
  • Sift matcha to avoid clumps in the cream.
  • Do not soak ladyfingers too long, they should be damp, not soggy.
  • Keep mascarpone at room temperature so it mixes smooth.
  • Chill the tiramisu well, chilled layers hold shape and taste better.
  • Taste the mascarpone mix before assembly, add a touch more sugar if you prefer sweeter.

Serving Suggestions

  • Serve chilled in small dishes or a glass trifle to show the layers.
  • Pair with a warm cup of green tea or a light coffee.
  • Add fresh berries on the side for color and a touch of tartness.
  • Garnish with thin chocolate shavings for a contrast of flavor.

Matcha Tiramisu Recipe

FAQs

Q: Can I make this ahead of time? A: Yes, make it a day ahead and chill it overnight, it will taste better.

Q: Can I use low-fat cream or cheese? A: Full-fat gives best texture, low-fat will change creaminess and firmness.

Q: How much matcha should I use if I want stronger flavor? A: Add up to 1 more teaspoon, but mix and taste so it stays balanced.

Q: Can I use espresso instead of green tea? A: You can, but then it becomes a coffee tiramisu, not matcha tiramisu.

Q: How long does it keep in the fridge? A: Keep it up to 3 days in a covered dish for best freshness.

Conclusion

If you want another matcha tiramisu version or ideas for plating, see this detailed recipe for tips and photos, Matcha Tiramisu – Teak & Thyme.

Matcha Tiramisu

A refreshing Japanese-inspired take on the classic Italian tiramisu, featuring layers of green tea-soaked ladyfingers and fluffy mascarpone cream.

For the Filling

  • 8 oz mascarpone cheese, room temperature (Keep at room temperature for easier mixing.)
  • 1 cup heavy cream, cold (Whipped to soft peaks.)
  • 1/3 cup sugar (Adjust to taste.)
  • 1 teaspoon vanilla extract

For the Soaking Liquid

  • 1 cup strong green tea, cooled (Whisk in matcha powder.)
  • 2 tablespoons matcha powder, sifted (Sift to avoid clumps.)

For the Layers

  • 24 pieces ladyfinger cookies (Dip briefly to prevent sogginess.)
  • Cocoa powder or extra matcha, for dusting (For garnish.)

Preparation

  1. Whisk matcha powder into the cooled green tea until smooth, set aside.
  2. In a bowl, beat mascarpone with sugar and vanilla until smooth.
  3. In a separate bowl, whip cold heavy cream to soft peaks.
  4. Fold the whipped cream into the mascarpone mix gently, keeping it light.

Assembly

  1. Dip each ladyfinger briefly into the matcha tea; do not soak.
  2. Arrange a layer of dipped ladyfingers in a dish and spread half of the mascarpone mix over them.
  3. Repeat with another layer of dipped ladyfingers and the rest of the mascarpone mix.
  4. Smooth the top, then dust with cocoa powder or sifted matcha.

Chilling

  1. Chill for at least 4 hours, or overnight, so the flavors set.

For best results, use high-quality matcha and do not soak ladyfingers too long. Chill well to hold shape.

Dessert
Italian, Japanese
Dessert, Italian Dessert, Japanese Dessert, Matcha Tiramisu, Tiramisu

Apple Cider Pecan Bread Pudding is a must-try dessert!

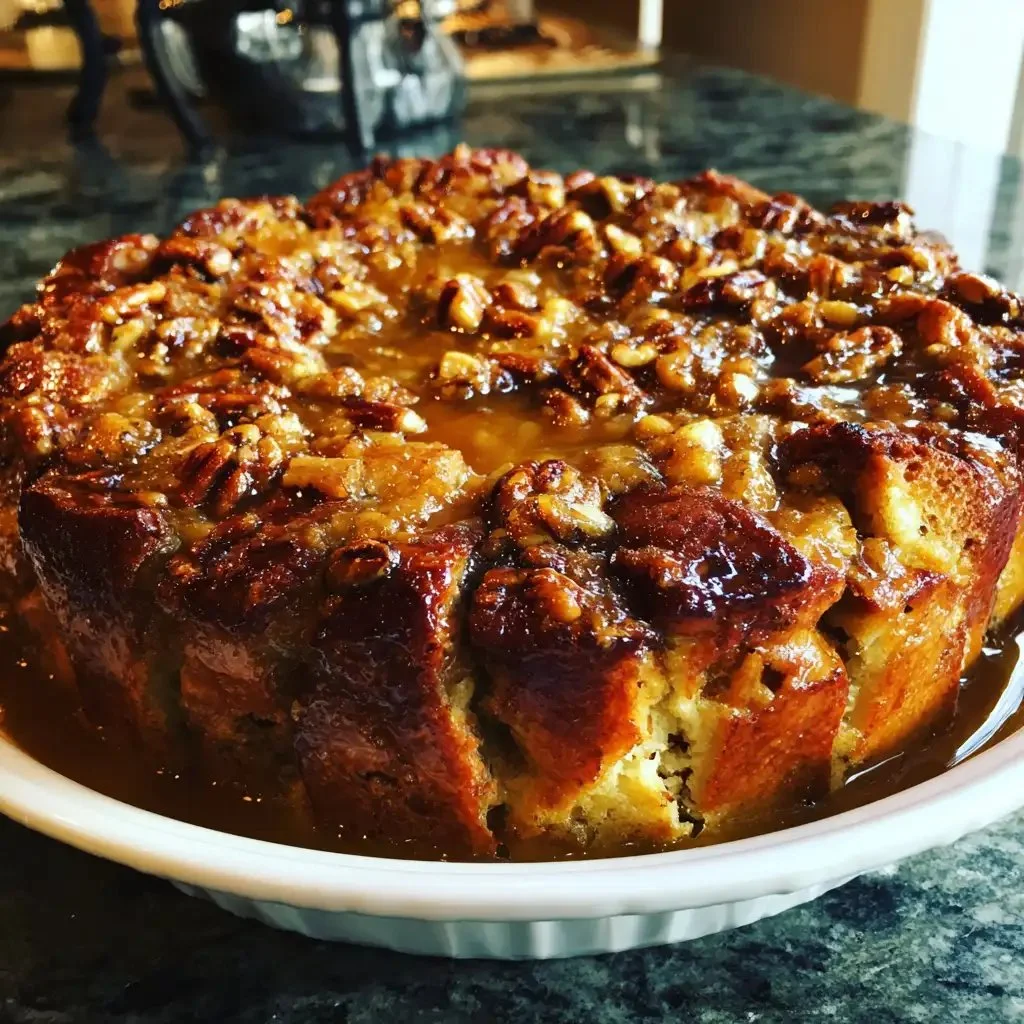
Delicious Apple Cider Pecan Bread Pudding served on a plate

This Apple Cider Pecan Bread Pudding feels like a warm hug on a plate. It mixes sweet apple cider, soft bread, and crunchy pecans for a cozy fall dessert that many will love. The cinnamon and brown sugar give it a homey, spicy note, and the pecans add a nice crunch. It works for a family dinner, a potluck, or a holiday table, and it uses simple pantry ingredients. If you like other apple baked treats, you might enjoy the similar twist in the Amish Apple Fritter Bread recipe. Try it once, and you may find yourself making it over and over, with a big smile at the first warm bite.

How to prepare Apple Cider Pecan Bread Pudding

Start by preheating the oven to 350°F (175°C). Tear or cut bread into cubes, about 1 inch. Warm apple cider with a little brown sugar and cinnamon, then pour it over the bread so the pieces soak well. In a bowl, whisk eggs, milk or cream, vanilla, and a pinch of salt. Stir in chopped pecans and pour the egg mixture over the soaked bread. Press the bread down so it absorbs the liquid. Let it sit for 10 to 15 minutes, then bake in a buttered dish for 40 to 50 minutes, until the center is set and the top is golden. Let it rest a few minutes before serving.

Apple Cider Pecan Bread Pudding is a must-try dessert!

Why You’ll Love Apple Cider Pecan Bread Pudding

  • It uses day old bread, so you waste less food.
  • Apple cider gives it a bright, fruity flavor, different from plain milk or cream.
  • Pecans add a toasty, crunchy contrast to the soft pudding.
  • You can make it ahead and warm it before serving, so it fits busy meals.
  • It feels special, but it is easy to make with common ingredients.

Tips for success

  • Use firm, day old bread for the best texture, not fresh soft bread.
  • Cut bread into even cubes so it soaks evenly.
  • Warm the cider before pouring, it helps the bread soak well.
  • Press the bread gently into the custard so it absorbs the liquid.
  • Check the center with a knife, it should come out mostly clean when done.
  • If the top browns too fast, cover with foil and finish baking.

Apple Cider Pecan Bread Pudding is a must-try dessert!

Serving Suggestions

  • Serve warm with a scoop of vanilla ice cream or a dollop of whipped cream.
  • Drizzle warm caramel or maple syrup over each slice for extra sweetness.
  • Pair it with hot coffee or spiced tea for a cozy treat.
  • Cut into small squares for a party buffet, or serve larger slices for dessert after dinner.
  • Add a side of fresh apple slices for a crisp contrast.

FAQs

Q: Can I use other kinds of bread?

A: Yes, brioche or challah work well for a richer pudding. Whole wheat will give a denser texture.

Q: How do I store leftovers?

A: Cover and keep in the fridge for 3 to 4 days. Warm in the oven or microwave before serving.

Q: Can I make it ahead of time?

A: Yes, assemble and refrigerate overnight, then bake when you are ready to serve.

Q: Can I leave out the nuts?

A: Yes, leave them out or swap for walnuts if you prefer.

Conclusion

This Apple Cider Pecan Bread Pudding makes a simple, tasty dessert that feels special and works for many occasions. For another fall favorite that blends bread pudding with apple cider flavors, try this Pumpkin Bread Pudding with Apple Cider Caramel Sauce recipe for more inspiration.

Apple Cider Pecan Bread Pudding

This warm dessert combines sweet apple cider, soft bread, and crunchy pecans, making it a cozy fall favorite that is perfect for family dinners or holiday gatherings.

For the pudding

  • 6 cups day old bread, cubed (Use firm bread for best texture.)
  • 1 cup apple cider, warmed (Warm with a bit of brown sugar and cinnamon.)
  • 1/2 cup brown sugar (For sweetness.)
  • 1 tablespoon cinnamon (For flavor.)
  • 4 large eggs (Whisked.)
  • 1 cup milk or cream (Your choice of milk or cream can be used.)
  • 1 teaspoon vanilla extract (For flavor.)
  • 1/2 teaspoon salt (A pinch of salt enhances the flavor.)
  • 1 cup pecans, chopped (Add a crunchy texture.)

Serving suggestions

  • 1 scoop vanilla ice cream (For serving warm.)
  • 1 dollop whipped cream (Optional topping.)
  • to taste warm caramel or maple syrup (For drizzling.)

Preparation

  1. Preheat the oven to 350°F (175°C).
  2. Tear or cut the bread into 1-inch cubes.
  3. Warm the apple cider with a little brown sugar and cinnamon, then pour it over the bread so the pieces soak well.
  4. In a bowl, whisk together the eggs, milk or cream, vanilla extract, and salt.
  5. Stir in the chopped pecans and pour the egg mixture over the soaked bread.
  6. Press the bread down gently so it absorbs the liquid.
  7. Let it sit for 10 to 15 minutes.

Baking

  1. Bake in a buttered dish for 40 to 50 minutes, until the center is set and the top is golden.
  2. Let it rest for a few minutes before serving.

Use day old bread for the best texture and cut bread into even cubes for consistent soaking. Check doneness by inserting a knife in the center; it should come out mostly clean.

Dessert
American
apple dessert, bread pudding, cozy dessert, fall dessert, pecan dessert

The Best Eggnog Waffles

Festive eggnog waffles served with whipped cream and dusted with cinnamon

Eggnog waffles bring holiday cheer to the breakfast table. These waffles use eggnog right in the batter, so they have a nice creamy flavor and soft inside with crisp edges. Many people love them at Christmas morning or for a special weekend treat. If you want a bright side to serve with them, try a light fruit salad like the honey lime fruit salad, it pairs well and adds fresh contrast. This recipe for The Best Eggnog Waffles is a crowd-pleaser, easy to make, and full of holiday spice and warmth. You will want to make them again and again, trust me, they disappear fast.

How to prepare The Best Eggnog Waffles

Ingredients

  • 2 cups all purpose flour
  • 2 tablespoons sugar
  • 1 tablespoon baking powder
  • 1/2 teaspoon salt
  • 1/2 teaspoon ground nutmeg
  • 1/2 teaspoon ground cinnamon
  • 2 large eggs
  • 1 3/4 cups eggnog
  • 1/2 cup milk
  • 1/3 cup melted butter, cooled
  • 1 teaspoon vanilla extract

Directions

  1. Preheat your waffle iron and heat it according to the maker instructions.
  2. In a large bowl, whisk flour, sugar, baking powder, salt, nutmeg, and cinnamon.
  3. In another bowl, beat eggs. Stir in eggnog, milk, melted butter, and vanilla.
  4. Pour the wet mix into the dry mix. Stir until just combined, do not overmix. A few small lumps are okay.
  5. Lightly oil the waffle iron. Pour batter onto the hot iron. Cook until waffles are golden and crisp.
  6. Keep cooked waffles warm in a low oven while you make the rest.
  7. Serve with maple syrup, whipped cream, or a dusting of extra nutmeg.

The Best Eggnog Waffles

Why You’ll Love The Best Eggnog Waffles

  • Warm holiday flavor from eggnog, nutmeg, and cinnamon.
  • Crispy on the outside, soft on the inside.
  • Quick to mix and easy to cook in any waffle iron.
  • A fun way to use leftover eggnog, and kids love the taste.

Tips for success

  • Do not overmix the batter, it keeps waffles light.
  • Make sure your waffle iron is hot, this gives a crisp outside.
  • If batter seems thick, add a splash more milk, one tablespoon at a time.
  • Use fresh baking powder for the best rise.
  • Keep waffles in a single layer on a wire rack in a warm oven, this keeps them crisp.

Serving Suggestions

  • Top with warm maple syrup and whipped cream.
  • Add a sprinkle of grated nutmeg or cinnamon on top.
  • Serve with fresh fruit or the honey lime fruit salad for brightness.
  • For a treat, drizzle with caramel sauce or add toasted pecans.

The Best Eggnog Waffles

FAQs

Q: Can I use low fat eggnog? A: Yes, low fat eggnog works fine. The waffles may be a bit less rich, but they still taste good.

Q: Can I make the batter ahead of time? A: You can mix the dry parts in one bowl and the wet parts in another, then combine just before cooking. Fully mixed batter is best used within a few hours and kept in the fridge.

Q: How do I keep waffles crisp if I make a lot? A: Place cooked waffles on a wire rack in a 200 F oven. This keeps them warm and crisp until you serve.

Q: Can I freeze these waffles? A: Yes, let them cool, then freeze in a single layer on a sheet. Once frozen, store in a bag. Reheat in a toaster or oven.

Conclusion

These eggnog waffles make a simple, cozy breakfast for the holidays or any cold morning. If you want another eggnog waffle idea or a different take on the recipe, see this Easy Eggnog Waffles Recipe from scratch – Fresh Coast Eats for more tips and variations.

Eggnog Waffles

Deliciously creamy waffles infused with eggnog, perfect for holiday breakfasts.

Dry Ingredients

  • 2 cups all purpose flour
  • 2 tablespoons sugar
  • 1 tablespoon baking powder
  • 1/2 teaspoon salt
  • 1/2 teaspoon ground nutmeg
  • 1/2 teaspoon ground cinnamon

Wet Ingredients

  • 2 large eggs
  • 1 3/4 cups eggnog
  • 1/2 cup milk
  • 1/3 cup melted butter, cooled
  • 1 teaspoon vanilla extract

Preparation

  1. Preheat your waffle iron and heat it according to the maker instructions.
  2. In a large bowl, whisk together the flour, sugar, baking powder, salt, nutmeg, and cinnamon.
  3. In another bowl, beat the eggs and stir in the eggnog, milk, melted butter, and vanilla extract.
  4. Pour the wet mixture into the dry mixture and stir until just combined, being careful not to overmix. A few small lumps are okay.
  5. Lightly oil the waffle iron and pour batter onto the hot iron. Cook until the waffles are golden and crisp.
  6. Keep cooked waffles warm in a low oven while you make the rest.

Serving

  1. Serve waffles with maple syrup, whipped cream, or a dusting of extra nutmeg.

Do not overmix the batter to keep waffles light. Make sure your waffle iron is hot for a crisp texture. You can add more milk if the batter seems thick.

Breakfast, Brunch
American, Holiday
Easy Recipe, Eggnog Waffles, Festive Treat, Holiday Breakfast, Waffle Recipe

Pineapple Coconut Pound Cake: 7 Steps to Tropical Bliss

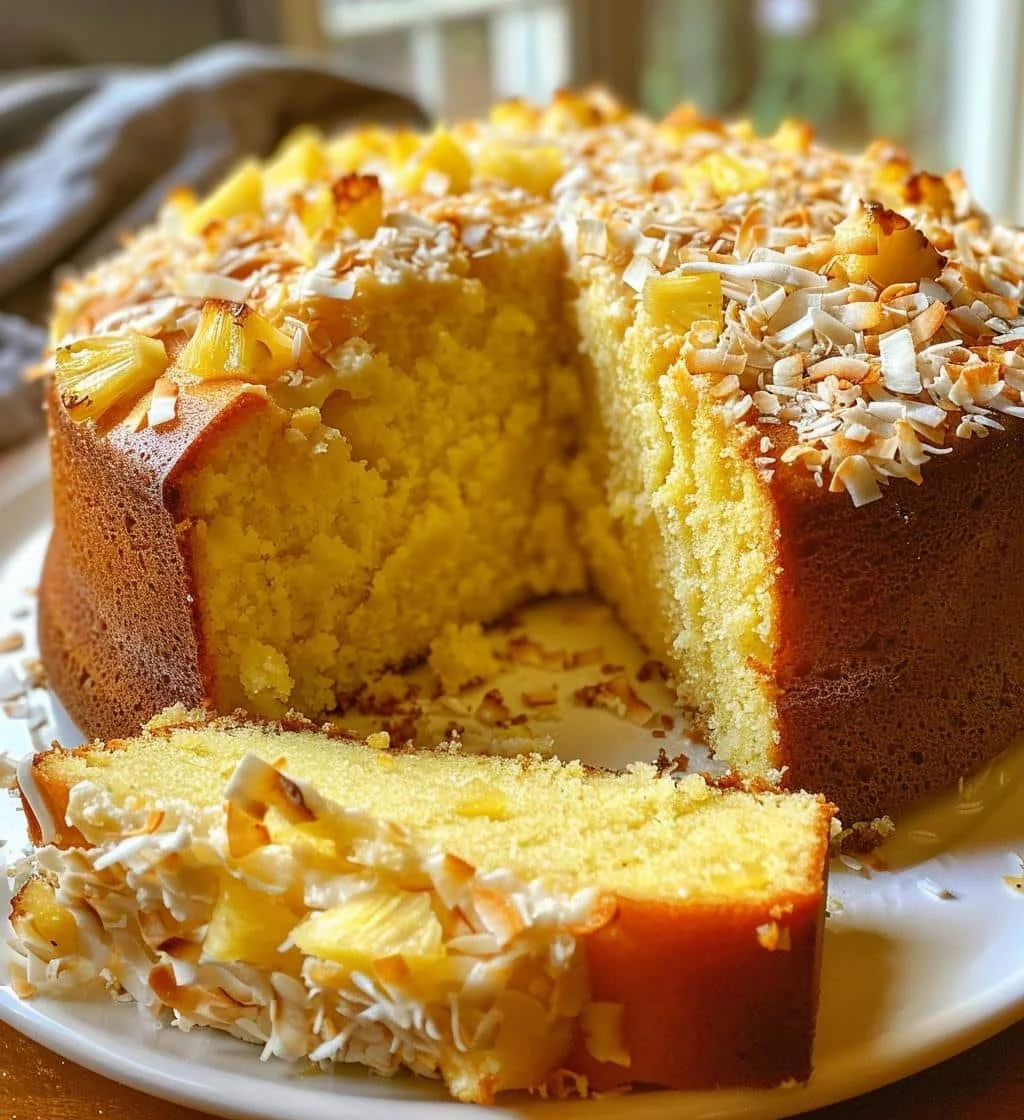
Delicious Pineapple Coconut Pound Cake topped with fresh pineapple and coconut flakes

This Pineapple Coconut Pound Cake is a moist, sweet, and full of pineapple and coconut flavor that people love. This cake works for family dinners, potlucks, or a simple treat with coffee. It is a crowd-pleaser because it is easy to slice, holds its shape, and tastes bright and homey. If you like simple, tasty foods, you might also enjoy the Classic Pancit recipe for another easy dish. Make this cake for friends, and get ready to smile as everyone asks for seconds.

How to prepare Pineapple Coconut Pound Cake: 7 Steps to Tropical Bliss

  1. Preheat the oven to 325°F (160°C). Grease and flour a loaf pan or line it with parchment.
  2. Drain a can of crushed pineapple well, press out extra juice with a spoon, set pineapple aside.
  3. In a bowl, beat 1 cup (240 g) softened butter with 2 cups (400 g) sugar until light and creamy.
  4. Add 4 large eggs, one at a time, beating after each egg until mixed.
  5. Stir in 1 teaspoon vanilla extract and 1 cup sour cream, mix until smooth.
  6. In another bowl, whisk 3 cups all-purpose flour, 1 teaspoon baking powder, 1/2 teaspoon baking soda, 1/2 teaspoon salt, then fold dry mix into wet mix until just combined. Fold in the drained pineapple and 1 cup shredded coconut.
  7. Pour batter into the pan, smooth the top, and bake 60 to 75 minutes, or until a toothpick comes out clean. Cool in the pan 10 minutes, then remove to a rack to cool fully.

Pineapple Coconut Pound Cake: 7 Steps to Tropical Bliss

Why You’ll Love Pineapple Coconut Pound Cake: 7 Steps to Tropical Bliss

  • It is very moist and keeps well, so you can make it ahead.
  • The pineapple adds bright, fresh taste, and the coconut gives a warm, nutty note.
  • This cake is easy to slice and works as a dessert or a sweet snack.
  • It uses simple pantry items, so you can make it any day.

Tips for success

  • Drain the pineapple well, extra juice can make the cake too wet.
  • Use room temperature eggs and butter so the batter mixes smoothly.
  • Do not overmix after adding flour, mix until you see no dry streaks.
  • Check the cake at 60 minutes, cover with foil if the top browns too fast.
  • Let the cake cool before slicing, it holds together better when cool.

Serving Suggestions

  • Serve plain with a dusting of powdered sugar for a simple treat.
  • Top slices with whipped cream and a few fresh pineapple chunks.
  • Add toasted coconut on top for crunch and extra coconut flavor.
  • Pair with a cup of coffee or a cold glass of milk for a quiet snack.

Pineapple Coconut Pound Cake: 7 Steps to Tropical Bliss

FAQs

Q: Can I use fresh pineapple instead of canned?

A: Yes, use fresh diced pineapple, but pat it dry so it does not add extra juice.

Q: Can I use less sugar?

A: You can reduce sugar a little, try 1 3/4 cups, but the cake will be less sweet and may be a bit denser.

Q: How do I store the cake?

A: Wrap the cooled cake in plastic wrap or a cake keeper, keep at room temperature for 2 days, or refrigerate up to 5 days.

Q: Can I make this gluten free?

A: Yes, swap in a 1:1 gluten free flour blend and watch texture, you may need a little less or more flour.

Conclusion

This Pineapple Coconut Pound Cake: 7 Steps to Tropical Bliss brings tropical flavor to your table with simple steps. It is moist, easy, and loved by many. If you want another coconut-forward cake idea with a different twist, see this Macadamia Nut Coconut Cake with Passion Fruit Glaze for more inspiration.

Pineapple Coconut Pound Cake

A moist and flavorful pound cake packed with pineapple and coconut, perfect for parties or as a sweet snack.

Wet Ingredients

  • 1 cup softened butter (at room temperature)
  • 2 cups sugar (granulated)
  • 4 large eggs (at room temperature)
  • 1 teaspoon vanilla extract
  • 1 cup sour cream (at room temperature)
  • 1 can crushed pineapple (drained well)
  • 1 cup shredded coconut

Dry Ingredients

  • 3 cups all-purpose flour
  • 1 teaspoon baking powder
  • 1/2 teaspoon baking soda
  • 1/2 teaspoon salt

Preparation

  1. Preheat the oven to 325°F (160°C). Grease and flour a loaf pan or line it with parchment.
  2. Drain a can of crushed pineapple well and press out extra juice with a spoon. Set pineapple aside.
  3. In a bowl, beat softened butter with sugar until light and creamy.
  4. Add eggs one at a time, beating after each addition until mixed.
  5. Stir in vanilla extract and sour cream, mixing until smooth.

Mixing

  1. In another bowl, whisk together the flour, baking powder, baking soda, and salt.
  2. Fold dry mix into the wet mix until just combined.
  3. Gently fold in the drained pineapple and shredded coconut.

Baking

  1. Pour batter into the prepared pan, smoothing the top.
  2. Bake for 60 to 75 minutes, or until a toothpick inserted comes out clean.
  3. Cool in the pan for 10 minutes, then remove and let cool fully on a rack.

Tips for success: Drain pineapple well to avoid excess moisture. Use room temperature eggs and butter for smooth mixing. Do not overmix after adding flour; stop when there are no dry streaks. Check cake at 60 minutes and cover with foil if browning too fast. Let cake cool before slicing for better texture.

Dessert, Snack
American, Tropical
Coconut Cake, Moist Cake, Pineapple Cake, Pound Cake, Tropical Desserts