Soft Chocolate Chip Cookies

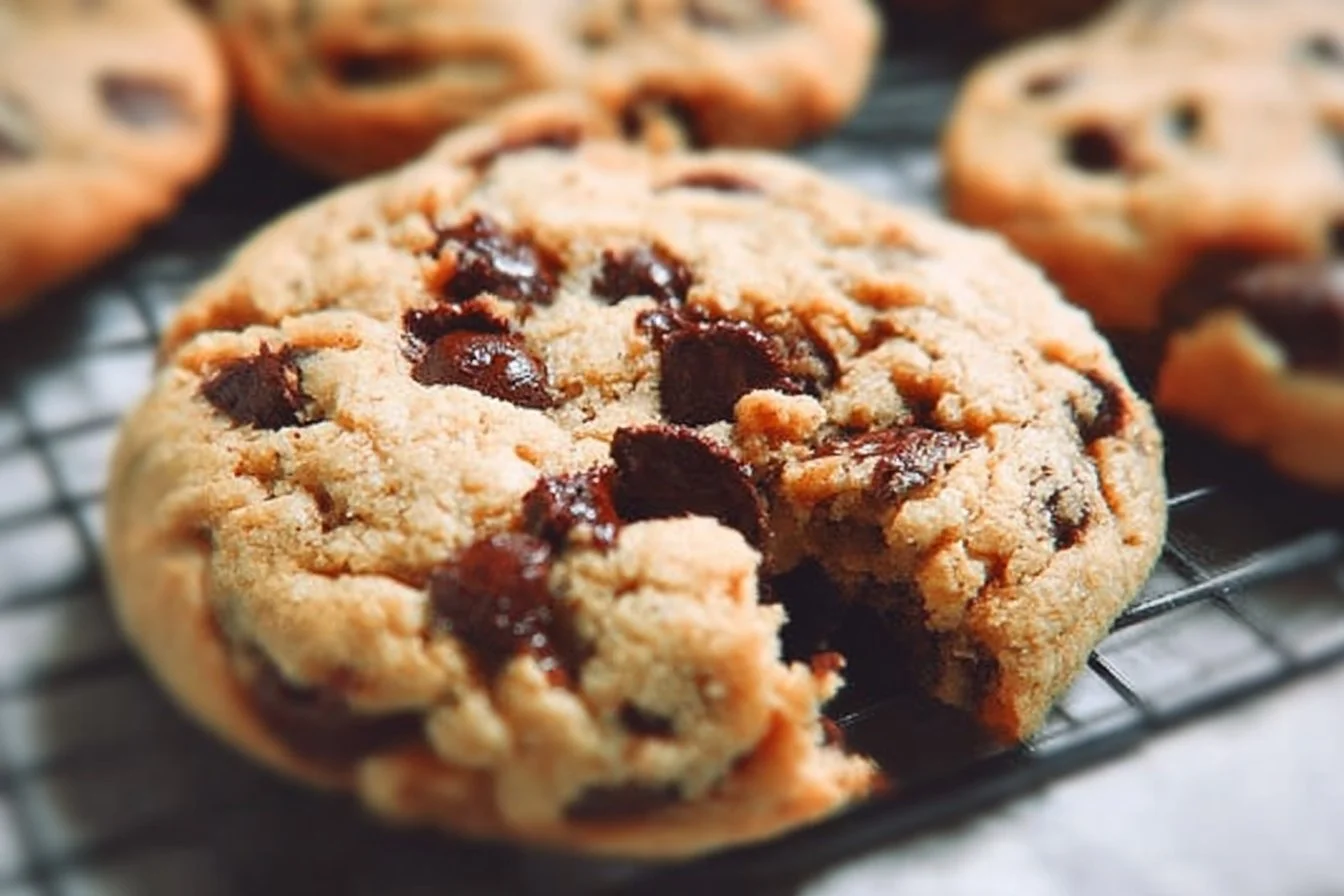
Deliciously soft chocolate chip cookies stacked on a plate

Soft Chocolate Chip Cookies are truly a timeless classic that brings joy to any gathering. With their warm, gooey centers and slightly crisp edges, these cookies appeal to both kids and adults alike. The rich aroma of melting chocolate combined with buttery goodness fills your kitchen and warms your heart. This recipe is a real crowd-pleaser, perfect for cookie lovers everywhere. Whether you need a sweet treat for a party or just want to indulge yourself, these cookies are the way to go. Get ready to dive into the deliciousness of Soft Chocolate Chip Cookies, and prepare to make some sweet memories!

How to Prepare Soft Chocolate Chip Cookies

To prepare Soft Chocolate Chip Cookies, start by gathering your ingredients. You will need 2 ¼ cups of all-purpose flour, 1 teaspoon of baking soda, ½ teaspoon of salt, 1 cup of unsalted butter (softened), ¾ cup of granulated sugar, ¾ cup of brown sugar, 1 teaspoon of vanilla extract, and 2 large eggs. Don’t forget the star of the show, 2 cups of semi-sweet chocolate chips!

First, preheat your oven to 350°F (175°C) and line a baking sheet with parchment paper. In a bowl, combine the flour, baking soda, and salt. In another bowl, beat the softened butter, granulated sugar, brown sugar, and vanilla until creamy. Add the eggs, one at a time, mixing well. Gradually add the flour mixture to the butter mix, then fold in the chocolate chips.

Using a spoon, scoop out dough balls and place them on the prepared baking sheet, spacing them about 2 inches apart. Bake for 10-12 minutes, or until the edges are golden and the centers are soft. Let them cool for a few minutes before transferring them to a wire rack. Enjoy the soft, melty goodness of your Soft Chocolate Chip Cookies.

Why You’ll Love Soft Chocolate Chip Cookies

You will absolutely love Soft Chocolate Chip Cookies for their irresistible texture and taste. The chewy centers are packed with delightful pockets of gooey chocolate. Each bite is a sweet combination of buttery flavor and crunchy edges. They are perfect for sharing, but beware, they are so good that you might want to keep them all to yourself! Plus, they are super easy to make. Even novice bakers can whip them up quickly. These cookies warm up beautifully, making them a perfect choice for any occasion, from cozy family nights to exciting gatherings with friends.

Tips for Success

To ensure your Soft Chocolate Chip Cookies turn out perfectly every time, here are some handy tips. First, make sure your butter is really soft but not melted; this will help create the perfect texture. When measuring flour, spoon it into your measuring cup and level it off for accuracy. Avoid overmixing the dough, as this can lead to tougher cookies. For extra softness, consider chilling the dough for at least 30 minutes before baking. This helps prevent spreading and keeps the cookies nice and thick. Lastly, remember to let the cookies cool slightly on the baking sheet before moving them to a wire rack. Following these tips will help you create delectable Soft Chocolate Chip Cookies that everyone will rave about!

Serving Suggestions

Soft Chocolate Chip Cookies are versatile and can be enjoyed in various ways. Serve them warm with a scoop of vanilla ice cream for an indulgent dessert. If you want a fun twist, try making ice cream sandwiches using two cookies and your favorite ice cream flavor. Pair the cookies with a glass of cold milk or a cup of hot coffee for a delightful treat any time of day. Want to impress your friends? Serve the cookies alongside fresh fruit or chocolate-covered strawberries for an elegant touch. There’s no wrong way to enjoy these cookies, so get creative and have fun!

FAQs

1. Can I use dark chocolate chips instead of semi-sweet?

Yes! Dark chocolate chips will add a richer flavor to your cookies, and they will still be delicious.

2. How do I store Soft Chocolate Chip Cookies?

Store the cookies in an airtight container at room temperature for up to a week. If you want to keep them longer, freeze them in a freezer-safe bag for up to three months.

3. Can I add nuts to the cookie dough?

Absolutely! Chopped walnuts or pecans make a great addition to your Soft Chocolate Chip Cookies for some extra crunch. Just fold them in with the chocolate chips.

Chocolate Chip Cookies

Delightfully soft and chewy chocolate chip cookies with a rich and gooey center, perfect for any gathering or a treat at home.

Dry Ingredients

  • 2 1/4 cups all-purpose flour
  • 1/2 teaspoon baking soda
  • 1 teaspoon salt

Wet Ingredients

  • 1 cup unsalted butter, softened (Make sure it is at room temperature)
  • 3/4 cup granulated sugar
  • 3/4 cup brown sugar, packed
  • 1 teaspoon vanilla extract
  • 2 large eggs (Make sure they are at room temperature)

Add-ins

  • 2 cups chocolate chips (Use semi-sweet or dark chocolate chips based on preference)

Preparation

  1. Preheat your oven to 350°F (175°C).
  2. In a bowl, whisk together the flour and baking soda, then set aside.
  3. In a separate large bowl, cream the softened butter, granulated sugar, brown sugar, and salt until smooth.
  4. Add the vanilla extract and eggs, mixing until well combined.
  5. Gradually mix in the dry ingredients, then fold in the chocolate chips.
  6. Drop rounded tablespoons of dough onto a baking sheet lined with parchment paper.

Baking

  1. Bake for 10-12 minutes, or until the edges are lightly golden.
  2. Let the cookies cool on the baking sheet for a few minutes before transferring them to a wire rack.

For success, ensure room temperature ingredients, avoid overbaking, and chill the dough for thicker cookies.

Dessert, Snack
American
Baking, Chocolate Chip Cookies, dessert recipe, Easy Cookies, soft batch cookies

Whipped Shortbread Cookies

Delicious whipped shortbread cookies arranged on a plate

Whipped shortbread cookies are a delightful treat that brings warmth and nostalgia with every bite. These cookies are smooth, buttery, and melt in your mouth. With their simple ingredients and easy preparation, they’re perfect for both novice bakers and seasoned pros. Imagine serving these delicate treats at holiday gatherings or enjoying them with a cup of tea. They are a total crowd-pleaser, charming everyone with their sweet flavor and crumbly texture. If you’re looking for a recipe that is as enjoyable to make as it is to savor, whipped shortbread cookies are calling your name, ready to be whisked up in your kitchen!

How to Prepare Whipped Shortbread Cookies

Preparing whipped shortbread cookies is a breeze. Start by gathering your ingredients: 1 cup of softened butter, ½ cup of powdered sugar, 2 cups of all-purpose flour, and 1 teaspoon of vanilla extract.

  1. Begin by creaming the butter and powdered sugar in a large mixing bowl until light and fluffy.
  2. Add in the vanilla extract and mix well.
  3. Gradually sift in the flour, mixing until just combined. The dough should be soft and smooth.
  4. Preheat your oven to 350°F (175°C) and line a baking sheet with parchment paper.
  5. Using a piping bag or a cookie scoop, shape the cookies onto the prepared baking sheet.
  6. Bake for 15-20 minutes, or until the edges are lightly golden.
  7. Allow them to cool on the sheet for 5 minutes before transferring them to a wire rack.

Why You’ll Love Whipped Shortbread Cookies

These whipped shortbread cookies are beloved for their incredible taste and texture. They are rich in butter and have a subtly sweet flavor that everyone adores. The light and airy feel makes them perfect for any occasion, whether it’s a holiday celebration or just a cozy night in. Additionally, they are easy to customize; you can add chocolate chips, nuts, or even dip them in chocolate for an extra treat. What’s more, these cookies do not require chilling time, making them a quick and convenient dessert option. Once you try them, you’ll understand why they have become a favorite for cookie enthusiasts everywhere!

Tips for Success

To ensure your whipped shortbread cookies turn out perfectly, follow these handy tips:

  1. Butter Temperature: Make sure your butter is softened to room temperature, as this helps create a light texture.
  2. Mixing Method: Beat the butter and sugar well until fluffy. This adds air to the mixture, contributing to the cookies’ lightness.
  3. Avoid Over-Mixing: Once you add the flour, mix just until combined. Over-mixing can lead to dense cookies.
  4. Piping Tips: If using a piping bag, choose a star tip for beautiful cookie shapes that look as good as they taste.
  5. Storage: Store your cookies in an airtight container to keep them fresh, and enjoy them within a week for the best flavor.

By following these tips, your whipped shortbread cookies will be a hit every time!

Serving Suggestions

Whipped shortbread cookies can be enjoyed in many delightful ways. Here are some serving suggestions to elevate your cookie experience:

  1. Tea Time Treat: Pair these cookies with a warm cup of tea for a charming afternoon snack.
  2. Gifting: Package them in a cute box or jar with a ribbon. They make a wonderful gift for holidays or special occasions.
  3. Decoration: Dust with extra powdered sugar or drizzle with chocolate for a fancy touch when hosting parties.
  4. Dessert Platter: Serve them on a dessert platter alongside other treats like brownies or fruit for a fun dessert table.

These little cookies have a charm that makes them perfect for sharing and enjoying in every situation.

FAQs

1. Can I use salted butter for these cookies?
Yes, you can use salted butter, just skip adding any extra salt to the recipe.

2. How should I store the cookies?
Store your whipped shortbread cookies in an airtight container at room temperature for up to a week.

3. Can I freeze the dough?
Absolutely! You can freeze the cookie dough for up to three months. Just thaw it in the refrigerator before baking.

4. What can I add to the recipe for variety?
Feel free to mix in chocolate chips, nuts, or dried fruit to add different flavors and textures to your cookies.

These FAQs will help you navigate any questions as you whip up your delicious shortbread cookies!

Whipped Chocolate Chip Shortbread

A delightful combination of buttery shortbread and sweet chocolate chips, perfect for any gathering.

Main Ingredients

  • 1 cup unsalted butter, softened (Make sure butter is at room temperature.)
  • ½ cup powdered sugar
  • 2 cups all-purpose flour
  • ½ cup chocolate chips (Feel free to use different types of chocolate.)
  • 1 teaspoon vanilla extract
  • 1 pinch salt (Reduce or skip if using salted butter.)

Preparation

  1. Preheat your oven to 325°F (160°C).
  2. In a large mixing bowl, beat the softened butter and powdered sugar together until light and fluffy.
  3. Add in the vanilla extract and salt, mixing until combined.
  4. Gradually add the all-purpose flour, mixing until the dough just comes together.
  5. Fold in the chocolate chips gently.
  6. Scoop out small portions of the dough and shape them into balls. Place them on a baking sheet lined with parchment paper.
  7. Gently flatten each ball with a fork or your hand.

Baking

  1. Bake in the preheated oven for 15-18 minutes, or until the edges are lightly golden.
  2. Let the cookies cool on the baking sheet for a few minutes before transferring them to a wire rack to cool completely.

These cookies are perfect for quick baking sessions, and they store well for several days. You can freeze the dough for up to three months. For different flavor options, consider adding nuts or using various types of chocolate chips.

Dessert, Snack
American
Baking, Chocolate Chip Cookies, Dessert, Easy Cookies, shortbread

3 Ingredient Mounds Bar Recipe: A Simple Homemade Delight

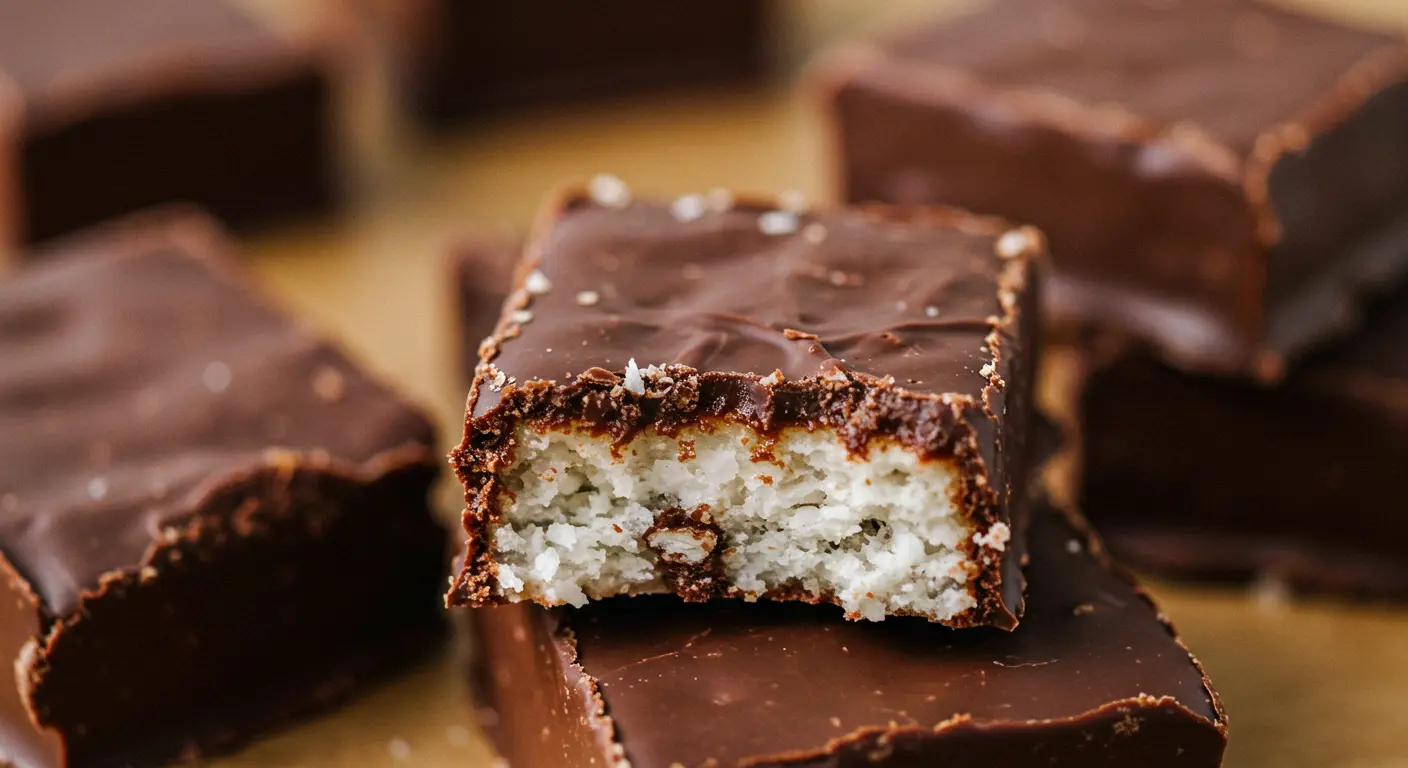
3 Ingredient Mounds Bar

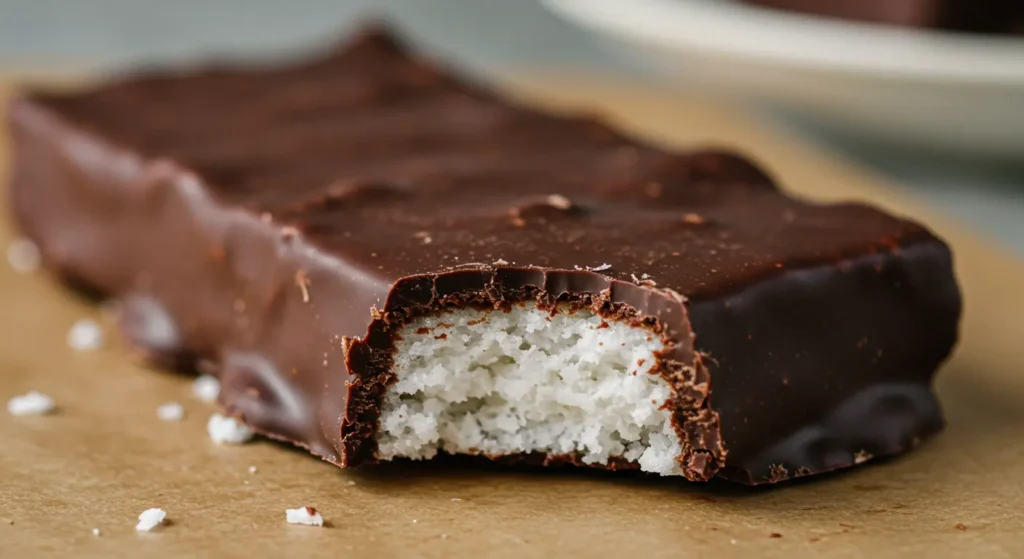
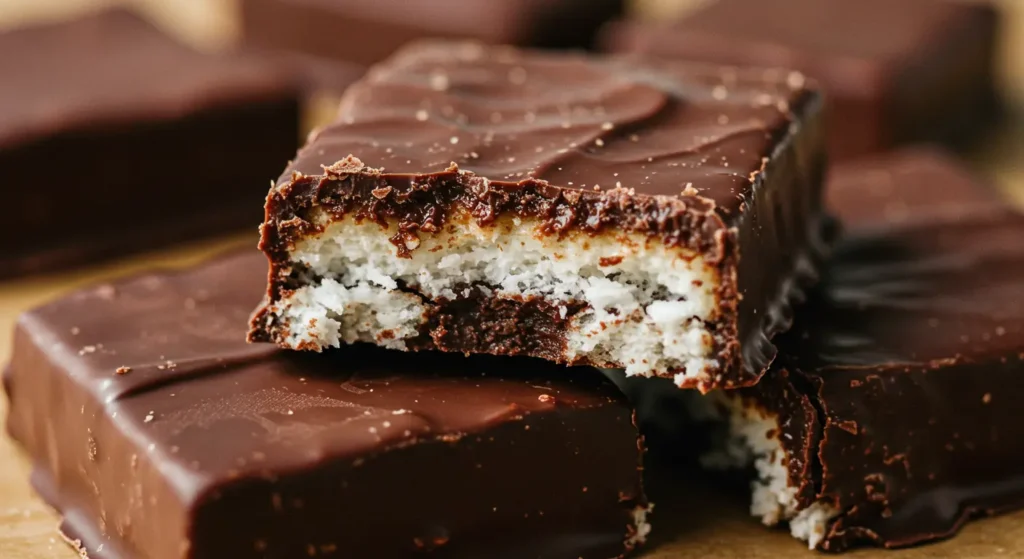
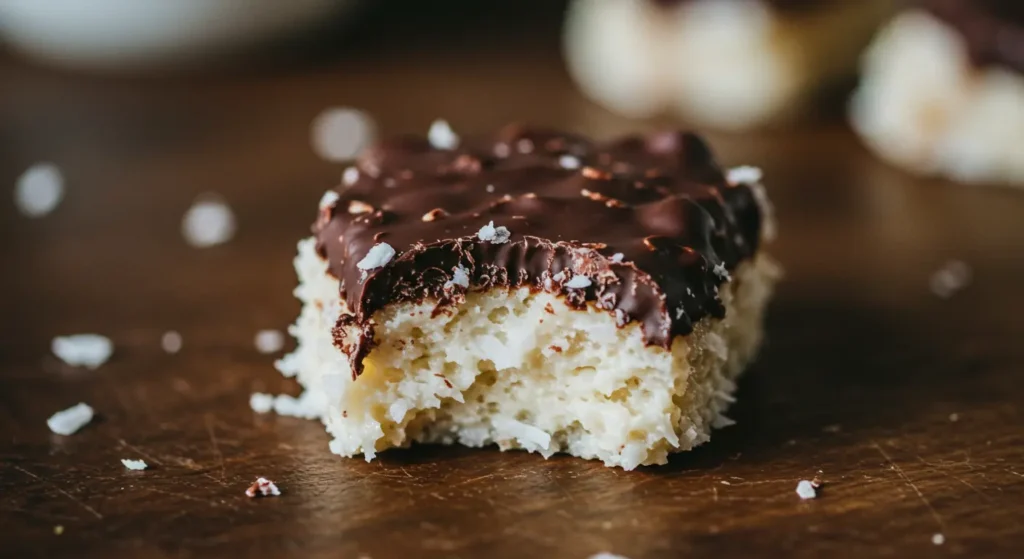
If you do love the classic combination of coconut and chocolate, then the 3 ingredient Mounds bar is the perfect homemade treat to satisfy your sweet tooth. Inspired by the popular store-bought candy bar, this simplified version captures the rich chocolate coating and luscious coconut center using just a few pantry staples. Whether you are looking for a quick dessert, a no-bake snack, or a healthier alternative to processed candy, this recipe will win you over with its simplicity and incredible taste.

In this article, we will walk you through everything you need to know about making 3 ingredient Mounds bars. You will learn about the ingredients, preparation steps, storage tips, variations, and the nutritional profile of this crowd-pleasing dessert. This guide is perfect for beginners, busy parents, or anyone who wants to create a decadent treat without spending hours in the kitchen.

Why Make a 3 Ingredient Mounds Bar at Home.

Homemade candy bars have many advantages over their store-bought counterparts. First and foremost, you have full control over the ingredients. Many commercial chocolate bars contain artificial flavors, preservatives, and excessive amounts of refined sugars. When you make your own, you can choose high-quality chocolate, organic shredded coconut, and natural sweeteners.

In addition, this recipe is extremely cost-effective. With only three ingredients, most of which are already in your pantry, you can recreate a beloved classic without making an extra trip to the store. It is also a fun recipe to prepare with kids or friends as part of a dessert night or holiday treat-making session.

Ingredients for the Perfect Mounds Bar

As promised, this recipe uses only three ingredients:

  1. Shredded coconut

  2. Sweetened condensed milk

  3. Dark chocolate chips or a dark chocolate bar

Let us take a closer look at each of these ingredients and why they matter.

  • Shredded coconut: The heart of any Mounds bar is the moist and chewy coconut filling. For best results, use unsweetened finely shredded coconut. This allows you to control the overall sweetness of the final product. The finely shredded variety creates a smooth texture that holds together well when mixed with the condensed milk.

  • Sweetened condensed milk: This thick, sugary milk binds the coconut together and acts as a natural sweetener. It gives the bars their signature gooey texture and balances the bitterness of dark chocolate. If you are dairy-free, you can find coconut-based condensed milk alternatives in many specialty stores.

  • Dark chocolate: A smooth chocolate shell is essential for a true Mounds bar experience. Choose a quality dark chocolate with at least 60 percent cocoa for a rich and slightly bitter contrast to the sweet coconut center. You can melt chocolate chips or chop up a chocolate bar depending on what you have on hand.

Step-by-Step Instructions to Make 3 Ingredient Mounds Bars

This recipe is ideal for those who want an easy, no-fuss dessert. You do not need special equipment or baking skills. Here are the simple steps to follow:

  • Line an 8 by 8 inch baking pan with parchment paper for easy removal and cleanup.

  • In a large mixing bowl, combine shredded coconut and sweetened condensed milk. Stir until the coconut is fully coated and the mixture holds together.

  • Press the coconut mixture into the lined baking pan. Use a spatula or your hands to flatten the surface evenly. Place the pan in the freezer for 30 minutes to firm up.

  • While the coconut layer is setting, melt the chocolate. You can do this in the microwave in 30-second intervals, stirring between each round, or by using a double boiler on the stove.

  • Once the coconut base is firm, remove the pan from the freezer and lift out the coconut slab using the parchment paper. Cut into rectangular bars of your desired size.

  • Dip each bar into the melted chocolate, using a fork to coat the entire surface. Place the coated bars on a parchment-lined tray.

  • Chill the bars in the refrigerator until the chocolate is fully set, usually about 15 to 20 minutes.

  • Store the finished bars in an airtight container in the refrigerator for up to one week.

Tips for Success.

3 Ingredient Mounds Bar

  • If your coconut mixture is too loose or sticky, add a little more shredded coconut to achieve the right consistency.

  • Use a sharp knife and clean between cuts to create neat, even bars.

  • For easier dipping, keep the coconut bars cold until just before coating them in chocolate.

Flavor Variations and Add-Ons

While the classic Mounds bar is made with dark chocolate and coconut, you can easily personalize this recipe with a few simple twists.

  • Almond Joy version: Add a whole almond on top of each coconut bar before coating in chocolate to mimic the popular Almond Joy bar.

  • White chocolate coating: Swap out the dark chocolate for white chocolate for a sweeter and creamier version.

  • Drizzle with sea salt: Sprinkle a pinch of flaky sea salt on top of the chocolate coating before it sets to enhance the flavor contrast.

  • Add vanilla or almond extract: Mix a small amount of vanilla or almond extract into the coconut mixture for extra depth.

  • Use flavored chocolate: Experiment with mint or orange-infused chocolate for a seasonal twist.

Is the 3 Ingredient Mounds Bar Healthy

This recipe can be part of a balanced diet when enjoyed in moderation. Compared to commercial candy bars, the homemade version contains fewer additives and preservatives. The use of dark chocolate provides antioxidants and less sugar than milk chocolate, while coconut offers healthy fats and fiber.

For those following a specific diet, such as gluten-free or vegetarian, these bars can be easily adapted with certified ingredients. For a lower sugar version, use unsweetened shredded coconut and a sugar-free or low-carb sweetened condensed milk alternative.

However, because sweetened condensed milk is naturally high in sugar, portion control is key. Each bar delivers rich flavor and indulgence, so even a small serving can satisfy a craving.

Serving Ideas

3 Ingredient Mounds Bar

These bars are perfect for a variety of occasions:

  • Holiday treats: Package them in festive tins for gifting during the holidays.

  • Party desserts: Arrange them on a dessert platter alongside cookies and fruit.

  • Lunchbox snack: Wrap individually and include as a treat for school or work lunches.

  • Mid-afternoon indulgence: Pair one bar with a cup of coffee or tea for a delightful break.

  • DIY dessert bar: Set up a station where guests can dip and decorate their own bars.

Storage and Shelf Life

Keep your Mounds bars fresh by storing them in an airtight container in the refrigerator. They should remain good for up to one week. If you want to extend their shelf life, consider freezing them. Place in a single layer on a tray to freeze, then transfer to a freezer-safe container. They can be stored frozen for up to two months. Allow them to thaw in the refrigerator before serving.

Final Thoughts

The 3 ingredient Mounds bar is a testament to the idea that delicious desserts do not need to be complicated. With minimal ingredients and no baking required, this recipe is perfect for busy days, last-minute guests, or simply treating yourself to a homemade indulgence. Rich chocolate, chewy coconut, and sweet condensed milk come together to recreate a beloved candy bar with a wholesome twist.

Try this easy recipe today and see why so many people are making the switch to homemade candy. Not only will you impress your friends and family, but you will also enjoy the satisfaction that comes from making a sweet treat from scratch.

FAQ SECTIONS

Can I use sweetened shredded coconut?
Yes, but reduce the amount of sweetened condensed milk slightly to avoid an overly sticky mixture.

Can I make these dairy-free?
Yes, use a dairy-free condensed milk substitute and dairy-free chocolate chips.

How long do homemade Mounds bars last?
They last up to one week in the refrigerator or two months in the freezer.

Do I need a candy thermometer?
No, this is a no-bake recipe that does not require any specialized tools.

Can I add protein powder?
You can add a tablespoon or two of vanilla protein powder to the coconut mixture for a protein boost.

With the 3 ingredient Mounds bar, simplicity meets decadence. Enjoy every bite and share with others who love coconut and chocolate as much as you do.

[tasty-recipe id=”2262″]

Summer Berry and Peach Cheesecake Recipe

Peach Cheesecake

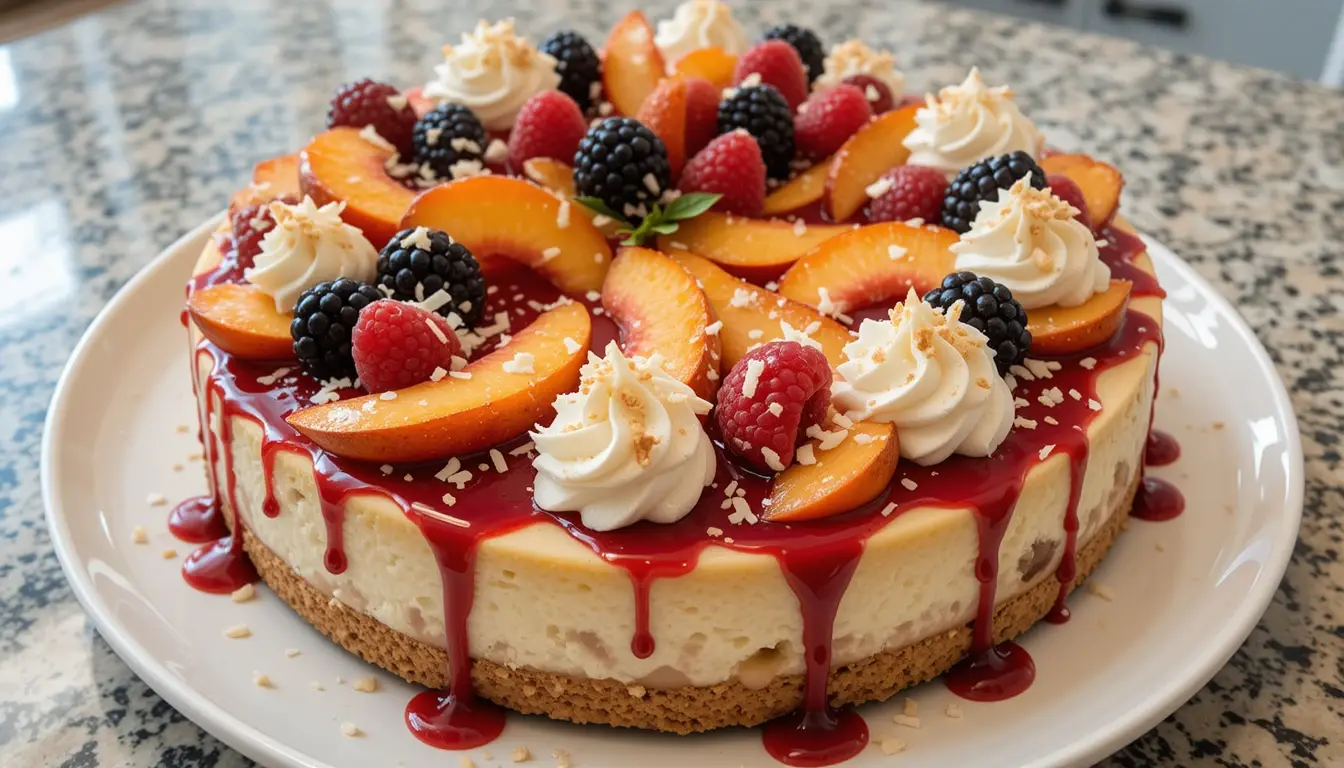
Summer is here, desserts loaded with fresh, juicy fruit! I remember the first time I made this Summer Berry and Peach Cheesecake; it was for a family barbecue, and let’s just say it disappeared in minutes. This cheesecake is the real deal, rich, creamy, and bursting with the sweet-tart flavors of ripe berries and peaches. It’s the kind of treat that just screams summer. If you are headed to a picnic, hosting a backyard hangout, or just want something sweet and seasonal, this cheesecake is bound to steal the show. Keep reading for the simple ingredients, step-by-step how-to, and some handy tips to nail it every time.

What is Peach Cheesecake?

Peach Cheesecake is a heavenly dessert that combines the silky richness of traditional New York-style cheesecake with the natural sweetness and aromatic essence of fresh peaches. This summer dessert features a buttery graham cracker crust, a velvety cream cheese filling infused with peach puree, and is crowned with caramelized peach slices that create both visual appeal and incredible flavor. Unlike basic sweet snacks, this dessert restaurant-quality creation offers layers of texture and taste that make it worthy of special occasions.

Ingredients List for Peach Cheesecake

For the Crust:

  • 1 ½ cups graham cracker crumbs (about 12 full-size graham crackers)
  • ¼ cup granulated sugar
  • ½ cup unsalted butter, melted

For the Cheesecake Filling:

  • 2 (8-ounce) packages cream cheese, softened
  • ⅔ cup granulated sugar
  • 2 large eggs
  • 1 teaspoon vanilla extract
  • ½ cup sour cream
  • 1 tablespoon lemon juice

For the Topping:

  • 1 cup fresh strawberries, hulled and sliced
  • 1 cup fresh blueberries
  • 1 cup fresh raspberries
  • 2 medium peaches, peeled, pitted, and sliced
  • 2 tablespoons apricot jam (optional, for glaze)

Substitutions and Variations

If you’re looking to customize your cheesecake or accommodate dietary needs, here are some substitutions and variations you can try:

  • Crust Alternatives: Use crushed digestive biscuits, Oreo cookies, or almond flour for a gluten-free option.
  • Sweeteners: Substitute granulated sugar with honey, maple syrup, or a low-calorie sweetener.
  • Dairy-Free: Use dairy-free cream cheese and coconut cream instead of sour cream.
  • Different Fruits: Swap the berries and peaches with other seasonal fruits like cherries, mangoes, or kiwi.

Substitutions and Variations

Transform this cheesecake recipes foundation to suit your preferences and dietary needs:

  • Crust Alternatives: Swap graham crackers for vanilla wafers, gingersnaps, or make a gluten-free version using almond flour and crushed pecans
  • Sweetener Options: Replace granulated sugar with coconut sugar, maple syrup, or sugar-free alternatives for diabetic-friendly baking sweets
  • Dairy Modifications: Create dairy-free versions using cashew cream cheese and coconut cream for those avoiding traditional dairy
  • Fruit Variations: Substitute peaches with nectarines, apricots, or create mixed stone fruit combinations for diverse summer desserts
  • Spice Enhancements: Add cardamom, ginger, or vanilla bean paste to elevate the flavor profile

Step-by-Step Cooking Instructions

How to Make Perfect Peach Cheesecake: A Complete Guide

Step 1: Prepare the crust

  1. Preheat your oven to 325°F (165°C) and grease a 9-inch springform pan.
  2. In a medium bowl, mix the graham cracker crumbs, sugar, and melted butter until well combined.
  3. Press the crumb mixture firmly into the bottom of the prepared pan, creating an even layer.
  4. Bake the crust for 10 minutes, then remove from the oven and let cool while you prepare the filling.

Step 2: Make the Cheesecake Filling

  1. In a large mixing bowl, beat the softened cream cheese until smooth and creamy.
  2. Gradually add the sugar, continuing to beat until well combined.
  3. Add the eggs one at a time, beating well after each addition.
  4. Mix in the vanilla extract, sour cream, and lemon juice until the filling is smooth and lump-free.

Step 3: Assemble and Bake

  1. Pour the cheesecake filling over the cooled crust, spreading it evenly.
  2. Bake in the preheated oven for 45-50 minutes, or until the center is set and just slightly jiggly.
  3. Turn off the oven, crack the oven door slightly, and let the cheesecake cool in the oven for about 30 minutes to prevent cracking.
  4. Remove the cheesecake from the oven and transfer it to a wire rack to cool completely.

Step 4: Add the Fruit Topping

  1. Once the cheesecake is completely cool, arrange the sliced strawberries, blueberries, raspberries, and peach slices on top.
  2. If using, warm the apricot jam in a small saucepan until it becomes liquid, then brush it over the fruit to create a glossy finish.

Step 5: Chill and Serve

  1. Refrigerate the cheesecake for at least 2 hours, or overnight for best results.
  2. Before serving, slice and enjoy your beautiful Summer Berry and Peach Cheesecake.
Common Mistakes to Avoid when preparing peach cheesecake
  • Temperature Troubles: Always use room temperature ingredients to prevent lumps and ensure smooth texture in your baking sweets
  • Overmixing Errors: Beat filling just until combined to avoid incorporating excess air that causes cracks
  • Skipping Water Bath: This technique prevents surface cracking and ensures even cooking throughout
  • Rushing the Process: Proper cooling prevents texture issues – patience creates restaurant-quality results
  • Fresh vs. Canned: Always use fresh peaches for superior flavor; canned versions lack the brightness needed for exceptional summer desserts

Serving and Presentation Tips

How to Serve Peach Cheesecake Like a Pro

Present your cheesecake recipes creation with restaurant flair:

  • Classic Style: Serve chilled with simple peach topping for pure flavor focus
  • Gourmet Presentation: Add dollops of cinnamon whipped cream and toasted almonds
  • Sauce Accompaniments: Drizzle with peach coulis or caramel sauce for extra indulgence

Professional Presentation Ideas

  • Elegant Plating: Use warmed knife for clean slices, wiping between cuts
  • Garnish Excellence: Fresh mint sprigs, edible flowers, or candied peach slices
  • Color Contrast: Serve on white plates to showcase the golden peach tones
  • Portion Control: Cut into 12 slices for ideal serving sizes that satisfy without overwhelming

Expert Peach Cheesecake Tips

Master these professional techniques for consistent success:

  • Ingredient Temperature: Room temperature ingredients blend seamlessly – plan ahead for best results
  • Crust Perfection: Pre-baking prevents soggy bottoms while maintaining structural integrity
  • Cooling Strategy: Gradual temperature changes prevent surface cracks in your just desserts masterpiece
  • Storage Wisdom: Wrap tightly and refrigerate up to 5 days, or freeze up to 3 months for future sweet snacks

Frequently Asked Questions (FAQs)

Q: Can I make this peach cheesecake ahead for entertaining? A: Absolutely! This dessert restaurant favorite actually improves with time. Make 2-3 days ahead and add fresh toppings just before serving.

Q: How do I prevent my cheesecake from cracking? A: Use room temperature ingredients, don’t overmix, bake in a water bath, and cool gradually. These steps ensure smooth, professional results.

Q: Can I use frozen peaches in this recipe? A: Fresh peaches provide superior texture and flavor for summer desserts. If using frozen, thaw completely and drain excess moisture thoroughly.

Q: Do I absolutely need a springform pan? A: While springform pans make removal easier, you can use a regular cake pan lined with parchment paper with long overhang handles.

Q: How do I know when my cheesecake is perfectly baked? A: The center should have a slight jiggle when gently shaken, but edges should be set. It continues cooking during the cooling process.

Q: Can I make individual mini cheesecakes instead? A: Yes! Use muffin tins with paper liners and reduce baking time to 18-22 minutes for personal-sized sweet snacks.

Conclusion

This Peach Cheesecake Recipe transforms ordinary ingredients into extraordinary summer desserts that rival any dessert restaurant creation. When you eat dessert this exceptional, you understand how sweet eats can bring joy to any gathering. Perfect for showcasing peak-season peaches, this baking sweets masterpiece delivers just desserts satisfaction that creates lasting memories.

Whether you’re hosting a dinner party or simply treating your family to something special, this cheesecake recipes gem proves that homemade can surpass store-bought every time. The combination of creamy texture, fresh peach flavor, and beautiful presentation makes this the ultimate addition to your sweet snacks repertoire.

[tasty-recipe id=”2313″]


Strawberry Jello Flag Cake: easy Dessert for fourth of july

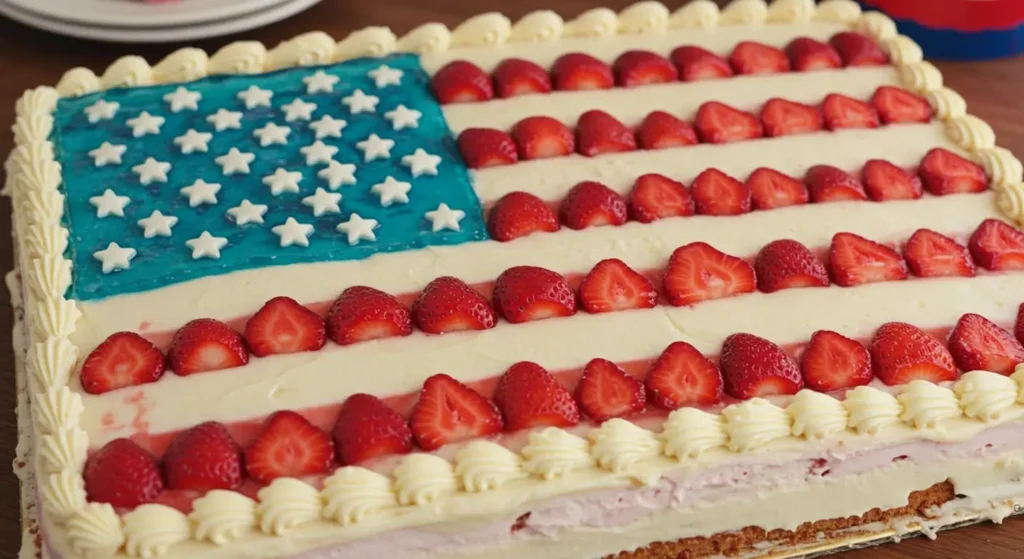
Strawberry Jello Flag Cake

Last Fourth of July, I found myself staring at a Pinterest board filled with elaborate patriotic desserts, feeling overwhelmed by the complexity of most recipes. My neighbor Sarah had invited our entire block to her annual Independence Day barbecue, and I desperately wanted to contribute something memorable. That’s when I stumbled upon a simple yet stunning Strawberry Jello Flag Cake recipe that would change my perspective on holiday baking forever.

The moment I pulled that cake from the refrigerator and revealed its perfect red, white, and blue layers, the entire party went silent. Children pressed their faces against the glass cake stand, adults whipped out their phones, and Sarah declared it the most beautiful dessert she’d ever seen at one of her gatherings. What started as a last-minute panic had transformed into my signature dish, requested at every patriotic holiday since.

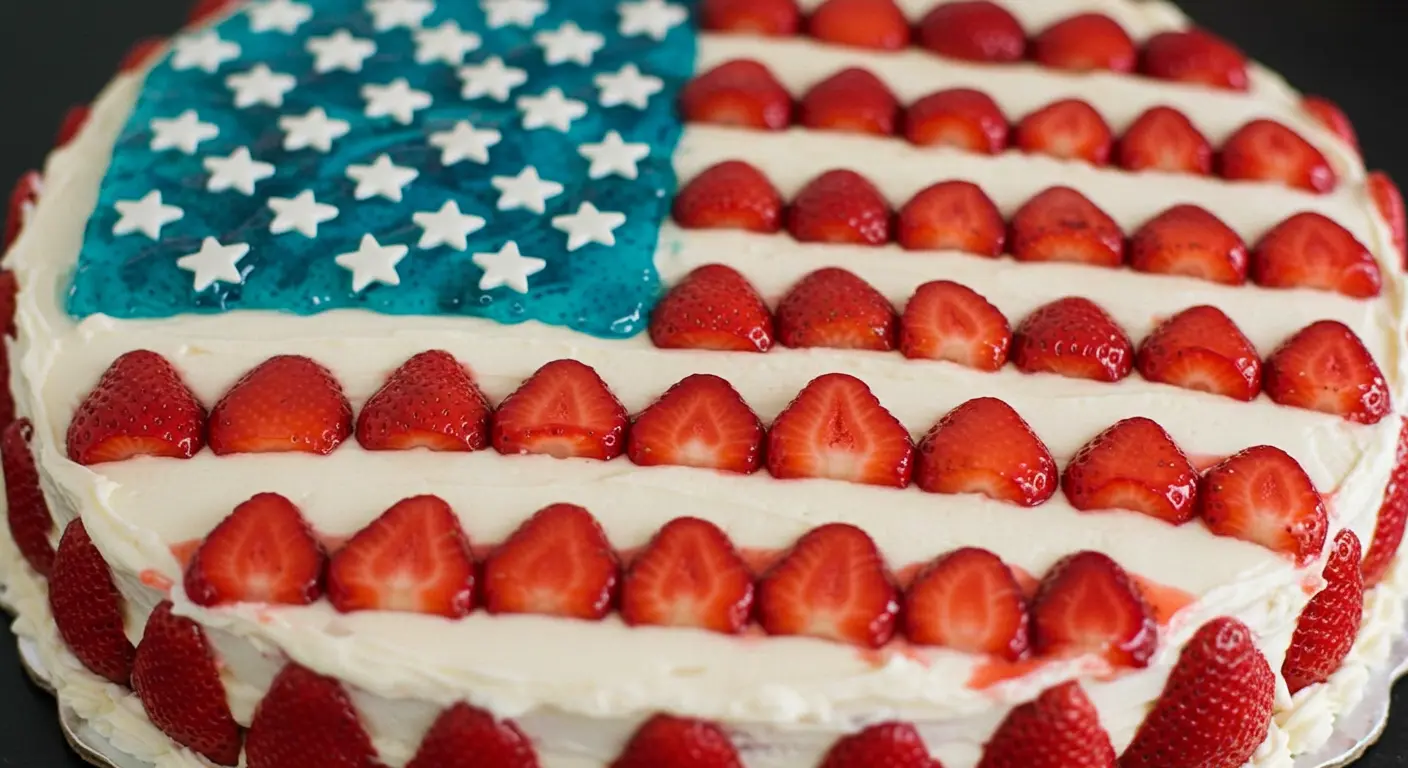
The beauty of this Strawberry Jello Flag Cake lies not just in its stunning visual appeal, but in its surprising simplicity. Unlike complicated layer cakes that require professional-level decorating skills, this dessert achieves its wow factor through the natural layering of strawberry jello, creating distinct red and white stripes that mirror the American flag. The addition of fresh blueberries in one corner completes the patriotic theme while adding bursts of natural sweetness and texture.

Why Make Strawberry Jello Flag Cake?
Strawberry Jello Flag Cake

Creating a Strawberry Jello Flag Cake offers numerous advantages that make it the ideal choice for patriotic celebrations. This dessert combines visual impact with practical benefits, making it perfect for both novice and experienced bakers.

The most compelling reason to choose this recipe is its guaranteed success rate. Unlike temperamental buttercream or finicky fondant decorations, jello layers are nearly foolproof. The gelatin sets reliably, creating clean, distinct stripes that photograph beautifully and slice cleanly. Even if you’ve never attempted a themed dessert before, this cake delivers professional-looking results.

Time management becomes effortless with this make-ahead dessert. The cake requires overnight chilling, which means you can prepare it entirely the day before your event. This advance preparation eliminates last-minute stress and frees up oven space for other dishes on busy holiday cooking days. The flavors actually improve with time, as the jello layers meld slightly with the cake base.

Cost-effectiveness makes this recipe particularly appealing for large gatherings. Basic ingredients like jello, cake mix, and frozen berries keep expenses low while serving a crowd. Compare this to purchasing a custom-decorated cake from a bakery, and the savings become substantial. A single recipe easily serves 12-15 people, making the per-serving cost remarkably affordable.

The versatility of this dessert extends beyond Independence Day celebrations. Modify the colors for different occasions: pink and white for Valentine’s Day, orange and black for Halloween, or green and white for St. Patrick’s Day. The basic technique adapts to any color scheme, making it a valuable skill for year-round entertaining.

Ingredient Notes for Strawberry Jello Flag Cake

Understanding each component of your Strawberry Jello Flag Cake ensures optimal results and helps you make informed substitutions when necessary. Quality ingredients make a noticeable difference in both taste and appearance.

The foundation begins with your cake base, typically a vanilla or white cake mix. Box mixes work excellently for this recipe, providing consistent results and saving time. If you prefer homemade cake, choose a sturdy vanilla cake recipe that won’t become soggy when layered with jello. The cake should be slightly dense rather than fluffy to support the jello layers properly.

Strawberry jello forms the star component, creating those distinctive red stripes. Use name-brand jello for the most vibrant color and reliable setting properties. Generic brands sometimes produce inconsistent results or less intense colors. You’ll need multiple boxes to create sufficient layers, so stock up accordingly. Sugar-free jello works equally well if you’re reducing sugar content.

Unflavored gelatin plays a crucial supporting role in creating the white layers. This ingredient requires careful handling, as it must be bloomed in cold water before dissolving in hot liquid. Knox brand unflavored gelatin provides reliable results. Each envelope contains exactly one tablespoon of gelatin, enough to set approximately two cups of liquid.

Heavy cream or milk creates the white layers when combined with unflavored gelatin. Heavy cream produces richer, more opaque white layers, while milk creates lighter layers with a softer set. Whole milk works better than low-fat varieties, as the fat content helps create better texture and color contrast.

Fresh blueberries complete the patriotic theme and add natural sweetness. Choose firm, plump berries without soft spots or wrinkled skin. Frozen blueberries work in a pinch but may release more juice, potentially affecting the clean lines of your design. Rinse fresh berries gently and pat completely dry before using.

Alternative Ingredient Suggestions for Dietary Restrictions

Accommodating various dietary needs doesn’t require sacrificing the visual impact or delicious taste of your Strawberry Jello Flag Cake. Modern ingredient alternatives make it possible to create inclusive versions that everyone can enjoy.

For gluten-free requirements, substitute the regular cake mix with a high-quality gluten-free version. Brands like Bob’s Red Mill or King Arthur produce excellent gluten-free vanilla cake mixes that behave similarly to traditional versions. Alternatively, make a gluten-free cake from scratch using almond flour or a gluten-free flour blend. Ensure all other ingredients, including jello and gelatin, are certified gluten-free.

Dairy-free adaptations require replacing both the cream and any butter in the cake. Full-fat coconut milk creates excellent white layers with rich texture and opacity. Canned coconut milk works better than carton versions due to higher fat content. For the cake itself, substitute dairy-free butter alternatives and non-dairy milk. Many people can’t distinguish between dairy and non-dairy versions in the finished product.

Vegan modifications present more complexity but remain achievable. Replace traditional gelatin with agar-agar, a seaweed-based gelling agent. Use about half the amount of agar-agar compared to gelatin, as it sets more firmly. Vegan jello brands exist, or create your own using fruit juice and agar-agar. Replace eggs in the cake with commercial egg replacers or make flax eggs using ground flaxseed and water.

Sugar-conscious bakers can use sugar-free jello and reduce sugar in other components. Natural sweeteners like stevia or monk fruit work well in the white layers. Keep in mind that sugar-free versions may have slightly different textures and flavors. Taste as you go and adjust sweetness levels accordingly.

For those avoiding artificial colors and flavors, create natural red layers using pureed strawberries or raspberries combined with unflavored gelatin. The color won’t be as intensely red as artificial versions, but the flavor improvement is significant. Natural food coloring derived from vegetables can enhance the color if desired.

How to Make Strawberry Jello Flag Cake

Creating your Strawberry Jello Flag Cake requires patience and timing, but the process itself is straightforward. Follow these detailed steps for guaranteed success.

Begin by preparing your cake base the day before assembly. Bake a vanilla or white cake according to package directions in a 9×13 inch pan. Allow the cake to cool completely before proceeding. Once cooled, use a fork to poke holes evenly across the surface, spacing them about half an inch apart. These holes allow the jello to penetrate and create better adhesion between layers.

Prepare the first red layer by dissolving two boxes of strawberry jello in two cups of boiling water. Stir until completely dissolved, then add two cups of cold water. Allow this mixture to cool to room temperature but not set. Pour half of this mixture over the prepared cake, ensuring even coverage. The liquid should settle into the holes and create the first red layer. Refrigerate for approximately two hours until firmly set.

While the first layer chills, prepare the white layer mixture. Sprinkle one envelope of unflavored gelatin over half a cup of cold water and let it bloom for five minutes. Heat one cup of heavy cream or milk until steaming but not boiling. Add the bloomed gelatin mixture and stir until completely dissolved. Add a quarter cup of sugar and stir until dissolved. Cool to room temperature.

Pour the white layer mixture over the set red layer, again ensuring even coverage. Return to the refrigerator for another two hours until set. The contrast between red and white should be clearly visible and appealing.

Create the second red layer using the remaining strawberry jello mixture. If it has begun to set, gently warm it until liquid again, then cool to room temperature. Pour over the white layer and refrigerate for two hours until set.

Prepare a final white layer using the same method as before. This creates the classic red-white-red-white pattern of flag stripes. Pour over the second red layer and refrigerate for at least four hours or overnight.

Before serving, create the blue field by arranging fresh blueberries in the upper left corner of the cake. Press them gently into the top white layer so they stay in place when slicing. The finished cake should display clear, distinct layers that remain stable when cut.

For clean slices, use a sharp knife dipped in warm water between cuts. This prevents the jello layers from dragging or creating messy edges. Serve immediately after slicing for the best presentation.

Nutrition Information

Understanding the nutritional content of your Strawberry Jello Flag Cake helps you make informed decisions about serving sizes and dietary planning. This analysis is based on a standard recipe serving 12 people.

Each serving contains approximately 285 calories, making it a moderate dessert choice for special occasions. The calorie content breaks down as follows: the cake base contributes about 180 calories per serving, while the jello layers add approximately 60 calories, and the cream layers contribute roughly 45 calories per serving.

Carbohydrate content totals approximately 45 grams per serving, primarily from the cake mix and jello. The sugar content accounts for about 32 grams per serving, combining natural and added sugars from all components. Those monitoring carbohydrate intake should consider this when planning portions.

Fat content averages 8 grams per serving, mainly from the cake ingredients and cream used in white layers. Saturated fat contributes about 4 grams per serving. Using lighter alternatives like low-fat milk instead of heavy cream can reduce these numbers significantly.

Protein content provides about 4 grams per serving, coming primarily from the cake mix, eggs, and gelatin. While not a significant protein source, it does contribute to the overall nutritional profile.

Sodium levels reach approximately 320 milligrams per serving, largely from the cake mix and jello packages. Those on sodium-restricted diets should consider this when determining appropriate serving sizes.

The dessert provides minimal vitamins and minerals, though the blueberries contribute small amounts of vitamin C and antioxidants. This is primarily a celebration food rather than a nutritional powerhouse, which is perfectly appropriate for its intended use.

Fiber content remains low at about 1 gram per serving, as refined ingredients dominate the recipe. Adding fresh berries throughout the layers could increase fiber content slightly.

Serving Suggestions

Presenting your Strawberry Jello Flag Cake effectively enhances its visual impact and ensures guests enjoy the full experience. Thoughtful serving choices elevate this dessert from simple to spectacular.

Temperature plays a crucial role in serving success. Remove the cake from the refrigerator 10-15 minutes before serving to allow slight softening, which makes slicing easier while maintaining the layer integrity. The cake should remain cool but not ice-cold when served.

Garnish options extend the patriotic theme beautifully. A light dusting of powdered sugar over the entire surface creates a subtle enhancement without overwhelming the design. Fresh mint leaves placed strategically around the blueberry field add color contrast and fresh aroma. Whipped cream rosettes piped along the edges provide elegant finishing touches.

Complementary beverages enhance the overall dessert experience. Cold milk pairs naturally with the cake flavors, while coffee provides a nice contrast to the sweetness. For adults, champagne or prosecco creates an elegant pairing for special celebrations. Fruit-infused waters or lemonades work well for casual gatherings.

Portion control becomes important given the rich nature of layered desserts. Cut generous but reasonable squares, approximately 3×4 inches, which provides satisfying servings without overwhelming guests. Use a ruler or template initially to ensure uniform portions that photograph well.

Presentation plates matter more than you might expect. White or clear glass plates showcase the colorful layers best, while patriotic-themed paper plates work well for casual outdoor gatherings. Avoid busy patterns that compete with the cake’s visual impact.

Consider timing your reveal for maximum impact. Cover the entire cake until the moment of serving, then dramatically unveil it to gasps of appreciation. This theatrical element adds to the celebration atmosphere and ensures your hard work receives proper recognition.

How to Store

Proper storage ensures your Strawberry Jello Flag Cake maintains its beautiful appearance and delicious taste for several days. Understanding storage requirements helps you plan preparation timing and handle leftovers appropriately.

Initial storage begins immediately after preparation. The completed cake must remain refrigerated at all times due to the perishable dairy components and gelatin layers. Cover tightly with plastic wrap, ensuring the covering doesn’t touch the surface and disturb the design. Alternatively, use a large cake keeper or tent aluminum foil over the cake.

Short-term storage works well for up to three days in the refrigerator. The flavors actually meld and improve during the first 24 hours, making day-old cake often superior to freshly made versions. Keep the temperature consistent, avoiding areas near the refrigerator door where temperature fluctuations occur.

Leftover portions require individual attention for optimal storage. Cut the cake into serving pieces and store in airtight containers, placing parchment paper between layers if stacking. This method prevents the pieces from sticking together and maintains clean layer lines.

Freezing presents challenges but remains possible for longer storage. Wrap individual portions tightly in plastic wrap, then place in freezer bags with air removed. Frozen cake keeps for up to one month but may experience texture changes in the jello layers upon thawing. Thaw slowly in the refrigerator rather than at room temperature.

Transportation requires special consideration for picnics or potluck events. Use a cooler with ice packs to maintain proper temperature, and keep the cake level to prevent layer shifting. Consider assembling the final garnishes at your destination to ensure perfect presentation.

Signs of spoilage include changes in smell, texture, or appearance of any layer. The dairy components will show signs of deterioration first, so monitor carefully. When in doubt, discard the cake rather than risk food safety issues.

For optimal freshness, plan to consume the cake within 48 hours of preparation. While it remains safe longer when properly stored, the peak quality and visual appeal occur during this timeframe. The investment in ingredients and time deserves to be enjoyed at its absolute best.

For more alternative desserts

[tasty-recipe id=”2295″]

Flank Steak Marinade Recipe

If you want a flank steak that’s actually tender and bursting with flavor (instead of chewy and boring), you absolutely need a good marinade like this one. Don’t even think about skipping it! Give your steak at least 2 hours to soak up all that goodness, but honestly, if you’ve got more time, let it hang out even longer.

What Is Flank Steak?

Okay, so flank steak is this super lean cut that comes from the cow’s belly area – basically the lower abs if cows did crunches! It’s one of those tougher cuts that doesn’t have much fat on it, which actually works in your favor. Here’s why: you don’t have to mess around trimming off fat, it won’t break the bank like those fancy rib eyes, and it absolutely loves a good marinade (we’re talking major flavor absorption here).

Flank Steak vs. Skirt Steak

People mix these up all the time, and honestly, I get it – they’re pretty similar! But here’s the deal: skirt steak comes from the cow’s diaphragm (yeah, the breathing muscle), while flank comes from lower down in the belly. Skirt steak is the fattier, more marbled one with those gorgeous little fat streaks running through it. Flank steak is thicker and wider, like the bigger, leaner cousin.

Flank Steak Substitute

Can’t find flank steak at the store? Don’t panic! Skirt steak is your best bet – they’re practically twins. Top round and hanger steak will also do the trick if you’re in a pinch. All of these cuts love the same treatment, so you’re good to go.

Flank Steak Marinade

This marinade is seriously crowd-pleasing stuff, and it’s made with things you probably already have: vegetable oil, soy sauce, red wine vinegar, lemon juice, Worcestershire sauce, Dijon mustard, garlic, and black pepper. Nothing fancy, but man does it work!

You need at least 2-6 hours in the fridge for decent results, but if you really want to blow people’s minds? Marinate that baby overnight or up to 12 hours. Trust me on this one – the extra time is totally worth it.

How to Cook Flank Steak

There are tons of ways to nail a perfect flank steak, but grilling is my go-to because you get that amazing smoky flavor that just makes everything better. That said, your oven or stovetop will work great too if grilling isn’t happening. Here’s the breakdown:

  • On the grill: Get your steak marinated and happy, then fire up a lightly oiled grill to medium-high heat. Pull that steak out of the marinade, shake off the extra liquid (don’t waste it though – you can brush it on while cooking), and grill each side until you hit your sweet spot. You’re looking for 130-145°F on a meat thermometer stuck right in the middle.
  • In the oven: Same marinade game, then pull the steak out and shake off excess. Toss it in a foil-lined baking dish and pop it in the oven. Keep checking with your thermometer until you hit that 130-145°F range.
  • On the stove: Marinate like a pro, then get a cast-iron skillet nice and hot. Sear those steaks until they’re golden brown on one side, flip ’em, and repeat. Then finish them off in a preheated oven until your thermometer reads 130-145°F.

Why Make Flank Steak Marinade

Flank steak is a favorite for many people because it’s flavorful and versatile. With this marinade recipe, you’ll transform a humble cut of meat into a mouthwatering dish that’s perfect for grilling, broiling, or pan-searing. The combination of ingredients not only tenderizes the meat but also adds a depth of flavor that will impress your family and friends. Plus, it’s super easy to whip up in no time!

How to Serve Flank Steak Marinade

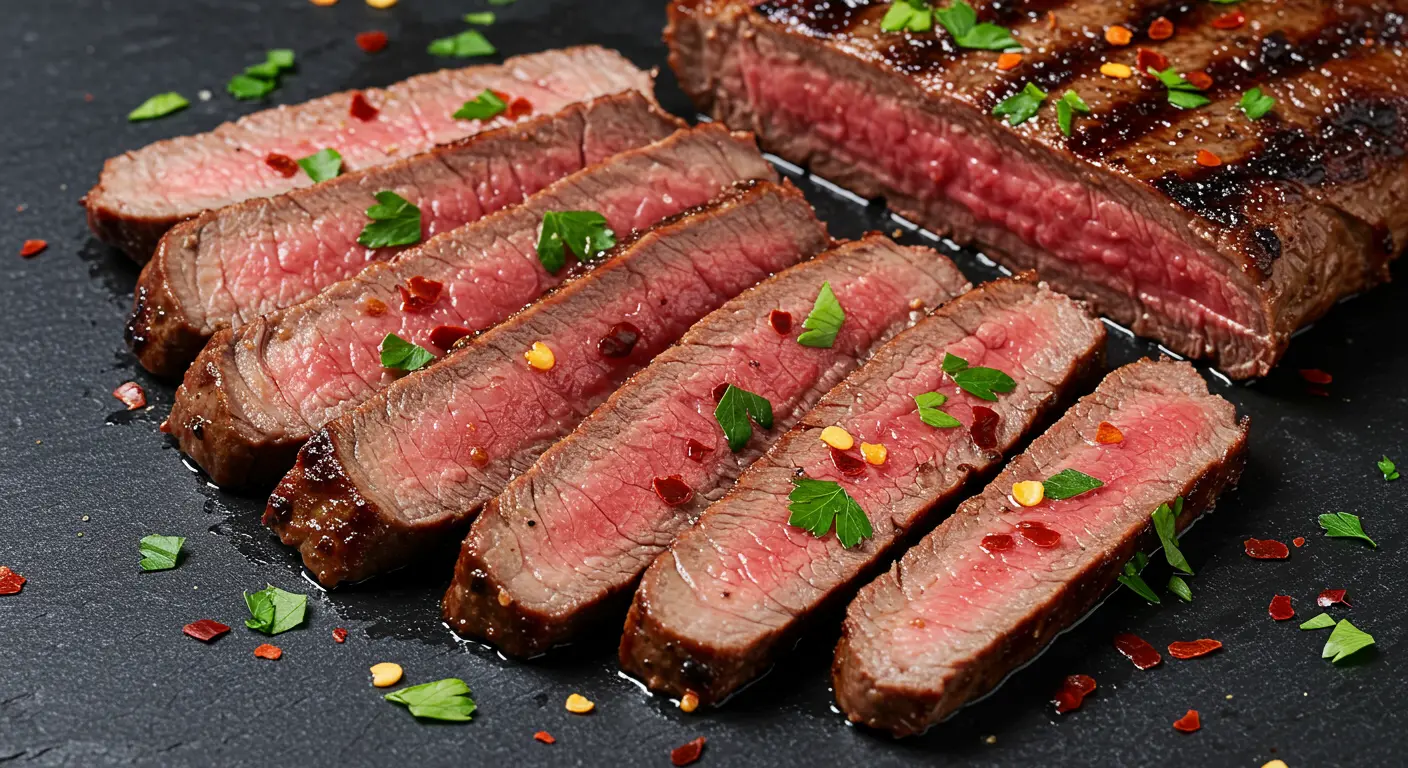
Once your steak is cooked to your liking, slice it against the grain for tender bites. Serve it alongside some grilled vegetables, a fresh salad, or even in tacos for a delightful meal. Don’t forget to drizzle some of the reserved marinade over the top for an extra burst of flavor!

How to Store Flank Steak Marinade

If you have leftover marinade that hasn’t touched raw meat, you can store it in the refrigerator for up to one week. If you’ve used it for marinating, it’s best to discard any leftover marinade to avoid cross-contamination. Cooked flank steak can be stored in an airtight container in the refrigerator for up to 3-4 days.

Tips to Make Flank Steak Marinade

  • For more flavor, try adding herbs like rosemary or thyme to the marinade.
  • If you like a bit of heat, consider adding some red pepper flakes or hot sauce to the mix.
  • Remember to cut the steak against the grain for the most tender slices!

Variation

You can easily change the marinade by using different acids, such as apple cider vinegar or adding some honey for sweetness. Mixing in fresh herbs like cilantro or adding citrus zest can also give the steak a unique flavor.

FAQs

Can I use a different cut of meat for this marinade?
Yes, this marinade works well with other cuts like skirt steak or chicken. Just adjust marinating time based on the thickness of the meat.

How long should I marinate the steak?
A minimum of 2 hours is recommended, but marinating overnight will yield the best flavor.

Can I grill the flank steak?
Absolutely! Flank steak is perfect for grilling. Just ensure it’s over high heat for a nice sear.

[tasty-recipe id=”4379″]

Raspberry Bars

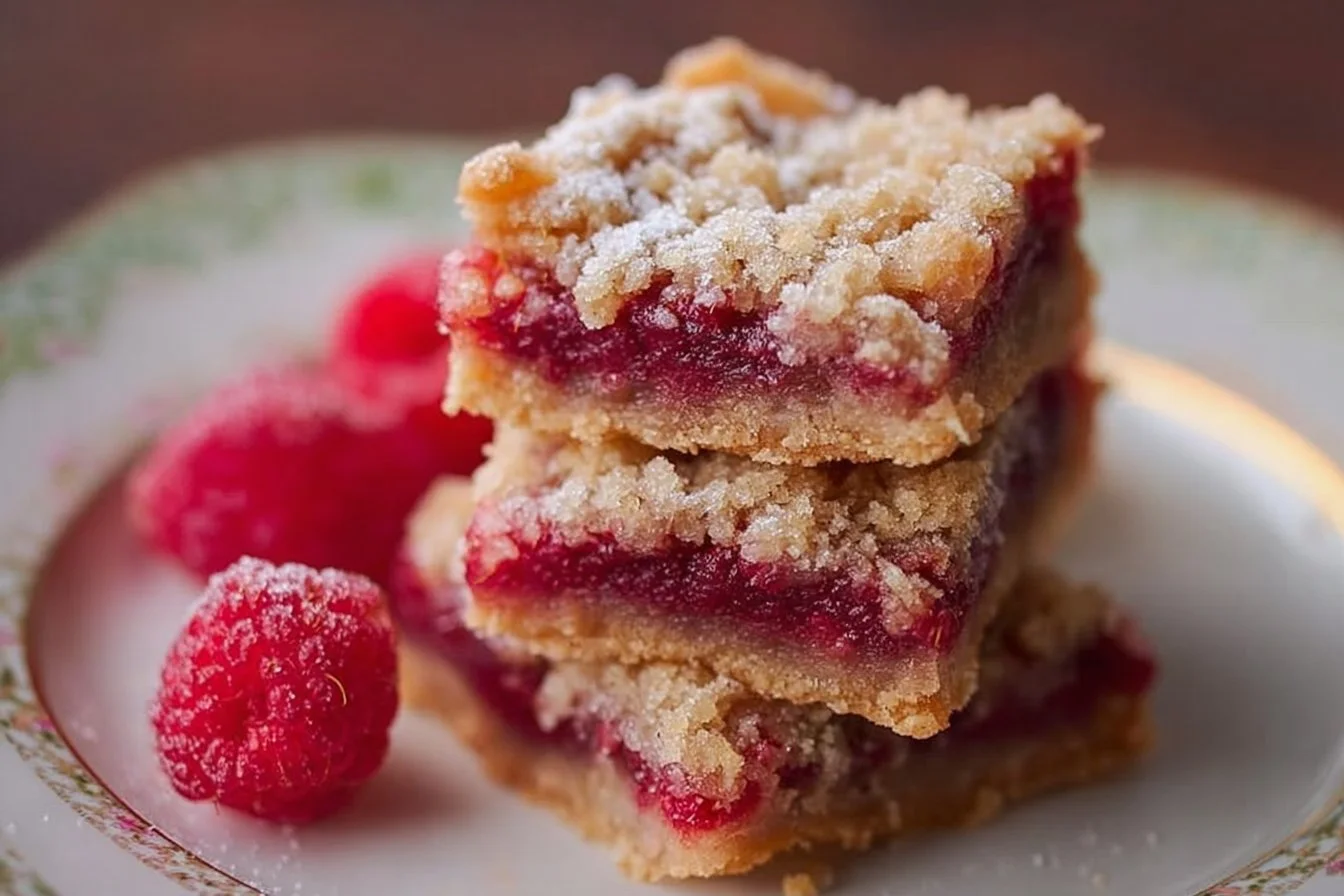
Delicious homemade raspberry bars on a wooden plate

Raspberry Bars are a delightful treat that everyone loves. With their sweet and tangy raspberry filling, a buttery crust, and a crumbly topping, these bars are perfect for any occasion. Whether you are hosting a gathering, packing lunch for the kids, or simply indulging yourself, Raspberry Bars are sure to delight. They are easy to make and even more fun to enjoy, as they are both fruity and satisfying. Get ready to bake something special, because these Raspberry Bars will become a favorite in no time!

How to Prepare Raspberry Bars

To make Raspberry Bars, start by preheating your oven to 350°F (175°C). Grease a 9×13-inch baking dish and set it aside. In a large bowl, combine 1 cup of softened butter, 1 cup of sugar, and 2 cups of all-purpose flour. Mix it well until you have a smooth dough. Reserve about 1 cup of the mixture for topping, and press the remaining mixture evenly into the bottom of the prepared baking dish.

Next, spread 2 cups of fresh or frozen raspberries evenly over the crust. In a small bowl, mix together 1 cup of sugar and 2 tablespoons of cornstarch, then sprinkle this mixture over the raspberries. Finally, crumble the reserved dough on top. Bake for about 45 minutes or until the top is lightly golden. Once baked, let the bars cool in the pan before cutting them into squares. Now, serve and enjoy!

Why You’ll Love Raspberry Bars

Raspberry Bars are not just another dessert, they are a slice of happiness! The combination of sweet crust and tangy raspberry filling creates a perfect balance of flavors. They are easy to make, requiring simple ingredients you might already have in your pantry. With each bite, you experience a burst of fruitiness followed by a buttery crunch. Plus, these bars are versatile; you can enjoy them for breakfast, dessert, or as a snack. Guaranteed to impress family and friends, Raspberry Bars are a quick recipe that produces delicious results every time.

Tips for Success

To make your Raspberry Bars turn out perfectly, here are some handy tips. First, ensure your butter is softened at room temperature for easier mixing. If using frozen raspberries, let them thaw slightly to avoid excess moisture. Don’t skip the cornstarch in the raspberry layer, as it helps thicken the filling and prevent sogginess. For an extra touch, sprinkle a bit of lemon zest into the filling for added flavor. Finally, allow your bars to cool completely in the pan before cutting them; this will help them hold their shape nicely.

Serving Suggestions

Raspberry Bars are great on their own, but you can make them even more special. Serve them warm with a scoop of vanilla ice cream or a dollop of whipped cream for a delightful dessert. They work well at picnics, paired with lemonade or iced tea. You can also sprinkle some powdered sugar on top for a beautiful finish or add fresh raspberries as a garnish. For a breakfast treat, enjoy them with a cup of coffee or tea. No matter how you serve them, these bars are sure to be a hit!

FAQs

Can I use other fruits instead of raspberries?
Yes, you can substitute raspberries with blueberries, blackberries, or strawberries, depending on your preference.

How do I store Raspberry Bars?
Store your Raspberry Bars in an airtight container at room temperature for up to three days, or refrigerate them for longer freshness.

Can I freeze Raspberry Bars?
Absolutely! After they cool completely, wrap them tightly in plastic wrap and place them in an airtight container. They can be frozen for up to three months.

Raspberry Bars

These easy-to-make raspberry shortbread bars combine buttery shortbread with sweet raspberry jam, making them a favorite treat.

Shortbread Base

  • 1 cup unsalted butter, softened (Make sure the butter is softened for easier blending.)
  • ½ cup sugar
  • 2 cups all-purpose flour (Can be substituted with gluten-free flour if desired.)

Raspberry Layer

  • 1 cup raspberry jam (Use high-quality jam for best flavor.)

Preparation

  1. Preheat your oven to 350°F (175°C).
  2. In a bowl, blend the softened unsalted butter until creamy.
  3. Gradually mix in the sugar until well combined.
  4. Add the all-purpose flour and mix until the mixture is combined.
  5. Press 2/3 of this mixture into the bottom of a greased baking pan.
  6. Spread the raspberry jam over the pressed shortbread base.
  7. Crumble the remaining dough over the raspberry jam.
  8. Bake for 30 minutes or until golden brown.
  9. Allow to cool completely before cutting into bars.

Serve these bars with a scoop of vanilla ice cream or a dollop of whipped cream for an extra treat. For a fun twist, sprinkle powdered sugar on top before serving.

Dessert, Snack
American
Baking, easy dessert, Five Ingredient Recipe, Raspberry Shortbread Bars, sweet treat

Nicoise Salad (French salad with tuna)

Delicious Nicoise Salad featuring fresh vegetables and tuna

Nicoise Salad also spelled niçoise, comes from the south of France, and it tastes like sunshine on a plate. The mix of warm potatoes, crisp green beans, briny olives, and meaty tuna gives a nice balance of flavor and texture. This Nicoise Salad (French salad with tuna) recipe is a crowd-pleaser, easy to put together for lunch, dinner, or a light party meal. If you like bold, simple salads, also try the creamy chickpea and feta salad for another quick option, it gives a different, rich taste to enjoy. Get ready to make a salad that looks and tastes impressive, with almost no fuss.

How to prepare Nicoise Salad

  1. Wash small new potatoes and cut any large ones in half. Put them in a pot, cover with salted water, bring to a boil, and cook 10 to 15 minutes until tender. Drain and let cool a little.
  2. Trim green beans and cook in boiling water 3 to 4 minutes until bright and just tender. Drain and rinse with cold water to stop cooking.
  3. Hard boil eggs: place eggs in a pot, cover with water, bring to a boil, then turn off heat and let sit 9 minutes. Cool in ice water and peel.
  4. Make dressing: whisk together olive oil, lemon juice or red wine vinegar, a little Dijon mustard, salt, and pepper. Taste and adjust. Add a small chopped garlic clove if you like.
  5. Flake canned tuna into large pieces. You can use tuna in oil or water, drain well.
  6. On a large platter or bowl, arrange lettuce or mixed greens, add potatoes, green beans, halved eggs, cherry tomatoes, and olives. Scatter tuna and anchovy fillets if you like. Drizzle dressing over the salad and toss gently, or serve dressing on the side.
  7. Finish with a sprinkle of chopped parsley or a few turns of black pepper, serve right away.

Nicoise Salad (French salad with tuna)

Why You’ll Love Nicoise Salad

  • It is a full meal, not just a side, because of the tuna and eggs.
  • The mix of warm and cool items gives a nice contrast in each bite.
  • You can make parts ahead, like boiled eggs and potatoes, and assemble fast.
  • It uses simple pantry items, like canned tuna and olives, for big flavor.
  • The dressing is light and bright, it brings out the fresh vegetables.

Tips for success

  • Use small waxy potatoes so they hold shape after cooking.
  • Don’t overcook green beans, keep them crisp and green.
  • Drain tuna well to avoid a soggy salad.
  • Taste the dressing before adding, adjust lemon or vinegar for brightness.
  • If you like, warm your potatoes slightly, they taste great with cold greens.
  • Use good quality canned tuna for best flavor, or fresh seared tuna for a fancy touch.

Serving Suggestions

  • Serve on a large platter so it looks pretty, people can pick what they like.
  • Offer crusty bread on the side to soak up the dressing.
  • Add a simple green soup or a light white wine for a full meal.
  • Leftovers work well in a sandwich or wrapped in a tortilla the next day.

Nicoise Salad (French salad with tuna)

FAQs

Q: Can I use fresh tuna instead of canned?

A: Yes, sear fresh tuna and slice it, place on top of the salad for a fresh, restaurant feel.

Q: Is this salad served warm or cold?

A: You can serve parts warm or cool. Warm potatoes and cool greens work well together.

Q: What can I use instead of olives or anchovies?

A: Use capers or extra tomatoes for a salty bite if you don’t like anchovies or olives.

Q: How long can I keep leftovers?

A: Keep leftovers in the fridge for 1 to 2 days, store dressing separately to keep the salad crisp.

Q: Can I make this vegetarian?

A: Yes, swap tuna for chickpeas or marinated tofu for a filling vegetarian version.

Conclusion

This Nicoise Salad is a simple, bright dish that brings French flavors to your table with little fuss. For a tested recipe with step by step photos and notes, see the full Nicoise Salad (French Salad with Tuna) on RecipeTin Eats, it has helpful tips and clear directions to follow: Nicoise Salad (French Salad with Tuna) – RecipeTin Eats

Nicoise Salad (French Salad with Tuna)

A refreshing and colorful salad featuring warm potatoes, crisp green beans, briny olives, and meaty tuna, perfect for lunch or dinner.

Salad Ingredients

  • 500 grams small new potatoes (Use waxy potatoes for best texture.)
  • 200 grams green beans (Trimmed and cooked just until tender.)
  • 4 pieces eggs (Hard-boiled and peeled.)
  • 200 grams canned tuna (Tuna can be in oil or water.)
  • 100 grams cherry tomatoes (Halved.)
  • 100 grams olives (Briny olives of your choice.)
  • 1 cup lettuce or mixed greens (For the base of the salad.)
  • anchovies (Optional, for added flavor.)
  • 2 tablespoons fresh parsley (Chopped, for garnish.)

Dressing

  • 3 tablespoons olive oil (Use good quality oil for better flavor.)
  • 2 tablespoons lemon juice or red wine vinegar (Adjust to taste.)
  • 1 teaspoon Dijon mustard (For flavor.)
  • to taste salt and pepper (Adjust seasoning as desired.)
  • 1 clove garlic (Small, chopped (optional).)

Preparation

  1. Wash the potatoes and cut any large ones in half. Place them in a pot, cover with salted water, and bring to a boil. Cook for 10 to 15 minutes until tender, then drain and let cool.
  2. Trim the green beans and cook them in boiling water for 3 to 4 minutes until bright and just tender. Drain and rinse with cold water.
  3. Hard boil the eggs by placing them in a pot, covering with water, bringing to a boil, then turning off the heat and letting them sit for 9 minutes. Cool in ice water and then peel.

Assembly

  1. In a bowl, whisk together the dressing ingredients: olive oil, lemon juice or red wine vinegar, Dijon mustard, salt, pepper, and chopped garlic.
  2. Flake the canned tuna into large pieces.
  3. On a large platter or bowl, arrange the lettuce or mixed greens, add the potatoes, green beans, halved eggs, cherry tomatoes, and olives.
  4. Scatter the tuna and anchovy fillets if using, then drizzle dressing over the salad and toss gently, or serve the dressing on the side.
  5. Finish with a sprinkle of chopped parsley or some turns of black pepper, and serve right away.

You can prepare elements of the salad in advance, like the boiled eggs and potatoes, and assemble quickly. Serve on a large platter for presentation and offer crusty bread on the side.

Main Course, Salad
French
Easy Recipe, French Salad, Healthy Salad, Nicoise Salad, Tuna Salad

Arugula Citrus Salad

Fresh Arugula Citrus Salad with citrus fruits and a light dressing.

Arugula Citrus Salad is bright, fresh, and full of bite. The peppery arugula pairs with sweet citrus and a light dressing, and the salad feels fancy but is very easy to make. This Arugula Citrus Salad is a crowd-pleaser, with juicy orange slices, thin red onion, and a simple lemon vinaigrette that brings the whole dish to life. If you like simple fresh salads like Apple Broccoli Salad, you will enjoy this one too. Give it a try, and get ready to smile at how good simple things taste.

How to prepare Arugula Citrus Salad

Ingredients

  • 4 cups fresh arugula, washed and dried
  • 2 large oranges, peeled and sliced into rounds or segments
  • 1 small red onion, thinly sliced
  • 1/4 cup toasted walnuts or almonds, chopped
  • 1/4 cup crumbled feta or goat cheese, optional
  • 2 tablespoons olive oil
  • 1 tablespoon fresh lemon juice
  • 1 teaspoon honey or maple syrup
  • Salt and black pepper to taste

Directions

  1. Make the dressing, whisk olive oil, lemon juice, honey, salt, and pepper in a small bowl until mixed well. Taste and adjust salt or honey, keep it simple.
  2. Arrange arugula on a wide platter or in a bowl, spread it out so leaves sit flat.
  3. Place the orange slices over the arugula, tuck thin red onion slices around the oranges.
  4. Sprinkle the toasted nuts and cheese over the salad, add a little black pepper on top.
  5. Drizzle the dressing over the salad just before serving, toss lightly so the leaves get a light coat, do not overdress.

Arugula Citrus Salad

Why You’ll Love Arugula Citrus Salad

  • Fast to make, you can finish in about 10 to 15 minutes.
  • Flavor contrast, peppery arugula, sweet citrus, tangy lemon dressing mix well.
  • Light and healthy, it works as a side or a starter, perfect for warm days.
  • Easy to change, swap nuts, cheese, or citrus for what you have.

Tips for success

  • Dry the arugula well, wet leaves make the dressing slide off and the salad soggy.
  • Use ripe but firm oranges, they slice cleanly and stay juicy.
  • Toast nuts in a dry pan for a few minutes, they get more flavor and crunch.
  • Add dressing just before serving to keep leaves crisp.
  • Taste the dressing, add more lemon or honey little by little so it stays balanced.

Serving Suggestions

  • Serve with grilled chicken or fish for a light main meal.
  • Add avocado or sliced cucumber to bulk the salad for lunch.
  • Pair with crusty bread or a simple pasta dish for a fuller plate.
  • Great at parties, put the dressing on the side so guests can add what they like.

Arugula Citrus Salad

FAQs

Q: Can I use store-bought dressing?

A: Yes, a simple lemon or citrus vinaigrette from the store works, just choose one not too sweet, and add a splash of fresh lemon if you can.

Q: How long will this salad stay fresh?

A: It is best eaten right away. If you must store it, keep dressing separate and refrigerate up to one day, but leaves will lose some crispness.

Q: Can I use other greens instead of arugula?

A: Yes, baby spinach or mixed greens work well, but you will lose the peppery bite that arugula gives.

Q: Are there good citrus alternatives?

A: Try grapefruit, blood orange, or a mix of citrus for more color and layered flavor.

Conclusion

This Arugula Citrus Salad is fresh, simple, and full of bright flavors, and it makes a great side or light main. For another quick citrus and arugula idea with clear steps, see this take on a citrus salad for extra inspiration, 15-Minute Refreshing Citrus Salad with Arugula – Our Salty Kitchen. Enjoy making it, and have fun sharing it with friends or family.

Arugula Citrus Salad

A bright, fresh salad featuring peppery arugula, sweet citrus, and a light lemon vinaigrette. Perfect for warm days and easy to make!

Salad Base

  • 4 cups fresh arugula, washed and dried
  • 2 large oranges, peeled and sliced into rounds or segments (Use ripe but firm oranges for better texture.)
  • 1 small red onion, thinly sliced
  • 1/4 cup toasted walnuts or almonds, chopped (Toast nuts in a dry pan for extra flavor and crunch.)
  • 1/4 cup crumbled feta or goat cheese, optional (This is optional but adds a nice creaminess.)

Dressing

  • 2 tablespoons olive oil
  • 1 tablespoon fresh lemon juice (Adjust the amount to taste.)
  • 1 teaspoon honey or maple syrup (Use to balance the acidity.)
  • to taste Salt and black pepper (Add to taste.)

Preparation

  1. In a small bowl, whisk together olive oil, lemon juice, honey, salt, and pepper until well mixed. Taste and adjust seasoning if needed.
  2. Arrange the arugula on a wide platter or in a bowl, spreading it out so leaves sit flat.
  3. Place the orange slices over the arugula, tucking thin red onion slices around the oranges.
  4. Sprinkle the toasted nuts and cheese over the salad, adding a little black pepper on top.
  5. Drizzle the dressing over the salad just before serving, toss lightly to coat the leaves, but do not overdress.

For best results, dry the arugula thoroughly and add the dressing just before serving to keep the leaves crisp.

Salad, Side Dish
American
Arugula Salad, Citrus Salad, Fresh Salad, Healthy Salad, Quick Salad

Banana Protein Muffins

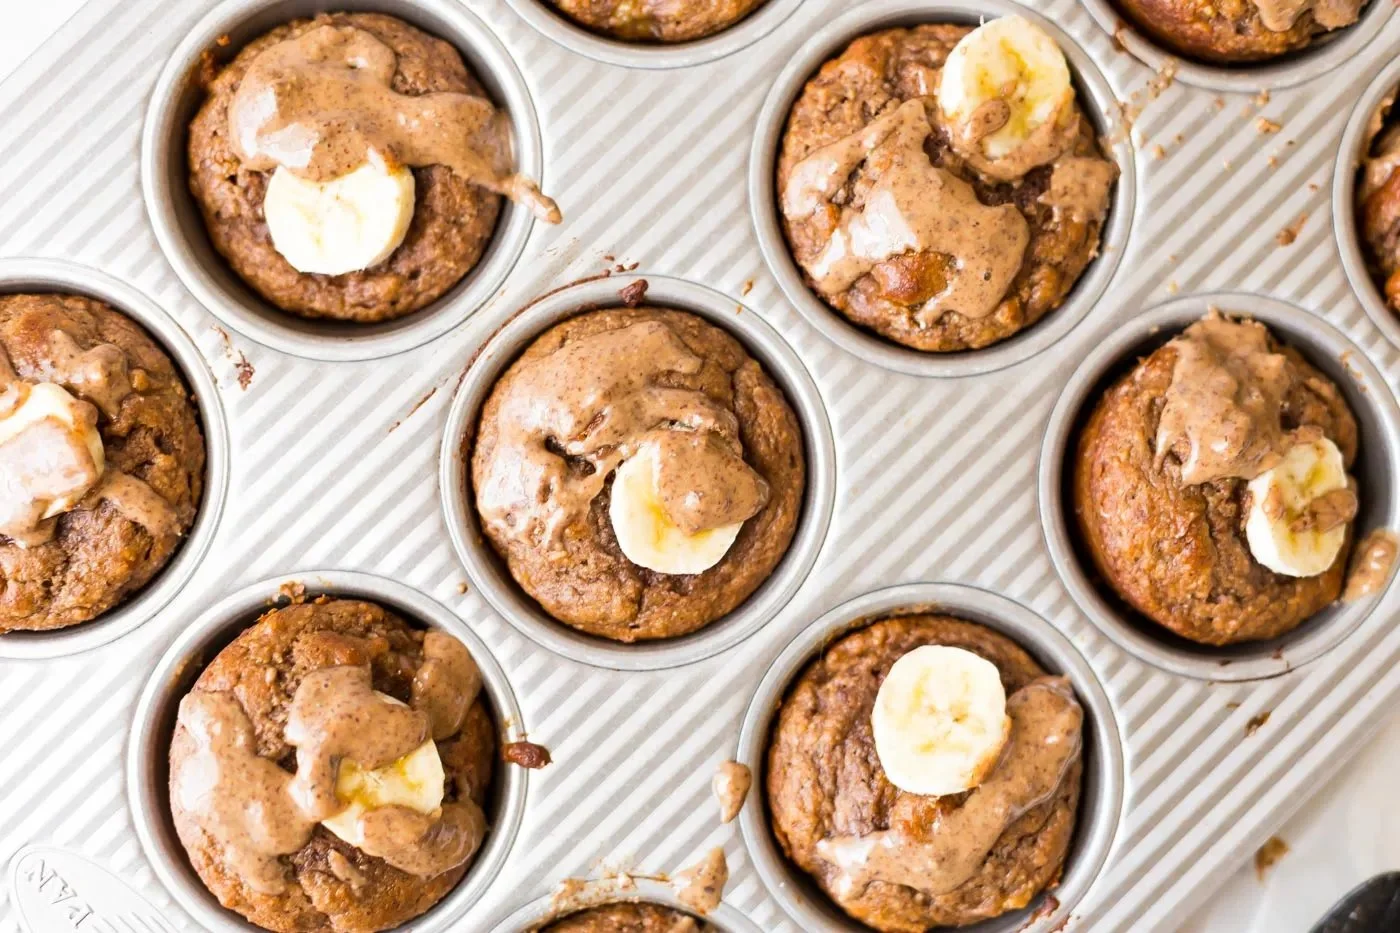
Delicious banana protein muffins arranged on a plate, perfect for a healthy snack.

I love a muffin that feels like a treat, and also helps keep you full, light, and happy. Banana Protein Muffins do just that. They mix ripe bananas, protein powder, and simple pantry items to make soft, tasty muffins. They work well for busy mornings, quick snacks, or to bring to a small get together. This recipe is a crowd-pleaser, with sweet banana taste, a soft crumb, and extra protein to fuel your day. If you like simple banana recipes, you might also enjoy this 3-ingredient banana oatmeal muffins recipe. Give these a try, and get ready to smile when you take your first bite.

How to prepare Banana Protein Muffins

Ingredients

  • 3 ripe bananas, mashed
  • 2 eggs
  • 1 cup flour, whole wheat or all purpose
  • 1 scoop vanilla or plain protein powder
  • 1/4 cup honey or maple syrup
  • 1/4 cup milk, any kind
  • 1 tsp baking powder
  • 1/2 tsp baking soda
  • 1/2 tsp salt
  • 1 tsp cinnamon, optional
  • 1/4 cup oil or melted butter
  • 1/4 cup nuts or chocolate chips, optional

Directions

  1. Preheat the oven to 350 F, and line a muffin tin with paper liners or grease it lightly.
  2. In a bowl, mash the ripe bananas with a fork until smooth.
  3. Add eggs, honey, milk, and oil to the bananas, mix well.
  4. In another bowl, whisk flour, protein powder, baking powder, baking soda, salt, and cinnamon.
  5. Pour the dry mix into the wet mix, stir until just combined, do not overmix.
  6. Fold in nuts or chocolate chips if you use them.
  7. Scoop batter into the muffin tin, fill each about two thirds full.
  8. Bake for 15 to 20 minutes, or until a toothpick comes out clean.
  9. Let muffins cool in the tin for 5 minutes, then move to a rack to cool more.

Banana Protein Muffins

Why You’ll Love Banana Protein Muffins

  • They taste like banana bread, but are quick to make.
  • The protein powder adds a filling boost, good for breakfast or after a workout.
  • You can change mix ins, like nuts or chocolate, to suit your taste.
  • They freeze well, so you can make a batch and save some for later.
  • The texture is soft, moist, and easy to eat on the go.

Tips for success

  • Use very ripe bananas, they give the best banana taste.
  • Do not overmix the batter, mix until you just combine dry and wet parts.
  • If your protein powder is very thick, add a splash more milk to the batter.
  • Test one muffin with a toothpick to check doneness, oven times vary.
  • Let muffins cool a bit before cutting, they set as they cool.

Serving Suggestions

  • Serve warm with a little butter or nut butter on top.
  • Pair with yogurt and fruit for a full breakfast.
  • Pack one with coffee for a simple morning snack.
  • Serve with a glass of milk or a protein shake after a workout.

Banana Protein Muffins

FAQs

Q: Can I use plant based protein powder? A: Yes, plant based protein works fine. You may need a little more liquid if it absorbs more.

Q: How long do these muffins last? A: Keep them in an airtight container at room temperature for 2 to 3 days. Put them in the fridge for up to a week.

Q: Can I freeze the muffins? A: Yes, wrap muffins individually or store in a freezer bag for up to 3 months. Thaw at room temperature or heat briefly.

Q: Can I make these without added sweetener? A: Yes, if your bananas are very ripe you can skip honey or syrup, or reduce it to taste.

Conclusion

If you want another clear, healthy take on banana protein muffins, check this recipe for more ideas and tips, Healthy Banana Protein Muffins – Eat With Clarity.

Banana Protein Muffins

Soft and tasty Banana Protein Muffins combine ripe bananas and protein powder for a filling treat, perfect for any time of the day.

Wet Ingredients

  • 3 pieces ripe bananas, mashed (Use very ripe bananas for the best taste.)
  • 2 pieces eggs
  • 1/4 cup honey or maple syrup (Can be omitted if bananas are very ripe.)
  • 1/4 cup milk, any kind (Add more if the batter is thick.)
  • 1/4 cup oil or melted butter

Dry Ingredients

  • 1 cup flour, whole wheat or all purpose
  • 1 scoop vanilla or plain protein powder
  • 1 tsp baking powder
  • 1/2 tsp baking soda
  • 1/2 tsp salt
  • 1 tsp cinnamon, optional (Adds extra flavor.)

Mix-Ins (Optional)

  • 1/4 cup nuts or chocolate chips (Could vary based on preference.)

Preparation

  1. Preheat the oven to 350°F (175°C) and line a muffin tin with paper liners or grease it lightly.
  2. In a bowl, mash the ripe bananas with a fork until smooth.
  3. Add eggs, honey, milk, and oil to the bananas, and mix well.

Mixing

  1. In another bowl, whisk together flour, protein powder, baking powder, baking soda, salt, and cinnamon.
  2. Pour the dry mix into the wet mix and stir until just combined; do not overmix.
  3. Fold in nuts or chocolate chips if using.

Baking

  1. Scoop batter into the muffin tin, filling each about two-thirds full.
  2. Bake for 15 to 20 minutes, or until a toothpick comes out clean.
  3. Let muffins cool in the tin for 5 minutes, then move to a wire rack to cool completely.

These muffins taste like banana bread, are quick to make, and are great for meals or snacks. They freeze well for later use.

Breakfast, Snack
American
Baked Goods, Banana Protein Muffins, Healthy Muffins, Quick Snacks