Chickpea Feta Avocado Salad

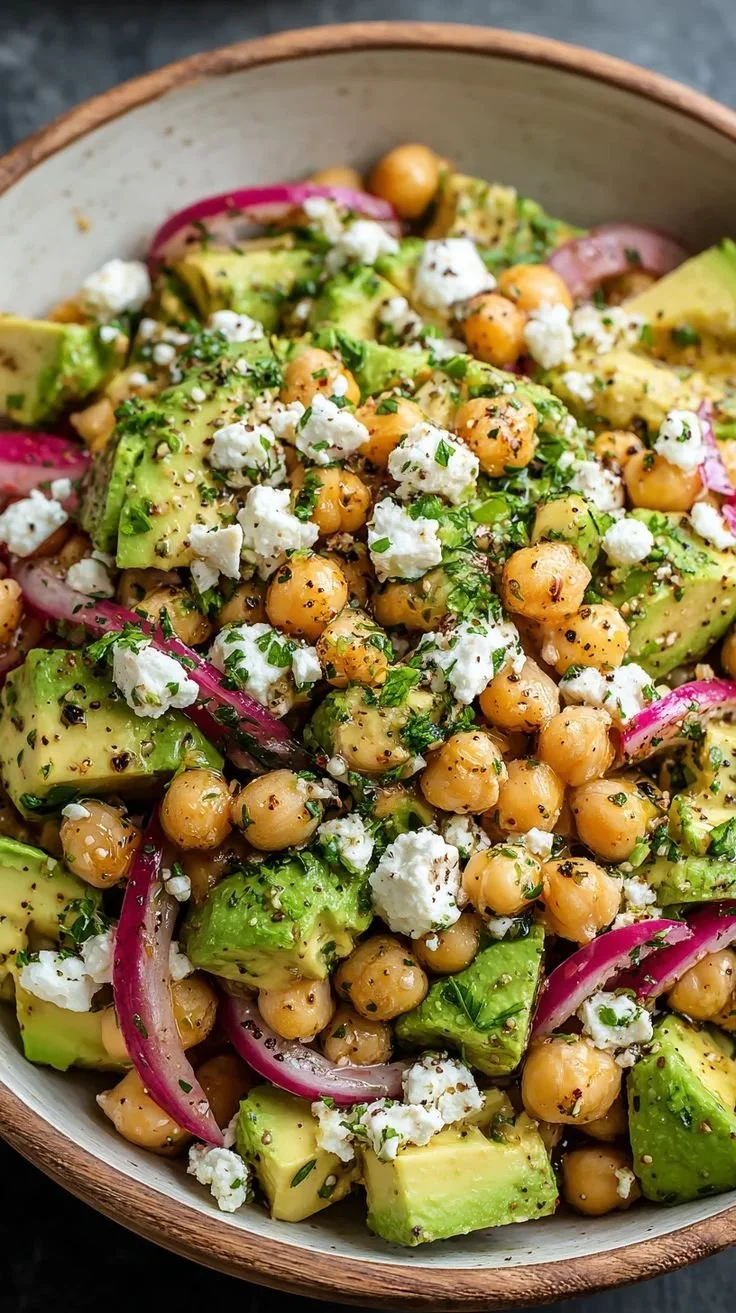
Chickpea Feta Avocado Salad with fresh ingredients in a vibrant bowl.

This Chickpea Feta Avocado Salad is bright, fresh, and very easy to make. It mixes creamy avocado, salty feta, and hearty chickpeas for a tasty and healthy dish. You get protein from the chickpeas, healthy fat from the avocado, and a fresh crunch from veggies. This salad works as a quick lunch, a light dinner, or a side for a picnic. If you want the full set of measurements and notes, see the SavoryLine recipe page. You will love how simple it is, and it will please a crowd, every time.

How to prepare Chickpea Feta Avocado Salad

  1. Rinse and drain two cans of chickpeas, then pat dry.
  2. Cut 2 ripe avocados into cubes, and squeeze a little lemon to slow browning.
  3. Halve 1 cup cherry tomatoes, dice 1 cucumber, and finely chop 1 small red onion.
  4. Crumble 1 cup feta cheese and chop a handful of fresh parsley.
  5. In a large bowl, combine chickpeas, avocado, tomatoes, cucumber, onion, and parsley.
  6. Make a simple dressing, whisking 3 tablespoons olive oil, 2 tablespoons lemon juice, 1 teaspoon Dijon mustard, salt, and pepper.
  7. Pour the dressing over the salad and toss gently to coat, try not to mash the avocado.
  8. Taste and adjust salt, pepper, or lemon juice, serve right away or chill for 20 minutes to blend flavors.

Chickpea Feta Avocado Salad

Why You’ll Love strawberry-salad

  • It is quick to make, ready in about 15 minutes.
  • The salad has a mix of textures, creamy avocado, crumbly feta, and firm chickpeas.
  • It is healthy and filling, perfect for a light lunch or side dish.
  • The flavors are bright, lemony, and a little salty from the feta, very refreshing.
  • You can change it easily, add herbs or spices for a new taste.

Tips for success

  • Use ripe but firm avocados, they hold shape better when tossed.
  • Pat the chickpeas dry to avoid a watery salad.
  • Add salt slowly, feta adds salt too.
  • Toss gently to keep avocado pieces whole.
  • If you need to make ahead, keep avocado and dressing separate and add just before serving.

Serving Suggestions

  • Serve over greens like baby spinach or arugula for a fuller salad.
  • Spoon onto toasted pita or whole grain bread for a sandwich.
  • Pair with grilled chicken or fish for a complete meal.
  • Bring to picnics or potlucks, it travels well if dressed lightly.

Chickpea Feta Avocado Salad

FAQs

Q: Can I make this salad ahead of time?

A: Yes, you can prep the chickpeas and veggies ahead. Keep the avocado and dressing separate and combine them right before serving.

Q: Is this salad gluten free?

A: Yes, the basic salad is gluten free, just check any added sides or bread.

Q: Can I swap the feta for a dairy-free option?

A: Yes, use a vegan cheese or skip the cheese and add extra herbs for flavor.

Q: How long will leftovers keep?

A: Keep leftovers in an airtight container in the fridge for 1 to 2 days, best eaten the same day to keep avocado fresh.

Q: Can I add other beans or grains?

A: Yes, try adding cooked quinoa, farro, or white beans for more bulk.

Conclusion

This Chickpea Feta Avocado Salad is simple, fresh, and full of flavor, a great go-to for many meals. For another version and extra ideas, check Two Peas & Their Pod’s Chickpea, Avocado, & Feta Salad.

Chickpea Feta Avocado Salad

This bright and fresh salad combines creamy avocado, salty feta, and hearty chickpeas for a tasty and healthy dish, perfect for lunch, dinner, or a side at a picnic.

Salad Ingredients

  • 2 cans canned chickpeas, rinsed and drained (Pat dry to avoid a watery salad.)
  • 2 pieces ripe avocados, cubed (Use ripe but firm avocados for better texture.)
  • 1 cup cherry tomatoes, halved
  • 1 piece cucumber, diced
  • 1 small red onion, finely chopped
  • 1 cup feta cheese, crumbled (Can substitute with dairy-free cheese if desired.)
  • 1 handful fresh parsley, chopped

Dressing Ingredients

  • 3 tablespoons olive oil
  • 2 tablespoons lemon juice (Freshly squeezed is best.)
  • 1 teaspoon Dijon mustard
  • Salt and pepper to taste (Add salt slowly, as feta adds salt too.)

Preparation

  1. Rinse and drain the canned chickpeas, then pat dry.
  2. Cut the ripe avocados into cubes and squeeze a little lemon juice to slow browning.
  3. Halve the cherry tomatoes, dice the cucumber, and finely chop the red onion.
  4. Crumble the feta cheese and chop a handful of fresh parsley.

Combine Ingredients

  1. In a large bowl, combine the chickpeas, avocado, tomatoes, cucumber, onion, and parsley.

Make Dressing

  1. In a separate bowl, whisk together olive oil, lemon juice, Dijon mustard, salt, and pepper.

Final Steps

  1. Pour the dressing over the salad and toss gently to coat, taking care not to mash the avocado.
  2. Taste and adjust salt, pepper, or lemon juice as needed.
  3. Serve right away or chill for 20 minutes to blend flavors.

This salad is quick to make, healthy, and filling. You can serve it over greens like baby spinach or arugula, spoon it onto toasted pita or whole grain bread, or pair it with grilled chicken or fish. It travels well for picnics or potlucks.
lunch, Salad, Side Dish
Healthy, Mediterranean
Avocado Salad, Chickpea Salad, Feta Salad, Healthy Salad, Quick Salad

Buffalo Chicken Zucchini Boats Recipe

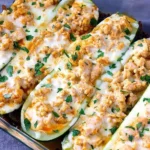
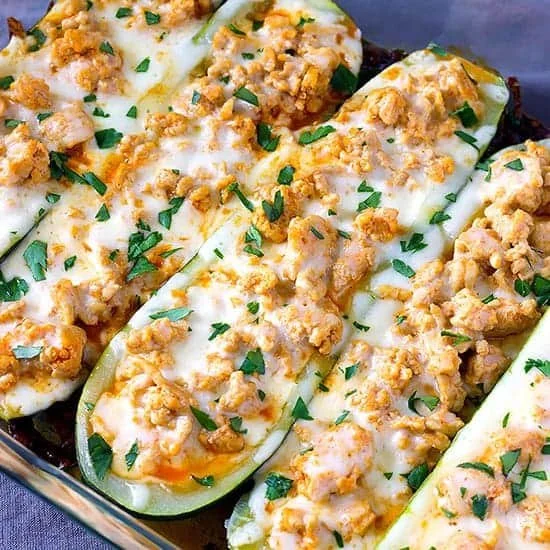
Buffalo Chicken Zucchini Boats garnished and ready to serve

These buffalo chicken zucchini boats are a fun, tasty meal. They mix spicy buffalo chicken with soft baked zucchini and melty cheese. People love them as a low carb main or a crowd pleasing appetizer. They are quick to make and full of bold flavor, so they fit weeknight dinners or game day snacks. If you like easy dinner ideas and simple swaps, try this recipe, and you might also enjoy an air fryer honey butter garlic chicken tenders recipe for another tasty meal. Get ready to smile when you take that first bite, it is fun and tasty.

How to prepare Buffalo Chicken Zucchini Boats

Ingredients

  • 4 medium zucchini
  • 2 cups cooked chicken, shredded
  • 1/2 cup hot sauce, like Frank’s
  • 1/2 cup cream cheese, softened
  • 1/2 cup shredded cheddar or mozzarella
  • 1/4 cup ranch or blue cheese dressing
  • 1 small celery stalk, finely chopped, optional
  • 1 tablespoon olive oil
  • Salt and pepper to taste

Directions

  1. Preheat oven to 400°F, line a baking sheet with foil or parchment.
  2. Wash zucchini and cut each in half lengthwise.
  3. Scoop out the seeds and some flesh to make a boat, leave a thin wall so they hold shape.
  4. Brush the inside with olive oil, sprinkle with salt and pepper.
  5. Bake zucchini boats for 8 to 10 minutes to soften, remove and set aside.
  6. In a bowl, mix shredded chicken, hot sauce, cream cheese, half the shredded cheese, chopped celery if using, and ranch or blue cheese dressing. Stir until smooth and creamy.
  7. Spoon the buffalo chicken mix into each zucchini boat, fill evenly.
  8. Sprinkle the remaining cheese on top.
  9. Bake for 10 to 12 minutes more, until cheese melts and tops bubble.
  10. Let cool for a few minutes, then garnish with extra ranch or chopped green onion if you like.

Buffalo Chicken Zucchini Boats Recipe

Why You’ll Love Buffalo Chicken Zucchini Boats

  • Low carb and keto friendly, they fit many diets.
  • Classic buffalo chicken taste without bread or heavy carbs.
  • Easy to make and easy to change, add more heat or mild flavor.
  • Great for meal prep or quick weeknight dinners.
  • Kids and adults both like the cheesy, spicy mix.

Tips for success

  • Scoop out enough zucchini flesh, but keep the walls thick enough so they do not fall apart.
  • Pat the zucchini dry before baking to avoid extra water.
  • Use warm cooked chicken, it mixes easier with cream cheese.
  • Taste the filling before stuffing, add more hot sauce or dressing if you want more flavor.
  • If you like extra crisp, broil for 1 to 2 minutes at the end, watch closely so it does not burn.

Serving Suggestions

  • Serve with ranch or blue cheese dressing for dipping.
  • Add a side salad or roasted veggies for a full low carb meal.
  • For a heartier plate, pair with cauliflower rice or a simple green slaw.
  • Offer celery sticks on the side to keep the buffalo theme.

Buffalo Chicken Zucchini Boats Recipe

FAQs

Q: Can I make these ahead of time? A: Yes, mix the filling and store in the fridge. Scoop the zucchini and bake just before serving, or bake everything and reheat in the oven.

Q: Can I use ground chicken or turkey? A: Yes, cooked ground chicken or turkey works well. Cook it first, then mix with the other filling ingredients.

Q: Are these spicy? A: They are as spicy as you make them. Use less hot sauce for mild flavor, or add more for heat.

Q: Can I freeze the boats? A: You can freeze the filled boats before baking. Thaw in the fridge and bake until hot. Texture of zucchini may change slightly.

Q: What cheese is best? A: Cheddar or mozzarella melt well. Use a mix if you like sharp flavor and good melt.

Conclusion

If you want more ideas and a keto friendly version, you can read a full guide for similar recipes at Buffalo Chicken Zucchini Boats – The Best Keto Recipes, it has tips and variations to try.

Buffalo Chicken Zucchini Boats

These buffalo chicken zucchini boats are a fun, low-carb meal that mixes spicy buffalo chicken with soft baked zucchini and melty cheese, perfect for weeknight dinners or game day snacks.

Zucchini Boats

  • 4 medium medium zucchini (Washed and cut in half lengthwise)
  • 1 tablespoon olive oil (For brushing zucchini)
  • to taste Salt and pepper (For seasoning)

Buffalo Chicken Filling

  • 2 cups cooked chicken, shredded (Use warm cooked chicken for easier mixing with cream cheese)
  • 1/2 cup hot sauce, like Frank’s (Adjust to taste according to desired spiciness)
  • 1/2 cup cream cheese, softened
  • 1/2 cup shredded cheddar or mozzarella (Use a mix for sharper flavor)
  • 1/4 cup ranch or blue cheese dressing (For added creaminess)
  • 1 small celery stalk, finely chopped (Optional for extra crunch)

Preparation

  1. Preheat oven to 400°F and line a baking sheet with foil or parchment.
  2. Wash zucchini and cut each in half lengthwise.
  3. Scoop out the seeds and some flesh to make a boat, leaving a thin wall to hold shape.
  4. Brush the inside with olive oil and sprinkle with salt and pepper.
  5. Bake zucchini boats for 8 to 10 minutes until softened, then remove and set aside.

Mixing Filling

  1. In a bowl, mix shredded chicken, hot sauce, cream cheese, half the shredded cheese, chopped celery if using, and ranch or blue cheese dressing until smooth and creamy.

Filling Zucchini

  1. Spoon the buffalo chicken mix into each zucchini boat, filling evenly.
  2. Sprinkle the remaining cheese on top.

Baking

  1. Bake for an additional 10 to 12 minutes, until cheese melts and tops bubble.
  2. Let cool for a few minutes, then garnish with extra ranch or chopped green onion if desired.

Scoop out enough zucchini flesh but keep the walls thick enough to prevent falling apart. Pat the zucchini dry before baking to avoid extra water. Taste the filling before stuffing and adjust spicy levels to preference. For extra crisp, broil for 1 to 2 minutes at the end, watching closely to prevent burning.

Appetizer, Main Course
American
Buffalo Chicken, Easy Dinner Ideas, Game Day Snacks, Low Carb, Zucchini Boats

Keto Cauliflower Pizza Casserole

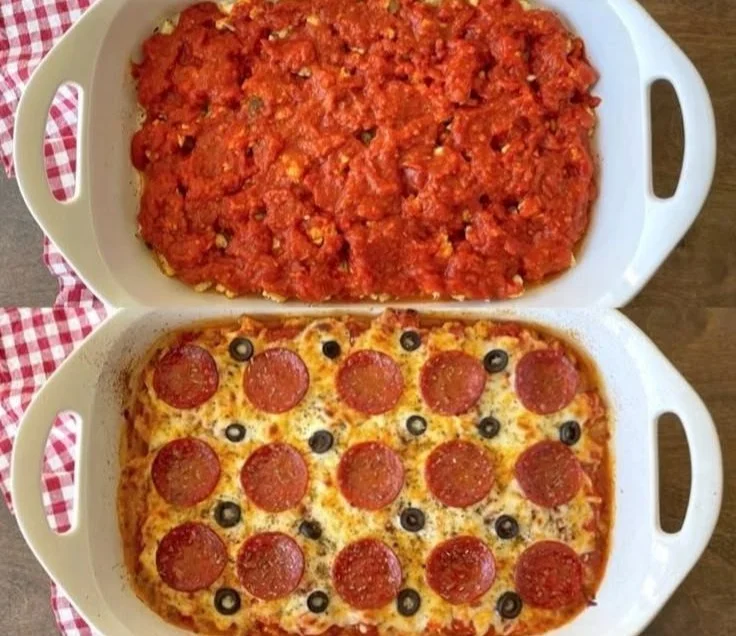
Keto Cauliflower Pizza Casserole topped with cheese and herbs

This Keto Cauliflower Pizza Casserole is warm, cheesy, and full of pizza flavor without the carbs. It feels like a comfort meal, but it fits a low carb or keto plan. The cauliflower gives a gentle bite, the sauce is tangy, and the cheese melts into a golden top. This recipe is a crowd-pleaser, easy to make, and great for busy weeknights or a casual dinner with friends. If you like a crisp cauliflower side, you might also enjoy this air fryer cauliflower recipe for a quick snack. Get ready to make a dish everyone will ask about, and have fun with the toppings when it comes out of the oven.

How to prepare Keto Cauliflower Pizza Casserole

  1. Preheat the oven to 375°F (190°C).
  2. Steam or boil about 1 large head of cauliflower until soft, then drain well and pat dry.
  3. Chop the cauliflower into small florets or pulse in a food processor until rice-like.
  4. In a bowl, mix the cauliflower with 1 cup of shredded mozzarella, 1/2 cup of grated Parmesan, 2 beaten eggs, 1/2 cup low-sugar pizza sauce, 1 teaspoon Italian seasoning, salt and pepper to taste.
  5. Spread the mixture into a greased 9×9 inch baking dish, pressing down lightly.
  6. Spoon a thin layer of pizza sauce over the top, then add more mozzarella and your favorite low-carb toppings like pepperoni, bell pepper, or olives.
  7. Bake for 20 to 25 minutes, until the top is golden and the casserole is set. Let it rest 5 minutes before serving.

Keto Cauliflower Pizza Casserole

Why You’ll Love Keto Cauliflower Pizza Casserole

  • Low carb and keto friendly, it keeps you on track without losing pizza flavor.
  • Cheesy and satisfying, yet lighter than a regular pizza crust.
  • Easy to make with simple ingredients you likely have on hand.
  • Flexible, you can change the toppings to fit your taste or what you have.

Tips for success

  • Squeeze out as much water from the cooked cauliflower as you can, this stops the casserole from getting soggy.
  • Use room temperature eggs and cheese so they blend evenly.
  • If you like a firmer texture, pulse the cauliflower a little less in the food processor.
  • Try a mix of cheeses for more flavor, like mozzarella and a bit of sharp cheddar.
  • Let it rest after baking, this helps it set and slice cleanly.

Serving Suggestions

  • Serve with a fresh green salad and a drizzle of olive oil and lemon.
  • Add a side of steamed greens, like broccoli or asparagus.
  • Top with fresh basil or a sprinkle of red pepper flakes for a flavor boost.
  • Cut into squares and serve with extra warmed pizza sauce for dipping.

Keto Cauliflower Pizza Casserole

FAQs

Q: Is this casserole good for a keto diet?

A: Yes, it is low in carbs and high in fat from the cheese, so it fits a typical keto plan.

Q: Can I make this ahead and reheat it?

A: Yes, you can make it ahead, cool it, cover, and store in the fridge. Reheat in the oven at 350°F (175°C) until warm.

Q: Can I freeze the casserole?

A: Yes, bake first or freeze unbaked in a freezer-safe dish. Thaw in the fridge before baking or reheat from frozen with extra time.

Q: What toppings work best?

A: Pepperoni, cooked sausage, mushrooms, bell peppers, olives, and spinach all work well. Keep higher-carb toppings low or skip them.

Q: Do I need to add almond flour or coconut flour to bind it?

A: Not required if you squeeze out the water well and use eggs and cheese to bind the mix. You can add a tablespoon of almond flour if you want more structure.

Conclusion

For a tested, low carb twist on pizza that feels like comfort food, try this casserole and change toppings to your liking. If you want another take on cauliflower pizza, see the Jar of Lemons’ Cauliflower Pizza Casserole (Low Carb / Keto) recipe for more ideas and tips.

Keto Cauliflower Pizza Casserole

A warm, cheesy casserole that delivers all the pizza flavor without the carbs, perfect for a low-carb or keto diet.

Cauliflower Base

  • 1 large head 1 large head of cauliflower (Steamed or boiled until soft, then drained and dried.)
  • 1 cup 1 cup of shredded mozzarella (Reserved for mixing and topping.)
  • 1/2 cup 1/2 cup of grated Parmesan
  • 2 large 2 beaten eggs (Use room temperature.)
  • 1/2 cup 1/2 cup low-sugar pizza sauce (For mixing and topping.)
  • 1 teaspoon 1 teaspoon Italian seasoning
  • to taste Salt and pepper

Toppings

  • as desired Low-carb toppings such as pepperoni, bell pepper, or olives (Add according to preference.)

Preparation

  1. Preheat the oven to 375°F (190°C).
  2. Steam or boil the cauliflower until soft, then drain well and pat dry.
  3. Chop the cauliflower into small florets or pulse in a food processor until rice-like.
  4. In a bowl, mix the cauliflower with shredded mozzarella, grated Parmesan, beaten eggs, low-sugar pizza sauce, Italian seasoning, salt, and pepper.
  5. Spread the mixture in a greased 9×9 inch baking dish, pressing down lightly.
  6. Spoon a thin layer of pizza sauce over the top, then add more mozzarella and your favorite toppings.

Baking

  1. Bake for 20 to 25 minutes, until the top is golden and the casserole is set.
  2. Let it rest for 5 minutes before serving.

Squeeze out as much water from the cooked cauliflower as you can. Use room-temperature eggs and cheese for better blending. For a firmer texture, pulse the cauliflower a little less in the food processor. Trying a mix of cheeses can enhance flavor. Let it rest after baking to set and slice cleanly.

Dinner, Main Course
Italian
Cauliflower, Comfort Food, Keto, Low Carb, Pizza Casserole