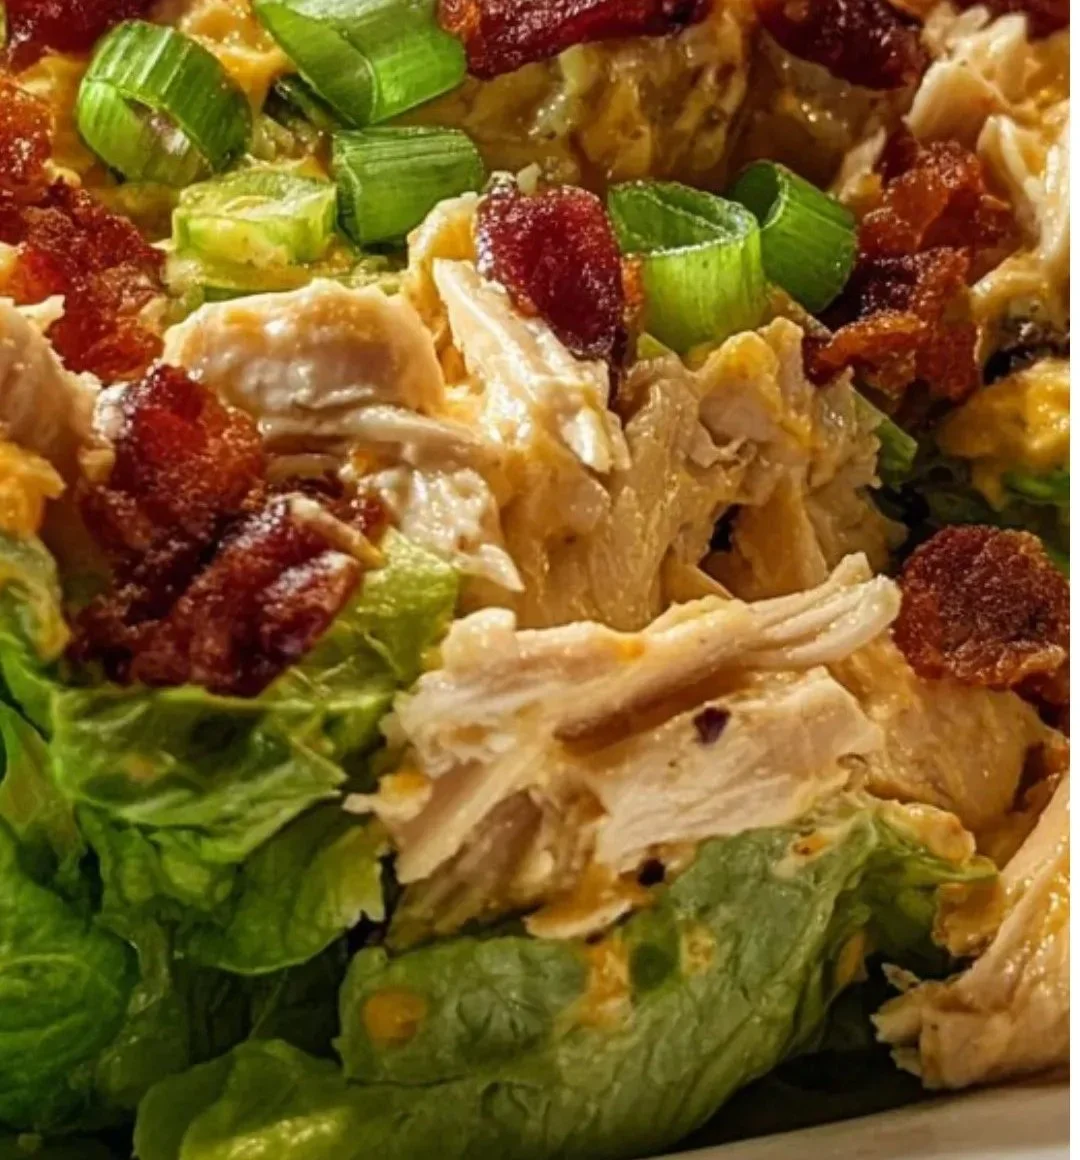
Carnivore Loaded Chicken Salad

Delicious carnivore loaded chicken salad topped with fresh ingredients.

Carnivore Loaded Chicken Salad is a hearty and delicious meal that caters to those who enjoy a meat-centric diet. It combines tender chicken with an array of satisfying ingredients, making it not only tasty but also filling. This salad is perfect for anyone looking to follow a low-carb or high-protein diet. It’s a quick and easy recipe that you can whip up at home without needing advanced cooking skills. You can serve it as lunch, dinner, or even a snack.

Another great reason to make this recipe is its versatility. You can customize it with your favorite meats and toppings, allowing you to suit your personal taste. The combination of the ingredients offers a range of flavors and textures that will satisfy anyone’s cravings. Additionally, this salad is perfect for meal prep, as it can be made ahead of time and stored in the fridge for easy access throughout the week. The Carnivore Loaded Chicken Salad brings together simplicity, taste, and nutrition in one bowl. It’s an excellent choice for busy individuals or families who want a quick meal that packs a punch.

How to Make Carnivore Loaded Chicken Salad

To make Carnivore Loaded Chicken Salad, start by gathering your ingredients. You will need cooked chicken — either grilled, baked, or rotisserie works best. Cut the chicken into bite-sized pieces. Next, gather crispy bacon, shredded cheese (like cheddar or mozzarella), and any additional meats you want to add, such as salami or pepperoni.

In a large bowl, combine the chopped chicken with cooked bacon and shredded cheese. For extra flavor, you might want to add some diced pickles or chopped green onions. You can also include a dollop of mayonnaise or sour cream for creaminess. Mix everything well until fully combined.

Season the mixture with salt, pepper, or any herbs you prefer. For more zest, consider adding hot sauce or mustard. Once everything is mixed, place it in the fridge for about 30 minutes to let the flavors meld together. After chilling, your hearty Carnivore Loaded Chicken Salad is ready to serve!

How to Serve Carnivore Loaded Chicken Salad

When it comes to serving Carnivore Loaded Chicken Salad, there are several ways to enjoy it. You can serve it in a bowl on its own, as it is satisfying enough to be a meal on its own. For extra flair, consider placing the salad in a large lettuce leaf or a hollowed-out bell pepper for added crunch and flavor.

This salad also pairs well with various sides. You can serve it alongside crispy vegetable chips, crunchy pickles, or even a side of hard-boiled eggs. If you’re in the mood for something warm, consider serving it with hot soup or a cheesy cauliflower bake.

Additionally, you can make it more interactive by creating a salad bar. Place the salad in the center, along with extra toppings such as croutons, sliced olives, or different types of cheese. This allows everyone to customize their own bowl, making mealtime fun and engaging!

How to Store Carnivore Loaded Chicken Salad

Storing your Carnivore Loaded Chicken Salad is simple and allows you to enjoy it later. To store it, place the salad in an airtight container. Make sure to push out as much air as possible to keep it fresh. You can store it in the refrigerator for up to three days.

If you plan to make it in advance, it’s best not to add any mayonnaise or creamy ingredients until you are ready to serve. This will help prevent the salad from becoming soggy. Instead, keep these dressings separate so you can mix them in just before eating.

If you have leftovers, consider using them in different ways. You can stuff the salad into a wrap or incorporate it into an omelet for breakfast. Being creative with leftovers helps minimize waste and lets you enjoy the dish in new ways!

Tips to Make Carnivore Loaded Chicken Salad

To make your Carnivore Loaded Chicken Salad even better, here are some handy tips. First, use high-quality meats. The chicken and bacon you choose can greatly impact the flavor of the dish, so pick fresh ingredients.

Don’t shy away from experimenting with additional ingredients. For a spicy kick, add jalapeños or a splash of your favorite hot sauce. For texture, consider adding nuts or seeds that complement the other ingredients, such as sunflower seeds or chopped almonds.

Make sure to chill the salad long enough to let the flavors blend well; this step enhances the overall taste. If you want to make the salad more filling, you can serve it on a bed of greens like spinach or arugula.

Lastly, if desired, you can add avocados or guacamole for extra creaminess. This gives a nice contrast to the crispy elements in the salad and makes it even more delightful.

Variation

If you’re looking for variations, feel free to swap out the chicken for turkey, pork, or any other preferred meat. You could also add various types of cheese, such as feta or blue cheese, for added flavor. Adding some cooked egg or an assortment of herbs can also change the dynamics of the taste.

FAQs

Can I make this salad ahead of time?
Yes, you can make the salad ahead of time! Just store it in the refrigerator, and it will stay fresh for up to three days. Remember to add creamy dressings right before serving.

Is this salad suitable for meal prep?
Absolutely! This salad is great for meal prep. You can portion it out into containers for lunches or dinners during the week.

Can I use different meats in the recipe?
Yes, you can use different meats like turkey, ham, or even seafood like shrimp or crab for variety in flavor and texture.

Carnivore Loaded Chicken Salad

A hearty and satisfying salad combining tender chicken with bacon, cheese, and optional toppings, perfect for low-carb or high-protein diets.

Main Ingredients

  • 2 cups cooked chicken, cut into bite-sized pieces (Grilled, baked, or rotisserie chicken works best.)
  • 6 slices crispy bacon, chopped
  • 1 cup shredded cheese (cheddar or mozzarella)
  • 1/2 cup diced pickles (Optional for flavor.)
  • 1/4 cup chopped green onions (Optional for flavor.)
  • 1/2 cup mayonnaise or sour cream (For added creaminess.)
  • 1 tsp salt (To taste.)
  • 1 tsp pepper (To taste.)
  • 1 tbsp hot sauce or mustard (Optional for extra zest.)

Preparation

  1. Gather your ingredients: cooked chicken, crispy bacon, shredded cheese, and any additional meats like salami or pepperoni.
  2. In a large bowl, combine chopped chicken, cooked bacon, and shredded cheese.
  3. Add diced pickles, chopped green onions, and mayonnaise or sour cream. Mix until well combined.
  4. Season the mixture with salt, pepper, and any desired herbs. Add hot sauce or mustard for extra flavor.
  5. Chill the salad in the fridge for about 30 minutes to let the flavors meld together.

Serving Suggestions

  1. Serve in a bowl, or for added flair, place in a large lettuce leaf or hollowed-out bell pepper.
  2. Pair with sides such as vegetable chips, crunchy pickles, or hard-boiled eggs.
  3. Consider creating a salad bar with extra toppings like croutons, sliced olives, or various cheeses.

Storage

  1. Store the salad in an airtight container, pushing out as much air as possible. It can stay fresh in the refrigerator for up to three days.
  2. Avoid adding creamy ingredients until ready to serve to prevent sogginess.

Use high-quality meats for the best flavor. Chill the salad to enhance taste. For variety, try adding jalapeños, nuts, or avocados for extra creaminess and texture.

Dinner, lunch, Snack
American
Chicken Salad, High Protein Salad, low carb meal, Meal Prep

Canned Chicken Pizza Crust

Delicious pizza crust made with canned chicken, ready to be topped.

Canned Chicken Pizza Crust is a unique and easy way to make pizza. This clever Chicken Crust Pizza Recipe uses canned chicken to create a tasty, protein-rich base without traditional dough. The best part is that it requires minimal ingredients and comes together quickly. Whether you’re in a hurry or exploring new Chicken Pizza Ideas, this crust will surprise you with its simplicity and flavor.

why make this recipe

Many people enjoy pizza, but making a traditional dough can be time-consuming and complicated. This Chicken Breast Pizza Crust alternative is a fantastic shortcut. It allows you to skip the long waiting times associated with classic dough while still enjoying a satisfying homemade pizza.

Using canned chicken as the base gives the crust a unique texture and boosts the protein content, making it a filling option. It’s similar in concept to a Shredded Chicken Pizza Crust, but even faster because the chicken is already cooked and ready to use. Additionally, this recipe is perfect for those who want a gluten-free pizza without regular flour.

The ease of this recipe makes it accessible to everyone, from beginners to experienced home cooks. If you usually rely on Pillsbury Pizza Crust Recipes or other Canned Pizza Dough Recipes Ideas, this version offers a fun, low-carb twist worth trying.

You can also personalize your pizza with endless toppings. Turn it into a flavorful Chicken Ranch Pizza, a veggie-loaded pie, or even a bold Pizza Chicken Bake style dinner. It’s a fun way to engage kids in the kitchen, and they’ll love shaping their pizzas.

With all these benefits, making Canned Chicken Pizza Crust is a smart choice for busy weeknights or casual gatherings. In short, this recipe delivers a quick, tasty, and protein-packed way to satisfy your pizza cravings.

how to make Canned Chicken Pizza Crust

Making this Ground Chicken Pizza Crust Recipe style dish with canned chicken is very straightforward.

First, drain one can of chicken thoroughly. Place the chicken in a mixing bowl and break it apart with a fork until finely shredded.

Add:

  • ½ cup shredded mozzarella cheese

  • ¼ cup grated Parmesan cheese

  • 1 beaten egg

Mix until well combined. The egg acts as a binder to help hold the crust together.

Next, add:

  • 1 teaspoon Italian seasoning

  • Salt to taste

Stir until evenly mixed.

Preheat your oven to 425°F (220°C). Line a baking sheet with parchment paper. Spread the mixture into a circle or rectangle about ½ inch thick. Use your hands or a spatula to shape it evenly.

Bake for 15–20 minutes until the crust is golden brown and firm. Watch closely near the end to prevent over-browning.

Once baked, remove from the oven and let it cool slightly. Your Chicken Crust Pizza Recipe base is now ready for toppings. Add sauce, cheese, and your favorite toppings, then bake again until the cheese is melted and bubbly.

how to serve Canned Chicken Pizza Crust

Serving this pizza can be a fun and delicious experience. After baking with toppings, slice it just like a traditional pizza. Serve on a large plate or wooden board for a rustic presentation.

It pairs well with dipping sauces such as:

  • Marinara

  • Ranch dressing (perfect for Chicken Ranch Pizza)

  • Garlic butter

A fresh salad on the side balances the meal nicely.

One of the best parts of this recipe is customization. Some people may want extra cheese, while others prefer veggie-loaded slices. You can even host a DIY pizza night where guests build their own creations from your favorite Chicken Pizza Ideas.

For parties, cut into small squares and serve with toothpicks as a protein-packed appetizer. This versatile dish works as a main course or shareable snack.

how to store Canned Chicken Pizza Crust

Proper storage keeps your pizza tasting fresh.

First, allow the crust or finished pizza to cool completely. Then:

Refrigerator:

  • Store in an airtight container

  • Keeps up to 3 days

Freezer (best for plain crust):

  • Wrap tightly in foil or freezer-safe container

  • Freeze up to 3 months

To use frozen crust, thaw overnight in the refrigerator, add toppings, and bake.

To reheat topped pizza, warm in the oven at 350°F (175°C) until heated through and the cheese melts. Avoid the microwave, which can make the crust soft.

tips to make Canned Chicken Pizza Crust

Use these tips to get the best results every time.

Drain very well
Excess moisture is the main reason a chicken crust turns soggy. Press the canned chicken with paper towels if needed.

Experiment with cheeses
Mozzarella works best for structure, but mixing in cheddar, gouda, or pepper jack adds great flavor.

Boost the seasoning
Garlic powder, onion powder, or dried oregano can enhance the taste of your Chicken Breast Pizza Crust.

Pre-bake properly
Make sure the crust is firm and lightly golden before adding toppings.

Don’t overload with wet toppings
Too much sauce or watery vegetables can soften the crust.

Make it crispier
Bake a few extra minutes for a firmer, more sliceable base.

Get kids involved
Let them shape mini pizzas — one of the most fun Chicken Pizza Ideas for family cooking.

variation

There are many ways to customize this versatile crust.

Low-carb tweak
Replace a small portion of cheese with almond flour for a slightly different texture.

Veggie boost
Mix in finely chopped spinach or sun-dried tomatoes for added flavor.

BBQ version
Use barbecue sauce, cooked chicken, bacon, and red onions for a bold twist.

Chicken Ranch Pizza
Top with ranch dressing, mozzarella, and cooked chicken for a creamy favorite.

Pizza Chicken Bake style
Turn the mixture into a thicker base in a baking dish and load it like a casserole.

Mini pizzas
Shape small rounds for appetizers or lunchboxes.

Crazy Crust Pizza inspiration
Spread the mixture thinner and irregular for a rustic, crispy-edge finish similar in spirit to Crazy Crust Pizza.

This flexibility makes it one of the most adaptable Canned Pizza Dough Recipes Ideas you can try.

FAQs

1. Can I use fresh chicken instead of canned chicken?
Yes. Finely shredded cooked chicken works well and creates a similar Shredded Chicken Pizza Crust texture. Just remove excess moisture.

2. Is this recipe gluten-free?
Yes, the base Chicken Crust Pizza Recipe contains no flour. Always check labels on cheese and toppings to be safe.

3. Can I make this crust in advance?
Absolutely. Bake the crust, cool completely, then refrigerate or freeze for later use.

4. What toppings work best?
Popular options include pepperoni, bell peppers, olives, onions, extra cheese, or ranch drizzle for a Chicken Ranch Pizza variation.

5. How do I keep the crust crispy?
Drain the chicken thoroughly, pre-bake until golden, and avoid too many moist toppings.

Canned Chicken Pizza Crust

A unique and easy pizza crust alternative made from canned chicken that is protein-rich and gluten-free, perfect for quick homemade pizzas.

For the crust

  • 1 can canned chicken (Drained thoroughly)
  • ½ cup shredded mozzarella cheese
  • ¼ cup grated Parmesan cheese
  • 1 large beaten egg (Acts as a binder)
  • 1 teaspoon Italian seasoning
  • to taste salt salt

Preparation

  1. Drain one can of chicken thoroughly and place it in a mixing bowl.
  2. Break apart the chicken with a fork until finely shredded.
  3. Add shredded mozzarella, grated Parmesan, and beaten egg. Mix until well combined.
  4. Add Italian seasoning and salt, then stir until evenly mixed.
  5. Preheat your oven to 425°F (220°C) and line a baking sheet with parchment paper.
  6. Spread the mixture into a circle or rectangle about ½ inch thick, shaping it evenly.

Baking

  1. Bake for 15-20 minutes until the crust is golden brown and firm.
  2. Remove from the oven and let it cool slightly; your Chicken Crust Pizza base is ready for toppings.

Serving

  1. After baking with toppings, slice it like a traditional pizza and serve.
  2. Pair with dipping sauces and a fresh salad on the side.

Drain chicken well to avoid soggy crust. Mix different cheeses for flavor and avoid too many moist toppings to keep the crust crispy.

Appetizer, Main Course
American
Canned Chicken Recipes, Chicken Pizza Crust, Easy Pizza Recipe, Gluten-Free Pizza, Low-Carb Pizza

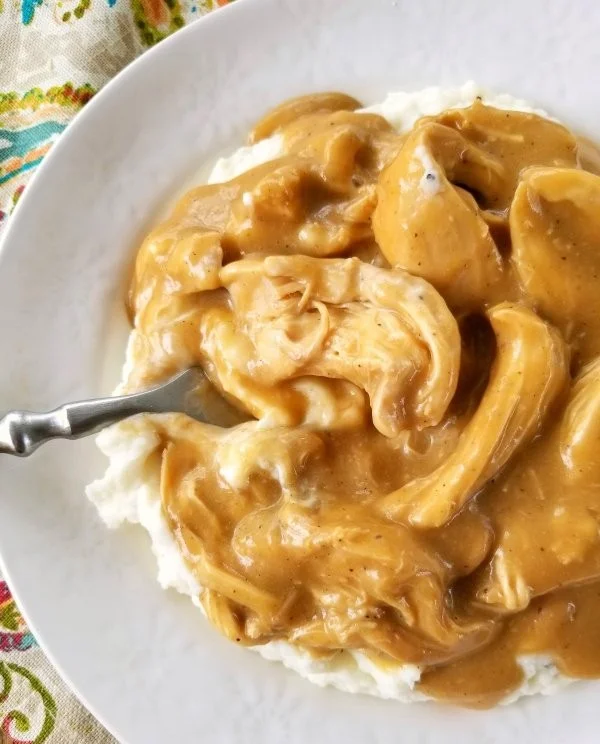
Crock Pot Chicken and Gravy

Crock Pot chicken and gravy served on a plate with fresh herbs

This Crock Pot Chicken & Gravy is warm, simple, and full of homey flavor. The chicken turns soft and juicy, and the gravy is rich and smooth. It’s true comfort food, great for busy days or a cozy night in. Kids and adults both love it, and it warms the whole house with good smells. You can call it slow cooker chicken or a gravy-topped dinner, it always feels special.

How to prepare Crock Pot Chicken and Gravy

  1. Pat 3 to 4 chicken breasts or thighs dry, salt and pepper both sides.
  2. Place one chopped onion and two peeled, sliced carrots in the bottom of the slow cooker.
  3. Put the chicken on top, add 2 cups low sodium chicken broth, 1 teaspoon garlic powder, and 1 teaspoon dried thyme.
  4. Cover and cook on low for 6 to 8 hours, or on high for 3 to 4 hours, until the chicken is tender.
  5. Remove the chicken, shred with two forks, and set aside.
  6. Mix 2 tablespoons cornstarch with 3 tablespoons cold water, stir into the slow cooker liquid to thicken the gravy. Cook on high for 10 minutes until it thickens.
  7. Return the shredded chicken to the gravy, stir, and serve hot over rice, mashed potatoes, or with biscuits.

Crock Pot Chicken & Gravy

Tips for success

  • Use chicken thighs if you want more flavor and less chance of drying out.
  • Do not lift the lid while cooking, it lets heat escape and adds time.
  • Use low sodium broth so you can control salt.
  • If the gravy is too thin, add a little more cornstarch mix and cook a few minutes more.
  • For extra flavor, add a splash of heavy cream at the end for a creamier gravy.

Serving Suggestions

  • Serve over mashed potatoes for a classic comfort meal.
  • Spoon over rice or egg noodles for an easy weeknight dinner.
  • Split biscuits and pour the chicken and gravy inside for a hearty sandwich.
  • Add a side of steamed green beans or a simple salad to balance the meal.

This recipe for Crock Pot Chicken & Gravy feels like a warm hug. It is easy to make and fills the kitchen with rich, savory aroma. The chicken comes out tender, and the gravy tastes like it simmered all day. It’s a real crowd-pleaser for family dinners or when friends drop by. If you like slow cooker comfort food, try a related dish like crock pot chicken pot pie. Trust me, you will want to make this again and again.

Crock Pot Chicken & Gravy

FAQs

Q: Can I use frozen chicken in the crock pot?

A: You can, but it takes longer and may cook unevenly. Thaw first if you can.

Q: How do I make the gravy smooth?

A: Mix cornstarch with cold water before adding, then stir well as it cooks to avoid lumps.

Q: Can I use chicken breasts instead of thighs?

A: Yes, breasts work fine. Watch time closely, they can dry out if overcooked.

Q: How long do leftovers last?

A: Store in the fridge for 3 to 4 days, or freeze for up to 3 months. Reheat gently on the stove.

Crock Pot Chicken & Gravy

This Crock Pot Chicken & Gravy is warm, simple, and full of homey flavor, making it true comfort food for the whole family.

Main Ingredients

  • 3 to 4 pieces chicken breasts or thighs (Use chicken thighs for more flavor.)
  • 1 medium chopped onion
  • 2 medium peeled and sliced carrots
  • 2 cups low sodium chicken broth (Allows for better control of salt.)
  • 1 teaspoon garlic powder
  • 1 teaspoon dried thyme
  • 2 tablespoons cornstarch (To thicken the gravy.)
  • 3 tablespoons cold water (To mix with cornstarch.)

Preparation

  1. Pat chicken breasts or thighs dry, salt and pepper both sides.
  2. Place chopped onion and sliced carrots in the bottom of the slow cooker.
  3. Put the chicken on top, then add chicken broth, garlic powder, and dried thyme.

Cooking

  1. Cover and cook on low for 6 to 8 hours, or on high for 3 to 4 hours, until the chicken is tender.
  2. Remove chicken, shred with two forks, and set aside.
  3. Mix cornstarch with cold water, stir into the slow cooker liquid to thicken the gravy.
  4. Cook on high for 10 minutes until it thickens.
  5. Return shredded chicken to the gravy, stir, and serve hot.

Do not lift the lid while cooking, as it lets heat escape and adds time. If the gravy is too thin, add more cornstarch mix and cook a few minutes more. For a creamier gravy, add a splash of heavy cream at the end.

Dinner, Main Course
American
Chicken and Gravy, Comfort Food, Crock Pot Chicken, Easy Dinner, Slow Cooker

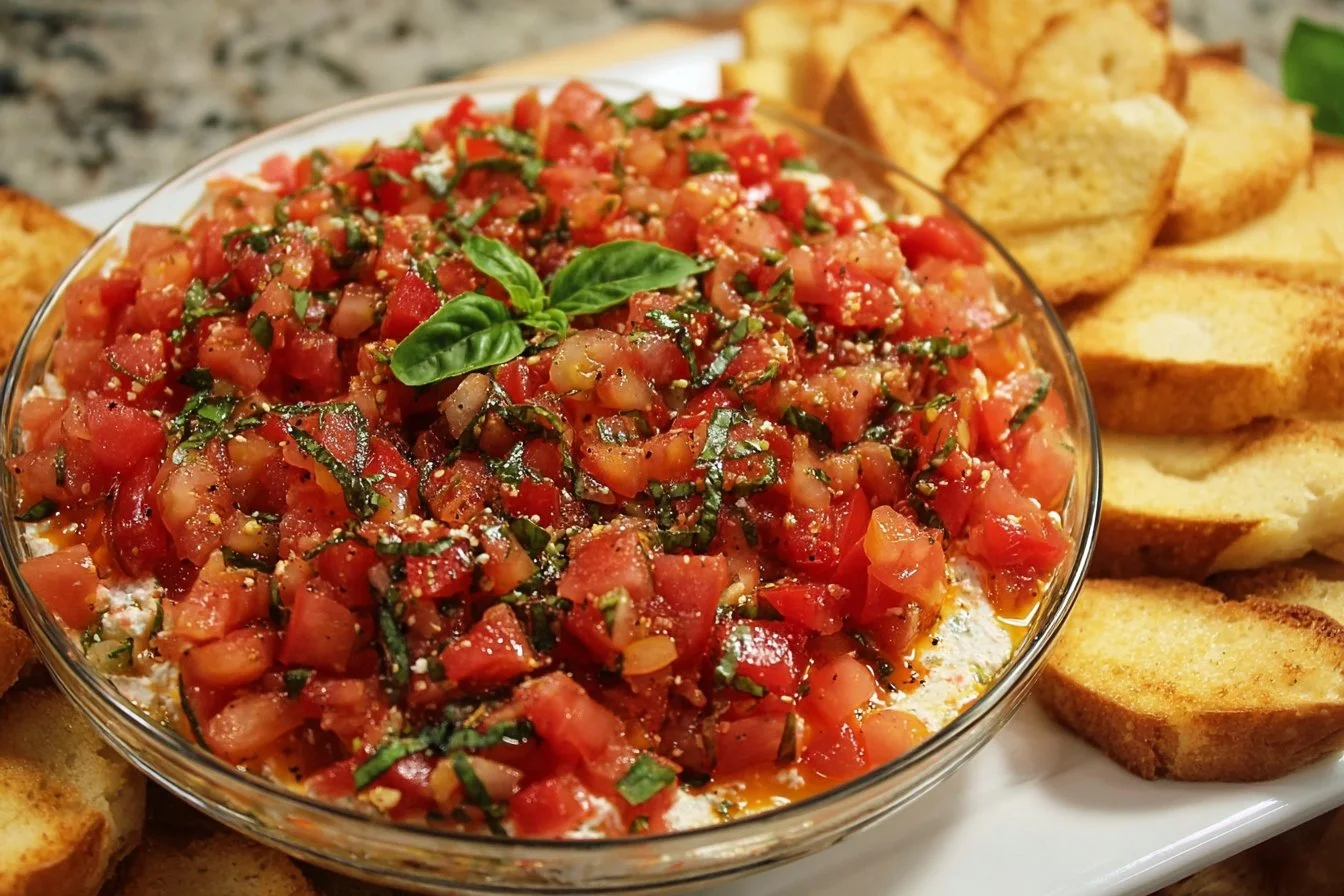
Bruschetta Dip: A Vibrant and Flavorful Appetizer to wow Your Guests

Colorful Bruschetta Dip garnished with fresh herbs and served with crusty bread.

Bruschetta Dip is not just any appetizer; it’s a delightful mix of chopped tomatoes, fresh basil, and creamy goodness that brings people together. This dip takes inspiration from the classic Italian bruschetta but gives it a fun twist that makes it perfect for any gathering. Whether you are hosting a party or enjoying a casual get-together, this dip will surely steal the spotlight on your snack table. Its vibrant colors and fresh flavors make it appealing to all, and the best part is how simple it is to prepare. Grab some crispy bread or crunchy chips, and get ready to impress your guests with this delicious Bruschetta Dip that they will be talking about long after the last bite. Let’s dive into how to create this crowd-pleaser!

How to Prepare Bruschetta Dip

To start making Bruschetta Dip, gather the ingredients: ripe tomatoes, fresh basil, garlic, cream cheese, sour cream, and a sprinkling of salt and pepper. Chop the tomatoes and basil into small pieces. In a mixing bowl, combine the cream cheese and sour cream until smooth. Stir in the chopped tomatoes, basil, minced garlic, and season with salt and pepper to taste. Mix everything gently until well-combined. Once your dip is ready, transfer it to a serving dish and chill it in the fridge for about 30 minutes. This allows the flavors to meld beautifully. While waiting, you can prepare your favorite dippers, like toasted bread or tortilla chips. When you’re ready to serve, take it out and enjoy the burst of flavors in every scoop!

Why You’ll Love Bruschetta Dip

Bruschetta Dip is the ultimate appetizer that combines fresh flavors and creamy texture, making it a hit with everyone. It is so easy to make, even a beginner in the kitchen can whip it up in no time. You can adjust the ingredients to suit your taste, adding more garlic or even a dash of balsamic vinegar for an extra zing. Plus, it’s versatile; you can serve it with various dippers, from crunchy crackers to sliced baguette. Your guests will not only love the taste but will appreciate the fresh ingredients that make this dip stand apart from store-bought options. The delightful mix of flavors makes it perfect for any season, whether it’s a summer barbecue or a cozy winter gathering. Once you try it, you will want to make it for every occasion!

Tips for Success

To ensure your Bruschetta Dip turns out perfectly, follow these helpful tips. First, use fresh, ripe tomatoes for the best flavor. If they are not in season, consider using cherry tomatoes, which are sweeter and easier to chop. Second, don’t skip the chilling step; letting the dip sit in the fridge for at least 30 minutes allows the flavors to develop and taste even better. Third, if you want a smoother texture, blend the cream cheese with sour cream in a food processor before mixing in the fresh ingredients. Lastly, for added flavor, consider adding some shredded mozzarella or grated Parmesan cheese to the dip. These tips will help you impress everyone at your gathering and create a dish they will crave again!

Serving Suggestions

When serving Bruschetta Dip, presentation is key to making it inviting. Start by placing the dip in a colorful bowl to attract attention. Pair it with a variety of dippers to cater to different tastes. You can use toasted baguette slices, pita chips, and assorted veggies like carrots or cucumbers for a fresh crunch. For a fun twist, serve it with flavored tortilla chips that can add an interesting taste to your dip. To make it even more appealing, garnish the dip with sprigs of fresh basil or a sprinkle of feta cheese. You could also offer a complementary drink, such as sparkling water with a slice of lemon or a glass of white wine. Your guests will love the variety and want to dig in!

FAQs

Can I make Bruschetta Dip ahead of time?

Yes, you can prepare the dip a few hours in advance and store it in the refrigerator. Just be sure to cover it well to keep it fresh.

What can I substitute for cream cheese?

You can use Greek yogurt for a lighter version or a dairy-free cream cheese alternative if you are looking for a vegan option.

How long does Bruschetta Dip last?

The dip can be stored in the refrigerator for up to 3 days. Make sure to keep it in an airtight container to maintain its freshness.

Can I add other ingredients to the dip?

Absolutely! You can add ingredients like olives, roasted red peppers, or even diced avocado to customize the dip to your liking.

Bruschetta Dip

A creamy, fresh dip filled with ripe tomatoes, aromatic basil, and garlic, topped with melted cheese; perfect for gatherings.

For the dip

  • 2 cups diced tomatoes (Make sure they are ripe and juicy for the best flavor.)
  • 1/2 cup chopped fresh basil
  • 1 clove garlic, minced
  • 8 oz cream cheese, softened
  • 1/2 cup sour cream
  • 1/2 cup shredded mozzarella cheese
  • Salt and pepper to taste

For serving

  • Baguette slices or tortilla chips (Crispy baguette slices or crunchy tortilla chips work best.)

Preparation

  1. In a mixing bowl, combine diced tomatoes, chopped basil, minced garlic, salt, and pepper. Mix well and set aside.
  2. In another bowl, blend softened cream cheese and sour cream until smooth.
  3. Spread the cream cheese mixture into a baking dish.
  4. Layer the tomato basil mixture over the cream cheese layer.
  5. Sprinkle shredded mozzarella cheese on top.

Baking

  1. Bake in a preheated oven at 350°F (175°C) for 20-25 minutes, or until bubbly and golden.
  2. Remove from the oven and let it cool for a few minutes.

Serving

  1. Serve warm with baguette slices or tortilla chips.

Feel free to add other ingredients like olives, red onion, or a drizzle of balsamic glaze for extra richness. For a spicier kick, consider adding red pepper flakes to the tomato mixture.

Appetizer, Snack
Italian
Appetizer Dip, Bruschetta Dip, Creamy Dip, Easy Recipe, Party Food

Cranberry Orange Glazed Turkey Breast

Cranberry Orange Glazed Turkey Breast served with festive sides

Cranberry Orange Glazed Turkey Breast is a delightful twist on the traditional turkey recipe. The combination of tangy cranberries and sweet oranges creates a vibrant glaze that brings out the best in the turkey meat. This dish is perfect for gatherings and special occasions, offering a beautiful presentation and a flavor that will satisfy everyone at the table. It’s not just a meal, it’s an experience that fills your home with warmth and joy. So, let’s roll up our sleeves and get ready to make this tasty dish that your friends and family will rave about!

How to Prepare Cranberry Orange Glazed Turkey Breast

To start, gather your ingredients: a turkey breast, fresh or frozen cranberries, orange juice, orange zest, brown sugar, honey, Dijon mustard, and some spices like salt and pepper.

Begin by preheating your oven to 350°F (175°C). In a saucepan, combine the cranberries, orange juice, orange zest, brown sugar, honey, and a pinch of salt. Cook on medium heat until the cranberries burst and the mixture thickens. This usually takes about 10-15 minutes.

While your glaze is simmering, season the turkey breast with salt and pepper. Place it in a roasting pan and brush a generous amount of your cranberry-orange mixture over the top. Reserve some glaze for later. Roast the turkey in the oven for about 1 to 1.5 hours, or until the internal temperature reaches 165°F (75°C). Every 30 minutes, baste the turkey with the remaining glaze for added flavor and moisture. Once done, let it rest before slicing.

Why You’ll Love Cranberry Orange Glazed Turkey Breast

This Cranberry Orange Glazed Turkey Breast is not just flavorful but also visually appealing. The vibrant color of the glaze adds a festive touch to your table. The combination of sweet and tart flavors will excite your taste buds while keeping the turkey juicy and tender. It is easy to prepare, making it a great option for both novice cooks and experienced chefs.

Furthermore, this dish is perfect for various occasions, whether it’s a holiday feast or a family dinner. Everyone loves the comforting flavors that come together in this recipe. If you want to impress your guests without spending all day in the kitchen, this recipe is a winner.

Tips for Success

First, ensure that you don’t overcook the turkey breast. Use a meat thermometer to check for doneness and avoid dryness. Second, for an extra layer of flavor, consider marinating the turkey overnight with some of the glaze. This infuses the meat with more taste.

Also, don’t skip the basting! Basting the turkey with the glaze every half hour will keep it moist and full of flavor. If you want a slightly thicker glaze, you can simmer it a bit longer after the cranberries burst, so it coats beautifully.

Lastly, let the turkey rest for about 20 minutes after cooking. This helps the juices redistribute throughout the meat, resulting in a succulent bird. With these tips, your turkey will turn out perfectly every time.

Serving Suggestions

Cranberry Orange Glazed Turkey Breast pairs perfectly with traditional sides like mashed potatoes or stuffing. You can also serve it alongside roasted vegetables for a colorful and nutritious plate. For a refreshing touch, a light salad with mixed greens, walnuts, and feta cheese enhances the meal beautifully.

Don’t forget about leftovers! This turkey tastes amazing in sandwiches with a spread of cream cheese or in a hearty turkey and cranberry salad. You can also serve the turkey cold on a charcuterie board with cheese and crackers for a fun gathering snack.

FAQs

Can I use a whole turkey instead of a turkey breast?

Yes, you can use a whole turkey. Just be sure to adjust the cooking time according to its weight.

Can I make the glaze ahead of time?

Absolutely, you can prepare the glaze a day in advance and refrigerate it. Just warm it up before using it on the turkey.

What kind of turkey breast should I buy?

Look for a bone-in turkey breast for more flavor, but boneless options work well too. Just adjust your cooking time accordingly.

With this guide in hand, you’re all set to create a stunning and tasty Cranberry Orange Glazed Turkey Breast that will impress everyone. Enjoy making this crowd-pleaser!

Cranberry Orange Glazed Turkey Breast

A delightful twist on the traditional turkey recipe with a vibrant cranberry and orange glaze, perfect for any gathering.

Turkey and Seasoning

  • 1 large bone-in turkey breast (Bone-in for more flavor; adjust cooking time if boneless.)
  • to taste salt (For seasoning turkey.)
  • to taste pepper (For seasoning turkey.)

Cranberry Orange Glaze

  • 2 cups fresh or frozen cranberries
  • 1 cup orange juice
  • 1 tablespoon orange zest
  • 1/2 cup brown sugar
  • 1/4 cup honey
  • 2 tablespoons Dijon mustard

Preparation

  1. Preheat your oven to 350°F (175°C).
  2. In a saucepan, combine cranberries, orange juice, orange zest, brown sugar, honey, and a pinch of salt. Cook on medium heat until the cranberries burst and the mixture thickens, about 10-15 minutes.
  3. Season the turkey breast with salt and pepper and place it in a roasting pan.
  4. Brush a generous amount of the cranberry-orange mixture over the turkey, reserving some glaze for later.

Cooking

  1. Roast the turkey in the oven for 1 to 1.5 hours, or until the internal temperature reaches 165°F (75°C).
  2. Baste the turkey with the reserved glaze every 30 minutes for added flavor and moisture.
  3. Once done, let the turkey rest for about 20 minutes before slicing.

Ensure the turkey is not overcooked by using a meat thermometer. For extra flavor, consider marinating the turkey overnight with some of the glaze. Simmer the glaze longer if you desire a thicker consistency.

Dinner, Main Course
American, Holiday
Cranberry, Glazed Turkey, Orange Glaze, Turkey

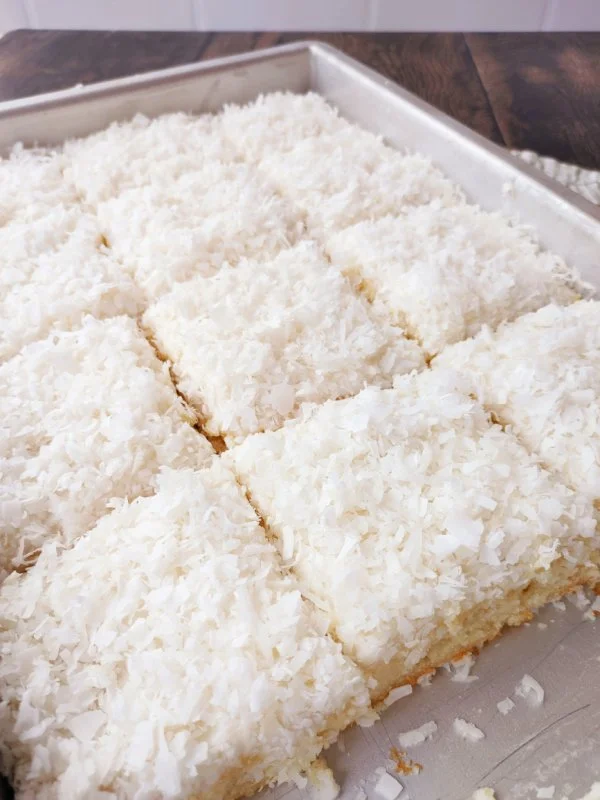
Coconut Texas Sheet Cake

Delicious Coconut Texas Sheet Cake served on a platter with coconut flakes on top

This Coconut Texas Sheet Cake feels cozy and bright, with rich chocolate and tender coconut in every bite. It is an easy, big cake that feeds a crowd, and it shines at family meals, potlucks, and parties. The cake stays moist, the frosting is glossy, and the coconut gives a nice chew and flavor. If you love coconut flavors in cake, you might also enjoy a different take on tropical baking with a pineapple coconut pound cake, it gives another sweet coconut idea to try. Get ready, this cake is simple to make and loved by many, you will want to make it again and again.

How to prepare Coconut Texas Sheet Cake

Ingredients

  • 2 cups all purpose flour
  • 2 cups sugar
  • 1 teaspoon baking soda
  • 1/2 teaspoon salt
  • 1 cup unsweetened cocoa powder, packed
  • 1 cup butter
  • 1 cup water
  • 1/2 cup buttermilk
  • 2 large eggs
  • 1 teaspoon vanilla extract
  • 1 cup sweetened shredded coconut, plus extra for topping

Frosting

  • 1 cup butter
  • 1/2 cup milk
  • 4 tablespoons cocoa powder
  • 4 cups powdered sugar
  • 1 teaspoon vanilla extract
  • 1 cup shredded coconut, for top

Directions

  1. Preheat the oven to 350°F, and grease a half sheet pan or 13×18 inch pan.
  2. In a bowl, mix flour, sugar, baking soda, and salt. Set aside.
  3. In a small saucepan, heat butter and water until the butter melts. Bring to a low boil, then remove from heat. Stir in cocoa powder until smooth.
  4. Pour the hot cocoa mixture into the dry mix, stir to combine.
  5. Stir in buttermilk, eggs, and vanilla until you have a smooth batter. Fold in 1 cup coconut.
  6. Spread batter in the prepared pan and bake 18 to 22 minutes, or until a toothpick comes out clean. Let the cake cool a bit in the pan.
  7. Make the frosting, in a saucepan melt butter with milk and cocoa, bring to a gentle boil. Remove from heat and stir in powdered sugar and vanilla until smooth.
  8. Pour the warm frosting over the warm cake, spread to cover. Sprinkle the remaining shredded coconut on top.
  9. Let the cake cool fully so the frosting sets, then slice and serve.

Coconut Texas Sheet Cake

Why You’ll Love Coconut Texas Sheet Cake

  • It makes a large cake fast, great for many people.
  • The cake stays moist, and the frosting soaks in a little, making each bite soft.
  • Coconut adds a fresh, tropical note that pairs well with chocolate.
  • You can make it in one pan, so cleanup is easy.

Tips for success

  • Measure flour properly, spoon into the cup and level it, do not pack.
  • Use fresh shredded coconut for best flavor, but sweetened or unsweetened both work.
  • Pour the warm frosting on the warm cake so it spreads easily and sets nicely.
  • Cool fully before cutting for neat slices, but it is great slightly warm too.
  • If you like extra coconut, toast a little and sprinkle on top for texture.

Serving Suggestions

  • Serve with a scoop of vanilla ice cream for a simple dessert.
  • Add fresh berries on the side to cut the sweetness.
  • Cut into small squares for a potluck, or large slices for a family dessert.
  • Pair with coffee or milk for a cozy treat.

Coconut Texas Sheet Cake

FAQs

Can I make Coconut Texas Sheet Cake ahead of time?

Yes, you can make it a day ahead. Store it covered at room temperature for one day, or in the fridge for up to three days. Bring to room temperature before serving for best flavor.

Can I use coconut milk instead of regular milk in the frosting?

Yes, you can use coconut milk, it will add more coconut flavor. Use the same amount, and the frosting may be a little thinner, so cool it a bit before pouring.

Is there a gluten free version of this cake?

You can make a gluten free version by swapping the flour for a 1 to 1 gluten free flour blend. The texture may change slightly, but it will still be tasty.

How do I store leftover cake?

Cover the cake with plastic wrap or store in an airtight container. Keep at room temperature for one day, or refrigerate up to three days. Warm slices slightly before serving if desired.

Coconut Texas Sheet Cake

A cozy and bright cake with rich chocolate and tender coconut, perfect for family meals, potlucks, and parties.

Cake Ingredients

  • 2 cups all purpose flour
  • 2 cups sugar
  • 1 teaspoon baking soda
  • 1/2 teaspoon salt
  • 1 cup unsweetened cocoa powder, packed
  • 1 cup butter
  • 1 cup water
  • 1/2 cup buttermilk
  • 2 large eggs
  • 1 teaspoon vanilla extract
  • 1 cup sweetened shredded coconut, plus extra for topping

Frosting

  • 1 cup butter
  • 1/2 cup milk
  • 4 tablespoons cocoa powder
  • 4 cups powdered sugar
  • 1 teaspoon vanilla extract
  • 1 cup shredded coconut, for topping

Preparation

  1. Preheat the oven to 350°F, and grease a half sheet pan or 13×18 inch pan.
  2. In a bowl, mix flour, sugar, baking soda, and salt. Set aside.
  3. In a small saucepan, heat butter and water until the butter melts. Bring to a low boil, then remove from heat. Stir in cocoa powder until smooth.
  4. Pour the hot cocoa mixture into the dry mix, stir to combine.
  5. Stir in buttermilk, eggs, and vanilla until you have a smooth batter. Fold in 1 cup coconut.
  6. Spread batter in the prepared pan and bake for 18 to 22 minutes, or until a toothpick comes out clean. Let the cake cool a bit in the pan.

Frosting

  1. In a saucepan melt butter with milk and cocoa, bring to a gentle boil.
  2. Remove from heat and stir in powdered sugar and vanilla until smooth.
  3. Pour the warm frosting over the warm cake, spread to cover. Sprinkle the remaining shredded coconut on top.
  4. Let the cake cool fully so the frosting sets, then slice and serve.

Measure flour properly, spoon into the cup and level it, do not pack. Use fresh shredded coconut for best flavor, but sweetened or unsweetened both work. Pour the warm frosting on the warm cake so it spreads easily and sets nicely. Cool fully before cutting for neat slices, but it is great slightly warm too. If you like extra coconut, toast a little and sprinkle on top for texture.

Dessert, Snack
American
chocolate cake, Coconut Cake, Coconut Texas Sheet Cake, Easy Cake Recipe, Sheet Cake

Porcupine Casserole

Delicious Porcupine Casserole served in a baking dish with herbs and spices

Porcupine Casserole is a warm, home-style dish with small beef meatballs that look like porcupine quills because of the rice inside. This dish mixes ground beef, rice, and tomato sauce into one pot, so it tastes rich and comforting. It is a real crowd-pleaser for weeknights and potlucks, and people like it for its simple flavors and easy steps. If you enjoy easy casseroles, you might also like a similar one like baked spaghetti casserole, which uses the same one-dish comfort idea. Give this a try tonight, you will smile when you eat it.

How to prepare Porcupine Casserole

Ingredients (basic)

  • 1 pound ground beef
  • 1 cup uncooked long grain rice
  • 1 small onion, chopped
  • 1 can (10.5 oz) condensed tomato soup
  • 1 can (14.5 oz) diced tomatoes, undrained
  • 1 cup beef broth or water
  • 1 teaspoon salt
  • 1/2 teaspoon black pepper
  • 1 cup shredded cheddar cheese (optional)

Directions

  1. Preheat the oven to 350°F (175°C). Lightly grease a 9×13 inch baking dish.
  2. In a large bowl, mix ground beef, rice, chopped onion, salt, and pepper. Mix well with your hands or a spoon.
  3. Shape the mixture into small meatballs, about 1 inch wide. Place them in the baking dish in a single layer.
  4. In a bowl, stir the tomato soup, diced tomatoes with juice, and beef broth. Pour this sauce evenly over the meatballs and rice.
  5. Cover the dish with foil and bake for 45 to 55 minutes, until the rice is tender and the meat is cooked through.
  6. Remove foil, sprinkle cheese on top if you like, and bake 5 more minutes until the cheese melts. Let rest for 5 minutes before serving.

Porcupine Casserole

Why You’ll Love Porcupine Casserole

  • It is simple to make with few ingredients.
  • The rice cooks inside the meat, so each bite holds flavor.
  • It feeds a family or a crowd without fuss.
  • It reheats well, so you can save leftovers for the next day.

Tips for success

  • Use long grain rice for best texture, or follow the rice package for cooking time if different.
  • If you like more sauce, add a little more beef broth or a second can of tomatoes.
  • Make meatballs small and even so they cook at the same time.
  • Check rice near the low end of time to avoid overcooking, ovens vary.
  • For extra flavor, brown the beef and onions in a pan before mixing, but this step is optional.

Serving Suggestions

  • Serve with a green salad and simple vinaigrette.
  • Offer steamed vegetables or roasted carrots on the side.
  • A slice of crusty bread works well to soak up extra sauce.
  • Top with chopped parsley for a fresh touch.

Porcupine Casserole

FAQs

Q: Can I use brown rice in Porcupine Casserole?

A: Yes, but brown rice needs more time and liquid. Cook time will increase and you may need more broth.

Q: Can I make this on the stove instead of baking?

A: Yes, you can simmer meatballs in a covered pan on low heat until rice is tender, about the same time as baking.

Q: Is this dish freezer friendly?

A: Yes, cool fully, then freeze in an airtight container. Thaw in the fridge overnight and reheat in the oven.

Q: Can I use ground turkey instead of beef?

A: Yes, ground turkey works fine. The dish will be leaner, so you may want a little extra sauce for moistness.

Porcupine Casserole

A warm, home-style dish featuring beef meatballs that resemble porcupine quills due to the rice inside, mixed with tomato sauce for a comforting one-pot meal.

For the Casserole

  • 1 pound ground beef (Use lean ground beef for best results.)
  • 1 cup uncooked long grain rice (Long grain rice recommended for texture.)
  • 1 small onion, chopped
  • 1 can 10.5 oz condensed tomato soup
  • 1 can 14.5 oz diced tomatoes, undrained
  • 1 cup beef broth or water (Use beef broth for more flavor.)
  • 1 teaspoon salt
  • 1/2 teaspoon black pepper
  • 1 cup shredded cheddar cheese (optional) (Add on top before final baking for a cheesy finish.)

Preparation

  1. Preheat the oven to 350°F (175°C). Lightly grease a 9×13 inch baking dish.
  2. In a large bowl, mix ground beef, rice, chopped onion, salt, and pepper. Mix well with your hands or a spoon.

Assembly

  1. Shape the mixture into small meatballs, about 1 inch wide. Place them in the baking dish in a single layer.
  2. In a bowl, stir the tomato soup, diced tomatoes with juice, and beef broth. Pour this sauce evenly over the meatballs and rice.

Baking

  1. Cover the dish with foil and bake for 45 to 55 minutes, until the rice is tender and the meat is cooked through.
  2. Remove foil, sprinkle cheese on top if you like, and bake 5 more minutes until the cheese melts.
  3. Let rest for 5 minutes before serving.

For best results, use long grain rice. Optionally, brown beef and onions before mixing to enhance flavor.

Casserole, Main Course
American
Comfort Food, Easy Casserole, meatballs, One Pot Meal, Porcupine Casserole

Porcupine Casserole

A warm, home-style dish featuring beef meatballs that resemble porcupine quills due to the rice inside, mixed with tomato sauce for a comforting one-pot meal.

For the Casserole

  • 1 pound ground beef (Use lean ground beef for best results.)
  • 1 cup uncooked long grain rice (Long grain rice recommended for texture.)
  • 1 small onion, chopped
  • 1 can (10.5 oz) condensed tomato soup
  • 1 can (14.5 oz) diced tomatoes, undrained
  • 1 cup beef broth or water (Use beef broth for more flavor.)
  • 1 teaspoon salt
  • 1/2 teaspoon black pepper
  • 1 cup shredded cheddar cheese (optional) (Add on top before final baking for a cheesy finish.)

Preparation

  1. Preheat the oven to 350°F (175°C). Lightly grease a 9×13 inch baking dish.
  2. In a large bowl, mix ground beef, rice, chopped onion, salt, and pepper. Mix well with your hands or a spoon.

Assembly

  1. Shape the mixture into small meatballs, about 1 inch wide. Place them in the baking dish in a single layer.
  2. In a bowl, stir the tomato soup, diced tomatoes with juice, and beef broth. Pour this sauce evenly over the meatballs and rice.

Baking

  1. Cover the dish with foil and bake for 45 to 55 minutes, until the rice is tender and the meat is cooked through.
  2. Remove foil, sprinkle cheese on top if you like, and bake 5 more minutes until the cheese melts.
  3. Let rest for 5 minutes before serving.

For best results, use long grain rice. Optionally, brown beef and onions before mixing to enhance flavor.

Casserole, Main Course
American
Casserole, Comfort Food, Easy Dinner, One-Pot Meal, Porcupine Casserole

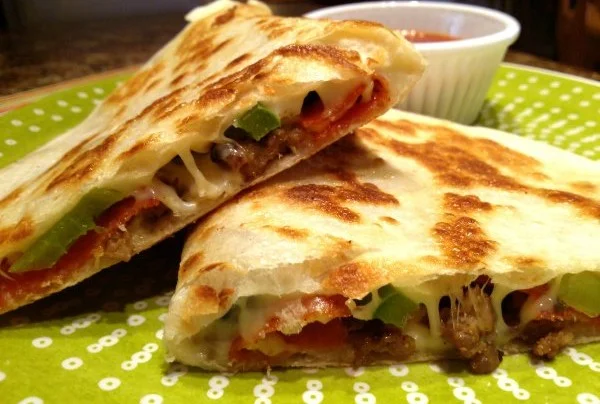
Pizza dillas

Delicious pizza dillas with melted cheese and fresh toppings

There’s something magical about combining two much-loved foods into one delightful dish, and that’s exactly what Pizza dillas do! Imagine the gooey goodness of cheesy pizza wrapped up in a crispy tortilla. It’s the ultimate comfort food that brings together flavors that everyone loves. Whether you’re making a quick weeknight meal or a fun snack for friends, Pizza dillas are sure to impress. With their crispy exterior and melty interior, these treats are not only delicious but also super easy to make. Who wouldn’t want to whip up a tasty twist on classic pizza? Let’s dive in and learn how to prepare these yummy Pizza dillas!

How to prepare Pizza dillas

  1. Ingredients:
  • 4 large flour tortillas
  • 2 cups shredded mozzarella cheese
  • 1 cup pizza sauce
  • 1 cup sliced pepperoni (or any favorite toppings)
  • Olive oil or butter for cooking
  1. Directions:
  • Heat a skillet over medium heat and lightly grease it with olive oil or butter.
  • Place a tortilla on the skillet and spread a generous amount of pizza sauce on half of it.
  • Sprinkle a layer of mozzarella cheese over the sauce, then add your chosen toppings.
  • Fold the tortilla over to create a half-moon shape.
  • Cook for about 3-4 minutes, or until the bottom is golden brown. Flip and cook for another 3-4 minutes, until both sides are crispy and the cheese is melted.
  • Remove from the skillet and let it cool for a minute before slicing into wedges.
  • Repeat with remaining tortillas and ingredients.

Pizzadillas

Why You’ll Love Pizza dillas

Pizza dillas are a fantastic way to enjoy all the flavors of pizza in a new and fun format. They’re crispy, gooey, and packed with your favorite toppings. Plus, they can be made in minutes, making them a perfect choice for busy days. With endless filling options, you can customize them to suit anyone’s taste. Kids love them, and adults do too! Plus, they make a great appetizer or party food. Once you take a bite, you’ll see why Pizza dillas are a hit on any table.

Tips for success

  • Use Fresh Ingredients: Fresh cheese and toppings enhance the flavor and texture.
  • Don’t Overfill: Keep the fillings to a moderate amount to make flipping easier.
  • Experiment with Toppings: Try vegetables, different cheeses, or even cooked meats for variety.
  • Cook at Medium Heat: This helps to ensure that the cheese melts perfectly without burning the tortilla.

Serving Suggestions

These delicious Pizza dillas can be paired with a variety of dips, like marinara sauce, ranch dressing, or sour cream. Serve them with a side salad for a balanced meal or alongside some crispy veggies for a great snack option. You can even cut them into smaller pieces for fun appetizers at gatherings!

FAQs

Can I make Pizza dillas ahead of time?

Yes, you can assemble the Pizza dillas in advance and store them in the fridge. Just cook them right before serving for the best taste.

What should I do with leftovers?

Leftover Pizza dillas can be stored in an airtight container in the fridge. Reheat them in a skillet until crispy again.

Can I freeze Pizza dillas?

Sure! You can freeze uncooked Pizza dillas. Just separate them with parchment paper and place them in a freezer bag. When ready to eat, cook them straight from frozen; it may just take a little longer.

Pizzadillas

Pizza Dillas

Combine the gooey goodness of cheesy pizza wrapped in a crispy tortilla for a fun and delicious twist on classic pizza.

Main Ingredients

  • 4 large large flour tortillas
  • 2 cups shredded mozzarella cheese (Use fresh cheese for better flavor.)
  • 1 cup pizza sauce
  • 1 cup sliced pepperoni (Or any favorite toppings.)
  • Olive oil or butter for cooking (Use for greasing the skillet.)

Cooking

  1. Heat a skillet over medium heat and lightly grease it with olive oil or butter.
  2. Place a tortilla on the skillet and spread a generous amount of pizza sauce on half of it.
  3. Sprinkle a layer of mozzarella cheese over the sauce, then add your chosen toppings.
  4. Fold the tortilla over to create a half-moon shape.
  5. Cook for about 3-4 minutes, or until the bottom is golden brown. Flip and cook for another 3-4 minutes, until both sides are crispy and the cheese is melted.
  6. Remove from the skillet and let it cool for a minute before slicing into wedges.
  7. Repeat with remaining tortillas and ingredients.

Use fresh ingredients for enhanced flavor. Don’t overfill to ensure easy flipping. Experiment with different toppings. Cook at medium heat for perfect cheese melting.

Appetizer, Snack
American, Italian
Cheesy Snacks, Comfort Food, Easy Recipes, Pizza Dillas, Tortilla Pizza

Monte Cristo Sliders

Plate of Monte Cristo sliders served with dipping sauce.

Monte Cristo sandwiches have always been a favorite of mine, but they can be pretty time-consuming to prepare. You have to layer everything, dip it in batter, and fry it totally delicious, but not always practical when you want something quick. That’s where these Monte Cristo Sliders come in. Soft sweet rolls are packed with ham, turkey, and cheese, then brushed with butter, dusted with powdered sugar, and served with raspberry jam for dipping. They’re a simple, crowd-friendly option that works just as well for lunch or dinner. try a different crowd favorite like the baked beef and cheese sliders recipe

How to prepare Monte Cristo Sliders

  1. Preheat your oven to 350°F, or get a pan hot on medium heat.
  2. Split a pack of slider rolls in half, keep the bottoms in a tray.
  3. Layer thin slices of turkey, ham, and Swiss cheese on the bottom rolls.
  4. Put the top rolls on, press lightly.
  5. Whisk 2 eggs with 1/4 cup milk, a pinch of salt, and a little pepper in a shallow dish.
  6. Dip each sandwich top and bottom quickly in the egg mix, do not soak.
  7. Melt a little butter in a pan and brown sliders a minute per side, or brush butter on top and bake 12 to 15 minutes until cheese melts.
  8. If you like, dust with a little powdered sugar and serve with raspberry or strawberry jam for dipping.
  9. Serve warm so the cheese is gooey and the bread is slightly crisp.

Monte Cristo Party Sliders

Why You’ll Love Monte Cristo Sliders

  • They are small and easy to eat, perfect for parties.
  • The mix of salty meat, melted cheese, and sweet jam is tasty and fun.
  • You can make many at once, and they reheat well.
  • Kids and adults like them, so they please a crowd.

Tips for success

  • Use thin slices of meat, they fit better and heat through fast.
  • Don’t soak the rolls in egg, a quick dip is enough.
  • Brush with melted butter before baking for a golden top.
  • Keep an eye when browning, they cook fast.
  • Cut into separate sliders after baking to serve easily.

Serving Suggestions

  • Serve with a small bowl of berry jam for dipping.
  • Add a side of pickles, chips, or a simple green salad.
  • Offer toothpicks so guests can grab them cleanly.
  • For a brunch touch, add a side of fresh fruit or roasted potatoes.

Monte Cristo Party Sliders

FAQs

Q: Can I make these ahead of time?

A: Yes, you can assemble and cover them, then bake right before guests arrive. This keeps bread from getting soggy.

Q: Can I use a different cheese?

A: Yes, Gruyere or cheddar work well, but Swiss gives the classic taste.

Q: How do I reheat leftovers?

A: Reheat in a 350°F oven for 8 to 10 minutes, or warm in a pan on low so the cheese melts without burning the bread.

Q: Can I make a vegetarian version?

A: Yes, swap the meat for grilled veggies or slices of cooked tofu and keep the cheese and jam.

Q: Is it better to pan-fry or bake them?

A: Pan-frying gives a crisp edge fast, baking heats many at once and melts the cheese evenly, choose by how many you need to cook.

Monte Cristo Sliders

Quick and delicious Monte Cristo Sliders packed with turkey, ham, and cheese, perfect for any gathering.

For the Sliders

  • 1 pack slider rolls (Soft sweet rolls)
  • 12 slices turkey (Thinly sliced)
  • 12 slices ham (Thinly sliced)
  • 12 slices Swiss cheese
  • 2 eggs (For the dipping mixture)
  • 1/4 cup milk (For the dipping mixture)
  • 1 pinch salt
  • 1 pinch pepper
  • 2 tablespoons butter (For frying or brushing)
  • 1/4 cup powdered sugar (For dusting)
  • raspberry jam (For dipping)

Preparation

  1. Preheat your oven to 350°F, or get a pan hot on medium heat.
  2. Split a pack of slider rolls in half, keeping the bottoms in a tray.
  3. Layer thin slices of turkey, ham, and Swiss cheese on the bottom rolls.
  4. Put the top rolls on and press lightly.
  5. Whisk 2 eggs with 1/4 cup milk, a pinch of salt, and a little pepper in a shallow dish.
  6. Dip each sandwich top and bottom quickly in the egg mix, do not soak.

Cooking

  1. Melt a little butter in a pan and brown sliders for about 1 minute per side, or brush butter on top and bake for 12 to 15 minutes until the cheese melts.
  2. If desired, dust with a little powdered sugar.

Serving

  1. Serve with raspberry or strawberry jam for dipping.

Use thin slices of meat for better fitting. Don’t soak the rolls in egg, a quick dip is enough. Brush with melted butter before baking for a golden top. Cut into separate sliders after baking to serve easily.

Dinner, lunch, Snack
American
Easy Recipe, Finger Food, Monte Cristo, Party Food, Sliders

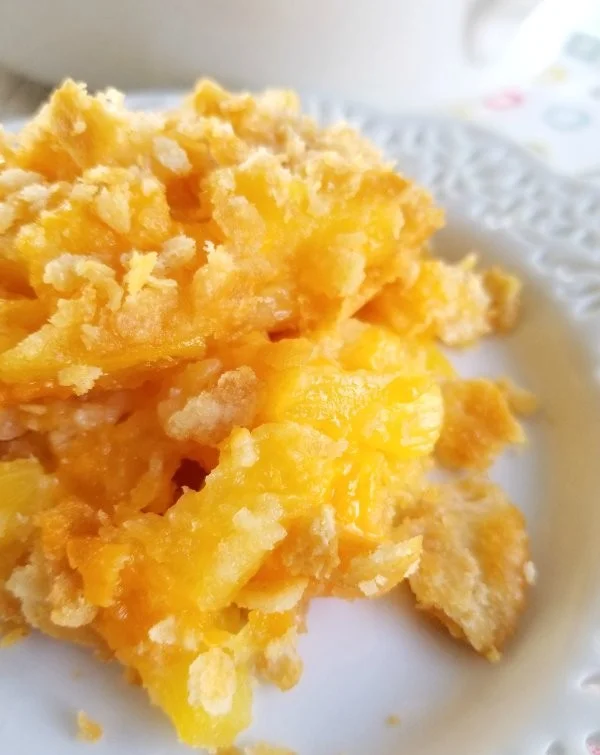
Pineapple Casserole

Delicious pineapple casserole dish served warm

This pineapple casserole feels warm and simple, it mixes sweet pineapple with a crunchy top for a nice contrast. It is a real crowd-pleaser at family dinners and potlucks, it tastes sweet, light, and a little crunchy. If you enjoy warm, cheesy casseroles like baked spaghetti casserole, you’ll find this pineapple casserole just as comforting. Give it a try, you might find yourself going back for seconds.

How to prepare Pineapple Casserole

Ingredients:

  • 1 can (20 oz) crushed pineapple, drained
  • 1 cup sugar
  • 1/2 cup all-purpose flour
  • 2 large eggs
  • 1/2 cup melted butter
  • 1 tsp vanilla extract
  • Pinch of salt
  • 1 cup crushed cornflakes or 1 cup crushed crackers for topping
  • 2 tbsp brown sugar for topping
  • 2 tbsp melted butter for topping

Directions:

  1. Preheat the oven to 350°F (175°C). Grease a 9×9 inch baking dish.
  2. In a bowl, mix the drained pineapple, sugar, flour, eggs, melted butter, vanilla, and salt until smooth.
  3. Pour the mixture into the prepared dish and spread it evenly.
  4. In a small bowl, combine the crushed cornflakes or crackers, brown sugar, and 2 tbsp melted butter. Mix so the crumbs hold together a bit.
  5. Sprinkle the crumb topping evenly over the pineapple mixture.
  6. Bake for 35 to 45 minutes, until the top is golden and the filling is set.
  7. Let it cool for 10 minutes before serving, it will firm up a little as it cools.

Pineapple Casserole

Why You’ll Love Pineapple Casserole

  • It is easy to make, with simple ingredients you may already have.
  • The mix of soft, sweet filling and crunchy topping feels satisfying.
  • It works as a side dish or a light dessert, it is quick to bake.
  • Kids and adults both like the sweet, familiar pineapple flavor.

Tips for success

  • Drain the pineapple well, too much juice can make the casserole runny.
  • Press the topping gently so it stays on as it bakes.
  • If you like a richer flavor, use a little brown sugar in the filling.
  • Check the casserole at 30 minutes, ovens vary, you want a golden top.
  • Let it cool a bit before serving, it holds its shape better.

Serving Suggestions

  • Serve warm with a scoop of vanilla ice cream for dessert.
  • Pair with roasted ham or baked chicken for a holiday plate.
  • Add a side of green salad to balance the sweetness.
  • Spoon over pound cake for a simple, tasty treat.

Pineapple Casserole

FAQs

Q: Can I use fresh pineapple instead of canned? A: Yes, use fresh pineapple that you chop small and drain a little. Fresh adds a brighter flavor.

Q: Can I make this ahead of time? A: Yes, you can assemble it and keep it in the fridge for a few hours before baking. Bake just before serving for best texture.

Q: How do I store leftovers? A: Cover and keep in the fridge for up to 3 days. Warm gently in the oven before serving.

Q: Can I make this gluten free? A: Yes, use a gluten free flour or a mix, and use gluten free crackers or cornflakes for the topping.

Q: Can I add nuts to the topping? A: Yes, chopped pecans or walnuts work well, add them to the crumb mix for extra crunch.

Pineapple Casserole

A warm and simple pineapple casserole that combines sweet pineapple with a crunchy topping, perfect for family dinners or potlucks.

Main Ingredients

  • 1 can 20 oz crushed pineapple, drained (Make sure to drain well.)
  • 1 cup sugar
  • 1/2 cup all-purpose flour (Can be substituted with gluten-free flour.)
  • 2 large eggs
  • 1/2 cup melted butter
  • 1 tsp vanilla extract
  • 1 pinch salt

Topping

  • 1 cup crushed cornflakes or crushed crackers (Use gluten-free options if needed.)
  • 2 tbsp brown sugar (Use for topping.)
  • 2 tbsp melted butter (Use for topping.)

Preparation

  1. Preheat the oven to 350°F (175°C). Grease a 9×9 inch baking dish.
  2. In a bowl, mix the drained pineapple, sugar, flour, eggs, melted butter, vanilla, and salt until smooth.
  3. Pour the mixture into the prepared dish and spread it evenly.
  4. In a small bowl, combine the crushed cornflakes or crackers, brown sugar, and melted butter. Mix until the crumbs hold together slightly.
  5. Sprinkle the crumb topping evenly over the pineapple mixture.

Baking

  1. Bake for 35 to 45 minutes, until the top is golden and the filling is set.
  2. Let it cool for 10 minutes before serving, as it will firm up a little as it cools.

Drain the pineapple well to prevent a runny casserole. Press the topping gently to ensure it stays on while baking. Consider using brown sugar in the filling for a richer flavor. Check the casserole at 30 minutes for doneness.

Dessert, Side Dish
American
Cheesy Casserole, Comfort Food, Family Dinner, Pineapple Casserole, Potluck Recipe