Cheesy Chicken Taco Pasta

Delicious Cheesy Chicken Taco Pasta bowl with colorful toppings

This Cheesy Chicken Taco Pasta is warm, simple, and full of flavor. It mixes shredded chicken, taco spices, pasta, and lots of cheese, all cooked slowly in the crock pot. It is a true crowd-pleaser for busy weeknights, potlucks, or when you want a simple, tasty meal with little fuss. If you like crock pot comfort meals, try this Crock Pot chicken pot pie recipe too. You will smile when you taste the creamy, cheesy taco sauce, and you may find yourself making it again the same week.

How to prepare Cheesy Chicken Taco Pasta

  1. Put chicken breasts in the crock pot. Sprinkle taco seasoning on top.
  2. Add a can of diced tomatoes with green chilies, a cup of chicken broth, and a little onion if you like.
  3. Cover and cook on low for 4 to 6 hours, or on high for 2 to 3 hours, until the chicken is tender.
  4. Remove chicken and shred with two forks. Put shredded chicken back into the crock pot.
  5. Stir in pasta, a cup of salsa, and a cup of cheese. Add more broth if needed, so the pasta cooks in liquid.
  6. Cover and cook on high for 20 to 30 minutes, stirring once or twice, until the pasta is tender.
  7. Stir in another cup of cheese until melted and creamy. Taste and add salt if needed. Serve hot.

Crock Pot Cheesy Chicken Taco Pasta

Why You’ll Love Cheesy Chicken Taco Pasta

  • It is very easy to make, the crock pot does most of the work.
  • The dish is creamy and cheesy, with classic taco flavor.
  • Kids and adults both enjoy it, so it works well for family meals.
  • You can change the heat level and ingredients to suit your taste, like adding beans or corn.
  • It stores well, and reheats nicely for quick lunches or dinners.

Tips for success

  • Use boneless, skinless chicken breasts or thighs, they shred easily.
  • If the sauce is too thick, add a little extra chicken broth, one quarter cup at a time.
  • Stir the pasta gently while it cooks so it does not stick or clump.
  • Use a pasta that cooks in about 10 to 12 minutes, like rotini or penne.
  • Taste before serving, and adjust salt or taco seasoning as needed.
  • For more creaminess, stir in a few tablespoons of cream cheese at the end.

Serving Suggestions

  • Top with chopped cilantro, sliced green onions, or diced avocado.
  • Serve with tortilla chips, a green salad, or a side of steamed veggies.
  • Add a dollop of sour cream or plain Greek yogurt for cool, tangy contrast.
  • Offer lime wedges to squeeze over the top for fresh flavor.

Crock Pot Cheesy Chicken Taco Pasta

FAQs

Q: Can I use frozen chicken in this recipe?

A: Yes, you can, but increase the cook time and be sure the chicken reaches a safe internal temperature before shredding.

Q: Can I make this without pasta, for a low carb meal?

A: Yes, skip the pasta and add extra cheese, cauliflower florets, or zucchini for a low carb version.

Q: How long will leftovers keep in the fridge?

A: Store in an airtight container for 3 to 4 days. Reheat on the stove or in the microwave, adding a splash of broth if it is dry.

Q: Can I make this in an instant pot instead of a crock pot?

A: Yes, use the pressure cook setting for 10 minutes, then shred the chicken and add pasta, cooking until tender. Adjust liquid as needed.

Cheesy Chicken Taco Pasta

This warm and flavorful Cheesy Chicken Taco Pasta mixes shredded chicken, taco spices, and lots of cheese, all cooked slowly in the crock pot, making it a true crowd-pleaser for busy weeknights.

Main Ingredients

  • 2 pieces boneless, skinless chicken breasts (or thighs)
  • 1 packet taco seasoning (adjust to taste)
  • 1 can diced tomatoes with green chilies (drained or use with liquid)
  • 1 cup chicken broth (more if needed)
  • 1/2 cup onion (optional, chopped)
  • 1 cup salsa (for added flavor)
  • 2 cups cheese (shredded, use more for topping)
  • 2 cups pasta (use rotini or penne)

Preparation

  1. Put chicken breasts in the crock pot.
  2. Sprinkle taco seasoning on top.
  3. Add diced tomatoes with green chilies, chicken broth, and chopped onion if desired.

Cooking

  1. Cover and cook on low for 4 to 6 hours or on high for 2 to 3 hours until chicken is tender.
  2. Remove chicken and shred with two forks. Put shredded chicken back into the crock pot.
  3. Stir in pasta, salsa, and 1 cup of cheese. Add more broth if needed.
  4. Cover and cook on high for 20 to 30 minutes until pasta is tender, stirring occasionally.
  5. Stir in another cup of cheese until melted and creamy. Taste and adjust salt as needed.

For added creaminess, stir in a few tablespoons of cream cheese at the end. Top with cilantro, green onions, or avocado.
Dinner, Main Course
American, Mexican
Cheesy Chicken, Comfort Food, Crock Pot Pasta, Easy Dinner, Taco Pasta

Oatmeal Cream Pie Bars

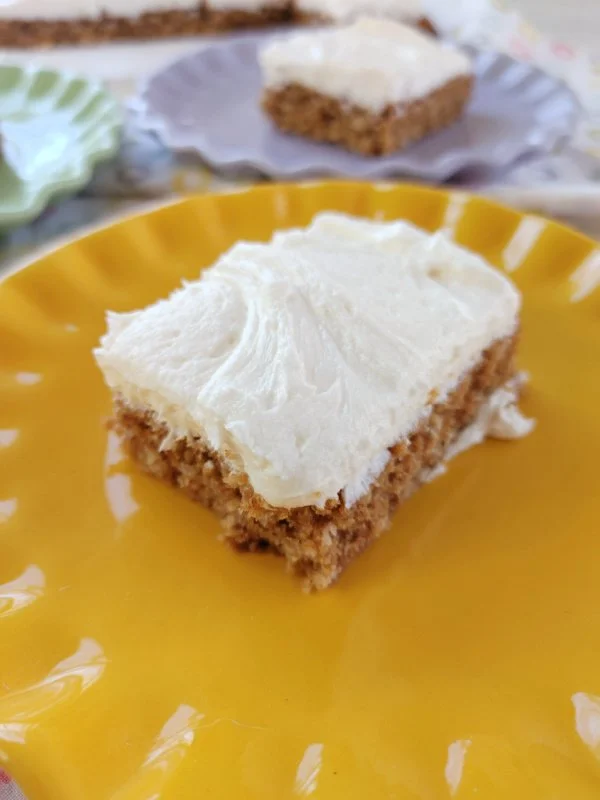
Delicious Oatmeal Cream Pie Bars on a plate

I love a treat that feels like a hug, and these Oatmeal Cream Pie Bars do just that. They mix soft, chewy oatmeal cookie flavor with a sweet, creamy filling, all in one easy bar. This recipe turns a classic sandwich cookie into a pan-friendly dessert that feeds a crowd and makes everyone smile. If you enjoy sweet, soft bars with a creamy center, you might also like this no-bake chocolate cream pie. Get ready, these bars are simple, comforting, and fun to share.

How to prepare Oatmeal Cream Pie Bars.

Ingredients

  • 1 cup (2 sticks) unsalted butter, softened
  • 1 cup packed brown sugar
  • 1/2 cup granulated sugar
  • 2 large eggs
  • 1 teaspoon vanilla extract
  • 1 1/2 cups all-purpose flour
  • 1 teaspoon baking soda
  • 1/2 teaspoon salt
  • 3 cups old-fashioned rolled oats

For the filling

  • 1/2 cup (1 stick) unsalted butter, softened
  • 1 1/2 cups powdered sugar
  • 1 teaspoon vanilla extract
  • 3/4 cup marshmallow fluff, or whipped cream cheese for a tangy version

Directions

  1. Preheat your oven to 350°F (175°C). Line a 9×13 inch pan with parchment paper, leaving an overhang to lift the bars later.
  2. In a large bowl, beat the butter and sugars until creamy. Add eggs and vanilla, beat until smooth.
  3. In a separate bowl, stir together flour, baking soda, and salt. Add the dry mix to the wet mix and stir until just combined. Fold in the oats.
  4. Press about half of the oat dough evenly into the prepared pan to form the base. Bake for 10 to 12 minutes, until lightly golden at the edges. Remove from oven and let cool slightly.
  5. While the base cools, make the filling. Beat the softened butter with powdered sugar and vanilla until smooth. Fold in the marshmallow fluff until you have a smooth, spreadable cream.
  6. Spread the filling evenly over the warm base. Crumble the remaining oat dough on top and press gently so it sticks to the filling.
  7. Return the pan to the oven and bake 12 to 15 minutes, until the top is lightly golden. Cool completely in the pan, then lift out using the parchment overhang and cut into bars. Chill a bit for cleaner slices, if you like.

Oatmeal Cream Pie Bars

Why You’ll Love Oatmeal Cream Pie Bars.

  • They taste like the classic oatmeal cream pie, but in an easy pan dessert form.
  • The oats make the bars chewy, the filling stays soft and sweet.
  • You can bake once and serve many, great for parties, school lunches, or a simple snack.
  • You can change the filling to marshmallow, cream cheese, or simple buttercream to match your taste.

Tips for success

  • Press the base evenly into the pan, that helps bars hold together.
  • If the top dough is too soft to crumble, chill it for 10 minutes before topping.
  • Let the pan cool fully before slicing, or use a warm, clean knife for neater cuts.
  • Use old-fashioned oats for texture, quick oats make it too soft.
  • Store bars in an airtight container, they keep well at room temperature for 2 days, or in the fridge for a week.

Serving Suggestions

  • Serve with a glass of cold milk, coffee, or tea.
  • Cut small squares for a party platter, or larger bars for dessert.
  • Add a sprinkle of cinnamon or a light dusting of powdered sugar on top.
  • Pair with fresh fruit for a balanced plate.

Oatmeal Cream Pie Bars

FAQs

Q: Can I make these gluten free?

A: Yes, use a 1-to-1 gluten free flour blend and make sure your oats are certified gluten free.

Q: Can I freeze the bars?

A: Yes, wrap tightly and freeze up to 2 months. Thaw in the fridge before serving.

Q: Can I use a different filling?

A: Yes, you can swap marshmallow fluff for a simple buttercream or a cream cheese frosting for a tangy twist.

Q: How long do they keep fresh?

A: At room temperature in an airtight container, about 2 days. In the fridge, about one week.

Q: Can I make them in a smaller pan?

A: Yes, reduce bake time slightly for a thicker bar, check doneness with a light golden top.

Oatmeal Cream Pie Bars

These Oatmeal Cream Pie Bars are a delightful blend of soft, chewy oatmeal cookies with a creamy filling, perfect for sharing with a crowd.

For the oatmeal cookie base

  • 1 cup unsalted butter, softened (2 sticks)
  • 1 cup packed brown sugar
  • 1/2 cup granulated sugar
  • 2 large eggs
  • 1 teaspoon vanilla extract
  • 1 1/2 cups all-purpose flour
  • 1 teaspoon baking soda
  • 1/2 teaspoon salt
  • 3 cups old-fashioned rolled oats

For the filling

  • 1/2 cup unsalted butter, softened (1 stick)
  • 1 1/2 cups powdered sugar
  • 1 teaspoon vanilla extract
  • 3/4 cup marshmallow fluff (or whipped cream cheese for a tangy version)

Preparation

  1. Preheat your oven to 350°F (175°C). Line a 9×13 inch pan with parchment paper, leaving an overhang to lift the bars later.
  2. In a large bowl, beat the butter and sugars until creamy. Add eggs and vanilla, beat until smooth.
  3. In a separate bowl, stir together flour, baking soda, and salt. Add the dry mix to the wet mix and stir until just combined. Fold in the oats.
  4. Press about half of the oat dough evenly into the prepared pan to form the base. Bake for 10 to 12 minutes, until lightly golden at the edges. Remove from oven and let cool slightly.

Filling and Assembly

  1. While the base cools, make the filling. Beat the softened butter with powdered sugar and vanilla until smooth. Fold in the marshmallow fluff until you have a smooth, spreadable cream.
  2. Spread the filling evenly over the warm base. Crumble the remaining oat dough on top and press gently so it sticks to the filling.
  3. Return the pan to the oven and bake 12 to 15 minutes, until the top is lightly golden. Cool completely in the pan, then lift out using the parchment overhang and cut into bars. Chill a bit for cleaner slices, if you like.

Press the base evenly into the pan to help the bars hold together. If the top dough is too soft to crumble, chill it for 10 minutes before topping. Let the pan cool fully before slicing, or use a warm, clean knife for neater cuts. Use old-fashioned oats for texture, quick oats make it too soft. Store bars in an airtight container, they keep well at room temperature for 2 days, or in the fridge for a week.

Dessert, Snack
American
Baking, Comfort Food, Dessert Bars, Oatmeal Cream Pie Bars

Delicious Cinnamon Rolls with Cream Cheese Icing

Delicious cinnamon rolls drizzled with cream cheese icing on a wooden table

I love the warm smell of cinnamon in the morning, and these rolls make the whole house feel cozy. Soft dough, sweet cinnamon, and a tangy cream cheese icing come together in a simple way, thanks to the bread machine. This version, The BEST Bread Machine Cinnamon Rolls with Cream Cheese Icing, is easy to make and will please a crowd, whether you bake them for a Sunday breakfast or a special treat. If you like cream cheese desserts, try the easy baked cream cheese rangoon rolls recipe for another tasty idea. Get ready to roll, bake, and enjoy a sticky, gooey bite that makes mornings better.

How to prepare Cinnamon Rolls with Cream Cheese Icing

Ingredients

  • 1 cup warm milk (about 110°F, warm to touch)
  • 1/3 cup butter, melted
  • 1 egg
  • 4 cups all purpose flour
  • 1/3 cup sugar
  • 1 teaspoon salt
  • 2 1/4 teaspoons active dry yeast (one packet)
  • Filling, 1/2 cup butter soft, 3/4 cup brown sugar, 2 tablespoons ground cinnamon
  • Cream cheese icing, 4 oz cream cheese soft, 1/4 cup butter soft, 1 cup powdered sugar, 1/2 teaspoon vanilla, 1-2 tablespoons milk

Directions

  1. Add dough ingredients to the bread machine pan in the order your machine suggests, usually liquids first, then flour, then yeast. Start the dough cycle.
  2. When the dough cycle finishes, remove dough to a lightly floured surface. Roll into a rectangle about 15×10 inches.
  3. Spread the softened 1/2 cup butter over the dough. Mix brown sugar and cinnamon, sprinkle evenly over the butter.
  4. Tightly roll the dough from the long side into a log. Pinch the seam to seal.
  5. Cut into 12 equal pieces with a sharp knife or dental floss. Place rolls in a greased 9×13 inch pan.
  6. Cover with a clean towel, let rise in a warm place until puffy, about 30 to 45 minutes.
  7. Preheat the oven to 350°F. Bake rolls for 20 to 25 minutes, until golden and cooked through.
  8. While rolls bake, beat cream cheese and butter until smooth. Add powdered sugar and vanilla, mix. Add milk as needed for spreadable texture.
  9. Remove rolls from oven, let cool 5 minutes, then spread cream cheese icing over warm rolls. Serve warm.

The BEST Bread Machine Cinnamon Rolls with Cream Cheese Icing

Why You’ll Love Cinnamon Rolls with Cream Cheese Icing

  • Easy, the bread machine does the hard work of mixing and rising the dough.
  • Soft and tender rolls with a sweet cinnamon center.
  • Cream cheese icing adds a tangy, rich finish that cuts the sweetness.
  • Great for guests, they look bakery-made but take less effort.
  • You can make them ahead, freeze, or bake fresh for a warm treat.

Tips for success

  • Use warm, not hot, milk, about 105 to 115°F, so yeast wakes up without dying.
  • Measure flour by spooning it into the cup and leveling, avoid packing.
  • Make sure your yeast is fresh, it should foam when mixed with warm liquid and sugar if you test it.
  • Roll the dough evenly so all rolls bake the same.
  • If rolls brown too fast, cover loosely with foil for last 5 to 10 minutes.
  • For thicker icing, add less milk, for thinner icing, add more a teaspoon at a time.

Serving Suggestions

  • Serve warm with a cup of coffee or hot tea.
  • Add sliced fruit on the side, like berries or orange segments, to balance the sweet roll.
  • Make mini rolls for a party, or bake in a muffin tin for single servings.
  • Pair with bacon or sausage for a full breakfast plate.
  • Leftovers warm well in a microwave for 10 to 15 seconds.

The BEST Bread Machine Cinnamon Rolls with Cream Cheese Icing

FAQs

Q, Can I use a stand mixer or mix by hand instead of a bread machine?

A, Yes, you can. Mix and knead the dough until smooth, then follow the same rise and bake steps.

Q, Can I freeze the rolls?

A, Yes, freeze before the second rise or after baking. Thaw before baking or reheating, then add icing when warm.

Q, How long do they stay fresh?

A, Keep in an airtight container at room temperature for 2 days, or refrigerate up to 4 days. Warm before serving.

Q, Can I use instant yeast?

A, Yes, you can use instant yeast. You may add it directly to the flour and use the dough cycle as usual.

Q, Can I make smaller or larger rolls?

A, Yes, change the number of cuts for size. Baking time will change, check often to avoid overbaking.

Cinnamon Rolls with Cream Cheese Icing

These soft dough cinnamon rolls with sweet cinnamon filling and tangy cream cheese icing are easy to make in a bread machine and perfect for any occasion.

Dough Ingredients

  • 1 cup warm milk (about 110°F, warm to touch) (Use warm milk, not hot, to activate yeast.)
  • 1/3 cup butter, melted
  • 1 egg
  • 4 cups all purpose flour (Measure by spooning into the cup and leveling.)
  • 1/3 cup sugar
  • 1 teaspoon salt
  • 2 1/4 teaspoons active dry yeast (one packet) (Ensure yeast is fresh and foams with warm liquid.)

Filling Ingredients

  • 1/2 cup butter, soft (Spread over the dough.)
  • 3/4 cup brown sugar
  • 2 tablespoons ground cinnamon

Cream Cheese Icing

  • 4 oz cream cheese, soft
  • 1/4 cup butter, soft
  • 1 cup powdered sugar
  • 1/2 teaspoon vanilla
  • 1-2 tablespoons milk (Add as needed for spreadable texture.)

Preparation

  1. Add dough ingredients to the bread machine pan in the order your machine suggests, usually liquids first, then flour, then yeast. Start the dough cycle.
  2. When the dough cycle finishes, remove the dough to a lightly floured surface. Roll into a rectangle about 15 x 10 inches.
  3. Spread the softened 1/2 cup of butter over the dough. Mix brown sugar and cinnamon, sprinkle evenly over the butter.
  4. Tightly roll the dough from the long side into a log. Pinch the seam to seal.
  5. Cut into 12 equal pieces with a sharp knife or dental floss. Place rolls in a greased 9 x 13 inch pan.
  6. Cover with a clean towel, let rise in a warm place until puffy, about 30 to 45 minutes.

Baking

  1. Preheat the oven to 350°F. Bake rolls for 20 to 25 minutes, until golden and cooked through.

Icing

  1. While rolls bake, beat cream cheese and butter until smooth. Add powdered sugar and vanilla, mix. Add milk as needed for spreadable texture.
  2. Remove rolls from oven, let cool for 5 minutes, then spread cream cheese icing over warm rolls. Serve warm.

These rolls are great for guests and can be made ahead. Store in an airtight container for 2 days at room temperature or refrigerate for up to 4 days.

Breakfast, Snack
American
Baked Goods, Bread Machine, Cinnamon Rolls, Cream Cheese Icing, Easy Recipe

Shellfish Chowder recipe

Bowl of creamy shellfish chowder with fresh ingredients

Shellfish chowder is the perfect comfort food, bringing cozy vibes to your kitchen. This creamy, delightful soup is packed with fresh shellfish and a medley of vegetables, making it a favorite for many. When you take a spoonful, you can taste the ocean, along with a blend of rich flavors that dance on your palate. It’s rich, satisfying, and a guaranteed crowd-pleaser for family gatherings or special occasions. Plus, making your own chowder at home is easier than you might think! Let’s dive into this delicious recipe and discover how you can create your very own bowl of shellfish goodness.

How to Prepare Shellfish Chowder

  1. Start by gathering all your ingredients. You will need fresh shellfish like clams or mussels, diced potatoes, onion, celery, garlic, heavy cream, chicken broth, butter, and seasonings.
  2. In a large pot, melt the butter over medium heat. Sauté the onions, celery, and garlic until they are soft.
  3. Add the diced potatoes and pour in the chicken broth. Let everything simmer until the potatoes are tender.
  4. Now, add the fresh shellfish and cover the pot. Cook until the shells open up, which should only take a few minutes.
  5. Finally, stir in the heavy cream and season with salt and pepper to taste. Let it cook for another few minutes to thicken the chowder a bit.
  6. Serve hot, garnished with some fresh parsley, and enjoy!

Shellfish Chowder

Why You’ll Love Shellfish Chowder

Shellfish chowder is not just tasty, it’s also nourishing. The creamy broth wraps around every bite of tender shellfish, bringing a luxurious feel. It’s also very versatile, so you can include your favorite seafood or adjust according to what you have on hand. This chowder is sure to warm you from the inside out, making it perfect for chilly nights. Its inviting aroma will make everyone excited to dig in!

Tips for Success

  • Make sure the shellfish is fresh. Always check for a clean smell and ensure the shells are tightly closed before cooking.
  • Play with your ingredients! You can add corn, carrots, or even some herbs for extra flavor.
  • For a thicker chowder, mash some of the potatoes while cooking, or you can add a little cornstarch mixed with water.

Serving Suggestions

Shellfish chowder pairs beautifully with crusty bread or a fresh green salad. You can also serve it topped with crispy bacon bits or a sprinkle of cheese for a little extra indulgence. A side of garlic bread makes it perfect for soaking up every bit of that delicious chowder!

FAQs

What type of shellfish works best for chowder?

Clams and mussels are the most common choices, but shrimp and scallops also work great. You can use a mix for more flavor!

Can I make shellfish chowder ahead of time?

Yes, you can prepare it ahead and keep it in the fridge. Just remember to reheat gently to avoid overcooking the shellfish.

What can I do if the chowder is too thick?

If your chowder turns out too thick, simply add a little more chicken broth or some water until it reaches your desired consistency.

Shellfish Chowder

Shellfish Chowder

A creamy, delightful soup packed with fresh shellfish and vegetables, perfect for any gathering.

Vegetables and Seasonings

  • 1 large onion, diced
  • 2 sticks celery, diced
  • 2 cloves garlic, minced
  • 2 cups diced potatoes
  • 4 cups chicken broth
  • 1 cup heavy cream
  • Salt to taste
  • Pepper to taste

Shellfish

  • 2 cups fresh shellfish (clams or mussels) (Ensure they are fresh and tightly closed before cooking.)

For Cooking

  • 2 tablespoons butter (For sautéing vegetables.)

Preparation

  1. Gather all your ingredients.

Cooking

  1. In a large pot, melt the butter over medium heat. Sauté the onions, celery, and garlic until soft.
  2. Add diced potatoes and pour in the chicken broth. Let simmer until the potatoes are tender.
  3. Add the fresh shellfish and cover the pot. Cook until the shells open up, about a few minutes.
  4. Stir in the heavy cream and season with salt and pepper. Cook for a few more minutes to thicken the chowder.
  5. Serve hot, garnished with fresh parsley, and enjoy!

Tips for Success: Make sure the shellfish is fresh. Play with your ingredients by adding corn, carrots, or herbs. For a thicker chowder, mash some potatoes or add cornstarch mixed with water.

Main Course, Soup
American, Seafood
Chowder, Comfort Food, Easy Recipe, Seafood Soup, Shellfish

Classic Vegetable Beef Soup

A bowl of classic vegetable beef soup with fresh vegetables and tender beef.

Classic Vegetable Beef Soup feels like a warm hug on a cool day. It is a simple, hearty beef and vegetable soup that many people love. The soup has tender beef, bright vegetables, and a rich broth, it is both filling and healthy. I share this easy soup recipe because it pleases a crowd and works for weeknight dinners or for a big family meal, and if you enjoy other cozy bowls you might also like a creamy Reuben soup recipe that gives a different, rich flavor. Get ready to make a pot, and smile when the house fills with a great smell.

How to prepare Classic Vegetable Beef Soup

This simple guide shows you how to make a warm pot of Classic Vegetable Beef Soup. Use stew beef or leftover roast, fresh or frozen vegetables, and a good beef broth for great taste.

Ingredients (for about 6 servings)

  • 1 to 1 1/2 pounds beef, cut into bite size pieces
  • 2 tablespoons oil
  • 1 large onion, chopped
  • 2 carrots, sliced
  • 2 celery stalks, sliced
  • 2 potatoes, peeled and cubed
  • 1 can (14 oz) diced tomatoes, with juice
  • 6 cups beef broth
  • 1 cup green beans, cut
  • 1 cup corn, fresh or frozen
  • 2 cloves garlic, minced
  • 1 bay leaf
  • 1 teaspoon dried thyme or 1 tablespoon fresh, chopped
  • Salt and pepper to taste
  • 2 tablespoons chopped fresh parsley, optional

Step by step

  1. Heat oil in a large pot over medium heat. Brown the beef in batches, do not crowd the pan, then set the beef aside.
  2. In the same pot, add onion, carrots, and celery. Cook until the onion is soft, about 5 minutes. Add garlic, stir for 30 seconds.
  3. Return the beef to the pot, add potatoes, diced tomatoes with juice, and beef broth. Add bay leaf and thyme. Bring to a boil.
  4. Lower the heat, cover, and simmer for 45 minutes to 1 hour, until the beef is tender.
  5. Add green beans and corn. Cook 10 more minutes, until the vegetables are tender.
  6. Taste and add salt and pepper. Stir in parsley if you like. Remove the bay leaf before serving.

Classic Vegetable Beef Soup

Why You’ll Love Classic Vegetable Beef Soup

  • It is a hearty soup, full of beef and vegetables, so it makes a full meal in one pot.
  • The flavors get better the next day, so it is great for leftovers.
  • You can change the vegetables to what you have, so it is flexible and easy.
  • It is both comfort food and a simple weeknight dinner, it suits many tastes.

Tips for success

  • Brown the beef well, browning gives the soup more flavor.
  • Cut vegetables in even sizes so they cook the same time.
  • Taste and adjust salt and pepper at the end, the broth or canned tomatoes can add salt.
  • If the soup seems thin, simmer with the lid off a little to reduce and thicken, or mash some potatoes in the pot.
  • Use a mix of fresh and frozen vegetables when you need to save time.

Serving Suggestions

  • Serve with crusty bread or a warm roll to soak up the broth.
  • A side salad, simple and green, adds a fresh touch.
  • Top with a sprinkle of fresh parsley or grated cheese for extra flavor.
  • For a heartier meal, serve over cooked rice or with buttered noodles.

Classic Vegetable Beef Soup

FAQs

Q: Can I use ground beef instead of stew beef?

A: Yes, you can. Brown the ground beef and drain extra fat. Add it back to the pot with the broth, the soup will be a little different, but still good.

Q: How long does this soup last in the fridge?

A: Store in a covered container, it will keep 3 to 4 days in the refrigerator. Reheat on the stove until hot.

Q: Can I freeze Classic Vegetable Beef Soup?

A: Yes, cool the soup, put it in freezer safe containers, and freeze up to 3 months. Thaw in the fridge overnight and reheat gently.

Q: Can I make this soup in a slow cooker or Instant Pot?

A: Yes, for a slow cooker, brown the beef first, then add all ingredients and cook on low for 6 to 8 hours. For an Instant Pot, brown the beef with sauté, add the rest, and cook on high pressure for 20 minutes, then quick release.

Q: How can I make the broth richer?

A: Use a good quality beef broth, or add a spoon of tomato paste while cooking, simmer a bit longer, it will deepen the flavor.

Classic Vegetable Beef Soup

A hearty and flavorful soup that combines tender beef with bright vegetables in a rich broth, perfect for cozy meals any day of the week.

Main Ingredients

  • 1-1.5 pounds beef, cut into bite-size pieces (Stew beef or leftover roast can be used.)
  • 2 tablespoons oil (For browning the beef.)
  • 1 large onion, chopped
  • 2 units carrots, sliced
  • 2 units celery stalks, sliced
  • 2 units potatoes, peeled and cubed
  • 1 can (14 oz) diced tomatoes, with juice
  • 6 cups beef broth (Use good quality beef broth.)
  • 1 cup green beans, cut (Fresh or frozen.)
  • 1 cup corn (Fresh or frozen.)
  • 2 cloves garlic, minced
  • 1 leaf bay leaf
  • 1 teaspoon dried thyme (Or 1 tablespoon fresh, chopped.)
  • Salt and pepper to taste
  • 2 tablespoons chopped fresh parsley (Optional, for garnish.)

Preparation

  1. Heat oil in a large pot over medium heat.
  2. Brown the beef in batches, do not crowd the pan, then set the beef aside.

Cooking

  1. In the same pot, add onion, carrots, and celery. Cook until the onion is soft, about 5 minutes.
  2. Add garlic, stir for 30 seconds.
  3. Return the beef to the pot, add potatoes, diced tomatoes with juice, and beef broth.
  4. Add bay leaf and thyme. Bring to a boil.
  5. Lower the heat, cover, and simmer for 45 minutes to 1 hour, until the beef is tender.
  6. Add green beans and corn. Cook 10 more minutes, until the vegetables are tender.
  7. Taste and add salt and pepper. Stir in parsley if you like.
  8. Remove the bay leaf before serving.

Brown the beef well for more flavor. Cut vegetables in even sizes to cook uniformly. If the soup seems thin, simmer with the lid off to thicken, or mash some potatoes in the pot.

Main Course, Soup
American
Comfort Food, Cozy Soup, Healthy Soup, Hearty Meal, Vegetable Beef Soup

Popular and tasteful Starbucks Pink Drink recipe

Starbucks Pink Drink - a refreshing berry-flavored beverage

I love a cold, fruity drink on a warm day, and the Starbucks Pink Drink fits that feeling perfectly. It is light, sweet, and creamy, with a pretty pink color that makes it fun to drink. This copycat Starbucks Pink Drink recipe is easy to make at home, and many people like it because it tastes like a mix of strawberries, acai, and coconut milk. If you enjoy colorful cold drinks, you might also like the Witches Brew drink recipe for another playful choice. Get ready to make a crowd-pleasing, tasty Pink Drink that feels special, and maybe a little bit magical.

How to prepare Starbucks Pink Drink

Ingredients

  • 1 cup coconut milk, chilled (use canned or boxed coconut milk drink)
  • 1/2 cup brewed and chilled hibiscus tea, or strawberry acai refresher base if you have it
  • 1/2 cup sliced fresh strawberries, or 2 tablespoons freeze-dried strawberries
  • 1 to 2 tablespoons simple syrup or sweetener, to taste
  • 1 cup ice
  • Optional, a few freeze-dried strawberry pieces for garnish

Directions

  1. If you use fresh strawberries, mash them lightly with a fork or blend briefly.
  2. In a tall glass or shaker, add the chilled hibiscus tea or refresher base and the simple syrup.
  3. Stir in the coconut milk, then add the mashed or freeze-dried strawberries.
  4. Add ice and shake or stir well until the drink looks smooth and pink.
  5. Pour into a glass and top with a few freeze-dried strawberry pieces if you like.

Starbucks Pink Drink

Why You’ll Love Starbucks Pink Drink

  • It is creamy and fruity, with a soft coconut milk texture.
  • The drink has bright strawberry flavor and a mild acai note, like a strawberry acai refresher.
  • It looks fun and pink, so it is great for parties or a treat.
  • You can make it quickly with simple ingredients you can find at the store.

Tips for success

  • Chill all liquids first, so the drink stays cold and not watered down.
  • Use freeze-dried strawberries for a stronger strawberry color and crunch.
  • Adjust sweetness slowly, taste as you go, many people like it lightly sweet.
  • If you want a thicker drink, add less tea and more coconut milk or a few frozen strawberries.
  • For a dairy option, you can use half-and-half instead of coconut milk, but the taste will change.

Serving Suggestions

  • Serve in a clear glass to show off the pink color.
  • Add a paper straw and a few strawberry slices on top for a pretty drink.
  • Pair with a light snack, like a lemon cookie or a plain scone.
  • Make a batch for friends, and let each person add extra fruit or syrup to taste.

Starbucks Pink Drink

FAQs

Q: Can I use regular milk instead of coconut milk? A: Yes, you can use regular milk or a milk alternative. Coconut milk gives the original taste, but any milk will work.

Q: Is the Pink Drink vegan? A: With coconut milk and no honey, yes it is vegan. Check your sweetener to be sure.

Q: Can I make it without hibiscus tea? A: Yes, you can use chilled water with a little white grape juice, or use a strawberry acai base if you have it.

Q: How do I make it less sweet? A: Use less simple syrup or skip it. The fruit and tea add flavor, so you may not need much sugar.

Conclusion

If you want to see the original Starbucks Pink Drink and compare menus or nutrition details, check the official page for the Pink Drink: Starbucks Coffee Company. Enjoy making your own version at home, and have fun with the color and flavor.

Starbucks Pink Drink

A creamy, fruity drink that tastes like a mix of strawberries, acai, and coconut milk. Perfect for warm days and fun gatherings.

Main ingredients

  • 1 cup coconut milk, chilled ((use canned or boxed coconut milk drink))
  • 1/2 cup brewed and chilled hibiscus tea ((or strawberry acai refresher base if you have it))
  • 1/2 cup sliced fresh strawberries ((or 2 tablespoons freeze-dried strawberries))
  • 1 to 2 tablespoons simple syrup or sweetener (to taste)
  • 1 cup ice
  • optional a few freeze-dried strawberry pieces (for garnish)

Preparation

  1. If using fresh strawberries, mash them lightly with a fork or blend briefly.
  2. In a tall glass or shaker, add the chilled hibiscus tea or refresher base and the simple syrup.
  3. Stir in the coconut milk, then add the mashed or freeze-dried strawberries.
  4. Add ice and shake or stir well until the drink looks smooth and pink.
  5. Pour into a glass and top with a few freeze-dried strawberry pieces if desired.

Chill all liquids first for the best taste. Use freeze-dried strawberries for enhanced color and texture. Adjust sweetness to your preference and experiment with dairy alternatives if needed.

Beverage, Cocktail
American
Cold Beverage, Fruity Drink, Pink Drink, Starbucks Copycat, Summer Drink

Paula Deen’s Banana Pudding

Delicious Paula Deen's Banana Pudding served in a bowl with banana slices on top

Paula Deen’s Banana Pudding is a warm, sweet Southern dessert that many people love. It feels like home, with soft banana slices, creamy pudding, and crunchy Nilla wafers. This article shares the simple, crowd-pleasing recipe for Paula Deen’s Banana Pudding, and it shows why this banana pudding recipe is a favorite at family dinners and potlucks. If you like easy banana dessert ideas, you might also enjoy banana pudding dream bars as another tasty treat to try.

How to prepare Paula Deen’s Banana Pudding

  1. Make a smooth pudding mix, following Paula Deen style with vanilla flavor and a touch of sweet milk for richness.
  2. Slice ripe bananas into even rounds.
  3. Layer vanilla wafers in a dish, add a layer of sliced bananas, then spread a layer of the creamy pudding.
  4. Repeat layers until the dish is full, ending with a thick layer of pudding on top.
  5. Chill the pudding for a few hours so it sets and the wafers soften a little.
  6. Before serving, top with whipped cream or toasted meringue if you like.

Paula Deen's Banana Pudding

Why You’ll Love Paula Deen’s Banana Pudding

  • It tastes creamy and sweet, with fresh banana flavor.
  • It is easy to make with simple pantry items, like vanilla pudding and Nilla wafers.
  • It makes a large dish that feeds a crowd, so it is perfect for family meals and parties.
  • The mix of soft banana, smooth pudding, and a little crunch makes every bite pleasing.

Tips for success

  • Use ripe but firm bananas, they add flavor but keep shape.
  • Let the pudding chill for at least 2 hours, longer is better for texture.
  • If you want firmer layers, wait to add wafers until just before serving.
  • For extra creaminess, fold a bit of whipped cream into the pudding.
  • Keep the dessert covered in the fridge to stop it from drying out.

Serving Suggestions

  • Serve in a big trifle dish for a showy table dessert.
  • Spoon into small bowls for single servings.
  • Add a few toasted nuts or a sprinkle of cinnamon on top for extra flavor.
  • Pair with coffee or sweet tea for a true Southern feel.

Paula Deen's Banana Pudding

FAQs

Q: How long can I keep banana pudding in the fridge?

A: You can keep it covered in the fridge for 3 to 4 days. The bananas may get softer with time.

Q: Can I make this pudding ahead of time?

A: Yes, make it a day ahead and chill it. It often tastes better after a few hours.

Q: Can I use homemade pudding instead of instant?

A: Yes, homemade pudding works fine and gives a rich, fresh taste.

Q: Do I need to add whipped topping?

A: No, whipped topping is optional. It adds lightness, but plain pudding is great too.

Conclusion

This Paula Deen banana pudding recipe brings a creamy, sweet Southern treat to your table that many people will enjoy. For the original Paula Deen version and full recipe details, see Paula Deen’s Not Yo Mama’s Banana Pudding recipe.

Banana Pudding

A warm, sweet Southern dessert featuring creamy pudding, fresh bananas, and crunchy Nilla wafers, perfect for family dinners and potlucks.

Pudding Mixture

  • 1 box vanilla pudding mix (Follow directions on the package)
  • 2 cups sweet milk (Used for richness)

Banana and Wafer Layers

  • 4 medium ripe bananas (Slice into even rounds)
  • 1 box Nilla wafers (To be layered in the dish)

Topping (optional)

  • 1 cup whipped cream (For serving, optional)
  • 1 cup toasted meringue (For serving, optional)

Preparation

  1. Make the pudding mix according to package directions, using vanilla flavor and sweet milk.
  2. Slice the ripe bananas into even rounds.

Layering

  1. In a dish, layer vanilla wafers, followed by a layer of sliced bananas, and then spread a layer of creamy pudding.
  2. Repeat the layers until the dish is full, ending with a thick layer of pudding on top.

Chilling

  1. Chill the pudding for at least 2 hours to set and soften the wafers.

Serving

  1. Before serving, top with whipped cream or toasted meringue, if desired.

For better texture, let the pudding chill for longer than 2 hours. Store covered in the fridge to prevent drying out. Serve in a big trifle dish or small bowls. Add toasted nuts or a sprinkle of cinnamon for extra flavor.

Dessert, Sweet Treat
Southern
Banana Pudding, easy dessert, Family Favorite, Paula Deen Recipe, Southern Dessert

Banana Pudding Dream Bars

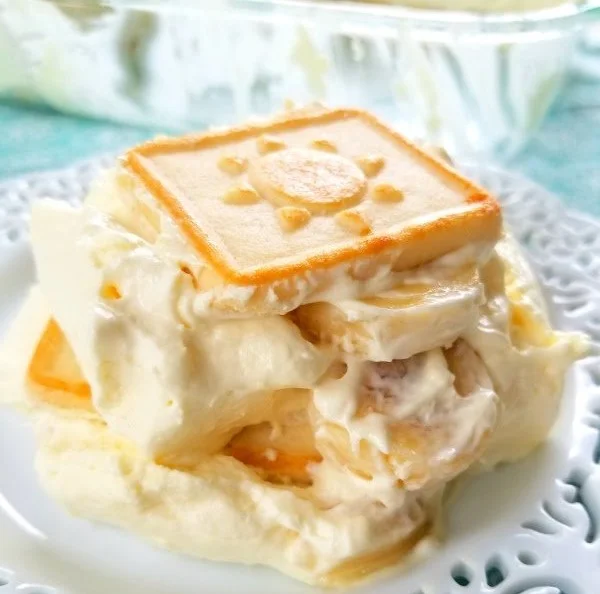
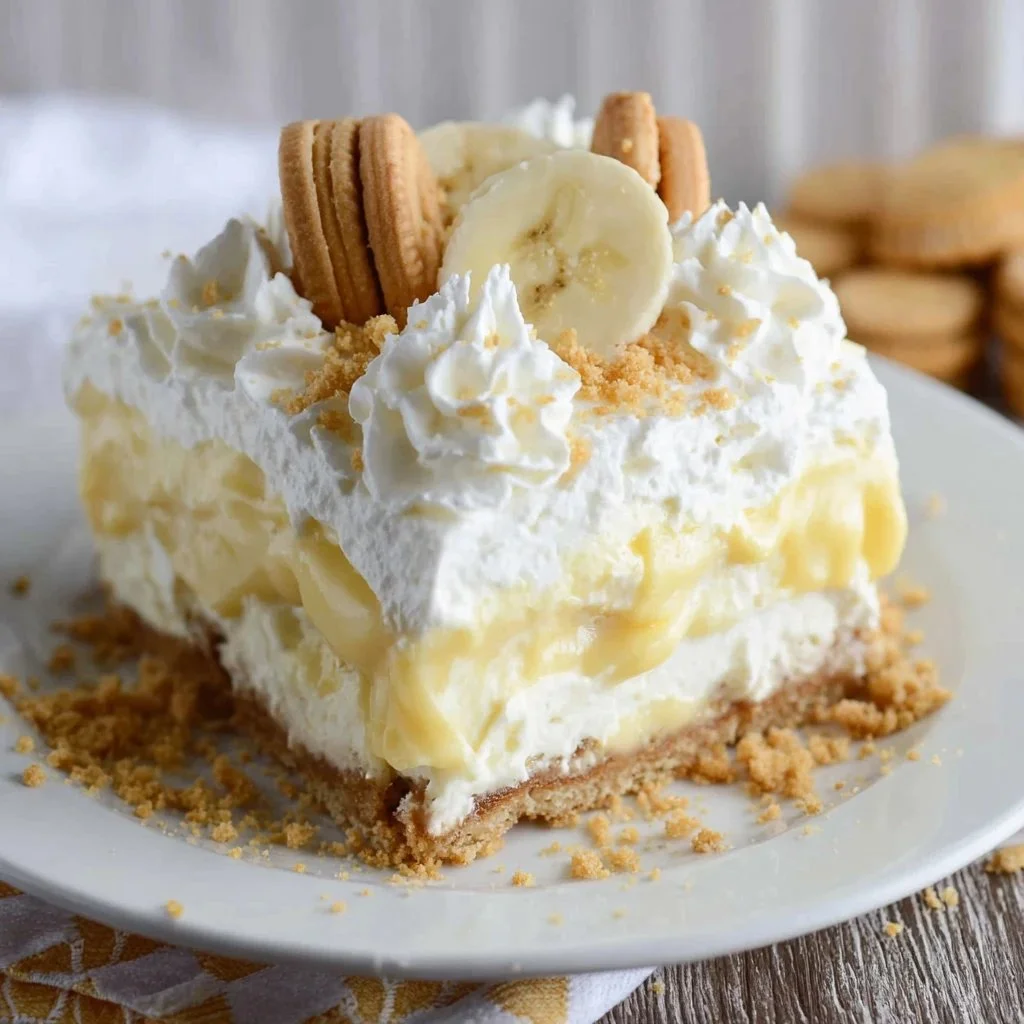
Delicious Banana Pudding Dream Bars ready to be served.

Banana pudding dream bars feel like a cozy hug in dessert form. They combine sweet banana slices, creamy vanilla pudding, and crunchy cookie crumbs into a soft, scoopable bar that people love at potlucks and family dinners. This layered dessert brings bright banana flavor and smooth cream cheese or pudding filling together for a simple crowd-pleaser. If you like small, easy banana desserts, try these mini banana pudding cheesecakes for another fun idea. Get ready to bake, chill, and enjoy a tasty treat that people will ask for again.

How to prepare Banana Pudding Dream Bars

  1. Preheat the oven to 350 degrees F. Line an 9×13 pan with foil or parchment and spray lightly.
  2. Make the crust, mix 2 cups crushed vanilla wafers or graham crumbs with 6 tablespoons melted butter and 2 tablespoons sugar. Press into the pan and bake 8 minutes then cool.
  3. For the filling, beat 8 ounces cream cheese until smooth. Add 1 can sweetened condensed milk and mix well. Stir in 1 cup cold milk and 1 package instant vanilla pudding, beat until thick. Fold in a cup of whipped topping if you like a lighter texture.
  4. Layer sliced ripe bananas over the cooled crust in a single layer. Pour the pudding mixture over the bananas and spread evenly.
  5. Add a final layer of crushed cookies, extra banana slices, or whipped topping. Chill at least 3 hours or until set, overnight for best slices.
  6. To serve, lift the foil and cut into bars. Clean the knife between cuts for neat squares, serve cold.


Banana Pudding Dream Bars

Why You’ll Love Banana Pudding Dream Bars

  • They taste like classic banana pudding, but you serve them as easy bars.
  • The mix of creamy vanilla pudding and sweet banana makes a comforting, familiar dessert.
  • You can make them ahead, chill, and bring to parties with little fuss.
  • They use simple pantry items, like vanilla pudding mix, Nilla wafers, cream cheese, and bananas, so they are quick to pull together.

Tips for success

  • Use ripe but firm bananas, not too brown, so the bars look fresh.
  • Chill long enough, at least 3 hours, to let the filling set so bars slice clean.
  • Press the crust firmly so it holds together when you cut bars.
  • If you want less sweetness, use low sugar pudding or reduce sweetened condensed milk a bit.
  • Add a thin layer of banana slices and a little lemon juice to stop browning if you will chill for a long time.

Serving Suggestions

  • Top with whipped cream and a dusting of crushed vanilla wafers.
  • Serve with fresh berries for color and a bright note.
  • Offer coffee or cold milk, both match the creamy flavor well.
  • Cut small squares for a potluck, or larger bars for a family dessert.


Banana Pudding Dream Bars

FAQs

Q: How long do these bars last in the fridge?

A: Store in an airtight container, they stay good 3 to 4 days chilled.

Q: Can I freeze Banana Pudding Dream Bars?

A: Yes, wrap bars well, freeze up to 1 month. Thaw in the fridge before serving.

Q: Can I make these without cream cheese?

A: Yes, use extra pudding and whipped topping for a lighter filling, the texture will be softer.

Q: Can I use homemade pudding?

A: You can, but instant vanilla pudding gives a firm set fast, which helps bars hold shape.

Banana Pudding Dream Bars

A cozy dessert combining sweet banana slices, creamy vanilla pudding, and crunchy cookie crumbs into soft, scoopable bars, perfect for gatherings.

Crust

  • 2 cups crushed vanilla wafers or graham crumbs (You can substitute with graham crackers if preferred.)
  • 6 tablespoons melted butter (Melted for mixing into the crust.)
  • 2 tablespoons sugar (Adds sweetness to the crust.)

Filling

  • 8 ounces cream cheese (Beat until smooth before mixing.)
  • 1 can sweetened condensed milk (Add to cream cheese and mix well.)
  • 1 cup cold milk (Used to help thicken pudding mixture.)
  • 1 package instant vanilla pudding (Ensure it’s instant for the right texture.)
  • 1 cup whipped topping (Fold in for a lighter texture.)
  • 3 medium ripe bananas (Sliced for layering.)

Toppings

  • additional crushed cookies, extra banana slices, or whipped topping (For a final layer before chilling.)

Preparation

  1. Preheat the oven to 350°F (175°C). Line a 9×13 pan with foil or parchment and spray lightly.
  2. In a bowl, mix 2 cups crushed vanilla wafers or graham crumbs with 6 tablespoons melted butter and 2 tablespoons sugar. Press into the bottom of the pan and bake for 8 minutes; then cool.

Filling

  1. Beat 8 ounces cream cheese until smooth, then add 1 can sweetened condensed milk and mix well.
  2. Stir in 1 cup cold milk and 1 package instant vanilla pudding, and beat until thick.
  3. Fold in 1 cup of whipped topping for a lighter filling texture.
  4. Layer sliced ripe bananas over the cooled crust in a single layer.
  5. Pour the pudding mixture over the bananas and spread evenly.
  6. Add a final layer of crushed cookies, extra banana slices, or whipped topping.
  7. Chill for at least 3 hours, or overnight for best results.

Serving

  1. Lift the foil from the pan and cut the bars into squares. Clean the knife between cuts for neat squares and serve cold.

Use ripe but firm bananas for best appearance. Chill the bars long enough to let the filling set. For less sweetness, use low sugar pudding or reduce the sweetened condensed milk. Add a thin layer of banana slices with a bit of lemon juice to prevent browning if chilling for a long time.

Dessert, Sweet Treat
American
Banana Desserts, Banana Pudding, Dessert Bars, No-Bake Desserts, Potluck Dessert

Lasagna with Cottage Cheese

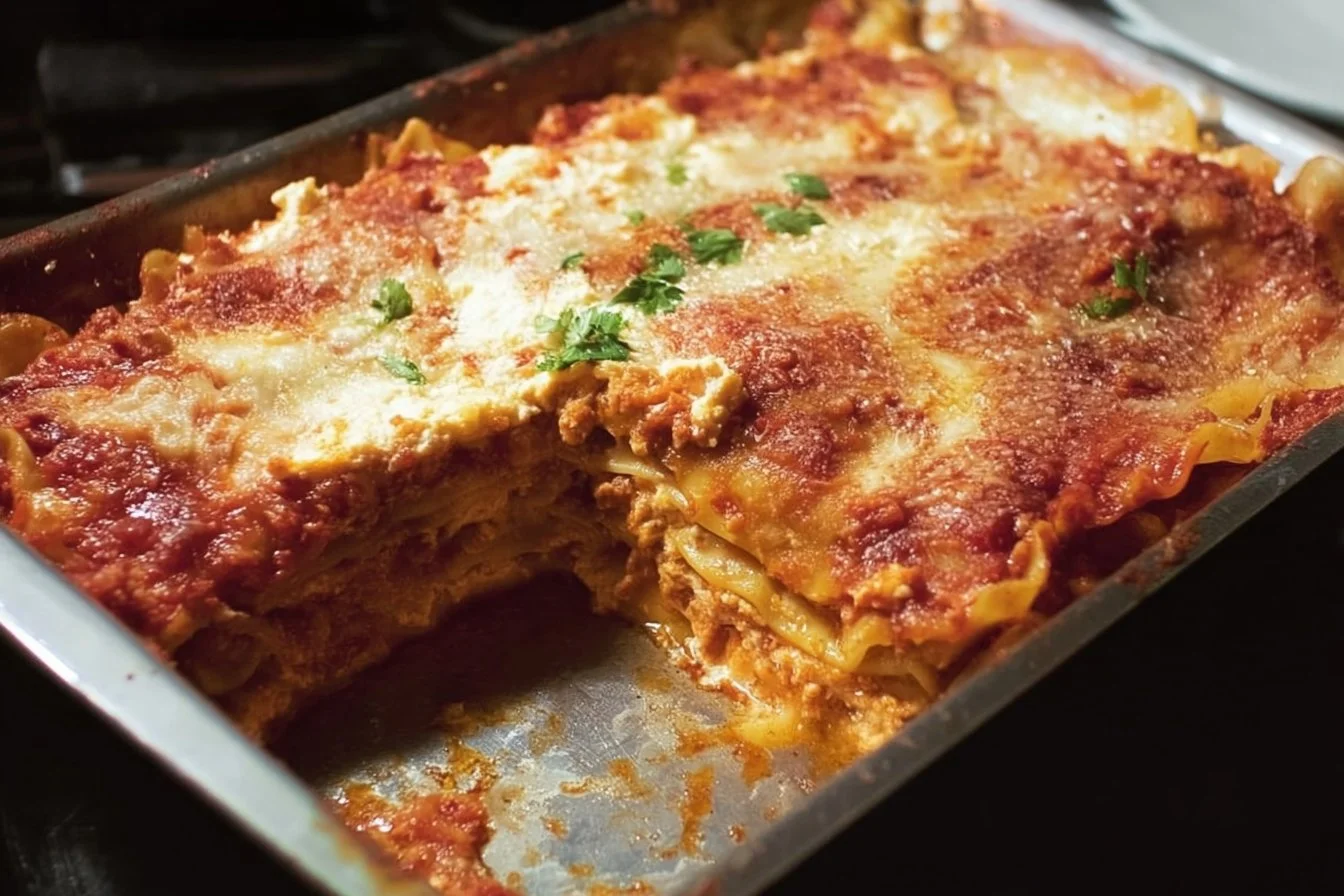
Delicious lasagna layered with cottage cheese, marinara sauce, and fresh herbs

Lasagna with Cottage Cheese is a dish that brings comfort to any table. With its layers of rich sauce, hearty noodles, and creamy cottage cheese, this recipe is sure to please everyone. It’s a wonderful blend of flavors, and the cottage cheese adds a unique twist that makes it both light and satisfying. This dish is perfect for family gatherings or cozy nights in, where the smell of bubbling cheese fills the air and everyone gathers around to enjoy. This lasagna isn’t just another pasta dish, it’s a crowd-pleaser that makes each meal feel special. Plus, who can resist those warm, cheesy layers? Let’s dive into how to prepare this delicious Lasagna with Cottage Cheese and bring some warmth to your dinner table.

How to Prepare Lasagna with Cottage Cheese

To make Lasagna with Cottage Cheese, you will need the following ingredients:

  • 9 lasagna noodles
  • 2 cups cottage cheese
  • 2 cups shredded mozzarella cheese
  • 1 pound ground beef or turkey
  • 1 jar (24 ounces) marinara sauce
  • 1 teaspoon dried Italian herbs
  • Salt and pepper to taste
  • Fresh basil for garnish (optional)

First, preheat your oven to 375°F (190°C). Cook the lasagna noodles according to the package directions, then drain and set them aside. In a skillet, cook the ground meat over medium heat until fully browned. Drain excess grease and add the marinara sauce, stirring to combine. In a bowl, mix the cottage cheese with half of the mozzarella, Italian herbs, salt, and pepper.

In a baking dish, spread a layer of the meat sauce, then place three lasagna noodles on top, followed by the cottage cheese mixture. Repeat this layering until all ingredients are used, finishing with a layer of meat sauce on top. Sprinkle the remaining mozzarella cheese over the top layer. Cover with foil and bake for 25 minutes, uncovering for another 10 minutes until the cheese is bubbly. Let it cool for a few minutes before serving.

Easy Lasagna with Cottage Cheese

Why You’ll Love Lasagna with Cottage Cheese

You will love Lasagna with Cottage Cheese for many reasons. First, it’s incredibly easy to make, making it a perfect choice for busy weeknights or special occasions. The cottage cheese creates a creamy texture that contrasts beautifully with the rich sauce and layers of pasta. Plus, this dish is packed with protein, making it filling without being too heavy.

Another reason to adore this lasagna is its versatility. You can easily customize it by adding your favorite vegetables, like spinach or mushrooms, or swapping the meat for a plant-based alternative. This means everyone can enjoy it, whether they are meat lovers or vegetarians. The warm, cheesy goodness makes it a hit with both kids and adults alike. Once you serve it, be prepared for compliments!

Tips for Success

Getting the perfect Lasagna with Cottage Cheese can be simple if you follow these tips. First, make sure to cook your lasagna noodles until they are al dente, as they will soften further while baking. Use a good quality marinara sauce for the best flavor, or try making your own for an extra special touch.

When layering, don’t overdo the cottage cheese mixture, as you want to maintain a balance between all components. Allow the lasagna to rest for a few minutes after taking it out of the oven. This helps it set and makes it easier to cut into neat slices. If you want extra flavor, sprinkle some grated Parmesan cheese over the top before baking. Lastly, if you like extra cheesy goodness, feel free to add more mozzarella!

Serving Suggestions

Lasagna with Cottage Cheese pairs wonderfully with a crisp green salad and a side of garlic bread. The freshness of a salad complements the rich lasagna, creating a balanced meal. You could use ingredients like romaine lettuce, cherry tomatoes, and a light vinaigrette for a refreshing touch.

For a more Italian-inspired feast, serve it alongside bruschetta or antipasto. Your guests will love nibbling on these appetizers before diving into the main course. If you’re hosting a gathering, consider offering a selection of wines to enjoy with the lasagna, such as a smooth Chianti or a light Pinot Grigio. And don’t forget dessert! A slice of classic Tiramisu would make a lovely finish to your meal.

FAQs

Can I make this lasagna ahead of time?
Yes, you can assemble the lasagna a day in advance and store it in the refrigerator before baking. Just add a few extra minutes to the baking time if it’s cold from the fridge.

Can I freeze leftover lasagna?
Absolutely! You can freeze individual portions or the entire pan. Just wrap it well and store it for up to 3 months.

What can I substitute for cottage cheese?
You can use ricotta cheese if you prefer a creamier texture, or even a vegan alternative made from tofu or cashews if you want a dairy-free option.

Lasagna with Cottage Cheese

A healthier and delicious twist on classic lasagna featuring layers of pasta, marinara sauce, and creamy cottage cheese.

For the Lasagna

  • 9 noodles 9 lasagna noodles (Use no-boil noodles if preferred.)
  • 2 cups 2 cups of cottage cheese (Can substitute with ricotta cheese for richer taste.)
  • 1 large 1 egg (Used to bind the cottage cheese mixture.)
  • 1 teaspoon 1 teaspoon of garlic powder (For added flavor.)
  • 1 teaspoon 1 teaspoon of dried oregano (For seasoning.)
  • 3 cups 3 cups of marinara sauce (Fresh marinara sauce recommended.)
  • 2 cups 2 cups of shredded mozzarella cheese (Reserve some for topping.)

Preparation

  1. Preheat your oven to 375°F (190°C).
  2. In a mixing bowl, combine cottage cheese, egg, garlic powder, and dried oregano. Mix well.
  3. Spread a thin layer of marinara sauce on the bottom of a 9 x 13 inch baking dish.
  4. Layer 3 lasagna noodles over the sauce. Spread half of the cottage cheese mixture over the noodles.
  5. Add another layer of marinara sauce, and then sprinkle with 1 cup of shredded mozzarella cheese.
  6. Repeat the layers: add 3 more noodles, the other half of the cottage cheese mixture, more sauce, and 1 cup of mozzarella.
  7. Top with the final 3 noodles, more marinara sauce, and a sprinkle of remaining mozzarella cheese.

Baking

  1. Cover the dish with foil and bake for 25 minutes.
  2. Remove the foil and bake for another 15 minutes, or until the cheese is bubbly and golden.
  3. Let it cool for a few minutes before slicing and serving.

Use fresh ingredients for the best flavor. Allow lasagna to rest for 10 minutes after baking for easier slicing.

Dinner, Main Course
Italian
Cottage Cheese, Easy Lasagna, Family Dinner, Healthy Recipe, Lasagna

Loaded Tater Tots Appetizers

Delicious loaded tater tots appetizers topped with cheese and toppings

There’s something truly special about Loaded Tater Tots Appetizers. These bite-sized delights are the perfect combination of crispy, cheesy goodness, topped with all your favorite flavors. Imagine golden-brown tater tots, smothered in melted cheese, crispy bacon bits, and freshly chopped green onions. It’s no surprise that this dish has become a favorite for parties, game days, and casual gatherings. Anyone who takes a bite will instantly smile and ask for more. If you’re looking for a fun and delicious appetizer that is sure to impress your guests, then Loaded Tater Tots are your answer. Get ready to roll up your sleeves and make these fabulous treats at home!

How to Prepare Loaded Tater Tots Appetizers

To make Loaded Tater Tots Appetizers, start by preheating your oven to 425°F (220°C). Spread a bag of frozen tater tots evenly on a baking sheet and bake them according to the package instructions, usually around 20 to 25 minutes, until they are golden and crispy. While the tater tots are baking, prepare your toppings. In a small bowl, mix cooked and crumbled bacon, shredded cheese, and chopped green onions. Once the tater tots are done, take them out of the oven and sprinkle the cheese mixture generously over the top. Return the baking sheet to the oven for an additional 5 minutes, or until the cheese is melted and bubbly. Remove from the oven and finish with a drizzle of sour cream or ranch dressing, as well as a sprinkle of extra green onions. Serve warm and enjoy every delicious bite.

Why You’ll Love Loaded Tater Tots

Loaded Tater Tots are not just any appetizer, they are a flavor explosion! The crunchy texture of the tots pairs beautifully with the gooey melted cheese and savory bacon. They are also super easy to make, which means you can whip them up in no time, whether it’s for a movie night or a casual get-together with friends. The customizable toppings make each serving unique, allowing everyone to enjoy their own perfect version. Plus, who can resist a dish that combines crispy potatoes and all that cheesy goodness? You will find that these tempting treats disappear quickly, leaving everyone craving more.

Tips for Success

To ensure your Loaded Tater Tots turn out perfectly every time, here are some simple tips. First, make sure to spread the tater tots in a single layer on the baking sheet for even cooking. This helps them get crispy all around. Use a mix of cheeses for extra flavor; cheddar and Monterey Jack work great together. Don’t be shy with the toppings, as they’re what make these tater tots truly loaded! For added crunch, try adding some chopped jalapeños for a spicy kick or some fresh diced tomatoes for a burst of freshness. Lastly, serve them right away to enjoy the cheesy goodness at its best.

Serving Suggestions

Loaded Tater Tots Appetizers can be served as a fun starter or a side dish at any meal. They pair wonderfully with a variety of dips like salsa, guacamole, or creamy ranch dressing. For a full meal experience, consider serving them alongside BBQ wings or sliders to create a delicious spread. They make a festive addition to any potluck or game day party too, sure to bring everyone together over their love for these tasty bites. Don’t forget to garnish with extra toppings like cilantro or sour cream for an extra touch of flavor!

FAQs

Can I make Loaded Tater Tots in an air fryer?
Yes, you can prepare them in an air fryer! Simply cook the tater tots as instructed, then follow the same loading and baking process.

Can I use fresh potatoes instead of frozen?
Absolutely! You can cut fresh potatoes into bite-sized pieces, blanch them, and then bake until crispy.

How do I store leftovers?
Store any leftovers in an airtight container in the fridge for up to three days. Reheat them in the oven or air fryer to restore their crispiness!

Loaded Tater Tots Appetizers

Crispy golden Tater Tots topped with melted cheese, crispy bacon, fresh toppings, and a drizzle of creamy sauce make for a fun and flavorful snack or side dish.

Main ingredients

  • 24 oz Frozen Tater Tots (Spread in a single layer on a baking sheet)
  • 8 oz Shredded cheese (Use your favorite type of cheese)
  • 6 oz Bacon (Cook until crispy and crumble on top)
  • 1 cup Sour cream (For drizzling on top)
  • 3 tbsp Green onions (Chopped, for garnish)

Preparation

  1. Preheat your oven to 400°F (200°C).
  2. Spread the frozen Tater Tots on a baking sheet in a single layer.
  3. Bake in the preheated oven for about 20-25 minutes or until they are golden brown and crispy.
  4. In the meantime, cook the bacon in a skillet over medium heat until it is crispy. Then, remove it from the pan and let it drain on paper towels.
  5. After the Tater Tots are done baking, take them out of the oven and sprinkle the shredded cheese and crumbled bacon on top.
  6. Return them to the oven for an additional 5 minutes or until the cheese is melted.

Serving

  1. Once they’re out of the oven, top with sour cream, chopped green onions, and any other toppings you like.
  2. Serve warm and enjoy!

Spread Tater Tots evenly for cooking. Customize toppings as desired. Serve hot for best taste.

Appetizer, Snack
American
Cheesy Tater Tots, Comfort Food, Loaded Tater Tots, Party Food, Tater Tots