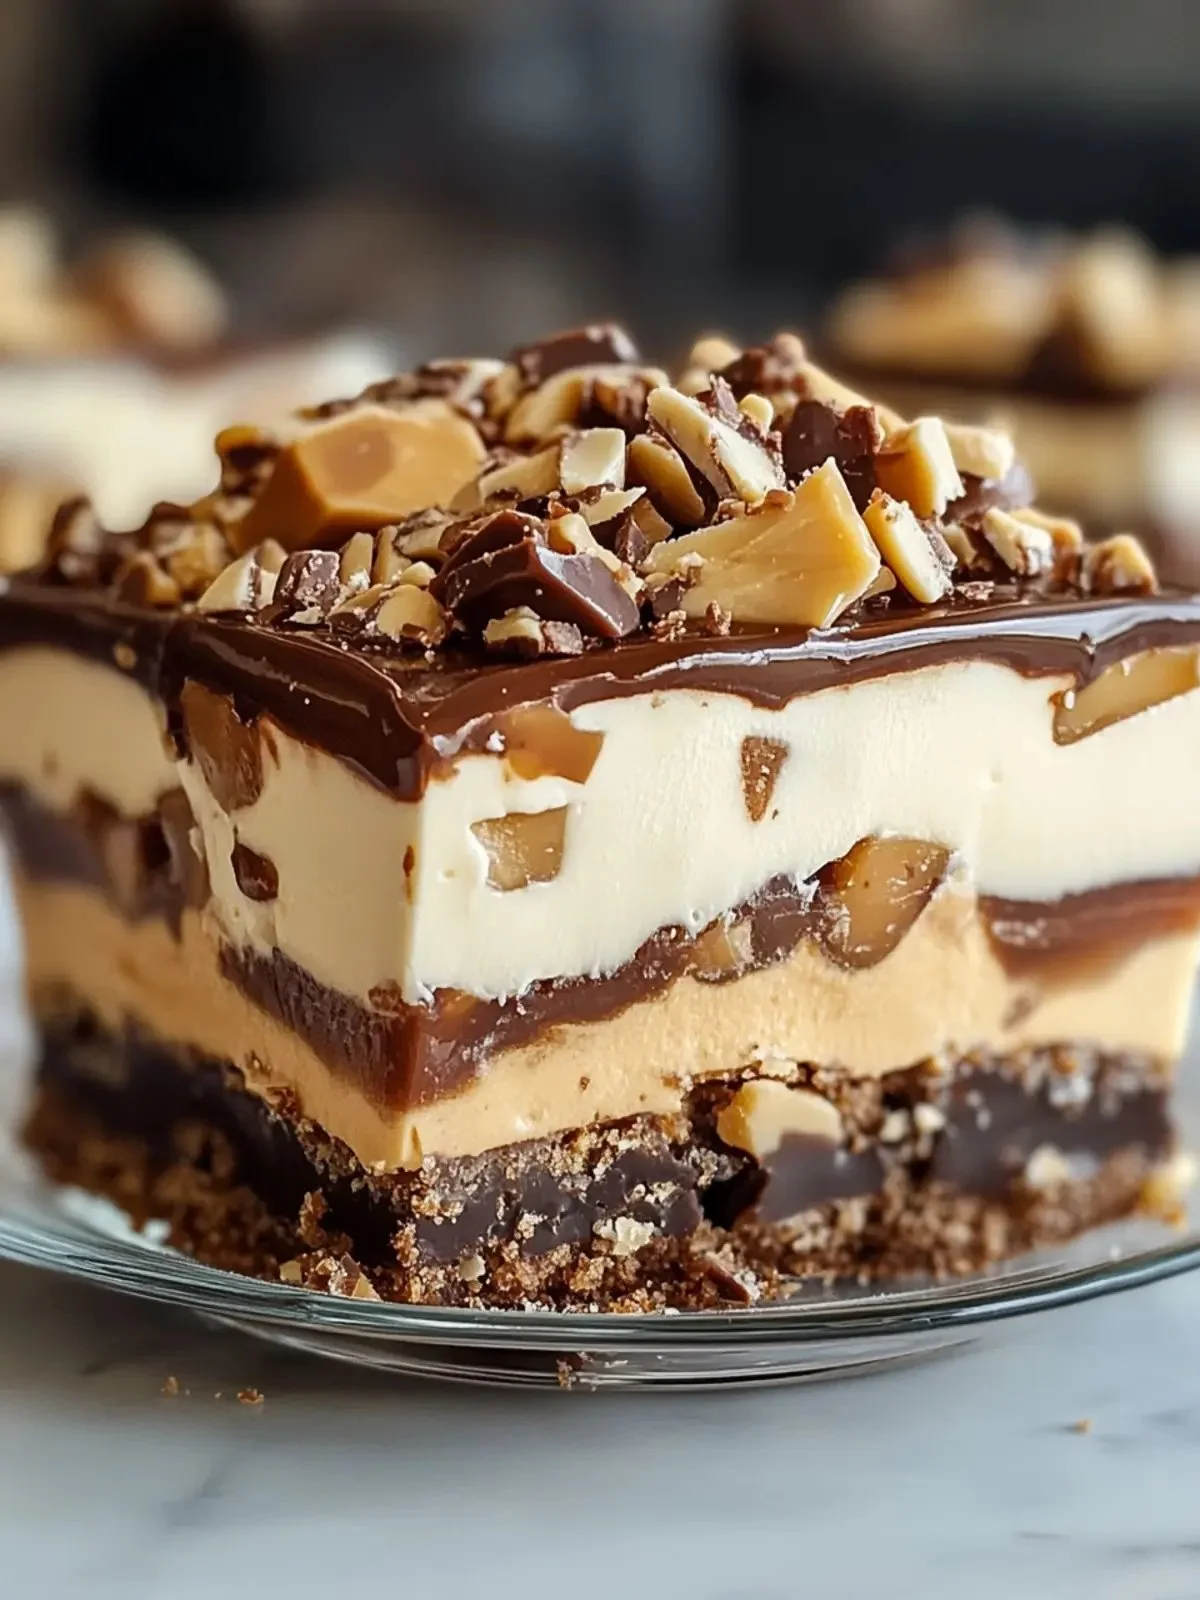
No Bake Turtle Lush: The Decadent Dessert You’ll Adore

No Bake Turtle Lush dessert featuring layers of chocolate, caramel, and cream

No Bake Turtle Lush is a sweet, layered no-bake dessert that mixes chocolate, caramel, and crunchy pecans. It feels rich but it is easy to make. Friends and family will love its creamy layers and nutty crunch. This crowd-pleaser has a simple graham cracker base, a creamy filling, warm caramel, melted chocolate, and chopped pecans on top. If you like quick, tasty treats, you will want to try this one soon. For another simple fruit dessert idea, see this easy blueberry crisp recipe for a different, homey option.

How to prepare No Bake Turtle Lush

  1. Make the crust, press it into a pan, and chill. A crust of crushed graham crackers, melted butter, and a bit of sugar works well.
  2. Mix a creamy layer, such as cream cheese with powdered sugar and a light whipped topping, or use a pudding layer for extra smoothness. Spread this over the chilled crust.
  3. Add a caramel layer, either canned caramel sauce or a simple homemade caramel, spooned in an even layer.
  4. Drizzle melted chocolate over the caramel, or add a layer of chocolate pudding for a softer bite.
  5. Sprinkle a generous amount of chopped pecans for that turtle crunch.
  6. Chill the dessert for at least 2 to 4 hours so the layers set well. Cut into squares and serve cold.

No Bake Turtle Lush: The Decadent Dessert You'll Adore

Why You’ll Love No Bake Turtle Lush

  • It is fast to make, no oven needed.
  • The mix of chocolate, caramel, and pecans gives a classic turtle flavor you know and love.
  • Layers make it look fancy, but the steps are simple.
  • It stores well in the fridge, so you can make it ahead for a party.
  • The dessert is easy to change, swap the cream layer for pudding, or use different nuts for variety.

Tips for success

  • Press the crust firmly into the pan for a stable base.
  • Use full chill time so the layers hold when you cut them.
  • Warm caramel slightly if it is too thick, but do not make it hot. Spread it gently.
  • Toast pecans lightly for more flavor, let them cool before adding.
  • Use a sharp knife dipped in hot water and wiped dry between cuts for neat slices.

Serving Suggestions

  • Serve chilled on small plates with extra caramel drizzled on top.
  • Add a dollop of whipped cream and a sprinkle of extra pecans for a pretty finish.
  • Pair with coffee or a glass of milk to balance the sweetness.
  • For a party, cut into bite-size squares for easy finger food.

No Bake Turtle Lush: The Decadent Dessert You'll Adore

FAQs

Q: Can I make No Bake Turtle Lush ahead of time?

A: Yes, make it a day ahead and keep it covered in the fridge. Chilling helps the layers set and the flavors meld.

Q: Can I use store-bought ingredients to save time?

A: Yes, ready-made caramel sauce and whipped topping save time and still give great taste.

Q: How long does this dessert last in the fridge?

A: It stays good for 3 to 4 days in an airtight container. Nuts may soften over time, so best eaten within a few days.

Q: Can I freeze this dessert?

A: You can freeze it, but textures may change slightly. Wrap well and thaw in the fridge before serving.

Conclusion

No Bake Turtle Lush is a simple, tasty dessert that looks and tastes like a special treat. It mixes easy layers of crust, cream, caramel, chocolate, and pecans for a dessert many will ask for again. For another delicious, no-bake style inspiration that mixes cream and fruit, try this Strawberry Cheesecake Dream Bars – 365 Days of Baking.

No Bake Turtle Lush

A sweet, layered no-bake dessert that combines chocolate, caramel, and crunchy pecans. Easy to make and perfect for any gathering.

For the crust

  • 2 cups crushed graham crackers (Use finely crushed for a stable base.)
  • 1/2 cup melted butter (Melt before mixing with graham crackers.)
  • 1/4 cup sugar (Adjust to taste.)

For the creamy layer

  • 8 oz cream cheese (Softened for easier mixing.)
  • 1/2 cup powdered sugar (Adjust sweetness as desired.)
  • 1 cup whipped topping (Light version for fluffiness.)

For the caramel layer

  • 1 cup canned caramel sauce (Or use homemade caramel.)

For the chocolate layer

  • 1 cup melted chocolate (Can also use chocolate pudding for a softer texture.)

For topping

  • 1 cup chopped pecans (Toast for enhanced flavor if desired.)

Preparation

  1. In a mixing bowl, combine crushed graham crackers, melted butter, and sugar until well mixed.
  2. Press the mixture firmly into the bottom of a 9×13-inch pan to form the crust.
  3. Chill the crust in the refrigerator while preparing the filling.

Creamy Layer

  1. In another bowl, beat the cream cheese and powdered sugar until smooth.
  2. Fold in the whipped topping until combined.
  3. Spread this mixture evenly over the chilled crust.

Caramel Layer

  1. Spoon the caramel sauce evenly over the cream layer.

Chocolate Layer

  1. Drizzle the melted chocolate over the caramel layer evenly.

Topping

  1. Sprinkle the chopped pecans generously over the top.

Chilling

  1. Chill the dessert for at least 2 to 4 hours until set.
  2. Cut into squares and serve cold.

Chill for the full time to ensure layers hold together when cutting. Use a warm, dry sharp knife for neat slices.

Dessert, No-Bake
American
Chocolate Dessert, easy dessert, No Bake Dessert, pecan dessert, Turtle Lush

Strawberry Shortcake Cookies

Homemade strawberry shortcake cookies with fresh strawberries and whipped cream

Strawberry Shortcake Cookies are soft, sweet cookies with bright strawberry taste. They feel like a little shortcake in every bite, with a mild vanilla base and real strawberry bits or powder inside. The cookie is gentle, tender, and made for warm afternoons, picnics, or a quick dessert after dinner. If you enjoy other strawberry treats, you might also like the strawberry charlotte cake, and these cookies give a fast, easy way to enjoy that fresh fruit taste. This featured recipe is a crowd-pleaser, sweet but not too sweet, soft, and full of strawberry flavor, and it makes your kitchen smell wonderful. Get ready to bake a batch that disappears fast, and have fun making them yourself.

How to prepare Strawberry Shortcake Cookies

Ingredients

  • 1 cup (225 g) unsalted butter, softened
  • 3/4 cup granulated sugar
  • 1/4 cup powdered sugar
  • 1 large egg
  • 1 teaspoon vanilla extract
  • 2 1/2 cups (310 g) all-purpose flour
  • 1 teaspoon baking powder
  • 1/2 teaspoon salt
  • 1/2 cup freeze-dried strawberries, crushed to powder (or 1/2 cup finely chopped fresh strawberries, well drained)
  • 1/2 cup powdered sugar + 1 tablespoon strawberry jam and a splash of milk for glaze, optional

Directions

  1. Preheat the oven to 350°F (175°C). Line a baking sheet with parchment paper.
  2. In a bowl, cream the softened butter with granulated sugar and powdered sugar until smooth and light.
  3. Beat in the egg and vanilla until mixed well.
  4. In another bowl, whisk flour, baking powder, and salt.
  5. Add the dry mix to the wet mix in two parts, stirring until just combined.
  6. Fold in the crushed freeze-dried strawberries, or gently fold in the chopped fresh strawberries if using.
  7. Scoop tablespoon-sized balls of dough and place them two inches apart on the baking sheet. Flatten slightly with your palm.
  8. Bake 10 to 12 minutes, until the edges look set and the tops stay pale for a soft, shortcake texture.
  9. Let the cookies cool on the sheet for 5 minutes, then move to a rack to cool completely.
  10. If you want a glaze, whisk 1/2 cup powdered sugar with 1 tablespoon strawberry jam and a splash of milk until smooth, then drizzle on cooled cookies.

Strawberry Shortcake Cookies

Why You’ll Love Strawberry Shortcake Cookies

  • Soft, tender texture, like a mini shortcake, not crunchy.
  • Bright strawberry taste from real fruit or freeze-dried powder.
  • Easy to make with simple pantry ingredients.
  • Great for summer picnics, bake sales, or a quick treat any day.
  • They pair well with tea, milk, or a scoop of vanilla ice cream.

Tips for success

  • Use freeze-dried strawberries for strong color and flavor without extra moisture.
  • If you use fresh strawberries, drain them well and pat dry, dry them in a paper towel to avoid soggy dough.
  • Chill dough 15 minutes if it feels too soft for shaping.
  • Do not overbake, bake until set but still pale for the best soft texture.
  • Measure flour by spooning into the cup and leveling, do not pack it down, this keeps cookies tender.
  • Cool fully before glazing so the glaze does not melt off.

Serving Suggestions

  • Serve with a cup of tea or cold milk.
  • Stack two cookies with a thin spread of strawberry jam and a small spoon of whipped cream for a sandwich treat.
  • Top warm cookies with a scoop of vanilla ice cream for a quick dessert.
  • Pack in a picnic box with fresh berries for a pretty summer treat.

Strawberry Shortcake Cookies

FAQs

Q: Can I use fresh strawberries instead of freeze-dried? A: Yes, you can. Chop them small and pat dry. Fresh strawberries add moisture, so dough may be softer. Use sparingly and chill dough if needed.

Q: How long do these cookies keep? A: Store in an airtight container at room temperature for 2 to 3 days, or refrigerate up to a week. Freeze baked cookies for up to 2 months.

Q: Can I make the dough ahead? A: Yes, you can make dough and chill it for up to 48 hours, or freeze shaped dough for up to 1 month. Bake from frozen, add a minute or two to baking time.

Q: Can I make these gluten free? A: Use a 1:1 gluten free flour blend that includes xanthan gum for the best result. Texture may vary slightly but should still be good.

Q: How do I make a stronger strawberry flavor? A: Add a bit more freeze-dried strawberry powder, or swirl a small amount of strawberry jam into the dough before baking.

Conclusion

If you want a quick, soft, and fruity cookie that tastes like strawberry shortcake, this recipe is a winner and great for family and friends. For another take on strawberry desserts and more ideas, check this detailed Strawberry Shortcake Cookies – Kitchen Confidante® recipe.

Strawberry Shortcake Cookies

Soft, sweet cookies bursting with bright strawberry flavor, reminiscent of strawberry shortcake, perfect for warm afternoons and picnics.

For the cookies

  • 1 cup unsalted butter, softened
  • 3/4 cup granulated sugar
  • 1/4 cup powdered sugar
  • 1 large egg
  • 1 teaspoon vanilla extract
  • 2 1/2 cups all-purpose flour
  • 1 teaspoon baking powder
  • 1/2 teaspoon salt
  • 1/2 cup freeze-dried strawberries, crushed to powder (or finely chopped fresh strawberries, well drained)

For the glaze (optional)

  • 1/2 cup powdered sugar
  • 1 tablespoon strawberry jam
  • a splash milk (for thin consistency)

Preparation

  1. Preheat the oven to 350°F (175°C). Line a baking sheet with parchment paper.
  2. In a bowl, cream the softened butter with granulated sugar and powdered sugar until smooth and light.
  3. Beat in the egg and vanilla until well mixed.
  4. In another bowl, whisk together flour, baking powder, and salt.
  5. Add the dry mix to the wet mix in two parts, stirring until just combined.
  6. Fold in the crushed freeze-dried strawberries or gently fold in the chopped fresh strawberries if using.

Baking

  1. Scoop tablespoon-sized balls of dough and place them two inches apart on the baking sheet. Flatten slightly with your palm.
  2. Bake for 10 to 12 minutes, until the edges look set and the tops stay pale for a soft, shortcake texture.
  3. Let the cookies cool on the sheet for 5 minutes, then move to a rack to cool completely.

Glazing (optional)

  1. If you want a glaze, whisk together 1/2 cup powdered sugar with 1 tablespoon strawberry jam and a splash of milk until smooth, then drizzle on cooled cookies.

Use freeze-dried strawberries for strong color and flavor without extra moisture. Chill dough 15 minutes if it feels too soft for shaping. Do not overbake for the best soft texture.

Dessert, Snack
American
Easy Cookies, picnic treat, shortcake cookies, strawberry cookies, Summer Dessert

Breakfast Egg Muffins with Sausage

Delicious breakfast egg muffins with sausage, perfect for meal prep.

Breakfast Egg Muffins with Sausage are warm, simple, and full of flavor. They make mornings easy because you can make a batch ahead and grab one on the way out. This recipe is a crowd-pleaser, with fluffy eggs, savory sausage, and melty cheese in a small, handy muffin shape. They taste great hot or cold, and kids and adults both enjoy them. If you like to plan meals, you can also see another take on this idea at easy sausage breakfast muffins. Get ready to make a batch and smile when breakfast is this good.

How to prepare Egg Muffins with Sausage

Ingredients

  • 8 large eggs
  • 1 cup cooked breakfast sausage, crumbled
  • 1/2 cup milk
  • 3/4 cup shredded cheddar cheese
  • 1/4 cup diced bell pepper, optional
  • 1/4 cup chopped spinach, optional
  • 1/2 teaspoon salt
  • 1/4 teaspoon black pepper
  • Cooking spray or a little oil for the muffin tin

Directions

  1. Preheat the oven to 350 F, and lightly spray a 12-cup muffin tin with cooking spray.
  2. Cook the sausage in a pan until browned, drain any extra fat, and let it cool a little.
  3. In a bowl, beat the eggs and milk until the mix is smooth.
  4. Stir in the cheddar cheese, salt, pepper, and any vegetables you use.
  5. Put a small spoonful of sausage into each muffin cup, then pour the egg mix over so each cup is about three quarters full.
  6. Bake for 18 to 22 minutes, until the egg muffins are set and a toothpick comes out clean.
  7. Let the muffins cool for a few minutes, then remove them from the tin with a small knife.
  8. Serve warm, or cool completely and store in the fridge for up to 4 days, or freeze for longer.


Breakfast Egg Muffins with Sausage

Why You’ll Love Egg Muffins with Sausage

These egg muffins are quick to make, easy to store, and full of protein. They warm up fast, so they fit a busy morning. The mix of sausage and cheese gives a rich, comforting taste, and you can change the veggies to use what you have. They work for meal prep, for kids lunch boxes, or for feeding a small crowd.

Tips for success

  • Use low-moisture fillings, so the muffins do not get watery, for example, drain cooked sausage well.
  • Do not overfill the cups, eggs expand a little while baking.
  • Let them cool a bit before removing, this keeps them whole.
  • For even cooking, chop vegetables small and use evenly sized sausage bits.
  • To reheat, microwave for 30 to 60 seconds from the fridge, or bake from frozen at 350 F for 15 to 20 minutes.

Serving Suggestions

  • Serve with fresh fruit for a bright contrast.
  • Add a side of toast or whole grain bagels for more carbs.
  • Top with a spoon of salsa or a dash of hot sauce for a zesty kick.
  • Pack with a small salad for a light lunch.


Breakfast Egg Muffins with Sausage

FAQs

Q: Can I make these ahead and freeze them? A: Yes, cool the muffins, place them in a freezer bag, and freeze. Reheat from frozen in the oven or microwave.

Q: Can I use liquid egg substitute? A: Yes, you can use egg substitute, but cooking time may change a little, check until set.

Q: Are these good for picky eaters? A: Yes, you can leave out veggies and add more cheese to suit picky tastes.

Q: How long do they keep in the fridge? A: They keep well for up to 4 days in an airtight container.

Conclusion

These Breakfast Egg Muffins with Sausage are a simple, tasty way to make mornings better. If you want another recipe idea and extra tips, check this Sausage Egg Muffins Recipe – Lauren’s Latest for more ways to enjoy egg muffins.


Breakfast Egg Muffins with Sausage

Warm, fluffy egg muffins filled with savory sausage and melty cheese, perfect for busy mornings.

Main Ingredients

  • 8 large large eggs
  • 1 cup cooked breakfast sausage, crumbled
  • 1/2 cup milk
  • 3/4 cup shredded cheddar cheese
  • 1/4 cup diced bell pepper, optional
  • 1/4 cup chopped spinach, optional
  • 1/2 teaspoon salt
  • 1/4 teaspoon black pepper
  • 1 spray cooking spray or a little oil for the muffin tin

Preparation

  1. Preheat the oven to 350°F and lightly spray a 12-cup muffin tin with cooking spray.
  2. Cook the sausage in a pan until browned, drain any extra fat, and let it cool a little.
  3. In a bowl, beat the eggs and milk until the mix is smooth.
  4. Stir in the cheddar cheese, salt, pepper, and any vegetables you use.

Baking

  1. Put a small spoonful of sausage into each muffin cup, then pour the egg mix over so each cup is about three quarters full.
  2. Bake for 18 to 22 minutes, until the egg muffins are set and a toothpick comes out clean.

Serving

  1. Let the muffins cool for a few minutes, then remove them from the tin with a small knife.
  2. Serve warm, or cool completely and store in the fridge for up to 4 days, or freeze for longer.

For best results, use low-moisture fillings, chop vegetables small, and do not overfill muffin cups.

Breakfast, Brunch
American
Breakfast Recipe, Easy Breakfast, Egg Muffins, Meal Prep, Sausage Muffins

Jalapeño Popper Soup

Delicious bowl of Jalapeño Popper Soup topped with cheese and jalapeños

Jalapeño Popper Soup is a delightful twist on the classic jalapeño poppers. This soup combines the rich, creamy flavors of cheese with the spicy kick of jalapeños, making it a fantastic comfort food. It’s perfect for chilly nights or when you want something warm and satisfying. This soup allows you to enjoy the taste of your favorite appetizer in a new way.

Making Jalapeño Popper Soup is also quite simple. You only need a handful of ingredients that blend together beautifully. The soup is not just tasty, but it is also versatile. You can adjust the level of spice depending on your preference. If you enjoy a little heat, you can add more jalapeños or use spicy cheese.

Another reason to try this recipe is that it cooks quickly. In less than an hour, you can prepare this flavorful soup. Plus, it’s a great dish to share with family and friends. It’s hearty and filling, which makes it a lovely option for gatherings or cozy dinners at home. Whether you serve it as a starter or the main dish, Jalapeño Popper Soup will surely satisfy everyone’s appetite.

How to Make Jalapeño Popper Soup

Making Jalapeño Popper Soup is simple and fun. First, gather your ingredients, which typically include diced jalapeños, cream cheese, shredded cheddar cheese, chicken broth, and some spices. Start by sautéing the diced jalapeños in a pot for about five minutes until they soften.

Next, add in the cream cheese and stir it well to combine, allowing it to melt smoothly. Once the cream cheese has blended nicely, pour in the chicken broth. This will create a base for your soup. Stir everything together and let it simmer gently for about ten minutes.

Then, mix in the shredded cheddar cheese until it melts and becomes creamy. You can adjust the thickness of the soup by adding more broth if desired. If you like a bit of texture, consider blending part of the soup with an immersion blender.

Finally, season with salt, pepper, and any other spices you prefer. Serve warm, and enjoy this delightful and zesty soup that combines all the flavors of your favorite jalapeño poppers!

How to Serve Jalapeño Popper Soup

Jalapeño Popper Soup is best served hot. Using a ladle, pour the soup into bowls and consider adding some tasty toppings. A few suggestions are crispy bacon bits, additional shredded cheese, or a dollop of sour cream. These toppings enhance the flavor and add a nice texture to the dish.

This soup pairs perfectly with crunchy tortilla chips or fresh bread. You can also serve it alongside a simple salad for a balanced meal. If you’re hosting a gathering, consider setting up a soup bar with various toppings, allowing guests to customize their bowls.

For a more festive touch, serve the soup in hollowed-out bread bowls. This fun presentation is sure to impress. Whether it’s a cozy night in or a welcoming gathering, Jalapeño Popper Soup makes for a fantastic dish to please everyone at the table.

How to Store Jalapeño Popper Soup

If you have leftover Jalapeño Popper Soup, storing it is easy. Let the soup cool down to room temperature before placing it in an airtight container. It can be kept in the refrigerator for up to 3-4 days. When you are ready to enjoy it again, simply reheat it on the stove or in the microwave.

For longer storage, you can freeze the soup. Just make sure to use a freezer-safe container or a zip-top bag. Jalapeño Popper Soup can be stored in the freezer for up to three months. When you want to enjoy it again, thaw it in the fridge overnight and heat it on the stove while stirring.

Remember not to refreeze soup that has already been thawed. Proper storage keeps the soup fresh and delicious, so you can savor the flavors of Jalapeño Popper Soup anytime you crave it!

Tips to Make Jalapeño Popper Soup

To make the perfect Jalapeño Popper Soup, here are some handy tips. First, if you’re sensitive to spice, be cautious with the amount of jalapeños you use. You can also remove the seeds from the peppers to lower the heat level.

Use fresh ingredients whenever possible. Fresh jalapeños and grated cheese will enhance the flavor of your soup. If you like a creamier texture, consider adding more cream cheese or blending a portion of the soup for a smooth finish.

Also, don’t be afraid to experiment with flavors! You can add spices like garlic powder or paprika for extra depth. If you love more richness, a splash of heavy cream can make the soup even creamier.

Lastly, serving the soup immediately guarantees the best taste, as the freshness of the ingredients shines through. Keep these tips in mind to create a comforting bowl of Jalapeño Popper Soup that everyone will love.

Variation

Feel free to customize your Jalapeño Popper Soup! You can add other ingredients like corn or black beans for extra texture and flavor. For a vegetarian option, substitute the chicken broth with vegetable broth. If you want to make it even cheesier, try mixing in different types of cheese, such as pepper jack, for an added kick.

FAQs

1. Can I make Jalapeño Popper Soup ahead of time?
Yes! You can prepare it a day ahead. Just store it in the fridge and reheat when ready to serve.

2. How spicy is this soup?
The spice level can vary depending on how many jalapeños you use. You can adjust the amount based on your taste.

3. Can I use frozen jalapeños?
Yes, frozen jalapeños work fine. Just make sure to thaw them and drain excess moisture before using.

4. Is this soup gluten-free?
Yes, as long as you use gluten-free broth and cheese, this soup can be made gluten-free.

5. How can I make it dairy-free?
You can substitute cream cheese with a dairy-free alternative and use plant-based cheese to make it dairy-free.

Jalapeño Popper Soup

A delightful twist on classic jalapeño poppers, this creamy and spicy soup is perfect for chilly nights and gatherings.

Main Ingredients

  • 2 cups Diced jalapeños (Adjust quantity for spice preference.)
  • 8 oz Cream cheese (Softened for easy mixing.)
  • 2 cups Shredded cheddar cheese (Use spicy cheese for more heat.)
  • 4 cups Chicken broth (Can substitute with vegetable broth for a vegetarian option.)
  • 1 tsp Salt (Adjust to taste.)
  • 1 tsp Pepper (Adjust to taste.)

Preparation

  1. Sauté the diced jalapeños in a pot for about 5 minutes until they soften.
  2. Add cream cheese and stir well to combine, allowing it to melt smoothly.
  3. Pour in the chicken broth and stir everything together.
  4. Let the mixture simmer gently for about 10 minutes.

Final Touches

  1. Mix in the shredded cheddar cheese until melted and creamy.
  2. Adjust the thickness of the soup by adding more broth if desired.
  3. Blend part of the soup with an immersion blender for a smoother texture.
  4. Season with additional salt, pepper, and any other preferred spices.
  5. Serve warm, topped with crispy bacon bits, extra shredded cheese, or sour cream.

Store leftovers in an airtight container in the fridge for up to 3-4 days, or freeze for up to three months. Thaw overnight in the fridge before reheating.

Appetizer, Soup
American
Chili, Comfort Food, Creamy Soup, Jalapeño Popper Soup, Spicy Soup

hearty beef barley soup

A steaming bowl of hearty beef barley soup with vegetables and fresh herbs

Warm and comforting beef soup feels like a warm hug on a cold day. It blends tender beef, soft vegetables, and rich broth into a bowl that fills you up and calms you down. This beef soup is easy to make and works for a weeknight meal or for feeding a small group. It has deep beef flavor, gentle herbs, and a cozy texture that most people love. If you like hearty beef dishes, you might also enjoy baked beef and cheese sliders. Give this soup a try, you may find it becomes your go to for comfort food, and you will be happy you made it.

How to prepare Warm and Comforting Beef Soup

  1. Brown the beef, use small cubes or ground beef, in a large pot over medium heat. Season with salt and pepper. Drain excess fat.
  2. Add chopped onion and cook until soft, about 5 minutes. Stir in minced garlic and cook 1 minute.
  3. Pour in beef broth, add diced carrots, celery, and potatoes. Bring to a boil, then lower heat to a simmer.
  4. Add a bay leaf, a little dried thyme, and a splash of Worcestershire sauce if you like. Simmer 30 to 40 minutes, until vegetables and beef are tender.
  5. Taste and adjust salt and pepper. Remove bay leaf. If you like a thicker soup, mash a few potatoes in the pot or add a spoon of flour mixed with water, stir and cook a few minutes.
  6. Serve hot with fresh bread or crackers.


Warm and Comforting Beef Soup

Why You’ll Love Warm and Comforting Beef Soup

  • It is simple to make with common ingredients, perfect for a quick dinner.
  • The broth has rich beef flavor, and the soft vegetables add a gentle sweetness.
  • It is a true comfort food, filling and soothing on cool nights.
  • You can change the vegetables or use leftover beef, so it is flexible and practical.

Tips for success

  • Brown the beef well, this adds more flavor to the broth.
  • Cut vegetables into similar sizes, so they cook evenly.
  • Taste as you go, and add salt slowly, broth can be salty.
  • If you use canned broth, check the sodium and choose low salt if needed.
  • For deeper flavor, simmer longer on low heat, beef flavor grows with time.

Serving Suggestions

  • Serve with crusty bread, a simple green salad, or a slice of toast.
  • Top with fresh parsley or a sprinkle of grated cheese for extra flavor.
  • Add a squeeze of lemon or a dash of vinegar at the end for a bright note.
  • Make extra, this soup reheats well and often tastes better the next day.


Warm and Comforting Beef Soup

FAQs

Q: Can I make this soup in a slow cooker?

A: Yes, brown the beef first, then add all ingredients to the slow cooker. Cook on low for 6 to 8 hours or on high for 3 to 4 hours.

Q: Can I use leftover roast beef in this soup?

A: Yes, add cooked beef near the end of cooking, heat until warm so it stays tender.

Q: How do I store and reheat beef soup?

A: Cool the soup and store in an airtight container in the fridge for up to 3 days. Reheat on the stove over low heat until hot, stir often.

Q: Can I freeze this soup?

A: Yes, freeze in airtight containers for up to 3 months. Thaw in the fridge before reheating.

Q: What can I use instead of potatoes?

A: Try barley, rice, or extra carrots for different textures and carbs.

Warm and Comforting Beef Soup

This hearty beef soup combines tender beef, soft vegetables, and rich broth for a comforting dish perfect for cool nights.

Main Ingredients

  • 1 lb beef (small cubes or ground) (Browned for flavor)
  • 1 medium onion, chopped (Adds sweetness)
  • 2 cloves garlic, minced (Enhances flavor)
  • 4 cups beef broth (Choose low sodium if desired)
  • 2 medium carrots, diced (Adds sweetness)
  • 2 stalks celery, diced (For added texture)
  • 2 medium potatoes, diced (Makes the soup hearty)
  • 1 leaf bay leaf (Adds depth of flavor)
  • 1 tsp dried thyme (Herbal flavor)
  • 1 tbsp Worcestershire sauce (Optional, for flavor)
  • to taste salt and pepper (Adjust per preference)
  • optional flour mixed with water (For thickening the soup if desired)

Cooking the Soup

  1. Brown the beef in a large pot over medium heat; season with salt and pepper and drain excess fat.
  2. Add the chopped onion and cook until soft, about 5 minutes. Stir in the minced garlic and cook for 1 minute.
  3. Pour in the beef broth and add the diced carrots, celery, and potatoes. Bring to a boil, then reduce the heat to a simmer.
  4. Add the bay leaf, dried thyme, and Worcestershire sauce if using. Simmer for 30 to 40 minutes until the vegetables and beef are tender.
  5. Taste and adjust the seasoning with salt and pepper. Remove the bay leaf.
  6. If you prefer a thicker soup, mash a few potatoes in the pot or add a spoon of flour mixed with water, stir and cook for a few minutes.
  7. Serve hot with fresh bread or crackers.

Tips for success include browning the beef well for flavor, cutting vegetables evenly, and checking sodium levels if using canned broth. For more flavor, simmer longer.

Bacon Brussels Sprouts

Crispy Bacon Brussels Sprouts served in a bowl, garnished and ready to enjoy.

Bacon Brussels Sprouts are a delightful blend of savory and smoky flavors that can turn any meal into a special occasion. Picture crispy, golden Brussels sprouts tossed with crunchy bacon, creating a dish that’s both comforting and impressive. This recipe has become a favorite among families and friends, making it the perfect side dish for gatherings or even a fancy dinner. The taste is simply irresistible, with a satisfying crunch and a rich buttery flavor. Once you try this recipe, you’ll find it hard to believe that healthy vegetables can taste this good! So grab your apron and let’s dive into making this crowd-pleaser that will have everyone asking for seconds.

How to Prepare Bacon Brussels Sprouts

To prepare Bacon Brussels Sprouts, start by gathering the ingredients. You will need Brussels sprouts, bacon, olive oil, salt, and pepper. First, preheat your oven to 400°F (200°C). Wash and trim the Brussels sprouts, cutting them in half lengthwise for even cooking. In a large bowl, toss the Brussels sprouts with a drizzle of olive oil, salt, and pepper. Then, chop the bacon into small pieces and add it to the bowl, mixing everything together so the flavors combine. Spread the mixture onto a large baking sheet in a single layer. Roast in the oven for 20-25 minutes, until the bacon is crispy and the Brussels sprouts are golden brown. Make sure to stir halfway through to ensure even cooking. Once done, remove from the oven and serve warm for a delicious treat that everyone will love.

Why You’ll Love Bacon Brussels Sprouts

Bacon Brussels Sprouts are a dish that has it all: flavor, texture, and convenience. The rich taste of the crispy bacon perfectly complements the earthy notes of the Brussels sprouts. This makes for a well-balanced and satisfying side dish that pairs well with just about anything. It’s also an easy recipe to whip up in no time. Whether you’re cooking for a holiday feast or a regular weeknight dinner, these Brussels sprouts are sure to impress. Plus, they’re a fun way to sneak in some veggies while still keeping it delicious. Your taste buds will thank you for trying this delightful recipe!

Tips for Success

To create the best Bacon Brussels Sprouts, keep a few tips in mind. First, choose fresh Brussels sprouts that are bright green and firm for the best flavor. When cutting them, try to keep the pieces uniform in size to ensure even cooking. Don’t be afraid to get a little extra crispy with the bacon, as it adds more flavor! Make sure to spread the Brussels sprouts out on the baking sheet without overcrowding them. This allows them to roast properly and get that nice crunch. Finally, feel free to add some garlic or a splash of balsamic vinegar to elevate the flavor even more. These simple tips will help you achieve the perfect Bacon Brussels Sprouts every time.

Serving Suggestions

Bacon Brussels Sprouts can be served in a variety of ways. They make a fantastic side dish for roasted meats like chicken, pork, or even beef. You can also present them alongside other vegetables for a colorful and vibrant veggie platter. Want to make it a festive dish? Try topping with some grated Parmesan cheese or a sprinkle of crushed red pepper for an extra kick. They’re also great for potlucks or family gatherings, as they warm up nicely and taste amazing even after being reheated. Whatever you choose, these Brussels sprouts are sure to be a hit on any table.

FAQs

Can I use frozen Brussels sprouts for this recipe?

Yes, you can use frozen Brussels sprouts, but be sure to thaw and dry them well before roasting to avoid sogginess.

How can I store leftovers?

Store any leftovers in an airtight container in the fridge for up to three days. Reheat in the oven for the best texture.

Can I make this dish ahead of time?

Yes, you can prepare the Brussels sprouts and bacon ahead of time and roast them when you’re ready to serve. Just toss them back in the oven until heated through and crispy!

Bacon Brussels Sprouts

A delicious side dish featuring the incredible flavors of crispy bacon and tender Brussels sprouts, perfect for any gathering.

Main Ingredients

  • 1 lb Brussels sprouts (Trimmed and halved if large)
  • 4 oz bacon (Chopped)
  • 2 tbsp olive oil
  • 1 tsp salt
  • 1 tsp pepper

Preparation

  1. Preheat your oven to 400°F (200°C).
  2. Wash and trim the Brussels sprouts, cutting them in half if they are large.
  3. In a large bowl, mix the Brussels sprouts with olive oil, salt, and pepper.
  4. Add chopped bacon, and toss everything together until the sprouts are well coated.
  5. Spread the mixture on a baking sheet in a single layer.

Cooking

  1. Roast in the oven for about 25-30 minutes, until the Brussels sprouts are golden and the bacon is crispy.
  2. Stir halfway through to ensure even cooking.
  3. Remove from the oven and let them cool slightly before serving.

Tips for success: Make sure to cut the Brussels sprouts evenly for even cooking. Don’t overcrowd the pan as it helps them get crispy. Consider adding garlic or balsamic vinegar for more flavor.

Side Dish
American
Bacon Brussels Sprouts, Brussels Sprouts, Crispy Bacon, side dish, Vegetable Side

Creamy Marry Me Chicken Soup

Bowl of creamy Marry Me Chicken Soup with herbs and ingredients

Rich, Creamy Marry Me Chicken Soup is a delightful dish that not only warms the body but also brings comfort to the soul. This recipe is perfect for chilly days or anytime you crave something hearty. The combination of tender chicken, rich cream, and flavorful seasonings creates a soup that is truly special. It’s more than just a meal; it’s a heartwarming experience.

One of the great things about this soup is that it’s versatile! You can enjoy it for lunch or dinner, and it even makes for a delicious leftover meal. The ingredients are easy to find, and the cooking process is simple. This is a recipe you can make on a busy weeknight or when you have guests over.

Moreover, Marry Me Chicken Soup is fantastic for feeding a family or a group of friends. Everyone loves a creamy soup, and because it’s packed with chicken and veggies, it’s both filling and nutritious. Sharing this soup with loved ones can turn an ordinary meal into a memorable occasion. Once they taste it, they might even fall head over heels for it—hence the name! Whether it’s a cozy night in or a special gathering, this soup has a way of bringing people together.

How to make Rich, Creamy Marry Me Chicken Soup

Making Rich, Creamy Marry Me Chicken Soup is straightforward and fun. Start by gathering your ingredients: boneless chicken, cream, chicken broth, vegetables like carrots and celery, and your favorite herbs and spices. First, heat some olive oil in a large pot over medium heat. Then, add the pieces of chicken and cook until they are brown on all sides. This will lock in the flavors.

Once the chicken is cooked, remove it from the pot and set it aside. In the same pot, toss in the chopped vegetables and sauté until they are soft. This usually takes about 5 minutes. Next, pour in the chicken broth, stirring to combine. Add in the browned chicken and let it simmer for about 15 minutes so the flavors mix well.

Now it’s time to add the richness! Stir in cream gradually, allowing it to melt into the broth. Season the soup with salt, pepper, and any herbs you enjoy, like thyme or parsley. Let everything cook together for another 10 minutes, stirring occasionally, until the soup is thick and creamy. Once finished, give it a taste and adjust any seasoning as necessary. Now your soup is ready to indulge in!

How to serve Rich, Creamy Marry Me Chicken Soup

Serving Rich, Creamy Marry Me Chicken Soup is simple and delightful. You can ladle the soup into bowls, ensuring each serving has pieces of chicken and plenty of veggies. For a beautiful presentation, you might consider garnishing with a sprinkle of fresh herbs, such as parsley or chives. This adds a pop of color and freshness.

Pair this warm soup with some crusty bread or a light salad for a complete meal. If you’re feeling extra festive, you can serve it with a glass of white wine or iced tea. The creamy texture of the soup complements the crunchy bread perfectly, making each bite a pleasure.

Don’t forget, this soup also works well when served in a bread bowl! It’s a fun way to enjoy the soup while indulging in the delicious bread as you go. Guests will love the attention to detail and the fun twist. Whether for a casual lunch, a cozy family dinner, or a small gathering with friends, this soup will impress everyone at the table.

How to store Rich, Creamy Marry Me Chicken Soup

Storing Rich, Creamy Marry Me Chicken Soup is simple. Once the soup has cooled down to room temperature, you can pour it into airtight containers. Make sure not to fill them to the top; leave some space for expansion if you decide to freeze it. You can store the soup in the refrigerator for about 3 to 4 days. It’s great for a quick lunch or dinner later in the week!

If you want to keep the soup for a longer period, consider freezing it. Make sure to label the containers with the date so you know when to use it. It can last in the freezer for about 2 to 3 months. When you are ready to enjoy it again, just thaw it in the fridge overnight or use the microwave for a quicker method.

When reheating the soup, do it gently. You can warm it on the stove over low heat, stirring occasionally, to prevent it from sticking to the pot. If the soup seems too thick after storing, add a little chicken broth or water to achieve your desired consistency.

Tips to make Rich, Creamy Marry Me Chicken Soup

To make your Rich, Creamy Marry Me Chicken Soup even better, there are several tips you can follow. First, use quality chicken. Fresh or organic chicken often has more flavor compared to frozen or lower-quality options. Also, don’t rush the browning stage; taking your time will enhance the taste of the soup.

Another tip is to add the cream slowly. This helps to ensure that it mixes well with the broth and doesn’t curdle. You can also experiment with different herbs and spices to match your personal taste. Some people love a little heat, so consider adding a pinch of red pepper flakes for a spicy kick.

You might also want to try adding more vegetables. Spinach, kale, or peas can give additional nutrients and colors to the soup. If you like it extra creamy, you can blend a portion of the soup and then mix it back in. This will create a delightfully creamy texture while still keeping some chunks of chicken and veggies.

Finally, don’t hesitate to adjust the seasoning. Every brand of broth and cream can taste different, so it’s always good to taste and tweak as you go!

Variation

There are various ways to modify Rich, Creamy Marry Me Chicken Soup. For a healthier twist, you can use low-fat cream or non-dairy milk options like almond or coconut milk. You can also swap chicken for turkey or even a plant-based protein like chickpeas for a vegetarian version.

If you want a zesty flavor, adding lime or lemon juice right before serving can brighten up the dish. You can also play with different vegetables, like bell peppers or zucchini, for added texture and nutrition.

FAQs

1. Can I use frozen chicken for this recipe?

Yes, you can use frozen chicken. Just ensure it is fully cooked before adding other ingredients. You may need to increase the cooking time slightly to ensure it’s heated through.

2. Can I make this soup in advance?

Absolutely! You can prepare it a day or two ahead. Just store it in the refrigerator and reheat it when you are ready to serve.

3. How can I make the soup spicier?

You can add red pepper flakes, cayenne pepper, or even some diced jalapeños to spice up your soup. Adjust the amount based on your spice preference.

4. Can I use vegetables other than carrots and celery?

Yes! Feel free to add any veggies you enjoy, like bell peppers, peas, or corn. They will all work great in this soup.

5. Is this soup freezer-friendly?

Yes, this soup freezes well! Just store it in an airtight container and consume it within 2 to 3 months for the best taste.

Marry Me Chicken Soup

A delightful chicken soup combining tender chicken, savory herbs, and creamy goodness, perfect for cozy days.

Main ingredients

  • 1 lb chicken breast, diced (Use fresh chicken for the best flavor.)
  • 1 tablespoon olive oil (For sautéing vegetables.)
  • 1 onion, chopped (Adds depth of flavor.)
  • 2 cloves garlic, minced (Use fresh garlic for better taste.)
  • 3 carrots, sliced (Can substitute with any preferred vegetables.)
  • 2 cups chicken broth (Homemade or store-bought.)
  • 1 cup heavy cream (For a rich and creamy texture.)
  • 1 teaspoon Italian seasoning (A blend of dried herbs.)
  • Salt and pepper to taste (Adjust according to preference.)
  • Fresh parsley, for garnish (Adds freshness and color.)

Preparation

  1. In a large pot, heat the olive oil over medium heat.
  2. Add the chopped onion and minced garlic, cooking until tender.
  3. Add in the diced chicken breast, browning it on all sides.
  4. Mix in the sliced carrots and pour the chicken broth into the pot.
  5. Stir in the Italian seasoning, plus salt and pepper to taste.
  6. Let it simmer until the chicken is cooked through and the carrots are tender.
  7. Slowly stir in the heavy cream, allowing it to thicken slightly.
  8. Serve hot and garnish with fresh parsley.

Ensure your chicken is diced evenly for consistent cooking. Adjust the thickness of the soup by adding more or less cream. Experiment with additional vegetables for variation. Fresh herbs like parsley should be added at the end for enhanced flavor.

Main Course, Soup
American
chicken soup, Comfort Food, Creamy Soup, Marry Me Chicken Soup, Quick Meals

Easy Apple Pie

Slice of easy apple pie with cinnamon and apple filling on a wooden table

This easy apple pie is a classic dessert that many people love. It is warm, sweet, and filled with delicious apples. The recipe is simple, making it perfect for everyone, from beginners to experienced bakers. It brings comfort and joy, whether you serve it at family gatherings, special occasions, or just because you want to treat yourself. The flaky crust paired with a sugary apple filling creates a delightful dessert that can melt hearts. Plus, it fills your home with a lovely aroma that makes everyone eager for a slice.

Making apple pie is also a great way to celebrate the fall season when apples are plentiful. You can pick apples from local farms or buy them at the store. No matter where they come from, using fresh apples makes this pie even better. Now, let’s dive into why you should try making this easy apple pie.

Why Make This Recipe

This Easy Apple Pie recipe is perfect for several reasons. First, it uses simple ingredients that are often already in your kitchen, such as apples, sugar, and flour. You don’t need fancy equipment or baking skills to whip this up. Just grab a few apples and a rolling pin, and you’ll be on your way.

Second, this pie is an excellent dessert for any occasion. It works well for holidays like Thanksgiving and Christmas, family dinners, or even just a cozy night at home. The warm filling and flaky crust give a sense of home and comfort.

Additionally, making apple pie is a fun activity that you can do with family or friends. It’s a great way to bond while creating something delicious. You can get children involved in peeling apples or rolling the dough, making it a shared experience.

Lastly, homemade apple pie is far tastier than store-bought versions. You can customize the sweetness, spice levels, and type of apples you use. By making it yourself, you control every aspect, ensuring a pie that is just right for your taste buds.

How to Make Easy Apple Pie

Making Easy Apple Pie starts with gathering your ingredients. You will need 6 to 8 cups of peeled and sliced apples, 1 cup of sugar, 2 tablespoons of flour, 1 teaspoon of cinnamon, and a pinch of salt. For the crust, you will need 2 ½ cups of all-purpose flour, 1 cup of unsalted butter (chilled and diced), and a bit of water.

To prepare the crust, combine the flour, sugar, and salt. Add the diced butter and mix until the mixture resembles coarse crumbs. Gradually add cold water, a tablespoon at a time, until the dough comes together. Divide the dough in half, shape it into discs, wrap them in plastic, and chill for at least an hour.

Next, preheat your oven to 425°F (220°C). Roll out one disc of dough on a floured surface to fit your pie pan. Place it in the pan and fill it with the sliced apples. In a bowl, mix the sugar, flour, cinnamon, and salt, then sprinkle it over the apples. Roll out the second dough disc and place it on top of the filling. Crimp the edges to seal and cut a few slits in the top for steam to escape.

Bake for 15 minutes, then reduce the temperature to 350°F (175°C) and continue baking for 30-35 minutes until the apples are tender and the crust is golden brown. Let it cool before serving. Enjoy your delicious apple pie!

How to Serve Easy Apple Pie

Serving Easy Apple Pie is as delightful as making it. It can be enjoyed warm or at room temperature. For a tasty twist, consider adding a scoop of vanilla ice cream or a dollop of whipped cream on top when serving. This combination enhances the flavors and makes the dessert extra special.

You can also sprinkle a little cinnamon on the whipped cream for an added touch of flavor. When serving, slice the pie into wedges for a clean look and ease of serving. Consider pairing it with coffee or hot cider for a classic autumn feel.

If you’re hosting a party, serve slices of apple pie on colorful dessert plates. You can also top each slice with a cherry or a sprinkle of nuts for extra flair. Another idea is to serve it with a side of caramel sauce for dipping, which adds a sweet contrast to the apples.

No matter how you choose to serve it, easy apple pie is sure to bring smiles and satisfaction to everyone at your table.

How to Store Easy Apple Pie

Proper storage of Easy Apple Pie ensures it stays fresh and delicious for days. If you have leftover pie, let it cool completely at room temperature before storing it.

To store apple pie, cover it loosely with plastic wrap or aluminum foil. You can also place it in an airtight container. In the refrigerator, apple pie can last for about 3 to 4 days. Make sure to keep it in a cool spot to maintain its freshness.

If you want to store it for a longer period, consider freezing it. Wrap individual slices or the whole pie in plastic wrap and then in aluminum foil to prevent freezer burn. When properly sealed, apple pie can be stored in the freezer for up to 3 months.

When you’re ready to enjoy the pie again, thaw it in the refrigerator overnight. You can reheat slices in the oven at 350°F (175°C) for about 10 minutes to bring back the freshness and warmth.

Tips to Make Easy Apple Pie

To make the best Easy Apple Pie, follow these helpful tips. First, use a mix of apple varieties. Combining sweet and tart apples, like Granny Smith and Honeycrisp, creates a balanced flavor that enhances the pie.

Second, do not skip the chilling step for the crust. A cold dough makes for a flakier crust. If possible, chill your dough for longer than an hour.

Third, taste the apple mixture before filling the pie to adjust the sugar and spice according to your preference. Some apples are sweeter than others, so you may need to reduce the sugar.

Also, ensure to cut slits in the top crust to allow steam to escape, which helps prevent a soggy bottom crust.

Lastly, keep an eye on the pie as it bakes. Oven temperatures can vary, so check for doneness. The crust should be golden, and the filling should bubble. If the edges brown too quickly, cover them with aluminum foil to prevent burning during baking.

Variation

You can easily customize this Easy Apple Pie recipe. For a bit of extra flavor, consider adding a handful of raisins or chopped nuts to the apple filling. You can also include spices like nutmeg or allspice to change up the traditional taste.

If you want to try something different, use peaches or berries instead of apples for a fruity twist. A crumb topping made of brown sugar, flour, and butter is another delicious alternative that gives a crunchy texture on top.

FAQs

  1. Can I use store-bought pie crust instead of making my own?
    Yes, using store-bought pie crust is a great time-saver. Just ensure it fits your pie pan and follow the baking instructions.
  2. Can I prepare the pie in advance?
    Absolutely! You can prepare and assemble the pie a day ahead, just refrigerate it until you are ready to bake.
  3. What type of apples are best for apple pie?
    The best apples for pie are firm varieties like Granny Smith, Honeycrisp, and Braeburn, as they hold their shape and provide a good balance of sweetness and tartness.
  4. Can I freeze the apple pie before baking?
    Yes, you can freeze it. Assemble the pie, wrap it well, and freeze it. When ready to bake, you can bake it straight from the freezer, just add a few extra minutes to the baking time.

Easy Apple Pie

A classic, warm dessert filled with delicious apples, perfect for any occasion.

For the filling

  • 6-8 cups peeled and sliced apples (A mix of sweet and tart apples is recommended.)
  • 1 cup sugar (Adjust based on the sweetness of the apples.)
  • 2 tablespoons flour (Helps thicken the filling.)
  • 1 teaspoon cinnamon (Can add more for extra flavor.)
  • 1 pinch salt

For the crust

  • 2.5 cups all-purpose flour
  • 1 cup unsalted butter (Chilled and diced.)
  • water as needed (Cold water, added gradually to form the dough.)

Prepare the crust

  1. Combine flour, sugar, and salt in a bowl.
  2. Add diced butter and mix until the mixture resembles coarse crumbs.
  3. Gradually add cold water, a tablespoon at a time, until the dough comes together.
  4. Divide the dough in half, shape into discs, wrap in plastic, and chill for at least 1 hour.

Prepare the filling

  1. Preheat oven to 425°F (220°C).
  2. Roll out one disc of dough on a floured surface to fit your pie pan.
  3. Place it in the pie pan and fill it with sliced apples.
  4. In a bowl, mix sugar, flour, cinnamon, and salt, then sprinkle over the apples.
  5. Roll out the second dough disc and place it on top of the filling. Crimp the edges to seal and cut a few slits in the top for steam to escape.

Bake the pie

  1. Bake for 15 minutes, then reduce the temperature to 350°F (175°C).
  2. Continue baking for 30-35 minutes until apples are tender and crust is golden brown.
  3. Let the pie cool before serving.

Serve warm or at room temperature. Can add ice cream or whipped cream for extra flavor.

Baked Goods, Dessert
American
apple pie, classic dessert, easy dessert, fall dessert, homemade pie

Witches Brew Drink

A spooky Witches Brew Drink with vibrant colors and garnishes, perfect for Halloween.

This spooky and fun drink brings excitement to any gathering, especially during Halloween. The Witches Brew Drink is colorful, fizzy, and has a slight sweetness that kids and adults will love. It’s perfect for parties, family gatherings, or a night of Halloween fun. With just a few simple ingredients, you can create a magical drink that looks and tastes enchanting. Whether you are hosting a Halloween bash or just looking for something unique to sip on, this recipe will surely impress your guests.

Why Make This Recipe

Halloween is a time for tricks and treats, and what better way to celebrate than with a creative drink? The Witches Brew Drink is not just visually appealing but also refreshing and fun. This recipe is easy to follow and requires minimal preparation. You can customize your Witches Brew drink by mixing different flavors or adding gummy worms, eyeballs, or other fun candies as a garnish.

Making this drink is an excellent way to spark creativity and let your imagination run wild. Whether you’re serving it to kids or adults, the excitement of a bubbling, colorful potion adds an element of surprise. It’s a great conversation starter and adds atmosphere to your Halloween celebrations. Furthermore, it can be prepared in bulk, making it convenient for parties. The best part? You can enjoy this drink anytime, and it doesn’t have to be Halloween to make it special.

So gather your ingredients, put on your witch hat, and let’s brew up some fun with this delightful drink. It’s sure to be a hit at your next gathering!

How to Make Witches Brew Drink

To make Witches Brew Drink, you will need the following ingredients:

  • 2 cups of lemon-lime soda
  • 1 cup of grape juice
  • 1 cup of orange juice
  • 1 cup of green food coloring (or blue for a different color)
  • Ice cubes
  • Optional: gummy worms, eyeball candies for garnish

Start by gathering all your ingredients. In a large pitcher, mix the lemon-lime soda, grape juice, and orange juice. Stir gently to combine, ensuring not to lose too many bubbles from the soda. Next, gradually add the green food coloring to the mixture. You can add a few drops at a time and stir until you reach your desired spooky color.

Once your Witches Brew is mixed, prepare glasses by filling them with ice cubes. Pour the drink over the ice, allowing the bright colors to shine through. For a fun twist, drop in gummy worms or eyeball candies to creep out your guests. Stir with a spooky straw for an extra fun touch!

Let the magic begin as you serve this impressive drink during your Halloween festivities. Your friends will love its taste and appearance!

How to Serve Witches Brew Drink

Serving Witches Brew Drink is part of the fun. First, choose colorful cups or cauldrons to enhance the theme. Clear cups will showcase the drink’s vibrant color, so consider using those for a visually stunning presentation. You can also rim the glasses with green or purple sugar for an extra sparkly touch.

Once you’ve filled the glasses with Witches Brew, garnish each drink with a few gummy worms or eyeball candies. You can even float some extra candies on top of the drink for added Halloween flair. Don’t forget to include spooky straws to make it an immersive experience for your guests.

To make your serving area more festive, consider adding some Halloween decorations, like mini pumpkins, spider webs, or themed tablecloths. This creates a magical setting that will impress everyone at your gathering. Encourage guests to share their drinks on social media for a fun memory!

How to Store Witches Brew Drink

If you have any Witches Brew Drink leftover, you can store it for later. To do this, first, remove any candy garnishes, as they may not keep well in the drink. Pour the remaining drink into a clean, airtight container or pitcher. Make sure to cover it tightly to prevent any spills or loss of carbonation.

Store the drink in the refrigerator for up to three days. However, it is best to consume it within the first couple of days for optimal freshness and fizz. When you’re ready to serve again, give it a gentle stir to mix any settled ingredients. If the bubbles have diminished, adding a splash of lemon-lime soda can bring back some fizz.

Remember that ice will dilute the drink, so it’s best to store the drink without ice. This way, you can enjoy your delightful Witches Brew Drink just as magical as the first time.

Tips to Make Witches Brew Drink

To make the best Witches Brew Drink, consider the following tips. First, chill all your ingredients beforehand. This way, you’ll have a refreshing drink without needing too much ice. Second, feel free to adjust the juice ratios according to your taste. If you want it sweeter, add more grape juice. If you prefer a citrusy flavor, add extra orange juice.

Another fun twist is to experiment with different food coloring. You can mix colors to create unique shades or even use edible glitter for a sparkly effect. Be cautious with the amount of food coloring, as a little goes a long way!

Lastly, if you’re making this drink for both kids and adults, consider offering an alcoholic version. Adding a splash of vodka or gin can turn this fun drink into a festive adult cocktail. Always serve alcohol responsibly and ensure there are non-alcoholic options available for everyone.

Variation

Feel free to experiment with different flavors in your Witches Brew Drink. You can use different types of soda, such as fruit-flavored sodas or sparkling water. If you want a non-carbonated version, try using fruit juices combined with a bit of sparkling water for lightness. Adding fruit slices like oranges, lemons, or strawberries can also enhance freshness and flavor while providing a visually pleasing appearance.

FAQs

1. Can I make Witches Brew Drink in advance?
Yes, you can make the drink ahead of time. However, bubble drinks are best served fresh for optimal fizz. You can prepare the ingredients and mix them right before serving.

2. What can I use as garnishes for the drink?
You can use gummy worms, eyeball candies, or other fun Halloween-themed snacks as garnishes. Fresh fruit like sliced lemons or oranges can also add a nice touch.

3. Is Witches Brew Drink kid-friendly?
Absolutely! The Witches Brew Drink is a fun and tasty beverage that’s perfect for kids and adults alike. Just keep any alcohol out if serving it to children.

Witches Brew Drink

A colorful and fizzy Halloween drink that delights kids and adults alike, perfect for parties and gatherings.

Main Ingredients

  • 2 cups lemon-lime soda (Chilled for best flavor.)
  • 1 cup grape juice (Adjust for sweetness.)
  • 1 cup orange juice (Use fresh juice for better flavor.)
  • 1 cup green food coloring (Or blue for a different color.)
  • to taste Ice cubes (For serving.)
  • as desired gummy worms (Optional garnishes.)
  • as desired eyeball candies (Optional garnishes.)

Preparation

  1. Gather all your ingredients.
  2. In a large pitcher, mix the lemon-lime soda, grape juice, and orange juice. Stir gently to combine.
  3. Gradually add the green food coloring, stirring until you reach your desired spooky color.
  4. Fill glasses with ice cubes and pour the Witches Brew over the ice.
  5. Garnish with gummy worms or eyeball candies for fun.
  6. Serve with spooky straws for an extra touch.

For serving, use colorful cups and consider rimming them with green or purple sugar. Decorate the serving area with Halloween-themed decorations.

Drink, Party
American, Halloween
Colorful Beverage, Fun Drink, Halloween Drink, Party Beverage, Witches Brew

Bloody Monster Eyes Halloween Milkshake

Bloody Monster Eyes Halloween Milkshake topped with creepy eyeball garnishes

Halloween is a time for spooky fun and tasty treats, and what better way to celebrate than with a Bloody Monster Eyes Halloween Milkshake? This colorful and delicious drink not only looks frightfully fun but also tastes fantastic. Perfect for Halloween parties or family gatherings, this milkshake is sure to be a hit with both kids and adults. Getting creative in the kitchen can be enjoyable, especially when the outcome is as playful as this milkshake. Plus, it adds a themed touch to your Halloween festivities!

why make this recipe

The Bloody Monster Eyes Halloween Milkshake is not just a drink; it’s an experience. It brings joy and excitement to any Halloween celebration. Making this milkshake is an opportunity to unleash your creativity and engage with family and friends in a fun activity. You can involve kids in the process, letting them help with the assembly and decoration. This milkshake is a blend of creamy goodness, sweet flavors, and eerie appeal, which makes it a great highlight for your Halloween menu.

This recipe is simple to follow, so you don’t need to be a professional chef to make it. With just a few ingredients, it allows for easy preparation and serves as a great way to create memories. The quirky decoration of “monster eyes” makes it visually appealing and adds a fun surprise element for guests. Plus, it’s easy to customize based on personal tastes or what you have at home. Overall, this milkshake is a delightful way to celebrate the spooky season!

how to make Bloody Monster Eyes Halloween Milkshake

To create the Bloody Monster Eyes Halloween Milkshake, gather your ingredients. You will need ice cream, milk, chocolate syrup, and some gummy eyeballs for decoration. Start with two cups of vanilla ice cream and add one cup of milk into a blender. Next, drizzle some chocolate syrup into the mixture for that delicious flavor and spooky appearance.

Blend everything until smooth, ensuring the milkshake has a thick consistency. If the shake is too thick for your liking, you can add a little more milk and blend again. Once your milkshake is ready, it’s time to serve. Get your favorite glasses and pour the milkshake into them, leaving some space at the top.

Now, for the fun part! Take your gummy eyeballs and place one or two on top of each milkshake. Drizzle more chocolate syrup over the “eyes” for a blood-like effect, and if you want to add some extra flair, garnish with whipped cream. Your Bloody Monster Eyes Milkshake is ready to scare and delight everyone at your Halloween gathering!

how to serve Bloody Monster Eyes Halloween Milkshake

Serving the Bloody Monster Eyes Halloween Milkshake is where the fun really begins! Choose some festive glasses or cups that fit your Halloween theme; black, orange, or even clear cups can work wonderfully. Pour the prepared milkshake into the cups, leaving a little room at the top for the toppings.

To make it extra festive, add whipped cream on top before placing the gummy eyeballs. This creates a fun spooky look and adds a creamy texture. You can also drizzle extra chocolate syrup over the whipped cream and eyes to enhance the creepy effect.

If you want to get fancy, consider using Halloween-themed straws or adding some decorative elements like plastic spiders or sticky eyeballs around the glasses. This will further enhance the theme and create a spooky atmosphere for your guests. Serve immediately and enjoy the reactions as everyone takes their first sip!

how to store Bloody Monster Eyes Halloween Milkshake

Storing your Bloody Monster Eyes Halloween Milkshake is simple, but it can be tricky since milkshakes are best enjoyed fresh. If you have leftovers, transfer them to an airtight container and place it in the freezer. This will keep the milkshake cold and frosty. However, when you want to enjoy them again, it’s best to let them thaw for a few minutes at room temperature before serving.

If ingredients remain unused, like the gummy eyeballs, store them in a cool, dry place. Avoid putting them in the fridge, as they may stick together. Keep the chocolate syrup handy for future drizzle. Remember that fresh milkshakes are the tastiest, so it’s ideal to prepare only what you think you can consume in one sitting.

For best quality, consume any stored milkshake within a day or two. Enjoying them fresh is always recommended for flavor and texture!

tips to make Bloody Monster Eyes Halloween Milkshake

Making the Bloody Monster Eyes Halloween Milkshake can be a fun and enjoyable activity. Here are some tips to make the process even smoother! First, choose high-quality vanilla ice cream for a creamy texture and rich flavor. Using cold milk helps keep the shake thick.

When it comes to blending, start on a low speed to combine everything and then move to high speed for a smooth finish. If you want a greener milkshake, consider using mint-flavored ice cream along with the vanilla.

You can also use food coloring to enhance the spooky effect. A few drops of red can create a bloodier look, or green can give it a monster effect. Be adventurous with garnishing details, such as additional candy or spooky sprinkles. Be sure to customize your toppings based on your party’s theme! Lastly, always serve your milkshake immediately for the best experience.

variation

If you want to try a fun twist on this recipe, consider adding chocolate or strawberry syrups into the milkshake for different flavors. You can also swap out the gummy eyeballs for candy corn or licorice strips. For adults, adding a splash of flavored liqueur can create a special spooky beverage for Halloween parties!

FAQs

1. Can I make the milkshake in advance?
While it’s best to make the milkshake fresh, you can prepare the base and store it in the freezer for a few hours. For the best taste and appearance, adding toppings should be done just before serving.

2. Can I use different ice cream flavors?
Absolutely! You can use any ice cream flavor you like, such as chocolate or mint chocolate chip, to create a unique milkshake experience.

3. What can I use instead of gummy eyeballs?
If you don’t have gummy eyeballs, try candy corn, chocolate-covered almonds, or other spooky-themed candies that can add a festive flair to your drink.

Bloody Monster Eyes Halloween Milkshake

A spooky and delicious milkshake perfect for Halloween festivities, featuring ‘monster eyes’ for an extra fun touch.

Milkshake Base

  • 2 cups vanilla ice cream (Choose high-quality for the best texture.)
  • 1 cup milk (Use cold milk for a thicker shake.)
  • 1 cup chocolate syrup (Plus extra for drizzling.)

Decorations

  • 8 pieces gummy eyeballs (For spooky decoration on top.)
  • 1 cup whipped cream (Optional for garnish.)

Preparation

  1. Combine the vanilla ice cream and milk in a blender.
  2. Add chocolate syrup to the blender.
  3. Blend until smooth; adjust thickness by adding more milk if necessary.

Serving

  1. Pour the milkshake into festive cups, leaving space at the top.
  2. Top each milkshake with whipped cream and place gummy eyeballs on top.
  3. Drizzle additional chocolate syrup over the whipped cream and eyeballs.
  4. Serve immediately with optional Halloween-themed straws.

For best results, serve immediately and customize toppings according to your Halloween theme. Store leftovers in an airtight container in the freezer, thawing slightly before consuming.

Dessert, Drink
American, Halloween
Bloody Milkshake, Fun Recipe, Halloween Milkshake, Halloween Treat, Spooky Drink