Cheesy Garlic Ritz Bits

If you’re looking for a delightful snack that is sure to win over your guests, Cheesy Garlic Ritz Bits are a perfect choice. These bite-sized treats combine the savory flavors of cheese and garlic with the satisfying crunch of Ritz crackers, making them a crowd favorite at parties or family gatherings. Imagine the aroma wafting through your kitchen as you prepare these tasty bites, enticing everyone around to come and enjoy. Trust me, once you try them, you’ll be excited to whip up this dish over and over again!

How to prepare Cheesy Garlic Ritz Bits

Making Cheesy Garlic Ritz Bits is simple and quick. Start by gathering all your ingredients, which include Ritz crackers, cheese, garlic powder, and butter. Preheat your oven to 350°F (175°C), then mix the garlic powder with melted butter. Brush this mixture onto the crackers, top them with cheese, and place them in the oven. Bake until the cheese is melted and bubbly. And voila, you have a delicious snack ready to serve!

Cheesy Garlic Ritz Bits

Why You’ll Love Cheesy Garlic Ritz Bits

These bite-sized snacks not only taste incredible but are also very versatile. You can customize the cheese used or even add spices to enhance the flavor. They are perfect for dipping, too! If you’re a fan of cheesy recipes, you might also enjoy these cheesy garlic chicken wraps. Each bite of Cheesy Garlic Ritz Bits is packed with flavor, making them an irresistible option for any occasion.

Tips for success

  1. Choose the Right Cheese: Opt for cheeses that melt well, like mozzarella or cheddar. You can even mix different kinds for a more complex flavor.
  2. Don’t Overcrowd: To ensure even cooking, arrange the crackers in a single layer without overlapping.
  3. Watch the Bake Time: Keep an eye on the oven so the crackers do not burn. They should be golden and the cheese nicely melted.

Cheesy Garlic Ritz Bits

Serving Suggestions

Serve your Cheesy Garlic Ritz Bits warm, alongside marinara sauce or your favorite dip. They pair well with a fresh salad or can even be a delicious appetizer before a meal. These bites are sure to be a hit whether at a family dinner or a casual get-together with friends.

FAQs

Can I make Cheesy Garlic Ritz Bits in advance?

Yes, you can prepare them ahead of time and bake them just before serving for the best results.

What can I substitute for butter?

You can use olive oil or a dairy-free butter substitute for a healthier option.

Can I freeze Cheesy Garlic Ritz Bits?

It’s best to bake them fresh, but if you have leftovers, you can freeze them. Reheat in the oven for a crispy texture.

Cheesy Garlic Ritz Bits

These bite-sized treats combine the savory flavors of cheese and garlic with the satisfying crunch of Ritz crackers, making them a perfect snack for parties or gatherings.

Main ingredients

  • 1 package Ritz crackers
  • 1 cup shredded cheese (mozzarella or cheddar) (Choose a cheese that melts well.)
  • 1 teaspoon garlic powder
  • 4 tablespoons butter, melted (Can substitute with olive oil or dairy-free butter.)

Preparation

  1. Preheat your oven to 350°F (175°C).
  2. Mix the garlic powder with the melted butter.
  3. Brush the garlic butter mixture onto the Ritz crackers.
  4. Top each cracker with shredded cheese.

Baking

  1. Place the crackers in the preheated oven.
  2. Bake for about 8 minutes until the cheese is melted and bubbly.
  3. Remove from the oven and let cool slightly before serving.

For best results, do not overcrowd the baking tray. Keep an eye on the crackers while baking to avoid burning. They can be served with marinara sauce or your favorite dip.

Appetizer, Snack
American
cheese snacks, Cheesy Garlic Ritz Bits, Easy Appetizers, Party Snacks, Snack Recipe

Easy Chicken Bacon Ranch Pinwheels

If you’re looking for a delicious and fun snack, look no further than Easy Chicken Bacon Ranch Pinwheels. These tasty treats are packed with flavor and are sure to be a hit at your next gathering. With a mix of tender chicken, crispy bacon, and creamy ranch dressing, it’s no wonder this recipe quickly becomes a crowd favorite. Plus, they are super easy to make, making them the perfect option for anyone wanting a quick bite. Just imagine serving these delightful pinwheels at your next party—everyone will want to grab a few!

How to prepare Chicken Bacon Ranch Pinwheels

Making these chicken bacon ranch pinwheels is a breeze. You’ll start by spreading a layer of cream cheese mixed with ranch dressing on a tortilla, then add shredded chicken and crispy bacon on top. Roll it up tightly, slice into pinwheels, and you’re ready to enjoy!

Easy Chicken Bacon Ranch Pinwheels: Your New Favorite Snack

Why You’ll Love Chicken Bacon Ranch Pinwheels

These pinwheels are loved for their delightful balance of flavors and textures. The creaminess from the ranch and cream cheese blend perfectly with the savory chicken and crispy bacon. They’re versatile as well—ideal for game day snacks, kids’ lunchboxes, or just a fun addition to a picnic. If you’re craving something with a similar flavor, check out this crispy chicken bacon ranch wrap that captures those same delicious notes.

Tips for success

To ensure your pinwheels turn out perfectly, here are a few tips to keep in mind. First, make sure to use fresh tortillas, as they will roll more easily without cracking. Second, allow the cream cheese to soften at room temperature for easier spreading. Lastly, refrigerate the rolled pinwheels for about 30 minutes before slicing—this helps them hold their shape.

Easy Chicken Bacon Ranch Pinwheels: Your New Favorite Snack

Serving Suggestions

These tasty pinwheels can be served at room temperature, making them perfect for parties. Pair them with a side of fresh veggies and dip or a zesty salsa for added flavor. You could also serve them alongside a refreshing salad or some crispy potato chips.

FAQs

Q: Can I use a different type of meat?

A: Absolutely! You can substitute the chicken with turkey, ham, or even a vegetarian option like roasted veggies.

Q: How long can I store leftover pinwheels?

A: Leftovers can be stored in an airtight container in the refrigerator for up to 3 days.

Q: Can I make these pinwheels ahead of time?

A: Yes, you can prepare these pinwheels a day in advance. Just make sure to wrap them tightly in plastic wrap and keep them refrigerated until you’re ready to serve.

Get ready to impress everyone with these Easy Chicken Bacon Ranch Pinwheels—your new favorite snack awaits!

Chicken Bacon Ranch Pinwheels

A delicious and easy snack featuring tender chicken, crispy bacon, and creamy ranch dressing, perfect for gatherings.

Main ingredients

  • 4 oz cream cheese (Softened at room temperature)
  • 1/4 cup ranch dressing
  • 2 cups shredded cooked chicken
  • 6 slices crispy bacon (Cooked and crumbled)
  • 4 large tortillas (Fresh for easy rolling)

Preparation

  1. In a medium bowl, mix the softened cream cheese and ranch dressing until smooth.
  2. Spread the cream cheese mixture evenly over each tortilla.
  3. Sprinkle shredded chicken and crumbled bacon over the cream cheese layer on each tortilla.
  4. Starting at one end, tightly roll the tortilla up to form a log.
  5. Wrap the rolled tortillas in plastic wrap and refrigerate for about 30 minutes to help them hold their shape.
  6. Once chilled, slice the rolled tortillas into 1-inch pinwheels.
  7. Serve immediately or store in an airtight container in the refrigerator.

Use fresh tortillas for better rolling and allow cream cheese to soften for easier spreading.

Appetizer, Snack
American
bacon ranch, chicken pinwheels, easy snacks, Party Food, quick bites

Crab Crescent Bites Delight

Delicious Crab Crescent Bites on a serving platter

Making tasty snacks can bring joy to any gathering or quiet night at home. One snack that truly shines is Crab Crescent Bites Delight. This dish is a delightful blend of creamy crab meat and flaky crescent rolls, making it a fabulous choice for parties, family get-togethers, or even just a cozy night in. Loved by seafood fans and even those who aren’t big on seafood, these bites pack a punch of flavor that keeps everyone coming back for more. With their crispy exterior and rich filling, they are sure to become a favorite in your home. So, let’s dive into this delicious recipe and get ready to impress your friends and family!

How to Prepare Crab Crescent Bites Delight

To whip up a batch of Crab Crescent Bites Delight, gather your ingredients: one can of crescent roll dough, eight ounces of cream cheese, one cup of crab meat (canned or fresh), half a cup of shredded cheddar cheese, one tablespoon of lemon juice, two green onions (chopped), and some salt and pepper for taste.

  1. Start by preheating your oven to 375°F (190°C).
  2. In a mixing bowl, combine the softened cream cheese, crab meat, cheddar cheese, lemon juice, green onions, salt, and pepper. Mix everything until well combined.
  3. Roll out the crescent dough and separate it into triangles as indicated on the package.
  4. Place a spoonful of the crab filling onto the wider end of each triangle.
  5. Roll the dough around the filling, starting from the wide end and working toward the point.
  6. Place the rolled bites on a baking sheet and bake for 15 to 20 minutes or until they are golden brown.
  7. Let them cool slightly before serving, and enjoy!

Why You’ll Love Crab Crescent Bites Delight

Crab Crescent Bites Delight are not just another snack; they are a flavor explosion in every bite. The combination of creamy crab and cheese wrapped in warm, flaky dough is simply irresistible. They are easy to make, which means you can prepare them quickly for unexpected guests or for a special get-together. Plus, they are perfect for all ages. Kids enjoy the fun of eating a little puff pastry while adults appreciate the sophisticated taste of crab and cheese. You can also customize the filling by adding your favorite ingredients. These bites are sure to become a hit at any table, making them a go-to recipe for all your gatherings.

Tips for Success

  1. Use Fresh Ingredients: If you can, opt for fresh crab meat instead of canned for a more vibrant flavor.
  2. Prep Ahead: You can prepare the filling and assemble the bites ahead of time. Just bake them right before serving for warm and crispy treats.
  3. Watch the Bake Time: Keep an eye on the bites as they bake. Ovens can vary, and you want them to be a perfect golden brown without burning.
  4. Experiment with Spices: Feel free to add spices like Old Bay seasoning or paprika for an extra kick.
  5. Serve with Dipping Sauce: Pair these bites with a tasty dipping sauce like cocktail sauce or a creamy garlic sauce to elevate the flavors.

Serving Suggestions

Crab Crescent Bites Delight can be served as a fantastic appetizer for any occasion. They pair wonderfully with drinks at a party or as part of a buffet spread. Consider adding a fresh salad or a veggie platter alongside for a balanced meal. For a casual night in, serve them with some homemade fries or a light soup, like clam chowder, to complete the seafood theme. Also, they make a great snack while watching your favorite movie or enjoying family game night. Remember, these bites are just as delicious when served at room temperature, so they can be set out on the table for guests to enjoy at their own pace.

FAQs

Can I use other types of seafood instead of crab?

Yes, you can substitute crab with shrimp, lobster, or even a mix of seafood for a different flavor.

Can I make these bites in advance?

Absolutely! You can prepare the filling and assemble the bites a few hours ahead. Just bake them when you are ready to serve.

Can I freeze them?

Yes, these bites freeze well! Freeze unbaked bites on a baking sheet, then transfer to a freezer bag. Bake directly from frozen, adding a few extra minutes to the bake time.

[tasty-recipe id=”5090″]

Crab Crescent Bites Delight

A delightful blend of creamy crab meat and flaky crescent rolls, perfect for any gathering.

Main Ingredients

  • 1 can crescents roll dough (Dough to wrap the filling)
  • 8 oz cream cheese (Softened for mixing)
  • 1 cup crab meat (Canned or fresh crab meat)
  • 0.5 cup shredded cheddar cheese (Adds creaminess and flavor)
  • 1 tbsp lemon juice (For freshness)
  • 2 pcs green onions (Chopped for flavor)
  • to taste salt and pepper (For seasoning)

Preparation

  1. Preheat your oven to 375°F (190°C).
  2. In a mixing bowl, combine the softened cream cheese, crab meat, cheddar cheese, lemon juice, green onions, salt, and pepper. Mix everything until well combined.
  3. Roll out the crescent dough and separate it into triangles as indicated on the package.
  4. Place a spoonful of the crab filling onto the wider end of each triangle.
  5. Roll the dough around the filling, starting from the wide end and working toward the point.

Baking

  1. Place the rolled bites on a baking sheet and bake for 15 to 20 minutes or until they are golden brown.
  2. Let them cool slightly before serving, and enjoy!

Use fresh crab meat for the best flavor. You can prep the filling ahead of time and bake just before serving. These bites pair well with various dipping sauces.

Appetizer, Snack
American, Seafood
Crab Bites, Crescent Rolls, Finger Food, Party Food, Seafood Snacks

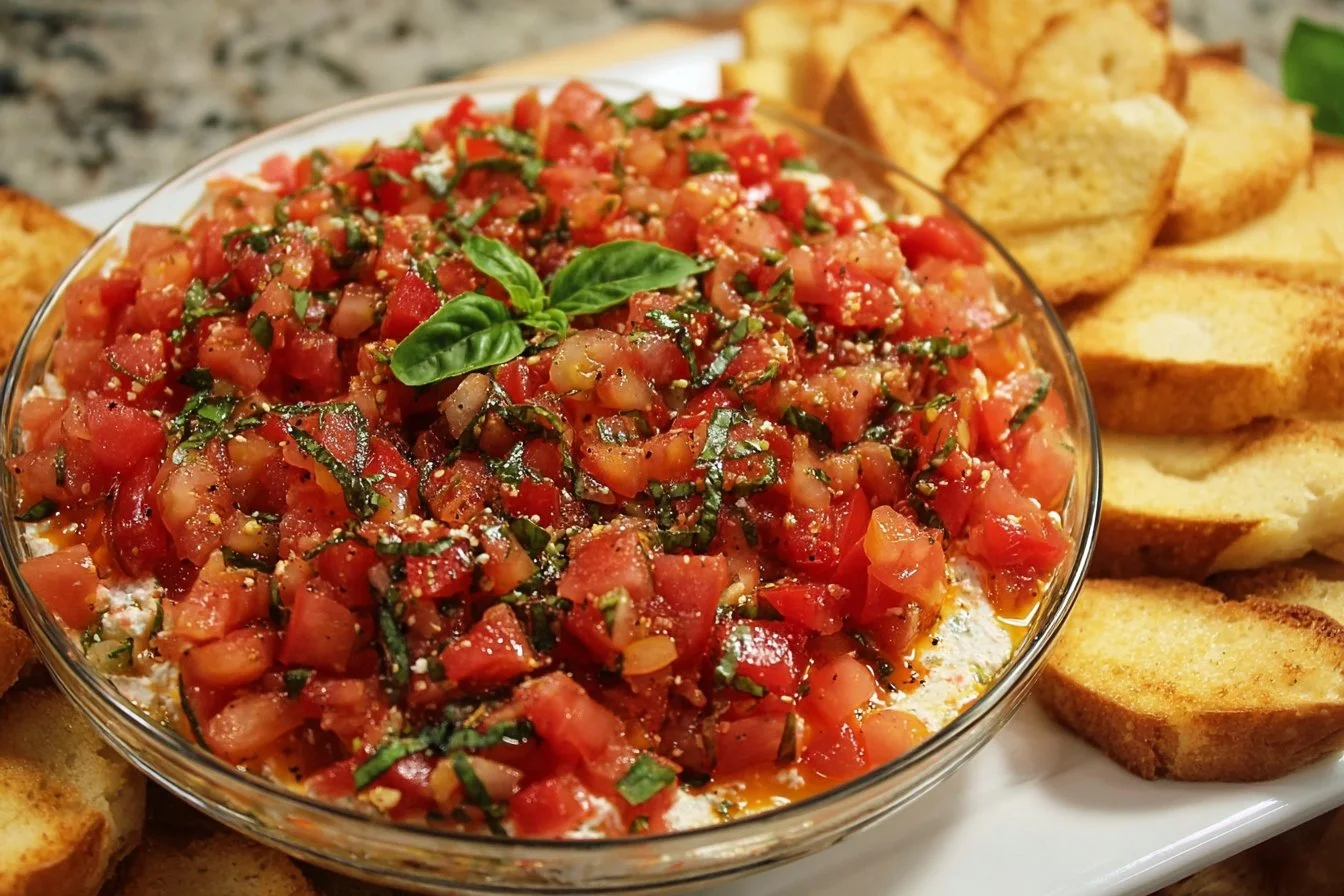
Bruschetta Dip: A Vibrant and Flavorful Appetizer to wow Your Guests

Colorful Bruschetta Dip garnished with fresh herbs and served with crusty bread.

Bruschetta Dip is not just any appetizer; it’s a delightful mix of chopped tomatoes, fresh basil, and creamy goodness that brings people together. This dip takes inspiration from the classic Italian bruschetta but gives it a fun twist that makes it perfect for any gathering. Whether you are hosting a party or enjoying a casual get-together, this dip will surely steal the spotlight on your snack table. Its vibrant colors and fresh flavors make it appealing to all, and the best part is how simple it is to prepare. Grab some crispy bread or crunchy chips, and get ready to impress your guests with this delicious Bruschetta Dip that they will be talking about long after the last bite. Let’s dive into how to create this crowd-pleaser!

How to Prepare Bruschetta Dip

To start making Bruschetta Dip, gather the ingredients: ripe tomatoes, fresh basil, garlic, cream cheese, sour cream, and a sprinkling of salt and pepper. Chop the tomatoes and basil into small pieces. In a mixing bowl, combine the cream cheese and sour cream until smooth. Stir in the chopped tomatoes, basil, minced garlic, and season with salt and pepper to taste. Mix everything gently until well-combined. Once your dip is ready, transfer it to a serving dish and chill it in the fridge for about 30 minutes. This allows the flavors to meld beautifully. While waiting, you can prepare your favorite dippers, like toasted bread or tortilla chips. When you’re ready to serve, take it out and enjoy the burst of flavors in every scoop!

Why You’ll Love Bruschetta Dip

Bruschetta Dip is the ultimate appetizer that combines fresh flavors and creamy texture, making it a hit with everyone. It is so easy to make, even a beginner in the kitchen can whip it up in no time. You can adjust the ingredients to suit your taste, adding more garlic or even a dash of balsamic vinegar for an extra zing. Plus, it’s versatile; you can serve it with various dippers, from crunchy crackers to sliced baguette. Your guests will not only love the taste but will appreciate the fresh ingredients that make this dip stand apart from store-bought options. The delightful mix of flavors makes it perfect for any season, whether it’s a summer barbecue or a cozy winter gathering. Once you try it, you will want to make it for every occasion!

Tips for Success

To ensure your Bruschetta Dip turns out perfectly, follow these helpful tips. First, use fresh, ripe tomatoes for the best flavor. If they are not in season, consider using cherry tomatoes, which are sweeter and easier to chop. Second, don’t skip the chilling step; letting the dip sit in the fridge for at least 30 minutes allows the flavors to develop and taste even better. Third, if you want a smoother texture, blend the cream cheese with sour cream in a food processor before mixing in the fresh ingredients. Lastly, for added flavor, consider adding some shredded mozzarella or grated Parmesan cheese to the dip. These tips will help you impress everyone at your gathering and create a dish they will crave again!

Serving Suggestions

When serving Bruschetta Dip, presentation is key to making it inviting. Start by placing the dip in a colorful bowl to attract attention. Pair it with a variety of dippers to cater to different tastes. You can use toasted baguette slices, pita chips, and assorted veggies like carrots or cucumbers for a fresh crunch. For a fun twist, serve it with flavored tortilla chips that can add an interesting taste to your dip. To make it even more appealing, garnish the dip with sprigs of fresh basil or a sprinkle of feta cheese. You could also offer a complementary drink, such as sparkling water with a slice of lemon or a glass of white wine. Your guests will love the variety and want to dig in!

FAQs

Can I make Bruschetta Dip ahead of time?

Yes, you can prepare the dip a few hours in advance and store it in the refrigerator. Just be sure to cover it well to keep it fresh.

What can I substitute for cream cheese?

You can use Greek yogurt for a lighter version or a dairy-free cream cheese alternative if you are looking for a vegan option.

How long does Bruschetta Dip last?

The dip can be stored in the refrigerator for up to 3 days. Make sure to keep it in an airtight container to maintain its freshness.

Can I add other ingredients to the dip?

Absolutely! You can add ingredients like olives, roasted red peppers, or even diced avocado to customize the dip to your liking.

Bruschetta Dip

A creamy, fresh dip filled with ripe tomatoes, aromatic basil, and garlic, topped with melted cheese; perfect for gatherings.

For the dip

  • 2 cups diced tomatoes (Make sure they are ripe and juicy for the best flavor.)
  • 1/2 cup chopped fresh basil
  • 1 clove garlic, minced
  • 8 oz cream cheese, softened
  • 1/2 cup sour cream
  • 1/2 cup shredded mozzarella cheese
  • Salt and pepper to taste

For serving

  • Baguette slices or tortilla chips (Crispy baguette slices or crunchy tortilla chips work best.)

Preparation

  1. In a mixing bowl, combine diced tomatoes, chopped basil, minced garlic, salt, and pepper. Mix well and set aside.
  2. In another bowl, blend softened cream cheese and sour cream until smooth.
  3. Spread the cream cheese mixture into a baking dish.
  4. Layer the tomato basil mixture over the cream cheese layer.
  5. Sprinkle shredded mozzarella cheese on top.

Baking

  1. Bake in a preheated oven at 350°F (175°C) for 20-25 minutes, or until bubbly and golden.
  2. Remove from the oven and let it cool for a few minutes.

Serving

  1. Serve warm with baguette slices or tortilla chips.

Feel free to add other ingredients like olives, red onion, or a drizzle of balsamic glaze for extra richness. For a spicier kick, consider adding red pepper flakes to the tomato mixture.

Appetizer, Snack
Italian
Appetizer Dip, Bruschetta Dip, Creamy Dip, Easy Recipe, Party Food

Loaded Tater Tots Appetizers

Delicious loaded tater tots appetizers topped with cheese and toppings

There’s something truly special about Loaded Tater Tots Appetizers. These bite-sized delights are the perfect combination of crispy, cheesy goodness, topped with all your favorite flavors. Imagine golden-brown tater tots, smothered in melted cheese, crispy bacon bits, and freshly chopped green onions. It’s no surprise that this dish has become a favorite for parties, game days, and casual gatherings. Anyone who takes a bite will instantly smile and ask for more. If you’re looking for a fun and delicious appetizer that is sure to impress your guests, then Loaded Tater Tots are your answer. Get ready to roll up your sleeves and make these fabulous treats at home!

How to Prepare Loaded Tater Tots Appetizers

To make Loaded Tater Tots Appetizers, start by preheating your oven to 425°F (220°C). Spread a bag of frozen tater tots evenly on a baking sheet and bake them according to the package instructions, usually around 20 to 25 minutes, until they are golden and crispy. While the tater tots are baking, prepare your toppings. In a small bowl, mix cooked and crumbled bacon, shredded cheese, and chopped green onions. Once the tater tots are done, take them out of the oven and sprinkle the cheese mixture generously over the top. Return the baking sheet to the oven for an additional 5 minutes, or until the cheese is melted and bubbly. Remove from the oven and finish with a drizzle of sour cream or ranch dressing, as well as a sprinkle of extra green onions. Serve warm and enjoy every delicious bite.

Why You’ll Love Loaded Tater Tots

Loaded Tater Tots are not just any appetizer, they are a flavor explosion! The crunchy texture of the tots pairs beautifully with the gooey melted cheese and savory bacon. They are also super easy to make, which means you can whip them up in no time, whether it’s for a movie night or a casual get-together with friends. The customizable toppings make each serving unique, allowing everyone to enjoy their own perfect version. Plus, who can resist a dish that combines crispy potatoes and all that cheesy goodness? You will find that these tempting treats disappear quickly, leaving everyone craving more.

Tips for Success

To ensure your Loaded Tater Tots turn out perfectly every time, here are some simple tips. First, make sure to spread the tater tots in a single layer on the baking sheet for even cooking. This helps them get crispy all around. Use a mix of cheeses for extra flavor; cheddar and Monterey Jack work great together. Don’t be shy with the toppings, as they’re what make these tater tots truly loaded! For added crunch, try adding some chopped jalapeños for a spicy kick or some fresh diced tomatoes for a burst of freshness. Lastly, serve them right away to enjoy the cheesy goodness at its best.

Serving Suggestions

Loaded Tater Tots Appetizers can be served as a fun starter or a side dish at any meal. They pair wonderfully with a variety of dips like salsa, guacamole, or creamy ranch dressing. For a full meal experience, consider serving them alongside BBQ wings or sliders to create a delicious spread. They make a festive addition to any potluck or game day party too, sure to bring everyone together over their love for these tasty bites. Don’t forget to garnish with extra toppings like cilantro or sour cream for an extra touch of flavor!

FAQs

Can I make Loaded Tater Tots in an air fryer?
Yes, you can prepare them in an air fryer! Simply cook the tater tots as instructed, then follow the same loading and baking process.

Can I use fresh potatoes instead of frozen?
Absolutely! You can cut fresh potatoes into bite-sized pieces, blanch them, and then bake until crispy.

How do I store leftovers?
Store any leftovers in an airtight container in the fridge for up to three days. Reheat them in the oven or air fryer to restore their crispiness!

Loaded Tater Tots Appetizers

Crispy golden Tater Tots topped with melted cheese, crispy bacon, fresh toppings, and a drizzle of creamy sauce make for a fun and flavorful snack or side dish.

Main ingredients

  • 24 oz Frozen Tater Tots (Spread in a single layer on a baking sheet)
  • 8 oz Shredded cheese (Use your favorite type of cheese)
  • 6 oz Bacon (Cook until crispy and crumble on top)
  • 1 cup Sour cream (For drizzling on top)
  • 3 tbsp Green onions (Chopped, for garnish)

Preparation

  1. Preheat your oven to 400°F (200°C).
  2. Spread the frozen Tater Tots on a baking sheet in a single layer.
  3. Bake in the preheated oven for about 20-25 minutes or until they are golden brown and crispy.
  4. In the meantime, cook the bacon in a skillet over medium heat until it is crispy. Then, remove it from the pan and let it drain on paper towels.
  5. After the Tater Tots are done baking, take them out of the oven and sprinkle the shredded cheese and crumbled bacon on top.
  6. Return them to the oven for an additional 5 minutes or until the cheese is melted.

Serving

  1. Once they’re out of the oven, top with sour cream, chopped green onions, and any other toppings you like.
  2. Serve warm and enjoy!

Spread Tater Tots evenly for cooking. Customize toppings as desired. Serve hot for best taste.

Appetizer, Snack
American
Cheesy Tater Tots, Comfort Food, Loaded Tater Tots, Party Food, Tater Tots

Easy Baked Cream Cheese Rangoon Rolls

Delicious baked cream cheese rangoon rolls ready to serve

I don’t know if you have ever had the pleasure of eating the cream cheese rangoons from Panda Express, but just to give you an idea, they’re basically heaven in your mouth. This recipe is very similar, only they’re baked instead of fried, and rolled into fun little sticks. Anyone who loves cream cheese will certainly enjoy them, try the baked beef and cheese sliders recipe I link to for more simple snacks. You will smile making these, and you might make them again the same week.

How to prepare Easy Baked Cream Cheese Rangoon Rolls

Ingredients

  • 8 oz cream cheese, softened
  • 1/2 cup finely chopped green onion
  • 1/2 cup finely chopped cooked crab or imitation crab, optional
  • 1 teaspoon garlic powder
  • 1 teaspoon soy sauce (optional)
  • 24 wonton wrappers
  • 1 tablespoon oil or cooking spray
  • 1 egg beaten, for egg wash (optional)

Directions

  1. Preheat oven to 400°F (200°C). Line a baking sheet with parchment.
  2. In a bowl, mix cream cheese, green onion, crab if used, garlic powder, and soy sauce until smooth.
  3. Place one wonton wrapper on a clean surface. Put about 1 teaspoon of filling in the center.
  4. Fold the wrapper into a roll or triangle, sealing edges with a little water or egg wash. Repeat with all wrappers.
  5. Place rolls on the baking sheet. Brush lightly with oil or egg wash, or spray with cooking spray.
  6. Bake 8 to 12 minutes, until the wrappers are golden and crisp. Let cool a few minutes before serving.

Easy Baked Cream Cheese Rangoon Rolls

Why You’ll Love Easy Baked Cream Cheese Rangoon Rolls

  • They are simple to make with few ingredients, so they fit busy nights.
  • Baking keeps them lighter than frying, and they still get crisp and golden.
  • The inside is creamy and rich, the outside is crisp, a great contrast.
  • You can make them ahead and bake when guests arrive, easy party food.
  • They work with or without crab, so you can make them vegetarian or not.

Tips for success

  • Soften the cream cheese well, it mixes smooth and fills easily.
  • Do not overfill the wrappers, one teaspoon is usually enough.
  • Seal edges with a little water or egg so they do not open while baking.
  • Space rolls on the sheet so hot air can crisp them evenly.
  • Watch the oven near the end, they go from golden to dark fast.

Serving Suggestions

  • Serve with sweet chili sauce, soy sauce, or a simple plum sauce.
  • Put them on a party plate with veggies for a fuller snack spread.
  • Make smaller or larger rolls to match your crowd.
  • These fit well with other finger foods and dips for a buffet or game night.

Easy Baked Cream Cheese Rangoon Rolls

FAQs

Q: Can I freeze these before baking?

A: Yes, freeze the raw rolls on a tray, then put in a bag. Bake from frozen, add a few minutes to the time.

Q: Can I make them without crab?

A: Yes, leave out crab and add more green onion, or a bit of finely chopped bell pepper for crunch.

Q: Are they healthy if baked?

A: Baking cuts the oil from frying, so they are lighter. Still, they are a snack, so enjoy in small portions.

Q: Can I use cream cheese packets or flavored cream cheese?

A: You can use flavored cream cheese for different taste, but reduce added salt or soy sauce if it’s already salty.

Conclusion

These Easy Baked Cream Cheese Rangoon Rolls make a warm, tasty snack that is quick to make and loved by many. For another take on baked party food ideas, see Baked Cream Cheese Rangoon Rolls – Instrupix, it offers a clear view of how these rolls can turn out and other tips to try.

Easy Baked Cream Cheese Rangoon Rolls

These baked cream cheese rangoons are a lighter version of the classic, crunchy on the outside and creamy on the inside, perfect for parties or quick snacks.

Filling Ingredients

  • 8 oz cream cheese, softened (Make sure it’s well softened for easy mixing.)
  • 1/2 cup finely chopped green onion
  • 1/2 cup finely chopped cooked crab or imitation crab, optional (Can be omitted for a vegetarian option.)
  • 1 teaspoon garlic powder
  • 1 teaspoon soy sauce, optional

Wrapper Ingredients

  • 24 pieces wonton wrappers
  • 1 tablespoon oil or cooking spray (For brushing or spraying the rolls.)
  • 1 piece egg, beaten, for egg wash, optional

Preparation

  1. Preheat the oven to 400°F (200°C) and line a baking sheet with parchment paper.
  2. In a bowl, mix the cream cheese, green onion, crab (if used), garlic powder, and soy sauce until smooth.
  3. Place one wonton wrapper on a clean surface and put about 1 teaspoon of the filling in the center.
  4. Fold the wrapper into a roll or triangle and seal the edges with a little water or egg wash. Repeat with all wrappers.
  5. Place the rolls on the baking sheet. Brush lightly with oil or egg wash, or spray with cooking spray.
  6. Bake for 8 to 12 minutes, until the wrappers are golden and crisp. Let cool for a few minutes before serving.

These rangoons are lighter than the fried versions and still delicious. Serve with sweet chili sauce or soy sauce for dipping. Can be frozen before baking and cooked from frozen, just add a few extra minutes.

Appetizer, Snack
American, Asian
Baked Appetizers, Cream Cheese Rangoons, easy snacks, Finger Foods, Party Snacks