Easy Soft Sandwich Bread

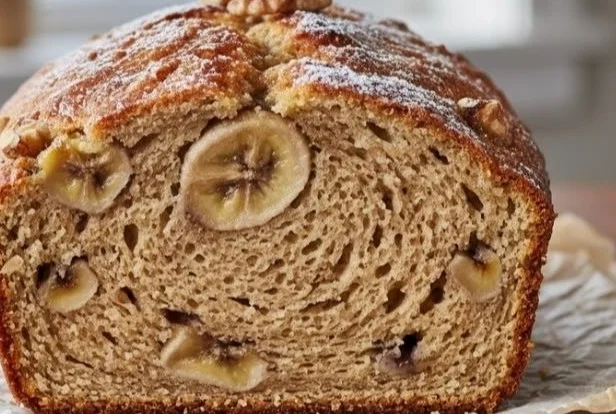
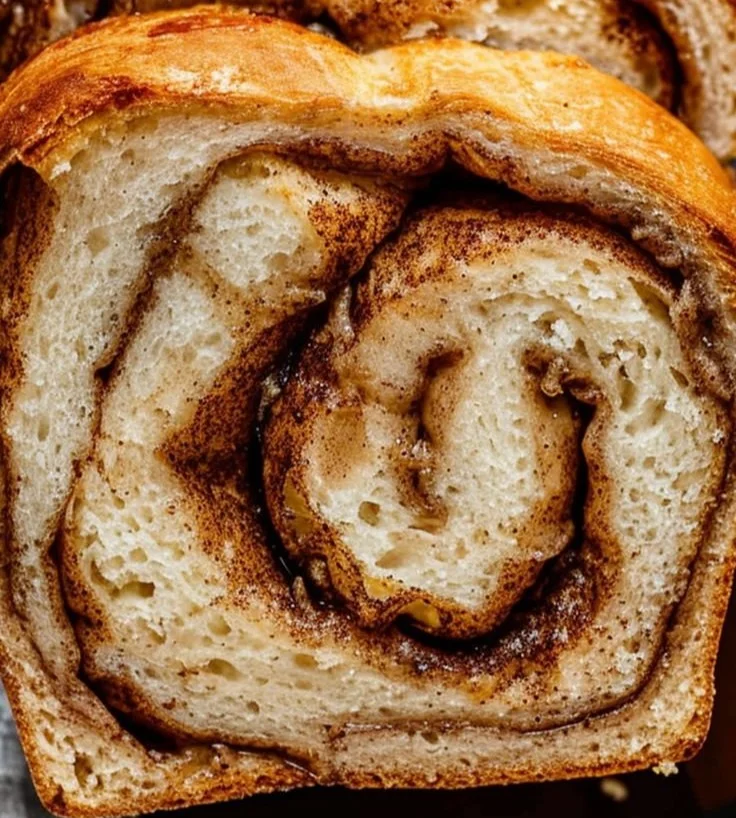
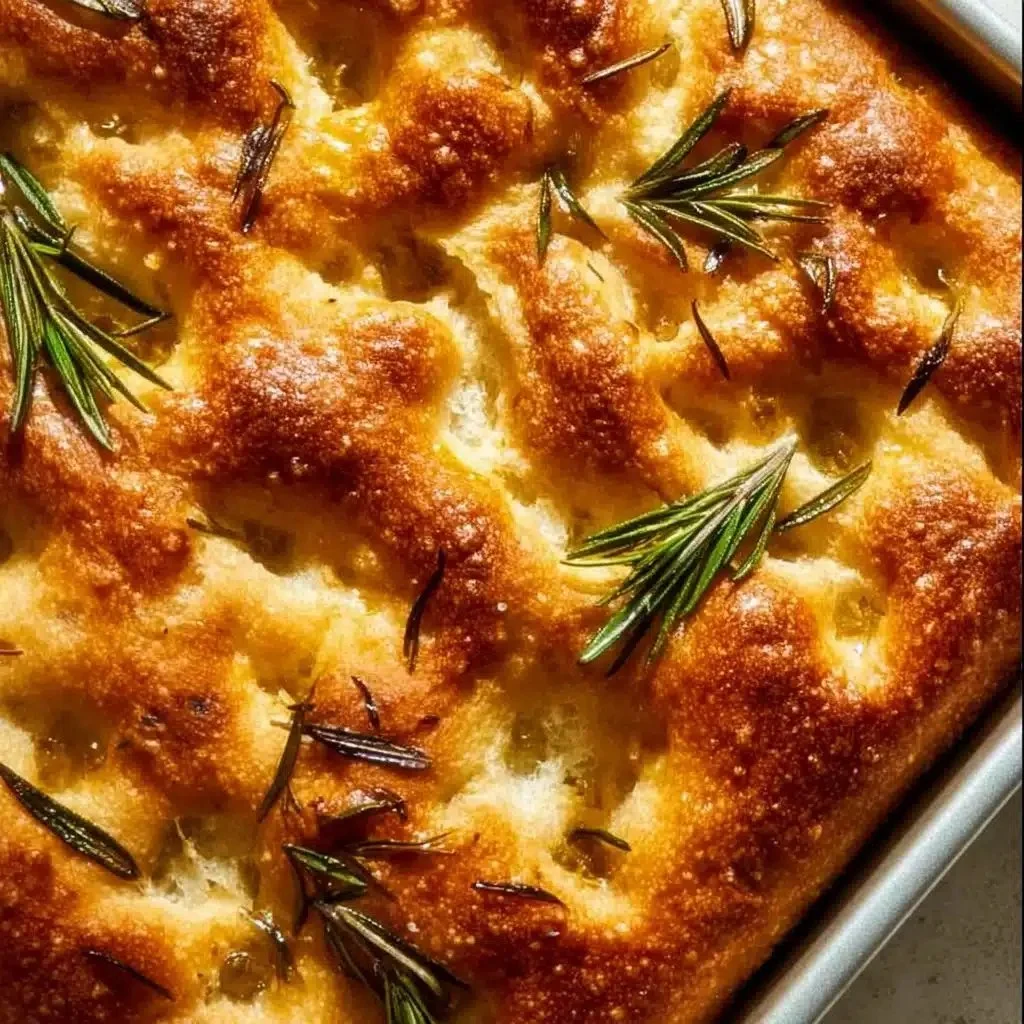
Loaf of easy soft sandwich bread fresh out of the oven

Easy Soft Sandwich Bread feels warm and friendly, the kind of loaf that makes simple lunches and cozy breakfasts better. This homemade sandwich loaf is soft, tender, and mild in taste, so kids and adults both love it. The crumb is light and the crust stays soft, which makes perfect slices for sandwiches, toast, and more. If you like soft baked goods, you might enjoy a sweet twist too, like this banana bread cookies recipe for another soft treat. Ready to bake a loaf that will vanish fast, and maybe steal a piece before anyone notices?

how to prepare Easy Soft Sandwich Bread

  1. Gather ingredients, about 3 1/2 cups all purpose flour, 2 1/4 teaspoons active dry yeast, 2 tablespoons sugar, 1 teaspoon salt, 1 cup warm milk, 1/4 cup warm water, 2 tablespoons softened butter, 1 large egg.
  2. Mix yeast and warm water with a pinch of sugar, let sit 5 minutes until foamy.
  3. In a large bowl, stir flour, sugar, and salt. Make a well in center, add milk, egg, yeast mix, and softened butter.
  4. Stir until dough comes together, then turn onto a lightly floured surface. Knead 8 to 10 minutes until smooth and elastic.
  5. Place dough in a lightly oiled bowl, cover with a clean towel or plastic wrap, let rise in a warm spot until doubled, about 1 hour.
  6. Punch dough down gently, shape into a loaf, place in a greased 9×5 inch loaf pan. Cover and let rise again until about 1 inch above the rim, about 30 to 45 minutes.
  7. Preheat oven to 350°F (175°C). Brush top with a little milk or melted butter for a soft crust.
  8. Bake 30 to 35 minutes until golden and the loaf sounds hollow when tapped. If top browns too fast, cover loosely with foil.
  9. Let cool in pan 10 minutes, then remove to a rack to cool before slicing, this helps keep slices neat and soft.

Easy Soft Sandwich Bread

Why You’ll Love Easy Soft Sandwich Bread

  • The texture is pillowy and moist, perfect for sandwiches and toast.
  • It uses simple pantry ingredients, no fancy tools needed.
  • It stays soft for days if wrapped well, so you get fresh bread without daily baking.
  • Versatile for peanut butter, jam, deli meats, or grilled cheese.
  • Great for beginners, the steps are clear and forgiving.

tips for success

  • Use warm, not hot, milk and water, about 100°F to 110°F, so yeast wakes up without dying.
  • Measure flour by spooning into the cup and leveling, do not pack, too much flour makes a dense loaf.
  • Knead until dough is smooth, it may feel sticky at first, but it should become elastic.
  • Let the dough rise in a warm, draft free spot, like an oven with the light on.
  • Don’t skip the second rise, it gives the loaf its soft crumb.
  • Test doneness by tapping the bottom, it should sound hollow, or check the internal temp, about 190°F to 200°F.

Serving Suggestions

  • Make classic deli sandwiches with thin slices, lettuce, and cheese.
  • Toast slices and spread butter and jam for simple breakfasts.
  • Use for French toast, soak slices for extra soft results.
  • Cube and use for warm bread pudding or stuffing.
  • Freeze sliced loaf, then toast straight from the freezer for quick meals.

Easy Soft Sandwich Bread

FAQs

Q: How long does this bread stay fresh?

A: Wrapped tight in plastic or stored in a bread box, it stays soft for 3 to 4 days at room temperature. For longer storage, slice and freeze.

Q: Can I use whole wheat flour?

A: Yes, you can swap part of the flour for whole wheat, try replacing up to half for a softer rise. You may need a little more liquid.

Q: Can I make this bread without an egg?

A: Yes, skip the egg and add a tablespoon more milk and one more minute of kneading for a similar result.

Q: Do I need a stand mixer?

A: No, you can knead by hand. A mixer with a dough hook just saves time and effort.

Conclusion

This Easy Soft Sandwich Bread makes simple meals feel homemade and special, with a soft slice every time. For another tested sandwich bread method and a step by step video, see Simply Sandwich Bread (Recipe + Video) – Sally’s Baking Addiction. Enjoy baking, and don’t forget to save a slice for yourself.

Easy Soft Sandwich Bread

A soft, tender loaf perfect for sandwiches, toast, and cozy breakfasts, Easy Soft Sandwich Bread is loved by both kids and adults alike.

Dough Ingredients

  • 3.5 cups all-purpose flour (Measure by spooning into the cup and leveling.)
  • 2.25 teaspoons active dry yeast (Mix with warm water to activate.)
  • 2 tablespoons sugar (Used to activate yeast.)
  • 1 teaspoon salt
  • 1 cup warm milk (Temperature should be about 100°F to 110°F.)
  • 0.25 cups warm water (Temperature should be about 100°F to 110°F.)
  • 2 tablespoons softened butter (For flavor and texture.)
  • 1 large egg (Optional, can be replaced for egg-free version.)

Preparation

  1. Mix yeast and warm water with a pinch of sugar, let sit for 5 minutes until foamy.
  2. In a large bowl, stir together flour, sugar, and salt. Make a well in the center, then add warm milk, egg, yeast mixture, and softened butter.
  3. Stir until the dough comes together, then turn it onto a lightly floured surface and knead for 8 to 10 minutes until smooth and elastic.

Rising

  1. Place the dough in a lightly oiled bowl, cover with a towel or plastic wrap, and let it rise in a warm spot until doubled in size, about 1 hour.
  2. Punch the dough down gently, shape it into a loaf, and place in a greased 9×5 inch loaf pan. Cover and let rise again until about 1 inch above the rim, about 30 to 45 minutes.

Baking

  1. Preheat oven to 350°F (175°C). Brush the top with a little milk or melted butter for a soft crust.
  2. Bake for 30 to 35 minutes until golden and the loaf sounds hollow when tapped. If the top browns too quickly, cover loosely with foil.
  3. Let cool in the pan for 10 minutes, then remove to a rack to cool before slicing.

Wrap well to keep bread fresh for 3 to 4 days at room temperature. For longer storage, slice and freeze.
Breakfast, lunch, Snack
American
basic bread, Easy Bread Recipe, Homemade Bread, sandwich bread, soft bread

World’s Easiest Yeast Bread Recipe

Freshly baked yeast bread loaf on a wooden table

This bread feels like a warm hug, and it is easy to make. The World’s Easiest Yeast Bread Recipe – Artisan, No Knead makes a crusty loaf with a soft, open crumb inside. People love it because it tastes like bakery bread but needs very little work. It fits busy days, beginners, and anyone who likes fresh bread. For a different homemade treat, you might also enjoy a simple cookie recipe I like, like this banana bread cookies recipe. Try this loaf and you will soon want to bake it again, it is that good and friendly.

how to prepare Yeast Bread Recipe

Ingredients

  • 3 cups all purpose flour
  • 1 teaspoon instant yeast
  • 1 1/4 teaspoons salt
  • 1 1/2 cups warm water

Directions

  1. In a big bowl, mix flour, yeast, and salt. Stir to combine.
  2. Pour in warm water, mix with a spoon until the dough comes together, it will be sticky.
  3. Cover the bowl with plastic wrap or a towel. Let it sit at room temperature for 12 to 18 hours, the dough will rise and get bubbles.
  4. After rising, dust your work surface with flour. Tip the dough out and fold it a few times to shape a rough ball. Do not knead.
  5. Place the dough on a piece of parchment paper. Cover and rest 30 minutes while you heat the oven.
  6. Heat oven to 450°F (230°C) with a heavy pot or Dutch oven inside, lid on, for 30 minutes.
  7. Carefully remove the hot pot, lift the dough with parchment into the pot, cover, and bake 30 minutes.
  8. Remove the lid, bake 10 to 15 more minutes until the crust is deep golden and crisp.
  9. Take the bread out and cool on a rack at least 30 minutes before slicing.

World's Easiest Yeast Bread Recipe - Artisan, No Knead

Why You’ll Love Yeast Bread Recipe

  • Very low work, no kneading, mix and wait.
  • Crunchy crust and soft inside, like artisan bread.
  • Uses simple pantry ingredients, no fancy tools.
  • Great for beginner bakers and busy cooks.
  • It fills your home with a warm, fresh bread smell.

tips for success

  • Use warm, not hot water, to help the yeast work.
  • Let the dough rest long enough, the long rise builds flavor.
  • Do not add too much flour when shaping, a sticky dough makes a better crumb.
  • Use a heavy lidded pot for best crust, a cast iron Dutch oven works well.
  • Cool the bread fully before you cut it, slicing too soon makes it gummy.

Serving Suggestions

  • Serve warm with butter and jam, simple and perfect.
  • Make sandwiches with slices of this crusty loaf.
  • Use for soup dipping, the crust holds up well.
  • Turn slices into toast or garlic bread for a quick treat.

World's Easiest Yeast Bread Recipe - Artisan, No Knead

FAQs

Q: How long can I store this bread?

A: Store at room temperature in a paper bag for 2 to 3 days. For longer, freeze sliced.

Q: Can I make smaller loaves?

A: Yes, divide the dough into two and bake in two smaller pots, adjust time a little.

Q: Do I need to use instant yeast?

A: Instant yeast works best for the no knead method, but active dry yeast will work if you proof it first.

Q: Can I add herbs or seeds?

A: Yes, fold in herbs or seeds after the first rise for extra flavor.

Conclusion

If you want the original detailed method and extra tips, see the full World’s Easiest Yeast Bread recipe – Artisan, NO KNEAD crusty bread page for more info and photos.

Yeast Bread

This no-knead, artisan-style bread features a crunchy crust and soft interior, making it a perfect choice for busy bakers looking for a simple and delicious bread option.

Main Ingredients

  • 3 cups all purpose flour
  • 1 teaspoon instant yeast
  • 1.25 teaspoons salt
  • 1.5 cups warm water (Use warm, not hot water.)

Preparation

  1. In a big bowl, mix flour, yeast, and salt. Stir to combine.
  2. Pour in warm water and mix with a spoon until the dough comes together; it will be sticky.
  3. Cover the bowl with plastic wrap or a towel and let it sit at room temperature for 12 to 18 hours to rise.
  4. After rising, dust your work surface with flour. Tip the dough out and fold it a few times to shape a rough ball. Do not knead.
  5. Place the dough on a piece of parchment paper, cover, and rest for 30 minutes while you heat the oven.
  6. Heat oven to 450°F (230°C) with a heavy pot or Dutch oven inside, lid on, for 30 minutes.

Baking

  1. Carefully remove the hot pot, lift the dough with parchment into the pot, cover, and bake for 30 minutes.
  2. Remove the lid and bake for an additional 10 to 15 minutes until the crust is deep golden and crisp.
  3. Take the bread out and cool on a rack for at least 30 minutes before slicing.

For best results, allow the bread to cool fully before cutting to prevent it from becoming gummy. Consider serving warm with butter and jam.

Bread, Snack
American, Artisan
Artisan Bread, Easy Bread Recipe, Homemade Bread, No Knead Bread, Yeast Bread

Homemade Focaccia Bread

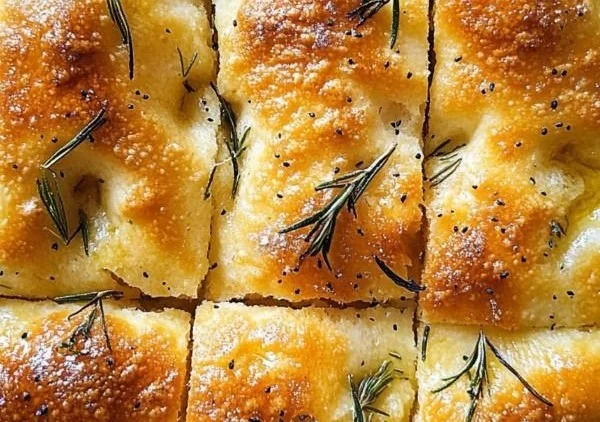
Homemade focaccia bread topped with herbs and olive oil

Focaccia bread is warm, soft, and full of flavor. This homemade focaccia bread makes a great snack, side, or party bread. It has a light, airy inside, a crispy top, and a nice olive oil taste. People love it plain, with herbs, or topped with olives and tomatoes. This recipe is simple and works for cooks of all levels, and it is a crowd-pleaser that fills the kitchen with a fresh, baked smell. If you enjoy easy home bakes, you might also like this Amish apple fritter bread for a sweet treat.

how to prepare Homemade Focaccia Bread

Ingredients

  • 3 1/2 cups all purpose flour
  • 1 packet (2 1/4 tsp) active dry yeast
  • 1 1/4 cups warm water, about 105 to 115 F
  • 2 tbsp olive oil, plus extra for the pan and top
  • 1 tsp sugar
  • 1 1/2 tsp salt
  • Coarse sea salt, for sprinkling
  • Fresh rosemary or other herbs, optional
  • Cherry tomatoes or olives, optional

Directions

  1. In a bowl, mix warm water, sugar, and yeast. Let sit 5 to 10 minutes, until it bubbles a little.
  2. In a large bowl, stir flour and salt. Add the yeast mix and 2 tablespoons olive oil. Mix until a soft dough forms.
  3. Turn the dough onto a floured surface and knead 5 to 7 minutes, until smooth and elastic. You can use a stand mixer with a dough hook.
  4. Lightly oil a bowl, put the dough in, and cover with a towel. Let rise in a warm spot 1 hour, until doubled.
  5. Oil a baking pan or sheet well. Press the dough into the pan to make an even layer about 1/2 to 3/4 inch thick. Cover and let rise 20 to 30 minutes.
  6. Preheat the oven to 425 F (220 C). Use your fingers to make dimples across the dough surface. Drizzle olive oil over the top. Add rosemary, sea salt, tomatoes, or olives as you like.
  7. Bake 20 to 25 minutes, until golden brown on top. Let cool a few minutes, slice, and serve warm.

Homemade Focaccia Bread

Why You’ll Love Homemade Focaccia Bread

  • It tastes fresh, with a rich olive oil flavor and a soft crumb.
  • You can change toppings to match any meal, like herbs, cheese, or veggies.
  • It is easy to make, even for new bakers, and it makes the house smell great.
  • Leftovers keep well and are great for sandwiches or toast the next day.
  • This easy focaccia is a simple way to enjoy classic Italian bread at home.

tips for success

  • Use warm, not hot, water so the yeast wakes up but does not die.
  • Give the dough time to rise, it makes the bread light and airy.
  • Oil the pan well, this gives a crisp bottom and easy release.
  • Press firmly to make dimples, they hold olive oil and herbs for more flavor.
  • Bake until the top is golden, not just pale, for a nice crust.

Serving Suggestions

  • Serve warm with olive oil and balsamic vinegar for dipping.
  • Pair with soups, salads, or pasta for a full meal.
  • Use slices to make sandwiches with cheese and roasted vegetables.
  • Add to a bread basket for parties, it pleases many tastes.

Homemade Focaccia Bread

FAQs

Q: Can I use instant yeast instead of active dry yeast?

A: Yes, you can. If you use instant yeast, mix it with the flour and skip the proof step with warm water. Add water and oil, then continue.

Q: How long does focaccia keep?

A: Store in an airtight container at room temperature for 2 to 3 days. Reheat in the oven to refresh the crust.

Q: Can I make focaccia ahead and bake later?

A: Yes, you can make the dough and keep it in the fridge overnight. Let it come to room temperature and rise a bit before baking.

Q: Can I use whole wheat flour?

A: You can swap part of the flour for whole wheat, but use less or add a bit more water, dough may be denser.

Q: What oven temperature is best?

A: 425 F gives a good rise and a golden crust. You can lower a bit if your oven runs hot.

Conclusion

Homemade focaccia bread is simple, tasty, and flexible. It fits many meals and tastes, from plain olive oil to herbed focaccia or topped versions. For another take on a simple bread recipe and more tips, check this Easy Focaccia Bread Recipe – Inspired Taste.

Focaccia Bread

This homemade focaccia bread is warm, soft, and full of flavor, making it a perfect snack, side, or party bread.

Dough Ingredients

  • 3 1/2 cups all purpose flour
  • 1 packet active dry yeast (2 1/4 tsp)
  • 1 1/4 cups warm water (about 105 to 115 F) (Warm, not hot, to activate yeast.)
  • 2 tbsp olive oil, plus extra for the pan and top
  • 1 tsp sugar
  • 1 1/2 tsp salt
  • Coarse sea salt, for sprinkling
  • Fresh rosemary or other herbs, optional
  • Cherry tomatoes or olives, optional

Preparation

  1. In a bowl, mix warm water, sugar, and yeast. Let sit for 5 to 10 minutes, until it bubbles a little.
  2. In a large bowl, stir flour and salt. Add the yeast mix and 2 tablespoons olive oil. Mix until a soft dough forms.
  3. Turn the dough onto a floured surface and knead for 5 to 7 minutes, until smooth and elastic.
  4. Lightly oil a bowl, put the dough in, and cover with a towel. Let rise in a warm spot for 1 hour, until doubled.
  5. Oil a baking pan or sheet well. Press the dough into the pan to make an even layer about 1/2 to 3/4 inch thick. Cover and let rise for 20 to 30 minutes.

Baking

  1. Preheat the oven to 425 F (220 C). Use your fingers to make dimples across the dough surface.
  2. Drizzle olive oil over the top. Add rosemary, sea salt, tomatoes, or olives as you like.
  3. Bake for 20 to 25 minutes, until golden brown on top. Let cool a few minutes, slice, and serve warm.

Use warm water to wake the yeast without killing it. Make sure to let the dough rise for a light and airy texture. A well-oiled pan gives a crisp bottom and easy release. Bake until the top is golden for the best crust.

Party Food, Side Dish, Snack
Italian
Baking, Easy Bread Recipe, Focaccia Bread, Homemade Focaccia, Italian Bread

Sourdough Discard Dinner Rolls

Freshly baked sourdough discard dinner rolls on a wooden table.

These sourdough discard dinner rolls are soft, warm, and full of good flavor. They use leftover sourdough starter, so you waste less and get a tasty bread. The rolls are fluffy on the inside, golden on the outside, and smell like home. This recipe is a simple crowd-pleaser, easy to shape, and great for family dinners or small parties. They pair well with soups, salads, or a roast, and are even delicious on their own with butter, or alongside an autumn chicken dinner with roasted vegetables. Get ready to pull these warm rolls from the oven and watch everyone smile.

how to prepare Sourdough Discard Dinner Rolls

  1. Mix 1 cup sourdough discard, 1/2 cup warm milk, 2 tablespoons sugar, and 1 beaten egg in a bowl. Stir to combine.
  2. Add 2 cups all-purpose flour, 1 teaspoon salt, and 2 teaspoons active dry yeast. Stir until the dough forms.
  3. Turn dough to a floured surface and knead 5 to 7 minutes until smooth and soft. If dough is sticky, add a little flour.
  4. Place dough in a greased bowl, cover with a towel, and let it rest in a warm spot for 30 to 45 minutes, until it has grown a bit.
  5. Divide dough into 12 equal pieces. Shape each into a round roll and place them in a greased 9×13 pan.
  6. Cover the pan and let the rolls rise 20 to 30 minutes, until puffy.
  7. Preheat oven to 375°F, brush rolls with melted butter or egg wash, and bake 15 to 20 minutes until golden brown.
  8. Brush hot rolls with more butter, let cool a few minutes, then serve warm.

Sourdough Discard Dinner Rolls

Why You’ll Love Sourdough Discard Dinner Rolls

  • They use sourdough discard, so you save the starter and cut waste.
  • The rolls are soft, tender, and have a mild, tangy flavor that everyone likes.
  • This recipe is quick and simple, so you can make fresh rolls without a long wait.
  • You can change the rolls easily, adding herbs, cheese, or garlic for more taste.

tips for success

  • Use warm milk, not hot, to help the yeast wake up.
  • If your discard is very thick, stir in a little water to loosen it before mixing.
  • Keep dough slightly sticky, it makes the rolls softer. Add flour slowly, only if needed.
  • Let the rolls rise in a warm spot, like near a warm oven or on top of the fridge.
  • Watch the rolls in the oven, baking times can change by a few minutes with different ovens.
  • Brush with butter right after baking, it gives a soft crust and good shine.

Serving Suggestions

  • Serve warm with salted butter or honey for simple comfort.
  • Pair with soups like tomato or chicken noodle for a cozy meal.
  • Use as a side for roast chicken or pork, they soak up gravy well.
  • Make small sandwiches with ham, cheese, or leftover turkey for lunch.
  • Add garlic butter and bake a few minutes for quick garlic rolls.

Sourdough Discard Dinner Rolls

FAQs

Q: What is sourdough discard, and can I use any starter?

A: Sourdough discard is the extra starter you remove when you feed it. You can use any fed or unfed starter, it will add mild tang and good texture.

Q: Do I need to add yeast if I use discard?

A: Yes, this recipe uses a small amount of yeast to help the rolls rise faster and stay light.

Q: Can I make these ahead and freeze them?

A: Yes, bake the rolls, cool them, then freeze in a bag. Reheat in the oven or microwave when ready to eat.

Q: How do I make them dairy free?

A: Use plant milk and a dairy-free butter or oil for brushing, the rolls will still turn out soft.

Q: Can I add seeds or cheese on top?

A: Yes, sprinkle seeds or shredded cheese before baking for extra flavor and texture.

Conclusion

These sourdough discard dinner rolls are simple, soft, and a smart way to use leftover starter, they make dinner feel special without extra work. For a fast, tested take on discard rolls you can compare with, see One Hour Sourdough Discard Rolls – Amy Bakes Bread.

Sourdough Discard Dinner Rolls

These soft and fluffy sourdough discard dinner rolls are easy to make and perfect for family dinners. They have a mild tangy flavor and pair well with various dishes.

Wet Ingredients

  • 1 cup sourdough discard (Use any type of sourdough starter)
  • 1/2 cup warm milk (Ensure the milk is warm, not hot)
  • 2 tablespoons sugar
  • 1 large beaten egg

Dry Ingredients

  • 2 cups all-purpose flour (Add flour as needed if the dough is sticky)
  • 1 teaspoon salt
  • 2 teaspoons active dry yeast (Helps the rolls rise)

For Baking

  • 2 tablespoons melted butter (For brushing before and after baking)

Mixing

  1. In a bowl, mix the sourdough discard, warm milk, sugar, and beaten egg until well combined.
  2. Add the all-purpose flour, salt, and active dry yeast. Stir until a dough forms.

Kneading

  1. Turn the dough onto a floured surface and knead for 5 to 7 minutes until smooth and soft.
  2. If the dough is sticky, add a little flour as needed.

First Rise

  1. Place the dough in a greased bowl, cover with a towel, and let it rest in a warm spot for 30 to 45 minutes, until it has grown.

Shaping

  1. Divide the dough into 12 equal pieces and shape each piece into a round roll.
  2. Place the rolls in a greased 9×13 pan.

Second Rise

  1. Cover the pan and let the rolls rise for 20 to 30 minutes until puffy.

Baking

  1. Preheat the oven to 375°F (190°C).
  2. Brush the rolls with melted butter or egg wash.
  3. Bake for 15 to 20 minutes until golden brown.
  4. Brush the hot rolls with more butter, let cool for a few minutes, and serve warm.

You can customize the rolls by adding herbs, cheese, or garlic. Let the rolls rise in a warm spot for the best results.

Appetizer, Side Dish
American, Baking
dinner rolls, easy rolls, Homemade Bread, sourdough discard, sourdough rolls

Sourdough Discard Banana Bread

Sourdough discard banana bread made with ripe bananas and sourdough starter.

Sourdough Discard Banana Bread is a warm, homey loaf that feels like a hug. It uses leftover sourdough discard, ripe bananas, simple pantry items, and a little love. This banana bread is moist, mildly tangy, and very easy to make, a real crowd-pleaser at coffee time or for a quick snack. If you like banana treats, try a small twist inspired by a banana bread cookies soft chewy easy recipe, then come back to this classic loaf. You will love how the sourdough discard adds depth, and the smell as it bakes will make everyone smile, so get ready to bake and enjoy.

how to prepare Sourdough Discard Banana Bread

  1. Preheat your oven to 350°F, and grease a 9×5 inch loaf pan or line it with paper.
  2. In a bowl, mash 3 ripe bananas until smooth. Add 1 cup sourdough discard, 1/2 cup melted butter or oil, 1 cup sugar, and 2 large eggs. Stir until mixed.
  3. In another bowl, whisk 1 1/2 cups flour, 1 teaspoon baking soda, 1/2 teaspoon salt, and 1 teaspoon cinnamon if you like.
  4. Add dry mix to wet mix, stir just until combined. Fold in 1/2 cup chopped nuts or chocolate chips if you want. Do not overmix.
  5. Pour batter into the pan, smooth the top, and bake 50 to 60 minutes, until a toothpick comes out clean or with a few crumbs.
  6. Cool in the pan 10 minutes, then turn out onto a rack to cool more before slicing.

Sourdough Discard Banana Bread

Why You’ll Love Sourdough Discard Banana Bread

  • It uses sourdough discard, so you waste less and get more flavor.
  • The bread stays moist for days, great for quick breakfasts.
  • It is simple to make with common ingredients, no fuss or special tools.
  • The mild tang from the discard balances the sweet banana taste, making it rich but not too sweet.

tips for success

  • Use very ripe bananas for the best banana flavor and natural sweetness.
  • Measure flour by spooning into the cup and leveling, do not pack it down.
  • Mix until the dry and wet parts just come together, overmixing can make the bread dense.
  • Check the loaf at 50 minutes, ovens vary, so test with a toothpick.
  • If the top browns too fast, tent with foil for the last 10 to 15 minutes.

Serving Suggestions

  • Serve warm with a thin spread of butter, it melts into the bread nicely.
  • Toast a slice and add cream cheese for a creamy contrast.
  • Pair with coffee or milk for a simple snack or breakfast.
  • Make a quick pudding by tearing slices into a dish, adding milk, eggs, and baking, for a dessert twist.

Sourdough Discard Banana Bread

FAQs

Q: Can I freeze this banana bread?

A: Yes, wrap slices or the whole loaf tight in foil and freeze up to 3 months. Thaw at room temperature.

Q: Do I need active sourdough starter for this recipe?

A: No, use unfed discard, you do not need active starter or to feed it first.

Q: Can I use less sugar?

A: Yes, you can reduce sugar a bit, the ripe bananas add sweetness, but the texture may change slightly.

Q: Can I make this in a muffin tin?

A: Yes, bake muffins at 350°F for about 18 to 22 minutes, check with a toothpick.

Conclusion

For a slightly different take or more tips on sourdough banana bread, you can explore Ultimate Sourdough Banana Bread – The Clever Carrot, it has helpful notes and ideas. Enjoy baking, and share a slice with someone you like.

Sourdough Discard Banana Bread

A moist and mildly tangy banana bread made with sourdough discard and ripe bananas, perfect for coffee time or a quick snack.

Wet Ingredients

  • 3 pieces ripe bananas (Use very ripe bananas for best flavor.)
  • 1 cup sourdough discard (Unfed, active starter is not needed.)
  • 1/2 cup melted butter or oil
  • 1 cup sugar (Can be reduced slightly for less sweetness.)
  • 2 pieces large eggs

Dry Ingredients

  • 1 1/2 cups flour (Measure by spooning into the cup and leveling.)
  • 1 teaspoon baking soda
  • 1/2 teaspoon salt
  • 1 teaspoon cinnamon (Optional, add if desired.)

Optional Add-ins

  • 1/2 cup chopped nuts or chocolate chips (Fold in if desired.)

Preparation

  1. Preheat your oven to 350°F (175°C) and grease a 9×5 inch loaf pan or line it with paper.
  2. In a bowl, mash the ripe bananas until smooth.
  3. Add sourdough discard, melted butter or oil, sugar, and eggs to the bananas and stir until mixed.
  4. In another bowl, whisk together flour, baking soda, salt, and cinnamon.
  5. Gradually mix the dry ingredients into the wet mixture, stirring just until combined.
  6. Fold in the optional nuts or chocolate chips without overmixing.

Baking

  1. Pour the batter into the prepared loaf pan and smooth the top.
  2. Bake for 50 to 60 minutes, or until a toothpick comes out clean or with a few crumbs.
  3. Cool the bread in the pan for 10 minutes before transferring to a rack to cool completely.

To avoid dense bread, don’t overmix the batter. Tent with foil if the top browns too quickly during baking.

Breakfast, Snack
American
banana bread, Easy Recipe, moist bread, quick snack, sourdough discard

2-Ingredient Cottage Cheese Bread

Freshly baked 2-ingredient cottage cheese bread loaf on a wooden cutting board.

This 2-Ingredient Cottage Cheese Bread is warm, soft, and easy to make. It uses simple items and little time, so it is perfect for busy days and small kitchens. The bread has a light crumb and a mild, slightly tangy taste from the cottage cheese. It works well for sandwiches, toast, or just warm with butter.

If you like easy recipes, you might also enjoy a related simple dessert, like a two-ingredient yogurt cheesecake for a quick sweet finish.

This featured recipe is a crowd-pleaser, gentle on flavor, and very forgiving. You will love how it fills the house with a fresh bread smell in under an hour. Get your hands ready to mix and bake, you will smile when you slice the first piece.

how to prepare 2-Ingredient Cottage Cheese Bread

Ingredients

  • 1 cup cottage cheese
  • 1 cup self-rising flour

Directions

  1. Preheat the oven to 350°F, and grease a small loaf pan or line it with parchment.
  2. In a bowl, blend the cottage cheese and self-rising flour until a soft dough forms. Mix with a spoon or a hand mixer on low for about 30 seconds.
  3. Turn the dough into the prepared pan. Smooth the top with a spatula or wet fingers.
  4. Bake for 30 to 40 minutes, until the top is golden and a toothpick comes out clean.
  5. Let the bread cool in the pan for 10 minutes, then remove and cool on a rack before slicing.

2-Ingredient Cottage Cheese Bread

Why You’ll Love 2-Ingredient Cottage Cheese Bread

  • It uses just two common ingredients, so it is fast and simple.
  • The bread is soft and moist, with a mild tang from the cottage cheese.
  • It bakes quickly, so you get fresh bread without long prep.
  • It is great for quick lunches, snacks, or a simple side for soup.

tips for success

  • Use full-fat cottage cheese for a richer texture.
  • If the dough seems too wet, add a tablespoon of flour at a time until it firms.
  • Do not overmix, mix until just combined for a light crumb.
  • Check the bread at 30 minutes, ovens vary, and bake until the center is set.
  • Cool the loaf enough before slicing, it finishes setting as it cools.

Serving Suggestions

  • Slice and toast, then spread with butter and honey.
  • Make a quick sandwich with ham and cheese.
  • Serve warm with soup or a salad for a simple meal.
  • Turn slices into croutons, cube and bake until crisp.

2-Ingredient Cottage Cheese Bread

FAQs

Q: Can I use low-fat cottage cheese? A: Yes, you can. Low-fat will work, but the bread may be a bit less rich.

Q: Can I make this gluten-free? A: Use a gluten-free self-rising flour blend made for baking. Check the package for rising agents.

Q: How long does this bread keep? A: Store in an airtight bag or container at room temperature for 2 days, or in the fridge for up to 5 days.

Q: Can I add herbs or cheese? A: Yes, fold in a tablespoon or two of chopped herbs, or 1/4 cup grated cheese, before baking.

Conclusion

This simple 2-Ingredient Cottage Cheese Bread is quick, tasty, and comforting. If you want to try a similar tested recipe, see the Easy 2 Ingredient Cottage Cheese Bread Recipe – Suzie The Foodie for another take and photo guide.

2-Ingredient Cottage Cheese Bread

This bread is warm, soft, and easy to make with just two ingredients—cottage cheese and self-rising flour. Perfect for busy days, it has a mild, slightly tangy flavor and is great for sandwiches or toasting.

Main Ingredients

  • 1 cup cottage cheese (Use full-fat for a richer texture.)
  • 1 cup self-rising flour (Can substitute with gluten-free self-rising flour.)

Preparation

  1. Preheat the oven to 350°F, and grease a small loaf pan or line it with parchment.
  2. In a bowl, blend the cottage cheese and self-rising flour until a soft dough forms, about 30 seconds using a spoon or hand mixer on low.
  3. Turn the dough into the prepared pan and smooth the top with a spatula or wet fingers.

Baking

  1. Bake for 30 to 40 minutes, until the top is golden and a toothpick comes out clean.
  2. Let the bread cool in the pan for 10 minutes, then remove and cool on a rack before slicing.

If the dough seems too wet, add a tablespoon of flour at a time until it firms. Do not overmix; mix until just combined for a light crumb. Check the bread at 30 minutes, ovens vary, and bake until the center is set. Cool the loaf enough before slicing, it finishes setting as it cools.

Breakfast, Snack
American
Comfort Food, Cottage Cheese Bread, Easy Bread Recipe, Quick Bread, Two Ingredient Bread

Cinnamon Swirl Bread

Homemade cinnamon swirl bread with a golden crust and rich, spiced filling.

This cinnamon swirl bread feels like a warm hug. It fills your kitchen with a sweet, spicy smell, and the soft loaf has a sticky cinnamon ribbon inside. The recipe, Cinnamon Swirl Bread [120 Minutes] – Chasety, is a crowd pleaser for breakfast, brunch, or a snack. If you like sweet quick loaves, you might also enjoy a similar cozy loaf at Amish apple fritter bread. Get ready to bake, and have fun pulling warm slices apart.how to prepare Cinnamon Swirl Bread

This simple plan shows the main steps to make a soft cinnamon swirl bread. Use your favorite bread dough recipe or follow a basic enriched dough with milk, butter, sugar, yeast, flour, salt, and eggs. Roll the dough thin, spread the cinnamon sugar, then roll and shape into a loaf. Bake until golden and cool before slicing.

  1. Mix warm milk, yeast, sugar, and a bit of flour. Let it sit until foamy, about 5 to 10 minutes.
  2. Add eggs, melted butter, salt, and the rest of the flour. Mix until a soft dough forms.
  3. Knead by hand or in a mixer until smooth, about 8 to 10 minutes.
  4. Let the dough rise in a warm spot until doubled, about 60 minutes.
  5. Punch down the dough and roll it into a rectangle on a floured surface.
  6. Mix brown sugar and ground cinnamon, spread it over the dough, leave a small border.
  7. Roll the dough tightly from the long side, pinch the seam to seal.
  8. Place the roll seam side down, shape as a loaf or braid, and put it into a greased loaf pan.
  9. Let it rise again until it puffs, about 30 to 45 minutes.
  10. Bake at 350°F (175°C) for 30 to 40 minutes, until the top is golden and an inserted skewer comes out clean.
  11. Cool on a rack, then slice and serve.

Cinnamon Swirl Bread [120 Minutes] - Chasety

Why You’ll Love Cinnamon Swirl Bread [120 Minutes] – Chasety

  • It tastes warm and sweet, with real cinnamon flavor in every bite.
  • The bread is soft inside, with a pretty cinnamon swirl that looks made for sharing.
  • It works for breakfast, tea, or a simple dessert.
  • You can make it from basic pantry items, so it feels easy and homey.
  • The smell while baking makes the whole house feel cozy.

tips for success

  • Use room temperature ingredients, they mix and rise better.
  • Don’t add too much flour, dough should stay slightly tacky.
  • Roll the dough tight, this gives a clear cinnamon swirl.
  • If the top browns too fast, cover with foil and finish baking.
  • Let the bread cool a bit before slicing, it cuts cleaner when not very hot.

Serving Suggestions

  • Serve warm with butter, cream cheese, or a simple glaze.
  • Pair a slice with coffee or milk for a cozy breakfast.
  • Add fruit on the side, like sliced apples or berries, for a fresh note.
  • Turn slices into French toast for a sweet brunch treat.

Cinnamon Swirl Bread [120 Minutes] - Chasety

FAQs

Q: Can I use instant yeast instead of active dry yeast?

A: Yes, you can. Use a bit less instant yeast and mix it with the dry flour, then add warm liquid. Follow the same rise times.

Q: Can I make this bread the night before?

A: Yes, you can do the first rise, then chill the dough in the fridge overnight. Shape and bake the next day. Let the dough warm a little before the final rise.

Q: How do I keep the swirl from leaking sugar while baking?

A: Press the cinnamon sugar into the dough and roll tightly. Pinch the seam well and place seam side down in the pan.

Q: Can I add nuts or raisins?

A: Yes, you can sprinkle chopped nuts or raisins on the cinnamon sugar before rolling for extra texture.

Q: How long does this bread keep?

A: Store in a sealed bag at room temperature for 2 to 3 days, or freeze slices for longer storage.

Conclusion

This Cinnamon Swirl Bread [120 Minutes] – Chasety recipe makes a soft, sweet loaf with a lovely cinnamon ribbon. It works for a simple family breakfast or a friendly gathering. For the original recipe details and full directions, see the main post on Cinnamon Swirl Bread [120 Minutes] – Chasety.

Cinnamon Swirl Bread

This delicious Cinnamon Swirl Bread features a soft loaf with a sweet cinnamon ribbon inside, perfect for breakfast or snacks, filling your kitchen with a cozy aroma.

Dough Ingredients

  • 1 cup Warm milk (For activating the yeast)
  • 2 teaspoons Active dry yeast
  • 2 tablespoons Sugar (For sweetness and activating yeast)
  • 3 cups All-purpose flour (Plus extra for dusting)
  • 2 large Eggs (At room temperature)
  • 4 tablespoons Melted butter (For richness)
  • 1 teaspoon Salt (For flavor)

Cinnamon Sugar Mixture

  • 1 cup Brown sugar (For the filling)
  • 1 tablespoon Ground cinnamon (For flavor)

Preparation

  1. Mix warm milk, yeast, sugar, and a bit of flour. Let it sit until foamy for about 5 to 10 minutes.
  2. Add eggs, melted butter, salt, and the rest of the flour. Mix until a soft dough forms.
  3. Knead by hand or in a mixer until smooth, for about 8 to 10 minutes.
  4. Let the dough rise in a warm spot until doubled, which takes about 60 minutes.

Forming the Loaf

  1. Punch down the dough and roll it into a rectangle on a floured surface.
  2. Mix brown sugar and ground cinnamon, spread over the dough, leaving a small border.
  3. Roll the dough tightly from the long side, and pinch the seam to seal.
  4. Place the roll seam side down, shape as a loaf or braid, and put it into a greased loaf pan.
  5. Let it rise again until it puffs, about 30 to 45 minutes.

Baking

  1. Bake at 350°F (175°C) for 30 to 40 minutes, until the top is golden and an inserted skewer comes out clean.
  2. Cool on a rack before slicing and serving.

Use room temperature ingredients for better mixing. The dough should stay slightly tacky, do not add too much flour. Roll the dough tightly for a clear cinnamon swirl. If the top browns too fast, cover with foil. Let the bread cool a bit before slicing for cleaner cuts.

Breakfast, Brunch, Snack
American
Baking, Breakfast Bread, Cinnamon Swirl Bread, Homemade Bread, Sweet Bread

Sourdough Focaccia Bread

Freshly baked sourdough focaccia bread topped with herbs and sea salt.

This Same Day Sourdough Focaccia Bread is a simple, happy loaf. It gives you a crisp top, soft inside, and a bright sourdough taste without waiting all day. The bread soaks up olive oil, holds herbs and salt, and pleases a crowd at any table. It works great for a snack, a meal side, or a sandwich base. You will love how easy it feels to make something that looks and tastes special, and you might find yourself baking it again next week.

how to prepare Sourdough Focaccia Bread

  1. Mix starter, water, and flour in a bowl until you have a shaggy dough. Cover and rest 20 minutes.
  2. Add salt and a little olive oil, fold the dough until it feels smoother.
  3. Move dough to an oiled pan, spread gently with wet hands to fill the pan.
  4. Let the dough rise in a warm spot about 1 to 2 hours, until puffed and light.
  5. Press dimples into the dough with your fingertips, drizzle more olive oil, and sprinkle salt and herbs.
  6. Bake in a hot oven about 20 to 30 minutes, until the top is golden and crisp.
  7. Cool a little, cut, and serve warm.

Same Day Sourdough Focaccia Bread

Why You’ll Love Sourdough Focaccia Bread

  • You get real sourdough flavor the same day, no long wait.
  • The crust turns crisp while the inside stays soft and airy.
  • Olive oil and salt make each bite rich and simple.
  • It fits quick weeknight meals and also shines at a party.

tips for success

  • Use an active starter that bubbles well.
  • Keep your hands wet when you spread the dough, it will not stick.
  • Let the dough get puffy, but don’t overproof it.
  • Heat the oven well before you bake, a hot oven gives a better crust.
  • Use good olive oil and coarse salt for the best flavor.

Serving Suggestions

  • Serve warm with extra olive oil and balsamic for dipping.
  • Top with roasted garlic, sliced tomatoes, or olives for a simple meal.
  • Use slices to make sandwiches with greens and cheese.
  • Cut into small pieces for a party board with cheese and charcuterie.

Same Day Sourdough Focaccia Bread

FAQs

Q: Can I make this without a sourdough starter? A: You can use commercial yeast, but the flavor will change. Sourdough gives a tangy taste you will miss.

Q: How long does focaccia keep? A: Store at room temperature up to 2 days in a covered container. Reheat in the oven to refresh the crust.

Q: Can I add toppings before baking? A: Yes, add toppings like herbs, olives, or tomatoes after you dimple the dough and before baking.

Q: Do I need a lot of kneading? A: No, simple folding and a few stretches are enough for this wet dough style.

Conclusion

If you want a clear recipe and step by step help to make this bread today, check this detailed same day sourdough guide, Same Day Sourdough Focaccia Recipe.

Sourdough Focaccia Bread

This Same Day Sourdough Focaccia Bread is a simple and delicious loaf with a crisp top and soft inside, perfect for snacks, side dishes, or sandwiches.

Dough Ingredients

  • 200 grams Active sourdough starter (Use a bubbly starter for best results.)
  • 250 ml Water (Room temperature.)
  • 400 grams All-purpose flour
  • 10 grams Salt (Coarse salt recommended.)
  • 50 ml Olive oil (Use good quality for flavor.)

Topping Ingredients

  • Salt to taste Coarse salt
  • Herbs to taste Fresh herbs (e.g., rosemary) (Optional, for added flavor.)

Dough Preparation

  1. In a bowl, mix sourdough starter, water, and flour until you have a shaggy dough.
  2. Cover and let rest for 20 minutes.
  3. Add salt and a little olive oil; fold the dough until smooth.
  4. Transfer the dough to an oiled pan and gently spread it with wet hands to fill the pan.
  5. Allow the dough to rise in a warm place for about 1 to 2 hours until it is puffed and light.

Toppings and Baking

  1. Press dimples into the dough with your fingertips.
  2. Drizzle additional olive oil over the dough and sprinkle with salt and herbs.
  3. Bake in a preheated oven for about 20 to 30 minutes or until the top is golden and crisp.
  4. Cool slightly, cut, and serve warm.

Use an active starter for best results; wet hands when spreading the dough to prevent sticking. Don’t overproof the dough and preheat the oven well for a better crust.

Appetizer, Side Dish, Snack
Italian
Baking, Easy Bread, Homemade Bread, Quick Bread, Sourdough Focaccia