Easy Baked Cream Cheese Rangoon Rolls

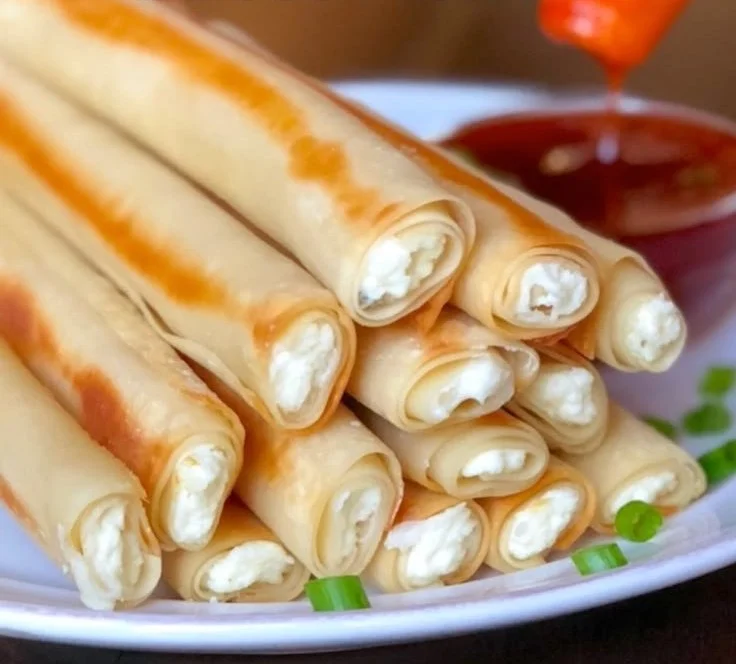
Delicious baked cream cheese rangoon rolls ready to serve

I don’t know if you have ever had the pleasure of eating the cream cheese rangoons from Panda Express, but just to give you an idea, they’re basically heaven in your mouth. This recipe is very similar, only they’re baked instead of fried, and rolled into fun little sticks. Anyone who loves cream cheese will certainly enjoy them, try the baked beef and cheese sliders recipe I link to for more simple snacks. You will smile making these, and you might make them again the same week.

How to prepare Easy Baked Cream Cheese Rangoon Rolls

Ingredients

  • 8 oz cream cheese, softened
  • 1/2 cup finely chopped green onion
  • 1/2 cup finely chopped cooked crab or imitation crab, optional
  • 1 teaspoon garlic powder
  • 1 teaspoon soy sauce (optional)
  • 24 wonton wrappers
  • 1 tablespoon oil or cooking spray
  • 1 egg beaten, for egg wash (optional)

Directions

  1. Preheat oven to 400°F (200°C). Line a baking sheet with parchment.
  2. In a bowl, mix cream cheese, green onion, crab if used, garlic powder, and soy sauce until smooth.
  3. Place one wonton wrapper on a clean surface. Put about 1 teaspoon of filling in the center.
  4. Fold the wrapper into a roll or triangle, sealing edges with a little water or egg wash. Repeat with all wrappers.
  5. Place rolls on the baking sheet. Brush lightly with oil or egg wash, or spray with cooking spray.
  6. Bake 8 to 12 minutes, until the wrappers are golden and crisp. Let cool a few minutes before serving.

Easy Baked Cream Cheese Rangoon Rolls

Why You’ll Love Easy Baked Cream Cheese Rangoon Rolls

  • They are simple to make with few ingredients, so they fit busy nights.
  • Baking keeps them lighter than frying, and they still get crisp and golden.
  • The inside is creamy and rich, the outside is crisp, a great contrast.
  • You can make them ahead and bake when guests arrive, easy party food.
  • They work with or without crab, so you can make them vegetarian or not.

Tips for success

  • Soften the cream cheese well, it mixes smooth and fills easily.
  • Do not overfill the wrappers, one teaspoon is usually enough.
  • Seal edges with a little water or egg so they do not open while baking.
  • Space rolls on the sheet so hot air can crisp them evenly.
  • Watch the oven near the end, they go from golden to dark fast.

Serving Suggestions

  • Serve with sweet chili sauce, soy sauce, or a simple plum sauce.
  • Put them on a party plate with veggies for a fuller snack spread.
  • Make smaller or larger rolls to match your crowd.
  • These fit well with other finger foods and dips for a buffet or game night.

Easy Baked Cream Cheese Rangoon Rolls

FAQs

Q: Can I freeze these before baking?

A: Yes, freeze the raw rolls on a tray, then put in a bag. Bake from frozen, add a few minutes to the time.

Q: Can I make them without crab?

A: Yes, leave out crab and add more green onion, or a bit of finely chopped bell pepper for crunch.

Q: Are they healthy if baked?

A: Baking cuts the oil from frying, so they are lighter. Still, they are a snack, so enjoy in small portions.

Q: Can I use cream cheese packets or flavored cream cheese?

A: You can use flavored cream cheese for different taste, but reduce added salt or soy sauce if it’s already salty.

Conclusion

These Easy Baked Cream Cheese Rangoon Rolls make a warm, tasty snack that is quick to make and loved by many. For another take on baked party food ideas, see Baked Cream Cheese Rangoon Rolls – Instrupix, it offers a clear view of how these rolls can turn out and other tips to try.

Easy Baked Cream Cheese Rangoon Rolls

These baked cream cheese rangoons are a lighter version of the classic, crunchy on the outside and creamy on the inside, perfect for parties or quick snacks.

Filling Ingredients

  • 8 oz cream cheese, softened (Make sure it’s well softened for easy mixing.)
  • 1/2 cup finely chopped green onion
  • 1/2 cup finely chopped cooked crab or imitation crab, optional (Can be omitted for a vegetarian option.)
  • 1 teaspoon garlic powder
  • 1 teaspoon soy sauce, optional

Wrapper Ingredients

  • 24 pieces wonton wrappers
  • 1 tablespoon oil or cooking spray (For brushing or spraying the rolls.)
  • 1 piece egg, beaten, for egg wash, optional

Preparation

  1. Preheat the oven to 400°F (200°C) and line a baking sheet with parchment paper.
  2. In a bowl, mix the cream cheese, green onion, crab (if used), garlic powder, and soy sauce until smooth.
  3. Place one wonton wrapper on a clean surface and put about 1 teaspoon of the filling in the center.
  4. Fold the wrapper into a roll or triangle and seal the edges with a little water or egg wash. Repeat with all wrappers.
  5. Place the rolls on the baking sheet. Brush lightly with oil or egg wash, or spray with cooking spray.
  6. Bake for 8 to 12 minutes, until the wrappers are golden and crisp. Let cool for a few minutes before serving.

These rangoons are lighter than the fried versions and still delicious. Serve with sweet chili sauce or soy sauce for dipping. Can be frozen before baking and cooked from frozen, just add a few extra minutes.
Appetizer, Snack
American, Asian
Baked Appetizers, Cream Cheese Rangoons, easy snacks, Finger Foods, Party Snacks

Apple Broccoli Salad

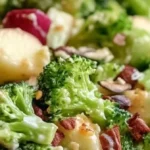
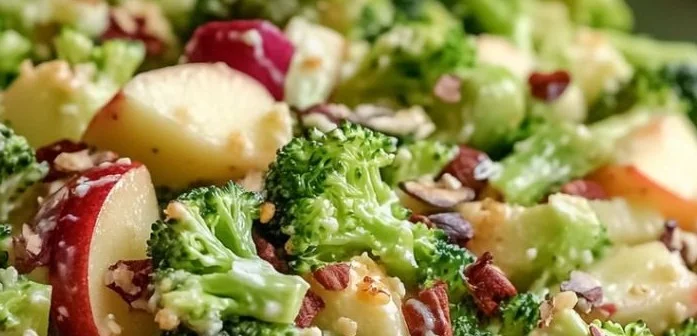
Fresh Apple Broccoli Salad with crunchy apples and tender broccoli

Apple Broccoli Salad is a fresh, crunchy dish that many people love. It mixes crisp broccoli, sweet apple, and a creamy dressing for a big mix of flavors. This salad works well for weeknight meals, potlucks, and summer cookouts. It is a crowd-pleaser, easy to make, and full of bright taste, with a balance of sweet and tangy notes.

If you like apple in salads, you might also enjoy an apple cobbler recipe for a warm dessert to follow this cool salad.

How to prepare Apple Broccoli Salad

  1. Wash and cut one head of broccoli into small florets. Trim the stalks and slice thin if you like them.
  2. Core and chop two medium apples into small bite-sized pieces. Keep the skin on for color and crunch.
  3. Thinly slice a small red onion or green onions, as you prefer.
  4. In a large bowl, mix broccoli, apples, and onion. Add 1/2 cup dried cranberries and 1/2 cup sunflower seeds or chopped nuts for crunch.
  5. Make the dressing by stirring together 1/2 cup mayonnaise, 2 tablespoons apple cider vinegar, 1 to 2 tablespoons honey, and a pinch of salt and pepper. Taste and adjust the sweetness or tang.
  6. Pour the dressing over the salad and toss to coat evenly. Add 1/2 cup shredded cheddar if you like a cheesy touch.
  7. Let the salad sit in the fridge for at least 30 minutes to let the flavors blend. Stir before serving.

Apple Broccoli Salad

Why You’ll Love Apple Broccoli Salad

You will love this broccoli apple salad because it mixes fresh crunch and sweet apple slices, with a creamy dressing that ties everything together. It is easy to make, stores well, and stays crisp when you use fresh ingredients. The salad is both a healthy side dish and a tasty dish that kids and adults enjoy. It fits many meals, from grilled chicken dinners to picnic spreads.

Tips for success

  • Cut the broccoli into small, even pieces, so every bite has a good mix of broccoli and apple.
  • Toss the cut apples in a little lemon juice if you want to slow browning and keep them bright.
  • Adjust the dressing, use yogurt or light mayo for a lighter version.
  • Add bacon bits for a smoky flavor, or keep it vegetarian with extra nuts and seeds.
  • Let the salad rest in the fridge at least 30 minutes, so flavors blend and the salad becomes more tasty.

Serving Suggestions

  • Serve this salad chilled as a side with grilled meats, sandwiches, or roasted chicken.
  • Put it on top of a bed of mixed greens for a larger salad meal.
  • Pack it for lunch; it keeps well in a sealed container for a day.
  • Bring it to a potluck, it pairs well with pasta salads and cold sides, and most guests enjoy the crisp, sweet mix.

Apple Broccoli Salad

FAQs

Q: How long will this salad stay fresh?

A: Keep it in an airtight container in the fridge, it will stay fresh for 3 to 4 days. Nuts or seeds may soften over time, so add them just before serving if you want extra crunch.

Q: Can I use frozen broccoli?

A: Fresh broccoli is best for crunch. If you use frozen, thaw and drain well, and the salad will be softer in texture.

Q: Can I make the dressing ahead of time?

A: Yes, make the dressing a day ahead and store it in the fridge. Mix it with the salad when you are ready to serve.

Q: What other fruits work in this salad?

A: Pears work well as a milder, sweet option. Dried cranberries or raisins add a chewy sweet bite.

Conclusion

For a reliable, crisp side that pleases many tastes, try this apple broccoli salad and enjoy the mix of textures and flavors. For another take on apples in salads, see the detailed Broccoli Apple Salad recipe at Cooking Classy which offers more tips and variations.

Apple Broccoli Salad

A fresh, crunchy salad that combines crisp broccoli, sweet apples, and a creamy dressing for a delightful mix of flavors, perfect for any occasion.

Salad Ingredients

  • 1 head broccoli (Cut into small florets)
  • 2 medium apples (Cored and chopped into small pieces, skin on)
  • 1 small red onion or green onions (Thinly sliced)
  • 1/2 cup dried cranberries
  • 1/2 cup sunflower seeds or chopped nuts (For added crunch)
  • 1/2 cup shredded cheddar (Optional for added flavor)

Dressing Ingredients

  • 1/2 cup mayonnaise
  • 2 tablespoons apple cider vinegar
  • 1-2 tablespoons honey (Adjust to taste)
  • 1 pinch salt
  • 1 pinch pepper

Preparation

  1. Wash and cut one head of broccoli into small florets. Trim the stalks and slice thin if desired.
  2. Core and chop two medium apples into small bite-sized pieces, keeping the skin on for color and crunch.
  3. Thinly slice a small red onion or green onions, as preferred.
  4. In a large bowl, mix broccoli, apples, and onion.
  5. Add 1/2 cup dried cranberries and 1/2 cup sunflower seeds or chopped nuts for crunch.

Make the Dressing

  1. In a separate bowl, stir together 1/2 cup mayonnaise, 2 tablespoons apple cider vinegar, 1 to 2 tablespoons honey, and a pinch of salt and pepper.
  2. Taste and adjust sweetness or tang as needed.

Combine Salad

  1. Pour the dressing over the salad and toss to coat evenly.
  2. Let the salad sit in the fridge for at least 30 minutes before serving to allow flavors to blend.

Toss apples in lemon juice to prevent browning. Use yogurt or light mayo for a lighter dressing version. Add bacon bits for a smoky flavor, or keep it vegetarian with extra nuts and seeds.

Salad, Side Dish
American
Apple Broccoli Salad, Creamy Dressing, Crisp Salad, Fresh Salad, Healthy Side Dish

Cottage Cheese Egg Muffins Recipe

Delicious homemade cottage cheese egg muffins ready to serve

These cottage cheese egg muffins make a simple, tasty breakfast or snack. They are light, soft, and full of protein, and they work well for busy mornings or meal prep. If you like easy egg muffins or high-protein breakfast ideas, you will enjoy this version. For a fruity twist with cottage cheese, see the cottage cheese blueberry muffins recipe for more ideas. Try this recipe, and you will find it a fast crowd-pleaser that tastes great warm or cold.

How to prepare Cottage Cheese Egg Muffins

Ingredients (simple list)

  • 6 large eggs
  • 1 cup cottage cheese
  • 1/2 cup shredded cheddar or your favorite cheese
  • 1/2 cup chopped bell pepper or spinach, optional
  • 1/4 cup chopped onion, optional
  • 1/2 teaspoon salt
  • 1/4 teaspoon black pepper
  • Cooking spray or a little oil

Directions, step by step

  1. Preheat your oven to 375°F (190°C). Grease a 12-cup muffin tin with cooking spray or oil.
  2. In a bowl, beat the eggs until smooth. Add the cottage cheese, salt, and pepper, mix well.
  3. Stir in the shredded cheese and the chopped vegetables, if you use them.
  4. Pour the mixture evenly into the muffin cups, about 3/4 full.
  5. Bake for 18 to 22 minutes, until the tops are set and lightly golden.
  6. Let them cool a few minutes, then remove from the tin with a spoon or knife.

Cottage Cheese Egg Muffins Recipe

Why You’ll Love Cottage Cheese Egg Muffins

  • High in protein, they keep you full longer.
  • Easy to make in one bowl, no fuss.
  • Versatile, you can add any veggies or cheese you like.
  • Make ahead and reheat for quick meals on busy days.

Tips for success

  • Drain any very wet vegetables, like tomatoes, before adding them.
  • Fill the muffin cups evenly so they cook at the same time.
  • Do not overbake, or the muffins may become dry.
  • Let muffins cool a bit before removing, this helps them keep their shape.
  • Use whole milk cottage cheese for a creamier texture, or low-fat for fewer calories.

Serving Suggestions

  • Serve with whole grain toast and fruit for a full breakfast.
  • Pack chilled muffins in a lunchbox with a small salad for a balanced meal.
  • Top warm muffins with salsa, avocado, or fresh herbs for extra flavor.
  • Use them as a protein side with soup or a green salad.

Cottage Cheese Egg Muffins Recipe

FAQs

Q: Can I freeze these muffins? A: Yes, cool completely, wrap or store in a freezer bag, and freeze up to 2 months. Reheat in the microwave or oven.

Q: How long do they keep in the fridge? A: Store in an airtight container for up to 4 days.

Q: Can I use Greek yogurt instead of cottage cheese? A: Yes, use a similar amount of Greek yogurt, but the texture will be a little different, still tasty and high in protein.

Q: Do I need to pre-cook vegetables? A: For hard vegetables like carrots or broccoli, lightly steam or sauté first. Soft veggies like spinach can go in raw after chopping.

Q: Can I make them dairy-free? A: To make dairy-free, skip the shredded cheese and use a dairy-free cottage cheese alternative if you have one, or add more vegetables and herbs for flavor.

Conclusion

If you want an extra reference or a similar idea to try, check this Easy Cottage Cheese Egg Muffins Recipe – The Lean Green Bean for another simple take on these tasty egg muffins. Enjoy making them, and have fun mixing in your favorite flavors.

Cottage Cheese Egg Muffins

These cottage cheese egg muffins make a simple, tasty breakfast or snack. They are light, soft, and full of protein, perfect for busy mornings or meal prep.

Main Ingredients

  • 6 large eggs
  • 1 cup cottage cheese (Use whole milk for creamier texture or low-fat for fewer calories.)
  • 1/2 cup shredded cheddar or your favorite cheese
  • 1/2 cup chopped bell pepper or spinach (Optional, can use any preferred vegetables.)
  • 1/4 cup chopped onion (Optional.)
  • 1/2 teaspoon salt
  • 1/4 teaspoon black pepper
  • Cooking spray or a little oil (For greasing the muffin tin.)

Preparation

  1. Preheat your oven to 375°F (190°C) and grease a 12-cup muffin tin with cooking spray or oil.
  2. In a bowl, beat the eggs until smooth. Add the cottage cheese, salt, and pepper, and mix well.
  3. Stir in the shredded cheese and the chopped vegetables, if using.
  4. Pour the mixture evenly into the muffin cups, filling them about 3/4 full.

Baking

  1. Bake for 18 to 22 minutes, until the tops are set and lightly golden.
  2. Let them cool for a few minutes, then carefully remove from the tin with a spoon or knife.

Drain any very wet vegetables before adding them. Fill muffin cups evenly to ensure they cook at the same time. Avoid overbaking to prevent dryness. Let muffins cool slightly to help them maintain their shape.

Breakfast, Snack
American
Cottage Cheese Egg Muffins, Easy Breakfast Recipe, Healthy Snack, High Protein Breakfast, Meal Prep

The Best Chicken Lo Mein

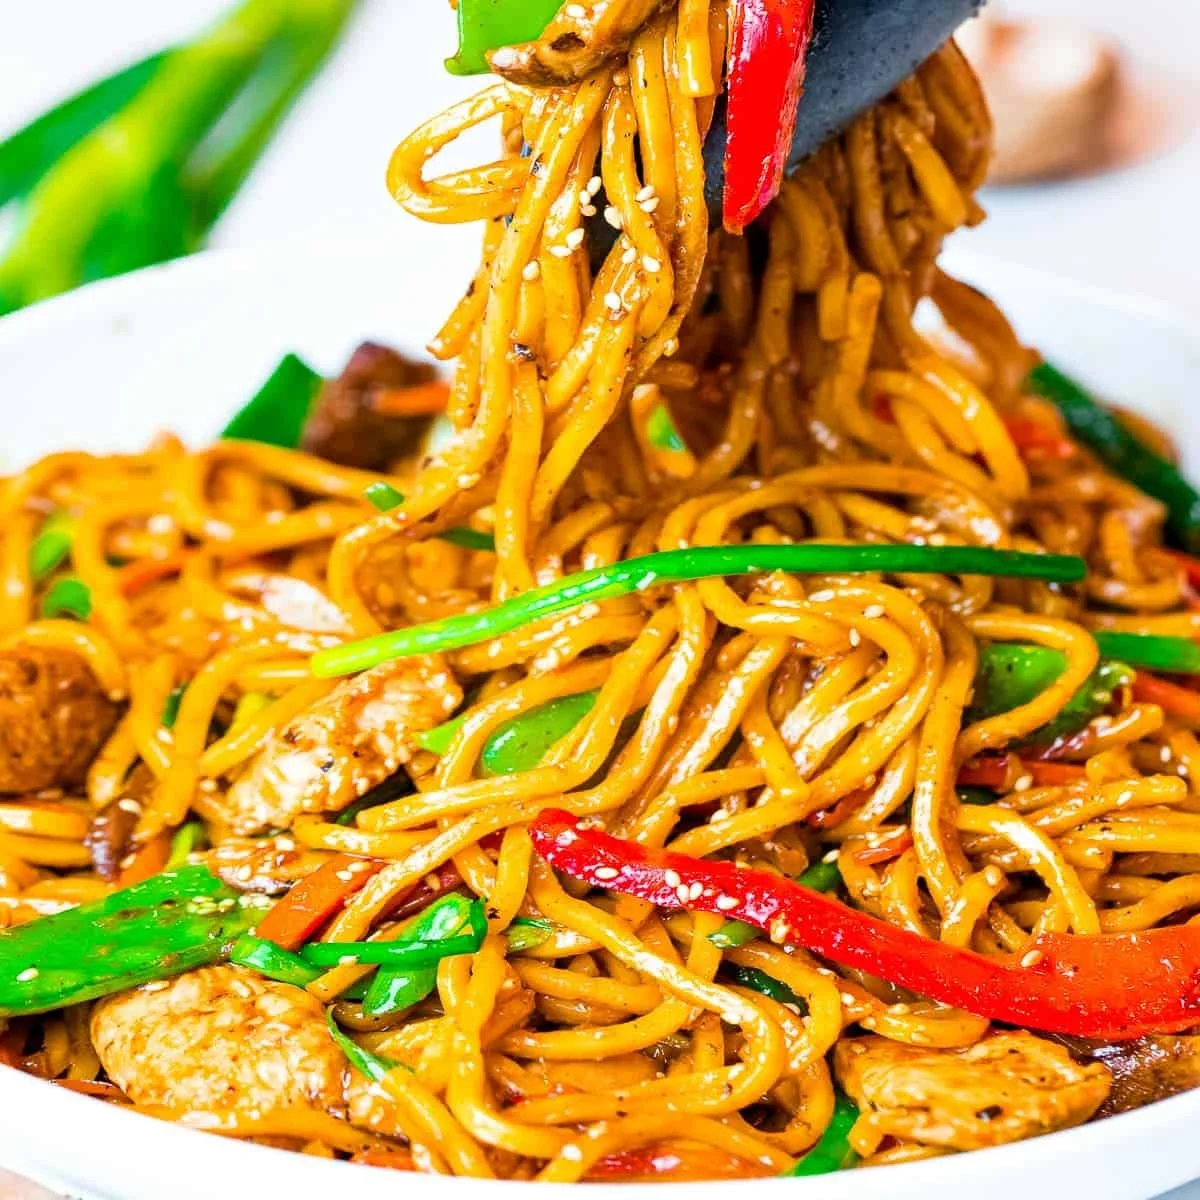
Plate of delicious chicken lo mein with vegetables and noodles

This Chicken Lo Mein is warm, simple, and tasty. It mixes soft lo mein noodles, tender chicken, crisp vegetables, and a savory sauce. It feels like takeout, but you make it faster and fresher at home. If you like easy chicken meals, you might also enjoy a rich Peruvian roast, see this Pollo a la Brasa recipe for another bold chicken idea. This lo mein is a crowd-pleaser, full of garlic, soy, and a little sweetness, and it comes together in one pan. Get ready to stir, toss, and enjoy something everyone will ask for again.

How to prepare The Best Chicken Lo Mein

  1. Cook lo mein noodles according to package directions, drain, and set aside.
  2. Cut boneless chicken into thin strips, season with a pinch of salt and pepper.
  3. Mix sauce in a bowl, use soy sauce, a little oyster sauce or hoisin, a splash of sesame oil, and a bit of sugar. Add garlic and ginger if you like.
  4. Heat oil in a large pan or wok over medium-high heat. Add chicken, stir-fry until cooked through, then remove from pan.
  5. In the same pan add more oil, then stir-fry carrots, bell peppers, and sliced onions until crisp-tender.
  6. Add mushrooms and green onions, cook one minute. Return chicken to pan.
  7. Add cooked noodles and pour the sauce over everything. Toss well so the sauce coats all noodles and pieces. Stir for 1 to 2 minutes until hot.
  8. Taste and add more soy or a pinch of sugar if needed. Serve right away for best texture.

The Best Chicken Lo Mein

Why You’ll Love The Best Chicken Lo Mein

  • It tastes like takeout, but you control the ingredients.
  • The sauce is savory, slightly sweet, and full of garlic and soy flavor.
  • It cooks fast, ready in about 20 to 30 minutes.
  • You can use any vegetables you have, so it is flexible and easy.
  • Leftovers reheat well, making great next-day lunch.

Tips for success

  • Use high heat to get a light sear on the chicken and veggies, this adds flavor.
  • Don’t overcook the noodles, undercook them slightly so they finish in the pan.
  • Slice the chicken thin, so it cooks quickly and stays tender.
  • Prepare all ingredients before you start, stir-fry moves fast.
  • Taste the sauce before adding, adjust soy or sweetness to your liking.
  • Add a splash of water or chicken broth if the sauce looks too thick while tossing.

Serving Suggestions

  • Serve with a side of steamed broccoli or bok choy for greens.
  • Top with sesame seeds and extra sliced green onions.
  • Add a small drizzle of chili oil for heat.
  • Pair with simple egg rolls or a light soup for a round meal.

The Best Chicken Lo Mein

FAQs

Q: Can I use other meats or tofu instead of chicken?

A: Yes, thinly sliced beef, pork, shrimp, or firm tofu all work well. Adjust cook time for each protein.

Q: What noodles should I use for lo mein?

A: Use lo mein noodles or other egg noodles. Spaghetti can work in a pinch, but egg noodles have the best texture.

Q: How do I keep the noodles from sticking?

A: Rinse cooked noodles in cold water and toss with a little oil after draining. Do not overcook them.

Q: Can I make this gluten free?

A: Yes, use gluten free soy sauce or tamari and check any sauces like oyster or hoisin for gluten free versions.

Conclusion

This homemade Chicken Lo Mein is simple, fast, and full of flavor, a perfect weeknight dinner that tastes like your favorite takeout. For another takeout-style chicken classic and extra ideas, check this version called The Best Chicken Lo Mein – Drive Me Hungry.

Chicken Lo Mein

This Chicken Lo Mein is a warm, simple, and tasty dish that combines soft lo mein noodles, tender chicken, and crisp vegetables in a savory sauce, perfect for a quick weeknight meal.

Main Ingredients

  • 8 ounces lo mein noodles (Cook according to package directions)
  • 1 pound boneless chicken (Cut into thin strips and seasoned with salt and pepper)
  • 2 tablespoons oil (For stir-frying)
  • 1 cup carrots (Sliced)
  • 1 cup bell peppers (Sliced)
  • 1 cup sliced onions
  • 1 cup mushrooms (Sliced)
  • 1 cup green onions (Sliced)

Sauce

  • 3 tablespoons soy sauce
  • 1 tablespoon oyster sauce or hoisin
  • 1 teaspoon sesame oil
  • 1 teaspoon sugar
  • 2 cloves garlic (Minced)
  • 1 teaspoon ginger (Minced)

Preparation

  1. Cook lo mein noodles according to package directions, drain, and set aside.
  2. Cut boneless chicken into thin strips and season with salt and pepper.
  3. Mix sauce ingredients in a bowl: soy sauce, oyster sauce or hoisin, sesame oil, sugar, garlic, and ginger.

Cooking

  1. Heat oil in a large pan or wok over medium-high heat. Add chicken and stir-fry until cooked through, then remove from the pan.
  2. In the same pan, add more oil and stir-fry carrots, bell peppers, and sliced onions until crisp-tender.
  3. Add mushrooms and green onions, cooking for one minute.
  4. Return the cooked chicken to the pan.
  5. Add the cooked noodles and pour the sauce over everything. Toss well to coat all noodles and pieces.
  6. Stir for 1 to 2 minutes until everything is hot.
  7. Taste and adjust seasoning with more soy or sugar if needed. Serve immediately for the best texture.

Tips for success: Use high heat for searing, don’t overcook the noodles, slice chicken thin, prepare all ingredients beforehand, and taste the sauce before serving.

Dinner, Main Course
Asian, Chinese
Chicken Lo Mein, Easy Dinner, Stir Fry

Savory Cheesy Pepperoni Pizza Roll Ups for Quick Snacks

Savory cheesy pepperoni pizza roll ups ready to enjoy as quick snacks.

Cheesy Pepperoni Pizza Roll Ups for Quick Snacks pack all the fun of pizza into a small, easy bite. They are great for hungry kids, quick parties, or when you want a simple snack that feels special. The dough wraps warm cheese and spicy pepperoni, so each roll gives a soft outside, melty inside, and a satisfying crunch on the edges. This recipe is a crowd-pleaser, full of familiar pizza flavors but ready in minutes, and it makes snack time feel like a mini celebration. Get your oven ready, because once you try them, you will want to make them again and again.

I like to share simple ideas, and if you enjoy similar bites, check this easy cheesy garlic rolls for another quick snack twist.

How to prepare Pepperoni Pizza Roll Ups

  1. Preheat the oven to 400°F, and line a baking sheet with parchment or lightly oil it.
  2. Lay out store-bought pizza dough or crescent roll dough on a clean board, roll it thin into a rectangle.
  3. Spread a thin layer of pizza sauce over the dough, leaving a small border at the far edge.
  4. Sprinkle shredded mozzarella evenly, add sliced pepperoni in a single layer, and sprinkle a little grated Parmesan or Italian seasoning if you like.
  5. Starting from the near edge, roll the dough tightly into a log. Seal the edge by pinching the dough.
  6. Cut the log into 1 to 1.5 inch slices and place them cut-side up on the baking sheet, a little space between each.
  7. Brush the tops with a bit of olive oil or melted butter and sprinkle with extra cheese or dried herbs.
  8. Bake 12 to 18 minutes, until golden brown and cheese melts. Let cool a minute before serving, so the cheese does not spill out.

Savory Cheesy Pepperoni Pizza Roll Ups for Quick Snacks

Why You’ll Love Pepperoni Pizza Roll Ups

  • They are fast to make, ready in about 20 minutes.
  • Kids and adults both love the familiar pizza taste in a hand-held form.
  • You can change fillings, add veggies, or make them spicy, so they fit any mood.
  • They freeze well, so you can bake a few now and store some for later.
  • They are perfect for parties, game nights, or a quick after-school snack.

Tips for success

  • Use room temperature dough, it rolls easier and bakes more evenly.
  • Don’t overfill, or cheese will leak while baking. A light layer of sauce is enough.
  • Seal the roll edge well, pressing and tucking so slices hold shape.
  • Brush the tops with butter or oil for a golden, shiny crust.
  • If slices spread, chill the log 10 minutes before slicing to keep neat rounds.

Serving Suggestions

  • Serve with warm marinara or ranch for dipping.
  • Pair with a simple green salad for a light meal.
  • Add a side of pickles or olives to cut the richness.
  • Bring them to parties on a platter, they fill a table fast and vanish faster.

Savory Cheesy Pepperoni Pizza Roll Ups for Quick Snacks

FAQs

Q: Can I make these ahead and bake later?

A: Yes, you can slice and freeze the unbaked rolls on a tray, then store in a freezer bag. Bake from frozen, adding a few extra minutes.

Q: Can I use whole wheat or gluten free dough?

A: Yes, both work. Baking time may change a little, so watch for golden color and melted cheese.

Q: How do I keep the bottoms from getting soggy?

A: Bake on a preheated sheet or stone, and don’t add too much sauce. A small shake of cornmeal on the pan helps too.

Q: Can I make them vegetarian?

A: Yes, swap pepperoni for roasted veggies, sliced mushrooms, or plant-based pepperoni.

Conclusion

These Savory Cheesy Pepperoni Pizza Roll Ups for Quick Snacks are an easy, tasty treat for any day you want pizza in a hurry. For another take on rolled pizza snacks and ideas to vary fillings, see Pepperoni Pizza Rolls – Sally’s Baking Addiction.

Pepperoni Pizza Roll Ups

These Pepperoni Pizza Roll Ups are a fun, easy snack that combines warm cheese and spicy pepperoni in a quick preparation. Perfect for parties or an after-school treat!

For the Roll Ups

  • 1 package store-bought pizza dough or crescent roll dough (can use room temperature dough for easier rolling)
  • 1/2 cup pizza sauce (spread a thin layer)
  • 1 cup shredded mozzarella cheese (sprinkle evenly over the sauce)
  • 1/2 cup sliced pepperoni (lay in a single layer)
  • 1/4 cup grated Parmesan cheese or Italian seasoning (optional toppings)
  • 1 tablespoon olive oil or melted butter (for brushing the tops)

Preparation

  1. Preheat the oven to 400°F (200°C) and line a baking sheet with parchment or lightly oil it.
  2. Lay out the pizza dough or crescent roll dough on a clean board and roll it thin into a rectangle.
  3. Spread a thin layer of pizza sauce over the dough, leaving a small border at the far edge.
  4. Sprinkle shredded mozzarella evenly over the sauce, add sliced pepperoni in a single layer, and sprinkle with grated Parmesan or Italian seasoning if desired.
  5. Starting from the near edge, roll the dough tightly into a log and seal the edge by pinching the dough.
  6. Cut the log into 1 to 1.5 inch slices and place them cut-side up on the baking sheet, leaving space between each.
  7. Brush the tops with olive oil or melted butter and sprinkle with extra cheese or dried herbs.
  8. Bake for 12 to 18 minutes, until golden brown and cheese melts. Let cool for a minute before serving.

Use room temperature dough for easier rolling and don’t overfill to prevent cheese leakage. Chill the log for neat slices if spreading occurs.

Appetizer, Snack
American, Italian
Cheesy Pizza Rolls, Easy Recipes, Party Food, Pepperoni Rolls, Quick Snacks

Egg Fried Rice

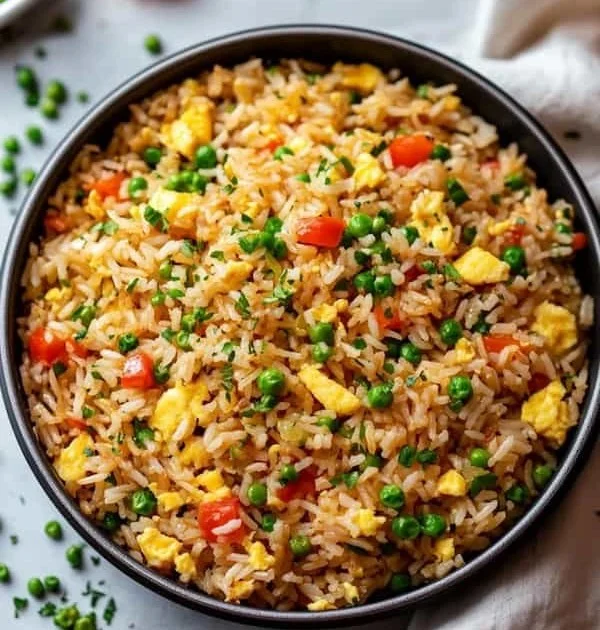
Plate of flavorful Egg Fried Rice garnished with vegetables and egg

Egg Fried Rice is a delicious dish that feels like home. It mixes soft eggs, savory soy sauce, and fluffy rice for a quick meal that most people love. This featured recipe is a true crowd-pleaser, easy to make for a weeknight dinner or a fast lunch. It tastes bright from green onions and rich from sesame oil, and it works well with many leftovers. If you like quick rice bowls, you might enjoy trying a similar idea, like the spicy ground beef stir fry bowl for more meal ideas. Give this egg fried rice a try and watch it disappear, one spoonful at a time.

How to prepare Egg Fried Rice

Ingredients

  • 3 cups cold cooked rice, day-old is best
  • 2 large eggs
  • 2 tablespoons vegetable oil
  • 1 small onion, chopped
  • 2 cloves garlic, minced
  • 2 green onions, sliced
  • 2 tablespoons soy sauce
  • 1 teaspoon sesame oil, optional
  • Salt and pepper to taste
  • Frozen peas or diced carrots, optional, 1/2 cup

Directions

  1. Break up the cold rice with your hands or a fork so it is loose and not in big clumps.
  2. Heat 1 tablespoon oil in a large pan or wok over medium-high heat. Scramble the eggs until just set, then move them to the side and break them up.
  3. Add the other tablespoon of oil. Stir in the chopped onion and cook 1 to 2 minutes until soft. Add garlic and cook 20 to 30 seconds.
  4. If you use peas or carrots, add them now and cook until heated.
  5. Add the rice to the pan and spread it out. Stir and toss the rice so it heats and gets a little color.
  6. Push rice to the side, add the eggs back in and mix. Stir in soy sauce and sesame oil, if using. Add salt and pepper to taste.
  7. Stir in sliced green onions and serve hot.

Egg Fried Rice

Why You’ll Love Egg Fried Rice

  • Fast to make, ready in about 15 to 20 minutes.
  • Uses simple ingredients you likely have at home.
  • Flexible, you can add veggies or meat for more flavor.
  • Great use for leftover rice, it keeps the rice from getting soggy.

Tips for success

  • Use cold, day-old rice, it fries better and stays separate.
  • Work on high heat, and keep the rice moving in the pan.
  • Don’t overcrowd the pan, cook in batches if needed.
  • Season at the end so you control the salt level.
  • Taste as you go, add more soy sauce or pepper if needed.

Serving Suggestions

  • Serve with a side of steamed vegetables or a simple salad.
  • Top with extra sliced green onions or a drizzle of sesame oil.
  • Add cooked shrimp, chicken, or tofu for protein.
  • Offer chili sauce or soy sauce at the table for extra flavor.

Egg Fried Rice

FAQs

Q: Can I use fresh rice?

A: You can, but fresh hot rice can be sticky. Cool it on a tray first so it dries a little.

Q: Can I make this without oil?

A: Oil helps fry and add flavor, but you can use a nonstick pan and a small spray of oil if you want less fat.

Q: How do I store leftovers?

A: Cool quickly and keep in an airtight container. Use within 2 days and reheat on the stove or in a microwave.

Q: Can I add more vegetables?

A: Yes, bell peppers, peas, carrots, and corn work well. Cook harder veggies first.

Conclusion

For a quick and tasty guide to a very similar recipe, see this simple version, The Easiest Egg Fried Rice (20 Minutes) | Healthy Nibbles by Lisa Lin, for more tips and a fast method to try.

Egg Fried Rice

A quick and delicious dish that mixes soft eggs, savory soy sauce, and fluffy rice, perfect for a crowd-pleasing meal any night of the week.

Main Ingredients

  • 3 cups cold cooked rice (day-old is best)
  • 2 large eggs
  • 2 tablespoons vegetable oil
  • 1 small onion, chopped
  • 2 cloves garlic, minced
  • 2 tablespoons soy sauce
  • 1 teaspoon sesame oil (optional)
  • 1/2 cup frozen peas or diced carrots (optional)
  • Salt and pepper (to taste)

Preparation

  1. Break up the cold rice with your hands or a fork so it is loose and not in big clumps.
  2. Heat 1 tablespoon oil in a large pan or wok over medium-high heat. Scramble the eggs until just set, then move them to the side and break them up.
  3. Add the other tablespoon of oil. Stir in the chopped onion and cook for 1 to 2 minutes until soft. Add garlic and cook for 20 to 30 seconds.
  4. If using peas or carrots, add them now and cook until heated.
  5. Add the rice to the pan and spread it out. Stir and toss the rice so it heats and gets a little color.
  6. Push rice to the side, add the eggs back in and mix. Stir in soy sauce and sesame oil, if using. Add salt and pepper to taste.
  7. Stir in sliced green onions and serve hot.

Use cold, day-old rice for the best texture. Work on high heat to keep the rice moving in the pan, and avoid overcrowding. Taste and adjust seasoning as needed.

Dinner, lunch, Main Course
Asian, Chinese
Egg Fried Rice, Fried Rice Recipe, Leftover Rice, Quick Meal, Vegetable Fried Rice

Easy Yogurt Granola Bowls (4 Ways!)

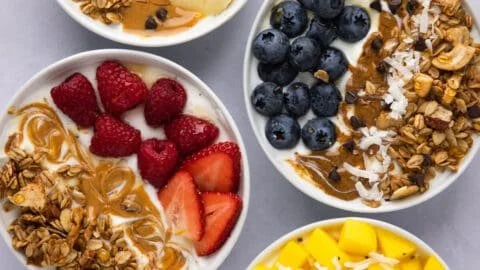
Delicious yogurt granola bowls served in colorful dishes with fresh fruits

Welcome to a simple, tasty idea for breakfast or a snack, Easy Yogurt Granola Bowls (4 Ways!). This dish is quick to make, healthy, and works for any time you want something fresh and crunchy. Each bowl mixes creamy yogurt with crunchy granola and fresh fruit, so every bite feels bright and satisfying. It’s a crowd-pleaser because you can change it up fast, and everyone can pick their favorite mix-ins. Get ready to build a bowl you will want to eat again and again.

How to prepare Easy Yogurt Granola Bowls (4 Ways!)

  1. Start with plain or flavored yogurt, about 1 cup per bowl. Spoon the yogurt into a bowl.
  2. Add 1/2 to 3/4 cup granola on top for crunch.
  3. Choose one of the 4 ways below and add the toppings.
  • Classic Berry: fresh strawberries, blueberries, a drizzle of honey.
  • Tropical: diced mango, pineapple, shredded coconut.
  • Nutty Banana: sliced banana, chopped almonds or walnuts, a pinch of cinnamon.
  • Apple Cinnamon: chopped apple, raisins, a little maple syrup and cinnamon.
  1. Stir a little if you like mixed textures, or leave layers for a pretty bowl.
  2. Taste, then add a touch more honey or a squeeze of lemon if you want more flavor.
  3. Serve right away for the best crunch, or cover and chill for up to a few hours, knowing the granola may soften.

Easy Yogurt Granola Bowls (4 Ways!)

Why You’ll Love Easy Yogurt Granola Bowls (4 Ways!)

  • They are fast to make, perfect for busy mornings or an easy snack.
  • You get creamy yogurt, crunchy granola, and fresh fruit in one bowl, great for texture and taste.
  • They are easy to change, so kids and adults can each have the flavors they like.
  • This recipe is healthy, full of protein, fiber, and real fruit to start your day well.

Tips for success

  • Use cold yogurt for a fresh taste.
  • Keep granola in a sealed bag or jar so it stays crunchy.
  • Add wet toppings like chopped fruit last to keep the granola crisp.
  • If you need more protein, choose Greek yogurt or add a spoon of nut butter.
  • Chop fruit into even pieces so every bite is balanced.

Serving Suggestions

  • Serve with a side of toast or a boiled egg for a fuller breakfast.
  • Pack in a jar for an easy take-to-work or school lunch.
  • Top with seeds or a spoon of chia for extra fiber.
  • Pair with coffee or a smoothie for a bright morning combo.

Easy Yogurt Granola Bowls (4 Ways!)

FAQs

Q: Can I use flavored yogurt instead of plain?

A: Yes, flavored yogurt works great, it adds more sweetness and flavor.

Q: How long will the bowls keep?

A: If you plan to eat right away, the bowl is best immediately. If you make ahead, keep yogurt and granola separate, then combine within a few hours.

Q: Can I make this dairy free?

A: Yes, use plant-based yogurt like almond or coconut yogurt and choose a dairy-free granola.

Q: Is granola high in sugar?

A: Some store-bought granolas have added sugar, so check labels or use a low-sugar or homemade granola.

Q: Can kids help make these bowls?

A: Definitely, kids can pick and add toppings, which makes breakfast fun and easy.

Conclusion

If you want more ideas for mix-ins and simple ways to build bowls, this recipe idea pairs well with many guides online, such as Granola & Yogurt Bowls (4 Ways) – Jar Of Lemons.

Easy Yogurt Granola Bowls (4 Ways)

A quick, healthy breakfast or snack that combines creamy yogurt, crunchy granola, and fresh fruit, perfect for customization.

Base Ingredients

  • 4 cup plain or flavored yogurt (1 cup per bowl)
  • 2-3 cup granola (1/2 to 3/4 cup per bowl)

Toppings Options

  • 1 cup fresh strawberries, blueberries (For Classic Berry variation)
  • 1 cup diced mango, pineapple, shredded coconut (For Tropical variation)
  • 1 cup sliced banana, chopped almonds or walnuts, pinch of cinnamon (For Nutty Banana variation)
  • 1 cup chopped apple, raisins, maple syrup, pinch of cinnamon (For Apple Cinnamon variation)

Preparation

  1. Start by spooning 1 cup of yogurt into a bowl.
  2. Add 1/2 to 3/4 cup of granola on top.
  3. Choose one of the four topping options and add them to your bowl.
  4. Stir to combine if you prefer mixed textures, or leave in layers for a prettier presentation.
  5. Taste the bowl and add more honey or a squeeze of lemon if desired.
  6. Serve immediately for the best crunch, or chill for up to a few hours (note that granola may soften).

Use cold yogurt for a fresher taste. Keep granola stored in a sealed bag or jar to maintain crunchiness. Add wet toppings last to keep granola crisp. For more protein, opt for Greek yogurt or add nut butter. Make sure to chop fruit into even pieces for balanced bites.

Breakfast, Snack
American
Customizable Snacks, Easy Recipes, Granola Bowls, Healthy Breakfast, Yogurt Bowls

Hibachi Chicken: 7 Sizzling Secrets to Mouthwatering Flavor

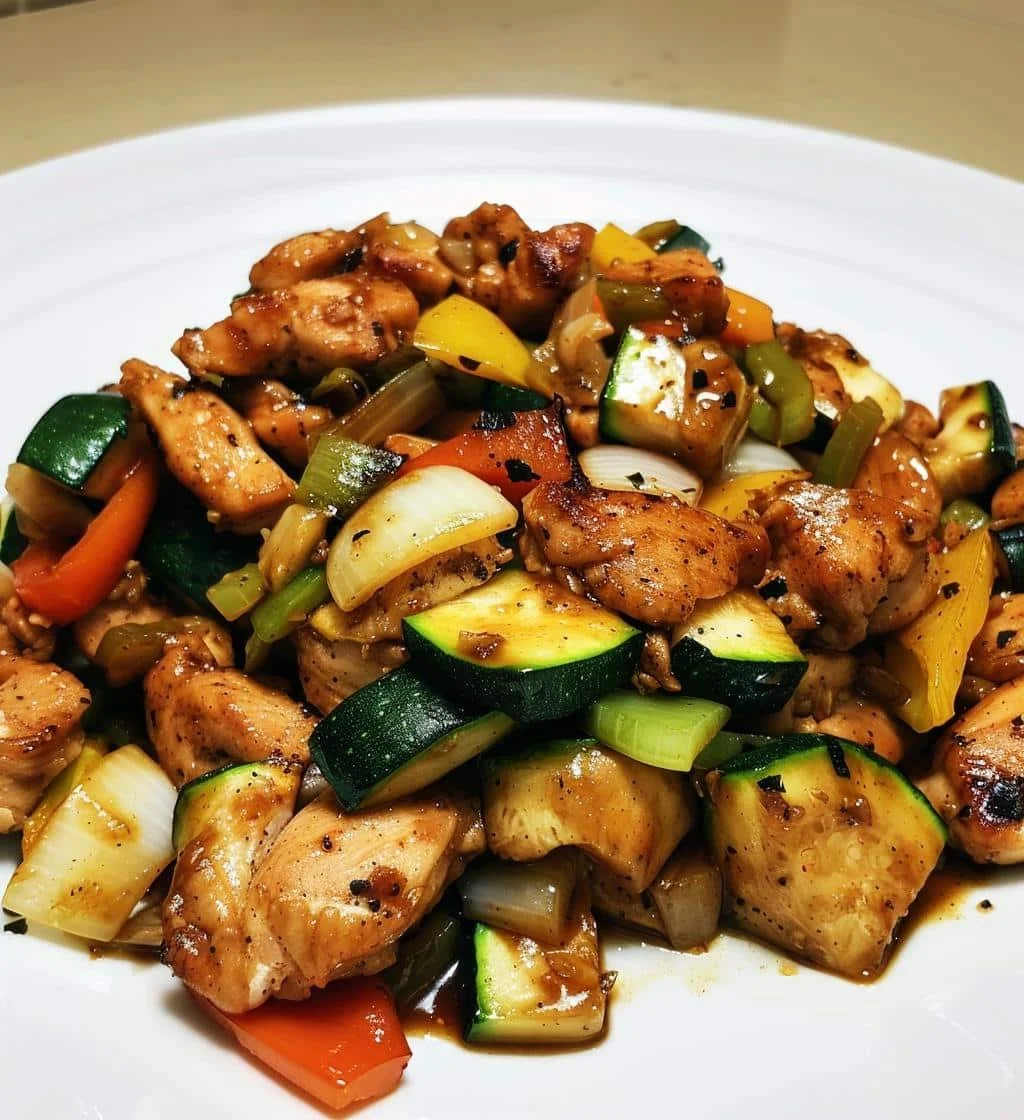
Delicious hibachi chicken sizzling on a grill, showcasing mouthwatering flavor.

Hibachi chicken is a simple, tasty dish that feels special. It has salty soy, warm garlic, and a bit of sweet from mirin or sugar. This style of cooking gives you seared edges and juicy bites, just like a Japanese steakhouse. The recipe below is a crowd pleaser, easy to make, and fast on busy nights. Get ready for a meal that smells amazing and brings smiles, you will want to make it again and again.

How to prepare Hibachi Chicken

  1. Cut 1 pound of boneless chicken breasts into bite size pieces. Pat dry with a paper towel.
  2. Mix 2 tbsp soy sauce, 1 tbsp mirin or rice wine, 1 tsp sesame oil, 1 tsp sugar, 1 clove garlic minced, and a pinch of black pepper. This is the simple hibachi marinade.
  3. Toss the chicken in the marinade and let sit 10 to 20 minutes, or up to 1 hour in the fridge for more flavor.
  4. Heat a skillet or flat top over medium high heat. Add 1 to 2 tbsp vegetable oil and 1 tbsp butter.
  5. Add chicken in a single layer, let brown without moving for 2 minutes, then stir and cook 3 to 4 more minutes until cooked through.
  6. Add chopped onion and sliced zucchini or mushrooms to the pan, cook until tender, toss with the chicken.
  7. Finish with a splash of soy sauce and a squeeze of lemon, or add a small drizzle of hibachi sauce if you like it sweet and savory. Serve hot with rice and steamed vegetables.

Hibachi Chicken: 7 Sizzling Secrets to Mouthwatering Flavor

Why You’ll Love Hibachi Chicken

  • Fast to cook, ready in about 20 minutes.
  • Big, bold flavors from simple sauces like soy, garlic, and sesame oil.
  • Versatile, you can add your favorite veggies, serve with rice or noodles.
  • Crowd pleaser, kids and adults enjoy the mild savory taste.
  • Feels like a restaurant meal at home, no fancy tools needed.

Tips for success

  • Pat chicken dry before marinating, this helps a good sear.
  • Do not crowd the pan, cook in batches if needed for a crisp edge.
  • Use medium high heat so the chicken browns quickly without overcooking.
  • Add butter near the end for that classic hibachi flavor.
  • Taste the sauce before serving, add a little sugar or lemon if it needs balance.
  • Cut veggies into similar size pieces so they cook evenly.

Serving Suggestions

  • Serve with steamed white rice or fried rice for a full plate.
  • Add grilled shrimp or steak for a mixed protein hibachi dinner.
  • Offer hot mustard, ginger sauce, or a simple teriyaki for dipping.
  • Plate with lemon wedges and chopped green onions for a bright finish.
  • For a low carb option, serve over cauliflower rice or a bed of stir fried greens.

Hibachi Chicken: 7 Sizzling Secrets to Mouthwatering Flavor

FAQs

Q: Can I use chicken thighs instead of breasts?

A: Yes, chicken thighs work well, they stay juicy and add rich flavor. Adjust cooking time so they reach a safe internal temp.

Q: Do I need mirin for the marinade?

A: No, you can use a little sugar and a splash of rice vinegar or white wine if you do not have mirin.

Q: How do I make hibachi sauce at home?

A: Mix soy sauce, a little sugar, mirin or sake, and minced garlic. Simmer for a minute to blend flavors, then cool.

Q: Can I make this ahead?

A: You can marinate the chicken for up to 1 day. Cook just before serving for best texture.

Q: Is there a vegetarian option?

A: Yes, use tofu or large mushrooms, press tofu well and cook the same way for a tasty hibachi style dish.

Conclusion

If you love the bold, simple taste of hibachi style meals, this hibachi chicken recipe is an easy way to bring that flavor home. For more authentic dishes or to order ready made options, consider exploring local Japanese restaurants online, for example Order Authentic Japanese Online | Shogun Japanese Grill & Sushi.

Hibachi Chicken

A simple yet flavorful dish featuring tender chicken marinated in soy sauce, garlic, and sesame oil, cooked to perfection for a taste reminiscent of Japanese steakhouses.

Chicken and Marinade

  • 1 pound boneless chicken breasts (Cut into bite size pieces)
  • 2 tablespoons soy sauce
  • 1 tablespoon mirin or rice wine (You can substitute with sugar and a splash of rice vinegar if needed)
  • 1 teaspoon sesame oil
  • 1 teaspoon sugar
  • 1 clove garlic minced
  • 1 pinch black pepper

Cooking Ingredients

  • 1-2 tablespoons vegetable oil (For cooking)
  • 1 tablespoon butter (Adds flavor)
  • 1 cup chopped onion
  • 1 cup sliced zucchini or mushrooms (Add your favorite veggies)

Preparation

  1. Cut the chicken breasts into bite-size pieces and pat dry with a paper towel.
  2. In a bowl, mix soy sauce, mirin or rice wine, sesame oil, sugar, minced garlic, and black pepper to create the marinade.
  3. Toss the chicken pieces in the marinade and let them sit for 10 to 20 minutes or up to 1 hour in the fridge for more flavor.

Cooking

  1. Heat a skillet or flat top over medium-high heat. Add vegetable oil and butter.
  2. Add the marinated chicken in a single layer and let it brown without moving for 2 minutes.
  3. Stir the chicken and cook for 3 to 4 more minutes until cooked through.
  4. Add chopped onion and sliced zucchini or mushrooms to the pan and cook until tender, tossing with the chicken.
  5. Finish with a splash of soy sauce and a squeeze of lemon or a drizzle of hibachi sauce, if desired. Serve hot with rice and steamed vegetables.

Pat chicken dry before marinating for better sear. Do not crowd the pan; cook in batches if necessary. Add butter near the end for classic hibachi flavor. Taste the sauce before serving for balance. Cut vegetables into similar sizes for even cooking.

Dinner, Main Course
Asian, Japanese
Chicken Recipe, Easy Dinner, Hibachi Chicken, Japanese Cuisine, Quick Meal

Shrimp Salad Recipe

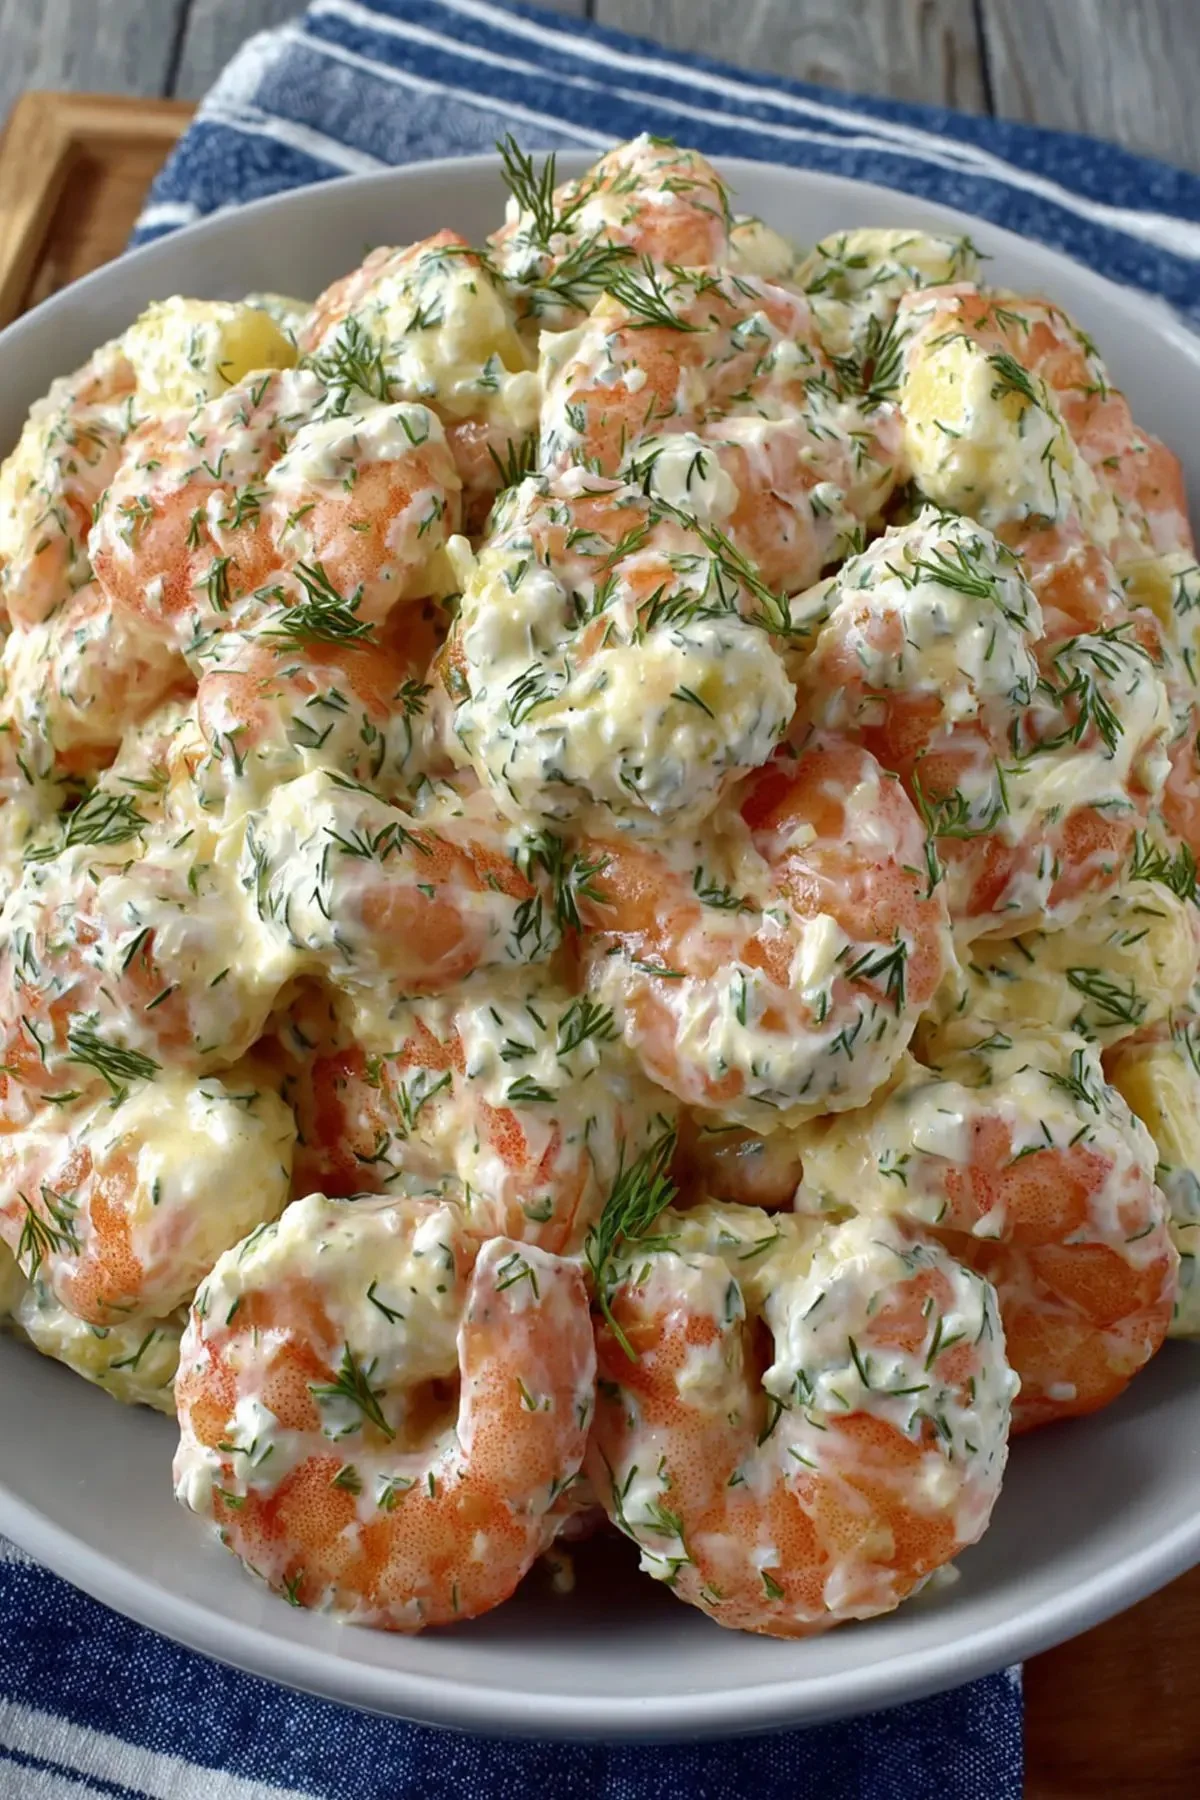
Delicious shrimp salad served in a bowl with fresh vegetables and dressing

I love a simple salad that feels fresh and bright, and shrimp salad does exactly that. It is light, tasty, and easy to make any time you want a quick meal. This Shrimp Salad Recipe is a crowd pleaser, with tender shrimp, crisp vegetables, and a creamy lemon dressing that fits many tastes. It works well for lunch, a light dinner, or a summer party, and people often ask for seconds. Try it and smile when you see how fast it disappears, because who can resist a good shrimp salad?

How to prepare Shrimp Salad

Ingredients

  • 1 pound cooked shrimp, peeled and deveined, chopped into bite size pieces
  • 4 cups mixed lettuce or your favorite salad greens
  • 1 cup cherry tomatoes, halved
  • 1/2 cup celery, thinly sliced
  • 1/4 cup red onion, thinly sliced
  • 1 avocado, diced (optional)
  • 1/4 cup mayonnaise
  • 2 tablespoons plain yogurt or sour cream
  • 2 tablespoons lemon juice, fresh
  • 1 tablespoon olive oil
  • 1 teaspoon Dijon mustard
  • Salt and black pepper, to taste
  • Fresh parsley or dill, chopped, for garnish

Directions

  1. If shrimp are frozen, thaw them in cold water, then pat dry with paper towels.
  2. In a small bowl, whisk together mayonnaise, yogurt, lemon juice, olive oil, Dijon mustard, salt and pepper to make the dressing.
  3. In a large bowl, add chopped shrimp, celery, red onion, and cherry tomatoes. Toss gently.
  4. Add the dressing to the shrimp mix, stir until all pieces are coated.
  5. Add avocado and greens last, toss lightly so avocado holds its shape.
  6. Taste and adjust salt and pepper. Garnish with chopped parsley or dill.
  7. Chill in the fridge for 15 to 30 minutes if you want a cold shrimp salad, then serve.

Shrimp Salad Recipe

Why You’ll Love Shrimp Salad

  • Easy and quick to make, perfect for busy days.
  • Fresh flavors, with lemon and herbs that lift the shrimp.
  • Versatile, you can make it as a cold shrimp salad, a hearty green salad, or a sandwich filling.
  • Healthy, with lean protein from shrimp and lots of vegetables.
  • Great for parties, picnics, and weeknight meals, it pleases many tastes.

Tips for success

  • Use cooked shrimp for speed, or grill fresh shrimp for more flavor.
  • Pat shrimp dry so the dressing sticks and does not get watery.
  • Chill the salad for a short time to let flavors blend, but add avocado just before serving to keep it fresh.
  • Taste the dressing before you add it, and adjust lemon, salt, or pepper.
  • If you like spice, add a pinch of paprika or a dash of hot sauce.
  • Use fresh herbs like parsley or dill for a brighter taste than dried herbs.

Serving Suggestions

  • Serve the shrimp salad on a bed of mixed greens for a light meal.
  • Fill a crusty roll or wrap for a tasty shrimp sandwich.
  • Spoon over sliced cucumbers or avocado halves for a low carb option.
  • Pair with crusty bread, a simple soup, or a chilled white wine for a full meal.
  • Bring it to picnics or potlucks, it travels well when kept cool.

Shrimp Salad Recipe

FAQs

Q: Can I use raw shrimp in this recipe? A: Yes, you can, but cook the raw shrimp first by boiling, grilling, or sautéing, then cool before mixing with the dressing.

Q: How long does shrimp salad last in the fridge? A: Keep it in an airtight container, and eat within 2 days for best taste and quality. Avocado may darken, so add it fresh if you prefer.

Q: Can I make this recipe ahead of time? A: Yes, mix shrimp and dressing ahead and store in the fridge. Add delicate items like greens and avocado right before serving.

Q: Is this shrimp salad healthy? A: Yes, shrimp is lean protein, and with lots of vegetables it makes a healthy meal. Use yogurt instead of some mayo to lower calories.

Conclusion

For another take and extra tips on making a great shrimp salad, see The Best Shrimp Salad Recipe – Inspired Taste.

Shrimp Salad

This refreshing and bright shrimp salad combines tender shrimp, crisp vegetables, and a creamy lemon dressing, making it perfect for lunch or light dinner.

Main Ingredients

  • 1 pound cooked shrimp, peeled and deveined, chopped into bite size pieces (Use fresh or pre-cooked shrimp.)
  • 4 cups mixed lettuce or your favorite salad greens (Any variety of greens works.)
  • 1 cup cherry tomatoes, halved (Adds sweetness to the salad.)
  • 1/2 cup celery, thinly sliced (Provides crunch.)
  • 1/4 cup red onion, thinly sliced (Adjust amount to taste.)
  • 1 each avocado, diced (optional) (Add just before serving for freshness.)

Dressing Ingredients

  • 1/4 cup mayonnaise (Creamy base for the dressing.)
  • 2 tablespoons plain yogurt or sour cream (Use yogurt for a lighter dressing.)
  • 2 tablespoons lemon juice, fresh (Adds tanginess.)
  • 1 tablespoon olive oil (For richness in the dressing.)
  • 1 teaspoon Dijon mustard (Gives depth of flavor.)
  • to taste Salt and black pepper (Adjust according to preference.)

Garnish

  • to taste Fresh parsley or dill, chopped (Used for garnish.)

Preparation

  1. If shrimp are frozen, thaw them in cold water, then pat dry with paper towels.
  2. In a small bowl, whisk together mayonnaise, yogurt, lemon juice, olive oil, Dijon mustard, salt and pepper to make the dressing.
  3. In a large bowl, add chopped shrimp, celery, red onion, and cherry tomatoes. Toss gently.
  4. Add the dressing to the shrimp mix, stir until all pieces are coated.
  5. Add avocado and greens last, toss lightly so avocado holds its shape.
  6. Taste and adjust salt and pepper. Garnish with chopped parsley or dill.
  7. Chill in the fridge for 15 to 30 minutes if you want a cold shrimp salad, then serve.

Use cooked shrimp for speed, or grill fresh shrimp for more flavor. Chill the salad briefly to blend flavors, but add avocado just before serving to ensure freshness. Adjust dressing ingredients to taste, and consider adding spices if desired.

Dinner, lunch, Salad
American, Seafood
Easy Recipe, Healthy Recipe, Quick Meal, Shrimp Salad, summer salad

Banana Bread Overnight Oats

A bowl of Banana Bread Overnight Oats topped with sliced bananas and nuts

Banana Bread Overnight Oats feel like a warm slice of banana bread turned into a quick, cool breakfast. This easy, creamy oat jar mixes the sweet banana taste, cinnamon spice, and a hint of vanilla for a familiar, cozy flavor. It makes mornings simple, it fills you up, and it tastes like a treat without the fuss.

The featured recipe below is a true crowd-pleaser, perfect for busy weekdays, work lunches, or a grab-and-go breakfast. It tastes like banana bread, but it is healthy, easy to make ahead, and great for meal prep. Get ready to make a breakfast that feels like dessert, and smile while you eat it.

How to prepare Banana Bread Overnight Oats

Ingredients

  • 1 ripe banana, mashed
  • 1 cup rolled oats
  • 1 cup milk or dairy-free milk
  • 1/2 cup plain yogurt or plant yogurt
  • 1 tablespoon chia seeds
  • 1 teaspoon vanilla extract
  • 1 teaspoon cinnamon
  • 1 tablespoon maple syrup or honey, optional
  • Pinch of salt
  • Optional toppings, chopped nuts, sliced banana, or chocolate chips

Directions

  1. In a bowl or mason jar, mash the ripe banana with a fork until smooth.
  2. Add the rolled oats, milk, yogurt, chia seeds, vanilla, cinnamon, maple syrup, and salt.
  3. Stir well, make sure the oats and chia seeds mix with the liquid.
  4. Close the jar or cover the bowl and chill in the fridge for at least 4 hours, or overnight for best texture.
  5. In the morning, stir the oats. Add a splash of milk if you want it looser.
  6. Top with sliced banana, chopped nuts, or a few chocolate chips, then enjoy.

Banana Bread Overnight Oats

Why You’ll Love Banana Bread Overnight Oats

  • It tastes like banana bread, but it is ready in the morning, no baking needed.
  • The oats and chia seeds keep you full for hours, making it a great healthy breakfast.
  • You can make jars ahead for easy meal prep, great for busy weeks.
  • It uses simple pantry ingredients, rolled oats, banana, cinnamon, and milk.
  • It is easy to change, add yogurt for creaminess, or nuts for crunch.

Tips for success

  • Use a ripe banana, it gives the best banana flavor and natural sweetness.
  • If you like a smoother texture, mash the banana very well or blend it with the milk before mixing.
  • Let the oats sit overnight for the best creamy texture, at least 4 hours if short on time.
  • Stir before serving, add more milk if the oats are too thick.
  • If you want more protein, add a scoop of protein powder or more yogurt.
  • Keep jars refrigerated up to 3 days for easy breakfasts all week.

Serving Suggestions

  • Serve in a mason jar for a neat, portable breakfast.
  • Top with toasted walnuts or pecans for crunch.
  • Add sliced banana and a drizzle of maple syrup for extra sweetness.
  • Sprinkle extra cinnamon or a few dark chocolate chips for a treat feel.
  • Pair with coffee or a green smoothie for a full morning meal.

Banana Bread Overnight Oats

FAQs

Q, Can I use quick oats instead of rolled oats? A, Yes, quick oats work, but the texture may be softer. Rolled oats keep a heartier bite.

Q, How long do overnight oats last in the fridge? A, They stay good for about 3 days in a sealed jar, great for meal prep.

Q, Can I make this recipe dairy free? A, Yes, use almond milk, oat milk, or soy yogurt to make it dairy free.

Q, Can I use frozen bananas? A, Yes, thaw and mash frozen banana before mixing, it works well.

Q, Do I need chia seeds? A, Chia seeds add thickness and fiber, but you can skip them if you want.

Conclusion

If you want more ideas or a similar recipe guide, you can find a nice version at Banana Bread Overnight Oats | Lemons & Zest, it has helpful photos and tips. Enjoy your easy, tasty banana oatmeal and have fun making a breakfast that feels like banana bread.

Banana Bread Overnight Oats

A quick and easy breakfast that tastes like a warm slice of banana bread, made with rolled oats, ripe banana, and cozy spices.

Main Ingredients

  • 1 ripe banana, mashed (Ensure the banana is ripe for better flavor and sweetness.)
  • 1 cup rolled oats (Use rolled oats for best texture.)
  • 1 cup milk or dairy-free milk (Any milk substitute can be used.)
  • 1/2 cup plain yogurt or plant yogurt (Optional for creaminess.)
  • 1 tablespoon chia seeds (Adds thickness and fiber.)
  • 1 teaspoon vanilla extract (For flavor enhancement.)
  • 1 teaspoon cinnamon (To mimic the flavor of banana bread.)
  • 1 tablespoon maple syrup or honey (Optional for added sweetness.)
  • Pinch of salt (Balances flavor.)

Optional Toppings

  • chopped nuts (For crunch.)
  • sliced banana (To enhance banana flavor.)
  • chocolate chips (For a dessert-like treat.)

Preparation

  1. In a bowl or mason jar, mash the ripe banana with a fork until smooth.
  2. Add the rolled oats, milk, yogurt, chia seeds, vanilla, cinnamon, maple syrup, and salt.
  3. Stir well and ensure the oats and chia seeds mix with the liquid.
  4. Close the jar or cover the bowl and chill in the fridge for at least 4 hours, or overnight for best texture.

Serving

  1. In the morning, stir the oats. Add a splash of milk if you want it looser.
  2. Top with sliced banana, chopped nuts, or a few chocolate chips, then enjoy.

Use a ripe banana for the best flavor, and let the oats sit overnight for optimal texture. Keep jars refrigerated up to 3 days for easy breakfasts.

Breakfast
American
Banana Bread Flavored, Easy Recipe, Healthy Breakfast, Meal Prep, Overnight Oats