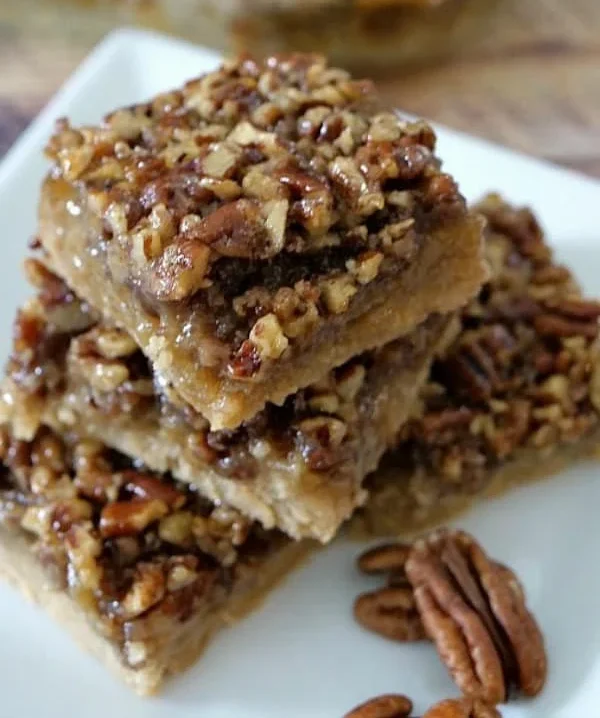
Pecan Pie Bars

pecan pie bars

There’s something special about gathering with friends and family over dessert. I still remember the first time I had Pecan Pie Bars at a holiday gathering. They were rich, sweet, and had a delightful crunch. It was an instant favorite, and I decided I had to learn how to make them. These bars have become a staple in my kitchen, especially during the festive season.

Why Make This Recipe

Pecan Pie Bars are a perfect blend of nutty and sweet flavors, making them a crowd-pleaser at any occasion. They are easy to make and serve, making them ideal for potlucks, parties, or simply a treat for yourself. With a buttery shortbread crust and a gooey pecan topping, these bars offer all the deliciousness of traditional pecan pie but in a much simpler form.

How to Make Pecan Pie Bars

Ingredients

  • 2 cups all-purpose flour
  • 1 cup brown sugar (packed)
  • 1 cup butter (softened)
  • 5 eggs
  • 1 cup dark corn syrup
  • 2/3 cup sugar
  • 1 tsp vanilla extract
  • 1/8 tsp salt
  • 2 cups chopped pecans

Directions

  1. Preheat your oven to 350°F (175°C).
  2. Start with the buttery shortbread crust. In a mixing bowl, combine the flour, brown sugar, and softened butter. Mix until the dough comes together.
  3. Press the dough into the bottom of a greased 9×13 inch baking dish.
  4. Bake the crust for about 15 minutes or until it becomes lightly golden.
  5. While the crust is baking, make the pecan pie topping. In a large bowl, beat the eggs. Then add the dark corn syrup, sugar, vanilla, and salt. Mix well.
  6. Fold in the chopped pecans into the mixture.
  7. Pour the pecan mixture over the baked crust and spread it evenly.
  8. Bake for an additional 25-30 minutes or until the topping is set and bubbly.
  9. Allow the bars to cool completely before cutting into squares.

How to Serve Pecan Pie Bars

Pecan Pie Bars can be served warm or at room temperature. You can also top them with a scoop of vanilla ice cream or a dollop of whipped cream for a special treat. They are delightful on their own too!

How to Store Pecan Pie Bars

To store Pecan Pie Bars, place them in an airtight container and keep them in the refrigerator. They will stay fresh for up to a week. You can also freeze them for longer storage, and simply thaw them in the refrigerator before serving.

Tips to Make Pecan Pie Bars

  • Make sure your butter is softened for easy mixing.
  • For an extra flavor boost, toast the pecans lightly before adding them to the filling.
  • Allow the bars to cool completely before cutting for clean slices.

Variation

For a twist on the classic recipe, consider adding chocolate chips or a swirl of caramel into the pecan mixture. You can also use different nuts if you prefer, such as walnuts or almonds.

FAQ SECTION

Can I use light corn syrup instead of dark corn syrup?
Yes, you can use light corn syrup, but the flavor will be slightly different. Dark corn syrup has a richer taste.

Can I make these bars ahead of time?
Absolutely! Pecan Pie Bars can be made a day or two in advance. Just store them in the refrigerator.

What if I don’t have pecans?
You can substitute other nuts such as walnuts or almonds, or even use a mixture of nuts for added flavor.

[tasty-recipe id=”3317″]

Pecan Pie Bars
Delicious and easy-to-make Pecan Pie Bars with a buttery shortbread crust and gooey pecan topping, perfect for gatherings.

For the crust

  • 2 cups all-purpose flour
  • 1 cup brown sugar (packed)
  • 1 cup butter (softened) (Make sure your butter is softened for easy mixing.)

For the pecan topping

  • 5 eggs
  • 1 cup dark corn syrup
  • 2/3 cup sugar
  • 1 tsp vanilla extract
  • 1/8 tsp salt
  • 2 cups chopped pecans (For an extra flavor boost, toast the pecans lightly before adding them to the filling.)

Preparation

  1. Preheat your oven to 350°F (175°C).
  2. In a mixing bowl, combine the flour, brown sugar, and softened butter. Mix until the dough comes together.
  3. Press the dough into the bottom of a greased 9×13 inch baking dish.
  4. Bake the crust for about 15 minutes or until it becomes lightly golden.

Pecan Topping

  1. In a large bowl, beat the eggs. Then add the dark corn syrup, sugar, vanilla, and salt. Mix well.
  2. Fold in the chopped pecans into the mixture.
  3. Pour the pecan mixture over the baked crust and spread it evenly.
  4. Bake for an additional 25-30 minutes or until the topping is set and bubbly.
  5. Allow the bars to cool completely before cutting into squares.

Pecan Pie Bars can be served warm or at room temperature. You can also top them with a scoop of vanilla ice cream or a dollop of whipped cream for a special treat. They are delightful on their own too! To store Pecan Pie Bars, place them in an airtight container and keep them in the refrigerator for up to a week. You can also freeze them for longer storage.
Dessert, Snack
American
Dessert Bars, Easy Desserts, Holiday Treats, Pecan Desserts, Pecan Pie Bars

No-Bake Pastel Oreo Cheesecake Cups

oreo cheesecake

Why Make This Recipe

No-Bake Pastel Oreo Cheesecake Cups are a delightful treat that not only look pretty but taste amazing too! They are perfect for spring picnics, birthday parties, or just a fun dessert after dinner. The creamy filling combined with the crunchy chocolate cookie base makes these cups irresistible. Plus, they are super easy to make and don’t require turning on the oven!

How to Make No-Bake Pastel Oreo Cheesecake Cups

oreo cheesecake

Ingredients:

  • 20 chocolate sandwich cookies, crushed into fine crumbs
  • 4 tablespoons unsalted butter, melted
  • 16 oz cream cheese, softened
  • 1 cup powdered sugar
  • 1 teaspoon vanilla extract
  • 1 tablespoon lemon juice
  • 1 cup heavy whipping cream, cold
  • 2 cups whipped cream or stabilized frosting
  • Pink and pastel green food coloring
  • Piping bags with star tips
  • Optional toppings: Mini sandwich cookies, Colorful spring sprinkles

Directions:

  1. Start by combining the crushed cookie crumbs with melted butter. Press this mixture into the bottom of your serving cups to create a base.
  2. In a mixing bowl, beat the softened cream cheese until smooth. Then, add the powdered sugar, vanilla, and lemon juice. Mix until well combined.
  3. In a separate bowl, whip the heavy cream until stiff peaks form. Gently fold this whipped cream into the cream cheese mixture until everything is combined.
  4. Divide the filling into three equal portions. Color one portion pink, another green, and leave the third portion white.
  5. Layer the colored fillings into the cups, swirling them gently to create a marbled effect.
  6. Place the cups in the refrigerator for at least 4 hours until they are set.
  7. Once set, pipe some colored whipped cream on top of each cup. You can garnish them with mini cookies and colorful sprinkles if you like!

How to Serve No-Bake Pastel Oreo Cheesecake Cups

Serve these delightful cheesecake cups chilled. They are perfect as a dessert for parties or a sweet treat for family gatherings. Just grab a spoon and enjoy the fluffy, creamy layers!

How to Store No-Bake Pastel Oreo Cheesecake Cups

Store any leftovers in the refrigerator. Make sure to cover them with plastic wrap or a lid. They will stay fresh for about 3-4 days, but they are best enjoyed within the first couple of days.

Tips to Make No-Bake Pastel Oreo Cheesecake Cups

  • Make sure the cream cheese is fully softened to avoid lumps in your filling.
  • When whipping the heavy cream, ensure your mixing bowl and beaters are cold for better results.
  • Feel free to customize the colors to fit any occasion! Use any pastel shades you prefer.

Variation

You can add different flavors to the filling by mixing in your favorite extracts. For example, almond or coconut extract can add a unique twist to the cheesecake flavor.

FAQs

Q: Can I use different cookies for the base?
A: Yes! You can use any flavored cookies you like, such as vanilla wafers or graham crackers.

Q: Is this recipe gluten-free?
A: If you use gluten-free cookies and a gluten-free whipped cream, this recipe can be made gluten-free.

Q: How can I make this recipe dairy-free?
A: Substitute cream cheese with a dairy-free cream cheese and use coconut cream or another vegan heavy cream for the filling.

[tasty-recipe id=”4400″]

No-Bake Pastel Oreo Cheesecake Cups

Delicious and visually appealing cheesecake cups that are perfect for spring picnics, birthday parties, or just a fun dessert after dinner.

For the crust

  • 20 pieces chocolate sandwich cookies, crushed into fine crumbs
  • 4 tablespoons unsalted butter, melted

For the filling

  • 16 oz cream cheese, softened (Make sure it’s fully softened to avoid lumps.)
  • 1 cup powdered sugar
  • 1 teaspoon vanilla extract
  • 1 tablespoon lemon juice
  • 1 cup heavy whipping cream, cold (Keep the mixing bowl and beaters cold for better results.)
  • 2 cups whipped cream or stabilized frosting
  • Pink and pastel green food coloring (Feel free to customize the colors.)

Optional Toppings

  • Mini sandwich cookies
  • Colorful spring sprinkles

Preparation

  1. Combine the crushed cookie crumbs with melted butter and press this mixture into the bottom of serving cups to create a base.
  2. In a mixing bowl, beat the softened cream cheese until smooth. Add the powdered sugar, vanilla, and lemon juice, and mix until well combined.
  3. In a separate bowl, whip the heavy cream until stiff peaks form, then gently fold this whipped cream into the cream cheese mixture until fully combined.
  4. Divide the filling into three equal portions. Color one portion pink, another green, and leave the third portion white.
  5. Layer the colored fillings into the cups, swirling them gently to create a marbled effect.
  6. Refrigerate the cups for at least 4 hours until they are set.
  7. Once set, pipe some colored whipped cream on top of each cup and garnish with mini cookies and colorful sprinkles if desired.

Store any leftovers in the refrigerator, covered with plastic wrap or a lid. Best enjoyed within the first couple of days.

Dessert, Sweet Treat
American
Cheesecake Cups, No-Bake Cheesecake, Oreo Cups, Pastel Desserts, Spring Desserts

Simple Peach Bruschetta with Whipped Ricotta

Delicious peach bruschetta topped with whipped ricotta served on toasted bread

Peach Bruschetta with Whipped Ricotta is a fresh snacks that feel a little fancy. It uses ripe peaches, creamy ricotta, and a bit of bread to make a bright, sweet, and salty bite. This dish works for summer nights, a light lunch, or a party starter. If you like warm fruit on toast, you might also enjoy a simple grilled peach recipe to pair with it, like this grilled peaches with brown butter cinnamon sugar glaze. Give it a try, you will smile at every bite and want to make it again.

How to prepare Simple Peach Bruschetta with Whipped Ricotta

Ingredients:

  • 4 ripe peaches, thinly sliced
  • 8 oz ricotta cheese
  • 1-2 tbsp honey, plus more to finish
  • 1 tbsp lemon juice
  • 1 baguette, sliced and toasted
  • 1 tbsp olive oil
  • Pinch of salt
  • Fresh basil leaves, torn
  • Optional, a little black pepper or flaky sea salt

Directions:

  1. Make whipped ricotta, put ricotta, 1 tbsp honey, lemon juice, and a pinch of salt in a bowl, whip with a fork or small blender until smooth and light.
  2. Toast baguette slices, brush each slice with olive oil, toast in a pan or oven until light brown.
  3. Slice peaches thin, if peaches are very soft, gently pat dry with a towel.
  4. Spread a spoonful of whipped ricotta on each toast slice.
  5. Top with 2-3 peach slices, add torn basil.
  6. Drizzle a little honey over each bruschetta, finish with a pinch of pepper or flaky salt if you like.

Simple Peach Bruschetta with Whipped Ricotta

Why You’ll Love Simple Peach Bruschetta with Whipped Ricotta

  • It is fast to make, most work is slicing and spreading.
  • The ricotta is light and creamy, it balances the sweet peaches.
  • You get fresh flavors, texture from toast, and a touch of herbs.
  • It looks pretty and works well for guests or a simple snack.

Tips for success

  • Use ripe, but firm peaches so slices hold their shape.
  • Whip ricotta until smooth, it spreads easier and feels lighter.
  • Toast bread well, a crisp base stops it from getting soggy.
  • Taste and adjust honey, add more if peaches are tart.
  • Prepare peaches and ricotta just before serving for best texture.

Serving Suggestions

  • Serve with a light salad, like arugula with lemon.
  • Pair with chilled white wine or sparkling water with lemon.
  • Make smaller slices for a party platter or larger for a light meal.
  • Add prosciutto for a salty contrast if you want a savory version.

Simple Peach Bruschetta with Whipped Ricotta

FAQs

Q: Can I use frozen peaches? A: Fresh peaches work best. If you use frozen, thaw and drain well, the texture will be softer.

Q: How long can I keep the whipped ricotta? A: Store in the fridge up to 2 days in a covered container. Stir before using.

Q: Can I use another cheese? A: Yes, mascarpone or cream cheese will work, but change the flavor and richness.

Q: Is there a vegan option? A: Use a plant-based ricotta and vegan honey or maple syrup, it will still be tasty.

Conclusion

Try this Simple Peach Bruschetta with Whipped Ricotta for a quick, tasty treat that looks like you spent hours on it. For another take on peaches and a sweet finish, see the full Peach Bruschetta with Whipped Ricotta recipe on How Sweet Eats.

Simple Peach Bruschetta with Whipped Ricotta

A fresh and fancy snack featuring ripe peaches, creamy ricotta, and toasted bread, perfect for summer or parties.

For the Whipped Ricotta

  • 8 oz ricotta cheese (Use light and creamy ricotta)
  • 1-2 tbsp honey (Plus more to finish)
  • 1 tbsp lemon juice
  • pinch salt

For the Bruschetta

  • 4 ripe peaches, thinly sliced (Use ripe but firm peaches)
  • 1 baguette sliced and toasted (Toast until light brown)
  • 1 tbsp olive oil (For brushing on the bread)
  • Fresh basil leaves, torn
  • optional a little black pepper or flaky sea salt

Preparation

  1. In a bowl, whip ricotta, 1 tbsp honey, lemon juice, and a pinch of salt until smooth and light.
  2. Brush baguette slices with olive oil and toast in a pan or oven until light brown.
  3. Thinly slice the peaches; pat dry with a towel if they are very soft.

Assembly

  1. Spread a spoonful of whipped ricotta on each toasted baguette slice.
  2. Top with 2-3 peach slices and add torn basil.
  3. Drizzle with honey and finish with a pinch of black pepper or flaky salt if desired.

For best texture, prepare peaches and ricotta just before serving. Adjust honey based on the tartness of the peaches.

Appetizer, Snack
Italian, Mediterranean
Light Lunch, Party Starter, Peach Bruschetta, Summer Snack, Whipped Ricotta

Cheesy Ranch Potatoes

Cheesy ranch potatoes with smoked sausage, a delicious comfort meal

Cheesy Ranch Potatoes and Smoked Sausage is a delicious and hearty dish that combines creamy, cheesy potatoes with seasoned smoked sausage for a comforting meal. This dish is easy to make, making it perfect for family dinners or gatherings with friends. The combination of flavors and textures creates a satisfying and filling dish that is loved by many.

why make this recipe

There are many reasons to prepare Cheesy Ranch Potatoes and Smoked Sausage. First, it is a versatile recipe that is simple to customize. You can add your favorite vegetables, adjust spices, or use different types of sausage based on your taste preferences. This dish is also a crowd-pleaser, making it ideal for parties or potluck gatherings. Everyone enjoys the rich flavor of cheesy potatoes combined with savory sausage.

Another reason to make this dish is the ease and speed of preparation. With just a few ingredients and straightforward steps, you can have a delicious meal in about an hour. The one-pan method means less cleanup, which is always a bonus after a long day.

Furthermore, it is a comforting meal that provides warmth and satisfies hunger. The combination of creamy cheese, ranch seasoning, and hearty sausage creates a dish that feels indulgent yet is simple to prepare. It can also be enjoyed any time of year, making it a go-to recipe for any season.

how to make Cheesy Ranch Potatoes and Smoked Sausage

To start making Cheesy Ranch Potatoes and Smoked Sausage, you will need the following ingredients: 2 pounds of potatoes, 1 pound of smoked sausage, 1 cup of shredded cheese, 1 packet of ranch seasoning, and some oil for cooking.

First, preheat your oven to 400°F (200°C). Begin by washing and dicing the potatoes into small pieces. In a large bowl, combine the diced potatoes with a drizzle of oil and the ranch seasoning. Mix everything well so that all the potatoes are coated in the seasoning.

Next, slice the smoked sausage into rounds and add it to the bowl with the potatoes. Stir well to combine. Pour the potato and sausage mixture into a greased baking dish. Spread it out evenly and top with the shredded cheese.

Bake in the preheated oven for about 30-35 minutes until the potatoes are tender. You may want to check them with a fork to ensure they are cooked through. For an extra cheesy finish, you can broil for a few minutes to bubble the cheese on top. Once done, take the baking dish out of the oven and let it cool for a few minutes before serving.

how to serve Cheesy Ranch Potatoes and Smoked Sausage

Cheesy Ranch Potatoes and Smoked Sausage can be served in a variety of ways. A simple way to serve this dish is directly from the baking dish, allowing everyone to help themselves. You can pair it with a fresh green salad or steamed vegetables for an added healthy touch. The freshness of a salad complements the richness of the cheesy potatoes and sausage.

For a family-style meal, consider putting the dish on the center of the table with serving utensils. This encourages sharing and enjoyment among family and friends.

You might also enjoy this dish with a dollop of sour cream or a sprinkle of fresh herbs on top for added flavor. If you have leftovers, they can be reheated and served as a quick lunch the next day. No matter how you choose to serve it, this dish is sure to please everyone around the table.

how to store Cheesy Ranch Potatoes and Smoked Sausage

Storing Cheesy Ranch Potatoes and Smoked Sausage is simple. First, allow the dish to cool to room temperature before storing it. This step prevents condensation that can make the dish soggy. Transfer any leftovers to an airtight container.

You can store the dish in the refrigerator for up to 3-4 days. When reheating, it’s best to use an oven to retain the dish’s crispiness. Preheat the oven to 350°F (175°C) and place the leftovers in an oven-safe dish, covering it with foil to prevent drying out. Heat for about 20-25 minutes or until warmed through.

If you want to store it for a longer period, consider freezing it. Pack the cooled dish in a well-sealed freezer container. It can last in the freezer for up to 2-3 months. Thaw overnight in the refrigerator before reheating. This makes it perfect for meal prep and easy weeknight dinners.

tips to make Cheesy Ranch Potatoes and Smoked Sausage

Here are some helpful tips to make your Cheesy Ranch Potatoes and Smoked Sausage even better. First, make sure to cut the potatoes into even sizes. This helps them cook evenly. You can also soak the diced potatoes in cold water for 30 minutes to remove excess starch, which helps to make them crispier.

Secondly, feel free to get creative with the cheese. While shredded cheddar works great, experimenting with other cheeses like Monterey Jack or pepper jack can add a nice twist.

Consider adding some vegetables to the dish. Bell peppers, onions, or broccoli can enhance the flavor and nutrition of the meal. You can roast them alongside the potatoes for a complete one-pan meal.

Finally, taste as you go! Adjust the seasoning according to your preference by adding more ranch seasoning or spices like garlic powder or paprika for an extra kick.

variation

If you want to switch things up, try replacing the smoked sausage with grilled chicken or turkey sausage for a different protein option. You can also make it vegetarian by omitting the sausage and adding extra vegetables, such as spinach or zucchini. For a spicier dish, consider adding jalapeños or a dash of hot sauce to the mix.

FAQs

1. Can I use fresh potatoes instead of frozen?
Yes, fresh potatoes work perfectly for this recipe. Just make sure to wash and chop them into even pieces.

2. Is this dish gluten-free?
Yes, Cheesy Ranch Potatoes and Smoked Sausage can be gluten-free if you use gluten-free ranch seasoning and ensure the sausage is also gluten-free.

3. Can I make this dish ahead of time?
Absolutely! You can prepare the dish in advance and keep it in the refrigerator before baking. Just add some extra baking time if it goes into the oven chilled.

[tasty-recipe id=”4705″]

Cheesy Ranch Potatoes and Smoked Sausage

A delicious and hearty dish that combines creamy, cheesy potatoes with seasoned smoked sausage for a comforting meal, perfect for family dinners or gatherings.

Main Ingredients

  • 2 pounds potatoes, diced (Cut into even sizes for even cooking.)
  • 1 pound smoked sausage, sliced (Can be substituted with grilled chicken or turkey sausage.)
  • 1 cup shredded cheese (Cheddar, Monterey Jack, or Pepper Jack cheese can be used.)
  • 1 packet ranch seasoning
  • 2 tablespoons oil (For cooking.)

Preparation

  1. Preheat the oven to 400°F (200°C).
  2. Wash and dice the potatoes into small pieces.
  3. In a large bowl, combine the diced potatoes with a drizzle of oil and the ranch seasoning.
  4. Mix everything well so that all the potatoes are coated in the seasoning.
  5. Slice the smoked sausage into rounds and add it to the bowl with the potatoes.
  6. Stir well to combine and pour the mixture into a greased baking dish.
  7. Spread it out evenly and top with the shredded cheese.

Cooking

  1. Bake in the preheated oven for about 30-35 minutes until the potatoes are tender.
  2. For an extra cheesy finish, broil for a few minutes to bubble the cheese on top.

Serving

  1. Allow to cool for a few minutes before serving.
  2. Serve directly from the baking dish or pair with a fresh green salad.
  3. Optional: Add a dollop of sour cream or a sprinkle of fresh herbs on top.

You can store leftovers in an airtight container in the refrigerator for up to 3-4 days. Reheat using an oven to retain crispiness.

Dinner, Main Course
American
Cheesy Ranch Potatoes, Comfort Food, Easy Dinner, Party Dish, Smoked Sausage

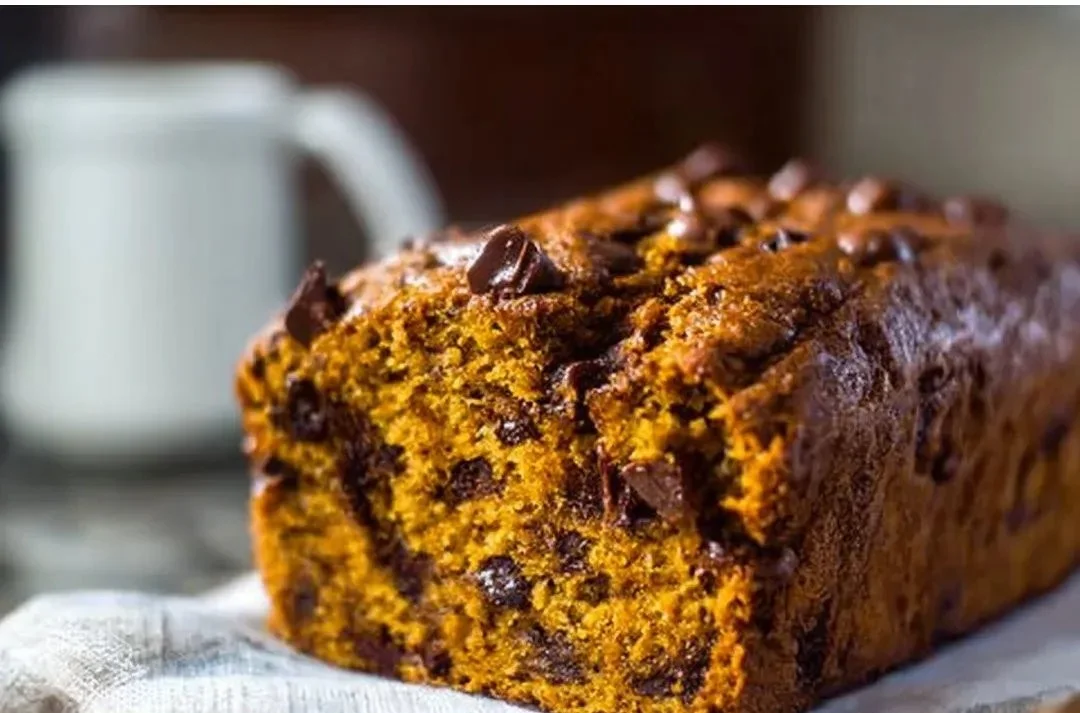
Banana Chocolate Chip Pumpkin Bread

Delicious banana chocolate chip pumpkin bread loaf on a wooden table

Banana Chocolate Chip Pumpkin Bread is a delicious treat that blends the flavors of ripe bananas, rich chocolate chips, and warm pumpkin spice. Perfect for breakfast or as a snack, this bread is easy to make and satisfying to eat. It combines nutritious ingredients with sweet indulgence, making it a favorite for many.

why make this recipe

Making Banana Chocolate Chip Pumpkin Bread is a fantastic way to use leftover ripe bananas and pumpkin puree, both of which are often found in many kitchens. This recipe is simple and doesn’t require fancy tools or skills. You can easily whip it up in one bowl, making cleanup quick and easy.

The combination of flavors brings comfort and joy, making it a great choice for fall or any time of the year. The warm spices from the pumpkin blend beautifully with the sweetness of bananas and the richness of chocolate chips. This bread is also versatile. You can enjoy it fresh out of the oven, toasted, or even as a dessert with a scoop of ice cream.

Nutritionally, the use of pumpkin adds fiber and vitamins, while the bananas contribute potassium. These ingredients make the bread more wholesome compared to traditional desserts. With its delightful aroma and taste, Banana Chocolate Chip Pumpkin Bread is bound to please everyone, from kids to adults. It’s the perfect reason to gather around the kitchen and share a delightful slice with loved ones.

how to make Banana Chocolate Chip Pumpkin Bread

To make Banana Chocolate Chip Pumpkin Bread, start by gathering your ingredients: ripe bananas, canned pumpkin, eggs, sugar, flour, baking soda, baking powder, cinnamon, and chocolate chips. Preheat your oven to 350°F (175°C) and grease a loaf pan.

In a large bowl, mash the ripe bananas until smooth. Next, add the pumpkin puree and eggs, mixing until well blended. Gradually stir in the sugar, ensuring everything is combined.

In another bowl, whisk together the flour, baking soda, baking powder, and cinnamon. Gradually add this dry mixture to the banana and pumpkin mixture, stirring until just combined. Finally, fold in the chocolate chips.

Pour the batter into the greased loaf pan. Bake for about 60 minutes or until a toothpick inserted into the center comes out clean. Allow the bread to cool in the pan for about 10 minutes before transferring it to a wire rack. Let it cool completely before slicing.

Enjoy your freshly baked Banana Chocolate Chip Pumpkin Bread, perfect for any time of the day!

how to serve Banana Chocolate Chip Pumpkin Bread

Banana Chocolate Chip Pumpkin Bread can be served in many delightful ways. For a simple breakfast, slice a piece and enjoy it plain with a cup of coffee or tea. The bread is delicious warm, straight from the oven, but if you prefer it toasted, pop a slice in the toaster for a few moments to enhance its flavors.

If you’re serving it as a dessert, top a warm slice with a scoop of vanilla or pumpkin spice ice cream. You can also spread a bit of butter or cream cheese on it for added richness.

For gatherings, consider arranging slices on a platter. Add some fresh fruit, like sliced strawberries or apples, for a colorful touch. Drizzling a bit of caramel sauce over the top can make it feel fancy for special occasions. No matter how you choose to serve it, people will enjoy this treat!

how to store Banana Chocolate Chip Pumpkin Bread

To store Banana Chocolate Chip Pumpkin Bread, allow it to cool completely after baking. Wrap it tightly in plastic wrap or aluminum foil to keep it fresh. You can also place it in an airtight container.

When stored this way, the bread will stay fresh at room temperature for about 3 days. If you want to keep it longer, consider freezing it. To freeze, wrap the bread securely to prevent freezer burn. It can be stored in the freezer for up to three months.

When you’re ready to eat it, just thaw it in the fridge overnight or leave it at room temperature for a few hours. You can also reheat individual slices in the microwave for a few seconds for extra warmth and comfort.

tips to make Banana Chocolate Chip Pumpkin Bread

For the best Banana Chocolate Chip Pumpkin Bread, use very ripe bananas. The riper they are, the sweeter the bread will be. When measuring flour, make sure to spoon it into the measuring cup and level it off with a knife. This ensures the correct amount and prevents the bread from being too dense.

Feel free to adjust the spices if you want more or less pumpkin flavor. Adding nuts, like walnuts or pecans, can add great texture and a nutty flavor. If you prefer a lower sugar option, you can reduce the sugar in the recipe without sacrificing taste.

Lastly, be careful not to overmix the batter. Mixing until just combined will result in a moist and tender loaf.

variation

You can easily customize this recipe by adding different mix-ins, such as dried fruits, shredded coconut, or even a splash of vanilla extract for extra flavor. For a healthier twist, try using whole wheat flour instead of all-purpose flour. You could also substitute half of the butter with applesauce to make the bread a little lighter.

FAQs

1. Can I use fresh pumpkin instead of canned?
Yes, you can use fresh pumpkin that has been cooked and pureed. Just ensure it’s smooth and not too watery.

2. How can I tell when the bread is done baking?
Insert a toothpick into the center of the bread. If it comes out clean or with a few crumbs, your bread is done.

3. Can I make this recipe gluten-free?
Yes, you can substitute all-purpose flour with a gluten-free flour blend. Just make sure it’s a blend that behaves similarly to regular flour in baking.

[tasty-recipe id=”4908″]

Banana Chocolate Chip Pumpkin Bread

A delightful blend of ripe bananas, chocolate chips, and pumpkin spice, perfect for breakfast or a snack.

Wet Ingredients

  • 3 medium ripe bananas (Very ripe bananas will yield a sweeter bread.)
  • 1 cup canned pumpkin (Alternatively, use cooked and pureed fresh pumpkin.)
  • 2 large eggs
  • 1 cup sugar (Feel free to reduce for a lower sugar option.)

Dry Ingredients

  • 1.5 cups all-purpose flour (Can substitute with whole wheat flour.)
  • 1 tsp baking soda
  • 1 tsp baking powder
  • 1 tsp cinnamon (Adjust for more or less pumpkin flavor.)

Add-Ins

  • 1 cup chocolate chips (Try adding nuts like walnuts or pecans for texture.)

Preparation

  1. Preheat your oven to 350°F (175°C) and grease a loaf pan.
  2. In a large bowl, mash the ripe bananas until smooth.
  3. Add the pumpkin puree and eggs, mixing until well blended.
  4. Gradually stir in the sugar, ensuring everything is combined.

Mixing

  1. In another bowl, whisk together the flour, baking soda, baking powder, and cinnamon.
  2. Gradually add this dry mixture to the banana and pumpkin mixture, stirring until just combined.
  3. Fold in the chocolate chips.

Baking

  1. Pour the batter into the greased loaf pan.
  2. Bake for about 60 minutes or until a toothpick inserted into the center comes out clean.
  3. Allow the bread to cool in the pan for about 10 minutes before transferring it to a wire rack.
  4. Let it cool completely before slicing.

Store the bread wrapped tightly in plastic wrap or in an airtight container. It stays fresh at room temperature for about 3 days or can be frozen for up to three months.

Breakfast, Snack
American, Fall
banana bread, Chocolate Chip Bread, Easy Baking, fall treats, Pumpkin Bread

Fast Pizza Dough

Fast pizza dough recipe for quick and easy homemade pizza.

Fast Pizza Dough is a fantastic solution for anyone craving pizza but short on time. With just a few ingredients, you can whip up a homemade pizza dough that is both quick and easy. Unlike traditional recipes that require long rising times, this dough is ready to use in about 30 minutes. This is perfect for busy weeknights or spontaneous gatherings with friends and family.

Making pizza at home allows you to customize it to your liking. You can choose your favorite toppings, sauce, and cheese to create a pizza just the way you like it. Plus, it’s a fun activity you can do with kids or friends, making it more than just dinner; it becomes an enjoyable experience.

Using this fast dough recipe saves money compared to ordering takeout. You can make multiple pizzas for a fraction of the price. By making your own pizza dough, you can also control the ingredients, making it a healthier option filled with fresh, delicious toppings. This recipe is simple enough for beginners but also gives seasoned cooks the opportunity to explore their creativity. Overall, Fast Pizza Dough brings the joys of homemade pizza to your table without the long wait!

how to make Fast Pizza Dough

Making Fast Pizza Dough is both simple and quick! You will need just a few basic ingredients: all-purpose flour, warm water, yeast, salt, and a little olive oil. Start by mixing the warm water and yeast in a bowl. Let it sit for about five minutes until it foams up. This shows that the yeast is alive and ready to work.

In a separate bowl, combine the flour and salt. Once the yeast mixture is ready, you can mix it into the flour and salt. Add the olive oil and stir until it forms a dough. Don’t worry if it seems a bit sticky at first; that’s normal. Now, sprinkle some flour on a clean surface and knead the dough for about 5 to 7 minutes until it becomes smooth and elastic.

Once kneaded, place the dough in a lightly greased bowl, cover it with a clean towel, and let it rest for about 20 minutes. This allows the dough to rise slightly, making it easier to stretch later on. After resting, your Fast Pizza Dough is ready to be rolled out and shaped into your favorite pizza!

how to serve Fast Pizza Dough

To serve your Fast Pizza Dough, roll it out on a floured surface into your desired shape—round, square, or even fun shapes for special occasions! Transfer the rolled dough to a pizza stone or a baking sheet lined with parchment paper.

Preheat your oven to 475°F (245°C) while you prepare your toppings. Spread a layer of pizza sauce onto the dough, leaving a small border around the edges. Then, sprinkle on your cheese of choice, whether it’s mozzarella, cheddar, or a mix!

Next, add your favorite toppings such as pepperoni, bell peppers, olives, or mushrooms. Don’t go too heavy on the toppings, as this can make the pizza soggy. Once topped, bake your pizza for about 12-15 minutes, or until the crust is golden brown and the cheese is bubbling. Serve hot and enjoy your homemade pizza fresh out of the oven!

how to store Fast Pizza Dough

If you have leftover Fast Pizza Dough, don’t worry! You can store it for later use. First, wrap the dough tightly in plastic wrap or place it in an airtight container. This helps to keep it from drying out.

You can store the wrapped dough in the refrigerator for up to three days. When you are ready to use it again, remove it from the fridge and let it come to room temperature for about 30 minutes. This will make it easier to roll out.

If you want to keep the dough for longer, you can freeze it. Wrap the dough in plastic wrap and then place it in a freezer bag. You can store it in the freezer for up to three months. To use frozen dough, transfer it to the fridge the night before you plan to make pizza, allowing it to thaw slowly.

tips to make Fast Pizza Dough

Here are some tips to get the best results from your Fast Pizza Dough. First, ensure that your water is warm, not hot, when activating the yeast. Hot water can kill the yeast, while cold water will not activate it properly.

Kneading is key! Make sure to knead the dough until it is smooth and elastic. This helps develop the gluten, which gives the pizza its chewy texture.

If the dough is too sticky, add just a touch more flour—do this gradually to avoid making the dough too dry. Also, feel free to experiment with different types of flour. While all-purpose flour works great, you can try bread flour for a chewier crust or whole wheat flour for a healthier option.

Finally, don’t overload your pizza with toppings. A few choice ingredients will enhance the flavor without making the dough soggy. Enjoy the process and have fun making your pizzas your way!

variation

You can easily customize this Fast Pizza Dough to suit different diets. For a gluten-free option, replace the all-purpose flour with a gluten-free flour blend. Just make sure your yeast and other ingredients are also gluten-free.

Additionally, you can infuse your dough with flavor by adding herbs like oregano or basil right into the dough before kneading. This adds a delightful taste to the crust.

FAQs

1. Can I use this dough for other types of bread?
Yes! This dough can be adapted for different types of bread. Just adjust your ingredients and baking time for your desired bread style.

2. How long can I freeze the dough?
You can freeze the Fast Pizza Dough for up to three months. Make sure it is tightly wrapped in plastic wrap and placed in a freezer bag.

3. Can I make the dough ahead of time?
Absolutely! You can make the dough a day in advance and store it in the fridge. Just let it come to room temperature before shaping it.

[tasty-recipe id=”4896″]

Fast Pizza Dough

Fast Pizza Dough is a quick and easy solution for homemade pizza, ready in about 30 minutes and customizable with your favorite toppings.

Dough Ingredients

  • 2 cups all-purpose flour (You can use bread flour or whole wheat flour for variations.)
  • 3/4 cup warm water (Warm but not hot, to activate the yeast.)
  • 1 packet yeast (Active dry yeast is recommended.)
  • 1 teaspoon salt (Enhances flavor.)
  • 1 tablespoon olive oil (For moisture and flavor.)

Preparation of Dough

  1. Mix the warm water and yeast in a bowl and let it sit for about five minutes until it foams.
  2. In a separate bowl, combine the flour and salt.
  3. Once the yeast mixture is ready, mix it into the flour and salt.
  4. Add the olive oil and stir until the mixture forms a dough.
  5. Sprinkle flour on a clean surface and knead the dough for about 5 to 7 minutes until smooth and elastic.
  6. Place the kneaded dough in a lightly greased bowl, cover with a clean towel, and let it rest for about 20 minutes.

Baking the Pizza

  1. Preheat your oven to 475°F (245°C).
  2. Roll the dough out on a floured surface into your desired shape.
  3. Transfer to a pizza stone or baking sheet lined with parchment paper.
  4. Spread pizza sauce onto the rolled dough, leaving a small border.
  5. Sprinkle cheese and add desired toppings.
  6. Bake for about 12-15 minutes until the crust is golden and cheese is bubbling.

Store leftover dough wrapped tightly in plastic wrap in the refrigerator for up to three days or freeze for up to three months. Allow frozen dough to thaw in the refrigerator overnight.

Main Course, Snack
Italian
Easy Pizza Recipe, Fast Pizza Dough, Homemade Pizza, Pizza Dough Recipe, Quick Dough

Jalapeño Popper Soup

Delicious bowl of Jalapeño Popper Soup topped with cheese and jalapeños

Jalapeño Popper Soup is a delightful twist on the classic jalapeño poppers. This soup combines the rich, creamy flavors of cheese with the spicy kick of jalapeños, making it a fantastic comfort food. It’s perfect for chilly nights or when you want something warm and satisfying. This soup allows you to enjoy the taste of your favorite appetizer in a new way.

Making Jalapeño Popper Soup is also quite simple. You only need a handful of ingredients that blend together beautifully. The soup is not just tasty, but it is also versatile. You can adjust the level of spice depending on your preference. If you enjoy a little heat, you can add more jalapeños or use spicy cheese.

Another reason to try this recipe is that it cooks quickly. In less than an hour, you can prepare this flavorful soup. Plus, it’s a great dish to share with family and friends. It’s hearty and filling, which makes it a lovely option for gatherings or cozy dinners at home. Whether you serve it as a starter or the main dish, Jalapeño Popper Soup will surely satisfy everyone’s appetite.

How to Make Jalapeño Popper Soup

Making Jalapeño Popper Soup is simple and fun. First, gather your ingredients, which typically include diced jalapeños, cream cheese, shredded cheddar cheese, chicken broth, and some spices. Start by sautéing the diced jalapeños in a pot for about five minutes until they soften.

Next, add in the cream cheese and stir it well to combine, allowing it to melt smoothly. Once the cream cheese has blended nicely, pour in the chicken broth. This will create a base for your soup. Stir everything together and let it simmer gently for about ten minutes.

Then, mix in the shredded cheddar cheese until it melts and becomes creamy. You can adjust the thickness of the soup by adding more broth if desired. If you like a bit of texture, consider blending part of the soup with an immersion blender.

Finally, season with salt, pepper, and any other spices you prefer. Serve warm, and enjoy this delightful and zesty soup that combines all the flavors of your favorite jalapeño poppers!

How to Serve Jalapeño Popper Soup

Jalapeño Popper Soup is best served hot. Using a ladle, pour the soup into bowls and consider adding some tasty toppings. A few suggestions are crispy bacon bits, additional shredded cheese, or a dollop of sour cream. These toppings enhance the flavor and add a nice texture to the dish.

This soup pairs perfectly with crunchy tortilla chips or fresh bread. You can also serve it alongside a simple salad for a balanced meal. If you’re hosting a gathering, consider setting up a soup bar with various toppings, allowing guests to customize their bowls.

For a more festive touch, serve the soup in hollowed-out bread bowls. This fun presentation is sure to impress. Whether it’s a cozy night in or a welcoming gathering, Jalapeño Popper Soup makes for a fantastic dish to please everyone at the table.

How to Store Jalapeño Popper Soup

If you have leftover Jalapeño Popper Soup, storing it is easy. Let the soup cool down to room temperature before placing it in an airtight container. It can be kept in the refrigerator for up to 3-4 days. When you are ready to enjoy it again, simply reheat it on the stove or in the microwave.

For longer storage, you can freeze the soup. Just make sure to use a freezer-safe container or a zip-top bag. Jalapeño Popper Soup can be stored in the freezer for up to three months. When you want to enjoy it again, thaw it in the fridge overnight and heat it on the stove while stirring.

Remember not to refreeze soup that has already been thawed. Proper storage keeps the soup fresh and delicious, so you can savor the flavors of Jalapeño Popper Soup anytime you crave it!

Tips to Make Jalapeño Popper Soup

To make the perfect Jalapeño Popper Soup, here are some handy tips. First, if you’re sensitive to spice, be cautious with the amount of jalapeños you use. You can also remove the seeds from the peppers to lower the heat level.

Use fresh ingredients whenever possible. Fresh jalapeños and grated cheese will enhance the flavor of your soup. If you like a creamier texture, consider adding more cream cheese or blending a portion of the soup for a smooth finish.

Also, don’t be afraid to experiment with flavors! You can add spices like garlic powder or paprika for extra depth. If you love more richness, a splash of heavy cream can make the soup even creamier.

Lastly, serving the soup immediately guarantees the best taste, as the freshness of the ingredients shines through. Keep these tips in mind to create a comforting bowl of Jalapeño Popper Soup that everyone will love.

Variation

Feel free to customize your Jalapeño Popper Soup! You can add other ingredients like corn or black beans for extra texture and flavor. For a vegetarian option, substitute the chicken broth with vegetable broth. If you want to make it even cheesier, try mixing in different types of cheese, such as pepper jack, for an added kick.

FAQs

1. Can I make Jalapeño Popper Soup ahead of time?
Yes! You can prepare it a day ahead. Just store it in the fridge and reheat when ready to serve.

2. How spicy is this soup?
The spice level can vary depending on how many jalapeños you use. You can adjust the amount based on your taste.

3. Can I use frozen jalapeños?
Yes, frozen jalapeños work fine. Just make sure to thaw them and drain excess moisture before using.

4. Is this soup gluten-free?
Yes, as long as you use gluten-free broth and cheese, this soup can be made gluten-free.

5. How can I make it dairy-free?
You can substitute cream cheese with a dairy-free alternative and use plant-based cheese to make it dairy-free.

Jalapeño Popper Soup

A delightful twist on classic jalapeño poppers, this creamy and spicy soup is perfect for chilly nights and gatherings.

Main Ingredients

  • 2 cups Diced jalapeños (Adjust quantity for spice preference.)
  • 8 oz Cream cheese (Softened for easy mixing.)
  • 2 cups Shredded cheddar cheese (Use spicy cheese for more heat.)
  • 4 cups Chicken broth (Can substitute with vegetable broth for a vegetarian option.)
  • 1 tsp Salt (Adjust to taste.)
  • 1 tsp Pepper (Adjust to taste.)

Preparation

  1. Sauté the diced jalapeños in a pot for about 5 minutes until they soften.
  2. Add cream cheese and stir well to combine, allowing it to melt smoothly.
  3. Pour in the chicken broth and stir everything together.
  4. Let the mixture simmer gently for about 10 minutes.

Final Touches

  1. Mix in the shredded cheddar cheese until melted and creamy.
  2. Adjust the thickness of the soup by adding more broth if desired.
  3. Blend part of the soup with an immersion blender for a smoother texture.
  4. Season with additional salt, pepper, and any other preferred spices.
  5. Serve warm, topped with crispy bacon bits, extra shredded cheese, or sour cream.

Store leftovers in an airtight container in the fridge for up to 3-4 days, or freeze for up to three months. Thaw overnight in the fridge before reheating.

Appetizer, Soup
American
Chili, Comfort Food, Creamy Soup, Jalapeño Popper Soup, Spicy Soup

Pineapple Casserole

Delicious pineapple casserole dish served warm

This pineapple casserole feels warm and simple, it mixes sweet pineapple with a crunchy top for a nice contrast. It is a real crowd-pleaser at family dinners and potlucks, it tastes sweet, light, and a little crunchy. If you enjoy warm, cheesy casseroles like baked spaghetti casserole, you’ll find this pineapple casserole just as comforting. Give it a try, you might find yourself going back for seconds.

How to prepare Pineapple Casserole

Ingredients:

  • 1 can (20 oz) crushed pineapple, drained
  • 1 cup sugar
  • 1/2 cup all-purpose flour
  • 2 large eggs
  • 1/2 cup melted butter
  • 1 tsp vanilla extract
  • Pinch of salt
  • 1 cup crushed cornflakes or 1 cup crushed crackers for topping
  • 2 tbsp brown sugar for topping
  • 2 tbsp melted butter for topping

Directions:

  1. Preheat the oven to 350°F (175°C). Grease a 9×9 inch baking dish.
  2. In a bowl, mix the drained pineapple, sugar, flour, eggs, melted butter, vanilla, and salt until smooth.
  3. Pour the mixture into the prepared dish and spread it evenly.
  4. In a small bowl, combine the crushed cornflakes or crackers, brown sugar, and 2 tbsp melted butter. Mix so the crumbs hold together a bit.
  5. Sprinkle the crumb topping evenly over the pineapple mixture.
  6. Bake for 35 to 45 minutes, until the top is golden and the filling is set.
  7. Let it cool for 10 minutes before serving, it will firm up a little as it cools.

Pineapple Casserole

Why You’ll Love Pineapple Casserole

  • It is easy to make, with simple ingredients you may already have.
  • The mix of soft, sweet filling and crunchy topping feels satisfying.
  • It works as a side dish or a light dessert, it is quick to bake.
  • Kids and adults both like the sweet, familiar pineapple flavor.

Tips for success

  • Drain the pineapple well, too much juice can make the casserole runny.
  • Press the topping gently so it stays on as it bakes.
  • If you like a richer flavor, use a little brown sugar in the filling.
  • Check the casserole at 30 minutes, ovens vary, you want a golden top.
  • Let it cool a bit before serving, it holds its shape better.

Serving Suggestions

  • Serve warm with a scoop of vanilla ice cream for dessert.
  • Pair with roasted ham or baked chicken for a holiday plate.
  • Add a side of green salad to balance the sweetness.
  • Spoon over pound cake for a simple, tasty treat.

Pineapple Casserole

FAQs

Q: Can I use fresh pineapple instead of canned? A: Yes, use fresh pineapple that you chop small and drain a little. Fresh adds a brighter flavor.

Q: Can I make this ahead of time? A: Yes, you can assemble it and keep it in the fridge for a few hours before baking. Bake just before serving for best texture.

Q: How do I store leftovers? A: Cover and keep in the fridge for up to 3 days. Warm gently in the oven before serving.

Q: Can I make this gluten free? A: Yes, use a gluten free flour or a mix, and use gluten free crackers or cornflakes for the topping.

Q: Can I add nuts to the topping? A: Yes, chopped pecans or walnuts work well, add them to the crumb mix for extra crunch.

Pineapple Casserole

A warm and simple pineapple casserole that combines sweet pineapple with a crunchy topping, perfect for family dinners or potlucks.

Main Ingredients

  • 1 can 20 oz crushed pineapple, drained (Make sure to drain well.)
  • 1 cup sugar
  • 1/2 cup all-purpose flour (Can be substituted with gluten-free flour.)
  • 2 large eggs
  • 1/2 cup melted butter
  • 1 tsp vanilla extract
  • 1 pinch salt

Topping

  • 1 cup crushed cornflakes or crushed crackers (Use gluten-free options if needed.)
  • 2 tbsp brown sugar (Use for topping.)
  • 2 tbsp melted butter (Use for topping.)

Preparation

  1. Preheat the oven to 350°F (175°C). Grease a 9×9 inch baking dish.
  2. In a bowl, mix the drained pineapple, sugar, flour, eggs, melted butter, vanilla, and salt until smooth.
  3. Pour the mixture into the prepared dish and spread it evenly.
  4. In a small bowl, combine the crushed cornflakes or crackers, brown sugar, and melted butter. Mix until the crumbs hold together slightly.
  5. Sprinkle the crumb topping evenly over the pineapple mixture.

Baking

  1. Bake for 35 to 45 minutes, until the top is golden and the filling is set.
  2. Let it cool for 10 minutes before serving, as it will firm up a little as it cools.

Drain the pineapple well to prevent a runny casserole. Press the topping gently to ensure it stays on while baking. Consider using brown sugar in the filling for a richer flavor. Check the casserole at 30 minutes for doneness.

Dessert, Side Dish
American
Cheesy Casserole, Comfort Food, Family Dinner, Pineapple Casserole, Potluck Recipe

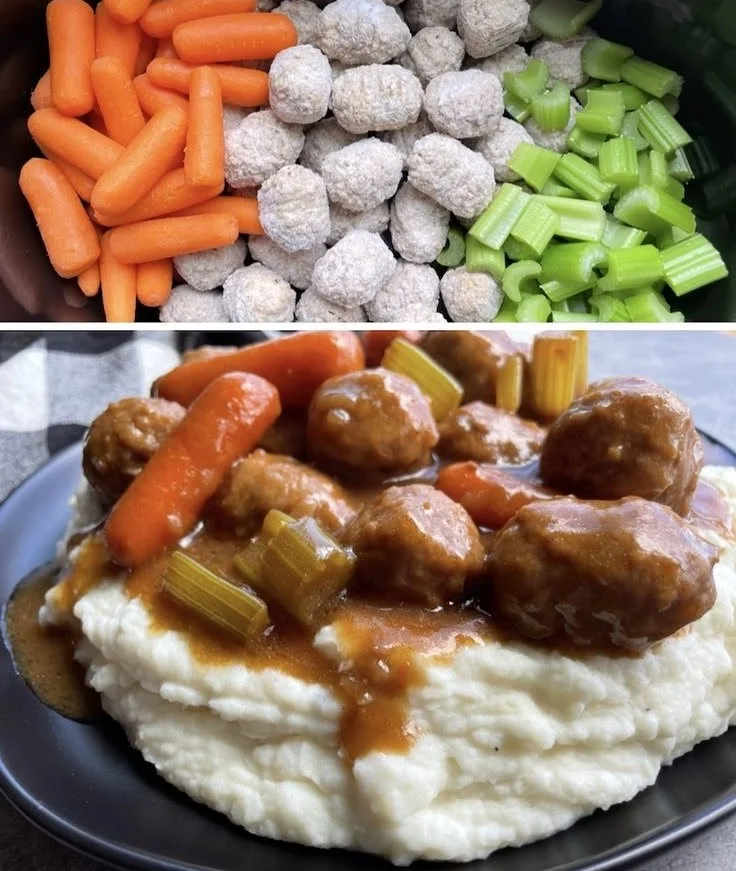
Easy Frozen Meatball Pot Roast (Slow Cooker Dinner Recipe)

Delicious slow cooker meatball pot roast served with vegetables

This easy Frozen Meatball Pot Roast is a simple family dinner that comes together in about 10 minutes. Just chop the celery, mix the gravy packets with water, and add everything to your slow cooker. Serve it over ready-made mashed potatoes for an even easier meal. You can also add your favorite vegetables like carrots, celery, potatoes, onions, or mushrooms. This Frozen Meatball Pot Roast is a versatile, budget-friendly dish that kids love and is perfect for busy weeknights. If you want a simple roasted veg side to go with this, try a similar easy side like autumn chicken dinner with roasted vegetables for a full, cozy plate.

How to prepare Frozen Meatball Pot Roast

  1. Put frozen meatballs in the slow cooker. No need to thaw.
  2. Add chopped onion, sliced carrots, and diced potatoes if you like. These add flavor and make it a full meal.
  3. Pour in 1 to 2 cups of beef broth, enough to come about halfway up the meatballs.
  4. Stir in a can of condensed mushroom or cream of celery soup, or use jarred gravy for a richer sauce.
  5. Add 1 to 2 tablespoons of Worcestershire sauce, 1 teaspoon garlic powder, salt and pepper to taste. Mix lightly.
  6. Cover and cook on low for 6 to 8 hours, or on high for 3 to 4 hours. The sauce will thicken and the meatballs will be tender.
  7. If the sauce is too thin at the end, whisk 1 tablespoon of cornstarch with 2 tablespoons cold water and stir into the cooker. Let it cook 10 more minutes to thicken.
  8. Taste and adjust salt and pepper, then serve.

Easy Frozen Meatball Pot Roast (Slow Cooker Dinner Recipe)

Why You’ll Love Frozen Meatball Pot Roast

  • It is simple, dump-and-go, and you do not need to thaw the meatballs first.
  • The slow cooker makes a rich, warm sauce that coats the meatballs, like a pot roast without the work.
  • It feeds a crowd or makes easy leftovers for the week.
  • The flavors are familiar and comforting, perfect as a family dinner or for guests.
  • You can change veggies and seasonings to match what you have, so it is flexible and forgiving.

Tips for success

  • Use frozen store-bought meatballs for quick work, or homemade ones if you prefer.
  • Cut veggies into similar size pieces so they cook evenly.
  • Do not lift the lid while it cooks, the slow cooker keeps the heat steady.
  • If you like a thicker gravy, mix cornstarch with cold water and add near the end.
  • Taste before serving, adjust seasonings last so salt is right.

Serving Suggestions

  • Serve over mashed potatoes, rice, or buttered egg noodles to soak up the sauce.
  • Add a green side like steamed broccoli or a simple salad for color and crunch.
  • Warm a crusty bread to dip in the gravy.
  • For a heartier meal, add extra carrots and potatoes to make it a full pot roast style dinner.

Easy Frozen Meatball Pot Roast (Slow Cooker Dinner Recipe)

FAQs

Q: Can I use a different kind of meatball?

A: Yes, beef, pork, turkey, or mixed meatballs all work. Cooking time is the same for frozen meatballs.

Q: Can I make this on the stove or in an oven?

A: You can simmer in a covered pot on low on the stove for 1 to 2 hours, or bake covered at 325°F for about 1 to 1.5 hours, until sauce thickens.

Q: How do I store leftovers?

A: Cool to room temperature, put in an airtight container, and keep in the fridge for up to 4 days. Reheat gently on the stove or in the microwave.

Q: Can I add wine or tomato sauce for a different flavor?

A: Yes, a splash of red wine or a can of diced tomatoes changes the sauce and adds depth. Adjust seasoning as needed.

Conclusion

This Easy Frozen Meatball Pot Roast (Slow Cooker Dinner Recipe) is a true comfort meal that is simple to make and big on flavor, perfect when you want a slow cooker dinner with little fuss. For the original recipe inspiration and full details, see Easy Frozen Meatball Pot Roast | Slow Cooker Dinner Recipe.

Frozen Meatball Pot Roast

This easy Frozen Meatball Pot Roast is a simple family dinner that comes together in about 10 minutes. It’s a versatile, budget-friendly dish that kids love, perfect for busy weeknights.

For the pot roast

  • 2 cups beef broth (Add enough to come about halfway up the meatballs.)
  • 1 can condensed mushroom or cream of celery soup (Alternatively, use jarred gravy for a richer sauce.)
  • 1-2 tablespoons Worcestershire sauce
  • 1 teaspoon garlic powder
  • salt and pepper (To taste.)

For the vegetables (optional)

  • 1 chopped onion
  • 2 cups sliced carrots
  • 2 cups diced potatoes (These enhance the flavor and make it a full meal.)

For thickening (optional)

  • 1 tablespoon cornstarch (Whisk with cold water to thicken sauce if it is too thin.)
  • 2 tablespoons cold water (To mix with cornstarch.)

Preparation

  1. Put frozen meatballs in the slow cooker. No need to thaw.
  2. Add chopped onion, sliced carrots, and diced potatoes if using.
  3. Pour in 1 to 2 cups of beef broth.
  4. Stir in a can of condensed mushroom or cream of celery soup, or jarred gravy.
  5. Add Worcestershire sauce, garlic powder, salt, and pepper. Mix lightly.

Cooking

  1. Cover and cook on low for 6 to 8 hours, or on high for 3 to 4 hours.
  2. If sauce is too thin, whisk cornstarch with cold water and add to the cooker. Cook for an additional 10 minutes.
  3. Taste and adjust salt and pepper before serving.

The dish feeds a crowd and makes easy leftovers for the week. You can easily modify the veggies and seasonings to your preference.

Dinner, Main Course
American
Comfort Food, Easy Dinner, Family Meal, Frozen Meatball Pot Roast, Slow Cooker

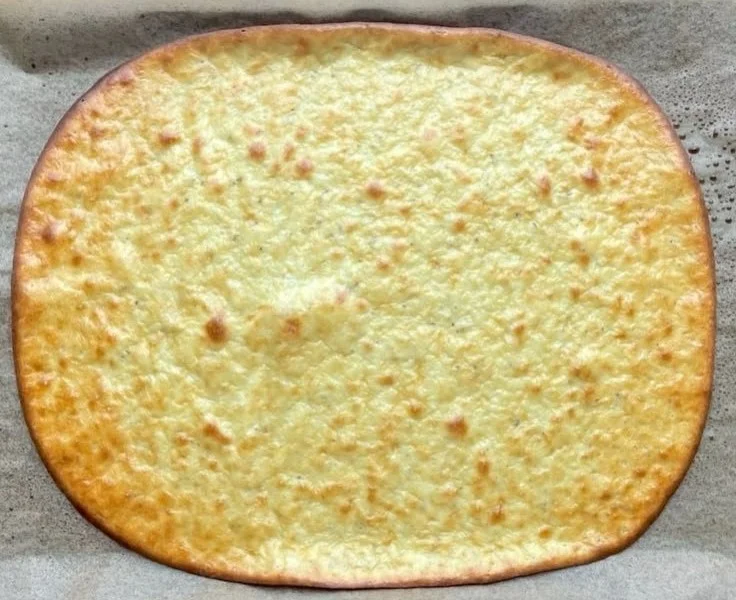
2 Ingredient Cottage Cheese Flatbread Recipe

Delicious cottage cheese flatbread made with just two ingredients.

This 2 Ingredient Cottage Cheese Flatbread Recipe is quick, simple, and tasty. It feels fresh from the oven, soft in the middle, and a little crisp on the edges. People love it because it uses just cottage cheese and eggs, so you can make flatbread fast for breakfast, lunch, or a snack. If you want a similar easy idea for low carb flatbread, check this helpful guide for a related version, two ingredient cottage cheese bread tips. This flatbread is a crowd-pleaser, mild in flavor, and very flexible, so you can top it any way you like, and you will want to make it again, trust me, it’s fun to cook.

How to prepare 2 Ingredient Cottage Cheese Flatbread

Ingredients

  • 1 cup cottage cheese
  • 2 large eggs
  • pinch of salt, optional
  • a little oil or butter for the pan, optional

Directions

  1. Put cottage cheese and eggs in a blender or food processor. Blend until smooth and well mixed.
  2. Add a pinch of salt if you want. Mix again a few seconds.
  3. Heat a nonstick pan on medium low. Add a little oil or butter if you like.
  4. Pour about 1/4 to 1/3 cup batter into the pan for each flatbread. Spread a bit with the back of the spoon.
  5. Cook 2 to 3 minutes until edges look set and the bottom is light brown. Flip and cook 1 to 2 minutes more.
  6. Repeat with the rest of the batter. Serve warm.

2 Ingredient Cottage Cheese Flatbread Recipe

Why You’ll Love 2 Ingredient Cottage Cheese Flatbread

  • Fast to make, you can mix and cook in 10 to 15 minutes.
  • Uses few ingredients, great when you want simple food.
  • Low carb and high in protein, it fits many simple diets.
  • Mild taste works with sweet or savory toppings, it feels like a blank canvas.
  • Soft and tender, but you can make it a bit crisp with more pan time.

Tips for success

  • Blend well, smooth batter makes a nicer flatbread.
  • Use a nonstick pan or a small amount of oil to avoid sticking.
  • Cook on medium low so the inside cooks without burning the outside.
  • Make pieces small if you want fast, even cooking.
  • Let the batter sit a minute if it seems runny, it firms up slightly.

Serving Suggestions

  • Top with avocado, tomato, and a sprinkle of salt for a light lunch.
  • Use as a base for eggs and smoked salmon at breakfast.
  • Spread peanut butter and sliced banana for a quick sweet snack.
  • Serve with soup or salad instead of bread.
  • Make mini pizzas, add sauce, cheese, and bake briefly.

2 Ingredient Cottage Cheese Flatbread Recipe

FAQs

Q: Is this flatbread gluten free?

A: Yes, the recipe uses only cottage cheese and eggs, so it is naturally gluten free.

Q: Can I use ricotta instead of cottage cheese?

A: You can try ricotta, but the texture may be softer. Blend well to get a smooth batter.

Q: How long does it keep in the fridge?

A: Store cooked flatbreads in an airtight container for 2 to 3 days, reheat in a pan or oven.

Q: Can I make the batter ahead?

A: You can mix the batter and keep it in the fridge for a day, stir before cooking.

Q: Is this low carb?

A: Yes, with cottage cheese and eggs the carbs are low compared to regular flour bread.

Conclusion

This 2 Ingredient Cottage Cheese Flatbread Recipe is a quick, flexible choice for any meal. It makes a soft, tasty flatbread with little work, and you can top it any way you like. For another take on a simple low carb cottage cheese flatbread, see this helpful recipe online, 2 Ingredient Cottage Cheese Flatbread – Instrupix. Enjoy making it, and have fun with your toppings.

2 Ingredient Cottage Cheese Flatbread

This quick and simple flatbread recipe uses just cottage cheese and eggs, making it a delicious option for breakfast, lunch, or a snack.

Main ingredients

  • 1 cup cottage cheese
  • 2 large eggs
  • pinch salt (optional)
  • a little oil or butter for the pan (optional)

Preparation

  1. Put cottage cheese and eggs in a blender or food processor. Blend until smooth and well mixed.
  2. Add a pinch of salt if desired. Mix again for a few seconds.

Cooking

  1. Heat a nonstick pan on medium low. Add a little oil or butter if preferred.
  2. Pour about 1/4 to 1/3 cup batter into the pan for each flatbread. Spread with the back of the spoon.
  3. Cook for 2 to 3 minutes until edges look set and the bottom is light brown. Flip and cook for an additional 1 to 2 minutes.
  4. Repeat with the remaining batter. Serve warm.

Tips for success include blending well for a smoother batter, using a nonstick pan or oil to avoid sticking, cooking on medium low heat, making small pieces for even cooking, and letting the batter sit for a minute if it seems runny.

Breakfast, Snack
American
Cottage Cheese Flatbread, Easy Recipe, High Protein, Low Carb Bread, Quick Flatbread