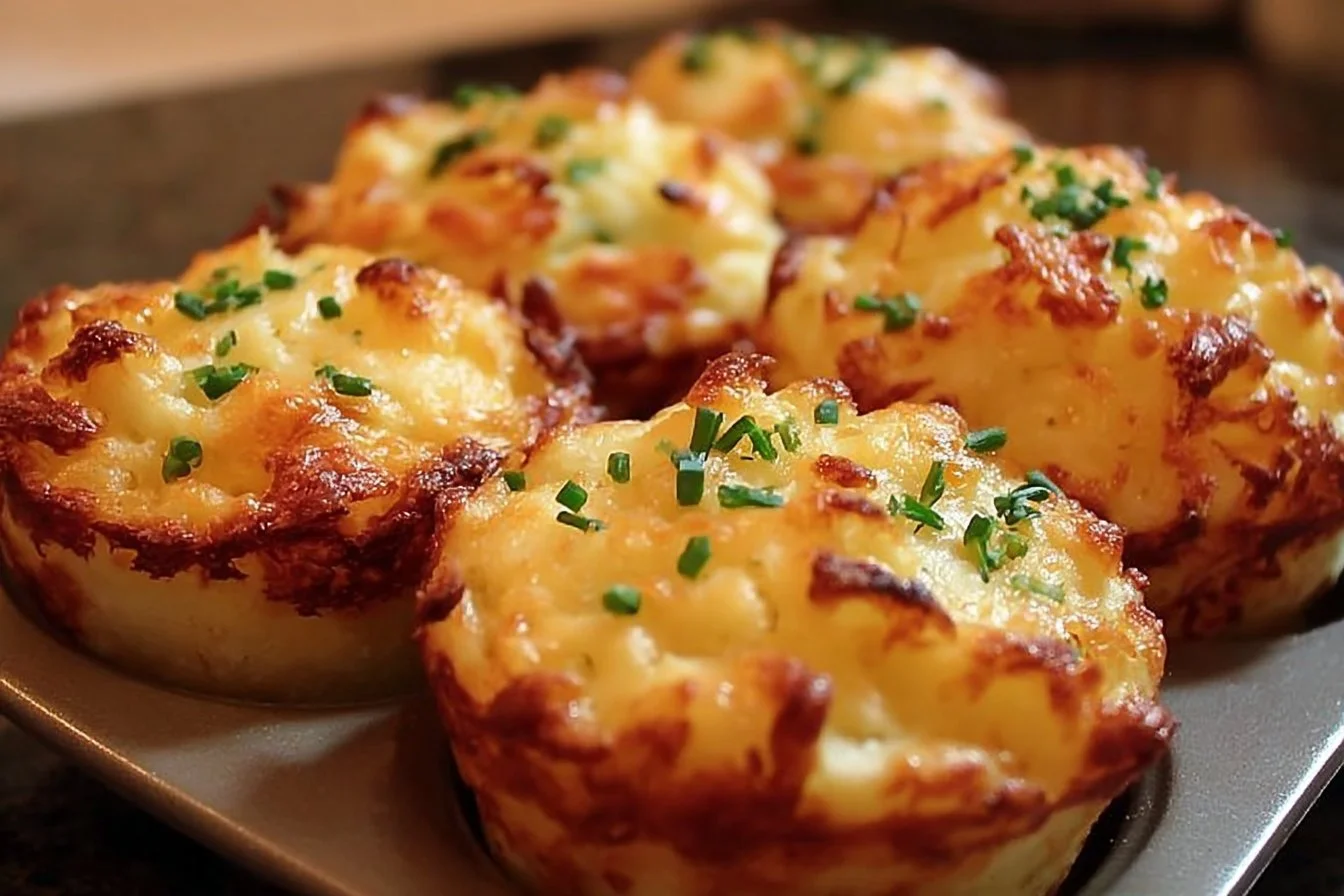
Cheesy Garlic Ritz Bits

If you’re looking for a delightful snack that is sure to win over your guests, Cheesy Garlic Ritz Bits are a perfect choice. These bite-sized treats combine the savory flavors of cheese and garlic with the satisfying crunch of Ritz crackers, making them a crowd favorite at parties or family gatherings. Imagine the aroma wafting through your kitchen as you prepare these tasty bites, enticing everyone around to come and enjoy. Trust me, once you try them, you’ll be excited to whip up this dish over and over again!

How to prepare Cheesy Garlic Ritz Bits

Making Cheesy Garlic Ritz Bits is simple and quick. Start by gathering all your ingredients, which include Ritz crackers, cheese, garlic powder, and butter. Preheat your oven to 350°F (175°C), then mix the garlic powder with melted butter. Brush this mixture onto the crackers, top them with cheese, and place them in the oven. Bake until the cheese is melted and bubbly. And voila, you have a delicious snack ready to serve!

Cheesy Garlic Ritz Bits

Why You’ll Love Cheesy Garlic Ritz Bits

These bite-sized snacks not only taste incredible but are also very versatile. You can customize the cheese used or even add spices to enhance the flavor. They are perfect for dipping, too! If you’re a fan of cheesy recipes, you might also enjoy these cheesy garlic chicken wraps. Each bite of Cheesy Garlic Ritz Bits is packed with flavor, making them an irresistible option for any occasion.

Tips for success

  1. Choose the Right Cheese: Opt for cheeses that melt well, like mozzarella or cheddar. You can even mix different kinds for a more complex flavor.
  2. Don’t Overcrowd: To ensure even cooking, arrange the crackers in a single layer without overlapping.
  3. Watch the Bake Time: Keep an eye on the oven so the crackers do not burn. They should be golden and the cheese nicely melted.

Cheesy Garlic Ritz Bits

Serving Suggestions

Serve your Cheesy Garlic Ritz Bits warm, alongside marinara sauce or your favorite dip. They pair well with a fresh salad or can even be a delicious appetizer before a meal. These bites are sure to be a hit whether at a family dinner or a casual get-together with friends.

FAQs

Can I make Cheesy Garlic Ritz Bits in advance?

Yes, you can prepare them ahead of time and bake them just before serving for the best results.

What can I substitute for butter?

You can use olive oil or a dairy-free butter substitute for a healthier option.

Can I freeze Cheesy Garlic Ritz Bits?

It’s best to bake them fresh, but if you have leftovers, you can freeze them. Reheat in the oven for a crispy texture.

Cheesy Garlic Ritz Bits

These bite-sized treats combine the savory flavors of cheese and garlic with the satisfying crunch of Ritz crackers, making them a perfect snack for parties or gatherings.

Main ingredients

  • 1 package Ritz crackers
  • 1 cup shredded cheese (mozzarella or cheddar) (Choose a cheese that melts well.)
  • 1 teaspoon garlic powder
  • 4 tablespoons butter, melted (Can substitute with olive oil or dairy-free butter.)

Preparation

  1. Preheat your oven to 350°F (175°C).
  2. Mix the garlic powder with the melted butter.
  3. Brush the garlic butter mixture onto the Ritz crackers.
  4. Top each cracker with shredded cheese.

Baking

  1. Place the crackers in the preheated oven.
  2. Bake for about 8 minutes until the cheese is melted and bubbly.
  3. Remove from the oven and let cool slightly before serving.

For best results, do not overcrowd the baking tray. Keep an eye on the crackers while baking to avoid burning. They can be served with marinara sauce or your favorite dip.
Appetizer, Snack
American
cheese snacks, Cheesy Garlic Ritz Bits, Easy Appetizers, Party Snacks, Snack Recipe

Cheesy Mashed Potato Puffs

Delicious cheesy mashed potato puffs served in a bowl

Cheesy Mashed Potato Puffs bring together the comforting flavors of creamy mashed potatoes and ooey-gooey cheese, creating a delightful bite-sized treat that everyone will love. Picture this: golden, crispy puffs with a soft, cheesy center, perfect as an appetizer or snack. They’re always a hit at parties and gatherings, inviting smiles and satisfied taste buds. Whether you’re hosting a party or just need a comforting side dish, these delicious puffs are sure to become a favorite. Get your kitchen ready because you’ll want to make these little bites of joy again and again!

how to prepare Cheesy Mashed Potato Puffs

To make Cheesy Mashed Potato Puffs, start by cooking your potatoes until they are tender. Drain them and mash them in a bowl, adding in butter, milk, salt, and pepper for seasoning. Mix in shredded cheese of your choice, such as cheddar or mozzarella, for an extra cheesy flavor. Allow the mixture to cool before handling it. Once cool, scoop out small portions of the mixture and shape them into round puffs. You can dip each puff in egg wash and then roll them in breadcrumbs for an extra crispy exterior. Preheat your oven to 400°F (200°C) and arrange the puffs on a baking sheet. Bake for around 20-25 minutes until they are golden brown and crunchy on the outside. Serve them warm, and watch your friends and family devour them in minutes!

Why You’ll Love Cheesy Mashed Potato Puffs

Cheesy Mashed Potato Puffs are a fantastic treat for so many reasons. First, they combine the beloved flavors of mashed potatoes and cheese, making them irresistible to both kids and adults. The crispy exterior provides a nice contrast to the soft and cheesy center, creating a delightful texture. They are also incredibly versatile; you can enjoy them as an appetizer, side dish, or snack. Perfect for parties, game nights, or a cozy dinner, these puffs bring a touch of comfort food to any occasion. Plus, they are easy to make, meaning you can whip them up in no time. With their cheesy goodness, every bite is a little party in your mouth, and who doesn’t love that?

tips for success

To ensure your Cheesy Mashed Potato Puffs turn out perfectly, there are a few tips to keep in mind. First, make sure your potatoes are adequately drained after boiling; excess moisture can lead to mushy puffs. Allow the potato mixture to cool completely before shaping them into puffs. This helps them hold their shape better during baking. Using a mix of cheeses can add depth to the flavor; don’t hesitate to experiment with your favorites! If you want a more flavorful twist, consider adding herbs like chives or parsley to the mixture. Finally, ensure your oven is fully preheated before baking the puffs for an even golden-brown finish. With these simple tips, your puffs will be a hit every time!

Serving Suggestions

Cheesy Mashed Potato Puffs are delicious on their own, but they shine even brighter with the right sides and dips. Serve them with a tangy dipping sauce, like ranch or garlic aioli, for extra flavor. They pair wonderfully with a fresh salad, giving a nice balance of crunchy greens and cheesy goodness. For a hearty meal, enjoy them alongside grilled chicken or roasted vegetables. If you’re preparing for a party, consider setting up a snack platter with dips, fresh veggies, and other bite-sized treats, making your Cheesy Mashed Potato Puffs the star of the show. No matter how you serve them, these puffs add fun and flavor to any table!

FAQs

Can I prepare Cheesy Mashed Potato Puffs in advance?

Yes, you can make the potato mixture ahead of time and shape the puffs. Store them in the fridge for up to a day before baking.

Can I freeze Cheesy Mashed Potato Puffs?

Absolutely! You can freeze the shaped puffs before baking. Just place them on a baking sheet to freeze, then transfer to a freezer bag. Bake them directly from frozen, adding a few extra minutes to the baking time.

What type of cheese works best?

Cheddar and mozzarella are popular choices, but feel free to mix in your favorites like gouda or pepper jack for a twist. The key is to use cheeses that melt well for that delicious gooey center.

[tasty-recipe id=”5106″]

Cheesy Mashed Potato Puffs

Delicious bite-sized treats made with creamy mashed potatoes and gooey cheese, perfect as an appetizer or snack.

Main ingredients

  • 4 medium potatoes (Boiled until tender)
  • 2 tablespoons butter (For flavor)
  • 1/4 cup milk (For creaminess)
  • 1 teaspoon salt (To taste)
  • 1 teaspoon pepper (To taste)
  • 1 cup shredded cheese (Cheddar, mozzarella or your choice)

For coating

  • 1 large egg (For egg wash)
  • 1 cup breadcrumbs (For a crispy exterior)

Preparation

  1. Cook the potatoes in boiling water until tender. Drain and mash them in a bowl.
  2. Add butter, milk, salt, and pepper to the mashed potatoes and mix until smooth.
  3. Fold in the shredded cheese until evenly incorporated.
  4. Allow the mixture to cool before handling.
  5. Scoop small portions of the mixture and shape them into round puffs.
  6. Dip each puff in the egg wash and roll in breadcrumbs for a crispy finish.
  7. Preheat your oven to 400°F (200°C) and arrange the puffs on a baking sheet.

Baking

  1. Bake the puffs for 20-25 minutes or until they are golden brown and crunchy.
  2. Serve warm and enjoy!

For best results, ensure your potatoes are well-drained to avoid mushy puffs. Experiment with different cheeses for unique flavors. Adding herbs like chives or parsley can enhance the taste. Always preheat the oven before baking.

Appetizer, Snack
American
Appetizer, cheese snacks, Cheesy Mashed Potato Puffs, Mashed Potatoes, Snack

Savory Cheesy Pepperoni Pizza Roll Ups for Quick Snacks

Savory cheesy pepperoni pizza roll ups ready to enjoy as quick snacks.

Cheesy Pepperoni Pizza Roll Ups for Quick Snacks pack all the fun of pizza into a small, easy bite. They are great for hungry kids, quick parties, or when you want a simple snack that feels special. The dough wraps warm cheese and spicy pepperoni, so each roll gives a soft outside, melty inside, and a satisfying crunch on the edges. This recipe is a crowd-pleaser, full of familiar pizza flavors but ready in minutes, and it makes snack time feel like a mini celebration. Get your oven ready, because once you try them, you will want to make them again and again.

I like to share simple ideas, and if you enjoy similar bites, check this easy cheesy garlic rolls for another quick snack twist.

How to prepare Pepperoni Pizza Roll Ups

  1. Preheat the oven to 400°F, and line a baking sheet with parchment or lightly oil it.
  2. Lay out store-bought pizza dough or crescent roll dough on a clean board, roll it thin into a rectangle.
  3. Spread a thin layer of pizza sauce over the dough, leaving a small border at the far edge.
  4. Sprinkle shredded mozzarella evenly, add sliced pepperoni in a single layer, and sprinkle a little grated Parmesan or Italian seasoning if you like.
  5. Starting from the near edge, roll the dough tightly into a log. Seal the edge by pinching the dough.
  6. Cut the log into 1 to 1.5 inch slices and place them cut-side up on the baking sheet, a little space between each.
  7. Brush the tops with a bit of olive oil or melted butter and sprinkle with extra cheese or dried herbs.
  8. Bake 12 to 18 minutes, until golden brown and cheese melts. Let cool a minute before serving, so the cheese does not spill out.

Savory Cheesy Pepperoni Pizza Roll Ups for Quick Snacks

Why You’ll Love Pepperoni Pizza Roll Ups

  • They are fast to make, ready in about 20 minutes.
  • Kids and adults both love the familiar pizza taste in a hand-held form.
  • You can change fillings, add veggies, or make them spicy, so they fit any mood.
  • They freeze well, so you can bake a few now and store some for later.
  • They are perfect for parties, game nights, or a quick after-school snack.

Tips for success

  • Use room temperature dough, it rolls easier and bakes more evenly.
  • Don’t overfill, or cheese will leak while baking. A light layer of sauce is enough.
  • Seal the roll edge well, pressing and tucking so slices hold shape.
  • Brush the tops with butter or oil for a golden, shiny crust.
  • If slices spread, chill the log 10 minutes before slicing to keep neat rounds.

Serving Suggestions

  • Serve with warm marinara or ranch for dipping.
  • Pair with a simple green salad for a light meal.
  • Add a side of pickles or olives to cut the richness.
  • Bring them to parties on a platter, they fill a table fast and vanish faster.

Savory Cheesy Pepperoni Pizza Roll Ups for Quick Snacks

FAQs

Q: Can I make these ahead and bake later?

A: Yes, you can slice and freeze the unbaked rolls on a tray, then store in a freezer bag. Bake from frozen, adding a few extra minutes.

Q: Can I use whole wheat or gluten free dough?

A: Yes, both work. Baking time may change a little, so watch for golden color and melted cheese.

Q: How do I keep the bottoms from getting soggy?

A: Bake on a preheated sheet or stone, and don’t add too much sauce. A small shake of cornmeal on the pan helps too.

Q: Can I make them vegetarian?

A: Yes, swap pepperoni for roasted veggies, sliced mushrooms, or plant-based pepperoni.

Conclusion

These Savory Cheesy Pepperoni Pizza Roll Ups for Quick Snacks are an easy, tasty treat for any day you want pizza in a hurry. For another take on rolled pizza snacks and ideas to vary fillings, see Pepperoni Pizza Rolls – Sally’s Baking Addiction.

Pepperoni Pizza Roll Ups

These Pepperoni Pizza Roll Ups are a fun, easy snack that combines warm cheese and spicy pepperoni in a quick preparation. Perfect for parties or an after-school treat!

For the Roll Ups

  • 1 package store-bought pizza dough or crescent roll dough (can use room temperature dough for easier rolling)
  • 1/2 cup pizza sauce (spread a thin layer)
  • 1 cup shredded mozzarella cheese (sprinkle evenly over the sauce)
  • 1/2 cup sliced pepperoni (lay in a single layer)
  • 1/4 cup grated Parmesan cheese or Italian seasoning (optional toppings)
  • 1 tablespoon olive oil or melted butter (for brushing the tops)

Preparation

  1. Preheat the oven to 400°F (200°C) and line a baking sheet with parchment or lightly oil it.
  2. Lay out the pizza dough or crescent roll dough on a clean board and roll it thin into a rectangle.
  3. Spread a thin layer of pizza sauce over the dough, leaving a small border at the far edge.
  4. Sprinkle shredded mozzarella evenly over the sauce, add sliced pepperoni in a single layer, and sprinkle with grated Parmesan or Italian seasoning if desired.
  5. Starting from the near edge, roll the dough tightly into a log and seal the edge by pinching the dough.
  6. Cut the log into 1 to 1.5 inch slices and place them cut-side up on the baking sheet, leaving space between each.
  7. Brush the tops with olive oil or melted butter and sprinkle with extra cheese or dried herbs.
  8. Bake for 12 to 18 minutes, until golden brown and cheese melts. Let cool for a minute before serving.

Use room temperature dough for easier rolling and don’t overfill to prevent cheese leakage. Chill the log for neat slices if spreading occurs.

Appetizer, Snack
American, Italian
Cheesy Pizza Rolls, Easy Recipes, Party Food, Pepperoni Rolls, Quick Snacks