Zesty Lemon Cottage Cheese Pudding: A High-Protein Delight

Bowl of zesty lemon cottage cheese pudding topped with fresh lemon zest

Making Zesty Lemon Cottage Cheese Pudding is simple and quick, making it perfect for a healthy dessert option. First, gather your ingredients: you’ll need 2 cups of cottage cheese, 1/4 cup of lemon juice, the zest of one lemon, 1/4 cup of honey or maple syrup for sweetness, and a pinch of salt. Now, let’s begin.

In a blender, combine the cottage cheese, lemon juice, lemon zest, honey or maple syrup, and salt.

Blend until the mixture is smooth and creamy.

Taste and adjust sweetness if needed, adding a little more honey or syrup if you prefer it sweeter.

Once blended, transfer the pudding to serving bowls and chill in the refrigerator for at least 30 minutes before serving.

you have a delightful high-protein pudding ready to be enjoyed!

Zesty Lemon Cottage Cheese Pudding: A High-Protein Delight

Why You’ll Love Zesty Lemon Cottage Cheese Pudding

This pudding is not only tasty but also packed with protein. Cottage cheese is a great source of protein, making this dessert a satisfying choice for anyone looking to boost their protein intake. The zesty lemon flavor brightens up the dish, giving it a fresh and invigorating taste. Plus, it’s easy to make and can be prepared ahead of time. Whether you’re hosting a gathering or simply treating yourself, this pudding is sure to be a crowd-pleaser.

Tips for success

To ensure your Zesty Lemon Cottage Cheese Pudding turns out perfectly, here are a few tips. First, make sure to use fresh lemon juice for the best flavor. If you don’t have a blender, a food processor will also work well to achieve a creamy consistency. If you like a thicker pudding, consider using a full-fat cottage cheese. You can also customize the sweetness to match your taste by adjusting the honey or maple syrup.

Zesty Lemon Cottage Cheese Pudding: A High-Protein Delight

Serving Suggestions

This pudding can be served on its own or topped with your favorite fruits like berries or bananas for an extra twist. You could also sprinkle some crushed nuts on top for a nice crunch. If you’re feeling adventurous, add a dollop of whipped cream or yogurt for added richness. It’s a delightful way to enjoy a guilt-free dessert!

FAQs

1. Can I use non-dairy cottage cheese?

Yes, you can substitute with a non-dairy alternative if you’re looking for a dairy-free option. There are many great choices available that can work wonderfully.

2. How long can I store the pudding?

This pudding can be stored in the refrigerator for up to 3 days. Make sure to cover it with plastic wrap or a lid to keep it fresh.

3. Can I freeze this pudding?

Freezing is not recommended as it may change the texture. It’s best enjoyed fresh or refrigerated.

Zesty Lemon Cottage Cheese Pudding is a refreshing and protein-packed dessert that everyone will love. With just a few simple ingredients and easy preparation, it’s a delightful treat for any occasion. For an extra twist on cottage cheese desserts, check out this Whipped Cottage Cheese Lemon Mousse recipe as well. Enjoy your cooking adventure!

Zesty Lemon Cottage Cheese Pudding

A refreshing and protein-packed dessert with a delightful lemon flavor, perfect for a healthy treat.

Main Ingredients

  • 2 cups cottage cheese (Use full-fat for a thicker pudding)
  • 1/4 cup lemon juice (Fresh lemon juice is recommended)
  • 1 whole lemon zest (Zest from one lemon)
  • 1/4 cup honey or maple syrup (Adjust sweetness to taste)
  • 1 pinch salt (Enhances flavor)

Preparation

  1. In a blender, combine the cottage cheese, lemon juice, lemon zest, honey or maple syrup, and salt.
  2. Blend until the mixture is smooth and creamy.
  3. Taste and adjust sweetness if needed, adding a little more honey or syrup if you prefer it sweeter.
  4. Transfer the pudding to serving bowls and chill in the refrigerator for at least 30 minutes before serving.

For serving, consider topping with your favorite fruits like berries or bananas or adding a dollop of whipped cream or yogurt for richness. This pudding can be stored in the refrigerator for up to 3 days.
Dessert, Snack
American
Cottage Cheese, Healthy Dessert, Lemon Pudding, Protein Dessert, quick recipe

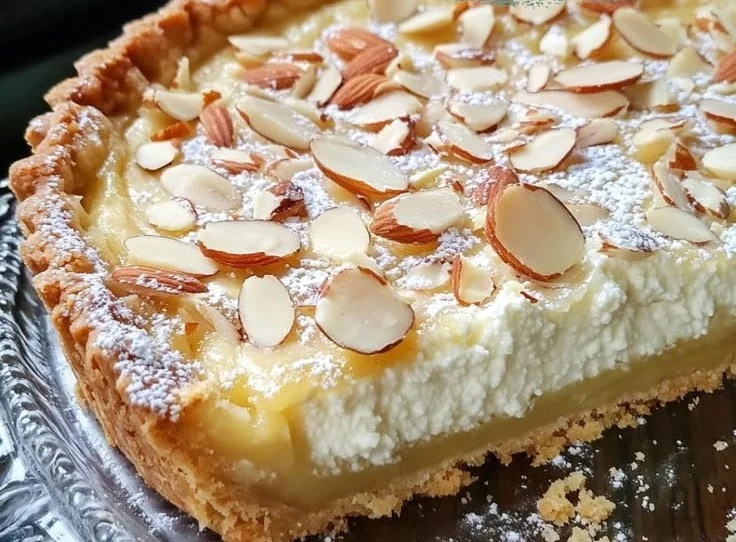
Italian Almond Cake

Slice of Italian Almond Cake topped with almonds and powdered sugar

If you are looking for a delightful dessert that brings a touch of Italy to your table, look no further than the Italian Almond Cake. This cake is known for its soft, moist texture and rich flavor, making it a delightful treat for any occasion. Almonds are the star ingredient, lending a beautiful nutty taste that pairs exceptionally well with a simple icing or a dusting of powdered sugar. This cake is not only a crowd-pleaser at gatherings but also makes for a comforting slice enjoyed with morning coffee or as an afternoon snack. It’s truly a recipe that you will love sharing with friends and family, and it might just become a new favorite in your home.

How to prepare Italian Almond Cake

To create this delightful cake, start by gathering your ingredients. You will need the following:

  • 1 cup of ground almonds (blanched)
  • 1 cup of sugar
  • 1/2 cup of butter, softened
  • 3 large eggs
  • 1/2 teaspoon of almond extract
  • 1/2 cup of all-purpose flour
  • 1/2 teaspoon of baking powder
  • A pinch of salt

Now let’s bake this delicious cake!

  1. Preheat your oven to 350°F (175°C) and grease an 8-inch round cake pan.
  2. In a mixing bowl, cream the softened butter and sugar together until light and fluffy.
  3. Add in the eggs one at a time, mixing well after each addition.
  4. Stir in the almond extract and ground almonds until well combined.
  5. In another bowl, whisk together the flour, baking powder, and salt.
  6. Gradually add the dry ingredients to the wet mixture, stirring until just combined.
  7. Pour the batter into the prepared cake pan and spread it out evenly.
  8. Bake in the preheated oven for about 25-30 minutes, or until a toothpick inserted in the center comes out clean.
  9. Allow the cake to cool in the pan for about 10 minutes before transferring it to a wire rack to cool completely.

Italian Almond Cake

Why You’ll Love Italian Almond Cake

This Italian Almond Cake is a wonderful combination of sweet and nutty flavors. The ground almonds create a rich texture, and the cake is moist without being overly heavy. It beautifully serves as a simple dessert or even a special occasion cake. And don’t forget the ear-to-ear smiles you’ll receive when serving it to your family and friends! It’s great on its own, or you can enhance its flavor by pairing it with a scoop of ice cream or a dollop of whipped cream.

Tips for success

To ensure your cake turns out perfectly, keep these tips in mind:

  • Make sure your butter is soft to allow for the best mixing.
  • Do not overmix the batter; mix just until combined to keep the cake light.
  • Check for doneness a few minutes before the timer goes off, as ovens can vary.

Serving Suggestions

Serve your Italian Almond Cake plain or dusted with powdered sugar for a simple yet elegant finish. You can also pair it with fresh berries or a light fruit compote for added flavor. For a delightful twist, you might even enjoy it alongside a slice of Italian Lemon Cream Cake, creating a delicious dessert spread perfect for any gathering.

FAQs

Can I use almond flour instead of ground almonds?

Yes, almond flour works perfectly as a substitute.

How should I store the cake?

Keep the cake covered at room temperature for up to three days. For longer storage, refrigerate it for up to a week.

Can I freeze the Italian Almond Cake?

Absolutely! Wrap it tightly in plastic wrap and foil before freezing. Thaw it in the refrigerator when you are ready to enjoy it.

This Italian Almond Cake is a treat that will surely enchant your taste buds and warm your heart. Enjoy baking!

Italian Almond Cake

A delightful dessert with a soft, moist texture and rich almond flavor, perfect for any occasion.

Main Ingredients

  • 1 cup ground almonds (blanched)
  • 1 cup sugar
  • 0.5 cup butter, softened (Make sure butter is soft for best mixing.)
  • 3 large eggs
  • 0.5 teaspoon almond extract
  • 0.5 cup all-purpose flour
  • 0.5 teaspoon baking powder
  • a pinch salt

Preparation

  1. Preheat your oven to 350°F (175°C) and grease an 8-inch round cake pan.
  2. In a mixing bowl, cream the softened butter and sugar together until light and fluffy.
  3. Add in the eggs one at a time, mixing well after each addition.
  4. Stir in the almond extract and ground almonds until well combined.
  5. In another bowl, whisk together the flour, baking powder, and salt.
  6. Gradually add the dry ingredients to the wet mixture, stirring until just combined.
  7. Pour the batter into the prepared cake pan and spread it out evenly.

Baking

  1. Bake in the preheated oven for about 25-30 minutes, or until a toothpick inserted in the center comes out clean.
  2. Allow the cake to cool in the pan for about 10 minutes before transferring it to a wire rack to cool completely.

To ensure your cake turns out perfectly, avoid overmixing the batter and check for doneness a few minutes before the timer goes off. Serve plain or dusted with powdered sugar, and pair with fresh berries or light fruit compote.

Dessert
Italian
Almond Cake, Baking, cake, Dessert, Italian Almond Cake

Cheeseburger Sliders

Delicious cheeseburger sliders on a platter ready to be served.

Cheeseburger sliders are delightful little bites that bring all the joy of a classic cheeseburger into a fun, bite-sized version. These sliders are perfect for parties, game days, or just a cozy night in. Imagine sinking your teeth into a juicy beef patty topped with melted cheese, all nestled in a soft slider bun. It’s no wonder these little sandwiches are loved by both kids and adults alike! Now, let’s dive into this easy recipe that’s sure to impress your friends and family.

Cheeseburger Sliders

Why You’ll Love Cheeseburger Sliders

One of the best reasons to make cheeseburger sliders is their versatility. You can customize them with your favorite toppings, from crisp lettuce and ripe tomatoes to a drizzle of tangy ketchup or mustard. Plus, they’re easy to prepare, so you won’t be stuck in the kitchen while everyone else is having fun. These sliders not only taste amazing but also bring smiles around the table. You’ll find that this recipe is sure to become a family favorite!

Tips for success

To ensure your cheeseburger sliders turn out perfectly, keep these tips in mind:

  1. Use high-quality ground beef: Aim for ground beef with a bit of fat—like 80/20—to keep the patties juicy and tasty.
  2. Don’t overwork the meat: Mix the beef gently when forming patties. Overworking can lead to tough sliders.
  3. Preheat your grill or skillet: Make sure it’s nice and hot before adding the patties, which helps achieve that delicious caramelization on the outside.
  4. Let them rest: After cooking, let the sliders rest for a few minutes before serving. This helps keep them juicy.

Serving Suggestions

Serve your cheeseburger sliders at a gathering with a side of crispy fries or a fresh salad for a complete meal. You can also set up a toppings bar with sliced pickles, jalapeños, sautéed onions, and a variety of sauces for guests to customize their sliders. These small bites also pair well with refreshing beverages, such as iced tea or lemonade, making for a perfect summer treat.

Cheeseburger Sliders

FAQs

1. Can I make the patties ahead of time?

Yes, you can prepare the patties and store them in the refrigerator for a day or two before cooking. This can save you time during your gathering.

2. What kind of cheese works best?

Cheddar cheese is a classic choice for cheeseburger sliders, but you can also try American, Swiss, or even pepper jack for a spicy kick.

3. Can I bake the sliders instead of grilling?

Absolutely! You can bake them in the oven at 350°F (175°C) on a baking sheet lined with parchment paper, cooking for about 15-20 minutes or until fully cooked through.

For those who want a more traditional cheeseburger recipe, consider checking out the Classic Cheeseburger Sliders for inspiration. Enjoy your cheeseburger slider adventure, and don’t hesitate to get creative with toppings and flavors!

Cheeseburger Sliders

Delicious bite-sized sliders bringing the joy of classic cheeseburgers to your gatherings, customizable with your favorite toppings.

For the patties

  • 1 lb ground beef (80/20) (Use high-quality ground beef for juiciness.)

For assembly

  • 8 pcs slider buns (Soft slider buns work best.)
  • 8 slices cheddar cheese (Cheddar is a classic choice.)
  • to taste lettuce, tomatoes, pickles, onions, jalapeños, ketchup, mustard (Customize with your favorite toppings.)

Preparation

  1. Preheat your grill or skillet on high heat.
  2. In a bowl, gently mix the ground beef without overworking it and form into 8 small patties.

Cooking

  1. Place the patties on the preheated grill or skillet and cook for about 4-5 minutes on each side.
  2. During the last minute of cooking, place a slice of cheddar cheese on each patty to melt.
  3. Remove the patties from the heat and let them rest for a few minutes before serving.

Assembly

  1. Assemble the sliders by placing each patty on a slider bun and adding desired toppings.

Serve with crispy fries or a fresh salad. Prepare the patties in advance and store in the fridge for up to two days.

Appetizer, Main Course
American
Cheeseburger Sliders, Easy Recipe, Ground Beef, Party Food, Slider Recipe

Creamy Italian Sausage Soup

Bowl of creamy Italian sausage soup garnished with herbs and vegetables

If you’re in search of a comforting bowl of goodness, look no further than creamy Italian sausage soup. This delightful dish combines the rich flavors of Italian sausage with a creamy broth, hearty vegetables, and aromatic herbs. It’s a meal that warms the soul and brings everyone to the table, making it a true crowd-pleaser. The combination of spices and creaminess creates a taste that’s simply irresistible. You’ll find yourself coming back for seconds and maybe even thirds! Let’s dive right into making this delicious recipe.

How to prepare Creamy Italian Sausage Soup

To create this lovely soup, you’ll need the following ingredients:

  • 1 pound Italian sausage
  • 1 medium onion, chopped
  • 3 cloves garlic, minced
  • 3 cups chicken broth
  • 1 can (14.5 ounces) diced tomatoes
  • 1 cup heavy cream
  • 2 cups kale, chopped
  • 1 teaspoon Italian seasoning
  • Salt and pepper, to taste
  • Grated Parmesan cheese, for serving

Now, let’s get into the directions:

  1. In a large pot, brown the Italian sausage over medium heat until fully cooked. Break it into small pieces as it cooks.
  2. Add the chopped onion and minced garlic to the pot, cooking until the onion becomes translucent.
  3. Pour in the chicken broth and diced tomatoes, stirring to combine.
  4. Bring the mixture to a simmer, then stir in the heavy cream and chopped kale.
  5. Add the Italian seasoning and salt and pepper to taste. Continue to simmer for about 5-10 minutes until the kale is tender.
  6. Serve hot, topped with grated Parmesan cheese.

Creamy Italian Sausage Soup

Why You’ll Love Creamy Italian Sausage Soup

There are plenty of reasons to adore this creamy Italian sausage soup. First, it’s loaded with flavor from the savory sausage and fresh herbs. The creamy texture makes every spoonful feel indulgent, but it’s simple enough to whip up on a busy weeknight. Plus, it’s packed with goodness from the kale and tomatoes, making it a satisfying meal. Whether you’re entertaining guests or having a cozy night in, this soup will surely impress!

Tips for success

To ensure your creamy Italian sausage soup turns out perfect, here are a few tips:

  • Use spicy or mild Italian sausage based on your heat preference.
  • If you prefer a thicker soup, you can add a few more potatoes or use an immersion blender to blend part of the soup.
  • Fresh herbs can boost the flavor, so consider adding basil or oregano for extra depth.

Serving Suggestions

This soup is delightful on its own, but it pairs wonderfully with a crusty bread or a fresh salad. For a complete meal, serve it alongside garlic bread to soak up all that creamy goodness. You can also add a side of roasted vegetables to add more color and nutrition to your table.

Creamy Italian Sausage Soup

FAQs

Can I make this soup in advance?

Yes, the soup can be made ahead and stored in the refrigerator for a couple of days. Just reheat gently when you’re ready to serve.

Can I freeze creamy Italian sausage soup?

Freezing is an option, but keep in mind the cream might change in texture once thawed. To avoid this, consider adding the cream just before serving after thawing the soup.

Is there a vegetarian version of this soup?

Absolutely! You can substitute the sausage with your favorite plant-based sausage or add more vegetables, beans, and lentils for protein.

Creamy Italian Sausage Soup

This delightful creamy Italian sausage soup combines rich flavors of sausage with a creamy broth, hearty vegetables, and aromatic herbs, making it a comforting meal.

Main Ingredients

  • 1 pound Italian sausage (Choose spicy or mild based on preference.)
  • 1 medium onion, chopped
  • 3 cloves garlic, minced
  • 3 cups chicken broth
  • 1 can (14.5 ounces) diced tomatoes
  • 1 cup heavy cream (Add before serving to maintain texture if freezing.)
  • 2 cups kale, chopped
  • 1 teaspoon Italian seasoning
  • to taste Salt and pepper
  • Grated Parmesan cheese, for serving

Cooking

  1. In a large pot, brown the Italian sausage over medium heat until fully cooked. Break it into small pieces as it cooks.
  2. Add the chopped onion and minced garlic to the pot, cooking until the onion becomes translucent.
  3. Pour in the chicken broth and diced tomatoes, stirring to combine.
  4. Bring the mixture to a simmer, then stir in the heavy cream and chopped kale.
  5. Add the Italian seasoning and salt and pepper to taste. Continue to simmer for about 5-10 minutes until the kale is tender.
  6. Serve hot, topped with grated Parmesan cheese.

This soup pairs wonderfully with crusty bread or a fresh salad. Consider adding fresh herbs like basil or oregano for extra flavor.

Main Course, Soup
Italian
Comfort Food, Creamy Soup, Hearty Soup, Italian Sausage, Kale Soup

Easy Baked Honey Dijon Chicken

Easy baked honey dijon chicken recipe on a plate

If you’re looking for a simple yet delicious dinner idea, look no further than Easy Baked Honey Dijon Chicken. This dish combines the sweet richness of honey with the tangy flavor of Dijon mustard, creating a delightful taste that everyone will love. Perfect for busy weeknights or casual gatherings, this recipe is sure to become a family favorite. With its easy preparation and tantalizing aroma wafting through your kitchen, you’ll be eager to whip this up time and again.

Why You’ll Love Easy Baked Honey Dijon Chicken

What’s not to love about this chicken? It’s moist, flavorful, and incredibly easy to make. The honey and Dijon glaze caramelizes beautifully in the oven, giving the chicken a nice golden finish. Plus, it pairs well with a variety of side dishes, making it a versatile option for any meal. If you’re looking for dishes that bring smiles to the dinner table, this chicken recipe definitely hits the mark!

Tips for success

To achieve the best results with your Easy Baked Honey Dijon Chicken, consider these helpful tips:

  • Marinate for Extra Flavor: Allow the chicken to marinate in the honey Dijon mixture for at least 30 minutes. This will enhance the flavors and tenderness of the meat.
  • Use Fresh Ingredients: Fresh honey and Dijon mustard make a noticeable difference in taste.
  • Adjust Cooking Time: Depending on the size of your chicken pieces, be mindful of the cooking time to ensure they are cooked through. A meat thermometer should read 165°F (75°C) to confirm they are safe to eat.

Serving Suggestions

This flavorful chicken dish goes well with many sides. Consider pairing it with steamed vegetables, roasted potatoes, or a fresh salad. You can also serve it with rice or quinoa for a complete meal. For a delightful twist, try drizzling some additional honey over the chicken right before serving.

Easy Baked Honey Dijon Chicken

FAQs

Can I use other types of chicken?

Yes, you can use other cuts, such as chicken thighs or drumsticks. Just ensure they are cooked through to the right temperature.

How do I store leftovers?

Store any leftovers in an airtight container in the refrigerator for up to three days. You can reheat them in the oven or microwave.

Can I freeze this dish?

Absolutely! You can freeze the uncooked marinated chicken for up to three months. Just remember to thaw it completely before baking.

For another delicious chicken option, check out this easy hot honey chicken thighs recipe!

Easy Baked Honey Dijon Chicken

Easy Baked Honey Dijon Chicken

A simple yet delicious chicken dish combining honey and Dijon mustard for a flavorful glaze, perfect for busy weeknights and gatherings.

For the marinade

  • 1/4 cup honey (Use fresh honey for best flavor.)
  • 1/4 cup Dijon mustard (Use fresh Dijon mustard.)

Main ingredients

  • 4 pieces chicken breasts (Can substitute with chicken thighs or drumsticks.)

Preparation

  1. In a bowl, mix honey and Dijon mustard to create the marinade.
  2. Place chicken breasts in a resealable bag or dish and pour the marinade over them.
  3. Marinate the chicken in the refrigerator for at least 30 minutes.

Cooking

  1. Preheat the oven to 375°F (190°C).
  2. Remove the chicken from the marinade and place it in a baking dish.
  3. Bake in the preheated oven for about 30 minutes, or until chicken reaches an internal temperature of 165°F (75°C).

For added flavor, drizzle extra honey over the chicken before serving. Store leftovers in an airtight container in the refrigerator for up to three days. Can freeze marinated chicken for up to three months.

Dinner, Main Course
American
Baked Chicken, easy chicken recipe, Family Favorite, Honey Dijon Chicken, Simple Dinner

Irish Shepherd’s Pie: 5 Reasons You’ll Fall in Love

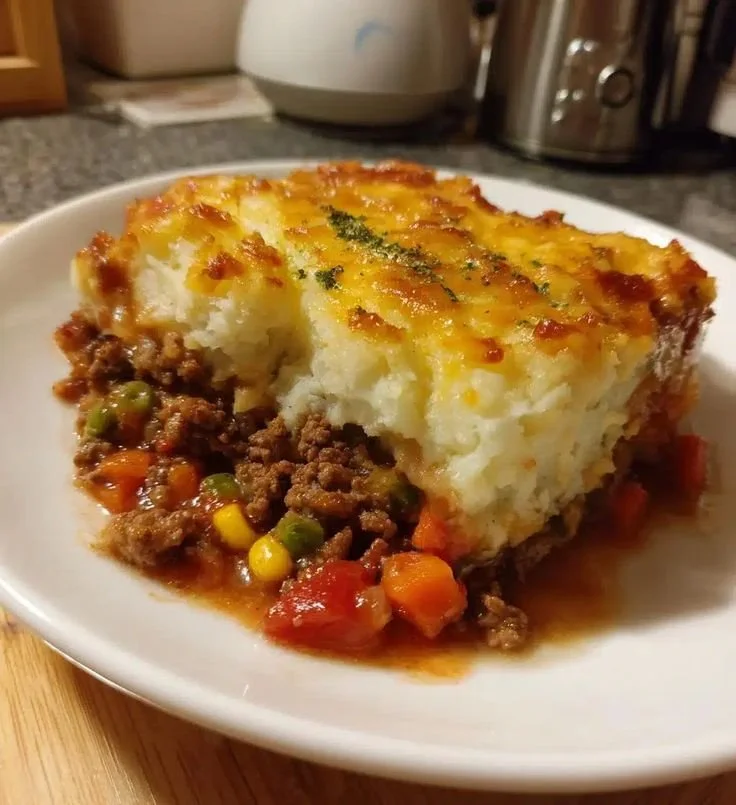
Irish Shepherd's Pie with mashed potatoes and beef in a baking dish

Irish Shepherd’s Pie is more than just a meal; it’s a warm hug on a plate. This classic dish brings heartiness and comfort together with its delicious layers. It features ground lamb or beef, rich gravy, and creamy mashed potatoes baked to golden perfection. With its savory flavors and delightful textures, it’s no wonder this dish is a crowd-pleaser. Whether it’s a family dinner or a gathering with friends, Irish Shepherd’s Pie is sure to make everyone feel at home. So, roll up your sleeves and get ready to fall in love with this comforting recipe.

How to prepare Irish Shepherd’s Pie

Making Irish Shepherd’s Pie is simple and rewarding. Here’s how you can create this delicious dish at home:

  1. Ingredients:
  • 2 pounds ground lamb or beef
  • 1 onion, chopped
  • 2 carrots, diced
  • 1 cup frozen peas
  • 2 tablespoons tomato paste
  • 1 cup beef broth
  • 1 tablespoon Worcestershire sauce
  • Salt and pepper to taste
  • 4 cups mashed potatoes
  • 1 cup shredded cheese (optional)
  1. Directions:
  • In a large skillet, brown the ground meat over medium heat. Add the onions and carrots, cooking until tender.
  • Stir in the tomato paste, beef broth, and Worcestershire sauce. Add the peas and season with salt and pepper. Simmer for 10 minutes.
  • Preheat your oven to 400°F (200°C).
  • Spread the meat mixture in a baking dish and top with a layer of mashed potatoes. If desired, sprinkle shredded cheese on top.
  • Bake for 20-25 minutes, or until the top is golden brown.

Irish Shepherd’s Pie: 5 Reasons You’ll Fall in Love

Tips for Success

To ensure your Irish Shepherd’s Pie turns out perfectly every time, here are a few tips to keep in mind:

  • Use leftover mashed potatoes to save time in preparation.
  • Experiment with different vegetables, such as mushrooms or corn, to give the pie your own twist.
  • For a richer flavor, let the meat mixture cook a bit longer before baking.
  • Always let the dish cool for a few minutes before serving to help it hold its shape.

Serving Suggestions

Serve Irish Shepherd’s Pie with a side salad or some crusty bread for a complete meal. A pint of beer or a glass of red wine pairs well too. If you want to elevate the dish, consider adding a dollop of sour cream or a sprinkle of fresh herbs, like parsley, right before serving.

Irish Shepherd’s Pie: 5 Reasons You’ll Fall in Love

FAQs

Can I make Shepherd’s Pie ahead of time?

Yes, you can prepare the meat mixture and mashed potatoes in advance. Simply assemble the pie, store it in the refrigerator, and bake it when ready to eat.

Is Shepherd’s Pie suitable for freezing?

Absolutely! You can freeze unbaked Shepherd’s Pie. Just make sure to wrap it tightly. When you’re ready to enjoy it, thaw it overnight and bake as directed.

Can I use ground turkey or chicken instead of lamb?

Yes, you can substitute with ground turkey or chicken if you prefer. Just keep in mind that the flavor will be a bit different, but still delicious!

Now that you know how to make this delightful dish, it’s time to gather your ingredients and dive into the world of Irish Shepherd’s Pie. Trust us, once you taste it, you’ll be excited to share it with everyone you know! If you’re looking for more comfort food recipes, check out a delightful twist with homemade pop tarts to get even more inspiration for your cooking adventures!

Irish Shepherd’s Pie

A classic comfort dish featuring layers of ground meat, rich gravy, and creamy mashed potatoes, baked to golden perfection.

Meat Mixture

  • 2 pounds ground lamb or beef
  • 1 large onion, chopped
  • 2 medium carrots, diced
  • 1 cup frozen peas
  • 2 tablespoons tomato paste
  • 1 cup beef broth
  • 1 tablespoon Worcestershire sauce
  • Salt and pepper to taste

Mashed Potatoes

  • 4 cups mashed potatoes
  • 1 cup shredded cheese (optional) (For topping, can be omitted.)

Preparation

  1. In a large skillet, brown the ground meat over medium heat.
  2. Add the onions and carrots, cooking until tender.
  3. Stir in the tomato paste, beef broth, and Worcestershire sauce.
  4. Add the peas and season with salt and pepper.
  5. Simmer for 10 minutes.

Baking

  1. Preheat your oven to 400°F (200°C).
  2. Spread the meat mixture in a baking dish and top with a layer of mashed potatoes.
  3. If desired, sprinkle shredded cheese on top.
  4. Bake for 20-25 minutes, or until the top is golden brown.

Use leftover mashed potatoes to save time. Experiment with different vegetables, such as mushrooms or corn. Let the meat mixture cook longer for richer flavor. Cool slightly before serving to hold its shape.

Dinner, Main Course
Irish
Baked Dish, Casserole, Comfort Food, Shepherd’s Pie, Traditional Recipe

Black Forest Cake

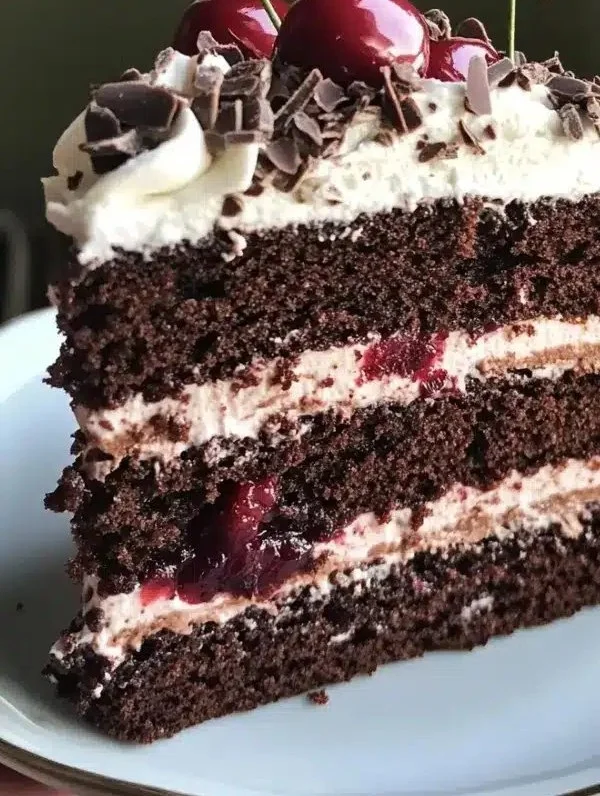
A delicious slice of Black Forest Cake topped with cherries and whipped cream.

There’s something truly magical about desserts that are as delightful to look at as they are to eat. Black Forest Cake is one of those treats that brings joy to every celebration. This classic German dessert features layers of rich chocolate cake, fluffy whipped cream, and tart cherries, making it a wonderful combination of flavors and textures. It’s not only a feast for the taste buds but also a showstopper at any gathering. Whether you’re planning a birthday party, a holiday celebration, or just a sweet treat for your family, Black Forest Cake is sure to impress.

If you’re ready to create a dessert that will have everyone asking for seconds, follow this simple recipe. It’s a crowd-pleaser that’s perfect for both novice bakers and seasoned pros. Best of all, you might find yourself sneaking a slice (or two) before it even makes it to the table!

How to prepare Black Forest Cake

  1. Bake the Chocolate Cake:
  • Preheat your oven to 350°F (175°C). Grease and flour two 9-inch round cake pans.
  • In a large bowl, mix 1 ¾ cups of all-purpose flour, 1 ¾ cups of sugar, ¾ cup of unsweetened cocoa powder, 1 ½ teaspoons of baking powder, 1 ½ teaspoons of baking soda, and 1 teaspoon of salt.
  • Add 2 large eggs, 1 cup of milk, ½ cup of vegetable oil, and 2 teaspoons of vanilla extract. Beat well for about 2 minutes.
  • Stir in 1 cup of boiling water until combined. Pour batter evenly into the prepared pans.
  • Bake for 30-35 minutes, or until a toothpick comes out clean. Cool in pans for 10 minutes, then remove from pans and cool completely.
  1. Prepare the Cherry Filling:
  • While the cake cools, drain 1 jar (about 14 ounces) of tart cherries. Reserve some juice for later.
  • In a small saucepan, combine the cherries, ¼ cup of sugar, and 1 tablespoon of cornstarch. Heat until bubbly and thickened. Let it cool.
  1. Make the Whipped Cream:
  • In a mixing bowl, whip 2 cups of heavy cream with ¼ cup of powdered sugar and 1 teaspoon of vanilla extract until soft peaks form.
  1. Assemble the Cake:
  • Place one layer of cake on a serving platter. Moisten with reserved cherry juice. Spread half of the cherry filling and a layer of whipped cream on top.
  • Add the second layer of cake and repeat the process with the remaining cherry filling and whipped cream. Decorate the top with chocolate shavings.
  1. Serve and Enjoy!
  • Slice the cake and serve to your enthusiastic guests!

Black Forest Cake

Why You’ll Love Black Forest Cake

Black Forest Cake stands out not just for its lovely appearance but also for its harmonious flavors. The sweet chocolate cake, the tart cherries, and the light whipped cream create a wonderful balance that keeps everyone coming back for more. This dessert is perfect for celebrations or as a comforting treat at home. It’s easy to make and adapts well for any occasion, whether you want it for a holiday or a casual family dinner.

Another reason to love this cake is it offers endless possibilities for customization. You can add more cherries, increase the whipped cream, or even incorporate some extra chocolate—making it your own masterpiece.

Tips for success

  1. Use Quality Ingredients: The quality of your chocolate and cherries can make a big difference in taste, so opt for the best you can find.
  2. Don’t Skip the Soaking: Moisten the cake layers with cherry juice to ensure they stay moist and flavorful.
  3. Chill the Whipped Cream: For best results, chill your mixing bowl and beaters before whipping cream. This helps it whip up faster and hold its shape.

Serving Suggestions

Pair your Black Forest Cake with a scoop of vanilla ice cream or a dollop of extra whipped cream for a decadent experience. You can also serve it with a side of fresh cherries or a drizzle of chocolate sauce to elevate the presentation.

FAQs

Can I make Black Forest Cake ahead of time?

Yes, you can bake the cake layers in advance. Just store them in an airtight container and assemble them closer to serving time.

What other fruits can I use?

If cherries aren’t your favorite, you can substitute them with raspberries or strawberries for a different twist.

How should I store leftovers?

Store any leftover cake in the refrigerator for up to 3 days. Make sure to cover it to keep it fresh, as the cream can spoil quickly.

Black Forest Cake

Making a scrumptious Black Forest Cake can be a rewarding experience, and we hope you enjoy every bit of this delicious recipe!

Black Forest Cake

A classic German dessert with layers of rich chocolate cake, fluffy whipped cream, and tart cherries that brings joy to every celebration.

For the Chocolate Cake

  • 1.75 cups all-purpose flour
  • 1.75 cups sugar
  • 0.75 cups unsweetened cocoa powder
  • 1.5 teaspoons baking powder
  • 1.5 teaspoons baking soda
  • 1 teaspoon salt
  • 2 large eggs
  • 1 cup milk
  • 0.5 cups vegetable oil
  • 2 teaspoons vanilla extract
  • 1 cup boiling water

For the Cherry Filling

  • 1 jar tart cherries (about 14 ounces) (Reserve some juice for later)
  • 0.25 cups sugar
  • 1 tablespoon cornstarch

For the Whipped Cream

  • 2 cups heavy cream
  • 0.25 cups powdered sugar
  • 1 teaspoon vanilla extract

For Assembly

  • 1 cup chocolate shavings (For decoration)

Bake the Chocolate Cake

  1. Preheat your oven to 350°F (175°C). Grease and flour two 9-inch round cake pans.
  2. In a large bowl, mix all-purpose flour, sugar, unsweetened cocoa powder, baking powder, baking soda, and salt.
  3. Add eggs, milk, vegetable oil, and vanilla extract. Beat well for about 2 minutes.
  4. Stir in boiling water until combined. Pour batter evenly into the prepared pans.
  5. Bake for 30-35 minutes, or until a toothpick comes out clean. Cool in pans for 10 minutes, then remove from pans and cool completely.

Prepare the Cherry Filling

  1. While the cake cools, drain the tart cherries and reserve some juice.
  2. In a small saucepan, combine cherries, sugar, and cornstarch. Heat until bubbly and thickened. Let it cool.

Make the Whipped Cream

  1. In a mixing bowl, whip heavy cream with powdered sugar and vanilla extract until soft peaks form.

Assemble the Cake

  1. Place one layer of cake on a serving platter. Moisten with reserved cherry juice.
  2. Spread half of the cherry filling and a layer of whipped cream on top.
  3. Add the second layer of cake and repeat the process with the remaining cherry filling and whipped cream.
  4. Decorate the top with chocolate shavings.

Serve

  1. Slice the cake and serve to your enthusiastic guests!

Use quality ingredients for the best taste; chill your mixing bowl and beaters before whipping cream for better results.

Cake, Dessert
German
Black Forest Cake, Celebration Cake, chocolate cake, dessert recipe, Layered Cake

Spicy Baked Chicken Strips

Spicy baked chicken strips served on a plate with dipping sauce

Warm up your kitchen with the mouthwatering aroma of Spicy Baked Chicken Strips. This recipe is not just about heat; it combines tender chicken with crunchy breading, creating a delicious dish that everyone will love. Perfect for a family dinner or a friendly gathering, these chicken strips will have your guests coming back for more. With a kick of spice and a satisfying crunch, they are sure to be a hit. Plus, they’re baked, making them a healthier option that’s easy to whip up any night of the week. So, let’s dive into this fantastic recipe!

How to prepare Spicy Baked Chicken Strips

Spicy Baked Chicken Strips

Start by gathering your ingredients: chicken breasts, breadcrumbs, flour, and a mix of spices like paprika, cayenne pepper, and garlic powder. Preheat your oven to 400°F (200°C) and line a baking sheet with parchment paper. Cut the chicken breasts into strips. Set up three bowls: one with flour, the second with beaten eggs, and the third with a mixture of breadcrumbs and spices. Dredge the chicken strips in flour, dip them in the egg, and then coat them with the seasoned breadcrumbs. Place the strips on the baking sheet and bake for about 20-25 minutes until golden and crispy.

Spicy Baked Chicken Strips

Why You’ll Love Spicy Baked Chicken Strips

These Spicy Baked Chicken Strips are undeniably easy to make and full of flavor. You get that delightful crunch every bite, along with a subtle kick that won’t overwhelm your taste buds. They are perfect for dipping into your favorite sauces, making them an excellent addition to any game day spread or a quick weeknight meal. You can customize the spice level to suit your family’s taste preferences, ensuring everyone can enjoy them.

Tips for success

To make sure your chicken strips turn out perfectly, here are a few tips: First, don’t skip the dredging step, as it helps the coating stick better. Second, use fresh breadcrumbs for a crunchier finish. Lastly, for added flavor, let the chicken strips sit in the spices for at least 30 minutes before baking. This allows the spices to really soak in, enhancing every bite.

Serving Suggestions

Serve your Spicy Baked Chicken Strips with a side of creamy ranch or tangy barbecue sauce for dipping. They pair wonderfully with a fresh salad or crispy fries. For a complete meal, add some roasted vegetables or a side of rice. If you’re looking for more ideas, check out this baked chicken parmesan pasta recipe for another delicious chicken dish.

FAQs

How can I make these chicken strips healthier?

You can substitute regular breadcrumbs with whole wheat breadcrumbs or crush some oats for a healthier coating.

Can I freeze the chicken strips?

Yes, you can freeze the uncooked, breaded chicken strips. Just make sure to freeze them in a single layer before transferring them to a zip-top bag for long-term storage.

What is the best way to store leftovers?

Store any leftover chicken strips in an airtight container in the fridge for up to three days. Reheat them in the oven for the best texture.

Spicy Baked Chicken Strips

These Spicy Baked Chicken Strips combine tender chicken and crunchy breading for a delicious dish that’s both flavorful and healthier.

Main ingredients

  • 1 lb chicken breasts (Cut into strips)
  • 1 cup breadcrumbs (Use fresh breadcrumbs for a crunchier finish)
  • 1/2 cup all-purpose flour (For dredging)
  • 2 large eggs (Beaten, for coating)

Spice mix

  • 1 tbsp paprika (Adjust spice level as desired)
  • 1/2 tbsp cayenne pepper (Use less for a milder flavor)
  • 1 tbsp garlic powder

Preparation

  1. Preheat your oven to 400°F (200°C) and line a baking sheet with parchment paper.
  2. Cut the chicken breasts into strips.
  3. Set up three bowls: one with flour, the second with beaten eggs, and the third with a mixture of breadcrumbs and spices.
  4. Dredge the chicken strips in flour, dip them in the egg, and then coat them with the seasoned breadcrumbs.

Baking

  1. Place the strips on the baking sheet and bake for about 20-25 minutes until golden and crispy.

For extra flavor, let the chicken strips sit in the spices for at least 30 minutes before baking to enhance the taste.

Appetizer, Main Course
American
Baked Chicken Strips, Easy Chicken Dinner, Finger Food, Healthy Chicken Recipe, Spicy Chicken

Edwardian Molasses Butter Cake: 5 Reasons to Indulge

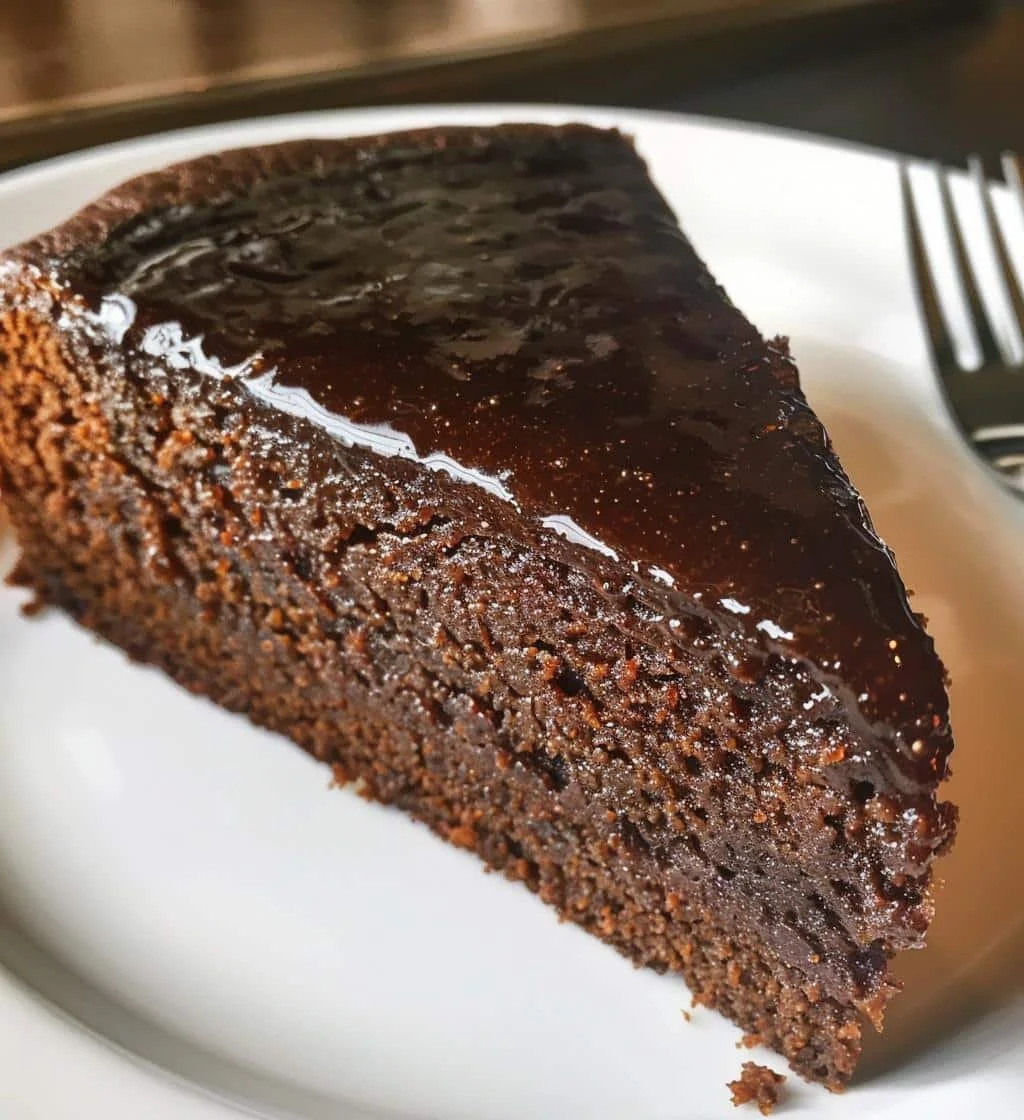
Slice of Edwardian Molasses Butter Cake topped with buttercream and served on a plate.

Edwardian Molasses Butter Cake brings a nostalgic touch to any gathering. This cake, with its rich molasses flavor and buttery texture, is a true crowd-pleaser that evokes a sense of comfort and home. Each bite melts in your mouth, offering a sweet escape reminiscent of simpler times. Imagine sharing a slice of this cake with loved ones, accompanied by cups of tea or coffee, creating memories that will stick with you long after the last crumb is gone. If you’ve never tasted it, you’re in for a treat that invites you to try your hand at baking it yourself!

How to prepare Edwardian Molasses Butter Cake

Ingredients:

  • 1 cup unsalted butter, softened
  • 2 cups brown sugar
  • 1 cup molasses
  • 4 large eggs
  • 4 cups all-purpose flour
  • 2 teaspoons baking soda
  • 1 teaspoon ground cinnamon
  • 1/2 teaspoon ground ginger
  • 1/2 teaspoon ground cloves
  • 1 cup buttermilk

Directions:

  1. Preheat your oven to 350°F (175°C) and grease a cake pan.
  2. In a large bowl, cream the softened butter and brown sugar until fluffy.
  3. Add the molasses and mix until well combined.
  4. Beat in the eggs, one at a time, ensuring each is fully mixed before adding the next.
  5. In another bowl, sift together the flour, baking soda, and spices.
  6. Gradually add the dry ingredients to the wet mixture, alternating with the buttermilk. Mix until just combined.
  7. Pour the batter into the prepared cake pan and smooth the top.
  8. Bake for 45-50 minutes, or until a toothpick inserted in the center comes out clean.
  9. Allow to cool before serving.

Edwardian Molasses Butter Cake: 5 Reasons to Indulge

Tips for Success

To ensure your cake turns out perfectly, it’s essential to measure your ingredients accurately. Use room temperature butter and eggs for better mixing. Don’t over-mix the batter, as this can result in a denser cake. If you want an extra touch, consider adding a sprinkle of powdered sugar on top before serving, or pair it with vanilla ice cream for a joyous dessert experience.

Serving Suggestions

Edwardian Molasses Butter Cake is perfect for various occasions, from family gatherings to casual get-togethers. Serve it warm with a dollop of whipped cream, or enjoy it plain for its rich flavor. Pair it with a cup of coffee or tea for a delightful afternoon treat. For special events, consider offering a selection of pastries, like homemade pop tarts, alongside this cake to impress your guests.

Edwardian Molasses Butter Cake: 5 Reasons to Indulge

FAQs

1. Can I use different types of sugar? Yes, while brown sugar adds a unique flavor, you can substitute it with granulated sugar, though it might slightly alter the cake’s taste.

2. How should I store the cake? Store the cake in an airtight container at room temperature for up to three days. For longer storage, keep it in the fridge, which can extend its freshness.

3. Can I freeze this cake? Absolutely! Wrap the cake tightly in plastic wrap and then in foil. It can be frozen for up to three months. Thaw it overnight in the fridge before serving.

Edwardian Molasses Butter Cake is not just a dessert, it’s an experience waiting to happen in your kitchen! Try making it today and indulge in its delightful taste.

Edwardian Molasses Butter Cake

A nostalgic cake with rich molasses flavor and buttery texture that evokes feelings of comfort and home.

Main ingredients

  • 1 cup unsalted butter, softened (Use room temperature for better mixing.)
  • 2 cups brown sugar (Can be substituted with granulated sugar.)
  • 1 cup molasses
  • 4 large eggs (Use room temperature for better mixing.)
  • 4 cups all-purpose flour (Sifted with baking soda and spices.)
  • 2 teaspoons baking soda
  • 1 teaspoon ground cinnamon
  • 1/2 teaspoon ground ginger
  • 1/2 teaspoon ground cloves
  • 1 cup buttermilk

Preparation

  1. Preheat your oven to 350°F (175°C) and grease a cake pan.
  2. In a large bowl, cream the softened butter and brown sugar until fluffy.
  3. Add the molasses and mix until well combined.
  4. Beat in the eggs, one at a time, ensuring each is fully mixed before adding the next.
  5. In another bowl, sift together the flour, baking soda, and spices.
  6. Gradually add the dry ingredients to the wet mixture, alternating with the buttermilk. Mix until just combined.
  7. Pour the batter into the prepared cake pan and smooth the top.

Baking

  1. Bake for 45-50 minutes, or until a toothpick inserted in the center comes out clean.
  2. Allow to cool before serving.

To ensure your cake turns out perfectly, measure your ingredients accurately. Don’t over-mix the batter to avoid a denser cake. Consider adding a sprinkle of powdered sugar on top or pairing it with vanilla ice cream.

Dessert
American
Butter Cake, Comfort Food, Edwardian Cake, Homemade Cake, Molasses Cake

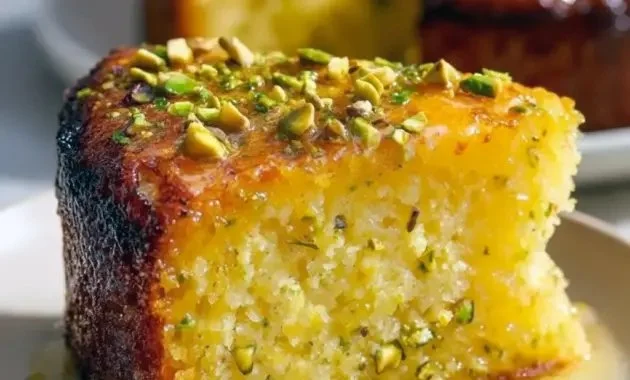
Irresistible Flourless Lemon Pistachio Cake (Easy Gluten-Free Dessert)

Delicious Flourless Lemon Pistachio Cake displayed on a rustic wooden table

There are moments when I’m in the mood for a dessert that feels rich and special but doesn’t require much time or effort. That’s exactly what this Flourless Pistachio Cake delivers. It’s a naturally gluten-free treat that brings out the bold, nutty flavor of pistachios while perfectly satisfying a sweet craving. With how busy everyday life can be especially balancing work and family having a recipe this simple is a game-changer. It’s quick to prepare, full of flavor, and ready in under an hour. A little indulgence, made easy, with no gluten in sight.

How to prepare Irresistible Flourless Lemon Pistachio Cake

To make this delightful cake, you will need the following ingredients:

  • 1 cup of ground pistachios
  • 1 cup of sugar
  • 1/4 cup of lemon juice
  • Zest of 1 lemon
  • 4 large eggs
  • 1/2 teaspoon of salt
  • 1/2 teaspoon of baking powder
  • Powdered sugar for dusting (optional)

Directions:

  1. Preheat your oven to 350°F (175°C). Lightly grease an 8-inch round cake pan and line the bottom with parchment paper.
  2. In a mixing bowl, combine ground pistachios and sugar. Mix well to combine.
  3. Add fresh lemon juice, lemon zest, and salt to the mixture. Stir until well blended.
  4. In a separate bowl, beat the eggs until they are frothy, then gradually add them to the pistachio mixture. Mix until fully incorporated.
  5. Gently fold in baking powder until combined.
  6. Pour the batter into your prepared cake pan. Bake for 25 to 30 minutes or until a toothpick inserted in the center comes out clean.
  7. Allow the cake to cool in the pan for about 10 minutes, then carefully invert onto a wire rack to cool completely.
  8. Once cooled, dust the cake with powdered sugar if desired and slice into pieces to serve.

Irresistible Flourless Lemon Pistachio Cake — Easy Gluten-Free Dessert

Why You’ll Love Irresistible Flourless Lemon Pistachio Cake

This cake is perfect for anyone on a gluten-free diet because it uses pistachios instead of flour, making it a delicious and healthy option. The fresh lemon juice and zest give it a wonderful bright flavor that contrasts beautifully with the nuttiness of the pistachios. Plus, it’s easy to make, so you don’t have to be a baking expert to create a lovely dessert.

Tips for Success

  1. Use fresh lemons for the best flavor. The zest and juice are essential for that vibrant lemon taste.
  2. Make sure to grind your pistachios very fine to get a smooth texture in the cake.
  3. Don’t overbake; keep an eye on it as ovens can vary in temperature. The cake should be moist, not dry.
  4. For an added touch, pair it with a dollop of whipped cream or ice cream.

Serving Suggestions

Serve your Flourless Lemon Pistachio Cake on its own or alongside some fresh berries for added color and flavor. A scoop of lemon sorbet can bring an extra zing to this delightful dessert. You can also garnish with mint leaves for a fresh touch.

FAQs

Can I substitute the pistachios with another nut?

Yes, you can use almonds, walnuts, or hazelnuts, but be mindful that it will change the flavor of the cake.

How do I store leftover cake?

Store any leftover cake in an airtight container in the refrigerator for up to three days.

Can I make this cake in advance?

Absolutely! You can prepare it a day before serving. Just be sure to keep it refrigerated and bring it to room temperature before serving.

Irresistible Flourless Lemon Pistachio Cake — Easy Gluten-Free Dessert

This Irresistible Flourless Lemon Pistachio Cake is a fantastic dessert choice that anyone can enjoy, whether they are gluten-free or not. Its bright flavors and delightful texture make it a showstopper at any gathering. To explore more about this delicious recipe, check out this Irresistible Flourless Lemon Pistachio Cake and get ready to impress your friends with your baking skills!

Flourless Lemon Pistachio Cake

A naturally gluten-free cake that highlights the bold flavor of pistachios, perfectly complemented by fresh lemon juice and zest, easy to prepare in under an hour.

Main Ingredients

  • 1 cup ground pistachios (Use very fine ground pistachios for a smooth texture.)
  • 1 cup sugar
  • 1/4 cup lemon juice (Use fresh juice for best flavor.)
  • 1 zest of 1 lemon (Essential for vibrant lemon taste.)
  • 4 large eggs (Beaten until frothy.)
  • 1/2 teaspoon salt
  • 1/2 teaspoon baking powder
  • powdered sugar for dusting (Optional for serving.)

Preparation

  1. Preheat your oven to 350°F (175°C). Lightly grease an 8-inch round cake pan and line the bottom with parchment paper.
  2. In a mixing bowl, combine ground pistachios and sugar. Mix well to combine.
  3. Add fresh lemon juice, lemon zest, and salt to the mixture. Stir until well blended.
  4. In a separate bowl, beat the eggs until they are frothy, then gradually add them to the pistachio mixture. Mix until fully incorporated.
  5. Gently fold in baking powder until combined.
  6. Pour the batter into your prepared cake pan.
  7. Bake for 25 to 30 minutes or until a toothpick inserted in the center comes out clean.
  8. Allow the cake to cool in the pan for about 10 minutes, then carefully invert onto a wire rack to cool completely.
  9. Once cooled, dust the cake with powdered sugar if desired and slice into pieces to serve.

This cake is perfect for gluten-free diets and serves well with whipped cream or ice cream. For added flavors, consider pairing it with berries or lemon sorbet.

Baking, Dessert
American, Gluten-Free
Easy Baking, Flourless Cake, Gluten-free dessert, Lemon Dessert, Pistachio Cake