Greek Yogurt Cookie Dough

Making Greek Yogurt Cookie Dough is a delightful way to enjoy a classic treat with a healthier twist. This cookie dough is creamy, sweet, and packed with flavor, making it a hit for both kids and adults. The use of Greek yogurt adds a hint of tanginess and moisture, while still allowing that yummy cookie dough taste to shine through. Plus, it’s simple to whip up, perfect for when those cravings strike.

This featured recipe is not just a treat for the taste buds, it’s also a crowd-pleaser at gatherings. Imagine serving this indulgent Greek Yogurt Cookie Dough at your next party, where everyone will appreciate its unique texture and delicious flavor. It’s a guaranteed hit, and you’ll find yourself savoring every bite. So grab your mixing bowl and let’s get started on this scrumptious creation!

How to prepare Greek Yogurt Cookie Dough

  1. In a large bowl, combine 1 cup of whole wheat flour, 1/2 teaspoon of baking soda, and a pinch of salt.
  2. In another bowl, mix together 1/2 cup of Greek yogurt, 1/4 cup of brown sugar, and 1/4 cup of granulated sugar until smooth.
  3. Gradually add the dry ingredients to the wet mixture and stir to combine.
  4. Fold in 1/2 cup of chocolate chips, or your favorite add-ins like nuts or dried fruit.
  5. Chill the dough in the refrigerator for about 30 minutes before serving.

Greek Yogurt Cookie Dough

Why You’ll Love Greek Yogurt Cookie Dough

You’ll love Greek Yogurt Cookie Dough because it feels indulgent while being a bit healthier than traditional cookie dough. The Greek yogurt provides a source of protein, making you feel good about snacking on it. The dough is incredibly versatile; add whatever mix-ins you prefer, and you can even adjust the sweetness to your liking. Plus, it’s super simple to make, which means you can enjoy this treat whenever the mood strikes!

Tips for success

  • Measure your flour correctly. Too much flour can make the dough dry, so spoon and level for accuracy.
  • Chill the dough before serving. This step helps the flavors meld together and makes it easier to scoop.
  • Play with different mix-ins. Try nuts, dried fruit, or even a swirl of peanut butter for a fun twist.

Greek Yogurt Cookie Dough

Serving Suggestions

Serve your Greek Yogurt Cookie Dough plain, or scoop it onto a graham cracker for a fun snack. You can also pair it with fresh fruit or a dollop of nut butter for a more filling treat. Feel free to add it to ice cream or yogurt for a delightful dessert experience!

FAQs

What can I use instead of Greek yogurt?

If you don’t have Greek yogurt, regular yogurt or cottage cheese can work, but the texture might change slightly.

Can I freeze the cookie dough?

Yes, you can freeze the dough! Just scoop it into small balls and freeze them on a baking sheet before transferring them to a bag. They can be enjoyed later, too!

Is this cookie dough safe to eat raw?

Yes! This Greek Yogurt Cookie Dough is safe to eat raw since it does not contain raw eggs. Enjoy without worry!

Greek Yogurt Cookie Dough

This Greek Yogurt Cookie Dough is a creamy and decadent treat with a healthier twist, perfect for both kids and adults.

Dry Ingredients

  • 1 cup whole wheat flour
  • 1/2 teaspoon baking soda
  • a pinch salt

Wet Ingredients

  • 1/2 cup Greek yogurt
  • 1/4 cup brown sugar
  • 1/4 cup granulated sugar

Mix-ins

  • 1/2 cup chocolate chips (or your favorite add-ins like nuts or dried fruit)

Preparation

  1. In a large bowl, combine whole wheat flour, baking soda, and a pinch of salt.
  2. In another bowl, mix together Greek yogurt, brown sugar, and granulated sugar until smooth.
  3. Gradually add the dry ingredients to the wet mixture and stir to combine.
  4. Fold in chocolate chips or your preferred mix-ins.
  5. Chill the dough in the refrigerator for about 30 minutes before serving.

Measure your flour correctly to avoid a dry dough. Chill the dough before serving to enhance flavors and make scooping easier. Experiment with various mix-ins for unique flavors.
Dessert, Snack
American, Greek
Dessert Snack, Greek Yogurt Cookie Dough, Healthy Cookie Dough, Homemade Cookie Dough, Protein Snack

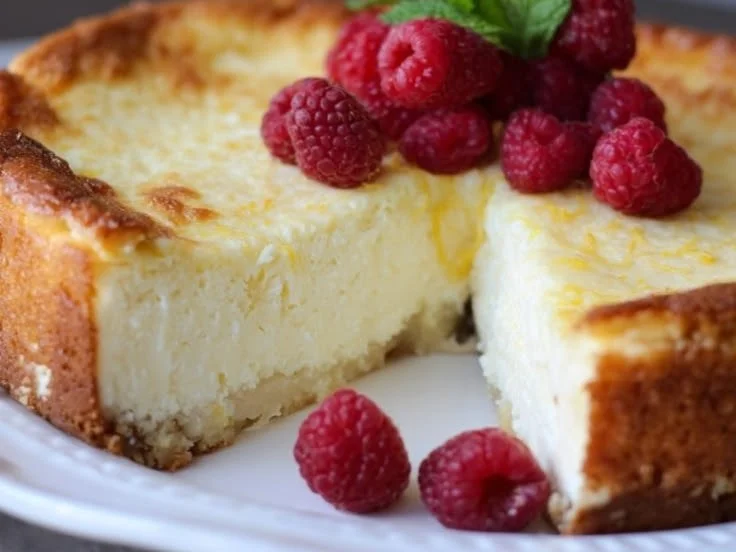
High Protein Cheesecake

High protein cheesecake with a creamy texture and healthy toppings

High Protein Cheesecake

There’s something delightful about indulging in a sweet treat that also offers a healthy boost, and that’s exactly what the High Protein Cheesecake brings to the table. This dessert is not just any cheesecake; it’s a perfect blend of creamy texture and rich flavor, all while packing a punch of protein. Whether you’re looking to enjoy a guilt-free dessert or impress friends at a gathering, this cheesecake is sure to please everyone. The taste is so divine that you might just forget it’s healthy, making it a fantastic choice for any occasion. So, grab your apron and get ready to whip up a treat that will have everyone asking for seconds!

How to prepare High Protein Cheesecake

To create this delicious High Protein Cheesecake, you’ll need some simple ingredients and a fun attitude. Here’s how to do it:

  1. Ingredients:

    • 2 cups low-fat cottage cheese
    • 1 cup Greek yogurt
    • 1/2 cup honey or agave syrup
    • 3 eggs
    • 1 tsp vanilla extract
    • 1/2 cup almond flour
    • A pinch of salt
  2. Directions:

    • Preheat your oven to 325°F (160°C).
    • In a blender, combine the cottage cheese and Greek yogurt until smooth.
    • Add the honey, eggs, vanilla extract, almond flour, and salt. Blend until everything is well mixed.
    • Grease a cheesecake pan and pour the blended mixture into it.
    • Bake in the oven for about 35-40 minutes or until the center is set.
    • Let it cool before refrigerating for at least 2 hours.
    • Serve chilled and enjoy!

High Protein Cheesecake

Why You’ll Love High Protein Cheesecake

This High Protein Cheesecake stands out because it satisfies your sweet tooth without compromising your health goals. With high protein content, it’s perfect for muscle recovery or just maintaining a balanced diet. Plus, it’s simple to make, which is a bonus for those with busy schedules. The creamy goodness combined with a slight sweetness makes it the ultimate comfort food that everyone can enjoy. Once you try it, you’ll see why people rave about this dessert!

Tips for success

Here are a few tips to ensure your High Protein Cheesecake turns out perfectly every time:

  • Use Fresh Ingredients: Fresh cottage cheese and Greek yogurt will enhance the taste and texture.
  • Blend Thoroughly: Make sure your mixture is smooth before pouring it into the pan, as this creates a creamier cheesecake.
  • Cooling Time: Allow enough time for the cheesecake to cool completely before refrigerating, as this helps improve the texture.

High Protein Cheesecake

Serving Suggestions

Pair your High Protein Cheesecake with fresh fruit like berries or a drizzle of low-sugar chocolate sauce for an extra treat. You could also top it with chopped nuts or a sprinkle of cinnamon for added flavor. Serve it as a delightful dessert after dinner or as a nutritious snack during the day.

FAQs

Can I substitute the cottage cheese?
Yes, you can use ricotta cheese for a different texture, but cottage cheese is recommended for its high protein content.

How long does the cheesecake last in the fridge?
It should stay fresh for about 4-5 days when stored in an airtight container in the fridge.

Can I freeze High Protein Cheesecake?
Yes, you can freeze it! Just be sure to wrap it tightly to prevent freezer burn, and let it thaw in the refrigerator before serving.

Elevate your dessert game and try making this High Protein Cheesecake; it’s an easy way to enjoy something sweet while staying healthy! If you’re looking for more nutritious options, check out easy high protein breakfast boxes to fuel your day.

High Protein Cheesecake

A creamy and delicious cheesecake packed with protein, perfect for satisfying your sweet tooth while staying healthy.

Cheesecake Base

  • 2 cups low-fat cottage cheese (Use fresh cottage cheese for best taste)
  • 1 cup Greek yogurt (Fresh yogurt enhances texture)
  • 1/2 cup honey or agave syrup (Sweetener of your choice)
  • 3 pcs eggs
  • 1 tsp vanilla extract
  • 1/2 cup almond flour (For a gluten-free option)
  • a pinch salt

Preparation

  1. Preheat your oven to 325°F (160°C).
  2. In a blender, combine the cottage cheese and Greek yogurt until smooth.
  3. Add the honey, eggs, vanilla extract, almond flour, and salt. Blend until everything is well mixed.
  4. Grease a cheesecake pan and pour the blended mixture into it.
  5. Bake in the oven for about 35-40 minutes or until the center is set.
  6. Let it cool before refrigerating for at least 2 hours.

Serving

  1. Serve chilled and enjoy!

To ensure perfect results, use fresh ingredients and blend thoroughly for a smooth mixture. Allow enough cooling time before refrigerating to improve texture.

Dessert, Snack
American
Easy Cheesecake Recipe, Healthy Dessert, High Protein Cheesecake, Low Fat Cheesecake, Protein Packed Dessert

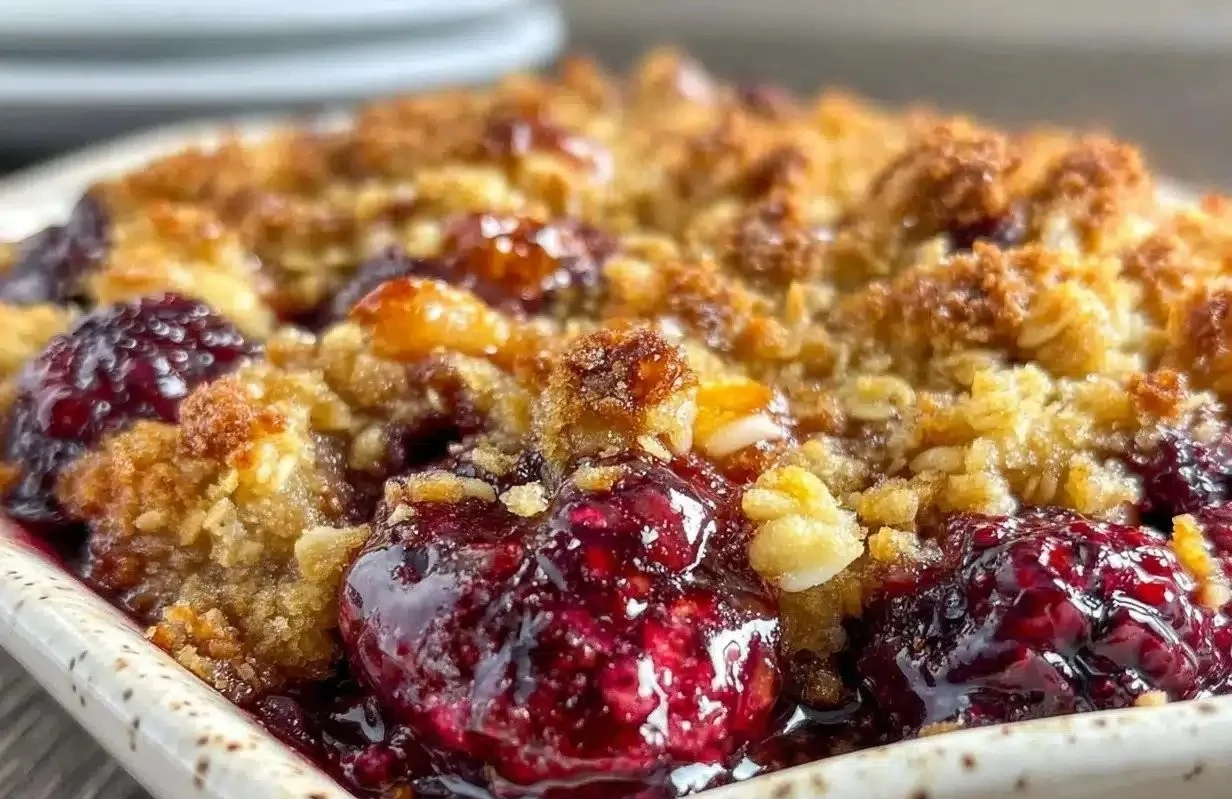
Mulberry Crisp with Easy Crunchy Oat

Delicious mulberry crisp dessert topped with crunchy oat layer

If you’re looking for a dessert that warms your heart and fills your home with a delightful aroma, look no further than this cozy mulberry crisp recipe. This dish is perfect for family gatherings, comforting weeknight dinners, or just a sweet treat after a long day. With its rich, juicy mulberries topped with a crunchy oat topping, it’s a dessert that is sure to please everyone. The combination of sweet fruit and a buttery, crunchy topping creates a satisfying flavor and texture that you’ll want to make again and again. Plus, it’s incredibly easy to put together, making it a foolproof recipe for bakers of all skill levels. Get ready to enjoy a cozy evening with a warm bowl of this delectable mulberry crisp!

How to prepare Cozy Mulberry Crisp

  1. Gather your ingredients: You will need fresh mulberries, rolled oats, flour, brown sugar, cinnamon, butter, and a pinch of salt.
  2. Preheat the oven: Set your oven to 350°F (175°C) to warm up while you prepare the filling and topping.
  3. Prepare the fruit filling: In a mixing bowl, combine the mulberries, a little sugar, and some cinnamon. Toss until the mulberries are well-coated.
  4. Make the topping: In another bowl, mix rolled oats, flour, brown sugar, cinnamon, and salt. Melting butter, mix it into the dry mixture until crumbly.
  5. Assemble the crisp: Spread the mulberry mixture in a baking dish and sprinkle the oat mixture on top.
  6. Bake: Place the dish in the oven and bake for about 30-35 minutes, or until the top is golden brown and the filling is bubbling.
  7. Serve warm: Enjoy your cozy mulberry crisp on its own or with a scoop of vanilla ice cream.

Cozy Mulberry Crisp Recipe with Easy Crunchy Oat Topping You’ll Love

Why You’ll Love Cozy Mulberry Crisp

There are many reasons to fall in love with this cozy mulberry crisp recipe. First, it highlights the delightful flavor of mulberries, which are sweet and slightly tart. Each bite is a burst of juicy goodness! The crunchy oat topping provides a perfect contrast, creating a delightful texture that is both comforting and satisfying. Additionally, the recipe is flexible. You can substitute in other berries if mulberries are not available, which is great for year-round baking. This recipe is not just a crowd-pleaser, it’s also a great way to connect with family and friends over comfort food.

Tips for success

  • Make sure your mulberries are fresh and ripe for the best flavor.
  • If mulberries are difficult to find, you can use other berries or even a mix of different fruits.
  • Adjust the sweetness of the filling according to your taste preference.
  • To ensure the topping gets that perfect crunchy texture, don’t skip the melting of the butter!

Cozy Mulberry Crisp Recipe with Easy Crunchy Oat Topping You’ll Love

Serving Suggestions

Enjoy your mulberry crisp with a scoop of vanilla ice cream or a dollop of whipped cream on top. It can also be served warm with a drizzle of cream, making it a delightful dessert for any occasion. Pair it with a steaming cup of tea or coffee to complete the cozy experience.

FAQs

Can I use frozen mulberries for this recipe?

Yes, frozen mulberries work well, but you may want to increase the baking time slightly to ensure they are fully heated through.

How long does the mulberry crisp last?

It can be stored in the refrigerator for up to three days. Just reheat it in the oven or microwave before serving.

Can I make this recipe ahead of time?

Absolutely! You can prepare the filling and topping separately, then store them in the fridge. Assemble and bake when you are ready to serve.

By making this cozy mulberry crisp, you’re not just creating a delicious dessert, you’re also making memories that might just become a family tradition. Happy baking!

Cozy Mulberry Crisp

A delightful dessert featuring sweet mulberries topped with a crunchy oat topping, perfect for any occasion.

For the Fruit Filling

  • 4 cups fresh mulberries (Use ripe, fresh mulberries for best flavor.)
  • 1/4 cup sugar (Adjust sweetness according to taste.)
  • 1 teaspoon cinnamon

For the Oat Topping

  • 1 cup rolled oats
  • 1/2 cup flour (All-purpose flour works well.)
  • 1/2 cup brown sugar
  • 1 teaspoon cinnamon
  • 1/4 teaspoon salt
  • 1/2 cup butter (Melted for mixing.)

Preparation

  1. Gather your ingredients: fresh mulberries, rolled oats, flour, brown sugar, cinnamon, butter, and a pinch of salt.
  2. Preheat the oven to 350°F (175°C).
  3. In a mixing bowl, combine the mulberries, sugar, and cinnamon. Toss until well-coated.
  4. In another bowl, mix rolled oats, flour, brown sugar, cinnamon, and salt. Add melted butter and mix until crumbly.

Assembly and Baking

  1. Spread the mulberry mixture into a baking dish.
  2. Sprinkle the oat mixture on top.
  3. Bake for about 30-35 minutes, or until the top is golden brown and the filling is bubbling.

Serving

  1. Serve warm on its own or with a scoop of vanilla ice cream.

Make sure your mulberries are fresh and ripe. You can substitute other berries if mulberries are not available. Adjust sweetness of the filling to your taste. Don’t skip melting the butter for the topping to achieve a crunchy texture.

Dessert
American
Berry Dessert, cozy dessert, Crisp Recipe, dessert recipe, Mulberry Crisp

Irresistible Flourless Lemon Pistachio Cake (Easy Gluten-Free Dessert)

Delicious Flourless Lemon Pistachio Cake displayed on a rustic wooden table

There are moments when I’m in the mood for a dessert that feels rich and special but doesn’t require much time or effort. That’s exactly what this Flourless Pistachio Cake delivers. It’s a naturally gluten-free treat that brings out the bold, nutty flavor of pistachios while perfectly satisfying a sweet craving. With how busy everyday life can be especially balancing work and family having a recipe this simple is a game-changer. It’s quick to prepare, full of flavor, and ready in under an hour. A little indulgence, made easy, with no gluten in sight.

How to prepare Irresistible Flourless Lemon Pistachio Cake

To make this delightful cake, you will need the following ingredients:

  • 1 cup of ground pistachios
  • 1 cup of sugar
  • 1/4 cup of lemon juice
  • Zest of 1 lemon
  • 4 large eggs
  • 1/2 teaspoon of salt
  • 1/2 teaspoon of baking powder
  • Powdered sugar for dusting (optional)

Directions:

  1. Preheat your oven to 350°F (175°C). Lightly grease an 8-inch round cake pan and line the bottom with parchment paper.
  2. In a mixing bowl, combine ground pistachios and sugar. Mix well to combine.
  3. Add fresh lemon juice, lemon zest, and salt to the mixture. Stir until well blended.
  4. In a separate bowl, beat the eggs until they are frothy, then gradually add them to the pistachio mixture. Mix until fully incorporated.
  5. Gently fold in baking powder until combined.
  6. Pour the batter into your prepared cake pan. Bake for 25 to 30 minutes or until a toothpick inserted in the center comes out clean.
  7. Allow the cake to cool in the pan for about 10 minutes, then carefully invert onto a wire rack to cool completely.
  8. Once cooled, dust the cake with powdered sugar if desired and slice into pieces to serve.

Irresistible Flourless Lemon Pistachio Cake — Easy Gluten-Free Dessert

Why You’ll Love Irresistible Flourless Lemon Pistachio Cake

This cake is perfect for anyone on a gluten-free diet because it uses pistachios instead of flour, making it a delicious and healthy option. The fresh lemon juice and zest give it a wonderful bright flavor that contrasts beautifully with the nuttiness of the pistachios. Plus, it’s easy to make, so you don’t have to be a baking expert to create a lovely dessert.

Tips for Success

  1. Use fresh lemons for the best flavor. The zest and juice are essential for that vibrant lemon taste.
  2. Make sure to grind your pistachios very fine to get a smooth texture in the cake.
  3. Don’t overbake; keep an eye on it as ovens can vary in temperature. The cake should be moist, not dry.
  4. For an added touch, pair it with a dollop of whipped cream or ice cream.

Serving Suggestions

Serve your Flourless Lemon Pistachio Cake on its own or alongside some fresh berries for added color and flavor. A scoop of lemon sorbet can bring an extra zing to this delightful dessert. You can also garnish with mint leaves for a fresh touch.

FAQs

Can I substitute the pistachios with another nut?

Yes, you can use almonds, walnuts, or hazelnuts, but be mindful that it will change the flavor of the cake.

How do I store leftover cake?

Store any leftover cake in an airtight container in the refrigerator for up to three days.

Can I make this cake in advance?

Absolutely! You can prepare it a day before serving. Just be sure to keep it refrigerated and bring it to room temperature before serving.

Irresistible Flourless Lemon Pistachio Cake — Easy Gluten-Free Dessert

This Irresistible Flourless Lemon Pistachio Cake is a fantastic dessert choice that anyone can enjoy, whether they are gluten-free or not. Its bright flavors and delightful texture make it a showstopper at any gathering. To explore more about this delicious recipe, check out this Irresistible Flourless Lemon Pistachio Cake and get ready to impress your friends with your baking skills!

Flourless Lemon Pistachio Cake

A naturally gluten-free cake that highlights the bold flavor of pistachios, perfectly complemented by fresh lemon juice and zest, easy to prepare in under an hour.

Main Ingredients

  • 1 cup ground pistachios (Use very fine ground pistachios for a smooth texture.)
  • 1 cup sugar
  • 1/4 cup lemon juice (Use fresh juice for best flavor.)
  • 1 zest of 1 lemon (Essential for vibrant lemon taste.)
  • 4 large eggs (Beaten until frothy.)
  • 1/2 teaspoon salt
  • 1/2 teaspoon baking powder
  • powdered sugar for dusting (Optional for serving.)

Preparation

  1. Preheat your oven to 350°F (175°C). Lightly grease an 8-inch round cake pan and line the bottom with parchment paper.
  2. In a mixing bowl, combine ground pistachios and sugar. Mix well to combine.
  3. Add fresh lemon juice, lemon zest, and salt to the mixture. Stir until well blended.
  4. In a separate bowl, beat the eggs until they are frothy, then gradually add them to the pistachio mixture. Mix until fully incorporated.
  5. Gently fold in baking powder until combined.
  6. Pour the batter into your prepared cake pan.
  7. Bake for 25 to 30 minutes or until a toothpick inserted in the center comes out clean.
  8. Allow the cake to cool in the pan for about 10 minutes, then carefully invert onto a wire rack to cool completely.
  9. Once cooled, dust the cake with powdered sugar if desired and slice into pieces to serve.

This cake is perfect for gluten-free diets and serves well with whipped cream or ice cream. For added flavors, consider pairing it with berries or lemon sorbet.

Baking, Dessert
American, Gluten-Free
Easy Baking, Flourless Cake, Gluten-free dessert, Lemon Dessert, Pistachio Cake