Vegan Baked Ziti

Vegan baked ziti served in a bowl with fresh basil and melted cheese alternatives

Everyone loves a hearty meal that warms the soul, and Vegan Baked Ziti fits the bill perfectly. This dish is a delightful blend of pasta, rich tomato sauce, and creamy vegan cheese, making it a satisfying comfort food that everyone can enjoy. Whether you are a longtime vegan or just looking for a delicious meal that everyone in the family can eat, Vegan Baked Ziti is sure to be a new favorite.

The layers of flavor in this baked ziti will tantalize your taste buds. Each bite brings the comforting familiar tastes of home-cooked Italian fare without any animal products. It’s a crowd-pleaser guaranteed to impress even the pickiest eaters. You may even find yourself wanting seconds (or thirds)! So, let’s dive into the deliciousness and discover why you’ll love this Vegan Baked Ziti.

How to prepare Vegan Baked Ziti

Making Vegan Baked Ziti at home is simple and straightforward. Here’s what you need and how to do it:

Ingredients:

  • 12 ounces of ziti pasta
  • 2 cups of marinara sauce
  • 1 cup of vegan ricotta cheese
  • 1 cup of vegan mozzarella cheese, shredded
  • 1 teaspoon of garlic powder
  • 1 teaspoon of dried basil
  • Salt and pepper to taste
  • Fresh basil for garnish (optional)

Directions:

  1. Preheat your oven to 375°F (190°C).
  2. Cook the ziti according to package instructions until al dente. Drain and set aside.
  3. In a large bowl, mix the cooked ziti, marinara sauce, garlic powder, dried basil, salt, and pepper.
  4. In a baking dish, spread half of the ziti mixture, then layer half of the vegan ricotta cheese and half of the vegan mozzarella cheese.
  5. Add the remaining ziti mixture on top, followed by the remaining vegan ricotta and mozzarella cheese.
  6. Cover the dish with aluminum foil and bake for 25 minutes.
  7. Remove the foil and bake for an additional 15 minutes, until the cheese is melted and bubbly.
  8. Allow to cool for a few minutes, then serve with fresh basil on top if desired.

Vegan Baked Ziti: 7 Reasons You'll Love This Comfort Food

Why You’ll Love Vegan Baked Ziti

  1. Creamy and Cheesy: The vegan ricotta and mozzarella provide a creamy texture that mimics traditional cheese without using any dairy.
  2. Quick and Easy: This recipe is simple enough for a weeknight dinner, making it convenient for busy families.
  3. Nutritious Ingredients: Packed with pasta and tomato sauce, it offers a good balance of carbs and vitamins.
  4. Customizable: Feel free to add your favorite vegetables, such as spinach or mushrooms, for extra nutrition and taste.
  5. Budget-Friendly: Vegan ingredients are often less expensive and can be a great way to save money while preparing a hearty meal.
  6. Crowd-Pleasing: Whether it’s a family dinner or a gathering with friends, this dish satisfies everyone.
  7. Leftover Friendly: Baked ziti is even better the next day. Enjoy the flavors as they meld together overnight.

Tips for success

  • Make sure to cook the pasta just until al dente since it will continue cooking in the oven.
  • Feel free to swap out the vegan cheeses for your favorite brand or use homemade versions if you have time.
  • Adding spices like red pepper flakes can give the dish a nice kick if you’re feeling adventurous.

Vegan Baked Ziti: 7 Reasons You'll Love This Comfort Food

Serving Suggestions

Vegan Baked Ziti pairs perfectly with a simple side salad or some garlic bread. For a comforting touch, serve it with a glass of red wine or your favorite non-alcoholic beverage.

FAQs

Can I use gluten-free pasta?

Yes, feel free to use gluten-free ziti or any pasta shape that you prefer.

How long do leftovers last?

Store leftover baked ziti in an airtight container in the fridge for up to 4 days.

Can I freeze Vegan Baked Ziti?

Absolutely! You can freeze it before baking. Just defrost and bake when you’re ready to enjoy it.

With all these benefits, it’s clear that Vegan Baked Ziti is not just a meal, but a comforting experience. So gather your ingredients and get ready to make this delectable dish that everyone will love!

Vegan Baked Ziti

A hearty and delicious meal featuring layers of pasta, marinara sauce, and creamy vegan cheese, perfect for families and gatherings.

Main ingredients

  • 12 ounces ziti pasta
  • 2 cups marinara sauce
  • 1 cup vegan ricotta cheese
  • 1 cup vegan mozzarella cheese, shredded
  • 1 teaspoon garlic powder
  • 1 teaspoon dried basil
  • to taste Salt and pepper
  • optional Fresh basil for garnish

Preparation

  1. Preheat your oven to 375°F (190°C).
  2. Cook the ziti according to package instructions until al dente. Drain and set aside.
  3. In a large bowl, mix the cooked ziti, marinara sauce, garlic powder, dried basil, salt, and pepper.

Assembly and Baking

  1. In a baking dish, spread half of the ziti mixture, then layer half of the vegan ricotta cheese and half of the vegan mozzarella cheese.
  2. Add the remaining ziti mixture on top, followed by the remaining vegan ricotta and mozzarella cheese.
  3. Cover the dish with aluminum foil and bake for 25 minutes.
  4. Remove the foil and bake for an additional 15 minutes, until the cheese is melted and bubbly.
  5. Allow to cool for a few minutes, then serve with fresh basil on top if desired.

Make sure to cook the pasta just until al dente since it will continue cooking in the oven. Feel free to swap out the vegan cheeses for your favorite brand or use homemade versions if you have time. Adding spices like red pepper flakes can give the dish a nice kick if you’re feeling adventurous.
Dinner, Main Course
Italian, Vegan
Comfort Food, Easy Vegan Dinner, Family Meal, Pasta Recipe, Vegan Baked Ziti

Sticky Fig Pecan Cake with Orange Zest Glaze

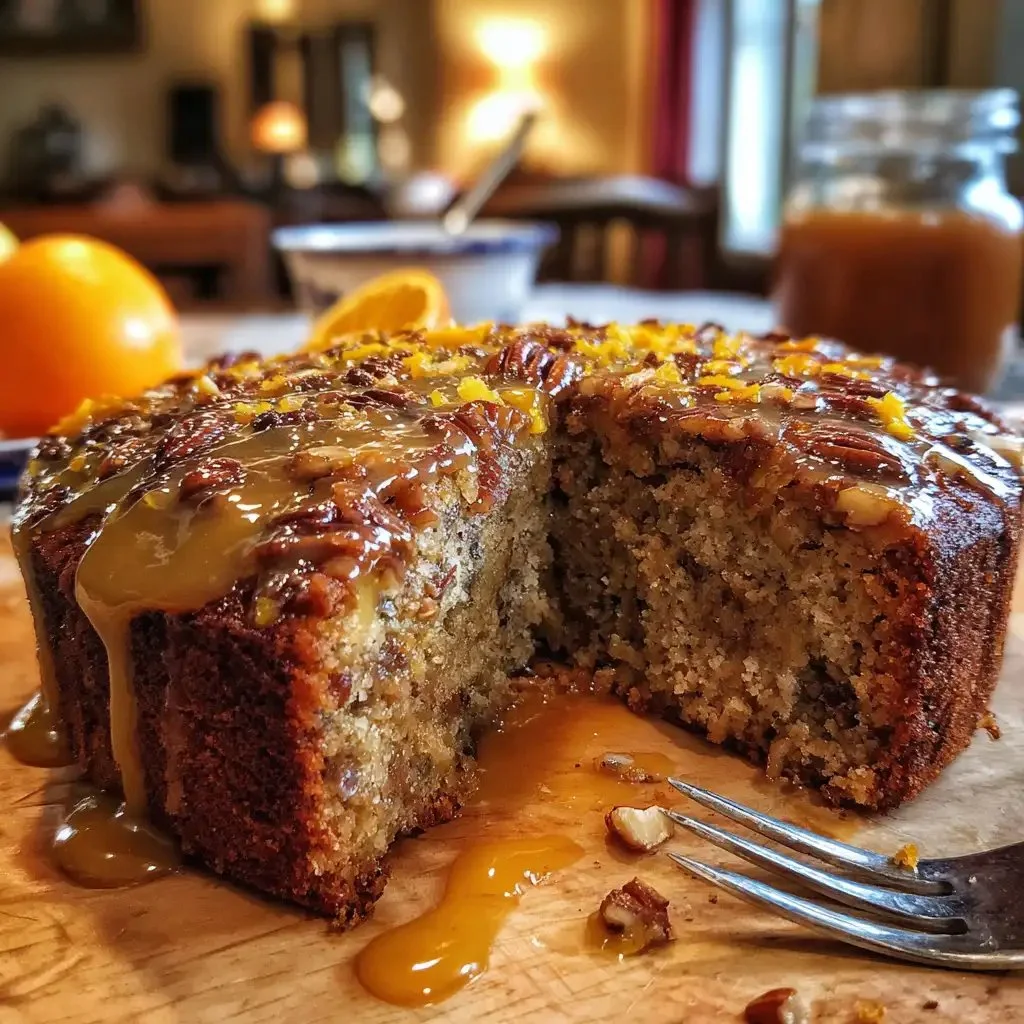
Sticky Fig Pecan Cake topped with a bright orange zest glaze.

This Sticky Fig Pecan Cake with Orange Zest Glaze is the perfect blend of flavors that will make your taste buds dance with joy. The rich sweetness of ripe figs pairs beautifully with the crunch of pecans, creating a delightful texture that everyone will love. Topped with a zesty orange glaze, this cake adds a fresh and vibrant twist that enhances its appeal. It’s a crowd-pleaser, perfect for gatherings or just a treat for yourself. Trust me, once you take a bite, you’ll wonder how you ever lived without it!

How to prepare Fig Pecan Cake with Orange Zest Glaze

To get started, gather your ingredients and follow these simple steps to make this delightful cake.

Sticky Fig Pecan Cake with Orange Zest Glaze

Ingredients

  • 1 cup chopped figs
  • 1 cup chopped pecans
  • 1 cup all-purpose flour
  • 1 cup sugar
  • 1/2 cup butter, softened
  • 2 eggs
  • 1 teaspoon baking powder
  • 1 teaspoon baking soda
  • 1/2 teaspoon salt
  • Zest of 1 orange
  • 1/4 cup orange juice

Directions

  1. Preheat your oven to 350°F (175°C). Grease a 9-inch round cake pan.
  2. In a bowl, cream together the butter and sugar until light and fluffy.
  3. Add eggs one at a time, mixing well after each addition.
  4. In another bowl, whisk together flour, baking powder, baking soda, and salt.
  5. Gradually add the dry ingredients to the wet mixture, alternating with the orange juice.
  6. Stir in the chopped figs, pecans, and orange zest until evenly combined.
  7. Pour the batter into the prepared pan and bake for about 30 to 35 minutes, or until a toothpick comes out clean.
  8. Allow the cake to cool before adding the orange glaze.

Orange Zest Glaze

  1. In a small bowl, mix 1 cup of powdered sugar with the zest of one orange and enough orange juice to create a pourable consistency.
  2. Drizzle the glaze over the cooled cake.

Sticky Fig Pecan Cake with Orange Zest Glaze

Why You’ll Love Fig Pecan Cake with Orange Zest Glaze

You’ll fall in love with this cake for its incredible taste, moist texture, and the way it fills your home with a wonderful aroma while baking. The figs bring a unique sweetness, while the pecans add a satisfying crunch. And who can resist a sweet orange glaze to tie it all together? This cake makes a perfect dessert for any occasion, such as birthdays, potlucks, or simply because you deserve a treat.

Tips for success

  • Make sure your figs are ripe for the best flavor. Dried figs work well too, just chop them into smaller pieces.
  • Toasting the pecans slightly can enhance their flavor.
  • Allow the cake to cool completely before glazing for clean, beautiful drips.

Serving Suggestions

Enjoy this cake warm or at room temperature. It pairs perfectly with a cup of tea or coffee, making it a wonderful afternoon treat. You can also serve it with a scoop of vanilla ice cream for an extra special dessert!

FAQs

Can I use different nuts instead of pecans?

Yes, walnuts or almonds can be great substitutes for pecans in this recipe.

How should I store the Sticky Fig Pecan Cake?

Store it in an airtight container at room temperature for a couple of days. For longer storage, you can refrigerate it.

Can I make this cake in advance?

Absolutely! This cake can be made a day ahead, and the flavors will only improve. Just remember to add the glaze just before serving.

Now that you have all the information, it’s time to roll up your sleeves and get baking! Enjoy creating this delightful Sticky Fig Pecan Cake with Orange Zest Glaze that everyone will be raving about! If you’re also interested in trying out another delicious recipe, check out this fantastic Carrot Date Cake with Honey Lemon Glaze.

Fig Pecan Cake with Orange Zest Glaze

A delightful Sticky Fig Pecan Cake topped with a zesty orange glaze, balancing rich flavors and textures, perfect for any occasion.

Cake Ingredients

  • 1 cup chopped figs
  • 1 cup chopped pecans (Toasting enhances flavor.)
  • 1 cup all-purpose flour
  • 1 cup sugar
  • 1/2 cup butter, softened
  • 2 pieces eggs
  • 1 teaspoon baking powder
  • 1 teaspoon baking soda
  • 1/2 teaspoon salt
  • zest of 1 orange
  • 1/4 cup orange juice

Orange Zest Glaze

  • 1 cup powdered sugar
  • zest of 1 orange
  • to taste as needed orange juice (Add enough to create a pourable consistency.)

Preparation

  1. Preheat your oven to 350°F (175°C). Grease a 9-inch round cake pan.
  2. In a bowl, cream together the butter and sugar until light and fluffy.
  3. Add eggs one at a time, mixing well after each addition.
  4. In another bowl, whisk together flour, baking powder, baking soda, and salt.
  5. Gradually add the dry ingredients to the wet mixture, alternating with the orange juice.
  6. Stir in the chopped figs, pecans, and orange zest until evenly combined.
  7. Pour the batter into the prepared pan and bake for about 30 to 35 minutes, or until a toothpick comes out clean.
  8. Allow the cake to cool before adding the orange glaze.

Making the Glaze

  1. In a small bowl, mix 1 cup of powdered sugar with the zest of one orange and enough orange juice to create a pourable consistency.
  2. Drizzle the glaze over the cooled cake.

Make sure your figs are ripe for the best flavor. Dried figs can be used, just chop them into smaller pieces. Allow the cake to cool completely before glazing for clean, beautiful drips.

Cake, Dessert
American
Baking, Dessert, Fig Cake, Orange Zest, Pecan Cake

Citrus Herb Turkey Breast

Citrus Herb Turkey Breast garnished with fresh herbs and citrus slices

Citrus Herb Turkey Breast is the kind of dish that instantly brings warmth and joy to any gathering. With its vibrant blend of citrus flavors and fragrant herbs, this turkey breast is not only visually appealing, but it also offers a delightful taste that everyone will love. It’s a fantastic choice for holiday dinners or special occasions, and the aroma alone can make your mouth water. If you’re looking for a way to impress your guests without spending all day in the kitchen, this recipe is a perfect fit. So let’s dive right in and see how you can create this crowd-pleaser in your own home.

How to prepare Citrus Herb Turkey Breast

Getting started is simple. Here’s how to prepare this delicious dish in just a few easy steps.

  1. Preheat your oven to 375°F (190°C).
  2. In a bowl, mix together your choice of chopped fresh herbs like rosemary, thyme, and parsley. Add some zesty lemon juice and orange juice for that citrus punch.
  3. Rub this flavorful mixture all over the turkey breast. Don’t forget to season it generously with salt and pepper!
  4. Place the turkey breast in a roasting pan and cover it loosely with foil. This will help keep it juicy.
  5. Roast the turkey in the oven for about 1.5 hours, or until it reaches an internal temperature of 165°F (74°C).
  6. Remove the foil for the last 30 minutes to allow the skin to get nice and crispy.
  7. Let the turkey rest for 10 to 15 minutes before slicing.

Citrus Herb Turkey Breast

This Citrus Herb Turkey Breast is not just about taste; it’s about creating a delightful experience for you and your loved ones.

Why You’ll Love Citrus Herb Turkey Breast

One of the standout features of Citrus Herb Turkey Breast is its versatility. The fresh, tangy notes of citrus combined with the earthy herbs make it suitable for any occasion, from family dinners to festive gatherings. This dish brings a burst of flavor that can make any meal feel like a celebration. Plus, it’s simple to prepare, which means you can spend less time cooking and more time enjoying your guests. If you love turkey with a twist, this recipe is definitely for you.

Tips for success

  • Make sure to use fresh herbs for the best flavor.
  • If you want extra juiciness, consider brining the turkey breast overnight.
  • Don’t skip the resting time, as it allows the juices to redistribute for a moist meat.
  • Try serving it with flavorful sides, like roasted vegetables or a light salad.

Citrus Herb Turkey Breast

Serving Suggestions

Citrus Herb Turkey Breast can shine on its own or pair beautifully with various sides. Consider serving it alongside creamy mashed potatoes, roasted sweet potatoes, or a sparkling cranberry sauce. A fresh salad with citrus vinaigrette can also complement the flavors nicely. If you want to elevate the meal, some fluffy dinner rolls on the side are always a hit.

FAQs

Q: How long should I cook the turkey breast?

A: Roast the turkey breast for about 1.5 hours, ensuring it reaches an internal temperature of 165°F (74°C).

Q: Can I use dried herbs instead of fresh?

A: Yes, you can use dried herbs, but fresh herbs will give a brighter flavor. Adjust the quantity to about one-third of the fresh amount when using dried.

Q: What can I do with leftovers?

A: Leftover turkey can be used in sandwiches, salads, or even in a comforting turkey soup. Get creative with how you enjoy it!

With just a bit of preparation, you can create a delicious Citrus Herb Turkey Breast that will surely impress everyone at your table. Happy cooking!

Citrus Herb Turkey Breast

A flavorful and visually appealing turkey breast infused with citrus and herbs, perfect for holiday dinners and special occasions.

Herb and Citrus Mixture

  • 1 cup Chopped fresh herbs (rosemary, thyme, parsley) (Use a mix of your favorite fresh herbs.)
  • 1 cup Lemon juice (Freshly squeezed for best flavor.)
  • 1 cup Orange juice (Freshly squeezed for best flavor.)

Turkey

  • 1 piece Turkey breast (Ensure it’s fully thawed before preparation.)
  • to taste Salt (Season generously.)
  • to taste Pepper (Season generously.)

Preparation

  1. Preheat your oven to 375°F (190°C).
  2. In a bowl, mix together chopped fresh herbs, lemon juice, and orange juice.
  3. Rub this mixture all over the turkey breast and season it generously with salt and pepper.

Cooking

  1. Place the turkey breast in a roasting pan and cover it loosely with foil.
  2. Roast the turkey for about 1.5 hours, until it reaches an internal temperature of 165°F (74°C).
  3. Remove the foil for the last 30 minutes to allow the skin to become crispy.

Resting

  1. Let the turkey rest for 10 to 15 minutes before slicing.

Use fresh herbs for the best flavor and consider brining the turkey overnight for extra juiciness. Don’t skip the resting time to allow juices to redistribute.

Dinner, Main Course
American, Holiday
Citrus Herb Turkey, Easy Turkey Recipe, Herb-Infused Turkey, Holiday Turkey, Turkey Breast Recipe

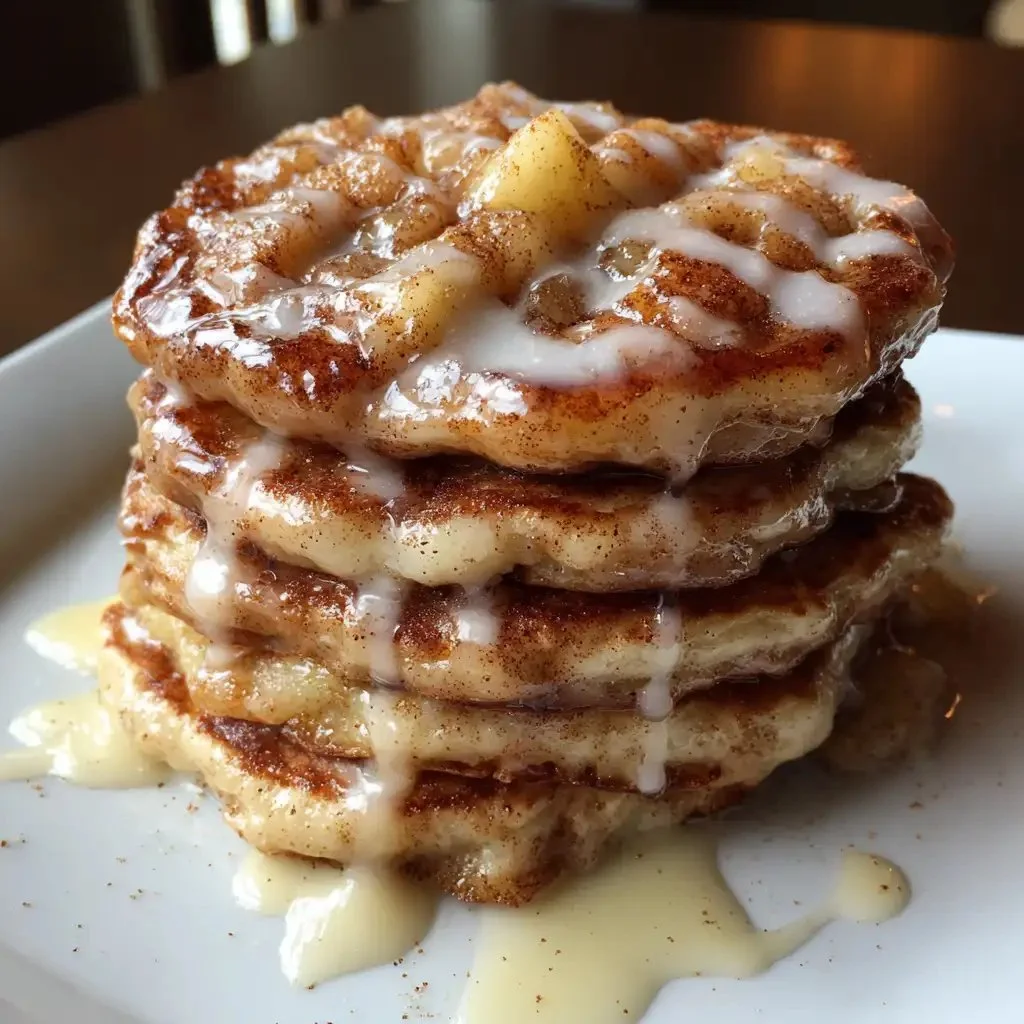
Apple Fritter Pancakes Recipe

Delicious stack of apple fritter pancakes topped with syrup and apples

Who doesn’t love a breakfast that feels like a warm hug? Apple Fritter Pancakes are a delightful mix of flavors that will make your mornings feel special. Imagine waking up to fluffy pancakes filled with tender apples, a hint of cinnamon, and a sweet glaze drizzle. This recipe is a crowd-pleaser, perfect for family brunches or simply treating yourself on a relaxing weekend. The blend of classic apple fritters and pancakes creates a dish you’ll crave time and again. Get ready to whip up these delicious pancakes and enjoy a mouthwatering breakfast experience!

How to prepare Apple Fritter Pancakes

To start making these tasty pancakes, gather your ingredients. You will need:

  • 1 cup all-purpose flour
  • 2 tablespoons sugar
  • 1 tablespoon baking powder
  • 1/2 teaspoon cinnamon
  • 1/4 teaspoon salt
  • 1 large egg
  • 1 cup milk
  • 1 teaspoon vanilla extract
  • 1 cup diced apples (preferably Granny Smith)
  • 1/4 cup chopped nuts (optional)
  • For the glaze: 1 cup powdered sugar, 2 tablespoons milk, and a pinch of vanilla extract
  1. In a bowl, mix together the flour, sugar, baking powder, cinnamon, and salt.
  2. In another bowl, whisk the egg, then add milk and vanilla extract.
  3. Combine the wet and dry ingredients until just mixed, then gently fold in the diced apples and nuts.
  4. Heat a non-stick skillet over medium heat. Pour batter onto the skillet, forming pancakes and cook until bubbles form, then flip and cook until golden brown.
  5. For the glaze, mix the powdered sugar with milk and vanilla until smooth, then drizzle over the finished pancakes before serving.

Apple Fritter Pancakes Recipe

Why You’ll Love Apple Fritter Pancakes

Apple Fritter Pancakes combine the best flavors of traditional apple fritters with the fluffy, comforting feel of pancakes. Each bite is sweet, warm, and slightly spiced, making them an irresistible treat. They’re perfect for those Sunday mornings when you want something special, but they’re also quick enough for busy weekdays. Plus, if you’re a fan of apple desserts, you’ll fall in love with how easy and satisfying these pancakes are.

Tips for Success

To make the best Apple Fritter Pancakes, here are a few tips:

  • Choose the right apples: Granny Smith apples add a nice tartness that balances the sweetness.
  • Don’t overmix the batter: Mix just until combined, or your pancakes may become tough.
  • Cook over medium heat: Too hot, and the outside will burn before the inside cooks through, so keep it moderate.
  • Experiment with add-ins: Consider adding nuts or dried fruits for extra flavor.

Apple Fritter Pancakes Recipe

Serving Suggestions

These delightful pancakes are great on their own, but you can elevate the experience with a few serving suggestions:

  • A dollop of whipped cream or a scoop of vanilla ice cream makes each bite even more indulgent.
  • Serve them with additional warm apple slices sprinkled with cinnamon for a delicious topping.
  • Pair them with crispy bacon or sausage for a sweet-savory breakfast.

FAQs

Can I make the batter ahead of time?

Yes, you can prepare the batter and store it in the refrigerator for up to 24 hours. Just give it a gentle stir before using.

Can I freeze leftover pancakes?

Absolutely! Cooked pancakes can be frozen for up to 2 months. Just reheat them in the toaster or microwave for a quick breakfast.

How can I make these pancakes gluten-free?

You can substitute all-purpose flour with a gluten-free blend, ensuring the other ingredients are also gluten-free.

Dive into this Apple Fritter Pancakes recipe today, and let the delicious flavors transport you to a cozy breakfast table!

Apple Fritter Pancakes

Apple Fritter Pancakes are fluffy pancakes filled with tender apples and a hint of cinnamon, topped with a sweet glaze, making for a delightful breakfast.

Pancake Ingredients

  • 1 cup all-purpose flour
  • 2 tablespoons sugar
  • 1 tablespoon baking powder
  • 1/2 teaspoon cinnamon
  • 1/4 teaspoon salt
  • 1 large egg
  • 1 cup milk
  • 1 teaspoon vanilla extract
  • 1 cup diced apples (preferably Granny Smith)
  • 1/4 cup chopped nuts (optional) (Use your choice of nuts.)

Glaze Ingredients

  • 1 cup powdered sugar
  • 2 tablespoons milk
  • a pinch vanilla extract

Preparation

  1. In a bowl, mix together the flour, sugar, baking powder, cinnamon, and salt.
  2. In another bowl, whisk the egg, then add milk and vanilla extract.
  3. Combine the wet and dry ingredients until just mixed, then gently fold in the diced apples and nuts.

Cooking

  1. Heat a non-stick skillet over medium heat.
  2. Pour batter onto the skillet, forming pancakes, and cook until bubbles form, then flip and cook until golden brown.

Glaze Preparation

  1. For the glaze, mix the powdered sugar with milk and vanilla until smooth.
  2. Drizzle the glaze over the finished pancakes before serving.

Choose Granny Smith apples for tartness, avoid overmixing the batter, and cook over medium heat to ensure even cooking. Consider adding nuts or dried fruits for extra flavor.

Breakfast, Brunch
American
Apple Fritter Pancakes, breakfast, easy pancakes, pancakes, recipes

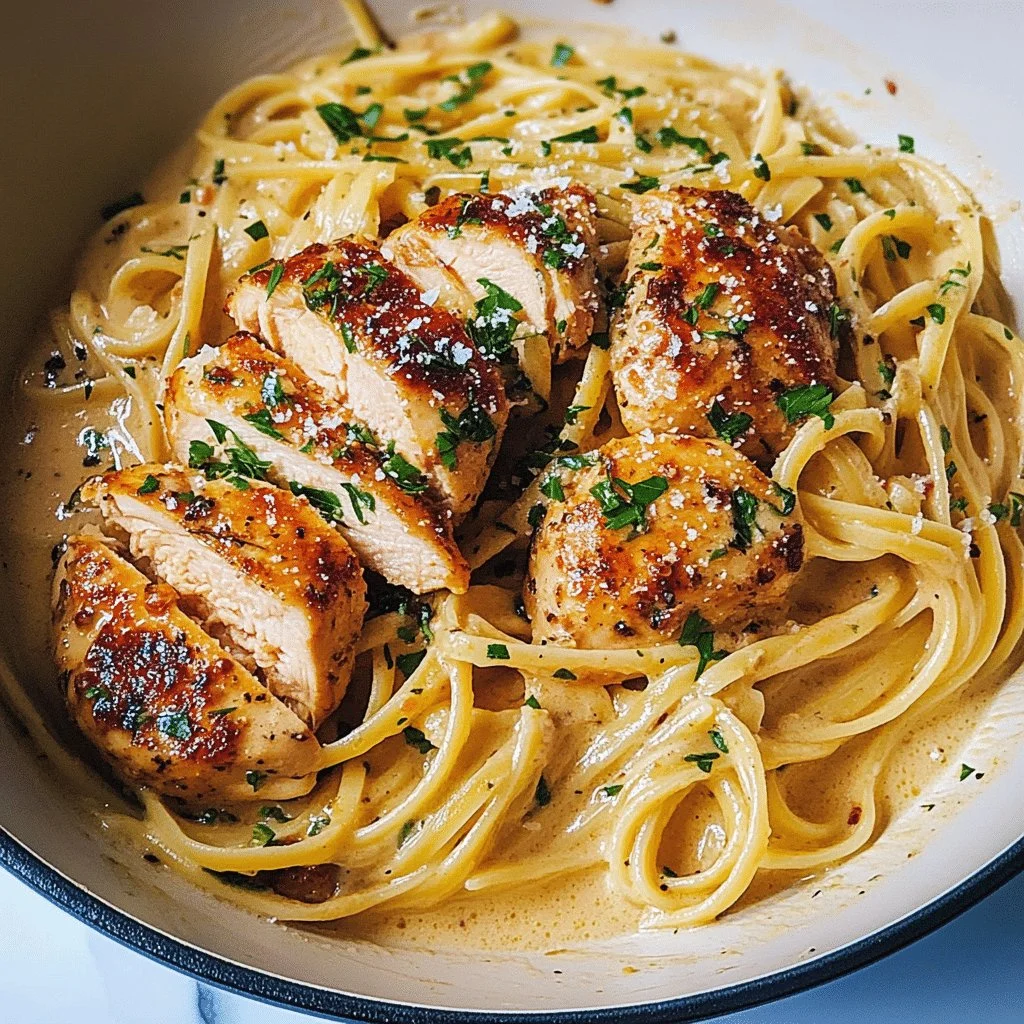
Best-Ever Chicken Carbonara

Delicious Chicken Carbonara served with a creamy sauce and crispy bacon

Imagine a dish that wraps you in warmth, with creamy sauce, tender chicken, and just the right amount of cheese. That’s what Best-Ever Chicken Carbonara brings to your table. This recipe is a real crowd-pleaser that combines the comfort of pasta with the savory goodness of chicken and crispy bacon. Perfect for family dinners or gatherings with friends, this dish is sure to impress everyone. The flavors meld beautifully, creating a satisfying meal that’s hard to resist. Trust me, once you make this, you’ll want to whip it up again and again!

How to prepare Best-Ever Chicken Carbonara

Cooking Best-Ever Chicken Carbonara is easier than you might think. Here’s a simple guide to get you started.

  1. Ingredients:
  • 8 ounces of spaghetti
  • 1 tablespoon olive oil
  • 1 pound chicken breast, cooked and diced
  • 4 slices of bacon, chopped
  • 2 cloves garlic, minced
  • 2 large eggs
  • 1 cup grated Parmesan cheese
  • Salt and pepper to taste
  • Fresh parsley, chopped (for garnish)
  1. Directions:
  2. Boil a large pot of salted water and cook the spaghetti according to package instructions.
  3. In a large skillet, heat the olive oil over medium heat. Add the chopped bacon and cook until crispy.
  4. Stir in the minced garlic and cook for about 1 minute, avoiding browning it.
  5. Add the cooked chicken to the skillet and combine well with the bacon and garlic.
  6. In a bowl, whisk together the eggs and Parmesan cheese.
  7. Once the spaghetti is cooked, reserve some pasta water and drain the rest.
  8. Quickly add the spaghetti to the skillet and remove it from the heat. Pour the egg and cheese mixture over the pasta, mixing everything quickly.
  9. If the sauce is too thick, add reserved pasta water a little at a time until creamy.
  10. Season with salt and pepper, and garnish with fresh parsley.

Best-Ever Chicken Carbonara

Why You’ll Love Best-Ever Chicken Carbonara

You’ll fall in love with Best-Ever Chicken Carbonara for so many reasons! First, it’s quick to make, making it perfect for busy weeknights. The creamy texture and robust flavors will make it a hit with anyone, young or old. Plus, it’s a versatile recipe; you can customize it to suit your taste by adding vegetables or making it a bit spicier. And if you’re looking for more delicious ideas, you might want to check out this air fryer Cajun chicken recipe.

Tips for success

  1. Use fresh ingredients: Fresh garlic and quality cheese can elevate the dish.
  2. Monitor heat: It’s important to mix the egg mixture quickly off the heat. This helps to prevent scrambling the eggs.
  3. Adjust the creaminess: Feel free to adjust the amount of pasta water to get the perfect creamy consistency.
  4. Cook pasta al dente: This keeps it firm and gives the dish a nice bite.

Best-Ever Chicken Carbonara

Serving Suggestions

Serve Best-Ever Chicken Carbonara with a light salad or steamed vegetables for a balanced meal. You can also add a sprinkle of extra Parmesan on top for added flavor. If you want to enjoy it even more, a side of garlic bread can make it a complete feast! This dish pairs wonderfully with a glass of white wine.

FAQs

Can I use different types of pasta?

Absolutely! You can use penne, fettuccine, or any pasta you prefer.

Can I make this dish in advance?

While it’s best enjoyed fresh, you can prepare the chicken and sauce ahead of time, then combine with pasta just before serving.

What if I don’t have bacon?

You can substitute it with pancetta, or even turkey bacon for a healthier option.

Best-Ever Chicken Carbonara is a delightful recipe that promises comfort and joy in every bite. It’s simple enough for anyone to make and delicious enough to become a staple in your kitchen. Enjoy!

Chicken Carbonara

A creamy, comforting pasta dish featuring tender chicken, crispy bacon, and cheesy goodness, perfect for family dinners.

Pasta and Sauce Ingredients

  • 8 ounces spaghetti
  • 1 tablespoon olive oil (For cooking)
  • 1 pound chicken breast, cooked and diced
  • 4 slices bacon, chopped (For crispy texture)
  • 2 cloves garlic, minced (Fresh garlic adds flavor)
  • 2 large eggs (For the creamy sauce)
  • 1 cup grated Parmesan cheese (Add more for serving if desired)
  • Salt and pepper to taste
  • Fresh parsley, chopped (for garnish) (For finishing touches)

Preparation

  1. Boil a large pot of salted water and cook the spaghetti according to package instructions.
  2. In a large skillet, heat the olive oil over medium heat. Add the chopped bacon and cook until crispy.
  3. Stir in the minced garlic and cook for about 1 minute, avoiding browning.
  4. Add the cooked chicken to the skillet and combine well with the bacon and garlic.
  5. In a bowl, whisk together the eggs and Parmesan cheese.

Combining

  1. Once the spaghetti is cooked, reserve some pasta water and drain the rest.
  2. Quickly add the spaghetti to the skillet and remove it from the heat. Pour the egg and cheese mixture over the pasta, mixing quickly.
  3. If the sauce is too thick, add reserved pasta water a little at a time until creamy.
  4. Season with salt and pepper, and garnish with fresh parsley.

Use fresh ingredients for the best flavor. It’s important to mix the egg mixture quickly off the heat to prevent scrambling. Adjust the creaminess by adding pasta water to your liking. Cook pasta al dente for optimal texture.

Dinner, Main Course
Italian
Chicken Carbonara, Comfort Food, Creamy Pasta, Easy Dinner, Pasta

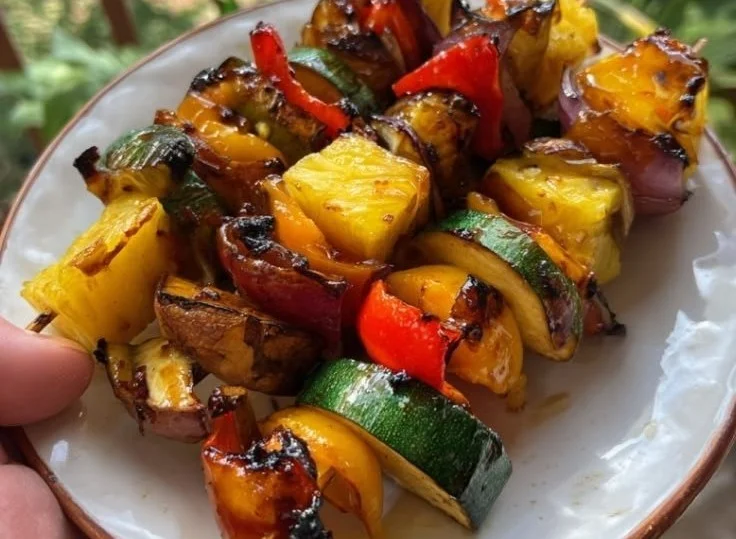
Grilled Vegetable Skewers with Honey-Lime Chili Glaze

Colorful grilled vegetable skewers with honey-lime chili glaze on a plate

Grilled Vegetable Skewers with Honey-Lime Chili Glaze are the perfect dish for every gathering, whether it’s a family barbecue or a picnic with friends. Packed with seasonal veggies charred to perfection, these skewers bring a sweet and spicy twist thanks to the delightful honey-lime chili glaze. Each bite bursts with flavor, making them not just a side but a star on the table. Plus, they are easy to whip up and sure to impress. Who can resist that vibrant color and rich taste? Get ready to make your taste buds dance!

How to Prepare Grilled Vegetable Skewers with Honey-Lime Chili Glaze

  1. Ingredients Needed:
  • Bell peppers (any color), cut into chunks
  • Zucchini, sliced into rounds
  • Red onion, chopped into squares
  • Cherry tomatoes
  • Olive oil
  • Honey
  • Fresh lime juice
  • Chili powder
  • Salt and pepper
  1. Directions:
  2. In a bowl, mix olive oil, honey, lime juice, chili powder, salt, and pepper to create the glaze.
  3. Thread the vegetables onto skewers, grouping them in a colorful manner.
  4. Brush the glaze over the skewers generously.
  5. Preheat the grill over medium-high heat.
  6. Grill the skewers for about 10-15 minutes, turning occasionally, until the veggies are tender and slightly charred.
  7. Serve warm and enjoy!

Grilled Vegetable Skewers with Honey-Lime Chili Glaze

Grilled Vegetable Skewers with Honey-Lime Chili Glaze

Tips for Success

To make the best Grilled Vegetable Skewers, choose fresh and vibrant vegetables for maximum flavor. Soaking wooden skewers in water for 30 minutes before grilling can help prevent them from burning. Feel free to mix and match your favorite vegetables or even add some protein like shrimp or chicken for extra heartiness. For additional ideas, you can check out other delicious grilled recipes, such as irresistible grilled peaches.

Serving Suggestions

These skewers are great on their own, but you can also pair them with a refreshing salad or some grilled bread. Serve them as an appetizer or alongside your favorite main dish at a barbecue. They also make excellent leftovers, perfect for a quick lunch.

FAQs

  1. Can I use different vegetables? Yes, feel free to use any vegetables you love. Asparagus, mushrooms, and eggplant also work well.
  2. Do I need to soak the skewers? If you are using wooden skewers, soaking them in water for 30 minutes helps prevent burning during grilling.
  3. Can I make the glaze in advance? Yes, the honey-lime chili glaze can be prepared a day ahead and stored in the refrigerator until you’re ready to grill.

Get ready to fire up that grill and enjoy these colorful and tasty Grilled Vegetable Skewers with Honey-Lime Chili Glaze! Happy grilling!

Grilled Vegetable Skewers with Honey-Lime Chili Glaze

These vibrant Grilled Vegetable Skewers with a sweet and spicy honey-lime chili glaze are perfect for any gathering, offering delicious flavor and a colorful presentation.

Vegetables

  • 2 each Bell peppers (any color), cut into chunks (Choose a mix of colors for presentation.)
  • 1 each Zucchini, sliced into rounds
  • 1 each Red onion, chopped into squares
  • 1 cup Cherry tomatoes

Glaze

  • 3 tablespoons Olive oil
  • 2 tablespoons Honey
  • 2 tablespoons Fresh lime juice
  • 1 teaspoon Chili powder
  • 1 teaspoon Salt (Adjust to taste.)
  • 1 teaspoon Pepper (Adjust to taste.)

Preparation

  1. In a bowl, mix olive oil, honey, lime juice, chili powder, salt, and pepper to create the glaze.
  2. Thread the vegetables onto skewers, grouping them in a colorful manner.
  3. Brush the glaze over the skewers generously.

Grilling

  1. Preheat the grill over medium-high heat.
  2. Grill the skewers for about 10-15 minutes, turning occasionally, until the veggies are tender and slightly charred.

Serving

  1. Serve warm and enjoy!

To make the best skewers, choose fresh, vibrant vegetables for maximum flavor. Soaking wooden skewers in water for 30 minutes before grilling can help prevent burning. Feel free to mix and match your favorite vegetables or add some protein like shrimp or chicken for extra heartiness.

Appetizer, Side Dish
American, Grilling
Barbecue Recipes, Grilled Vegetable Skewers, Healthy Grill, Honey-Lime Chili Glaze, Vegetable Skewers

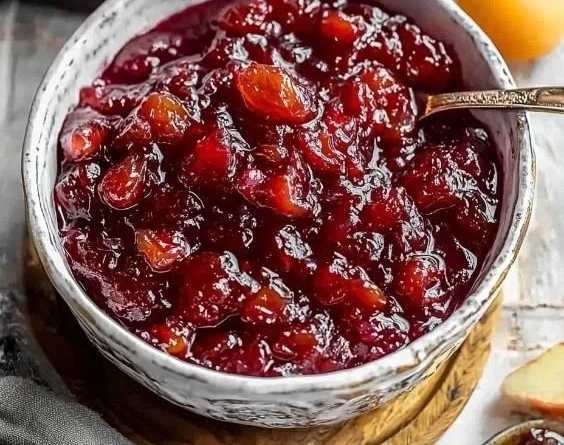
Cranberry Chutney

Homemade cranberry chutney served in a small dish with fresh cranberries.

Cranberry chutney is a delightful mix of sweet, tangy, and spicy flavors that can brighten up any dish. This homemade condiment pairs perfectly with meats, cheeses, or even spreads on sandwiches. It’s not only refreshing but also versatile enough to enhance your holiday meals or everyday dinners. The best part is, it’s easy to make and a definite crowd-pleaser. Get ready to impress your family and friends with this amazing recipe; you’ll always want to have a jar of it in your fridge.

How to prepare Cranberry Chutney

Gather your ingredients and let’s get started on this simple yet delicious cranberry chutney that you’ll fall in love with!

Ingredients

  • 2 cups fresh or frozen cranberries
  • 1 cup sugar
  • 1/2 cup diced onion
  • 1/2 cup apple cider vinegar
  • 1/2 teaspoon ground ginger
  • 1/4 teaspoon ground cinnamon
  • 1/4 teaspoon ground cloves
  • 1/4 teaspoon salt
  • 1/2 cup raisins
  1. In a saucepan over medium heat, combine the cranberries, sugar, onion, apple cider vinegar, ginger, cinnamon, cloves, salt, and raisins.
  2. Bring the mixture to a boil, stirring occasionally.
  3. Once boiling, reduce the heat and let it simmer for about 15-20 minutes, or until the cranberries burst and the mixture thickens.
  4. Remove from heat and cool to room temperature. The chutney will thicken more as it cools.
  5. Transfer the chutney to a jar and refrigerate. It can be served cold or at room temperature.

Cranberry Chutney

Why You’ll Love Cranberry Chutney

You’ll adore cranberry chutney for its bright flavor and versatility. It adds a special touch to roasted turkey, chicken, or ham during the holidays. Plus, it’s fantastic with cheese on crackers for a quick snack or appetizer. The sweet and tangy notes make it a favorite at any gathering, and it’s sure to spark conversations around the table. If you’re looking for a delicious addition to your meals, this is it!

Tips for success

  • Make sure to use fresh cranberries for the best flavor.
  • Adjust the sugar according to your taste; you might want it sweeter or more tart.
  • Add more spices like nutmeg or allspice if you want to experiment with flavors.
  • Don’t skip the cooling step as it helps the chutney thicken perfectly.

Cranberry Chutney

Serving Suggestions

Cranberry chutney is incredibly versatile. Serve it with roasted meats like turkey or pork, or mix it into salads for a burst of flavor. It can also be used as a spread on sandwiches, elevating any turkey or ham lunch to something special. For an appetizer, pair this chutney with cream cheese and crackers for a delightful treat.

For those looking for more ways to enjoy cranberries, you might also find it interesting to check out this refreshing apple cranberry coleslaw.

FAQs

Can I make this cranberry chutney ahead of time?

Absolutely! In fact, cranberry chutney tastes even better when made a day or two in advance, as the flavors have more time to meld.

How long does cranberry chutney last in the fridge?

When stored in an airtight container, cranberry chutney can last up to 2 weeks in the fridge.

Can I freeze cranberry chutney?

Yes, you can freeze cranberry chutney. Just place it in a freezer-safe container, and it should keep for about 3 months. Thaw it in the fridge before serving.

Now that you know how to make this delightful cranberry chutney, it’s time to roll up your sleeves and get cooking!

Cranberry Chutney

This homemade cranberry chutney is a delightful mix of sweet, tangy, and spicy flavors, perfect for enhancing any meal or holiday gathering.

Main ingredients

  • 2 cups fresh or frozen cranberries (Fresh cranberries provide the best flavor.)
  • 1 cup sugar (Adjust according to your taste.)
  • 1/2 cup diced onion (Adds a savory depth to the chutney.)
  • 1/2 cup apple cider vinegar (Provides acidity to balance the sweetness.)
  • 1/2 teaspoon ground ginger (Adds a warm spice flavor.)
  • 1/4 teaspoon ground cinnamon (Brings a hint of sweetness.)
  • 1/4 teaspoon ground cloves (Intensifies the spice blend.)
  • 1/4 teaspoon salt (Enhances all flavors.)
  • 1/2 cup raisins (Contributes natural sweetness.)

Preparation

  1. In a saucepan over medium heat, combine the cranberries, sugar, onion, apple cider vinegar, ginger, cinnamon, cloves, salt, and raisins.
  2. Bring the mixture to a boil, stirring occasionally.
  3. Once boiling, reduce the heat and let it simmer for about 15-20 minutes, or until the cranberries burst and the mixture thickens.
  4. Remove from heat and cool to room temperature. The chutney will thicken more as it cools.
  5. Transfer the chutney to a jar and refrigerate. It can be served cold or at room temperature.

Make it ahead of time for better flavor. Storing in an airtight container allows up to two weeks in the fridge.

Condiment, Side Dish
American
Condiment, Cranberry Chutney, Easy Recipes, Holiday Recipes

Flourless Lemon Pistachio Cake

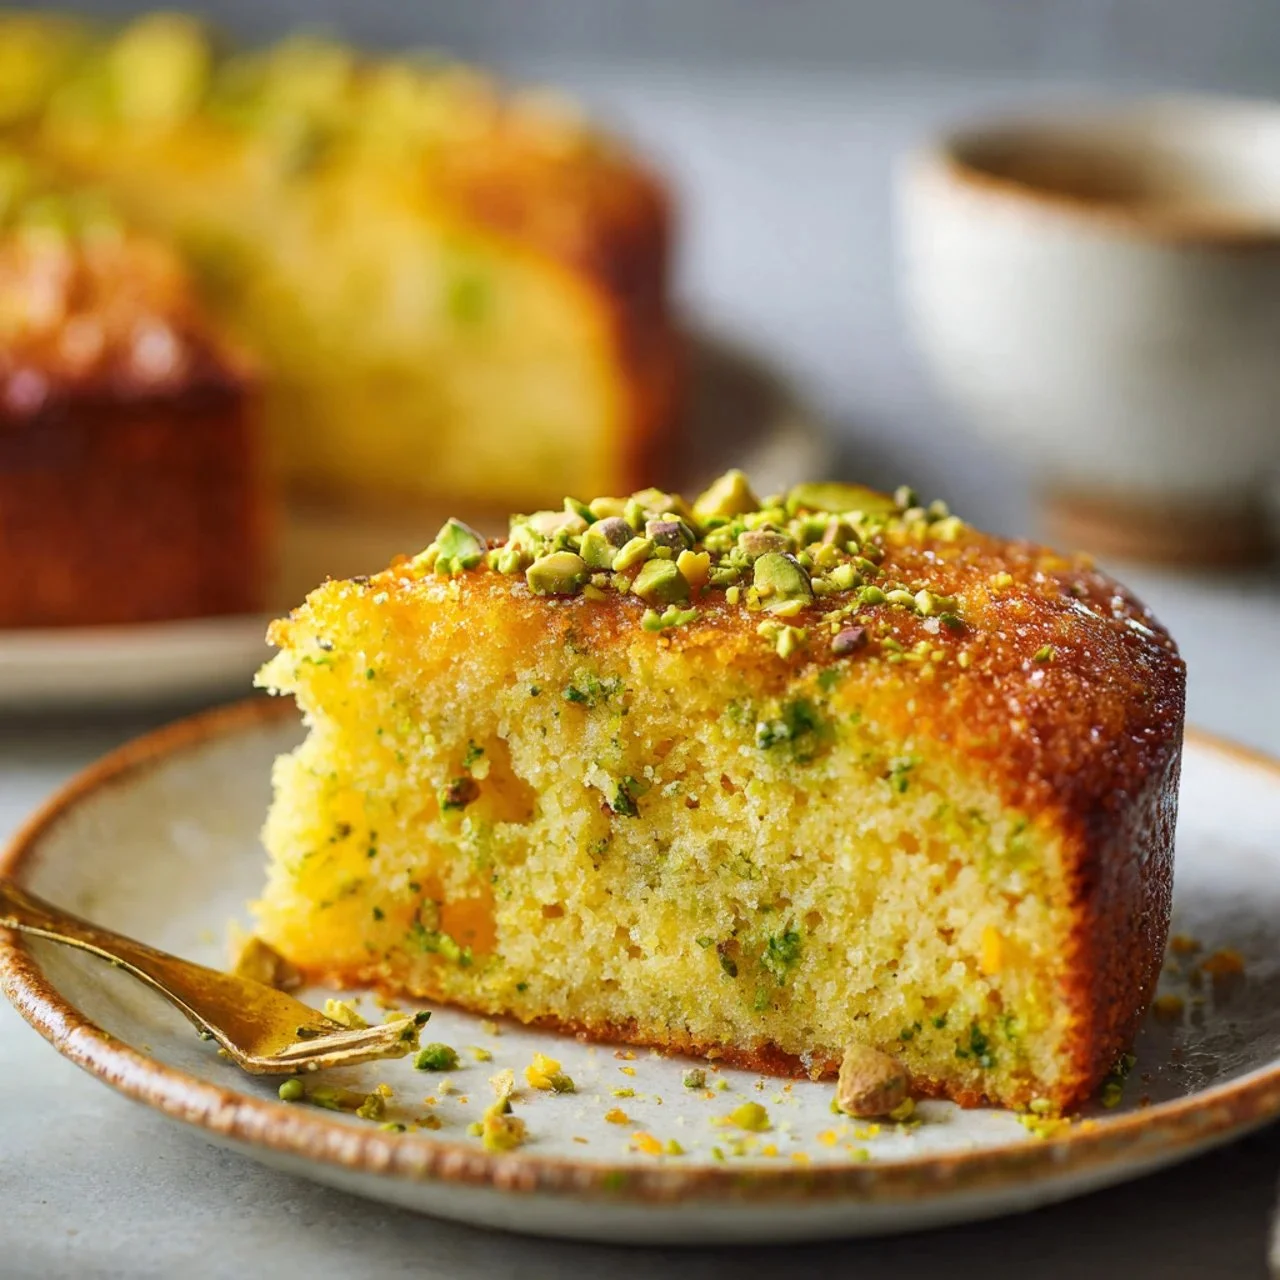
Flourless lemon pistachio cake with vibrant lemon zest and pistachios on top.

Flourless Lemon Pistachio Cake is a bright and delightful treat that captures the essence of sunny days with its fresh lemon flavor and nutty crunch. This cake is perfect for any occasion, whether you’re hosting a small gathering or just want something sweet to enjoy at home. The combination of tart lemon and rich pistachios creates a flavor explosion that will undoubtedly make this cake a crowd-pleaser. It’s a delightful option for those who want a gluten-free dessert that doesn’t skimp on taste. Get ready to indulge in a slice of this moist and flavorful cake, and perhaps share it with friends—if you can resist it all for yourself!

How to prepare Flourless Lemon Pistachio Cake

To start your culinary adventure, gather all the ingredients needed for this delicious cake. You will need:

  • 1 cup shelled pistachios
  • 4 large eggs
  • 1 cup granulated sugar
  • 1/4 teaspoon salt
  • Zest and juice of 2 lemons
  • 1/2 teaspoon baking powder
  • Powdered sugar for dusting (optional)

Now, follow these easy steps to create your Flourless Lemon Pistachio Cake:

  1. Preheat your oven to 350°F (175°C).
  2. Grease an 8-inch round cake pan and line the bottom with parchment paper.
  3. In a food processor, pulse the pistachios until finely ground but not pasty.
  4. In a large mixing bowl, whisk together the eggs and sugar until thick and pale.
  5. Mix in the zest and juice of the lemons, salt, and baking powder.
  6. Fold in the ground pistachios until everything is combined.
  7. Pour the batter into the prepared cake pan.
  8. Bake for about 30-35 minutes or until the cake is set and a toothpick comes out clean.
  9. Allow it to cool in the pan for 10 minutes, then turn it out onto a wire rack.
  10. Once cooled, dust with powdered sugar if desired.

Enjoy this delightful treat by serving it with a dollop of whipped cream or fresh berries. It’s a simple yet elegant dessert that looks beautiful on any table.

Flourless Lemon Pistachio Cake

Why You’ll Love Flourless Lemon Pistachio Cake

You will adore Flourless Lemon Pistachio Cake for its unique blend of flavors and textures. The nutty texture of the pistachios pairs wonderfully with the bright, zesty lemon. Each bite is moist, rich, and satisfying. Plus, it is naturally gluten-free, making it a winner for anyone with dietary restrictions. Your guests will be asking for seconds, and you can proudly tell them how easy it was to make.

Tips for success

To make sure your Flourless Lemon Pistachio Cake turns out perfectly, keep these tips in mind:

  • Make sure to finely grind the pistachios for the best texture.
  • Use fresh lemons for maximum flavor; the zest adds a lovely brightness.
  • Keep an eye on the baking time, as ovens can vary; check for doneness with a toothpick.

Flourless Lemon Pistachio Cake

Serving Suggestions

This cake is versatile and can be enjoyed in several ways. Pair it with fresh berries for a pop of color, or serve it with a scoop of vanilla ice cream for a delightful contrast in temperatures. You can also enjoy it with a cup of tea or coffee for a lovely afternoon treat. For more cake inspiration, check out this carrot date cake with honey lemon glaze that you might also love.

FAQs

Can I use other nuts instead of pistachios?

Yes, you can substitute pistachios with almonds or walnuts for different flavors.

How should I store leftover cake?

Keep leftovers in an airtight container at room temperature for up to 3 days. You can also refrigerate it for longer storage.

Can I make this cake ahead of time?

Absolutely! This cake can be made a day in advance and stored. Just add the powdered sugar right before serving for a fresh look.

Flourless Lemon Pistachio Cake

A bright and delightful gluten-free cake featuring fresh lemon and crunchy pistachios, perfect for any occasion.

Main ingredients

  • 1 cup shelled pistachios (Finely ground for best texture)
  • 4 large eggs (At room temperature)
  • 1 cup granulated sugar (Adjust sweetness to taste)
  • 1/4 teaspoon salt (Enhances flavor)
  • 2 units lemons (Zest and juice needed)
  • 1/2 teaspoon baking powder (Helps with rising)
  • to taste Powdered sugar (For dusting (optional))

Preparation

  1. Preheat your oven to 350°F (175°C).
  2. Grease an 8-inch round cake pan and line the bottom with parchment paper.
  3. In a food processor, pulse the pistachios until finely ground but not pasty.
  4. In a large mixing bowl, whisk together the eggs and sugar until thick and pale.
  5. Mix in the zest and juice of the lemons, salt, and baking powder.
  6. Fold in the ground pistachios until everything is combined.
  7. Pour the batter into the prepared cake pan.

Baking

  1. Bake for about 30-35 minutes or until the cake is set and a toothpick comes out clean.
  2. Allow it to cool in the pan for 10 minutes, then turn it out onto a wire rack.
  3. Once cooled, dust with powdered sugar if desired.

Enjoy this cake with a dollop of whipped cream or fresh berries. Store leftovers in an airtight container at room temperature for up to 3 days.

Cake, Dessert
American, Gluten-Free
Easy Recipes, Flourless Cake, Gluten-free dessert, Lemon Dessert, Pistachio Cake

Irresistible Rhubarb Bread

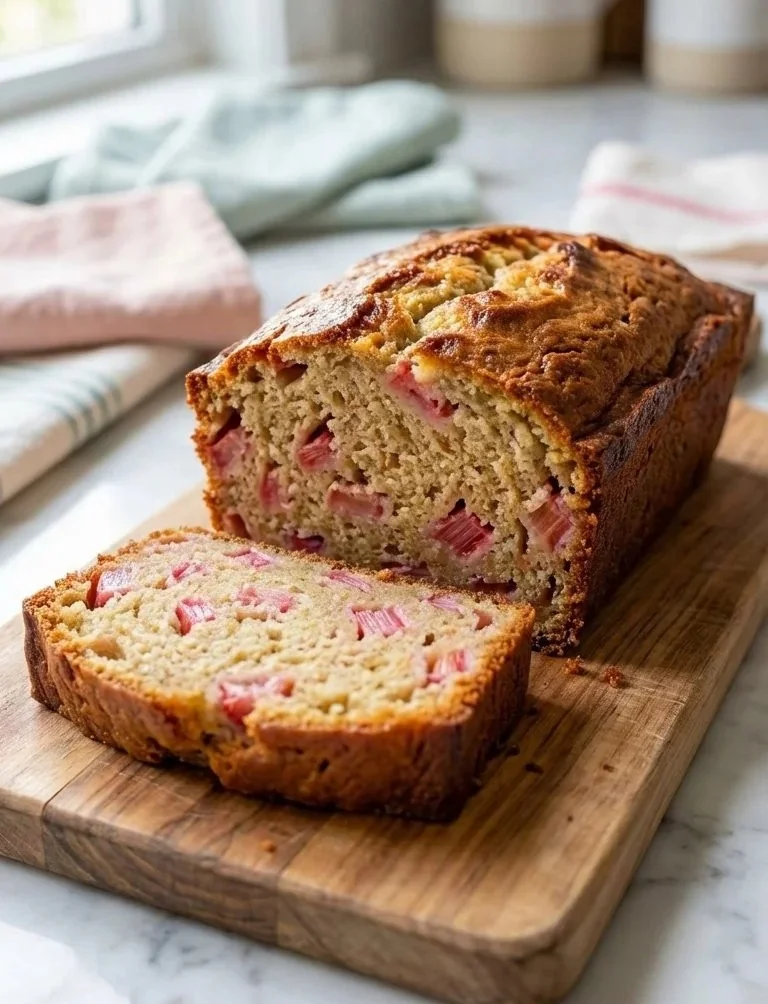
Irresistible rhubarb bread baked golden brown, garnished with fresh rhubarb.

Rhubarb is one of those unique ingredients that can add a delightful twist to your baking. The tartness of rhubarb blends beautifully with sweetness, creating a classic balance that many love. One such treat that captures this harmony perfectly is the Irresistible Rhubarb Bread. This bread is not just moist and tender, but it also carries a burst of fruity flavor in each bite. It’s perfect for breakfast, a snack, or even a dessert. Once you take a slice, you’ll find it hard to stop at just one! Let’s dive into this crowd-pleaser you’ll want to bake for friends and family.

How to prepare Irresistible Rhubarb Bread

To make this delicious bread, gather your ingredients and follow the simple steps below.

  1. Preheat your oven to 350°F (175°C).
  2. In a mixing bowl, combine sugar, eggs, and oil. Stir until well blended.
  3. Gradually add in flour, baking soda, and salt. Mix until just combined.
  4. Gently fold in chopped rhubarb and nuts if you are using them.
  5. Pour the mixture into a greased loaf pan.
  6. Bake for 50-60 minutes, or until a toothpick comes out clean.

Irresistible Rhubarb Bread

Why You’ll Love Irresistible Rhubarb Bread

There are so many reasons to love this bread! It is not only easy to make but also offers a lovely contrast between sweet and tart. The rhubarb gives it a refreshing zing, while the texture is soft and satisfying. It’s a wonderful way to enjoy rhubarb, especially if you are exploring how to use this versatile ingredient creatively. Plus, it makes your kitchen smell amazing as it bakes!

Tips for success

To ensure that your Irresistible Rhubarb Bread turns out perfectly, here are a few helpful tips:

  • Make sure to chop the rhubarb into small, even pieces to distribute the flavor well throughout the bread.
  • For added sweetness, you can sprinkle some sugar on top before baking.
  • Keep an eye on your baking time; every oven is different! Check for doneness a little early to avoid overbaking.
  • If you’d like to experiment with flavors, consider adding some cinnamon or lemon zest to the batter.

Irresistible Rhubarb Bread

Serving Suggestions

This bread can be enjoyed in many ways! Slice it and serve it plain, or spread a little butter on top for good measure. You can also pair it with a cup of tea or coffee for a delightful afternoon snack. For a creative twist, consider using it as a base for French toast. The options are endless!

FAQs

Can I use frozen rhubarb for this recipe?

Yes, you can absolutely use frozen rhubarb! Just make sure to thaw it and drain any excess moisture before adding it to the batter.

How should I store leftover bread?

Store your Irresistible Rhubarb Bread in an airtight container at room temperature for up to three days. If you want to keep it longer, wrap it well and freeze it.

Can I add other fruits to this recipe?

Definitely! Feel free to mix in some strawberries or blueberries along with the rhubarb for a fruity twist.

Now that you’re equipped with the recipe and tips, it’s time to grab that rhubarb and bake a loaf of this delicious bread. Trust us, you’ll be making it again and again! If you’re interested in trying out other easy baking ideas, check out this simple cottage cheese bread recipe. Happy baking!

Irresistible Rhubarb Bread

A delightful bread that combines the tartness of rhubarb with sweetness, perfect for breakfast, snacks, or dessert.

For the bread

  • 1 cup sugar
  • 2 large eggs
  • 1/2 cup oil (Can use vegetable or canola oil.)
  • 2 cups all-purpose flour
  • 1 teaspoon baking soda
  • 1/2 teaspoon salt
  • 2 cups chopped rhubarb (Chop into small, even pieces for best flavor distribution.)
  • 1/2 cup chopped nuts (Optional.)

Preparation

  1. Preheat your oven to 350°F (175°C).
  2. In a mixing bowl, combine sugar, eggs, and oil. Stir until well blended.
  3. Gradually add in flour, baking soda, and salt. Mix until just combined.
  4. Gently fold in chopped rhubarb and nuts if you are using them.
  5. Pour the mixture into a greased loaf pan.

Baking

  1. Bake for 50-60 minutes, or until a toothpick comes out clean.

For added sweetness, you can sprinkle some sugar on top before baking. Check for doneness a little early to avoid overbaking. Try adding cinnamon or lemon zest for extra flavor.

Breakfast, Dessert, Snack
American
Baking, Easy Recipes, Irresistible Bread, Quick Bread, Rhubarb Bread

Chocolate Orange Cheesecake Layer Cake

Decadent chocolate orange cheesecake layer cake garnished with orange slices and chocolate shavings.

There’s something truly special about a Chocolate Orange Cheesecake Layer Cake that brings joy to any occasion. The rich, creamy cheesecake layered between moist chocolate cake layers is a heavenly treat that plays on the beloved combination of chocolate and orange. With a delightful burst of citrus paired with rich cocoa, this cake is sure to wow your family and friends. Whether you’re celebrating a birthday, having a casual get-together, or just indulging in a sweet craving, this recipe is a guaranteed crowd-pleaser. Get ready to roll up your sleeves and dive into making this delicious dessert!

How to prepare Chocolate Orange Cheesecake Layer Cake

  1. Gather Your Ingredients: Collect all the ingredients you’ll need for both the cheesecake and the cake layers. This includes cream cheese, chocolate, sugar, eggs, flour, and, of course, fresh oranges for that zesty flavor.
  2. Make the Cheesecake Filling: Start by beating the cream cheese and sugar until smooth. Add the eggs and orange zest, mixing well. Pour the mixture into a prepared springform pan and bake until set. Allow it to cool completely before removing it from the pan.
  3. Bake the Chocolate Cake Layers: Prepare a chocolate cake batter by combining flour, cocoa powder, sugar, baking powder, and eggs. Divide the batter into two greased round cake pans. Bake until a toothpick comes out clean.
  4. Assemble the Cake: Once everything has cooled, place the first chocolate layer on a cake plate. Spread a layer of the cheesecake filling on top, add the second chocolate layer, and finish with more cheesecake on top.
  5. Decorate: For the final touch, you can add whipped cream and orange slices.
  6. Chill and Serve: Refrigerate the cake for a few hours or overnight to let the flavors meld together before slicing into this stunning dessert.

Chocolate Orange Cheesecake Layer Cake

Why You’ll Love Chocolate Orange Cheesecake Layer Cake

This recipe is not just about looks, but taste as well. The combination of smooth cheesecake and rich chocolate creates a beautiful harmony that dances on your taste buds. Each bite is creamy, decadent, and refreshing, thanks to the citrus burst. It’s perfect for any occasion, from birthdays to family dinners. Plus, who doesn’t love layers? This cake is not just a dessert, it’s an experience that you, your friends, and family will remember.

Tips for Success

  • Be sure to let the cheesecake cool completely before assembling the cake. This prevents melting and gives you clean layers.
  • Use high-quality chocolate and fresh oranges for best flavors.
  • If you’re in a hurry, you can make the cheesecake a day in advance and assemble the cake later.

Serving Suggestions

Pair your Chocolate Orange Cheesecake Layer Cake with a scoop of vanilla ice cream or some fresh berries for a delightful contrast. A cup of coffee or tea also complements the cake beautifully, making it a perfect choice for an afternoon treat.

FAQs

Can I make this cheesecake layer ahead of time?

Yes, you can prepare the cheesecake layer a day in advance, just remember to give it time to cool completely before storing it.

Can I use a different flavor than orange?

Absolutely! You can experiment with other flavors like lemon or raspberry for a different twist.

How should I store any leftovers?

Keep any leftovers in the refrigerator, well wrapped. It should stay fresh for up to five days.

Chocolate Orange Cheesecake Layer Cake

With this lovely Chocolate Orange Cheesecake Layer Cake, your next gathering will surely be a hit! Happy baking!

Chocolate Orange Cheesecake Layer Cake

A delicious and visually stunning layer cake combining rich chocolate cake with creamy cheesecake and a zesty orange flavor, perfect for any occasion.

For the Cheesecake Filling

  • 16 oz cream cheese (Softened)
  • 1 cup sugar (Granulated)
  • 3 large eggs (Room temperature)
  • 1 tbsp orange zest (Freshly grated)

For the Chocolate Cake Layers

  • 2 cups all-purpose flour
  • 3/4 cup cocoa powder (Unsweetened)
  • 1.5 cups sugar (Granulated)
  • 1 tbsp baking powder
  • 4 large eggs (Room temperature)

For Assembly and Decoration

  • 1 cup whipped cream (For topping)
  • 1 orange sliced (For decoration)

Preparation

  1. Gather all the ingredients needed for both the cheesecake and the chocolate cake layers.
  2. Preheat your oven and prepare a springform pan for the cheesecake.

Cheesecake Filling

  1. Beat the cream cheese and sugar together until smooth.
  2. Add the eggs and orange zest, mixing well.
  3. Pour the mixture into the prepared springform pan and bake until set.
  4. Allow the cheesecake to cool completely before removing it from the pan.

Chocolate Cake Layers

  1. Prepare the chocolate cake batter by combining flour, cocoa powder, sugar, baking powder, and eggs.
  2. Divide the batter into two greased round cake pans.
  3. Bake until a toothpick comes out clean.

Assembly

  1. Once everything has cooled, place the first chocolate layer on a cake plate.
  2. Spread a layer of the cheesecake filling on top, then add the second chocolate layer.
  3. Finish with more cheesecake on top.

Decoration and Serving

  1. For the decoration, add whipped cream and orange slices on top.
  2. Refrigerate the cake for a few hours or overnight before cutting and serving.

Be sure to let the cheesecake cool completely before assembling to prevent melting. Use high-quality chocolate and fresh oranges for the best flavor. You can make cheesecake a day in advance and assemble the cake later.

Cake, Dessert
American
Celebration Cake, cheesecake, chocolate cake, Layer Cake, Orange Dessert