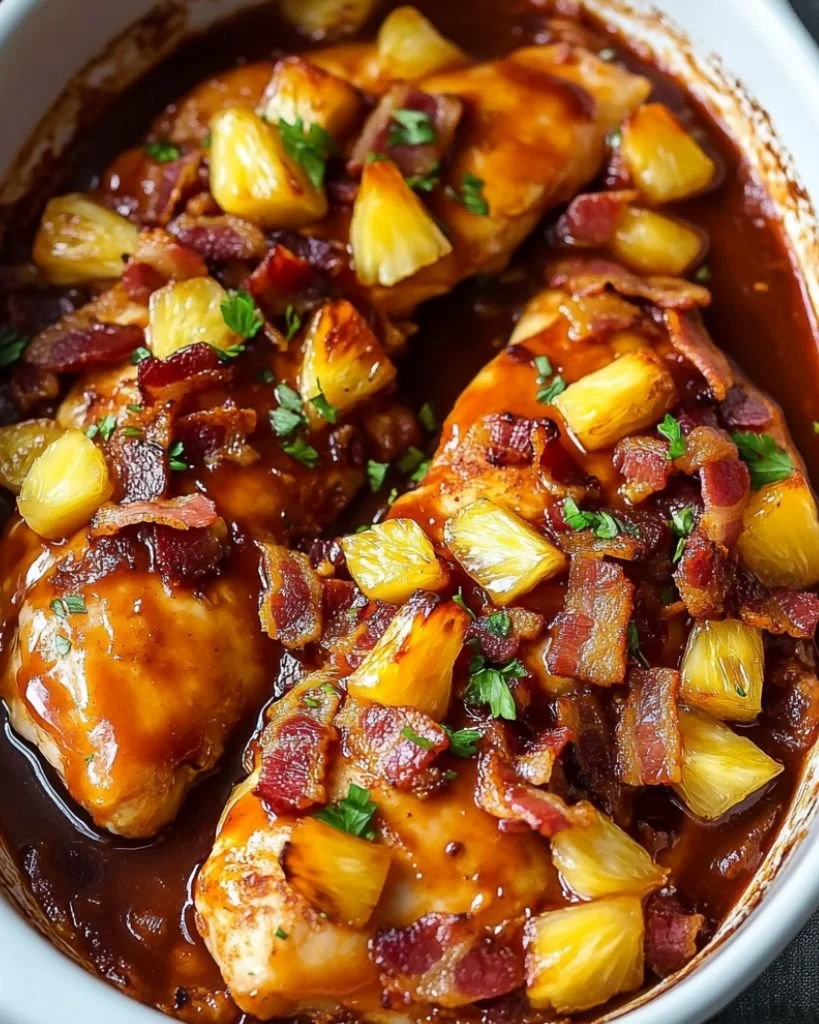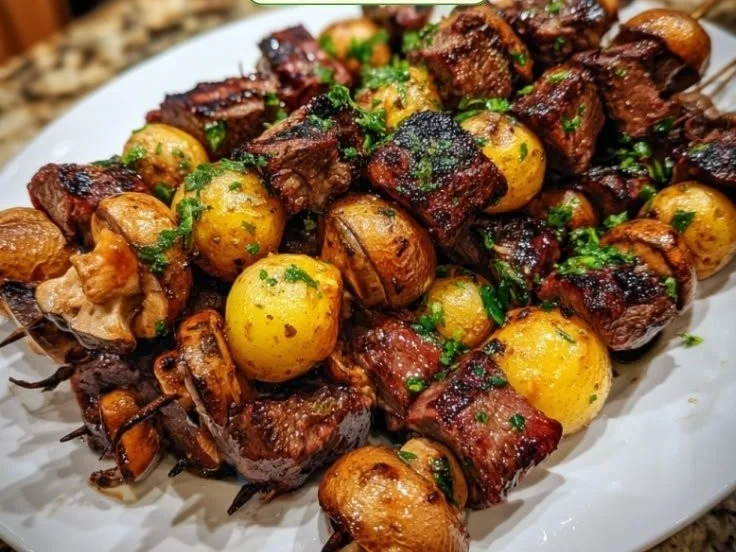
Juicy Garlic Herb Steak Kabobs

Grilled juicy garlic herb steak kabobs on skewers

Steak kabobs are a delightful treat that brings joy to gatherings and family dinners alike. Imagine perfectly grilled pieces of tender steak, marinated and skewered with vibrant vegetables, all sizzling away on the grill. These kabobs are not only visually stunning but offer a taste sensation that will make your mouth water.

To prepare steak kabobs, you’ll want to start with some delicious ingredients. Here’s what you need:

Ingredients

  • 1 lb of sirloin steak, cut into 1-inch cubes
  • 1 bell pepper, cut into chunks
  • 1 red onion, cut into wedges
  • 1 zucchini, sliced
  • 1 cup cherry tomatoes
  • 1/4 cup olive oil
  • 2 tablespoons soy sauce
  • 2 tablespoons balsamic vinegar
  • 2 cloves garlic, minced
  • Salt and pepper to taste
  • Skewers (wooden or metal)

Directions

  1. In a bowl, mix olive oil, soy sauce, balsamic vinegar, garlic, salt, and pepper to create a marinade.
  2. Add the cubed steak to the marinade, ensuring each piece is well-coated. Let it marinate for at least 30 minutes, preferably a few hours in the fridge.
  3. Pre-soak wooden skewers in water for about 30 minutes to prevent them from burning on the grill.
  4. Thread the marinated steak and vegetables onto the skewers in alternating patterns.
  5. Preheat your grill to medium-high heat and lightly oil the grill grates.
  6. Grill the skewers for about 10-12 minutes, turning occasionally, until the steak is cooked to your desired doneness and the vegetables are tender.
  7. Remove the kabobs from the grill and let them rest for a few minutes before serving.

Steak Kabobs

Why You’ll Love Steak Kabobs

One of the best things about steak kabobs is their versatility. You can customize them with your favorite vegetables or even switch up the marinade for a different flavor profile. The combination of smoky, grilled steak with fresh, crunchy veggies makes each bite satisfying and bursting with flavor. They are great for hosting friends, family barbecues, or simply enjoying an easy dinner at home.

For a delightful pairing, consider serving these kabobs with a fresh side salad. A salad like the Balsamic Steak Gorgonzola Salad would complement the flavors perfectly!

Tips for success

  • Cut the steak and vegetables into similar-sized pieces for even cooking.
  • Don’t rush the marinating process—longer marinating enhances the flavor tremendously.
  • Make sure your grill is well-heated to help achieve a nice sear and prevent sticking.
  • Let the kabobs rest a few minutes after grilling. This helps retain juices and improves the texture.

Steak Kabobs

Serving Suggestions

Steak kabobs can be served on their own or with various sides. Consider pairing them with steamed rice, a fresh cucumber salad, or even grilled corn on the cob for a complete meal. Don’t forget to add your favorite dipping sauce for a little extra flavor. A tangy yogurt sauce or a spicy chimichurri can take these kabobs to the next level.

FAQs

How do I know when my steak kabobs are done?

The best way to check is by using a meat thermometer. For medium-rare steak, aim for an internal temperature of 130-135°F.

Can I make steak kabobs ahead of time?

Absolutely! You can marinate the steak and prep the kabobs a few hours in advance or even the night before. Just grill them when you’re ready to serve.

What can I substitute for steak in kabobs?

You can use chicken, shrimp, or even tofu for a vegetarian option. Just adjust the cooking time accordingly for different proteins.

Get ready to impress your guests and satisfy your taste buds with these mouthwatering steak kabobs. Happy grilling!

Steak Kabobs

Deliciously grilled steak kabobs marinated with vibrant vegetables, ideal for gatherings and family dinners.

For the Kabobs

  • 1 lb sirloin steak, cut into 1-inch cubes (Choose a tender cut for best results.)
  • 1 bell pepper, cut into chunks (Any color bell pepper works.)
  • 1 red onion, cut into wedges (Red onion adds sweetness.)
  • 1 zucchini, sliced
  • 1 cup cherry tomatoes
  • 1/4 cup olive oil (For marinating.)
  • 2 tablespoons soy sauce (Adds flavor to the marinade.)
  • 2 tablespoons balsamic vinegar
  • 2 cloves garlic, minced
  • to taste salt and pepper (For seasoning.)
  • Skewers (wooden or metal) (If using wooden skewers, pre-soak in water.)

Preparation

  1. In a bowl, mix olive oil, soy sauce, balsamic vinegar, garlic, salt, and pepper to create a marinade.
  2. Add the cubed steak to the marinade, ensuring each piece is well-coated. Let it marinate for at least 30 minutes, preferably a few hours in the fridge.
  3. Pre-soak wooden skewers in water for about 30 minutes to prevent them from burning on the grill.
  4. Thread the marinated steak and vegetables onto the skewers in alternating patterns.

Grilling

  1. Preheat your grill to medium-high heat and lightly oil the grill grates.
  2. Grill the skewers for about 10-12 minutes, turning occasionally, until the steak is cooked to your desired doneness and the vegetables are tender.
  3. Remove the kabobs from the grill and let them rest for a few minutes before serving.

Cut the steak and vegetables into similar-sized pieces for even cooking. Don’t rush the marinating process; longer marinating enhances the flavor tremendously. Make sure your grill is well-heated to help achieve a nice sear and prevent sticking. Let the kabobs rest a few minutes after grilling to retain juices.
Dinner, Main Course
American, Grill
BBQ Recipe, Easy Dinner, Grilled Kabobs, Marinated Steak, Steak Kabobs

No-Bake Strawberry Dessert

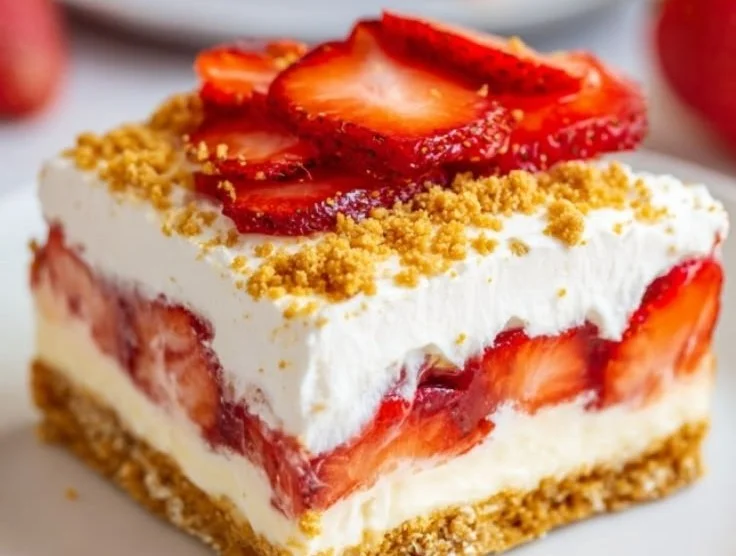
Delicious no-bake strawberry dessert topped with fresh strawberries and whipped cream

When the weather gets warm, there’s nothing quite like a refreshing dessert to cool you down. This No-Bake Strawberry Dessert is a delightful way to enjoy the sweetness of fresh strawberries without turning on the oven. Packed with creamy goodness and a buttery crust, it’s a treat that will have everyone coming back for seconds. Whether you’re hosting a summer barbecue or enjoying a quiet evening at home, this dessert is sure to impress. So grab your mixing bowl, and let’s dive into making this luscious treat that is as fun to make as it is to eat!

How to prepare No-Bake Strawberry Dessert

To make this no-bake treat, gather the following ingredients:

Ingredients

  • 1 cup crushed graham crackers
  • 1/2 cup unsalted butter, melted
  • 1 cup cream cheese, softened
  • 1 cup powdered sugar
  • 1 cup whipped topping
  • 2 cups fresh strawberries, sliced
  • 1 cup strawberry gelatin
  • 1 cup boiling water
  • Extra strawberries for garnish

Now, let’s get started on how to prepare this delicious dessert!

  1. In a medium bowl, mix the crushed graham crackers with melted butter until well combined. Press this mixture firmly into the bottom of a 9×9 inch baking dish to form the crust.
  2. In another bowl, beat the softened cream cheese and powdered sugar together until smooth. Gently fold in the whipped topping until fully incorporated.
  3. Spread the cream cheese mixture over the crust in the baking dish.
  4. In a separate bowl, dissolve the strawberry gelatin in boiling water. Allow it to cool slightly before pouring it over the cream cheese layer.
  5. Arrange the sliced strawberries on top of the gelatin layer, ensuring they’re well distributed.
  6. Refrigerate the dessert for at least four hours, or until the gelatin is set.
  7. Once set, cut into squares and serve chilled. You can add extra strawberries as a garnish if desired.

No-Bake Strawberry Dessert

Why You’ll Love No-Bake Strawberry Dessert

This No-Bake Strawberry Dessert is not just easy to whip up, it’s also incredibly satisfying. The combination of the sweet, creamy filling with the tartness of the strawberries creates a delightful balance. Plus, the no-bake aspect means you won’t have to deal with any complicated baking steps, making it an ideal recipe for beginners. It’s the perfect way to enjoy a summer treat without fuss, making it a hit not just for families, but for gatherings and parties too. If you love no-bake desserts, this one is sure to become a favorite!

Tips for Success

To make sure your No-Bake Strawberry Dessert turns out perfectly, keep these tips in mind:

  • Use fresh strawberries for the best flavor. They will add a burst of freshness that complements the creamy filling.
  • Allow the dessert to sit in the fridge for the full four hours; this will ensure that the gelatin sets properly.
  • For a creative twist, consider adding other fruits like blueberries or raspberries along with the strawberries.

No-Bake Strawberry Dessert

Serving Suggestions

This No-Bake Strawberry Dessert can be served on its own or paired with a scoop of vanilla ice cream for extra indulgence. You might even consider serving it alongside a refreshing glass of iced tea or lemonade. It’s simple, yet elegant enough for any occasion!

FAQs

Can I use frozen strawberries instead of fresh ones?

Yes, you can use frozen strawberries, but fresh ones give the best flavor and texture.

How long will this dessert last in the fridge?

It can last for about 3-4 days in the refrigerator, but it’s best enjoyed fresh on the first couple of days.

Can I make this dessert a day ahead?

Absolutely! This dessert is perfect for making ahead of time, giving it ample time to set before serving.

For those who enjoy exploring more no-bake options, check out this decadent dessert that you might adore just as much! Enjoy making this delightful No-Bake Strawberry Dessert and let those sweet summer vibes shine through!

No-Bake Strawberry Dessert

A refreshing no-bake dessert featuring creamy layers and fresh strawberries, perfect for warm weather gatherings.

For the crust

  • 1 cup crushed graham crackers
  • 1/2 cup unsalted butter, melted

For the filling

  • 1 cup cream cheese, softened
  • 1 cup powdered sugar
  • 1 cup whipped topping

For the gelatin layer

  • 1 cup strawberry gelatin
  • 1 cup boiling water (Use to dissolve the gelatin)
  • 2 cups fresh strawberries, sliced (Use extra for garnish)

Preparation

  1. In a medium bowl, mix the crushed graham crackers with melted butter until well combined. Press this mixture firmly into the bottom of a 9×9 inch baking dish to form the crust.
  2. In another bowl, beat the softened cream cheese and powdered sugar together until smooth. Gently fold in the whipped topping until fully incorporated.
  3. Spread the cream cheese mixture over the crust in the baking dish.
  4. In a separate bowl, dissolve the strawberry gelatin in boiling water. Allow it to cool slightly before pouring it over the cream cheese layer.
  5. Arrange the sliced strawberries on top of the gelatin layer, ensuring they are well distributed.
  6. Refrigerate the dessert for at least four hours, or until the gelatin is set.
  7. Once set, cut into squares and serve chilled. You can add extra strawberries as a garnish if desired.

Use fresh strawberries for the best flavor. Ensure to refrigerate for the full four hours for proper gelatin setting. Can add other fruits like blueberries or raspberries for a twist.

Dessert
American
Creamy Dessert, easy dessert, No-Bake Dessert, Strawberry Dessert, Summer Treat

Pineapple Upside Down Sugar Cookies That Delight Every Bite

Pineapple Upside Down Cookies with colorful cherry and pineapple topping

If you’re looking for a cookie that not only tastes amazing but also brings a touch of creativity to your baking, look no further than Pineapple Upside Down Sugar Cookies. These delightful treats combine the classic flavors of pineapple upside-down cake with a soft and chewy sugar cookie base, making them a fun and fruity snack for any occasion. Each bite is bursting with flavor, and the lovely caramelized pineapple on top is sure to impress your friends and family.

Whether you’re hosting a party or simply want to surprise your loved ones with a homemade treat, this cookie recipe is sure to be a crowd-pleaser. Now, get ready to whip up a batch of these Pineapple Upside Down Sugar Cookies that will delight every bite!

How to prepare Pineapple Upside Down Sugar Cookies

  1. Gather your ingredients: You will need flour, sugar, butter, eggs, baking powder, vanilla extract, a can of pineapple rings, and maraschino cherries.
  2. Preheat your oven to 350°F (175°C).
  3. Prepare the cookie base: In a bowl, cream together the softened butter and sugar until light and fluffy. Add in the eggs and vanilla, mixing well. In a separate bowl, combine flour and baking powder, then gradually add to the wet ingredients until fully combined.
  4. Prepare the pineapple topping: In a baking dish, place the pineapple rings and cherries in the center of each ring.
  5. Assemble the cookies: Using a scoop or spoon, place dollops of cookie dough over the pineapple and cherries, carefully spreading it to cover them.
  6. Bake for 15-20 minutes or until the edges are lightly golden.
  7. Cool: Allow the cookies to cool slightly before flipping them over to reveal the beautiful pineapple topping.

Pineapple Upside Down Sugar Cookies That Delight Every Bite

Why You’ll Love Pineapple Upside Down Sugar Cookies

These cookies bring the classic flavors of a beloved dessert into a fun and snackable form. The soft sugar cookie base pairs perfectly with the sweet, tangy pineapple and the pop of the cherry. They are not only delicious but also visually appealing, making them a great addition to any dessert tray. You can easily bring these cookies to potlucks, birthday parties, or just enjoy them at home as a delightful treat.

Tips for success

  • Use fresh ingredients: Ensure your butter is soft and your eggs are at room temperature for the best texture.
  • Don’t skip chilling the dough: If you have time, chilling the dough for about 30 minutes will help the cookies keep their shape.
  • Check your baking time: Every oven is different, so keep an eye on your cookies as they bake to avoid overbaking.

Pineapple Upside Down Sugar Cookies That Delight Every Bite

Serving Suggestions

These Pineapple Upside Down Sugar Cookies are delicious on their own, but consider pairing them with a scoop of vanilla ice cream or a drizzle of chocolate sauce for an extra special treat. You can also serve them with fresh fruit or a tropical smoothie to enhance the fruitiness of the cookies.

FAQs

Can I use fresh pineapple instead of canned?

Yes, you can use fresh pineapple, just make sure to slice it thinly and perhaps caramelize it slightly beforehand to enhance the flavor.

How should I store these cookies?

Store the cookies in an airtight container at room temperature for up to a week. You can also freeze them for longer storage.

Can I make this recipe gluten-free?

Absolutely! Just substitute all-purpose flour with a gluten-free flour blend, and ensure that your baking powder is gluten-free as well.

For more delicious cookie ideas, check out this detailed pineapple upside down sugar cookie recipe that will surely inspire you in your baking adventures!

Pineapple Upside Down Sugar Cookies

Delightful cookies that combine the classic flavors of pineapple upside-down cake with a soft and chewy sugar cookie base, perfect for any occasion.

Cookie Base

  • 2 cups all-purpose flour (Can substitute with gluten-free flour blend.)
  • 1 cup granulated sugar (For the cookie base.)
  • 1/2 cup butter, softened (Use room temperature butter for best texture.)
  • 1 large egg (At room temperature.)
  • 1 teaspoon vanilla extract
  • 2 teaspoons baking powder (Ensure gluten-free if needed.)

Pineapple Topping

  • 1 can pineapple rings (Canned or thinly sliced fresh pineapple can be used.)
  • 12 pieces maraschino cherries (One for each pineapple ring.)

Preparation

  1. Gather your ingredients: flour, sugar, butter, eggs, baking powder, vanilla extract, a can of pineapple rings, and maraschino cherries.
  2. Preheat your oven to 350°F (175°C).
  3. In a bowl, cream together the softened butter and sugar until light and fluffy.
  4. Add in the egg and vanilla, mixing well.
  5. In a separate bowl, combine flour and baking powder, then gradually add to the wet ingredients until fully combined.

Assembling and Baking

  1. In a baking dish, place the pineapple rings and cherries in the center of each ring.
  2. Using a scoop or spoon, place dollops of cookie dough over the pineapple and cherries, carefully spreading it to cover them.
  3. Bake for 15-20 minutes or until the edges are lightly golden.
  4. Allow the cookies to cool slightly before flipping them over to reveal the beautiful pineapple topping.

These cookies can be served on their own or with a scoop of vanilla ice cream or chocolate sauce. Store cookies in an airtight container at room temperature for up to a week or freeze for longer storage.

Dessert, Snack
American
Baking, Dessert Recipes, Pineapple Cookies, Sugar Cookies, Sweet Treats

Buttery S’Mores Hand Pies

Delicious buttery S'Mores hand pies with chocolate, marshmallows, and graham cracker crust

Buttery S’Mores Hand Pies

Buttery S’Mores Hand Pies are a delightful treat that captures the essence of nostalgic campfire memories in a handheld form. The flaky crust and gooey filling bring together the classic flavors of chocolate, marshmallows, and graham crackers in every delicious bite. These little desserts are perfect for gatherings, picnics, or simply indulging in a sweet moment at home. When you take a bite, you’ll find the warm chocolate and melted marshmallow oozing out, making them a hit for both kids and adults alike. Get ready to impress your family and friends with this easy and mouthwatering recipe!

How to prepare Buttery S’Mores Hand Pies

Making Buttery S’Mores Hand Pies is simpler than it might seem. Here’s a step-by-step guide to whip up these delicious treats:

  1. Gather Your Ingredients: Start by collecting your ingredients, which include pie dough, milk chocolate, mini marshmallows, and graham cracker crumbs.
  2. Prepare the Dough: Roll out your pie dough on a clean, floured surface. Cut it into circles of your desired size using a cookie cutter or a glass.
  3. Fill the Pies: On one half of each circle, sprinkle graham cracker crumbs, add chocolate pieces, and top with mini marshmallows. Leave some space around the edges.
  4. Seal the Pies: Fold the dough over the filling, creating a half-moon shape. Press the edges with a fork to ensure they are well sealed.
  5. Bake: Place the hand pies on a baking sheet lined with parchment paper and brush them with melted butter. Bake in a preheated oven until golden brown.
  6. Cool and Serve: Let the pies cool slightly before serving so you don’t burn your tongue on the molten filling.

Buttery S'Mores Hand Pies

Why You’ll Love Buttery S’Mores Hand Pies

You’ll surely fall in love with these Buttery S’Mores Hand Pies because they’re the perfect blend of crispy and gooey. They are easy to make, which means they are great for any occasion. Whether you’re having a cozy night in or a fun outdoor gathering, these hand pies come to the rescue. Their convenient size makes them an ideal dessert to share, plus they satisfy any sweet tooth. Once you taste the buttery crust with the sweet, melty filling, you’ll want to keep making them again and again.

Tips for success

  1. Keep the Dough Cold: If the dough gets warm, it may become hard to handle. If needed, chill the cut-out dough circles in the fridge before filling them.
  2. Don’t Overfill: Be careful not to overstuff the hand pies. Too much filling can cause them to burst while baking.
  3. Experiment with Flavors: Feel free to customize these hand pies. You can try different chocolate flavors, or add peanut butter or fruit for a twist.

Buttery S'Mores Hand Pies

Serving Suggestions

Serve the Buttery S’Mores Hand Pies warm. You can dust them with powdered sugar or serve with a scoop of ice cream to take them to the next level. Pair them with a hot cup of cocoa or a refreshing glass of milk for the ultimate treat experience. You might even want to try some delicious ghost taco hand pies for a savory counterpart.

FAQs

Can I make these ahead of time?
Yes, you can make the filling ahead and assemble the pies when you’re ready.

What can I use instead of pie dough?
If you prefer, you can use store-bought puff pastry, which will give them a lighter, flakier texture.

How do I store leftovers?
Keep leftover hand pies in an airtight container at room temperature for up to two days, or refrigerate them for longer freshness.

With a little bit of preparation and patience, you can enjoy these delightful treats that are sure to be a favorite. So grab your ingredients and start baking!

Buttery S’Mores Hand Pies

Delightful hand pies capturing the nostalgic flavors of s’mores with a flaky crust and gooey chocolate and marshmallow filling.

For the Hand Pies

  • 1 package pie dough (Homemade or store-bought)
  • 1 cup milk chocolate (Chopped into pieces)
  • 1 cup mini marshmallows
  • 1/2 cup graham cracker crumbs
  • 2 tablespoons melted butter (For brushing on the pies)

Preparation

  1. Gather your ingredients: pie dough, milk chocolate, mini marshmallows, and graham cracker crumbs.
  2. Roll out your pie dough on a clean, floured surface and cut into circles using a cookie cutter or glass.

Filling

  1. On one half of each circle, sprinkle graham cracker crumbs, add chocolate pieces, and top with mini marshmallows, leaving some space around the edges.

Sealing and Baking

  1. Fold the dough over the filling to create a half-moon shape and press the edges with a fork to seal.
  2. Place the pies on a baking sheet lined with parchment paper, brush with melted butter, and bake in a preheated oven until golden brown.

Serving

  1. Let the pies cool slightly before serving to avoid burning yourself on the filling.

Keep the dough cold for ease of handling. Don’t overfill the pies to prevent bursting during baking. Experiment with different chocolate flavors or add peanut butter or fruit for variety.

Dessert, Snack
American
dessert recipe, Easy Recipe, Flaky Pastry, Hand Pies, S’mores

Keto Crunchy Chips

Delicious and crunchy Keto Chips for a low-carb snack option.

If you’re looking for a delicious snack that fits perfectly into your keto lifestyle, these Keto Crunchy Chips are a must-try. They are crispy, flavorful, and satisfy that crunchy craving without the carbs. This recipe is great for parties, movie nights, or just when you’re in the mood for a tasty treat. The appeal of these chips lies not only in their satisfying crunch but also in how easy they are to prepare. You’ll find yourself reaching for these chips again and again, so let’s dive into making a batch yourself!

How to Prepare Keto Crunchy Chips

To make these Keto Crunchy Chips, you will need:

  • 1 cup shredded cheddar cheese
  • 1 cup shredded mozzarella cheese
  • 1 tablespoon garlic powder
  • 1 teaspoon onion powder
  • 1 teaspoon paprika
  • Salt and pepper to taste

Directions:

  1. Preheat your oven to 350°F (175°C).
  2. In a bowl, mix together the cheddar cheese, mozzarella cheese, garlic powder, onion powder, paprika, salt, and pepper.
  3. Line a baking sheet with parchment paper.
  4. Drop spoonfuls of the cheese mixture onto the baking sheet, spacing them about two inches apart.
  5. Flatten the spoonfuls slightly to form small circles.
  6. Bake for about 10-12 minutes or until they are golden brown and crispy.
  7. Let them cool on the baking sheet for a few minutes before transferring to a wire rack.

Keto Crunchy Chips

Why You’ll Love Keto Crunchy Chips

These Keto Crunchy Chips are not only low in carbs but also packed with flavors that everyone will love. The combination of cheddar and mozzarella creates a cheesy delight that pairs well with various dips or can be enjoyed on their own. Plus, they’re super easy to make, so you can whip up a batch anytime you want a snack. Whether you’re on a keto diet or just wanting a tasty treat, these chips won’t disappoint.

Tips for Success

  • Make sure the cheeses are freshly shredded for the best melting and crispy texture.
  • Keep an eye on the chips as they bake, since oven temperatures can vary.
  • Experiment with different spices or herbs to customize the flavor to your liking.

Keto Crunchy Chips

Serving Suggestions

These chips go wonderfully with guacamole, salsa, or your favorite keto-friendly dip. You can also serve them alongside a fresh salad for added crunch. They’re perfect for sharing with friends and family during gatherings, or just for your own late-night snack!

FAQs

Can I use different types of cheese?

Yes, feel free to experiment with other cheeses like provolone or pepper jack for a different flavor profile.

How long do these chips last?

Keto Crunchy Chips are best enjoyed fresh, but you can store any leftovers in an airtight container for a few days. Reheat them in the oven for a few minutes to regain their crunch.

Can I make these chips spicy?

Absolutely! Adding some cayenne pepper or crushed red pepper can give these chips an extra kick that spice lovers will enjoy.

These Keto Crunchy Chips are bound to become your new favorite snack, so gather your ingredients and get ready to enjoy this delightful treat!

Keto Crunchy Chips

These Keto Crunchy Chips are crispy, flavorful, and satisfy your crunchy cravings without the carbs, making them ideal for keto snacks and gatherings.

Cheese Mixture

  • 1 cup shredded cheddar cheese (Freshly shredded for best results)
  • 1 cup shredded mozzarella cheese (Freshly shredded for best results)

Spices

  • 1 tablespoon garlic powder
  • 1 teaspoon onion powder
  • 1 teaspoon paprika
  • Salt and pepper to taste

Preparation

  1. Preheat your oven to 350°F (175°C).
  2. In a bowl, mix together the cheddar cheese, mozzarella cheese, garlic powder, onion powder, paprika, salt, and pepper.
  3. Line a baking sheet with parchment paper.
  4. Drop spoonfuls of the cheese mixture onto the baking sheet, spacing them about two inches apart.
  5. Flatten the spoonfuls slightly to form small circles.

Baking

  1. Bake for about 10-12 minutes or until they are golden brown and crispy.
  2. Let them cool on the baking sheet for a few minutes before transferring to a wire rack.

These chips pair well with guacamole, salsa, or your favorite keto-friendly dip. Store any leftovers in an airtight container for a few days and reheat in the oven to regain crunch.

Appetizer, Snack
American, Keto
Cheese Chips, Crunchy Snack, Gluten-Free Snack, Keto Chips, Low Carb Snack

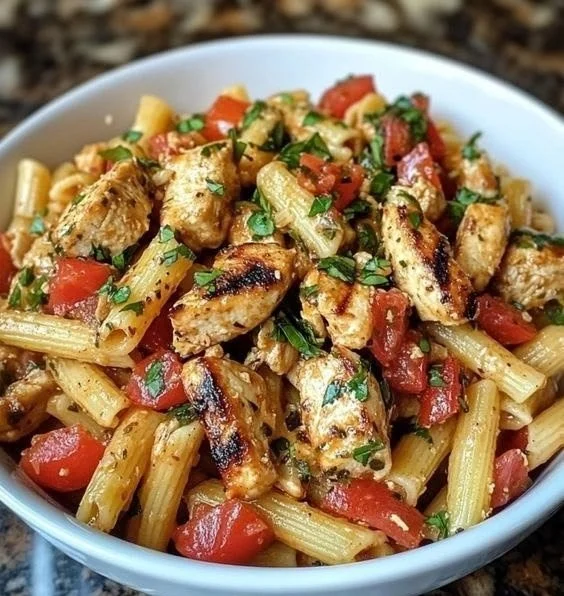
Bruschetta Chicken Pasta

Plate of Bruschetta Chicken Pasta garnished with fresh basil and tomatoes

Bruschetta Chicken Pasta is a delightful dish that combines the flavors of classic bruschetta with hearty pasta and tender chicken. This recipe bursts with freshness and is perfect for a family dinner or a gathering with friends. The combination of juicy tomatoes, fragrant basil, seasoned chicken, and pasta makes it a fulfilling meal that everyone will love. Plus, it’s simple enough for even beginner cooks to whip up, making it a great addition to your weekly dinner menu.

To prepare Bruschetta Chicken Pasta, you will need the following ingredients:

Ingredients

  • 2 boneless, skinless chicken breasts
  • 2 cups of pasta (penne, rotini, or your choice)
  • 2 cups of cherry tomatoes, diced
  • 1/4 cup of fresh basil, chopped
  • 2 cloves of garlic, minced
  • 1/4 cup of balsamic vinegar
  • 1/4 cup of olive oil
  • Salt and pepper to taste
  • Grated parmesan cheese for topping

Directions

  1. Start by boiling water in a large pot. Cook the pasta according to the package instructions until al dente. Drain and set aside.
  2. While the pasta is cooking, heat olive oil in a skillet over medium heat. Season the chicken breasts with salt and pepper, then cook for about 6-7 minutes on each side until fully cooked. Remove and let the chicken rest before slicing it into thin strips.
  3. In the same skillet, add minced garlic and diced cherry tomatoes. Sauté for about 3-4 minutes until tomatoes soften.
  4. Stir in the balsamic vinegar and add the chopped basil. Let it simmer for an additional minute.
  5. Toss the cooked pasta into the skillet with the tomato mixture, mixing well. Add the chicken on top and garnish with grated parmesan cheese before serving.

Bruschetta Chicken Pasta

Why You’ll Love Bruschetta Chicken Pasta

This dish combines classic Italian flavors in a fun and satisfying way. The juicy tomatoes and fresh basil provide a vibrant taste, while the chicken and pasta make it a hearty, fulfilling meal. It’s also versatile—feel free to customize it by adding veggies like spinach or bell peppers to suit your family’s preferences. Whether you’re hosting a dinner party or just looking for a quick weeknight dinner, Bruschetta Chicken Pasta is sure to impress.

Tips for success

  • Ensure your pasta is cooked al dente for the best texture.
  • Use fresh ingredients whenever possible for maximum flavor.
  • Adjust the amount of garlic and balsamic vinegar to match your taste.
  • If you crave more protein, you can add cooked shrimp or Italian sausage to the mix.

Bruschetta Chicken Pasta

Serving Suggestions

Pair Bruschetta Chicken Pasta with a side salad or garlic bread for a complete meal. A light white wine, such as Sauvignon Blanc, complements the flavors beautifully.

FAQs

Can I make this dish ahead of time?

Yes, you can prepare the pasta and chicken in advance. Just store everything separately and combine them when ready to serve.

What type of pasta works best?

Penne or rotini holds the sauce well, but feel free to use your favorite pasta shape.

Can I freeze leftovers?

Yes, you can freeze leftover Bruschetta Chicken Pasta for up to three months. Just make sure to store it in an airtight container.

For more tasty pasta ideas, check out our Baked Chicken Parmesan Pasta. Making this recipe is a fun experience, and you’ll enjoy delicious flavors all in one bowl!

Bruschetta Chicken Pasta

Bruschetta Chicken Pasta is a delightful dish that combines classic bruschetta flavors with pasta and tender chicken, perfect for family dinners or gatherings.

Main Ingredients

  • 2 pieces boneless, skinless chicken breasts (Seasoned with salt and pepper)
  • 2 cups pasta (penne, rotini, or your choice) (Cook according to package instructions)
  • 2 cups cherry tomatoes, diced (Fresh and juicy)
  • 1/4 cup fresh basil, chopped (Adds freshness to the dish)
  • 2 cloves garlic, minced (Enhances flavor)
  • 1/4 cup balsamic vinegar (Provides acidity and depth)
  • 1/4 cup olive oil (For cooking the chicken)
  • to taste Salt and pepper (For seasoning)
  • Grated to taste parmesan cheese (For topping)

Cooking Pasta

  1. Boil water in a large pot and cook the pasta according to package instructions until al dente. Drain and set aside.

Cooking Chicken

  1. Heat olive oil in a skillet over medium heat, season chicken breasts with salt and pepper, then cook for about 6-7 minutes on each side until fully cooked.
  2. Remove chicken from skillet and let it rest before slicing it into thin strips.

Making the Sauce

  1. In the same skillet, add minced garlic and diced cherry tomatoes, sauté for about 3-4 minutes until tomatoes soften.
  2. Stir in the balsamic vinegar and add the chopped basil. Let it simmer for an additional minute.

Combining Ingredients

  1. Toss the cooked pasta into the skillet with the tomato mixture, mixing well.
  2. Add the chicken on top and garnish with grated parmesan cheese before serving.

Ensure pasta is cooked al dente for the best texture. Use fresh ingredients whenever possible for maximum flavor. Adjust the amount of garlic and balsamic vinegar to match your taste. For more protein, you can add cooked shrimp or Italian sausage.

Dinner, Main Course
Italian
Bruschetta Chicken Pasta, Chicken Pasta, Easy Pasta Dish, Family Dinner, Italian Pasta Recipe

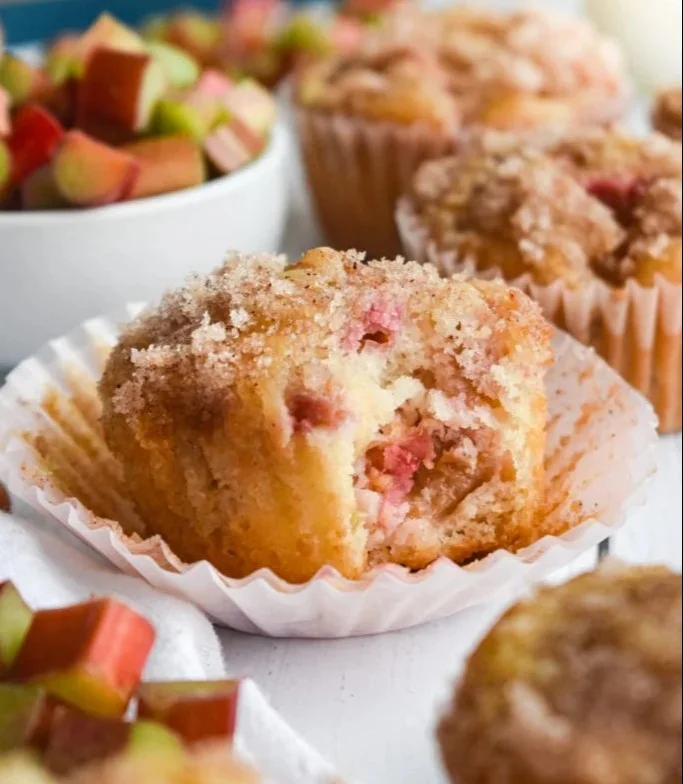
Rhubarb Muffins

Freshly baked rhubarb muffins on a wooden table

Rhubarb Muffins are a delightful treat that brings a burst of tangy flavor to your breakfast or snack time. These muffins are not just delicious, but they are also simple to make, making them a perfect choice for both novice and experienced bakers. With a tender crumb and a sweet-tart twist from the rhubarb, these muffins are sure to impress your family and friends. Imagine the warm aroma wafting through your kitchen as they bake, inviting everyone to gather around for a delicious bite. Ready to dive into a recipe that will quickly become a crowd-pleaser? Let’s get started!

How to prepare Rhubarb Muffins

To make these tasty Rhubarb Muffins, you will need the following ingredients:

Ingredients:

  • 1 ½ cups chopped rhubarb
  • ½ cup sugar
  • 1 ½ cups all-purpose flour
  • 1 teaspoon baking powder
  • ½ teaspoon baking soda
  • ½ teaspoon salt
  • 1 large egg
  • ½ cup milk
  • ¼ cup vegetable oil
  • 1 teaspoon vanilla extract

Directions:

  1. Preheat your oven to 350°F (175°C). Line a muffin tin with paper liners or grease it.
  2. In a bowl, mix the chopped rhubarb with ¼ cup of sugar and set it aside.
  3. In another bowl, whisk together the flour, baking powder, baking soda, and salt.
  4. In a separate bowl, beat the egg, then add the milk, vegetable oil, and vanilla extract. Mix well.
  5. Slowly add the wet ingredients to the dry ingredients. Stir until just combined, then fold in the rhubarb.
  6. Divide the batter evenly among the muffin cups. Sprinkle the remaining sugar on top.
  7. Bake for 18-20 minutes, or until a toothpick comes out clean.
  8. Let the muffins cool for a few minutes in the pan before transferring them to a wire rack.

Rhubarb Muffins

Why You’ll Love Rhubarb Muffins

There are many reasons to love Rhubarb Muffins. First, they have a unique flavor that combines sweet and tart, offering a refreshing taste that stands out among other muffins. Second, they are perfect for any occasion, whether it’s a cozy breakfast at home, a packed lunch for school or work, or a charming treat at a picnic. Plus, they are easy to make, so you can whip them up quickly without any fuss. With Rhubarb Muffins, you’ll find yourself wanting to bake a new batch time and again!

Tips for success

  • Ensure your rhubarb is fresh and cut into small pieces for even distribution in the batter.
  • Do not overmix the batter; this can cause your muffins to be tough. Stir until just combined for the best texture.
  • If you want a sweeter muffin, consider adding a bit more sugar or topping with a streusel before baking.

Rhubarb Muffins

Serving Suggestions

Enjoy your Rhubarb Muffins warm from the oven or at room temperature. They pair wonderfully with a cup of tea or coffee. You can also add a dollop of butter, some cream cheese, or even a sprinkle of powdered sugar on top for an extra special treat.

FAQs

Can I use frozen rhubarb for this recipe?

Yes, you can use frozen rhubarb. Just thaw it and drain any excess liquid before adding it to the batter.

How do I store leftover muffins?

Store leftover muffins in an airtight container at room temperature for up to three days. You can also freeze them for up to three months.

Can I add other fruits to the recipe?

Absolutely! You can mix in other fruits like strawberries or blueberries for a fun twist. Just make sure to adjust the sugar based on the sweetness of the fruit.

Rhubarb Muffins

Delightful Rhubarb Muffins with a sweet-tart twist, perfect for breakfast or a snack.

Muffin Ingredients

  • 1.5 cups chopped rhubarb (Fresh rhubarb, cut into small pieces)
  • 0.5 cups sugar (Divided into 1/4 cup for mixing with rhubarb and 1/4 cup for topping)
  • 1.5 cups all-purpose flour
  • 1 teaspoon baking powder
  • 0.5 teaspoon baking soda
  • 0.5 teaspoon salt
  • 1 large egg (Beaten)
  • 0.5 cups milk
  • 0.25 cups vegetable oil
  • 1 teaspoon vanilla extract

Preparation

  1. Preheat your oven to 350°F (175°C). Line a muffin tin with paper liners or grease it.
  2. In a bowl, mix the chopped rhubarb with 1/4 cup of sugar and set it aside.
  3. In another bowl, whisk together the flour, baking powder, baking soda, and salt.
  4. In a separate bowl, beat the egg, then add the milk, vegetable oil, and vanilla extract. Mix well.
  5. Slowly add the wet ingredients to the dry ingredients. Stir until just combined, then fold in the rhubarb.
  6. Divide the batter evenly among the muffin cups. Sprinkle the remaining sugar on top.

Baking

  1. Bake for 18-20 minutes, or until a toothpick comes out clean.
  2. Let the muffins cool for a few minutes in the pan before transferring them to a wire rack.

Ensure your rhubarb is fresh and cut into small pieces for even distribution in the batter. Do not overmix the batter; this can cause your muffins to be tough. Consider adding a bit more sugar for a sweeter muffin or topping with streusel before baking.

Breakfast, Snack
American
Baking, Muffin Recipe, Rhubarb Muffins, Simple Recipes, Sweet Tart Treat

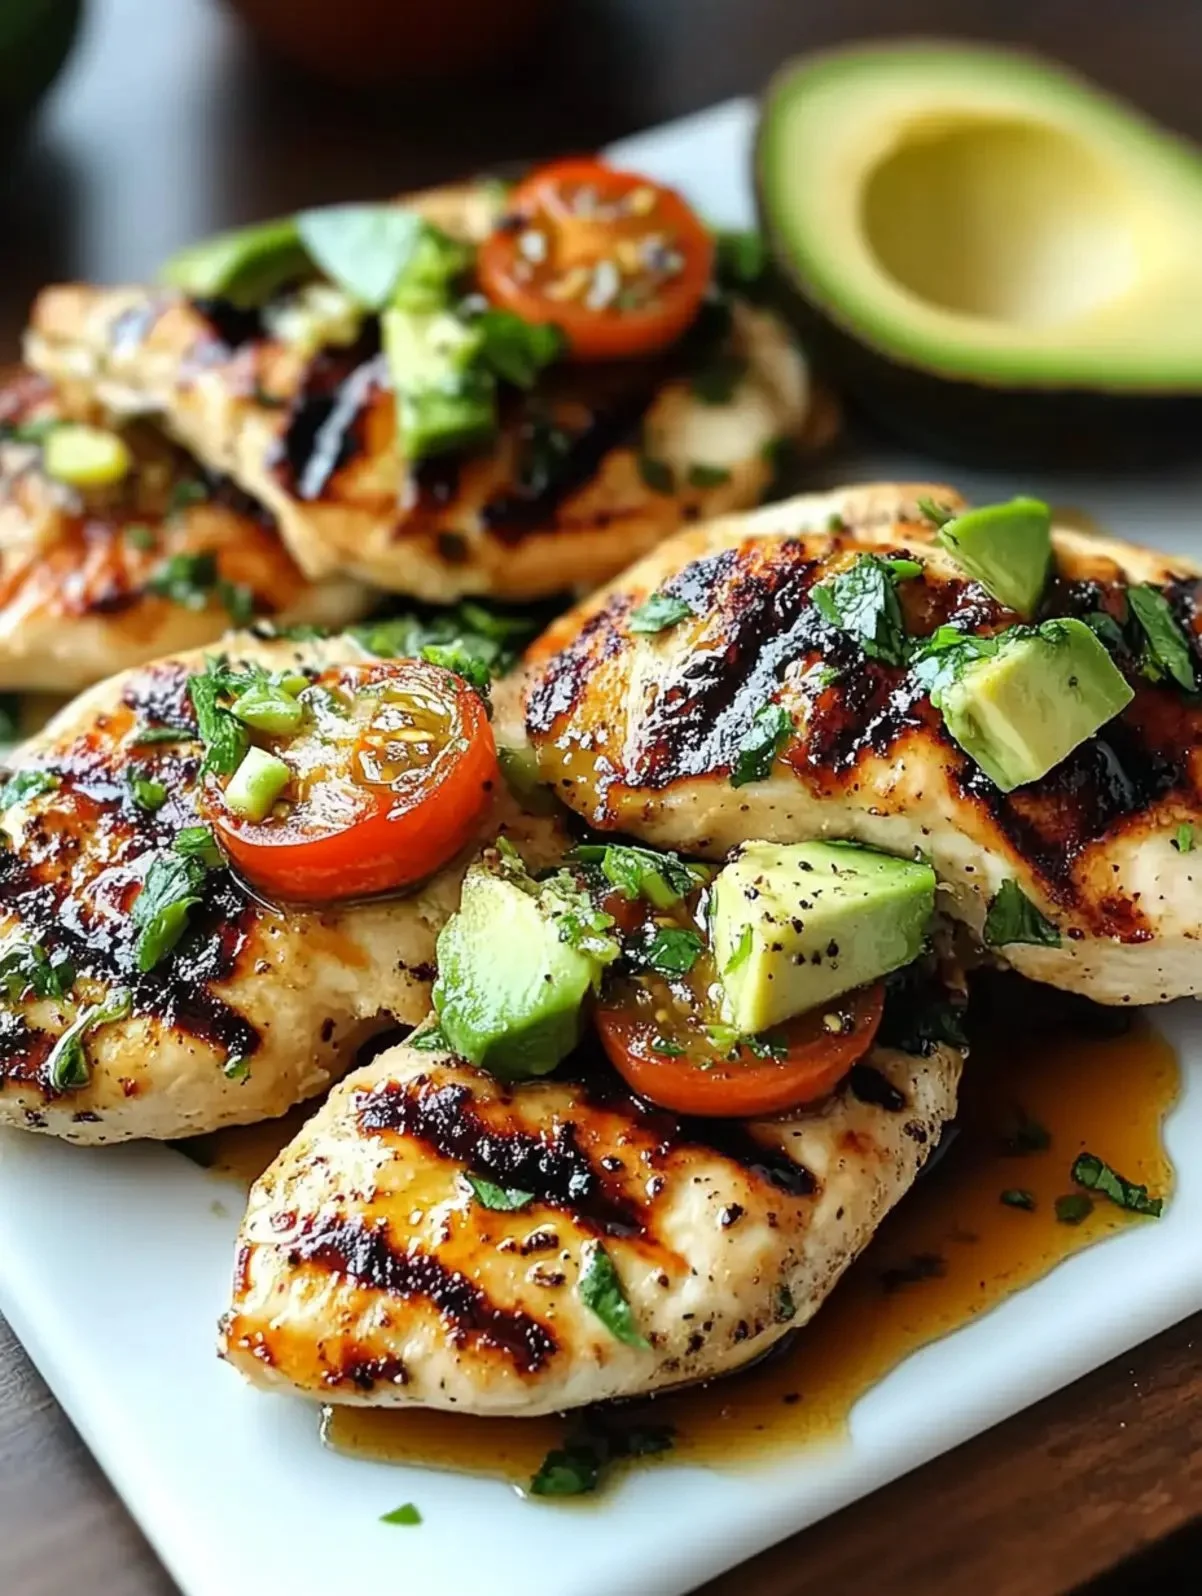
Ultimate Grilled California Avocado Chicken Recipe

Grilled avocado chicken served on a plate with fresh herbs.

There’s something magical about summer grilling, and when California avocados are involved, it’s a match made in heaven. This Ultimate Grilled California Avocado Chicken Recipe is not just a meal, it’s an experience! Imagine succulent chicken marinated to perfection, chargrilled to give that smoky flavor, and topped with creamy avocado you can almost taste the sunshine. Perfect for gatherings with friends or a cozy family dinner, this dish is sure to impress with its delightful flavors and vibrant presentation. So, roll up your sleeves and get ready to whip up something absolutely delicious!

How to prepare Ultimate Grilled California Avocado Chicken

Follow these easy steps for grilling a delightful chicken dish bursting with flavor:

  1. Ingredients:
  • 2 boneless, skinless chicken breasts
  • 2 ripe California avocados
  • 1 lime, juiced
  • 2 tablespoons olive oil
  • 1 tablespoon honey
  • 2 cloves garlic, minced
  • Salt and pepper to taste
  • Fresh cilantro for garnish (optional)
  1. Prepare the Marinade: In a bowl, mix lime juice, olive oil, honey, garlic, salt, and pepper.
  2. Marinate the Chicken: Place the chicken in a resealable bag and pour the marinade over it. Seal the bag and let it marinate for at least 30 minutes (or overnight for best results).
  3. Grill the Chicken: Preheat the grill to medium-high heat. Remove the chicken from the marinade and grill for about 6-7 minutes on each side or until fully cooked.
  4. Prepare the Avocado Topping: While the chicken is grilling, cut the avocados in half, remove the pits, and scoop out a little bit to make room for the chicken. You can mix the avocado with a bit of lime juice and cilantro for extra flavor.
  5. Assemble: Once the chicken is grilled, place it inside the avocado halves and drizzle any remaining marinade over the top.
  6. Serve: Enjoy your Ultimate Grilled California Avocado Chicken with your favorite side dishes!

Ultimate Grilled California Avocado Chicken Recipe

Why You’ll Love Ultimate Grilled California Avocado Chicken

You’ll fall in love with this dish for so many reasons. First, the combination of the juicy grilled chicken and creamy avocado creates a flavor explosion that is just irresistible. Plus, it’s healthy! California avocados are packed with good fats and nutrients, making this meal not only delicious but also nutritious. The fusion of tangy lime and sweet honey in the marinade enhances the taste, ensuring that every bite is a treat. It’s easy to prepare and works perfectly for both casual and festive occasions, making it a versatile choice for any cook.

Tips for success

To make the most out of your Ultimate Grilled California Avocado Chicken, follow these tips:

  • Choose Ripe Avocados: Make sure your avocados are at the right ripeness for a creamy texture.
  • Don’t Skip the Marinade: The longer you marinate the chicken, the more flavorful it will be. Aim for at least 30 minutes, but overnight is best.
  • Preheat Your Grill: Make sure your grill is hot before adding the chicken for a nice char.
  • Rest the Chicken: Allow the chicken to rest for a few minutes after grilling before slicing to keep it juicy.

Ultimate Grilled California Avocado Chicken Recipe

Serving Suggestions

This delicious chicken dish pairs wonderfully with a side of grilled vegetables, a fresh garden salad, or in soft tortilla wraps for a fun twist. You could also serve it with quinoa or rice for a hearty meal. Adding a sprinkle of fresh cilantro on top can elevate the presentation and flavor even more!

FAQs

Can I use frozen chicken breasts?

Yes, you can certainly use frozen chicken breasts, just be sure to thoroughly thaw them before marinating and grilling.

What if I don’t have a grill?

No problem! You can cook this chicken in a skillet on the stove or in the oven. Just make sure the internal temperature reaches 165°F.

Can I make the marinade ahead of time?

Absolutely! You can prepare the marinade ahead and store it in the fridge for up to a week. It’s a great way to save time during a busy week!

This Ultimate Grilled California Avocado Chicken Recipe is an easy, delicious way to enjoy summer flavors right in your kitchen. Enjoy the compliments you’ll receive when you serve this to your family and friends!

Ultimate Grilled California Avocado Chicken

A delightful grilled chicken dish topped with creamy California avocados that brings summer flavors to your table.

For the marinade

  • 1 lime 1 lime, juiced
  • 2 tablespoons 2 tablespoons olive oil
  • 1 tablespoon 1 tablespoon honey
  • 2 cloves 2 cloves garlic, minced
  • to taste Salt and pepper to taste

Main ingredients

  • 2 pieces 2 boneless, skinless chicken breasts
  • 2 pieces 2 ripe California avocados (Choose ripe avocados for creaminess.)
  • for garnish Fresh cilantro for garnish (optional)

Preparation

  1. In a bowl, mix lime juice, olive oil, honey, garlic, salt, and pepper to create the marinade.
  2. Place the chicken in a resealable bag and pour the marinade over it. Seal the bag and let it marinate for at least 30 minutes, or overnight for the best flavor.

Cooking

  1. Preheat the grill to medium-high heat.
  2. Remove the chicken from the marinade and grill for about 6-7 minutes on each side or until fully cooked.

Assembling

  1. While the chicken is grilling, cut the avocados in half, remove the pits, and scoop out a little bit to make room for the chicken.
  2. You can mix the avocado with a bit of lime juice and cilantro for extra flavor.
  3. Once the chicken is grilled, place it inside the avocado halves and drizzle any remaining marinade over the top.

Serving

  1. Enjoy your Ultimate Grilled California Avocado Chicken with your favorite side dishes!

For best results, marinate the chicken overnight. This dish pairs well with grilled vegetables or a fresh garden salad. You can also serve it in soft tortilla wraps or with quinoa or rice for a hearty meal.

Dinner, Main Course
American
California Avocados, Easy Grilling, grilled chicken, Healthy Dinner, Summer Recipes

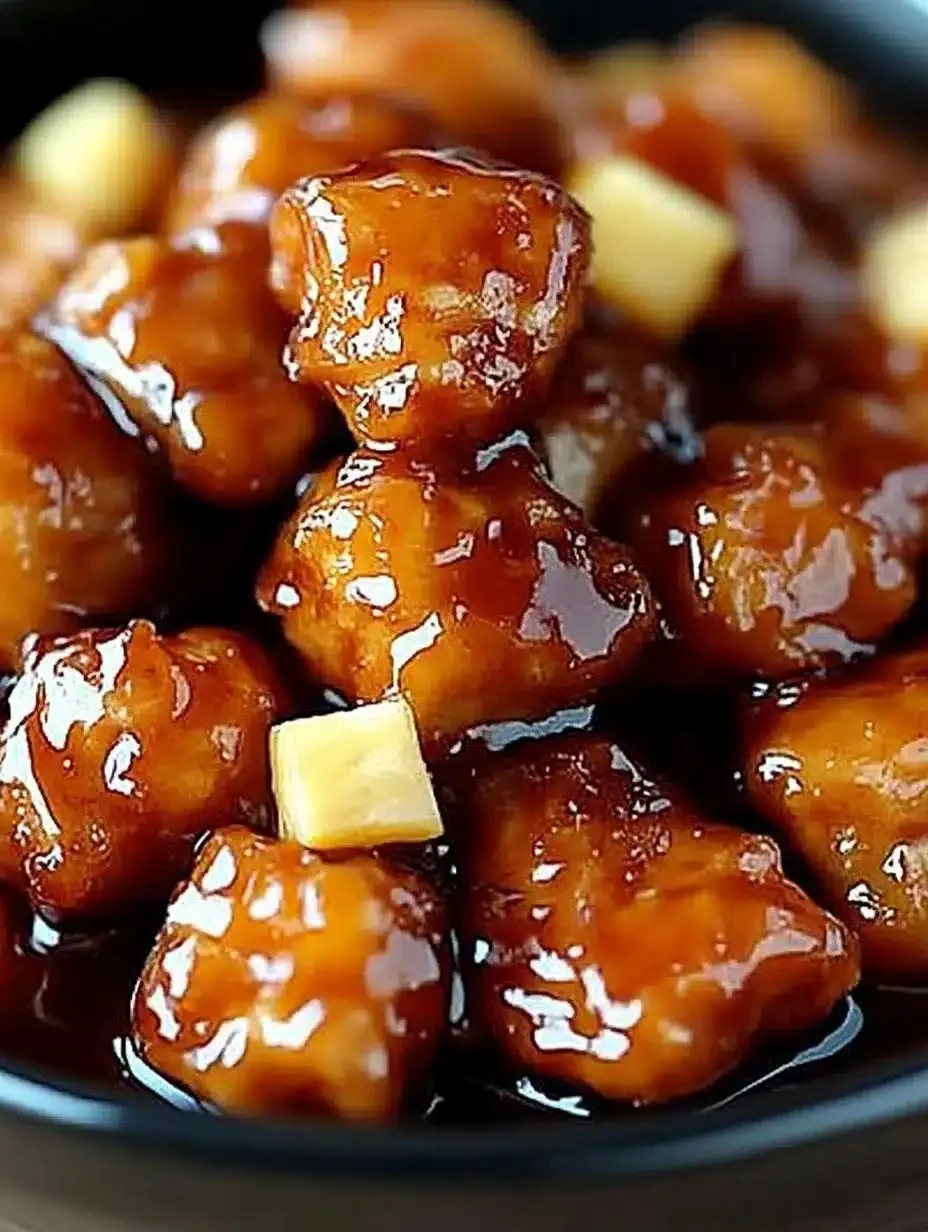
Brown Sugar Pineapple Chicken

Delicious Brown Sugar Pineapple Chicken served on a plate with fresh herbs.

Brown Sugar Pineapple Chicken is a delightful dish that combines sweet and savory flavors in a way that makes your taste buds dance. This recipe features tender chicken coated in a luscious sauce made from brown sugar, soy sauce, pineapple juice, and fresh pineapple chunks. The results are irresistible and perfect for any occasion.

Why You’ll Love Brown Sugar Pineapple Chicken

There are so many reasons to love this dish. For starters, the sweet brown sugar perfectly balances the savory soy sauce, creating a rich flavor profile that everyone will enjoy. Plus, the juicy pineapple adds a tropical touch that brightens the dish, making it a great choice for summer cookouts or family dinners. You will find that this recipe is not only easy to prepare but also a great way to impress your guests!

Brown Sugar Pineapple Chicken

Tips for success

To make sure your Brown Sugar Pineapple Chicken turns out perfectly, consider these helpful tips:

  1. Use Fresh Ingredients: Fresh pineapple will give the best flavor, but canned pineapple can also work in a pinch.
  2. Marinate the Chicken: Allowing the chicken to marinate in the sauce for at least 30 minutes will enhance its flavor.
  3. Cook on Medium Heat: Cooking over medium heat helps to caramelize the brown sugar without burning it.
  4. Serve Immediately: This dish tastes best when served right after cooking, making it a great option for those special meal times.

Brown Sugar Pineapple Chicken

Serving Suggestions

Pair your Brown Sugar Pineapple Chicken with fluffy rice to soak up that delicious sauce. You could also serve it with a crisp green salad or steamed vegetables to add some crunch to your meal. If you are looking to transport your taste buds further, consider serving it with a side of sweet potato fries for a fun twist!

FAQs

Can I use chicken thighs instead of chicken breast?

Yes, chicken thighs will work wonderfully and may even add a bit more flavor and juiciness to the dish.

Can I make this recipe gluten-free?

Absolutely! Simply use a gluten-free soy sauce to ensure the rest of the ingredients are gluten-free as well.

How should I store leftovers?

Store any leftover Brown Sugar Pineapple Chicken in an airtight container in the fridge for up to three days. You can reheat it in the microwave or on the stovetop.

This Brown Sugar Pineapple Chicken is just the kind of dish that brings warmth and smiles to the table. With its delightful combination of flavors, it truly is a crowd-pleaser that you’ll want to make again and again!

Brown Sugar Pineapple Chicken

A delightful dish that combines sweet and savory flavors with tender chicken coated in a luscious brown sugar and pineapple sauce.

Main Ingredients

  • 4 pieces Chicken breasts (Or chicken thighs can be used for more flavor.)
  • 1/2 cup Brown sugar (For the sauce.)
  • 1/4 cup Soy sauce (Use gluten-free if needed.)
  • 1/2 cup Pineapple juice (Freshly squeezed is best.)
  • 1 cup Fresh pineapple chunks (For added flavor and texture.)

Preparation

  1. Marinate the chicken in a mixture of brown sugar, soy sauce, pineapple juice, and pineapple chunks for at least 30 minutes.

Cooking

  1. In a skillet over medium heat, cook the marinated chicken until it’s browned and cooked through, about 20 minutes.
  2. Ensure the sauce thickens and caramelizes without burning.

Serving

  1. Serve the chicken immediately with fluffy rice, a crisp salad, or steamed vegetables.

Use fresh ingredients for best flavor. Store leftovers in an airtight container in the fridge for up to three days.

Dinner, Main Course
American, Tropical
Brown Sugar Pineapple Chicken, Chicken Recipe, Easy Dinner, Summer Recipe, Tropical Chicken

Pineapple BBQ Baked Chicken Breast

Pineapple BBQ Baked Chicken Breast on a plate with pineapple slices

Pineapple BBQ Baked Chicken Breast is a delightful dish that bursts with flavor, balancing the sweetness of pineapple with the smokiness of barbecue sauce. It’s an effortless recipe that you can whip up for a family dinner or serve at gatherings, and it’s sure to impress everyone. The juicy chicken breasts cook perfectly, absorbing all the delicious marinade. Imagine the aroma wafting through your kitchen as it bakes in the oven – it’s simply mouthwatering! This dish not only tastes amazing but also looks vibrant on the plate. Let’s dive into this crowd-pleaser recipe that will have everyone asking for seconds!

Pineapple BBQ Baked Chicken Breast

Why You’ll Love Pineapple BBQ Baked Chicken Breast

You’ll find several reasons to love this dish. First, it’s incredibly easy to make, with minimal ingredients and preparation time. Second, the combination of pineapple and barbecue sauce creates a sweet and tangy flavor that makes your taste buds dance with joy. Plus, it’s a great way to enjoy lean protein while still indulging in something tasty. Whether you’re feeding picky eaters or adventurous palates, this recipe is a fantastic option for everyone. And don’t forget how convenient it is; just pop it in the oven and let it cook while you prepare your favorite sides!

Tips for success

For perfect Pineapple BBQ Baked Chicken Breast, start with fresh, boneless chicken breasts to ensure they stay juicy while baking. Marinating is key, so let the chicken soak in the pineapple BBQ sauce for at least an hour, or overnight if you have time. This step enhances the flavor, making every bite succulent. Additionally, avoid overcooking by using a meat thermometer, ensuring your chicken reaches an internal temperature of 165°F. Lastly, serve it with some grilled vegetables or rice for a complete meal!

Pineapple BBQ Baked Chicken Breast

Serving Suggestions

Serve your Pineapple BBQ Baked Chicken Breast with fragrant rice or a hearty quinoa salad. You can also pair it with steamed vegetables like broccoli or green beans for a healthy touch. For a more casual meal, consider making a tropical coleslaw to contrast the savory chicken, or even create delicious sandwiches using the leftovers! The versatility of this dish makes it a wonderful addition to any meal plan.

FAQs

What is the best way to store leftovers?

Store leftovers in an airtight container in the refrigerator. They will stay fresh for up to three days.

Can I use chicken thighs instead of breasts?

Yes, chicken thighs work well too! They may need a little extra time to cook, so keep an eye on them.

What dips or sauces go well with this dish?

A refreshing yogurt dressing or ranch dip can complement the flavors beautifully. If you want more BBQ goodness, consider adding some extra barbecue sauce on the side!

Don’t wait too long; gather your ingredients and start creating this delightful Pineapple BBQ Baked Chicken Breast today!

Pineapple BBQ Baked Chicken Breast

A delightful dish that balances the sweetness of pineapple with the smokiness of barbecue sauce, perfect for family dinners or gatherings.

For the Chicken

  • 4 pieces boneless chicken breasts (Use fresh chicken for best results.)

For the Marinade

  • 1 cup pineapple BBQ sauce (Ensure it’s a quality sauce for the best flavor.)

Preparation

  1. Preheat your oven to 375°F (190°C).
  2. In a bowl, combine the boneless chicken breasts with the pineapple BBQ sauce, ensuring they are fully coated.
  3. Allow the chicken to marinate for at least 1 hour, or overnight for more flavor.

Cooking

  1. Place the marinated chicken breasts in a baking dish.
  2. Bake for 35-45 minutes, or until the internal temperature reaches 165°F (74°C).

Serving

  1. Let the chicken rest for a few minutes before slicing.
  2. Serve with fragrant rice, quinoa salad, or steamed vegetables.

For best results, avoid overcooking the chicken by using a meat thermometer. Leftovers can be stored in an airtight container in the refrigerator for up to three days.

Dinner, Main Course
American
Baked Chicken, easy chicken recipe, Family Dinner, marinated chicken, Pineapple BBQ Chicken