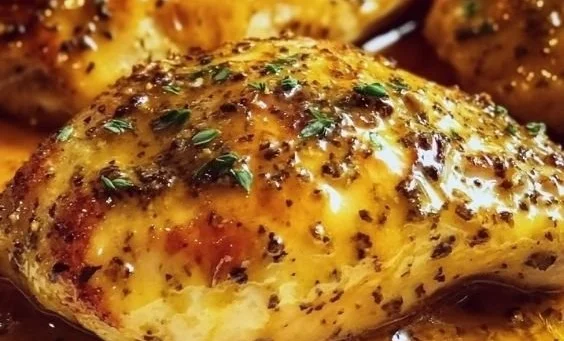
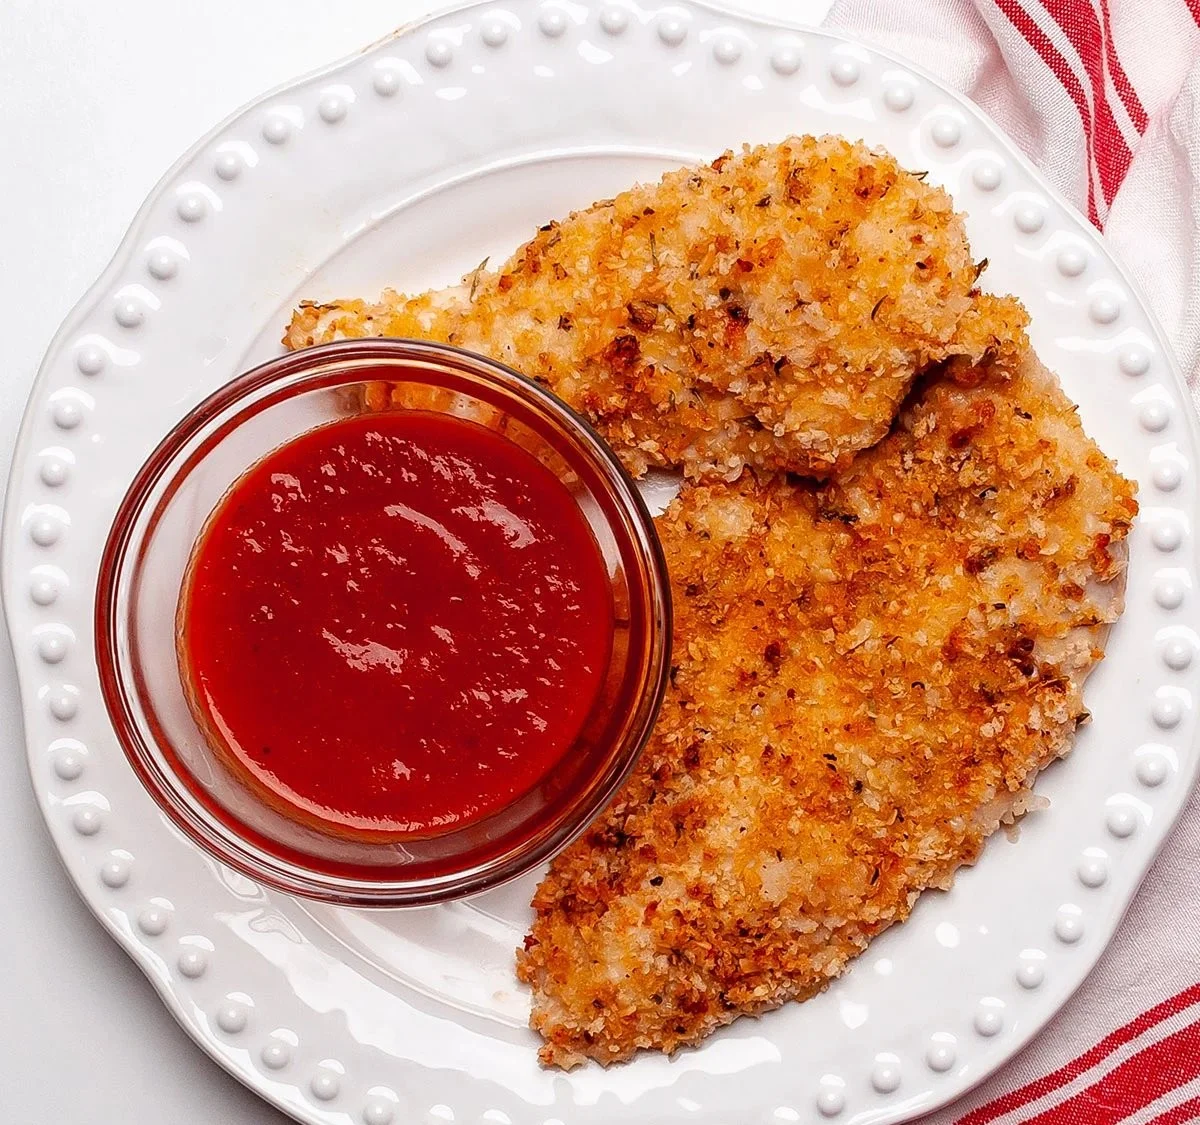
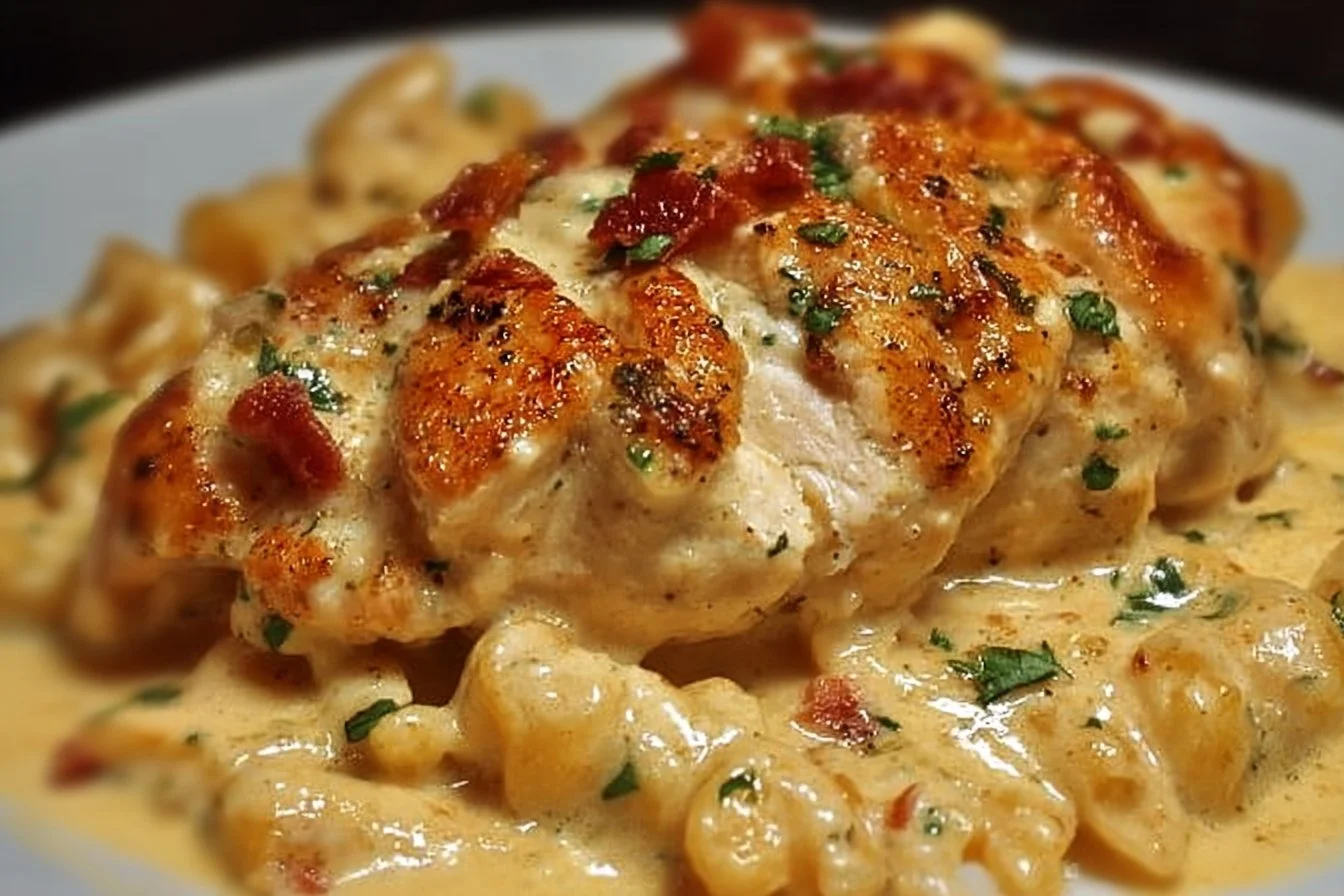
Million Dollar Baked Chicken Breast

When it comes to simple yet delightful meals, Million Dollar Baked Chicken Breast truly stands out. This dish is not just a treat for your taste buds, but it’s also a crowd-pleaser that leaves everyone asking for seconds. Imagine juicy chicken breasts baked to perfection, topped with creamy goodness that melts in your mouth. It’s a dish that makes weekday dinners feel special, without requiring much effort. If you’re looking to impress your family or friends, this recipe is your ticket to culinary greatness. Get ready, because making this delicious meal will soon become a favorite in your kitchen!

How to Prepare Million Dollar Baked Chicken Breast

To start, gather the following ingredients:

  • 4 boneless, skinless chicken breasts
  • 1 cup cream cheese, softened
  • 1 cup shredded cheddar cheese
  • 1 cup sour cream
  • 1 package ranch seasoning mix
  • Salt and pepper to taste

Before we dive into the steps, remember to set your oven to 350°F (175°C). This will give your chicken the perfect environment to bake while keeping it moist and tasty.
Million Dollar Baked Chicken Breast

  1. Begin by preparing the chicken breasts; season them with salt and pepper.
  2. In a separate bowl, mix the softened cream cheese, ranch seasoning, shredded cheddar cheese, and sour cream until well combined.
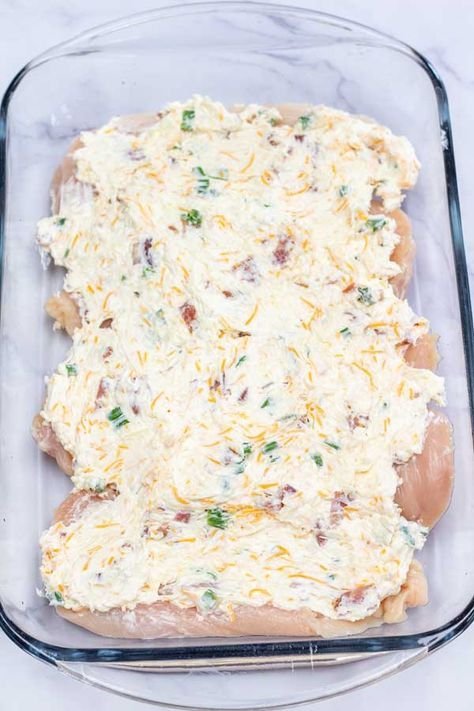
  3. Place the chicken in a baking dish and spread the cheese mixture generously on top.
  4. Bake for 30 to 35 minutes, or until the chicken is cooked through and the top is bubbly and golden brown.

Why You’ll Love Million Dollar Baked Chicken Breast

You’ll love Million Dollar Baked Chicken Breast not just for its mouthwatering flavor but also for its versatility. It pairs wonderfully with almost anything! Whether you enjoy it with a side of steamed vegetables, mashed potatoes, or a fresh salad, this dish fits right in. Plus, it’s an ideal option for potlucks or family gatherings. If you’re craving something equally delicious, consider trying balsamic baked chicken breast with mozzarella cheese, which offers a different but equally rich taste experience.

Tips for Success

  • Make sure to let the cream cheese soften at room temperature before mixing to ensure a smooth and creamy blend.
  • For added flavor, you can incorporate chopped herbs like parsley or chives into the cheese mixture.
  • If you prefer, you can grill the chicken instead of baking it for a lovely smoky flavor.

Million Dollar Baked Chicken Breast

Serving Suggestions

Million Dollar Baked Chicken Breast is perfect for any meal. Serve it with a side of roasted vegetables, or perhaps some buttery rice. For a fresh touch, consider a simple green salad topped with vinaigrette. If you’re in the mood for something more decadent, this dish pairs fabulously with garlic bread on the side. Don’t hesitate to explore and pair it with your favorite side dishes—it’s all about what you love!

FAQs

1. Can I use frozen chicken breasts for this recipe?

Yes, but make sure to thaw them completely before cooking for the best results.

2. How can I store leftovers?

Store any leftovers in an airtight container in the refrigerator for up to 3 days.

3. Is it possible to make this recipe ahead of time?

Absolutely! You can prepare the chicken and cheese mixture a day in advance, just cover it and keep it in the fridge until you’re ready to bake.

For another option, try the delicious garlic butter baked chicken breast for a rich flavor twist. This dish is sure to become a repeat in your meal rotation!

Million Dollar Baked Chicken Breast

A creamy, delicious baked chicken dish that’s easy to prepare and loved by all.

Main Ingredients

  • 4 pieces boneless, skinless chicken breasts
  • 1 cup cream cheese, softened (Ensure it is at room temperature for easy mixing.)
  • 1 cup shredded cheddar cheese
  • 1 cup sour cream
  • 1 package ranch seasoning mix
  • Salt and pepper to taste

Preparation

  1. Preheat your oven to 350°F (175°C).
  2. Season the chicken breasts with salt and pepper.
  3. In a bowl, mix the softened cream cheese, ranch seasoning, shredded cheddar cheese, and sour cream until well combined.
  4. Place the seasoned chicken breasts in a baking dish and spread the cheese mixture generously on top.

Cooking

  1. Bake for 30 to 35 minutes, or until the chicken is cooked through and the top is bubbly and golden brown.

For added flavor, consider incorporating chopped herbs like parsley or chives into the cheese mixture. You can also grill the chicken instead of baking it for a lovely smoky flavor.

Dinner, Main Course
American
Baked Chicken, Creamy Chicken Dish, Delicious Dinner, easy chicken recipe, Million Dollar Chicken

Baked Ranch Chicken

Baked Ranch Chicken is a dish that many families adore, and it’s not hard to see why. With its crispy, flavorful coating and juicy chicken, this recipe is a true crowd-pleaser. The ranch seasoning brings a delightful taste that complements the chicken perfectly, making it a favorite for dinner gatherings and busy weeknights. If you’re looking for a simple yet delicious meal that will leave everyone asking for seconds, this is it! So grab your apron and get ready to dive into this mouthwatering recipe.

How to prepare Baked Ranch Chicken

First, gather your ingredients. You will need chicken breasts, ranch seasoning, breadcrumbs, and cheese. To prepare, begin by preheating your oven. Next, coat the chicken breasts with ranch seasoning, then cover them in breadcrumbs for added crunch. Place the chicken in a baking dish and sprinkle cheese on top before baking. After a set time, you will end up with golden-brown, flavorful chicken that’s sure to impress.

Baked Ranch Chicken

Why You’ll Love Baked Ranch Chicken

This Baked Ranch Chicken is not only easy to make, but it also packs a punch of flavor that everyone loves. The combination of ranch seasoning and cheese creates a delicious crust that seals in the moisture of the chicken, keeping it tender and juicy. Plus, it pairs wonderfully with sides like steamed vegetables or mashed potatoes, making it a versatile option for any meal. For more savory dishes, you might want to check out this baked chicken parmesan pasta recipe that’s equally appealing.

Tips for success

Achieving the perfect Baked Ranch Chicken requires a few key tips. First, make sure to pound the chicken breasts to an even thickness to ensure they cook uniformly. Second, if you want extra crunch, consider adding crushed cornflakes to your breadcrumb mixture. Lastly, letting the chicken rest for a few minutes after baking will help retain its juices, giving you the best possible flavor and texture.

Serving Suggestions

Baked Ranch Chicken

Consider serving your Baked Ranch Chicken alongside a fresh salad, roasted vegetables, or a hearty grain like quinoa. These sides not only complement the chicken perfectly but also add more nutrition to your meal. You might also enjoy pairing it with a tasty dipping sauce, such as barbecue or honey mustard, to enhance the flavors further.

FAQs

1. Can I use chicken thighs instead of breasts?

Yes, chicken thighs would work well in this recipe. They may take a little longer to cook, but they will be equally flavorful.

2. How can I store leftovers?

Leftovers can be stored in an airtight container in the refrigerator for up to three days. Reheat in the oven for the best results.

3. Can I freeze Baked Ranch Chicken?

Absolutely! You can freeze cooked Baked Ranch Chicken in a suitable container for up to two months. Just remember to thaw it completely before reheating. For another delicious chicken variation, try this balsamic baked chicken breast with mozzarella cheese recipe for a delightful change.

Baked Ranch Chicken

A crispy and flavorful chicken dish featuring ranch seasoning that is perfect for family dinners and gatherings.

Main Ingredients

  • 4 pieces chicken breasts (Pounded to an even thickness)
  • 1 packet ranch seasoning (For coating)
  • 1 cup breadcrumbs (For coating; can add crushed cornflakes for extra crunch)
  • 1 cup cheese (Sprinkled on top before baking)

Preparation

  1. Preheat your oven.
  2. Coat the chicken breasts with ranch seasoning.
  3. Cover the chicken in breadcrumbs.
  4. Place the chicken in a baking dish.
  5. Sprinkle cheese on top of the chicken.

Baking

  1. Bake until the chicken is golden-brown and cooked through, about 30 minutes.

Pound the chicken to ensure uniform cooking. Let the chicken rest for a few minutes after baking to retain its juices.

Dinner, Main Course
American
Baked Chicken, Easy Dinner, Family Meal, Ranch Chicken

Juicy 30-Minute Baked Chicken Breast

Are you looking for a quick and delicious meal that will surely impress your family? If so, the Juicy 30-Minute Baked Chicken Breast is just the recipe you need! This dish brings together tender chicken, flavorful seasoning, and a hint of mouthwatering juices that make it a crowd-pleaser at any dinner table. It’s perfect for busy weeknights when you want something tasty without spending hours in the kitchen. Just imagine biting into a juicy piece of chicken that’s bursting with flavor—sounds delicious, right? Let’s dive into how to prepare this delightful meal.

How to prepare Juicy Baked Chicken Breast

First, gather your ingredients and preheat your oven. You will want your chicken to cook evenly and quickly. Make sure to season it well with your favorite spices. For a truly delicious twist, you might also want to check out this Pineapple BBQ Baked Chicken Breast recipe, which adds a fun fruity flavor to your chicken!

Juicy 30-Minute Baked Chicken Breast

Once your oven is ready, place the chicken breasts in a baking dish. Brush them with some olive oil, season with salt and pepper, and sprinkle any additional herbs or spices that you enjoy. Bake them for around 20-30 minutes, or until the chicken reaches an internal temperature of 165°F. This will ensure that your chicken is cooked perfectly and remains juicy.

Juicy 30-Minute Baked Chicken Breast

Why You’ll Love Baked Chicken Breast

This recipe is not only quick to make but also adaptable to everyone’s taste! You can easily customize the seasoning to suit your palate, whether you enjoy something zesty, sweet, or savory. Besides, baked chicken is loaded with protein and is a healthier option compared to fried versions. It pairs wonderfully with various side dishes, making it an ideal choice for family gatherings or meal prep for the week ahead.

Tips for success

To ensure your chicken is as juicy as possible, here are some helpful tips:

  • Always let the chicken rest for a few minutes before slicing, which helps to lock in those tasty juices.
  • Consider marinating the chicken for a few hours before baking for even more flavor.
  • Experiment with different spices and herbs to discover your favorite combination.

Serving Suggestions

Juicy 30-Minute Baked Chicken Breast

Baked chicken breast is versatile and can be served in many ways. Serve it alongside a fresh salad, roasted vegetables, or creamy mashed potatoes. You could even slice the chicken and put it in a sandwich or wrap for a delicious lunch option. If you’re in the mood for something different, you might also enjoy trying out the Balsamic Baked Chicken Breast with Mozzarella Cheese, which adds a delightful twist to your meal.

FAQs

1. How can I store leftover baked chicken?

Store any leftover chicken in an airtight container in the refrigerator for up to 4 days.

2. Can I freeze baked chicken?

Yes, baked chicken can be frozen. Make sure it’s completely cool, then wrap it tightly in freezer-safe packaging. It should be good for up to 3 months.

3. What are some easy sides to serve with baked chicken?

Some great sides include steamed broccoli, quinoa, or a simple rice pilaf. You can choose sides that add nutrition and color to your plate.

Juicy Baked Chicken Breast

A quick and delicious baked chicken breast recipe that is tender, flavorful, and perfect for busy weeknights.

Main Ingredients

  • 4 pieces chicken breasts (Boneless and skinless for best results)
  • 2 tablespoons olive oil (For brushing the chicken)
  • 1 teaspoon salt (Adjust to taste)
  • 1 teaspoon black pepper (Adjust to taste)

Optional Seasonings

  • to taste additional herbs and spices (Customize to your preference (e.g., garlic powder, paprika))

Preparation

  1. Preheat your oven to 375°F (190°C).
  2. Gather all the ingredients.

Seasoning

  1. Brush the chicken breasts with olive oil.
  2. Season the chicken with salt, pepper, and any additional herbs or spices.

Baking

  1. Place the seasoned chicken breasts in a baking dish.
  2. Bake in the preheated oven for 20-30 minutes until the internal temperature reaches 165°F (74°C).

Serving

  1. Let the chicken rest for a few minutes before slicing to lock in the juices.
  2. Serve with your choice of sides like salad, roasted vegetables, or mashed potatoes.

For added flavor, consider marinating the chicken for a few hours before baking. Experiment with different spices to discover your favorite flavor combination.

Dinner, Main Course
American
Baked Chicken, Easy Dinner, Family Dinner, Healthy Recipe, Quick Meal

Easy Baked Honey Dijon Chicken

Easy baked honey dijon chicken recipe on a plate

If you’re looking for a simple yet delicious dinner idea, look no further than Easy Baked Honey Dijon Chicken. This dish combines the sweet richness of honey with the tangy flavor of Dijon mustard, creating a delightful taste that everyone will love. Perfect for busy weeknights or casual gatherings, this recipe is sure to become a family favorite. With its easy preparation and tantalizing aroma wafting through your kitchen, you’ll be eager to whip this up time and again.

Why You’ll Love Easy Baked Honey Dijon Chicken

What’s not to love about this chicken? It’s moist, flavorful, and incredibly easy to make. The honey and Dijon glaze caramelizes beautifully in the oven, giving the chicken a nice golden finish. Plus, it pairs well with a variety of side dishes, making it a versatile option for any meal. If you’re looking for dishes that bring smiles to the dinner table, this chicken recipe definitely hits the mark!

Tips for success

To achieve the best results with your Easy Baked Honey Dijon Chicken, consider these helpful tips:

  • Marinate for Extra Flavor: Allow the chicken to marinate in the honey Dijon mixture for at least 30 minutes. This will enhance the flavors and tenderness of the meat.
  • Use Fresh Ingredients: Fresh honey and Dijon mustard make a noticeable difference in taste.
  • Adjust Cooking Time: Depending on the size of your chicken pieces, be mindful of the cooking time to ensure they are cooked through. A meat thermometer should read 165°F (75°C) to confirm they are safe to eat.

Serving Suggestions

This flavorful chicken dish goes well with many sides. Consider pairing it with steamed vegetables, roasted potatoes, or a fresh salad. You can also serve it with rice or quinoa for a complete meal. For a delightful twist, try drizzling some additional honey over the chicken right before serving.

Easy Baked Honey Dijon Chicken

FAQs

Can I use other types of chicken?

Yes, you can use other cuts, such as chicken thighs or drumsticks. Just ensure they are cooked through to the right temperature.

How do I store leftovers?

Store any leftovers in an airtight container in the refrigerator for up to three days. You can reheat them in the oven or microwave.

Can I freeze this dish?

Absolutely! You can freeze the uncooked marinated chicken for up to three months. Just remember to thaw it completely before baking.

For another delicious chicken option, check out this easy hot honey chicken thighs recipe!

Easy Baked Honey Dijon Chicken

Easy Baked Honey Dijon Chicken

A simple yet delicious chicken dish combining honey and Dijon mustard for a flavorful glaze, perfect for busy weeknights and gatherings.

For the marinade

  • 1/4 cup honey (Use fresh honey for best flavor.)
  • 1/4 cup Dijon mustard (Use fresh Dijon mustard.)

Main ingredients

  • 4 pieces chicken breasts (Can substitute with chicken thighs or drumsticks.)

Preparation

  1. In a bowl, mix honey and Dijon mustard to create the marinade.
  2. Place chicken breasts in a resealable bag or dish and pour the marinade over them.
  3. Marinate the chicken in the refrigerator for at least 30 minutes.

Cooking

  1. Preheat the oven to 375°F (190°C).
  2. Remove the chicken from the marinade and place it in a baking dish.
  3. Bake in the preheated oven for about 30 minutes, or until chicken reaches an internal temperature of 165°F (75°C).

For added flavor, drizzle extra honey over the chicken before serving. Store leftovers in an airtight container in the refrigerator for up to three days. Can freeze marinated chicken for up to three months.

Dinner, Main Course
American
Baked Chicken, easy chicken recipe, Family Favorite, Honey Dijon Chicken, Simple Dinner

Spicy Baked Chicken Strips

Spicy baked chicken strips served on a plate with dipping sauce

Warm up your kitchen with the mouthwatering aroma of Spicy Baked Chicken Strips. This recipe is not just about heat; it combines tender chicken with crunchy breading, creating a delicious dish that everyone will love. Perfect for a family dinner or a friendly gathering, these chicken strips will have your guests coming back for more. With a kick of spice and a satisfying crunch, they are sure to be a hit. Plus, they’re baked, making them a healthier option that’s easy to whip up any night of the week. So, let’s dive into this fantastic recipe!

How to prepare Spicy Baked Chicken Strips

Spicy Baked Chicken Strips

Start by gathering your ingredients: chicken breasts, breadcrumbs, flour, and a mix of spices like paprika, cayenne pepper, and garlic powder. Preheat your oven to 400°F (200°C) and line a baking sheet with parchment paper. Cut the chicken breasts into strips. Set up three bowls: one with flour, the second with beaten eggs, and the third with a mixture of breadcrumbs and spices. Dredge the chicken strips in flour, dip them in the egg, and then coat them with the seasoned breadcrumbs. Place the strips on the baking sheet and bake for about 20-25 minutes until golden and crispy.

Spicy Baked Chicken Strips

Why You’ll Love Spicy Baked Chicken Strips

These Spicy Baked Chicken Strips are undeniably easy to make and full of flavor. You get that delightful crunch every bite, along with a subtle kick that won’t overwhelm your taste buds. They are perfect for dipping into your favorite sauces, making them an excellent addition to any game day spread or a quick weeknight meal. You can customize the spice level to suit your family’s taste preferences, ensuring everyone can enjoy them.

Tips for success

To make sure your chicken strips turn out perfectly, here are a few tips: First, don’t skip the dredging step, as it helps the coating stick better. Second, use fresh breadcrumbs for a crunchier finish. Lastly, for added flavor, let the chicken strips sit in the spices for at least 30 minutes before baking. This allows the spices to really soak in, enhancing every bite.

Serving Suggestions

Serve your Spicy Baked Chicken Strips with a side of creamy ranch or tangy barbecue sauce for dipping. They pair wonderfully with a fresh salad or crispy fries. For a complete meal, add some roasted vegetables or a side of rice. If you’re looking for more ideas, check out this baked chicken parmesan pasta recipe for another delicious chicken dish.

FAQs

How can I make these chicken strips healthier?

You can substitute regular breadcrumbs with whole wheat breadcrumbs or crush some oats for a healthier coating.

Can I freeze the chicken strips?

Yes, you can freeze the uncooked, breaded chicken strips. Just make sure to freeze them in a single layer before transferring them to a zip-top bag for long-term storage.

What is the best way to store leftovers?

Store any leftover chicken strips in an airtight container in the fridge for up to three days. Reheat them in the oven for the best texture.

Spicy Baked Chicken Strips

These Spicy Baked Chicken Strips combine tender chicken and crunchy breading for a delicious dish that’s both flavorful and healthier.

Main ingredients

  • 1 lb chicken breasts (Cut into strips)
  • 1 cup breadcrumbs (Use fresh breadcrumbs for a crunchier finish)
  • 1/2 cup all-purpose flour (For dredging)
  • 2 large eggs (Beaten, for coating)

Spice mix

  • 1 tbsp paprika (Adjust spice level as desired)
  • 1/2 tbsp cayenne pepper (Use less for a milder flavor)
  • 1 tbsp garlic powder

Preparation

  1. Preheat your oven to 400°F (200°C) and line a baking sheet with parchment paper.
  2. Cut the chicken breasts into strips.
  3. Set up three bowls: one with flour, the second with beaten eggs, and the third with a mixture of breadcrumbs and spices.
  4. Dredge the chicken strips in flour, dip them in the egg, and then coat them with the seasoned breadcrumbs.

Baking

  1. Place the strips on the baking sheet and bake for about 20-25 minutes until golden and crispy.

For extra flavor, let the chicken strips sit in the spices for at least 30 minutes before baking to enhance the taste.

Appetizer, Main Course
American
Baked Chicken Strips, Easy Chicken Dinner, Finger Food, Healthy Chicken Recipe, Spicy Chicken

BEST Crispy Baked Panko Chicken Recipe

Crispy baked panko chicken on a plate garnished with herbs

There’s something truly wonderful about the crunch of crispy chicken that brings smiles to faces. The BEST Crispy Baked Panko Chicken Recipe is a simple dish that nearly everyone loves, making it perfect for family dinners or gatherings with friends. This delightful chicken has a golden, crispy coating thanks to the panko breadcrumbs, giving it a satisfying texture without frying. You’ll love how easy it is to prepare, and the flavor is just incredible! Gather your ingredients, roll up your sleeves, and let’s make a dish that will have everyone asking for seconds.

How to prepare BEST Crispy Baked Panko Chicken

  1. Preheat the oven to 400°F (200°C).
  2. Prepare the chicken: Take boneless, skinless chicken breasts and pound them a bit for even cooking.
  3. Make the coating: In a bowl, mix panko breadcrumbs, grated Parmesan cheese, garlic powder, onion powder, salt, and pepper together.
  4. Egg wash: In another bowl, beat a couple of eggs and dip each chicken piece in the egg, ensuring it is well coated.
  5. Coat the chicken: Roll each piece in the panko mixture, pressing gently so it sticks well.
  6. Place on a baking sheet: Lay the coated chicken on a lined baking sheet, making sure they don’t touch.
  7. Bake: Cook for 20-25 minutes, or until golden brown and cooked through, checking with a meat thermometer to ensure it reaches 165°F (75°C).
  8. Serve and enjoy: Let the chicken sit for a few minutes, then serve hot with your favorite sides.

BEST Crispy Baked Panko Chicken Recipe

Why You’ll Love BEST Crispy Baked Panko Chicken

You’ll absolutely love this recipe for a few reasons. First, it’s a healthier alternative to fried chicken while still delivering that beloved crunch. The panko breadcrumbs not only provide a crispy texture but also soak up lovely flavors. Plus, it’s a versatile dish that pairs wonderfully with various sides and dips. Whether you’re doing a cozy family night or hosting, this chicken is guaranteed to be a crowd-pleaser!

Tips for success

  • Make sure to not overcrowd the baking sheet so each piece gets the right amount of heat for that crispy finish.
  • Let the chicken rest after baking. This helps ensure all the juices stay inside for a moist bite.
  • Get creative with seasonings! Adding herbs can bring a fresh twist to your chicken, opening up even more flavor combinations.

Serving Suggestions

This crispy baked panko chicken serves well alongside a fresh salad, mashed potatoes, or some roasted veggies. You could also pair it with dips like honey mustard or barbecue sauce for a flavor burst. Consider serving it with rice or pasta to take a more filling approach to your meal.

FAQs

Can I make this chicken ahead of time?

Yes, you can prepare the chicken earlier in the day and refrigerate it before baking. Just remember to add a few extra minutes to the baking time if it’s cold from the fridge!

Can I use regular breadcrumbs instead of panko?

While you can use regular breadcrumbs, you won’t achieve the same level of crunch. Panko breadcrumbs are lighter and result in a crispier texture.

What should I do with leftovers?

Store any leftovers in an airtight container in the fridge for up to 3 days. Reheat them in the oven or air fryer for the best results in maintaining the crispiness.

BEST Crispy Baked Panko Chicken Recipe

If you’re looking for more tasty chicken ideas, check out this delicious air fryer honey butter garlic chicken tenders recipe for another savory treat!

Crispy Baked Panko Chicken

Enjoy the crunchy goodness of this healthier alternative to fried chicken, featuring a golden panko breadcrumb coating.

Chicken Preparation

  • 4 pieces Boneless, skinless chicken breasts (Pounded for even cooking)

Coating

  • 1 cup Panko breadcrumbs (Provides crispiness)
  • 1/2 cup Grated Parmesan cheese (Adds flavor)
  • 1 teaspoon Garlic powder
  • 1 teaspoon Onion powder
  • 1 teaspoon Salt (Adjust to taste)
  • 1/2 teaspoon Black pepper (Adjust to taste)

Egg Wash

  • 2 large Eggs (Beaten for coating)

Preparation

  1. Preheat the oven to 400°F (200°C).
  2. Prepare the chicken by pounding the boneless, skinless chicken breasts for even cooking.

Coating

  1. In a bowl, mix panko breadcrumbs, grated Parmesan cheese, garlic powder, onion powder, salt, and pepper together.
  2. In another bowl, beat the eggs and dip each chicken piece in the egg, ensuring it is well coated.
  3. Roll each piece in the panko mixture, pressing gently so it sticks well.

Baking

  1. Place the coated chicken on a lined baking sheet, ensuring they don’t touch.
  2. Bake for 20-25 minutes, or until golden brown and cooked through, reaching an internal temperature of 165°F (75°C).
  3. Let the chicken sit for a few minutes before serving hot with your favorite sides.

Do not overcrowd the baking sheet to ensure each piece gets the right amount of heat for a crispy finish. Get creative with seasonings by adding herbs for a fresh twist.

Dinner, Main Course
American
Baked Chicken, Crispy Chicken, Family Dinner, Healthy Chicken, Panko Chicken

Creamy Baked Asiago Chicken

Creamy Baked Asiago Chicken with a rich sauce and herbs

Creamy Baked Asiago Chicken is a delightful dish that warms the heart and fills the belly. This meal combines tender chicken with a rich and creamy sauce that has just the right amount of cheesy goodness. It’s the kind of recipe that takes a dinner from ordinary to extraordinary, making it perfect for family gatherings or cozy nights in. The flavorful asiago cheese pairs beautifully with the juicy chicken, creating a dish that everyone will rave about. If you’re looking for something that’s not just delicious but also easy to prepare, you’ve hit the jackpot! Let’s dive into how to whip up this scrumptious dish.

How to Prepare Creamy Baked Asiago Chicken

To start, preheat your oven to 375 degrees Fahrenheit. Take four boneless, skinless chicken breasts and season them with salt and pepper. In a large skillet, melt some butter over medium heat, then add the chicken breasts. Brown each side for about 4-5 minutes until they develop a nice golden crust.

Next, in a mixing bowl, combine cream cheese, asiago cheese, garlic powder, and Italian seasoning. Spread this creamy mixture over the browned chicken in the skillet. Once covered, transfer the skillet to the preheated oven. Bake for about 25-30 minutes until the chicken is cooked through and registers at least 165 degrees Fahrenheit on a meat thermometer.

For a delightful finish, garnish with fresh parsley before serving. Just like that, you’ve created an easy yet impressive meal that is sure to be a favorite!

Why You’ll Love Creamy Baked Asiago Chicken

Creamy Baked Asiago Chicken is not just about flavor, it’s about comfort too. The creamy sauce envelops the chicken, making every bite soft and luscious. Asiago cheese gives a nice, tangy kick that tantalizes your taste buds. Plus, this dish is a breeze to prepare, saving you time in the kitchen while still impressing your family or guests.

Whether you’re new to cooking or a seasoned chef, you’ll find this recipe straightforward and satisfying. It works well for busy weeknights and special occasions alike. And let’s not forget about its lovely presentation; the vibrant colors and creamy sauce make for an eye-catching dish that is sure to impress everyone at the table!

Tips for Success

To ensure your Creamy Baked Asiago Chicken turns out perfectly every time, here are some helpful tips. Firstly, make sure not to overcook the chicken when browning it in the skillet. You want a nice sear but not to cook it all the way through, as it will finish cooking in the oven.

Using room temperature cream cheese can make mixing it with the other ingredients much easier, creating a smoother sauce. If you want extra flavor, consider adding sautéed spinach or mushrooms to the cheesy mixture. Lastly, don’t skip the garnish; fresh parsley not only adds a pop of color but also a hint of freshness that brightens the dish!

Serving Suggestions

Creamy Baked Asiago Chicken pairs wonderfully with various sides. For a complete meal, consider serving it along with fluffy mashed potatoes or buttery rice to soak up all that delicious sauce.

You can also add some steamed vegetables like broccoli or green beans for a healthy balance. If you want a lighter option, serve it over a fresh salad with a lemon vinaigrette for a bright contrast. This dish is versatile, making it an exciting option for any meal occasion!

FAQs

1. Can I use other types of cheese?

Yes, you can substitute asiago cheese with parmesan or mozzarella if you prefer. Both offer delicious flavor options for this dish!

2. Can I use skin-on chicken for this recipe?

Absolutely! Just be aware that skin-on chicken may render more fat while cooking, so adjust your skillet accordingly.

3. How do I store leftovers?

Store any leftovers in an airtight container in the refrigerator. They can last for about 3-4 days, so you can enjoy them again!

4. Can I freeze the prepared dish?

Yes, you can freeze the baked chicken. Just ensure it’s in a freezer-safe container, and it will last for up to 3 months. Thaw it in the fridge before reheating.

5. Can I make this dish ahead of time?

Certainly! You can prepare everything up to baking and store it in the fridge. When you’re ready to eat, just pop it in the oven as directed.

[tasty-recipe id=”5109″]

Creamy Baked Asiago Chicken

A delightful dish combining tender chicken with a rich, creamy asiago cheese sauce, perfect for both family gatherings and cozy nights in.

Chicken Preparation

  • 4 pieces boneless, skinless chicken breasts (Seasoned with salt and pepper)
  • 2 tablespoons butter (For browning the chicken)

Creamy Asiago Sauce

  • 8 ounces cream cheese (Use room temperature for easier mixing)
  • 1 cup asiago cheese (Grated)
  • 1 teaspoon garlic powder
  • 1 teaspoon Italian seasoning

Garnish

  • 2 tablespoons fresh parsley (Chopped, for garnish)

Preparation

  1. Preheat your oven to 375°F.
  2. Season the chicken breasts with salt and pepper.

Browning the Chicken

  1. In a large skillet, melt butter over medium heat.
  2. Add the chicken breasts and brown each side for about 4-5 minutes until golden.

Making the Sauce

  1. In a mixing bowl, combine cream cheese, asiago cheese, garlic powder, and Italian seasoning.
  2. Spread the creamy mixture evenly over the browned chicken in the skillet.

Baking

  1. Transfer the skillet to the preheated oven and bake for about 25-30 minutes.
  2. Ensure the chicken is cooked through and registers at least 165°F on a meat thermometer.

Serving

  1. Garnish with fresh parsley before serving.

For best results, don’t overcook the chicken when browning. You can add sautéed spinach or mushrooms for extra flavor. The dish pairs well with mashed potatoes, buttery rice, or a fresh salad.

Dinner, Main Course
American
Asiago, Baked, Chicken, Comfort Food, Creamy