No-Bake Strawberry Dessert

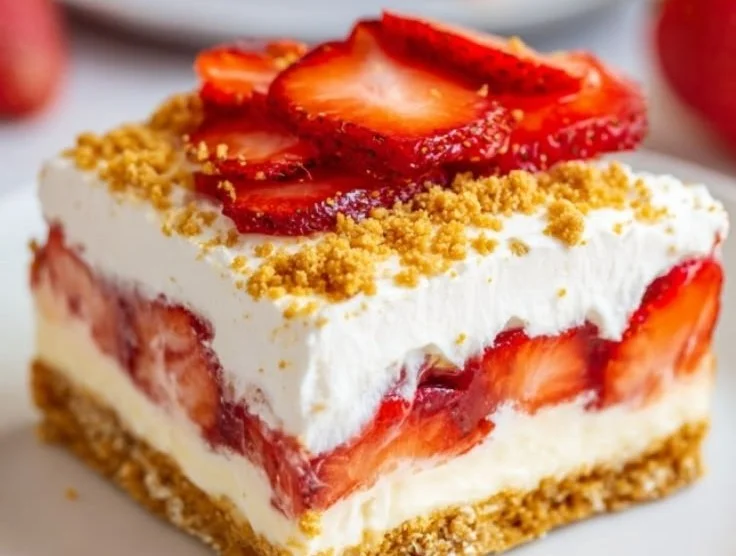
Delicious no-bake strawberry dessert topped with fresh strawberries and whipped cream

When the weather gets warm, there’s nothing quite like a refreshing dessert to cool you down. This No-Bake Strawberry Dessert is a delightful way to enjoy the sweetness of fresh strawberries without turning on the oven. Packed with creamy goodness and a buttery crust, it’s a treat that will have everyone coming back for seconds. Whether you’re hosting a summer barbecue or enjoying a quiet evening at home, this dessert is sure to impress. So grab your mixing bowl, and let’s dive into making this luscious treat that is as fun to make as it is to eat!

How to prepare No-Bake Strawberry Dessert

To make this no-bake treat, gather the following ingredients:

Ingredients

  • 1 cup crushed graham crackers
  • 1/2 cup unsalted butter, melted
  • 1 cup cream cheese, softened
  • 1 cup powdered sugar
  • 1 cup whipped topping
  • 2 cups fresh strawberries, sliced
  • 1 cup strawberry gelatin
  • 1 cup boiling water
  • Extra strawberries for garnish

Now, let’s get started on how to prepare this delicious dessert!

  1. In a medium bowl, mix the crushed graham crackers with melted butter until well combined. Press this mixture firmly into the bottom of a 9×9 inch baking dish to form the crust.
  2. In another bowl, beat the softened cream cheese and powdered sugar together until smooth. Gently fold in the whipped topping until fully incorporated.
  3. Spread the cream cheese mixture over the crust in the baking dish.
  4. In a separate bowl, dissolve the strawberry gelatin in boiling water. Allow it to cool slightly before pouring it over the cream cheese layer.
  5. Arrange the sliced strawberries on top of the gelatin layer, ensuring they’re well distributed.
  6. Refrigerate the dessert for at least four hours, or until the gelatin is set.
  7. Once set, cut into squares and serve chilled. You can add extra strawberries as a garnish if desired.

No-Bake Strawberry Dessert

Why You’ll Love No-Bake Strawberry Dessert

This No-Bake Strawberry Dessert is not just easy to whip up, it’s also incredibly satisfying. The combination of the sweet, creamy filling with the tartness of the strawberries creates a delightful balance. Plus, the no-bake aspect means you won’t have to deal with any complicated baking steps, making it an ideal recipe for beginners. It’s the perfect way to enjoy a summer treat without fuss, making it a hit not just for families, but for gatherings and parties too. If you love no-bake desserts, this one is sure to become a favorite!

Tips for Success

To make sure your No-Bake Strawberry Dessert turns out perfectly, keep these tips in mind:

  • Use fresh strawberries for the best flavor. They will add a burst of freshness that complements the creamy filling.
  • Allow the dessert to sit in the fridge for the full four hours; this will ensure that the gelatin sets properly.
  • For a creative twist, consider adding other fruits like blueberries or raspberries along with the strawberries.

No-Bake Strawberry Dessert

Serving Suggestions

This No-Bake Strawberry Dessert can be served on its own or paired with a scoop of vanilla ice cream for extra indulgence. You might even consider serving it alongside a refreshing glass of iced tea or lemonade. It’s simple, yet elegant enough for any occasion!

FAQs

Can I use frozen strawberries instead of fresh ones?

Yes, you can use frozen strawberries, but fresh ones give the best flavor and texture.

How long will this dessert last in the fridge?

It can last for about 3-4 days in the refrigerator, but it’s best enjoyed fresh on the first couple of days.

Can I make this dessert a day ahead?

Absolutely! This dessert is perfect for making ahead of time, giving it ample time to set before serving.

For those who enjoy exploring more no-bake options, check out this decadent dessert that you might adore just as much! Enjoy making this delightful No-Bake Strawberry Dessert and let those sweet summer vibes shine through!

No-Bake Strawberry Dessert

A refreshing no-bake dessert featuring creamy layers and fresh strawberries, perfect for warm weather gatherings.

For the crust

  • 1 cup crushed graham crackers
  • 1/2 cup unsalted butter, melted

For the filling

  • 1 cup cream cheese, softened
  • 1 cup powdered sugar
  • 1 cup whipped topping

For the gelatin layer

  • 1 cup strawberry gelatin
  • 1 cup boiling water (Use to dissolve the gelatin)
  • 2 cups fresh strawberries, sliced (Use extra for garnish)

Preparation

  1. In a medium bowl, mix the crushed graham crackers with melted butter until well combined. Press this mixture firmly into the bottom of a 9×9 inch baking dish to form the crust.
  2. In another bowl, beat the softened cream cheese and powdered sugar together until smooth. Gently fold in the whipped topping until fully incorporated.
  3. Spread the cream cheese mixture over the crust in the baking dish.
  4. In a separate bowl, dissolve the strawberry gelatin in boiling water. Allow it to cool slightly before pouring it over the cream cheese layer.
  5. Arrange the sliced strawberries on top of the gelatin layer, ensuring they are well distributed.
  6. Refrigerate the dessert for at least four hours, or until the gelatin is set.
  7. Once set, cut into squares and serve chilled. You can add extra strawberries as a garnish if desired.

Use fresh strawberries for the best flavor. Ensure to refrigerate for the full four hours for proper gelatin setting. Can add other fruits like blueberries or raspberries for a twist.
Dessert
American
Creamy Dessert, easy dessert, No-Bake Dessert, Strawberry Dessert, Summer Treat

Best Rhubarb Cake with Cake Mix

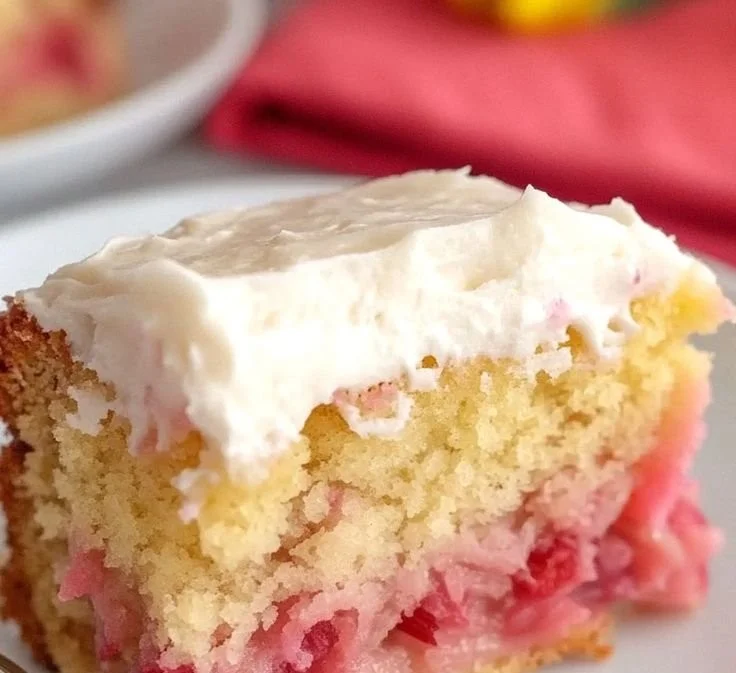
Slice of best rhubarb cake made with cake mix on a plate

Rhubarb cake is an absolute delight, bursting with a tangy flavor that perfectly complements the sweetness of the cake. At the heart of this dish is the Best Rhubarb Cake with Cake Mix, making it an easy and delightful treat to whip up for any gathering. This cake is not only simple to prepare, it has an incredible taste that will have your friends and family asking for seconds. With moist layers and the irresistible flavor of rhubarb, this cake is sure to be a crowd-pleaser. Grab your apron, and let’s dive into making this delicious dessert together!

How to prepare Best Rhubarb Cake with Cake Mix

Before we get started, make sure to gather all your ingredients, so you’re ready to go. The process is quick and easy, perfect even for novice bakers.

  1. Preheat your oven to 350°F (175°C).
  2. In a large bowl, mix one box of cake mix, eggs, oil, and water as directed on the package.
  3. Chop fresh rhubarb into small pieces and fold it into the batter.
  4. Pour the mixture into a greased baking dish.
  5. Bake for about 30-35 minutes or until a toothpick comes out clean.
  6. Let it cool, then dust with powdered sugar before serving.

Best Rhubarb Cake with Cake Mix

Why You’ll Love Best Rhubarb Cake with Cake Mix

This cake stands out for its beautiful balance of sweetness and tartness, thanks to the rhubarb. The use of cake mix means you can spend less time measuring and more time enjoying delicious results. Plus, it’s a perfect dessert for any occasion, be it a family gathering, a picnic, or just a cozy evening at home. You can even pair it with whipped cream or a scoop of ice cream for an extra special treat.

Don’t forget, if you enjoy cakes made from simple mixes, you might want to check out this Carrot Date Cake with Honey Lemon Glaze too!

Tips for success

  1. Fresh Rhubarb: Use fresh rhubarb for the best flavor and texture.
  2. Mix it well: Be sure to mix the cake batter until smooth, but avoid over-mixing to keep the cake light.
  3. Butter the pan: Greasing your baking dish will prevent sticking, ensuring a clean release.
  4. Cooling: Allow the cake to cool completely before dusting with powdered sugar for the best presentation.

Serving Suggestions

Best served slightly warm or at room temperature, this cake pairs beautifully with a dollop of whipped cream or a scoop of vanilla ice cream. You could also serve it alongside a warm cup of tea or coffee for a delightful afternoon treat.

FAQs

Can I use frozen rhubarb in this recipe?

Yes, you can use frozen rhubarb, but make sure to thaw and drain any excess moisture before adding it to the batter.

How do I store leftovers?

Keep any leftovers in an airtight container at room temperature for up to three days, or in the refrigerator for up to a week.

Can I add other ingredients like nuts or chocolate chips?

Absolutely! Feel free to add some chopped nuts or chocolate chips to the batter for extra flavor and texture.

Embrace the fun of baking with the Best Rhubarb Cake with Cake Mix, and watch everyone delight in its delicious taste!

Best Rhubarb Cake with Cake Mix

A delightful rhubarb cake made easy with cake mix, perfect for any gathering.

Main Ingredients

  • 1 box cake mix (Any preferred flavor or brand)
  • 3 large eggs (Large eggs, at room temperature)
  • 1/2 cup oil (Vegetable oil or canola oil)
  • 1 cup water (As directed on the cake mix package)
  • 2 cups fresh rhubarb, chopped (Chopped into small pieces)
  • powdered sugar for dusting (Optional, for serving)

Preparation

  1. Preheat your oven to 350°F (175°C).
  2. In a large bowl, mix the cake mix, eggs, oil, and water as directed on the package.
  3. Chop fresh rhubarb into small pieces and fold it into the batter.
  4. Pour the mixture into a greased baking dish.
  5. Bake for about 30-35 minutes or until a toothpick comes out clean.
  6. Let it cool, then dust with powdered sugar before serving.

Fresh rhubarb is best for flavor. Mix batter well but avoid over-mixing to keep cake light. Cool completely before dusting with sugar.

Dessert
American
cake mix, easy dessert, quick cake, Rhubarb Cake, Sweet and Tangy

Easy Apple Pie

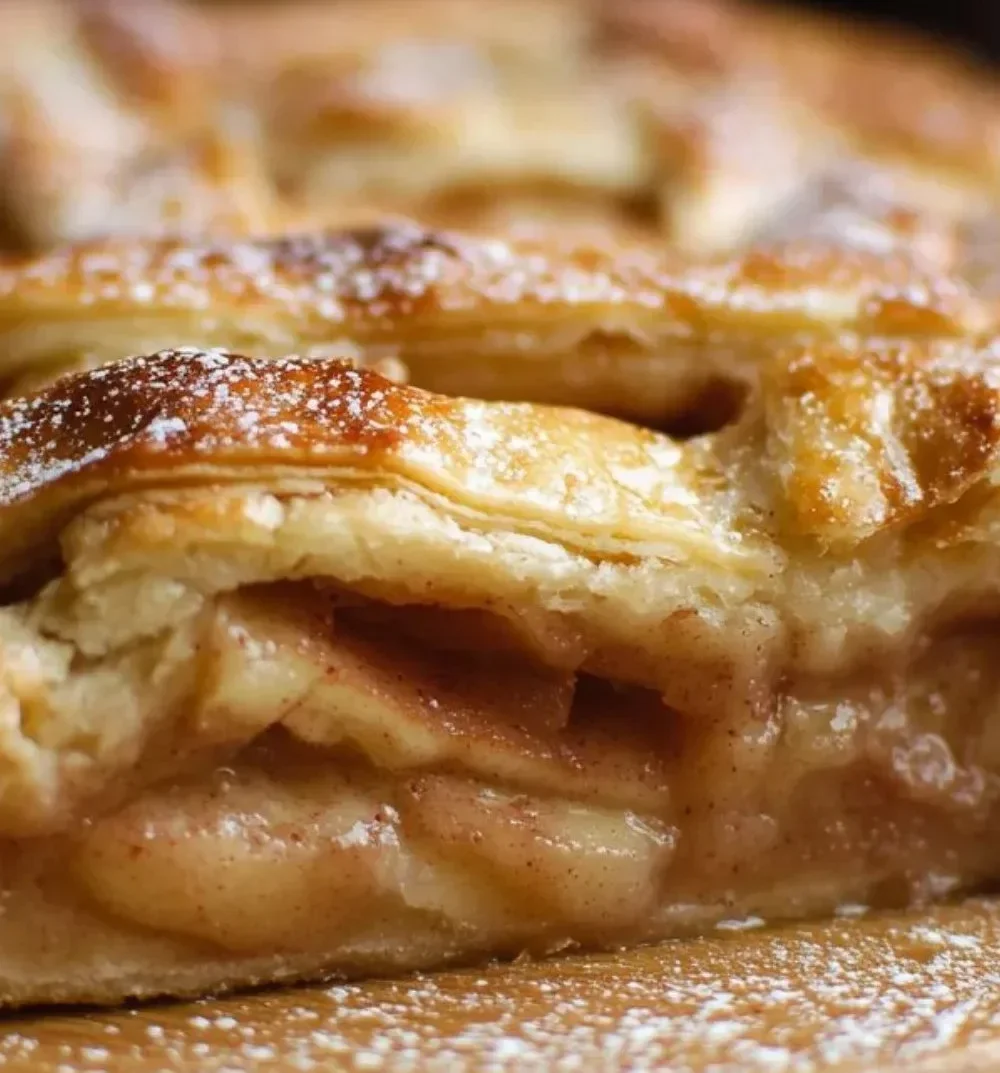
Slice of easy apple pie with cinnamon and apple filling on a wooden table

This easy apple pie is a classic dessert that many people love. It is warm, sweet, and filled with delicious apples. The recipe is simple, making it perfect for everyone, from beginners to experienced bakers. It brings comfort and joy, whether you serve it at family gatherings, special occasions, or just because you want to treat yourself. The flaky crust paired with a sugary apple filling creates a delightful dessert that can melt hearts. Plus, it fills your home with a lovely aroma that makes everyone eager for a slice.

Making apple pie is also a great way to celebrate the fall season when apples are plentiful. You can pick apples from local farms or buy them at the store. No matter where they come from, using fresh apples makes this pie even better. Now, let’s dive into why you should try making this easy apple pie.

Why Make This Recipe

This Easy Apple Pie recipe is perfect for several reasons. First, it uses simple ingredients that are often already in your kitchen, such as apples, sugar, and flour. You don’t need fancy equipment or baking skills to whip this up. Just grab a few apples and a rolling pin, and you’ll be on your way.

Second, this pie is an excellent dessert for any occasion. It works well for holidays like Thanksgiving and Christmas, family dinners, or even just a cozy night at home. The warm filling and flaky crust give a sense of home and comfort.

Additionally, making apple pie is a fun activity that you can do with family or friends. It’s a great way to bond while creating something delicious. You can get children involved in peeling apples or rolling the dough, making it a shared experience.

Lastly, homemade apple pie is far tastier than store-bought versions. You can customize the sweetness, spice levels, and type of apples you use. By making it yourself, you control every aspect, ensuring a pie that is just right for your taste buds.

How to Make Easy Apple Pie

Making Easy Apple Pie starts with gathering your ingredients. You will need 6 to 8 cups of peeled and sliced apples, 1 cup of sugar, 2 tablespoons of flour, 1 teaspoon of cinnamon, and a pinch of salt. For the crust, you will need 2 ½ cups of all-purpose flour, 1 cup of unsalted butter (chilled and diced), and a bit of water.

To prepare the crust, combine the flour, sugar, and salt. Add the diced butter and mix until the mixture resembles coarse crumbs. Gradually add cold water, a tablespoon at a time, until the dough comes together. Divide the dough in half, shape it into discs, wrap them in plastic, and chill for at least an hour.

Next, preheat your oven to 425°F (220°C). Roll out one disc of dough on a floured surface to fit your pie pan. Place it in the pan and fill it with the sliced apples. In a bowl, mix the sugar, flour, cinnamon, and salt, then sprinkle it over the apples. Roll out the second dough disc and place it on top of the filling. Crimp the edges to seal and cut a few slits in the top for steam to escape.

Bake for 15 minutes, then reduce the temperature to 350°F (175°C) and continue baking for 30-35 minutes until the apples are tender and the crust is golden brown. Let it cool before serving. Enjoy your delicious apple pie!

How to Serve Easy Apple Pie

Serving Easy Apple Pie is as delightful as making it. It can be enjoyed warm or at room temperature. For a tasty twist, consider adding a scoop of vanilla ice cream or a dollop of whipped cream on top when serving. This combination enhances the flavors and makes the dessert extra special.

You can also sprinkle a little cinnamon on the whipped cream for an added touch of flavor. When serving, slice the pie into wedges for a clean look and ease of serving. Consider pairing it with coffee or hot cider for a classic autumn feel.

If you’re hosting a party, serve slices of apple pie on colorful dessert plates. You can also top each slice with a cherry or a sprinkle of nuts for extra flair. Another idea is to serve it with a side of caramel sauce for dipping, which adds a sweet contrast to the apples.

No matter how you choose to serve it, easy apple pie is sure to bring smiles and satisfaction to everyone at your table.

How to Store Easy Apple Pie

Proper storage of Easy Apple Pie ensures it stays fresh and delicious for days. If you have leftover pie, let it cool completely at room temperature before storing it.

To store apple pie, cover it loosely with plastic wrap or aluminum foil. You can also place it in an airtight container. In the refrigerator, apple pie can last for about 3 to 4 days. Make sure to keep it in a cool spot to maintain its freshness.

If you want to store it for a longer period, consider freezing it. Wrap individual slices or the whole pie in plastic wrap and then in aluminum foil to prevent freezer burn. When properly sealed, apple pie can be stored in the freezer for up to 3 months.

When you’re ready to enjoy the pie again, thaw it in the refrigerator overnight. You can reheat slices in the oven at 350°F (175°C) for about 10 minutes to bring back the freshness and warmth.

Tips to Make Easy Apple Pie

To make the best Easy Apple Pie, follow these helpful tips. First, use a mix of apple varieties. Combining sweet and tart apples, like Granny Smith and Honeycrisp, creates a balanced flavor that enhances the pie.

Second, do not skip the chilling step for the crust. A cold dough makes for a flakier crust. If possible, chill your dough for longer than an hour.

Third, taste the apple mixture before filling the pie to adjust the sugar and spice according to your preference. Some apples are sweeter than others, so you may need to reduce the sugar.

Also, ensure to cut slits in the top crust to allow steam to escape, which helps prevent a soggy bottom crust.

Lastly, keep an eye on the pie as it bakes. Oven temperatures can vary, so check for doneness. The crust should be golden, and the filling should bubble. If the edges brown too quickly, cover them with aluminum foil to prevent burning during baking.

Variation

You can easily customize this Easy Apple Pie recipe. For a bit of extra flavor, consider adding a handful of raisins or chopped nuts to the apple filling. You can also include spices like nutmeg or allspice to change up the traditional taste.

If you want to try something different, use peaches or berries instead of apples for a fruity twist. A crumb topping made of brown sugar, flour, and butter is another delicious alternative that gives a crunchy texture on top.

FAQs

  1. Can I use store-bought pie crust instead of making my own?
    Yes, using store-bought pie crust is a great time-saver. Just ensure it fits your pie pan and follow the baking instructions.
  2. Can I prepare the pie in advance?
    Absolutely! You can prepare and assemble the pie a day ahead, just refrigerate it until you are ready to bake.
  3. What type of apples are best for apple pie?
    The best apples for pie are firm varieties like Granny Smith, Honeycrisp, and Braeburn, as they hold their shape and provide a good balance of sweetness and tartness.
  4. Can I freeze the apple pie before baking?
    Yes, you can freeze it. Assemble the pie, wrap it well, and freeze it. When ready to bake, you can bake it straight from the freezer, just add a few extra minutes to the baking time.

Easy Apple Pie

A classic, warm dessert filled with delicious apples, perfect for any occasion.

For the filling

  • 6-8 cups peeled and sliced apples (A mix of sweet and tart apples is recommended.)
  • 1 cup sugar (Adjust based on the sweetness of the apples.)
  • 2 tablespoons flour (Helps thicken the filling.)
  • 1 teaspoon cinnamon (Can add more for extra flavor.)
  • 1 pinch salt

For the crust

  • 2.5 cups all-purpose flour
  • 1 cup unsalted butter (Chilled and diced.)
  • water as needed (Cold water, added gradually to form the dough.)

Prepare the crust

  1. Combine flour, sugar, and salt in a bowl.
  2. Add diced butter and mix until the mixture resembles coarse crumbs.
  3. Gradually add cold water, a tablespoon at a time, until the dough comes together.
  4. Divide the dough in half, shape into discs, wrap in plastic, and chill for at least 1 hour.

Prepare the filling

  1. Preheat oven to 425°F (220°C).
  2. Roll out one disc of dough on a floured surface to fit your pie pan.
  3. Place it in the pie pan and fill it with sliced apples.
  4. In a bowl, mix sugar, flour, cinnamon, and salt, then sprinkle over the apples.
  5. Roll out the second dough disc and place it on top of the filling. Crimp the edges to seal and cut a few slits in the top for steam to escape.

Bake the pie

  1. Bake for 15 minutes, then reduce the temperature to 350°F (175°C).
  2. Continue baking for 30-35 minutes until apples are tender and crust is golden brown.
  3. Let the pie cool before serving.

Serve warm or at room temperature. Can add ice cream or whipped cream for extra flavor.

Baked Goods, Dessert
American
apple pie, classic dessert, easy dessert, fall dessert, homemade pie