Creamy Homemade Frozen Yogurt with Berry Swirl

Creamy homemade frozen yogurt topped with a vibrant berry swirl

When the warm weather hits, there’s nothing quite like a cool and refreshing treat. Creamy Homemade Frozen Yogurt with Berry Swirl is the perfect way to indulge without feeling guilty. This delightful dessert combines the smooth, tangy taste of yogurt with a luscious berry swirl that is both visually appealing and incredibly satisfying. It’s a crowd-pleaser that everyone will love! Plus, with homemade goodness, you can feel great about what you’re serving. Get ready to whip up this sweet treat that will brighten up any day!

Creamy Homemade Frozen Yogurt with Berry Swirl

How to prepare Creamy Homemade Frozen Yogurt with Berry Swirl

To make this delicious frozen yogurt, you will need the following ingredients:

Ingredients

  • 2 cups plain yogurt
  • 1 cup heavy cream
  • 3/4 cup sugar
  • 1 teaspoon vanilla extract
  • 1 cup mixed berries (strawberries, blueberries, raspberries)
  • 2 tablespoons honey or maple syrup

Let’s get started on how to create this tasty treat.

Creamy Homemade Frozen Yogurt with Berry Swirl

  1. In a mixing bowl, combine yogurt, heavy cream, sugar, and vanilla extract. Mix well until the sugar is fully dissolved.
  2. In another bowl, mash the mixed berries with honey or maple syrup until you have a chunky puree.
  3. Fold the berry mixture into the yogurt mixture gently. You want swirls of berry, not a completely mixed color.
  4. Pour the mixture into an ice cream maker and churn according to the manufacturer’s instructions, or transfer to a freezer-safe container if you don’t have an ice cream maker.
  5. If using a container, place it in the freezer. Stir every 30 minutes for about 2-3 hours to prevent ice crystals from forming, until the yogurt is firm.
  6. Scoop the frozen yogurt into bowls and enjoy!

{image_2}

Why You’ll Love Creamy Homemade Frozen Yogurt with Berry Swirl

This creamy frozen yogurt is not just delicious, it’s also a healthy alternative to traditional ice cream. The yogurt provides a probiotic boost, which is great for digestion, and the berries add antioxidants that are beneficial for health. The balance of sweet and tangy flavors makes every spoonful enjoyable. It’s a fun way to cool down on a hot day and a perfect treat for family gatherings, barbecues, or simply a cozy night at home. You’ll find yourself making it again and again!

Tips for success

  • Use full-fat yogurt for a creamier texture.
  • Make sure to let the mixture chill in the refrigerator for at least an hour before churning for the best results.
  • If you want a smoother berry swirl, blend the berries into a puree, but don’t forget to save some whole berries for extra texture!

{image_1}

Serving Suggestions

This Creamy Homemade Frozen Yogurt with Berry Swirl is delicious on its own, but you can also serve it with toppings for added fun. Consider adding fresh sliced fruits, granola, or a drizzle of chocolate sauce. It’s also great in a waffle cone for a delightful treat that feels like ice cream. Get creative with your toppings to suit your taste!

FAQs

Can I use any type of yogurt?

Yes, you can use Greek yogurt for a thicker texture, or any flavored yogurt, but plain is best for this recipe.

How long does homemade frozen yogurt last in the freezer?

It stays fresh for up to two weeks in the freezer. Just remember to store it in an airtight container.

Is it possible to make this recipe without an ice cream maker?

Absolutely! Just use a blender to mix the ingredients, pour into a container, and freeze while stirring occasionally to break up any ice crystals.

Now you have the perfect recipe for a homemade frozen yogurt that’s easy to make and even easier to enjoy. So gather your ingredients and get ready for a delicious, creamy dessert unlike any other!

Creamy Homemade Frozen Yogurt with Berry Swirl

A refreshing and guilt-free dessert combining smooth yogurt with a luscious berry swirl, perfect for warm weather treats.

Base Ingredients

  • 2 cups plain yogurt (Use full-fat yogurt for a creamier texture.)
  • 1 cup heavy cream
  • 3/4 cup sugar (Mix until fully dissolved.)
  • 1 teaspoon vanilla extract

Berry Swirl Ingredients

  • 1 cup mixed berries (strawberries, blueberries, raspberries) (Mash with honey or maple syrup.)
  • 2 tablespoons honey or maple syrup

Preparation

  1. In a mixing bowl, combine yogurt, heavy cream, sugar, and vanilla extract. Mix well until the sugar is fully dissolved.
  2. In another bowl, mash the mixed berries with honey or maple syrup until you have a chunky puree.
  3. Fold the berry mixture into the yogurt mixture gently, creating swirls of berry.

Churning

  1. Pour the mixture into an ice cream maker and churn according to the manufacturer’s instructions.
  2. If you don’t have an ice cream maker, transfer to a freezer-safe container, place it in the freezer, and stir every 30 minutes for about 2-3 hours until the yogurt is firm.

Serving

  1. Scoop the frozen yogurt into bowls and enjoy!

Let the mixture chill in the refrigerator for at least an hour before churning for the best results. For a smoother swirl, blend the berries, but save some whole berries for texture.

Dessert, Snack
American
Berry Swirl, Frozen Yogurt, Healthy Dessert, Homemade Yogurt, Summer Treat

Fluffy Cottage Cheese Cloud Bread

Fluffy cottage cheese cloud bread recipe for low-carb diets

Fluffy Cottage Cheese Cloud Bread is a delightful twist on traditional bread, perfect for those looking for a light and fluffy alternative. This unique bread is made from simple ingredients and comes together surprisingly quickly. With its airy texture and subtle flavor, it’s no wonder that Fluffy Cottage Cheese Cloud Bread has become a favorite among families and friends alike. Whether you are enjoying it as a sandwich base or a side with your meal, this recipe is sure to impress. Who knew cloud-like bread could be so easy and delicious? Let’s dive into the recipe!

Fluffy Cottage Cheese Cloud Bread

How to prepare Fluffy Cottage Cheese Cloud Bread

To make Fluffy Cottage Cheese Cloud Bread, gather your ingredients and follow these easy steps:

  1. Preheat your oven to 300°F (150°C).
  2. In a mixing bowl, combine 1 cup of cottage cheese and 3 large eggs. Blend until smooth.
  3. Add ¼ cup of almond flour, ½ teaspoon of baking powder, and a pinch of salt. Stir until well combined.
  4. Whip the egg whites from another 3 large eggs in a separate bowl until stiff peaks form.
  5. Gently fold the whipped egg whites into the cottage cheese mixture, being careful not to deflate the mixture.
  6. Line a baking sheet with parchment paper and spoon the batter into cloud shapes, about the size of a hamburger patty.
  7. Bake for 25-30 minutes or until they are golden brown on top.
  8. Allow to cool slightly before serving.

{image_2}

Fluffy Cottage Cheese Cloud Bread

Why You’ll Love Fluffy Cottage Cheese Cloud Bread

One of the biggest reasons you’ll love Fluffy Cottage Cheese Cloud Bread is its incredible texture. The lightness makes it a perfect base for various toppings, from fresh avocado and tomato to lean meats and cheeses. Plus, it’s low in carbs, making it suitable for different diets. The protein from the cottage cheese keeps you satisfied without feeling heavy, and the simple ingredients ensure that it can be whipped up quickly. It’s not just a bread alternative; it’s a versatile food option for any meal.

Tips for success

To ensure that your Fluffy Cottage Cheese Cloud Bread turns out perfectly every time, keep these tips in mind:

  • Make sure to whip the egg whites until they reach stiff peaks, which helps create the fluffy texture you want.
  • Gently fold the egg whites into the batter to maintain the airy consistency; don’t stir too vigorously.
  • Experiment with seasonings; you can add herbs or spices to the batter to customize the flavor even more.
  • Avoid opening the oven door while the bread is baking, as this can cause them to deflate.

{image_1}

Serving Suggestions

Fluffy Cottage Cheese Cloud Bread can be enjoyed in many delightful ways. Try it as a sandwich with your favorite deli meats, or use it as a vehicle for spreads like hummus or cream cheese. It also works wonderfully as a side to soups or salads. Some even enjoy it topped with sweet ingredients like jam or nut butter for a delightful breakfast treat.

FAQs

1. Can I store leftover Cloud Bread?

Yes, you can store Fluffy Cottage Cheese Cloud Bread in an airtight container in the fridge for up to a week. You can also freeze them, wrapped individually, for longer storage.

2. Can I substitute ingredients?

Yes, you can try different types of cheese or flours. Just keep in mind that this may change the texture and flavor slightly.

3. Is this recipe gluten-free?

Yes, as long as you use gluten-free almond flour, Fluffy Cottage Cheese Cloud Bread is a gluten-free option that everyone can enjoy!

With its airy texture and delicious flavor, Fluffy Cottage Cheese Cloud Bread is a must-try. Get your ingredients ready and enjoy making this delightful bread yourself!

Fluffy Cottage Cheese Cloud Bread

A light and fluffy alternative to traditional bread, perfect for sandwiches or as a delightful side dish.

Main Ingredients

  • 1 cup cottage cheese (The base for the bread, providing protein and moisture.)
  • 6 large eggs (3 eggs mixed with cottage cheese; 3 egg whites whipped separately.)
  • ¼ cup almond flour (Adds structure and a subtle nutty flavor.)
  • ½ teaspoon baking powder (Helps the bread rise.)
  • 1 pinch salt (Enhances the flavor.)

Preparation

  1. Preheat your oven to 300°F (150°C).
  2. In a mixing bowl, combine 1 cup of cottage cheese and 3 large eggs. Blend until smooth.
  3. Add ¼ cup of almond flour, ½ teaspoon of baking powder, and a pinch of salt. Stir until well combined.
  4. Whip the egg whites from another 3 large eggs in a separate bowl until stiff peaks form.
  5. Gently fold the whipped egg whites into the cottage cheese mixture, being careful not to deflate the mixture.
  6. Line a baking sheet with parchment paper and spoon the batter into cloud shapes, about the size of a hamburger patty.
  7. Bake for 25-30 minutes or until they are golden brown on top.
  8. Allow to cool slightly before serving.

To ensure success, whip egg whites to stiff peaks, fold gently into the batter, experiment with seasonings, and avoid opening the oven door while baking.

Breakfast, Snack
American
Cloud Bread, Cottage Cheese Recipe, Easy Bread Recipe, Gluten-Free Bread, Low Carb Bread

Healthy Chicken Salad

Bowl of healthy chicken salad with fresh vegetables and herbs

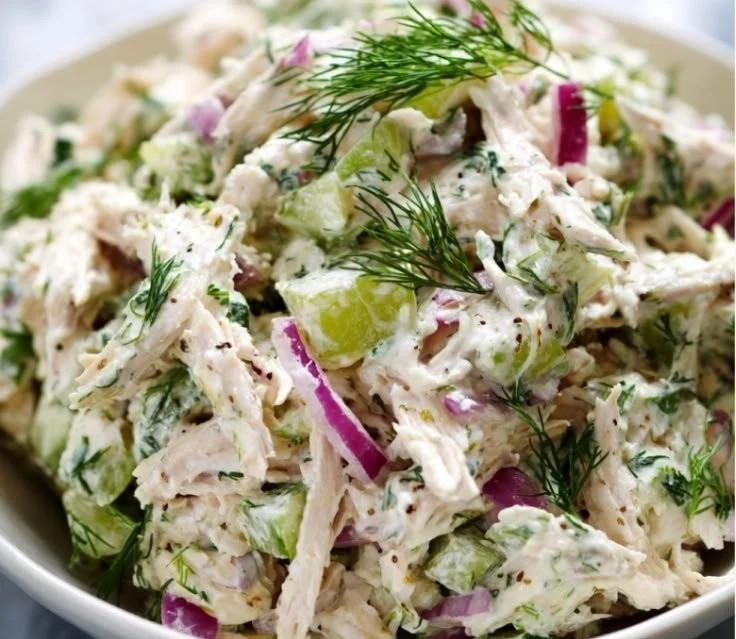
Healthy Chicken Salad is a delightful dish that brings together vibrant ingredients and delicious flavors. This salad is not just a meal, it’s a celebration in a bowl, perfect for lunch or as a light dinner. With tender chicken, crisp veggies, and a creamy yet healthy dressing, this recipe is sure to impress your family and friends. It’s healthy, quick to prepare, and vibrant, making it a great go-to for any occasion. Whether you’re serving it at a picnic, potluck, or enjoying it at home, this Healthy Chicken Salad is guaranteed to please.

Healthy Chicken Salad

So, grab your apron and get ready to create a dish bursting with flavor and nutrition!

How to prepare Healthy Chicken Salad

To make this Healthy Chicken Salad, you’ll need the following ingredients:

Healthy Chicken Salad

  • 2 cups cooked chicken, shredded
  • 1 cup Greek yogurt
  • 1 tablespoon Dijon mustard
  • 1 tablespoon apple cider vinegar
  • 1 celery stalk, chopped
  • 1/2 cup red grapes, halved
  • 1/4 cup chopped walnuts
  • 1/4 cup green onions, sliced
  • Salt and pepper, to taste
  • Mixed greens, for serving

Now, let’s walk through the steps:

  1. In a mixing bowl, combine the Greek yogurt, Dijon mustard, and apple cider vinegar, stirring until smooth.
  2. Add the shredded chicken, celery, grapes, walnuts, and green onions. Mix everything together until well combined.
  3. Season the mixture with salt and pepper to taste.
  4. Serve the chicken salad over a bed of mixed greens.

{image_2}

Why You’ll Love Healthy Chicken Salad

You will love this Healthy Chicken Salad for several reasons. First, it is an excellent source of protein, thanks to the chicken and Greek yogurt, which keeps you full and energized throughout the day. Second, the combination of fresh veggies and fruits adds crunch and sweetness, making every bite exciting. Additionally, this recipe is very versatile; feel free to swap in your favorite vegetables or nuts! All of these elements come together to create a meal that is satisfying, nutritious, and simply delicious.

Tips for success

  1. Use leftover chicken: To make this salad even easier, use leftover rotisserie chicken or any cooked chicken you have on hand.
  2. Customize it: Don’t hesitate to add your favorite veggies or nuts, like bell peppers or almonds, to make this salad your own.
  3. Make it ahead: This chicken salad can be made in advance and stored in the fridge for 3-4 days, making it perfect for meal prep.

{image_1}

Serving Suggestions

Enjoy this Healthy Chicken Salad by itself, or pair it with whole-grain crackers or a slice of whole-grain bread for a more filling meal. It also goes great with a light soup or roasted sweet potatoes for a hearty lunch or dinner.

FAQs

Can I use canned chicken for this recipe?

Yes, canned chicken can work in a pinch! Just be sure to drain it well before using.

Is this salad gluten-free?

Yes, all the ingredients listed are gluten-free. Just check any added seasonings if you have gluten concerns.

Can I make this salad vegetarian?

Absolutely! You can replace the chicken with chickpeas or tofu for a tasty vegetarian option.

Healthy Chicken Salad

A delightful dish that brings together vibrant ingredients and delicious flavors, perfect for lunch or as a light dinner.

Main ingredients

  • 2 cups cooked chicken, shredded (Can use leftover rotisserie chicken)
  • 1 cup Greek yogurt (Adds creaminess and protein)
  • 1 tablespoon Dijon mustard (Adds tanginess)
  • 1 tablespoon apple cider vinegar (For acidity)
  • 1 stalk celery, chopped (For crunch)
  • 1/2 cup red grapes, halved (For sweetness)
  • 1/4 cup chopped walnuts (Can substitute with other nuts)
  • 1/4 cup green onions, sliced (For flavor)
  • Salt and pepper, to taste
  • Mixed greens, for serving (For serving)

Preparation

  1. In a mixing bowl, combine the Greek yogurt, Dijon mustard, and apple cider vinegar, stirring until smooth.
  2. Add the shredded chicken, celery, grapes, walnuts, and green onions. Mix everything together until well combined.
  3. Season the mixture with salt and pepper to taste.
  4. Serve the chicken salad over a bed of mixed greens.

Customize the salad by adding your favorite veggies or nuts. The salad can be made ahead and stored in the fridge for 3-4 days. It pairs well with whole-grain crackers, bread, light soup, or roasted sweet potatoes.

Dinner, lunch
American
Healthy Chicken Salad, Light Meal, Nutritious

Brown Butter Banana Muffins

Delicious brown butter banana muffins freshly baked and ready to enjoy.

Brown Butter Banana Muffins are a delightful treat that combines the rich, nutty flavor of brown butter with the sweet, comforting taste of ripe bananas. This recipe is sure to be a crowd-pleaser, bringing smiles to anyone who takes a bite. With simple ingredients and an easy method, these muffins are perfect for breakfast or a snack. Plus, the aroma of banana muffins baking in your kitchen is simply irresistible. Get ready to impress your family and friends with this warm and tasty recipe!

Brown Butter Banana Muffins

How to prepare Brown Butter Banana Muffins

To start, gather your ingredients: ripe bananas, flour, sugar, brown butter, baking powder, baking soda, salt, eggs, and vanilla extract. First, you need to brown the butter in a saucepan until it turns a lovely golden color and develops a nutty aroma. Let it cool slightly while you mash the bananas in a bowl. Then, mix the brown butter with sugar and eggs, followed by the mashed bananas and vanilla. Add the dry ingredients, mix until just combined, and you’re ready to bake!

{image_2}

Brown Butter Banana Muffins

Why You’ll Love Brown Butter Banana Muffins

You’ll love these muffins because they are moist and fluffy, with a flavorful twist thanks to the brown butter. The natural sweetness from the bananas eliminates the need for too much added sugar. Additionally, they are great for using up overripe bananas, making them both delicious and practical. Whether you enjoy them fresh out of the oven or toasted with a bit of butter, they will quickly become a favorite in your recipe collection.

Tips for success

  1. Use very ripe bananas for the best flavor and sweetness.
  2. Allow the browned butter to cool slightly before mixing it with the eggs to prevent them from cooking.
  3. Don’t overmix the batter; mix just until the dry ingredients are incorporated for tender muffins.

{image_1}

Serving Suggestions

Serve these muffins warm with a pat of butter or enjoy them alongside a cup of coffee or tea. They also freeze well, so you can make a big batch and save some for later.

FAQs

Can I use regular butter instead of brown butter?

Yes, you can use regular butter, but you will miss out on the nutty flavor that brown butter provides.

How do I store leftover muffins?

Keep them in an airtight container at room temperature for up to three days or freeze them for longer storage.

Can I add nuts or chocolate chips to the muffins?

Absolutely! Feel free to add walnuts, pecans, or chocolate chips for extra flavor and texture.

These Brown Butter Banana Muffins are a simple yet delightful treat, making baking fun and rewarding. Enjoy the process and savor every bite!

Brown Butter Banana Muffins

Delightful muffins combining rich, nutty brown butter flavor with sweet, ripe bananas, perfect for breakfast or a snack.

Wet Ingredients

  • 3 medium ripe bananas (Use very ripe bananas for best flavor)
  • 1/2 cup brown butter (Brown until golden with a nutty aroma)
  • 1/2 cup sugar (Adjust sweetness as desired)
  • 2 large eggs (Allow to come to room temperature)
  • 1 teaspoon vanilla extract

Dry Ingredients

  • 1 cup all-purpose flour
  • 1 teaspoon baking powder
  • 1/2 teaspoon baking soda
  • 1/4 teaspoon salt

Preparation

  1. Preheat your oven to 350°F (175°C) and line a muffin tin with paper liners.
  2. In a saucepan, brown the butter until golden and fragrant. Let it cool slightly.
  3. In a mixing bowl, mash the ripe bananas until smooth.
  4. In another bowl, whisk together the brown butter, sugar, and eggs until well combined.
  5. Add the mashed bananas and vanilla extract to the mixture, stirring until combined.
  6. In a separate bowl, whisk together the flour, baking powder, baking soda, and salt.
  7. Fold the dry ingredients into the wet ingredients until just combined; be careful not to overmix.

Baking

  1. Scoop the batter into the muffin tin, filling each cup about 2/3 full.
  2. Bake for 18-20 minutes or until a toothpick inserted into the center comes out clean.
  3. Let the muffins cool in the pan for a few minutes before transferring them to a wire rack.

Store in an airtight container at room temperature for up to three days, or freeze for longer storage.

Breakfast, Snack
American
Banana Muffins, Brown Butter, Muffins

Greek Yogurt Pizza Dough

Greek Yogurt Pizza Dough

There’s something magical about pizza that brings people together. Now, imagine a pizza made with a dough that’s not just delicious but also healthy. Greek Yogurt Pizza Dough is a fantastic choice for anyone looking for a simple yet tasty base for their favorite toppings. This recipe is a crowd-pleaser, offering a delightful blend of flavors and a wonderful texture that pairs perfectly with whatever ingredients you choose. You’ll find that it bakes up beautifully, with a light and fluffy crust that everyone will enjoy. Get ready to impress your family or friends and have fun making your own delicious pizza!

Greek Yogurt Pizza Dough

How to prepare Greek Yogurt Pizza Dough

To make Greek Yogurt Pizza Dough, you’ll need just a few simple ingredients. Here is a quick rundown of what you’re going to need:

Ingredients

  • 1 cup Greek yogurt
  • 1 cup all-purpose flour (plus extra for dusting)
  • 1 teaspoon baking powder
  • ½ teaspoon salt

Directions

  1. In a mixing bowl, combine Greek yogurt, flour, baking powder, and salt.
  2. Stir until a dough starts to form.
  3. Sprinkle flour on a clean surface, then knead the dough for about 2-3 minutes, adding more flour as needed until not sticky.
  4. Roll out the dough into your desired shape and thickness.
  5. Preheat your oven to 450°F (230°C).
  6. Place your rolled-out dough on a baking sheet or pizza stone, add your favorite sauce, cheese, and toppings.
  7. Bake in the oven for about 10-12 minutes or until the crust is golden brown.

{image_2}

Greek Yogurt Pizza Dough

Why You’ll Love Greek Yogurt Pizza Dough

Greek Yogurt Pizza Dough is not only easy to make, but it also provides a nutritious twist on traditional pizza dough. The use of Greek yogurt adds a boost of protein, making it a healthier option. Plus, it’s a great way to sneak in some extra nutrients without sacrificing flavor. The combination of ingredients results in a perfectly chewy and airy crust that holds up well under any toppings you can dream up. Whether you’re having a cozy family night or a lively pizza party, this dough will surely make your pizza a hit!

Tips for success

  1. Use full-fat Greek yogurt for the best flavor and texture, but low-fat can work in a pinch.
  2. Knead the dough gently to avoid overworking it, which can lead to a tough crust.
  3. Experiment with herbs and spices in the dough for extra flavor—think garlic powder or Italian seasoning.
  4. Don’t forget to preheat your oven, as a hot oven is key to achieving a nice crust.
  5. Adjust your baking time, as ovens can vary—keep an eye on your pizza to get it just right.

{image_1}

Serving Suggestions

Greek Yogurt Pizza Dough is versatile, making it perfect for any topping combination. Consider classic margherita with fresh basil and mozzarella, or try a loaded veggie pizza with bell peppers, onions, and olives. If you are feeling adventurous, why not make a dessert pizza topped with Nutella and fruits? The options are endless, giving you the chance to create something special every time!

FAQs

Can I freeze Greek Yogurt Pizza Dough?

Yes, you can freeze the dough! Wrap it tightly in plastic wrap and place it in a freezer bag. Thaw it in the fridge before using.

How long does the pizza dough last in the fridge?

When stored in an airtight container, it can last up to 3 days in the fridge.

Can I use whole wheat flour instead?

Absolutely! Whole wheat flour can be a healthier option, but it may change the texture slightly. You might need to adjust the amount of yogurt.

Now that you have everything you need, why not gather your ingredients and get started on making your very own Greek Yogurt Pizza Dough? Enjoy the process and, more importantly, enjoy your delicious creation!

Greek Yogurt Pizza Dough

A healthy and delicious pizza dough recipe made with Greek yogurt, perfect for any topping combination.

Main Ingredients

  • 1 cup Greek yogurt (Use full-fat for best flavor and texture.)
  • 1 cup all-purpose flour (Plus extra for dusting.)
  • 1 teaspoon baking powder
  • ½ teaspoon salt

Preparation

  1. In a mixing bowl, combine Greek yogurt, flour, baking powder, and salt.
  2. Stir until a dough starts to form.
  3. Sprinkle flour on a clean surface, then knead the dough for about 2-3 minutes, adding more flour as needed until not sticky.
  4. Roll out the dough into your desired shape and thickness.

Baking

  1. Preheat your oven to 450°F (230°C).
  2. Place your rolled-out dough on a baking sheet or pizza stone, add your favorite sauce, cheese, and toppings.
  3. Bake in the oven for about 10-12 minutes or until the crust is golden brown.

Knead the dough gently to avoid overworking it. Experiment with herbs and spices in the dough for extra flavor. Preheating your oven is key to achieving a nice crust.

Dinner, Main Course
Mediterranean
easy pizza, Greek yogurt, Healthy Recipes, Homemade Pizza, Pizza Dough

Asian Chicken Kabobs

Asian Chicken Kabobs on skewers with colorful vegetables and sauces

Asian Chicken Kabobs are the perfect blend of juicy chicken, vibrant vegetables, and a medley of mouthwatering flavors that will leave everyone wanting more. These kabobs are not only delicious but also incredibly easy to make, making them a fantastic choice for family dinners, backyard barbecues, or entertaining guests. Just imagine succulent pieces of chicken marinated in a savory sauce, threaded onto skewers with colorful veggies, and then grilled to perfection. It’s a dish that looks just as good as it tastes, and it’s sure to be a crowd-pleaser. So, roll up your sleeves and get ready to create this delightful dish that brings a taste of Asia right to your kitchen!

How to prepare Asian Chicken Kabobs

Preparing Asian Chicken Kabobs is straightforward, and you’ll love how quickly you can bring this dish together. Here’s how to do it:

  1. Ingredients:
  • 1 pound chicken breast, cut into cubes
  • 2 bell peppers, cut into chunks
  • 1 onion, cut into wedges
  • 1/4 cup soy sauce
  • 2 tablespoons sesame oil
  • 2 tablespoons honey
  • 1 teaspoon garlic powder
  • 1 teaspoon ginger powder
  • Salt and pepper to taste
  • Skewers (wooden or metal)
  1. Marinate the Chicken: In a mixing bowl, combine soy sauce, sesame oil, honey, garlic powder, ginger powder, salt, and pepper. Add the chicken cubes to the marinade and let them sit for at least 30 minutes to absorb all the delicious flavors.
  2. Assemble the Kabobs: Thread the marinated chicken, bell peppers, and onion onto the skewers, alternating between each ingredient for a colorful presentation.
  3. Grill the Kabobs: Preheat your grill to medium heat. Place the skewers on the grill and cook for about 10-12 minutes, turning occasionally, until the chicken is cooked through and has a nice char.
  4. Serve and Enjoy: Once done, remove the kabobs from the grill and serve them hot, garnished with sesame seeds or fresh herbs if desired.

Asian Chicken Kabobs

Why You’ll Love Asian Chicken Kabobs

Asian Chicken Kabobs are not just tasty; they are also versatile. You can customize them according to your preferences by adding different vegetables or even swapping chicken for tofu or shrimp. Their marinated flavor is a delightful mix of sweet and savory, and the combination of spices adds a nice kick. Furthermore, they are easy to make, which means you can whip them up for any occasion without stress. Plus, cooking them on the grill creates that wonderful smoky flavor that is perfect for summertime gatherings. If you love a simple yet flavorful recipe, these kabobs won’t disappoint.

Tips for success

To ensure your Asian Chicken Kabobs turn out amazing every time, here are a few tips:

  • Soak Wooden Skewers: If using wooden skewers, soak them in water for about 30 minutes before grilling to prevent burning.
  • Cut Uniformly: Make sure to cut the chicken and veggies into uniform sizes so they cook evenly.
  • Watch The Grill: Keep an eye on your kabobs while they grill to avoid overcooking. Chicken is safe to eat when it reaches an internal temperature of 165°F.
  • Experiment with Marinades: Don’t hesitate to try out different marinades or sauces for a unique twist each time you make your kabobs.

Asian Chicken Kabobs

Serving Suggestions

Asian Chicken Kabobs pair wonderfully with steamed rice, quinoa, or a fresh green salad. You could also serve them with a side of dipping sauce, such as sweet chili sauce or additional soy sauce, for added flavor. For a fun touch, try making a mini kabob platter with various types of skewers, letting everyone customize their plate with their favorite ingredients. This makes for a colorful, interactive meal.

FAQs

Can I use chicken thighs instead of chicken breast? Yes, chicken thighs are often juicier and can make for a delicious swap!

How long can I marinate the chicken? You can marinate the chicken for up to 4 hours in the refrigerator for even more flavor.

Can I make these kabobs in the oven? Absolutely! If you don’t have a grill, you can bake them in the oven at 400°F for about 20-25 minutes, turning halfway through.

Don’t miss the chance to try out this delightful recipe, which not only is full of flavor but also brings a little bit of Asian cuisine to your dining table!

Asian Chicken Kabobs

These Asian Chicken Kabobs offer a delightful blend of juicy chicken, vibrant vegetables, and a perfect medley of sweet and savory flavors. Easy to make, they’re a fantastic choice for any gathering.

For the marinade

  • 1 pound chicken breast, cut into cubes (You can also use chicken thighs for a juicier option.)
  • 1/4 cup soy sauce
  • 2 tablespoons sesame oil
  • 2 tablespoons honey
  • 1 teaspoon garlic powder
  • 1 teaspoon ginger powder
  • Salt and pepper to taste

For the kabobs

  • 2 bell peppers, cut into chunks (Use a mix of colors for a vibrant presentation.)
  • 1 onion, cut into wedges
  • Skewers (wooden or metal) (Soak wooden skewers in water for 30 minutes before grilling.)

Preparation

  1. In a mixing bowl, combine soy sauce, sesame oil, honey, garlic powder, ginger powder, salt, and pepper.
  2. Add the chicken cubes to the marinade and let them sit for at least 30 minutes to absorb all the delicious flavors.

Assembly

  1. Thread the marinated chicken, bell peppers, and onion onto the skewers, alternating between each ingredient.

Cooking

  1. Preheat your grill to medium heat.
  2. Place the skewers on the grill and cook for about 10-12 minutes, turning occasionally, until the chicken is cooked through and has a nice char.

Serving

  1. Remove the kabobs from the grill and serve them hot, garnished with sesame seeds or fresh herbs if desired.

Serve with steamed rice, quinoa, or a fresh green salad. Pair with dipping sauces like sweet chili sauce or soy sauce for added flavor.

Dinner, Main Course
Asian, Grilled
Asian Chicken Kabobs, Chicken Skewers, Easy Kabobs, grilled chicken, Healthy Dinner

Chimichurri Chicken Thighs

Delicious chimichurri chicken thighs garnished with fresh herbs

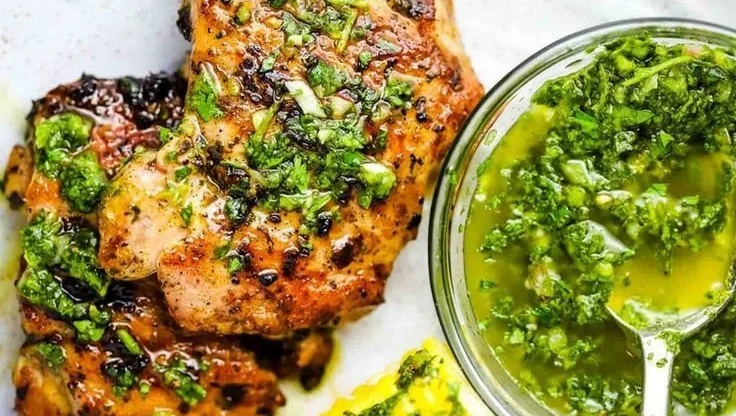
Chimichurri Chicken Thighs are a fantastic dish that brings a punch of flavor and excitement to your table. This recipe is vibrant and colorful, with juicy chicken thighs coated in a fresh and zesty chimichurri sauce. Imagine the aroma of garlic, parsley, and vinegar coming together to create a taste sensation that your family and friends will love. It’s a true crowd-pleaser, perfect for dinners or gatherings. With the ease of preparation and delightful taste, you’ll find yourself coming back to this recipe time and again. Get ready to impress your loved ones and have fun in the kitchen!

Chimichurri Chicken Thighs

Why You’ll Love Chimichurri Chicken Thighs

You will love Chimichurri Chicken Thighs for several reasons. First, the combination of juicy chicken and herby chimichurri creates a mouthwatering flavor explosion. The marinated chicken thighs are tender and flavorful, making every bite satisfying. Additionally, this dish is quick to make, which is perfect for busy weeknights or last-minute dinner plans. The fresh ingredients not only enhance the taste but also make your home smell divine while cooking. With its lively colors and deliciousness, it’s sure to be a hit at your dining table.

Tips for success

To ensure your Chimichurri Chicken Thighs turn out perfect, start with high-quality chicken thighs and fresh herbs. Marinate the chicken for at least 30 minutes, or even better, overnight, to let the flavors seep in deeply. Always preheat your grill or skillet to medium-high heat for optimal cooking. If you want added flavor, consider using a meat thermometer to check for doneness, ensuring that they reach an internal temperature of 165°F (75°C). For the chimichurri, feel free to adjust the garlic and spice levels according to your taste, making it as mild or as spicy as you prefer.

Chimichurri Chicken Thighs

Serving Suggestions

Chimichurri Chicken Thighs can be served with a variety of sides. Pair them with a fresh garden salad, or enjoy them alongside grilled vegetables for a complete meal. You could also serve them over a bed of fluffy rice or quinoa to soak up that delicious chimichurri sauce. If you’re feeling adventurous, consider making boiled chicken thighs to enhance your protein options on the table.

FAQs

Can I use chicken breasts instead of thighs?

While chicken breasts can be used, thighs are recommended for their juiciness and flavor. If you prefer breasts, just be cautious not to overcook them.

How long should I marinate the chicken?

Marinating for at least 30 minutes is essential, but for the best flavor, marinate for several hours or even overnight.

Can I freeze leftovers?

Yes, you can freeze leftover chicken thighs. Allow them to cool completely, then store them in an airtight container for up to three months.

Chimichurri Chicken Thighs

A vibrant dish featuring juicy chicken thighs marinated in a zesty chimichurri sauce, perfect for gatherings and quick dinners.

For the Chicken

  • 4 pieces chicken thighs (Use high-quality chicken thighs for best flavor.)

For the Chimichurri Sauce

  • 1 cup fresh parsley, chopped (Adjust the amount based on your taste preference.)
  • 3 cloves garlic, minced (Feel free to adjust this based on your spice preference.)
  • 1/2 cup olive oil
  • 1/4 cup red wine vinegar
  • 1 teaspoon salt
  • 1/2 teaspoon black pepper
  • 1 teaspoon red pepper flakes (Optional, adjust for spiciness.)

Preparation

  1. In a bowl, mix the chopped parsley, minced garlic, olive oil, red wine vinegar, salt, black pepper, and red pepper flakes to create the chimichurri sauce.
  2. Place chicken thighs in a large resealable bag or container and pour the chimichurri sauce over them. Seal and marinate for at least 30 minutes, or overnight for best results.

Cooking

  1. Preheat your grill or skillet to medium-high heat.
  2. Remove chicken from marinade and place on the grill or skillet.
  3. Cook for 6-7 minutes on each side, or until the internal temperature reaches 165°F (75°C).

Serving

  1. Serve the chimichurri chicken thighs with sides like a fresh garden salad, grilled vegetables, or over rice or quinoa.

For best results, marinate overnight. Don’t forget to check for doneness with a meat thermometer.

Dinner, Main Course
Latin American
Chicken Thighs, Chimichurri Chicken, Easy Dinner, grilled chicken, marinated chicken

High Protein Cheesecake

High protein cheesecake with a creamy texture and healthy toppings

High Protein Cheesecake

There’s something delightful about indulging in a sweet treat that also offers a healthy boost, and that’s exactly what the High Protein Cheesecake brings to the table. This dessert is not just any cheesecake; it’s a perfect blend of creamy texture and rich flavor, all while packing a punch of protein. Whether you’re looking to enjoy a guilt-free dessert or impress friends at a gathering, this cheesecake is sure to please everyone. The taste is so divine that you might just forget it’s healthy, making it a fantastic choice for any occasion. So, grab your apron and get ready to whip up a treat that will have everyone asking for seconds!

How to prepare High Protein Cheesecake

To create this delicious High Protein Cheesecake, you’ll need some simple ingredients and a fun attitude. Here’s how to do it:

  1. Ingredients:

    • 2 cups low-fat cottage cheese
    • 1 cup Greek yogurt
    • 1/2 cup honey or agave syrup
    • 3 eggs
    • 1 tsp vanilla extract
    • 1/2 cup almond flour
    • A pinch of salt
  2. Directions:

    • Preheat your oven to 325°F (160°C).
    • In a blender, combine the cottage cheese and Greek yogurt until smooth.
    • Add the honey, eggs, vanilla extract, almond flour, and salt. Blend until everything is well mixed.
    • Grease a cheesecake pan and pour the blended mixture into it.
    • Bake in the oven for about 35-40 minutes or until the center is set.
    • Let it cool before refrigerating for at least 2 hours.
    • Serve chilled and enjoy!

High Protein Cheesecake

Why You’ll Love High Protein Cheesecake

This High Protein Cheesecake stands out because it satisfies your sweet tooth without compromising your health goals. With high protein content, it’s perfect for muscle recovery or just maintaining a balanced diet. Plus, it’s simple to make, which is a bonus for those with busy schedules. The creamy goodness combined with a slight sweetness makes it the ultimate comfort food that everyone can enjoy. Once you try it, you’ll see why people rave about this dessert!

Tips for success

Here are a few tips to ensure your High Protein Cheesecake turns out perfectly every time:

  • Use Fresh Ingredients: Fresh cottage cheese and Greek yogurt will enhance the taste and texture.
  • Blend Thoroughly: Make sure your mixture is smooth before pouring it into the pan, as this creates a creamier cheesecake.
  • Cooling Time: Allow enough time for the cheesecake to cool completely before refrigerating, as this helps improve the texture.

High Protein Cheesecake

Serving Suggestions

Pair your High Protein Cheesecake with fresh fruit like berries or a drizzle of low-sugar chocolate sauce for an extra treat. You could also top it with chopped nuts or a sprinkle of cinnamon for added flavor. Serve it as a delightful dessert after dinner or as a nutritious snack during the day.

FAQs

Can I substitute the cottage cheese?
Yes, you can use ricotta cheese for a different texture, but cottage cheese is recommended for its high protein content.

How long does the cheesecake last in the fridge?
It should stay fresh for about 4-5 days when stored in an airtight container in the fridge.

Can I freeze High Protein Cheesecake?
Yes, you can freeze it! Just be sure to wrap it tightly to prevent freezer burn, and let it thaw in the refrigerator before serving.

Elevate your dessert game and try making this High Protein Cheesecake; it’s an easy way to enjoy something sweet while staying healthy! If you’re looking for more nutritious options, check out easy high protein breakfast boxes to fuel your day.

High Protein Cheesecake

A creamy and delicious cheesecake packed with protein, perfect for satisfying your sweet tooth while staying healthy.

Cheesecake Base

  • 2 cups low-fat cottage cheese (Use fresh cottage cheese for best taste)
  • 1 cup Greek yogurt (Fresh yogurt enhances texture)
  • 1/2 cup honey or agave syrup (Sweetener of your choice)
  • 3 pcs eggs
  • 1 tsp vanilla extract
  • 1/2 cup almond flour (For a gluten-free option)
  • a pinch salt

Preparation

  1. Preheat your oven to 325°F (160°C).
  2. In a blender, combine the cottage cheese and Greek yogurt until smooth.
  3. Add the honey, eggs, vanilla extract, almond flour, and salt. Blend until everything is well mixed.
  4. Grease a cheesecake pan and pour the blended mixture into it.
  5. Bake in the oven for about 35-40 minutes or until the center is set.
  6. Let it cool before refrigerating for at least 2 hours.

Serving

  1. Serve chilled and enjoy!

To ensure perfect results, use fresh ingredients and blend thoroughly for a smooth mixture. Allow enough cooling time before refrigerating to improve texture.

Dessert, Snack
American
Easy Cheesecake Recipe, Healthy Dessert, High Protein Cheesecake, Low Fat Cheesecake, Protein Packed Dessert

Mulberry Crisp with Easy Crunchy Oat

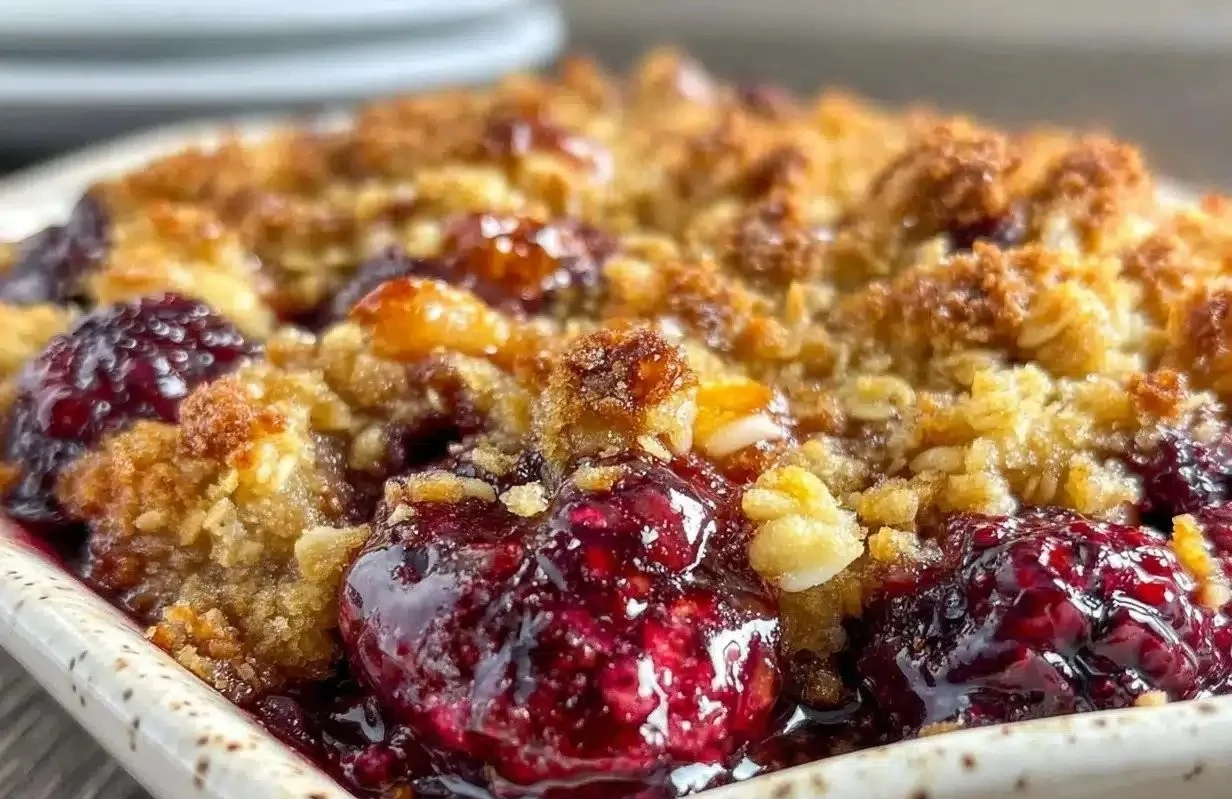
Delicious mulberry crisp dessert topped with crunchy oat layer

If you’re looking for a dessert that warms your heart and fills your home with a delightful aroma, look no further than this cozy mulberry crisp recipe. This dish is perfect for family gatherings, comforting weeknight dinners, or just a sweet treat after a long day. With its rich, juicy mulberries topped with a crunchy oat topping, it’s a dessert that is sure to please everyone. The combination of sweet fruit and a buttery, crunchy topping creates a satisfying flavor and texture that you’ll want to make again and again. Plus, it’s incredibly easy to put together, making it a foolproof recipe for bakers of all skill levels. Get ready to enjoy a cozy evening with a warm bowl of this delectable mulberry crisp!

How to prepare Cozy Mulberry Crisp

  1. Gather your ingredients: You will need fresh mulberries, rolled oats, flour, brown sugar, cinnamon, butter, and a pinch of salt.
  2. Preheat the oven: Set your oven to 350°F (175°C) to warm up while you prepare the filling and topping.
  3. Prepare the fruit filling: In a mixing bowl, combine the mulberries, a little sugar, and some cinnamon. Toss until the mulberries are well-coated.
  4. Make the topping: In another bowl, mix rolled oats, flour, brown sugar, cinnamon, and salt. Melting butter, mix it into the dry mixture until crumbly.
  5. Assemble the crisp: Spread the mulberry mixture in a baking dish and sprinkle the oat mixture on top.
  6. Bake: Place the dish in the oven and bake for about 30-35 minutes, or until the top is golden brown and the filling is bubbling.
  7. Serve warm: Enjoy your cozy mulberry crisp on its own or with a scoop of vanilla ice cream.

Cozy Mulberry Crisp Recipe with Easy Crunchy Oat Topping You’ll Love

Why You’ll Love Cozy Mulberry Crisp

There are many reasons to fall in love with this cozy mulberry crisp recipe. First, it highlights the delightful flavor of mulberries, which are sweet and slightly tart. Each bite is a burst of juicy goodness! The crunchy oat topping provides a perfect contrast, creating a delightful texture that is both comforting and satisfying. Additionally, the recipe is flexible. You can substitute in other berries if mulberries are not available, which is great for year-round baking. This recipe is not just a crowd-pleaser, it’s also a great way to connect with family and friends over comfort food.

Tips for success

  • Make sure your mulberries are fresh and ripe for the best flavor.
  • If mulberries are difficult to find, you can use other berries or even a mix of different fruits.
  • Adjust the sweetness of the filling according to your taste preference.
  • To ensure the topping gets that perfect crunchy texture, don’t skip the melting of the butter!

Cozy Mulberry Crisp Recipe with Easy Crunchy Oat Topping You’ll Love

Serving Suggestions

Enjoy your mulberry crisp with a scoop of vanilla ice cream or a dollop of whipped cream on top. It can also be served warm with a drizzle of cream, making it a delightful dessert for any occasion. Pair it with a steaming cup of tea or coffee to complete the cozy experience.

FAQs

Can I use frozen mulberries for this recipe?

Yes, frozen mulberries work well, but you may want to increase the baking time slightly to ensure they are fully heated through.

How long does the mulberry crisp last?

It can be stored in the refrigerator for up to three days. Just reheat it in the oven or microwave before serving.

Can I make this recipe ahead of time?

Absolutely! You can prepare the filling and topping separately, then store them in the fridge. Assemble and bake when you are ready to serve.

By making this cozy mulberry crisp, you’re not just creating a delicious dessert, you’re also making memories that might just become a family tradition. Happy baking!

Cozy Mulberry Crisp

A delightful dessert featuring sweet mulberries topped with a crunchy oat topping, perfect for any occasion.

For the Fruit Filling

  • 4 cups fresh mulberries (Use ripe, fresh mulberries for best flavor.)
  • 1/4 cup sugar (Adjust sweetness according to taste.)
  • 1 teaspoon cinnamon

For the Oat Topping

  • 1 cup rolled oats
  • 1/2 cup flour (All-purpose flour works well.)
  • 1/2 cup brown sugar
  • 1 teaspoon cinnamon
  • 1/4 teaspoon salt
  • 1/2 cup butter (Melted for mixing.)

Preparation

  1. Gather your ingredients: fresh mulberries, rolled oats, flour, brown sugar, cinnamon, butter, and a pinch of salt.
  2. Preheat the oven to 350°F (175°C).
  3. In a mixing bowl, combine the mulberries, sugar, and cinnamon. Toss until well-coated.
  4. In another bowl, mix rolled oats, flour, brown sugar, cinnamon, and salt. Add melted butter and mix until crumbly.

Assembly and Baking

  1. Spread the mulberry mixture into a baking dish.
  2. Sprinkle the oat mixture on top.
  3. Bake for about 30-35 minutes, or until the top is golden brown and the filling is bubbling.

Serving

  1. Serve warm on its own or with a scoop of vanilla ice cream.

Make sure your mulberries are fresh and ripe. You can substitute other berries if mulberries are not available. Adjust sweetness of the filling to your taste. Don’t skip melting the butter for the topping to achieve a crunchy texture.

Dessert
American
Berry Dessert, cozy dessert, Crisp Recipe, dessert recipe, Mulberry Crisp

Hawaiian Chicken Sheet Pan

Hawaiian chicken sheet pan with colorful vegetables and pineapple slices

Hawaiian Chicken Sheet Pan is the perfect dish for family dinners or easy weeknight gatherings. This delightful recipe brings together the vibrant flavors of chicken, pineapple, and colorful veggies all roasted together on one pan. It’s a dish that appeals to everyone, with its sweet and savory notes making it a real crowd-pleaser. The combination of tender chicken infused with Hawaiian-inspired flavors will have your taste buds dancing. Plus, the ease of cleanup makes it even more appealing. Who wouldn’t want to dive into this deliciousness?

How to prepare Hawaiian Chicken Sheet Pan

To whip up this scrumptious Hawaiian Chicken Sheet Pan, start by gathering your ingredients. You’ll need chicken thighs or breasts, fresh pineapple chunks, bell peppers, onions, garlic, soy sauce, brown sugar, and some spices for the perfect flavor blend. Begin by preheating your oven, then marinate the chicken in soy sauce and brown sugar while you chop the veggies.

Arrange everything on a large sheet pan, making sure to distribute the ingredients evenly. This helps everything cook beautifully together. Roast in the oven and let the wonderful aroma fill your kitchen. Just wait until it’s time to dig in!

Hawaiian Chicken Sheet Pan

Why You’ll Love Hawaiian Chicken Sheet Pan

One of the best things about the Hawaiian Chicken Sheet Pan is how versatile it is. You can swap in your favorite veggies, and even adjust the sweetness to your liking. It’s not just a meal; it’s a whole experience. This dish loves to please and is bound to be a hit at any dinner table. Plus, it takes hardly any time to prepare, making it an ideal choice for those bustling weeknights.

Tips for success

  1. Use fresh ingredients: Opt for fresh pineapple and colorful vegetables to enhance the dish’s vibrant flavors.
  2. Marinate well: Allow your chicken to marinate in the soy sauce and brown sugar for at least 20-30 minutes for the best flavor absorption.
  3. Watch the timing: Keep an eye on the cooking time depending on the size of your chicken pieces to ensure they don’t overcook.

Hawaiian Chicken Sheet Pan

Serving Suggestions

For the best experience, serve your Hawaiian Chicken Sheet Pan over a bed of fluffy rice or quinoa. You can also top it with some chopped green onions or sesame seeds for an extra crunch. Pair it with a fresh side salad or some steamed broccoli to complete your meal.

FAQs

Can I use chicken breasts instead of thighs?

Yes, you can! Just ensure that the cooking time is adjusted as chicken breasts may cook faster.

What can I substitute for soy sauce?

If you’re looking for a soy-free option, try using coconut aminos or tamari as a great alternative.

Can I prepare this dish ahead of time?

Absolutely! You can marinate the chicken and chop the veggies a day in advance. Just store everything in the fridge until you’re ready to cook.

To explore more easy recipes, check out this Parmesan Crusted Chicken Sheet Pan Dinner. It’s another fantastic option for quick weeknight meals!

Hawaiian Chicken Sheet Pan

A delightful one-pan dish featuring chicken, pineapple, and colorful veggies, perfect for family dinners or easy weeknight gatherings.

Main ingredients

  • 1 lbs chicken thighs or breasts (Use your preference for taste.)
  • 1 cup fresh pineapple chunks (Fresh pineapple enhances flavor.)
  • 2 cups bell peppers, chopped (Any color of bell pepper can be used.)
  • 1 medium onion, sliced (Yellow or red onions work well.)
  • 3 cloves garlic, minced
  • 1/4 cup soy sauce (Can substitute with coconut aminos or tamari.)
  • 2 tablespoons brown sugar (Adjust sweetness to taste.)

Preparation

  1. Preheat your oven.
  2. Marinate the chicken in soy sauce and brown sugar for at least 20-30 minutes.
  3. Chop the vegetables while the chicken marinating.

Cooking

  1. Arrange chicken, pineapple, and veggies on a large sheet pan, distributing evenly.
  2. Roast in the preheated oven until the chicken is cooked through and veggies are tender.

For serving, plate over rice or quinoa, topped with green onions or sesame seeds. Pair with a fresh salad or steamed broccoli. Adjust cooking time based on chicken size to prevent overcooking.

Dinner, Main Course
Asian, Hawaiian
Easy Weeknight Meal, Family Dinner, Hawaiian Chicken, One Pan Meal, Sheet Pan Dinner