Small Batch Pistachio Cream Cinnamon Rolls

Delicious small batch pistachio cream cinnamon rolls with cinnamon and icing

These Small Batch Pistachio Cream Cinnamon Rolls are a cozy, nutty twist on a classic. They pair soft, yeasted dough with a rich pistachio cream and a touch of cinnamon sugar. The rolls bake up tender, with a green, nutty swirl that looks as good as it tastes. This recipe makes just a few rolls, so you get fresh, warm sweet rolls without a lot of extra work. It is a real crowd-pleaser, perfect for a small family breakfast, a lazy weekend, or when you want a special treat. You will love how the pistachio cream adds a mild, buttery nut flavor that balances the sweet cinnamon. Ready to make a little baking magic, one small batch at a time?

How to prepare Small Batch Pistachio Cream Cinnamon Rolls

  1. Make a soft dough, using flour, yeast, milk, a little sugar, butter, and salt. Knead until smooth, then let it rise until doubled.
  2. Roll the dough into a small rectangle on a floured surface.
  3. Mix pistachio cream, a little powdered sugar, and softened butter to make a spreadable pistachio filling. Spread it evenly over the dough.
  4. Sprinkle cinnamon sugar over the pistachio layer for extra warmth and sweetness.
  5. Roll the dough tightly from the long side into a log, then cut into 4 to 6 equal rolls for a small batch.
  6. Place the rolls in a small pan, let them rise briefly, then bake until golden and puffed.
  7. Make a simple glaze or cream cheese frosting and drizzle it over the warm rolls. Serve right away for the best texture.

Small Batch Pistachio Cream Cinnamon Rolls

Why You’ll Love Small Batch Pistachio Cream Cinnamon Rolls

  • Small batch, so you bake just what you need, no waste.
  • The pistachio cream gives a mild, buttery nut taste that is different from regular cinnamon rolls.
  • The rolls stay soft and fresh, with a nice green swirl that looks pretty on the plate.
  • They feel special but are simple to make, even if you bake alone.
  • Great for gifts, brunch, or a weekend treat.

Tips for success

  • Use room temperature ingredients so the dough rises well.
  • Don’t add too much flour when rolling, a slightly tacky dough makes softer rolls.
  • Spread the pistachio cream thin and even for a neat spiral.
  • Let the rolls rise until puffy, but not overproofed, or they may collapse in the oven.
  • Watch the oven, small pans bake fast, reduce time if needed.
  • Cool the rolls a little before glazing, so the glaze sets nicely.

Serving Suggestions

  • Serve warm with coffee or tea for a simple brunch.
  • Add a scoop of vanilla ice cream for a dessert twist.
  • Plate with fresh berries for color and a bright contrast.
  • Make a small platter for guests, these rolls are great shared.

Small Batch Pistachio Cream Cinnamon Rolls

FAQs

Q: Can I make the pistachio cream ahead of time?

A: Yes, you can make the pistachio cream a day ahead and keep it in the fridge, bring to room temperature before spreading.

Q: Can I use store bought pistachio paste?

A: Yes, store bought pistachio paste works well, just mix it with a little butter or cream to reach a spreadable texture.

Q: How do I store leftovers?

A: Keep leftovers in an airtight container at room temperature for one day, or in the fridge for up to three days. Reheat gently in the oven or microwave.

Q: Can I make these vegan or dairy free?

A: You can swap milk and butter for plant based options and use a vegan glaze. The texture will be similar, but you may need to adjust liquids slightly.

Conclusion

If you want a similar idea with a vegan twist or more small batch inspiration, see the Brown Butter Small Batch Vegan Pistachio Sweet Rolls recipe for more tips and a vegan approach.

Small Batch Pistachio Cream Cinnamon Rolls

These Small Batch Pistachio Cream Cinnamon Rolls offer a cozy, nutty twist on a classic, featuring soft dough paired with rich pistachio cream and a touch of cinnamon sugar, perfect for a small family breakfast or special treat.

Dough ingredients

  • 2 cups all-purpose flour (Use as needed, don’t add too much when rolling out.)
  • 1 packet instant yeast (To help the dough rise.)
  • 1/4 cup milk (Use at room temperature.)
  • 1 tablespoon sugar (For slight sweetness.)
  • 2 tablespoons butter (Melted, at room temperature.)
  • 1/4 teaspoon salt (For flavor.)

Pistachio cream filling ingredients

  • 1/2 cup pistachio cream (Homemade or store-bought.)
  • 1/4 cup powdered sugar (Adjust for sweetness as desired.)
  • 1 tablespoon butter (Softened for spreading.)

Cinnamon sugar topping

  • 1 tablespoon cinnamon (For flavor.)
  • 2 tablespoons sugar (To sprinkle over the filling.)

Preparation

  1. Make a soft dough by combining flour, yeast, milk, sugar, butter, and salt. Knead until smooth, then let it rise until doubled in size.
  2. Roll the dough into a small rectangle on a floured surface.
  3. Mix pistachio cream, powdered sugar, and softened butter to form a spreadable filling.
  4. Spread the pistachio filling evenly over the rolled dough.
  5. Sprinkle cinnamon sugar over the pistachio layer.
  6. Roll the dough tightly from the long side into a log, then cut into 4 to 6 equal rolls.
  7. Place the rolls in a small pan, let them rise briefly, then bake at 350°F until golden and puffed.

Finishing Touch

  1. Prepare a simple glaze or cream cheese frosting and drizzle over the warm rolls before serving.

Use room temperature ingredients for better rise. Don’t over-flour when rolling, and let the rolls rise until puffy before baking. Cool before glazing for the best texture.

Baking, Breakfast, Dessert
American
Baking Recipe, Breakfast Treat, Cinnamon Rolls, Pistachio Cream, Small Batch

Vanilla French Beignets

Delicious Vanilla French Beignets dusted with powdered sugar

Vanilla French Beignets are soft, airy fried dough with a clear vanilla taste and a cloud of powdered sugar on top. They smell warm and sweet, and people love to eat them hot. This Vanilla French Beignets recipe is a simple crowd-pleaser, with light centers, crisp edges, and a pure vanilla note that makes each bite feel special. If you like fried dough, simple desserts, or a sweet breakfast treat, you will want to make these again and again.

I also like to read other French pastry ideas while I cook, like a guide to the best French meat pie, it gives quick ideas for savory meals to pair with sweet treats.

How to prepare Vanilla French Beignets

Ingredients

  • 2 1/4 teaspoons active dry yeast (1 packet)
  • 1/4 cup warm water, about 110 F
  • 3/4 cup warm milk
  • 1/4 cup sugar
  • 1/2 teaspoon salt
  • 1 large egg
  • 1 teaspoon vanilla extract
  • 2 1/2 to 3 cups all-purpose flour
  • 2 tablespoons melted butter
  • Vegetable oil for frying
  • Powdered sugar for dusting

Directions

  1. Stir yeast into warm water with a pinch of sugar, wait 5 minutes until it is foamy.
  2. In a bowl, mix warm milk, sugar, salt, egg, vanilla, and melted butter. Add the yeast mixture.
  3. Add 2 cups of flour and mix, then add more flour a little at a time until the dough is soft and slightly sticky.
  4. Knead by hand or mixer for 5 minutes until smooth. Place dough in a lightly oiled bowl, cover with a towel, and let rise in a warm place for 1 to 1 1/2 hours, until doubled.
  5. Punch down dough and roll out on a lightly floured surface to about 1/4 inch thick. Cut into 2 to 3 inch squares or rounds.
  6. Heat oil in a deep pot to 350 F, or heat until a small piece of dough browns in 30 seconds. Fry a few beignets at a time, flipping once, until golden brown, about 1 to 2 minutes per side. Do not crowd the pot.
  7. Drain on paper towels and dust generously with powdered sugar while warm. Serve right away.


Vanilla French Beignets

Why You’ll Love Vanilla French Beignets

  • They are light, not heavy, so you can enjoy more than one, without feeling too full.
  • The vanilla flavor is simple, clean, and pairs well with powdered sugar or a fruit jam.
  • These beignets make a plain morning feel fancy, and they are easy to share with friends.
  • You can change them by adding a small filling or a flavored sugar, but the basic vanilla version is a classic.

tips for success

  • Use warm liquid, not hot, to activate the yeast, warm enough to touch, but not scalding.
  • Keep the oil temperature steady, around 350 F, for even puff and color. Too hot, and the outside burns before the inside cooks. Too cool, and the beignets soak up oil.
  • Do not add too much flour, a slightly sticky dough gives the best rise and soft crumb.
  • Let the dough rest and rise fully for the lightest, airiest beignets.
  • Dust with powdered sugar right after frying so it sticks while the beignets are still warm.

Serving Suggestions

  • Serve hot with extra powdered sugar on the side.
  • Offer a small bowl of jam, chocolate sauce, or honey for dipping.
  • Pair with coffee, café au lait, or a simple glass of milk.
  • For a brunch spread, place beignets next to fresh fruit and yogurt for balance.


Vanilla French Beignets

FAQs

Q: How long do beignets stay fresh?

A: Best the same day, eaten warm. You can store them in an airtight container for a day, but they lose crispness.

Q: Can I bake them instead of frying?

A: You can bake them, they will be less crisp and not the same as fried beignets, but they still taste good.

Q: Can I make the dough ahead?

A: Yes, chill the dough in the fridge after the first rise, up to 24 hours. Let it warm and rise a bit before shaping and frying.

Q: What if I do not have a thermometer for the oil?

A: Test with a small piece of dough, it should turn golden in about 30 seconds. Adjust heat as needed.

Q: Can I add fillings?

A: Yes, after frying, you can pipe in jam, custard, or chocolate, just be gentle so the beignet stays light.

Conclusion

If you want a classic New Orleans style beignet guide for extra ideas, try this reliable resource, New Orleans Style Beignets Recipe – Preppy Kitchen, it shows a trusted take on these fried dough treats.

Vanilla French Beignets

Soft, airy fried dough with a clear vanilla taste, topped with powdered sugar. A delightful treat for breakfast or dessert.

Dough Ingredients

  • 2 1/4 teaspoons active dry yeast (1 packet)
  • 1/4 cup warm water, about 110 F (Use warm, not hot, to activate the yeast.)
  • 3/4 cup warm milk (Warm enough to touch.)
  • 1/4 cup sugar
  • 1/2 teaspoon salt
  • 1 large egg
  • 1 teaspoon vanilla extract
  • 2 1/2 to 3 cups all-purpose flour (Add flour until dough is soft and slightly sticky.)
  • 2 tablespoons melted butter
  • Vegetable oil for frying (Heat to 350 F.)
  • Powdered sugar for dusting (Dust while warm.)

Preparation

  1. Stir yeast into warm water with a pinch of sugar, wait 5 minutes until foamy.
  2. In a bowl, mix warm milk, sugar, salt, egg, vanilla, and melted butter. Add the yeast mixture.
  3. Add 2 cups of flour and mix, then add more flour a little at a time until the dough is soft and slightly sticky.
  4. Knead by hand or mixer for 5 minutes until smooth.
  5. Place dough in a lightly oiled bowl, cover with a towel, and let rise in a warm place for 1 to 1 1/2 hours, until doubled.

Frying

  1. Punch down dough and roll out on a lightly floured surface to about 1/4 inch thick. Cut into 2 to 3 inch squares or rounds.
  2. Heat oil in a deep pot to 350 F, or heat until a small piece of dough browns in 30 seconds.
  3. Fry a few beignets at a time, flipping once, until golden brown, about 1 to 2 minutes per side. Do not crowd the pot.
  4. Drain on paper towels and dust generously with powdered sugar while warm.
  5. Serve right away.

Use warm liquid to activate yeast, keep oil at 350 F for best results, and dust with powdered sugar immediately after frying.

Breakfast, Dessert
French
French Pastry, Fried Dough, Sweet Treats, Vanilla Beignets

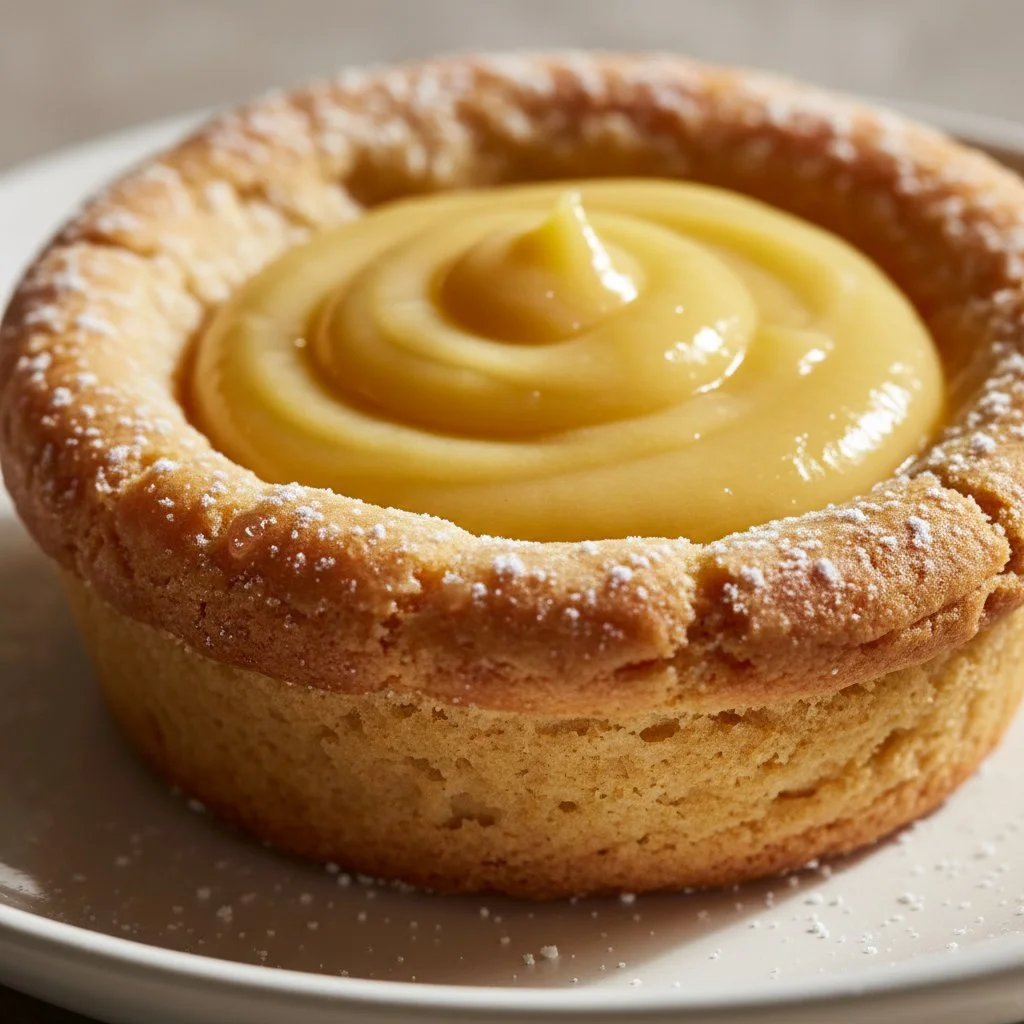
Lemon Curd Cookie Cups with Almond Twist

Delicious Lemon Curd Cookie Cups with an Almond Twist, garnished for dessert

Making Lemon Curd Cookie Cups with Almond Twist is a delightful and simple process that anyone can enjoy. Here’s how you can create these tasty treats in your own kitchen:

Ingredients

  • 1 cup of almond flour
  • 1 cup of all-purpose flour
  • 1/2 cup of butter, softened
  • 1/2 cup of sugar
  • 1/4 cup of powdered sugar
  • 1 egg
  • 1 teaspoon of vanilla extract
  • 1/2 teaspoon of almond extract
  • 1/2 teaspoon of baking powder
  • 1 cup of lemon curd (store-bought or homemade)
  • Fresh lemon zest and sliced almonds for garnish

Directions

  1. Preheat the oven to 350°F (175°C).
  2. In a large bowl, cream together the softened butter, sugar, and powdered sugar until light and fluffy.
  3. Beat in the egg, vanilla extract, and almond extract until well combined.
  4. Whisk together the almond flour, all-purpose flour, and baking powder in a separate bowl.
  5. Gradually add the dry ingredients to the wet ingredients, mixing until a dough forms.
  6. Scoop tablespoons of dough and press them into the bottom and up the sides of a muffin tin to create cups.
  7. Bake in the preheated oven for about 10-12 minutes, or until lightly golden.
  8. Remove the cookie cups from the oven and allow them to cool completely.
  9. Once cooled, fill each cookie cup with lemon curd.
  10. Garnish with fresh lemon zest and sliced almonds for added flavor and texture.

Lemon Curd Cookie Cups with Almond Twist (Easy Recipe)

Why You’ll Love Lemon Curd Cookie Cups with Almond Twist

These Lemon Curd Cookie Cups with Almond Twist are an absolute treat! The bright and zesty lemon curd pairs beautifully with the nutty flavors of almond, making each bite a refreshing experience. The cookie cups are tender and slightly crumbly, providing a perfect vessel for the smooth, tart lemon curd. They are great for any occasion, whether it’s a casual family get-together, a festive party, or just a sweet indulgence at home. Plus, they’re easy to make, which is a win for home bakers of any skill level.

tips for success

  1. Use fresh lemon curd if possible, as homemade adds a wonderful flavor. But store-bought works just fine too for convenience.
  2. Let the cookie cups cool completely before filling them, so the lemon curd doesn’t melt into the cookies.
  3. Experiment with flavors by adding a sprinkle of coconut or using different extracts, like lemon or vanilla, to suit your taste.

Serving Suggestions

These lovely cookie cups are perfect on their own, but you could serve them alongside a scoop of vanilla ice cream for a delightful dessert. They also pair well with a cup of herbal tea or coffee, making them a great addition to an afternoon snack or a dessert platter.

FAQs

1. Can I make the cookie cups ahead of time?

Absolutely! You can prepare the cookie cups a day before serving. Just fill them with lemon curd right before serving for the best taste.

2. How should I store leftover cookie cups?

Store any leftover cookie cups in an airtight container in the refrigerator. They can last for about 2-3 days. If possible, keep them unfilled until you’re ready to enjoy them again.

3. Can I use other fruit curds instead of lemon?

Yes indeed! Feel free to substitute lemon curd with other flavors like lime, orange, or even berry curds for a delicious twist.

Lemon Curd Cookie Cups with Almond Twist

Delightful cookie cups filled with zesty lemon curd and topped with sliced almonds, perfect for any occasion.

Cookie Cup Ingredients

  • 1 cup almond flour
  • 1 cup all-purpose flour
  • 1/2 cup butter, softened
  • 1/2 cup sugar
  • 1/4 cup powdered sugar
  • 1 large egg
  • 1 teaspoon vanilla extract
  • 1/2 teaspoon almond extract
  • 1/2 teaspoon baking powder

Filling and Garnish

  • 1 cup lemon curd (store-bought or homemade)
  • fresh lemon zest (for garnish)
  • sliced almonds (for garnish)

Preparation

  1. Preheat the oven to 350°F (175°C).
  2. In a large bowl, cream together the softened butter, sugar, and powdered sugar until light and fluffy.
  3. Beat in the egg, vanilla extract, and almond extract until well combined.
  4. Whisk together the almond flour, all-purpose flour, and baking powder in a separate bowl.
  5. Gradually add the dry ingredients to the wet ingredients, mixing until a dough forms.
  6. Scoop tablespoons of dough and press them into the bottom and up the sides of a muffin tin to create cups.
  7. Bake in the preheated oven for about 10-12 minutes, or until lightly golden.
  8. Remove the cookie cups from the oven and allow them to cool completely.
  9. Once cooled, fill each cookie cup with lemon curd.
  10. Garnish with fresh lemon zest and sliced almonds for added flavor and texture.

Use fresh lemon curd if possible for better flavor. Let the cookie cups cool completely before filling them to prevent the lemon curd from melting into the cookies. Experiment with flavors by adding coconut or using different extracts.

Dessert, Snack
American
almond, cookie cups, dessert recipe, lemon curd, quick dessert

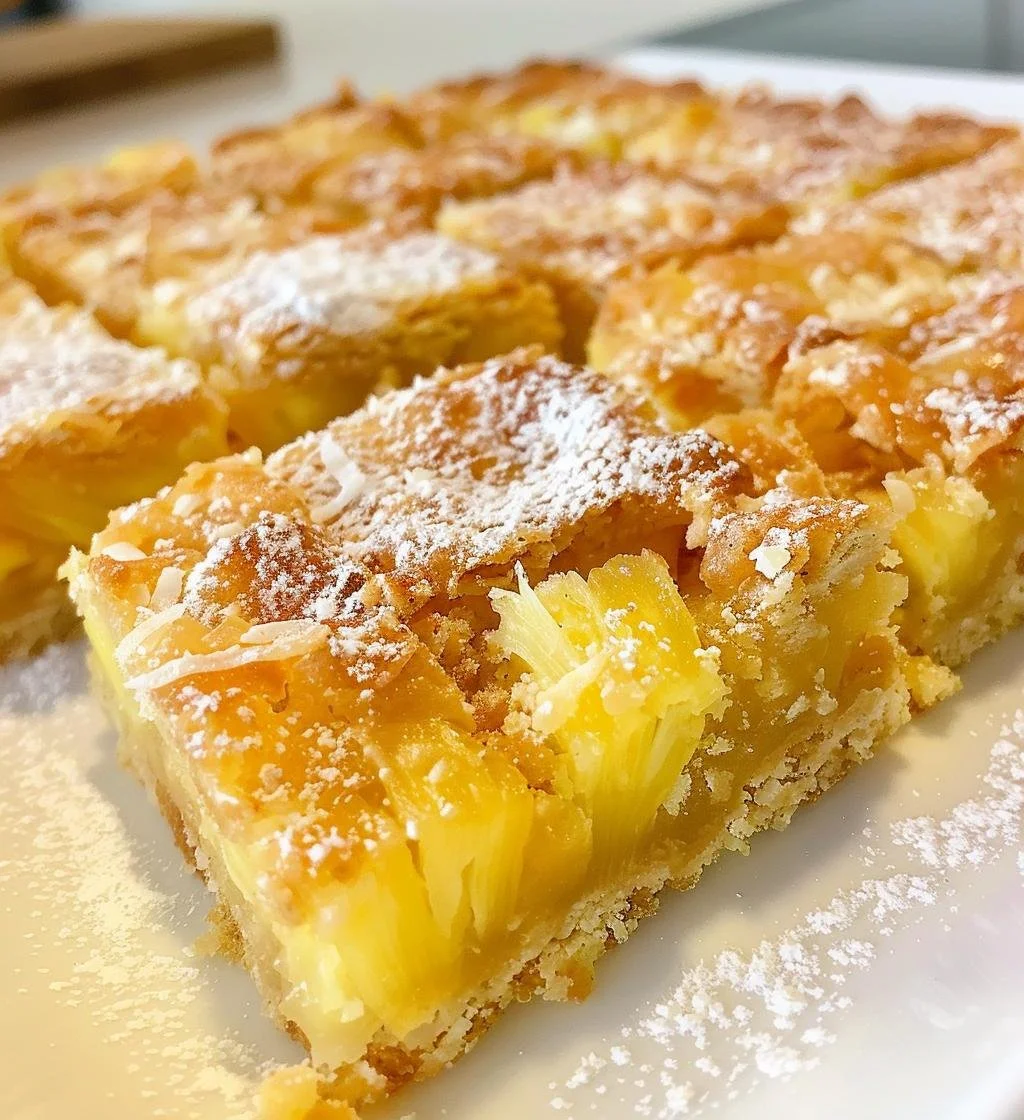
Pineapple Bliss Bars: 7 Sweet Reasons to Indulge Today

Delicious Pineapple Bliss Bars showcasing a tropical dessert delight

How to Prepare Pineapple Bliss Bars

Making Pineapple Bliss Bars is quick and easy! Here’s how to whip up these delicious treats in no time. You’ll need some simple ingredients like crushed pineapple, butter, and sugar. Just follow these steps:

  1. Preheat your oven to 350°F (175°C).
  2. In a bowl, combine crushed pineapple, melted butter, and sugar. Mix well.
  3. Add in flour, baking powder, and a pinch of salt. Stir until everything is combined.
  4. Pour the mixture into a greased baking pan and spread it evenly.
  5. Bake for about 25-30 minutes or until golden brown.
  6. Let it cool, then cut into bars and enjoy!

Pineapple Bliss Bars: 7 Sweet Reasons to Indulge Today

Why You’ll Love Pineapple Bliss Bars

Pineapple Bliss Bars are more than just a dessert, they’re a burst of sunshine in your mouth! With their sweet pineapple flavor and buttery texture, every bite feels like a mini vacation. Plus, they are super easy to share at parties or potlucks, making them a perfect crowd-pleaser. If you love tropical treats, this recipe is a must-try — you won’t regret it!

Tips for Success

  1. Use Fresh Pineapple: If you prefer, you can use fresh pineapple instead of canned. Just chop it finely and make sure to drain excess moisture.
  2. Don’t Overmix: When combining the ingredients, mix just until everything is nicely incorporated. Overmixing can make the bars tough.
  3. Cool Completely: Let the bars cool fully before cutting them. This helps them hold together nicely.

Serving Suggestions

Pineapple Bliss Bars can be enjoyed in many ways! Serve them with a scoop of vanilla ice cream for a delightful dessert. You can also dust them with powdered sugar for a pretty touch. For a tropical twist, add a dollop of whipped cream or fresh fruit on top. Enjoy them at breakfast, as an afternoon snack, or after dinner, they’re good any time of the day!

FAQs

Can I use other fruits?
Definitely! While pineapple is the star here, you can try using mashed bananas or other fruits if you prefer.

How should I store the bars?
Store them in an airtight container at room temperature for up to a week. You can also refrigerate them for longer freshness.

Can I freeze Pineapple Bliss Bars?
Yes, you can freeze them! Wrap individual bars in plastic wrap and then place them in a freezer bag. They should stay fresh for up to 3 months.

Indulging in Pineapple Bliss Bars is just a recipe away, so gather your ingredients and get ready to whip up this sweet delight!

Pineapple Bliss Bars

A delightful tropical treat with sweet pineapple flavor and buttery texture, perfect for any occasion.

Main Ingredients

  • 1 can crushed pineapple, drained (Use fresh pineapple if preferred, chopped finely.)
  • 1/2 cup butter, melted (Melted for easy mixing.)
  • 1 cup sugar
  • 1 cup all-purpose flour
  • 1 teaspoon baking powder
  • 1 pinch salt

Preparation

  1. Preheat your oven to 350°F (175°C).
  2. In a bowl, combine crushed pineapple, melted butter, and sugar. Mix well.
  3. Add in flour, baking powder, and a pinch of salt. Stir until everything is combined.
  4. Pour the mixture into a greased baking pan and spread it evenly.
  5. Bake for about 25-30 minutes or until golden brown.
  6. Let it cool, then cut into bars and enjoy!

Use fresh pineapple for a better flavor. Don’t overmix the batter to avoid tough bars. Let bars cool completely before cutting for the best texture.

Dessert, Snack
American, Tropical
bars, easy dessert, party treat, Pineapple Bliss Bars, tropical dessert