Cinnamon Crumb Banana Bread: A Cozy Twist on Comfort Food

Cinnamon Crumb Banana Bread baked to a golden perfection with a delicious crumb topping.

Warm, cozy smells make a house feel like home, and this cinnamon crumb banana bread does that in one bake. Soft, moist banana bread meets a sweet, cinnamon crumb top. It tastes like breakfast and dessert at once, and people smile when it comes out of the oven. If you like warm comfort food like bacon cheddar gnocchi soup, you will find this bread just as comforting. This recipe is a crowd pleaser, easy to make, and full of banana and cinnamon flavor, so get your loaf pan ready, and have fun baking something that feels like a hug.

How to prepare Cinnamon Crumb Banana Bread

  • Preheat oven to 350 F, and grease a 9×5 inch loaf pan or line it with parchment.
  • In a bowl, mash 3 ripe bananas until smooth.
  • Stir in 1/2 cup melted butter, 1 cup sugar, and 2 beaten eggs until mixed.
  • Add 1 teaspoon vanilla extract.
  • In another bowl, mix 1 1/2 cups all purpose flour, 1 teaspoon baking soda, 1/2 teaspoon salt, and 1/2 teaspoon ground cinnamon.
  • Fold the dry mix into the banana mix, stir until just combined, do not over mix.
  • For the crumb topping, mix 1/3 cup brown sugar, 1/4 cup flour, 1/2 teaspoon cinnamon, and 3 tablespoons cold butter cut into small pieces. Use a fork to mix until crumbly.
  • Pour batter into the pan, sprinkle crumb topping evenly over the batter.
  • Bake 55 to 65 minutes, or until a toothpick in the center comes out clean.
  • Let cool in the pan 10 minutes, then turn out to finish cooling on a rack.
  • Cinnamon Crumb Banana Bread: A Cozy Twist on Comfort Food

Why You’ll Love Cinnamon Crumb Banana Bread

  • It is moist and full of banana flavor, not dry.
  • The cinnamon crumb adds a sweet crunch on top, giving a nice contrast.
  • You can eat it for breakfast, snack, or dessert, it works any time.
  • It uses simple pantry ingredients, and ripened bananas make it even better.
  • It makes a great gift, and it fills the house with warm, cozy smells.

Tips for success

  • Use very ripe bananas, they add natural sweetness and soft texture.
  • Measure flour lightly, pack it not too tight, to keep the bread tender.
  • Do not over mix the batter, mix until just combined for a soft crumb.
  • Keep the butter cold when making the crumb, this helps make good crumbs.
  • Check the bread at 55 minutes, ovens vary, and a clean toothpick means it is done.
  • Cool a bit before slicing, the bread firms up and slices cleanly.

Serving Suggestions

  • Serve warm with a pat of butter or cream cheese.
  • Cut into thick slices for breakfast with coffee.
  • Add a scoop of vanilla ice cream for a simple dessert.
  • Toast slices lightly and spread nut butter for a hearty snack.
  • Pair with fruit, yogurt, or a hot drink for a cozy plate.

Cinnamon Crumb Banana Bread: A Cozy Twist on Comfort Food

FAQs

Q: Can I freeze this banana bread? A: Yes, wrap slices or the whole loaf in foil and freeze up to 3 months, thaw at room temperature.

Q: Can I use less sugar? A: Yes, you can reduce sugar by up to a quarter cup, the bread will be less sweet but still good.

Q: Can I add nuts or chocolate? A: Yes, fold in 1/2 to 3/4 cup chopped nuts or chocolate chips into the batter before baking.

Q: Can I make it gluten free? A: You can try a 1 to 1 gluten free flour blend, baking time may change, check with a toothpick.

Q: How do I make the crumb extra crunchy? A: Use cold butter and do not over mix the crumb, press larger crumbs on top for more texture.

Conclusion

This cinnamon crumb banana bread is simple, cozy, and a real crowd pleaser, it brings sweet cinnamon and ripe banana together in every bite. For a lighter, gluten free take on banana bread, see Healthy Banana Bread: Gluten-Free & Delicious – TraveLynn Eats, it has ideas that may inspire swaps for your next loaf. Enjoy baking, and share a slice with someone you love.

Cinnamon Crumb Banana Bread

This moist and delicious cinnamon crumb banana bread features a sweet crumb topping and is perfect for breakfast or dessert.

For the Banana Bread

  • 3 pieces ripe bananas (Use very ripe bananas for natural sweetness.)
  • 1/2 cup melted butter (Keep the butter cold for the crumb topping.)
  • 1 cup sugar (Can be reduced by up to a quarter cup.)
  • 2 pieces eggs, beaten
  • 1 teaspoon vanilla extract

For the Dry Mix

  • 1 1/2 cups all-purpose flour (Measure lightly and do not pack tightly.)
  • 1 teaspoon baking soda
  • 1/2 teaspoon salt
  • 1/2 teaspoon ground cinnamon

For the Crumb Topping

  • 1/3 cup brown sugar
  • 1/4 cup flour
  • 1/2 teaspoon cinnamon
  • 3 tablespoons cold butter (Cut into small pieces.)

Preparation

  1. Preheat oven to 350°F and grease a 9×5 inch loaf pan or line it with parchment.
  2. In a bowl, mash the ripe bananas until smooth.
  3. Stir in the melted butter, sugar, and beaten eggs until well mixed.
  4. Add the vanilla extract.
  5. In another bowl, mix the all-purpose flour, baking soda, salt, and ground cinnamon.
  6. Fold the dry mix into the banana mix and stir until just combined; do not over mix.

Crumb Topping Preparation

  1. To make the crumb topping, mix the brown sugar, flour, cinnamon, and cold butter in a bowl.
  2. Use a fork to mix until crumbly.

Baking

  1. Pour the batter into the prepared pan and sprinkle the crumb topping evenly over the batter.
  2. Bake for 55 to 65 minutes, or until a toothpick inserted in the center comes out clean.
  3. Let cool in the pan for 10 minutes, then turn out to finish cooling on a rack.

Serve warm with butter or cream cheese. For a heartier snack, toast slices and spread with nut butter.

Breakfast, Dessert, Snack
American
Baking, banana bread, Cinnamon Bread, Comfort Food, Easy Recipes

Egg Fried Rice

Plate of flavorful Egg Fried Rice garnished with vegetables and egg

Egg Fried Rice is a delicious dish that feels like home. It mixes soft eggs, savory soy sauce, and fluffy rice for a quick meal that most people love. This featured recipe is a true crowd-pleaser, easy to make for a weeknight dinner or a fast lunch. It tastes bright from green onions and rich from sesame oil, and it works well with many leftovers. If you like quick rice bowls, you might enjoy trying a similar idea, like the spicy ground beef stir fry bowl for more meal ideas. Give this egg fried rice a try and watch it disappear, one spoonful at a time.

How to prepare Egg Fried Rice

Ingredients

  • 3 cups cold cooked rice, day-old is best
  • 2 large eggs
  • 2 tablespoons vegetable oil
  • 1 small onion, chopped
  • 2 cloves garlic, minced
  • 2 green onions, sliced
  • 2 tablespoons soy sauce
  • 1 teaspoon sesame oil, optional
  • Salt and pepper to taste
  • Frozen peas or diced carrots, optional, 1/2 cup

Directions

  1. Break up the cold rice with your hands or a fork so it is loose and not in big clumps.
  2. Heat 1 tablespoon oil in a large pan or wok over medium-high heat. Scramble the eggs until just set, then move them to the side and break them up.
  3. Add the other tablespoon of oil. Stir in the chopped onion and cook 1 to 2 minutes until soft. Add garlic and cook 20 to 30 seconds.
  4. If you use peas or carrots, add them now and cook until heated.
  5. Add the rice to the pan and spread it out. Stir and toss the rice so it heats and gets a little color.
  6. Push rice to the side, add the eggs back in and mix. Stir in soy sauce and sesame oil, if using. Add salt and pepper to taste.
  7. Stir in sliced green onions and serve hot.

Egg Fried Rice

Why You’ll Love Egg Fried Rice

  • Fast to make, ready in about 15 to 20 minutes.
  • Uses simple ingredients you likely have at home.
  • Flexible, you can add veggies or meat for more flavor.
  • Great use for leftover rice, it keeps the rice from getting soggy.

Tips for success

  • Use cold, day-old rice, it fries better and stays separate.
  • Work on high heat, and keep the rice moving in the pan.
  • Don’t overcrowd the pan, cook in batches if needed.
  • Season at the end so you control the salt level.
  • Taste as you go, add more soy sauce or pepper if needed.

Serving Suggestions

  • Serve with a side of steamed vegetables or a simple salad.
  • Top with extra sliced green onions or a drizzle of sesame oil.
  • Add cooked shrimp, chicken, or tofu for protein.
  • Offer chili sauce or soy sauce at the table for extra flavor.

Egg Fried Rice

FAQs

Q: Can I use fresh rice?

A: You can, but fresh hot rice can be sticky. Cool it on a tray first so it dries a little.

Q: Can I make this without oil?

A: Oil helps fry and add flavor, but you can use a nonstick pan and a small spray of oil if you want less fat.

Q: How do I store leftovers?

A: Cool quickly and keep in an airtight container. Use within 2 days and reheat on the stove or in a microwave.

Q: Can I add more vegetables?

A: Yes, bell peppers, peas, carrots, and corn work well. Cook harder veggies first.

Conclusion

For a quick and tasty guide to a very similar recipe, see this simple version, The Easiest Egg Fried Rice (20 Minutes) | Healthy Nibbles by Lisa Lin, for more tips and a fast method to try.

Egg Fried Rice

A quick and delicious dish that mixes soft eggs, savory soy sauce, and fluffy rice, perfect for a crowd-pleasing meal any night of the week.

Main Ingredients

  • 3 cups cold cooked rice (day-old is best)
  • 2 large eggs
  • 2 tablespoons vegetable oil
  • 1 small onion, chopped
  • 2 cloves garlic, minced
  • 2 tablespoons soy sauce
  • 1 teaspoon sesame oil (optional)
  • 1/2 cup frozen peas or diced carrots (optional)
  • Salt and pepper (to taste)

Preparation

  1. Break up the cold rice with your hands or a fork so it is loose and not in big clumps.
  2. Heat 1 tablespoon oil in a large pan or wok over medium-high heat. Scramble the eggs until just set, then move them to the side and break them up.
  3. Add the other tablespoon of oil. Stir in the chopped onion and cook for 1 to 2 minutes until soft. Add garlic and cook for 20 to 30 seconds.
  4. If using peas or carrots, add them now and cook until heated.
  5. Add the rice to the pan and spread it out. Stir and toss the rice so it heats and gets a little color.
  6. Push rice to the side, add the eggs back in and mix. Stir in soy sauce and sesame oil, if using. Add salt and pepper to taste.
  7. Stir in sliced green onions and serve hot.

Use cold, day-old rice for the best texture. Work on high heat to keep the rice moving in the pan, and avoid overcrowding. Taste and adjust seasoning as needed.

Dinner, lunch, Main Course
Asian, Chinese
Egg Fried Rice, Fried Rice Recipe, Leftover Rice, Quick Meal, Vegetable Fried Rice

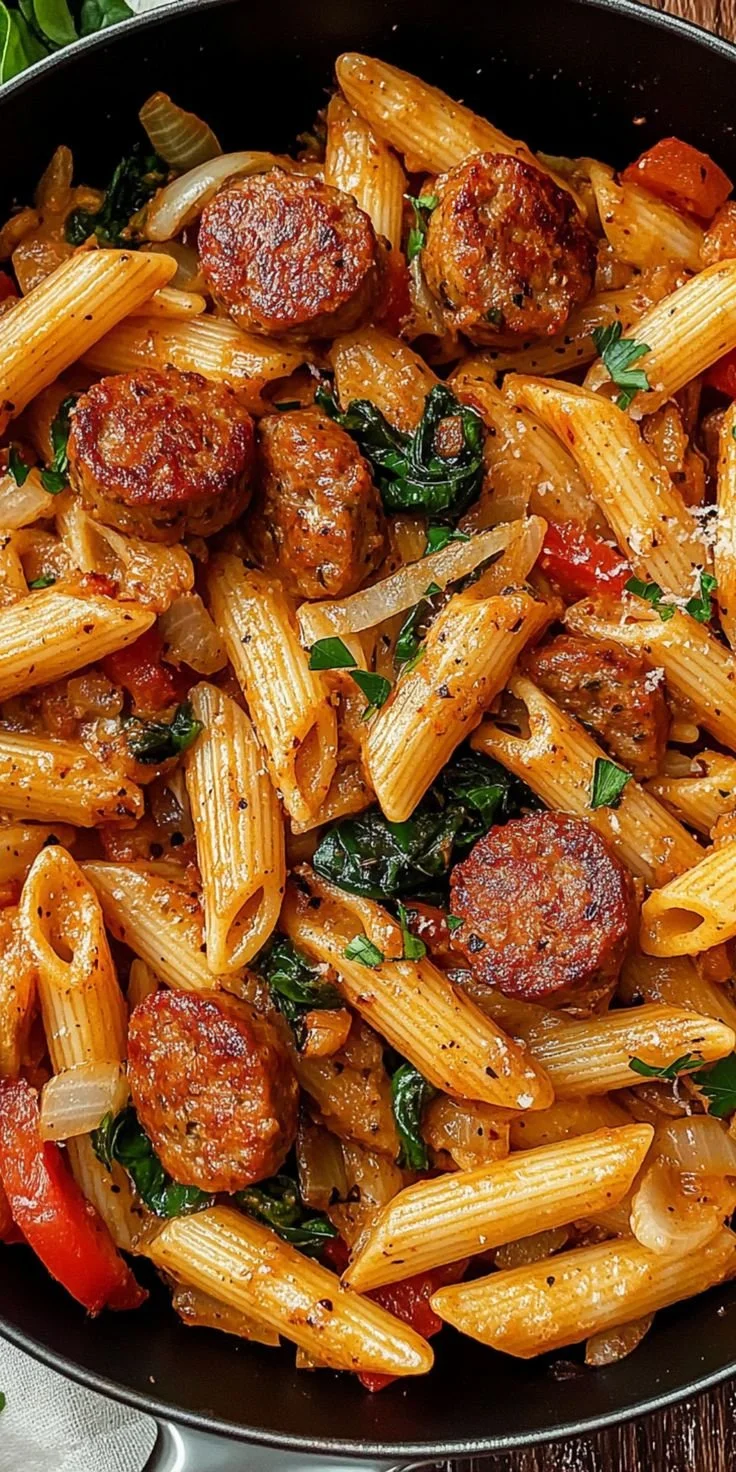
Cajun Sausage Pasta

Bowl of Cajun Sausage Pasta topped with fresh herbs and spices

I love meals that are quick, bold, and fill the whole house with good smells. Cajun Sausage Pasta is one of those dishes. It blends spicy Cajun seasoning, smoky sausage, and a creamy sauce with pasta. This dish is a crowd-pleaser, easy to make, and tastes like a warm hug with a little kick. Get ready to make a bowl that your family will ask for again and again.

How to prepare Cajun Sausage Pasta

  1. Cook 12 ounces of pasta in salted water until just tender, drain and save a cup of pasta water.
  2. Slice 1 pound smoked sausage into rounds. Heat a large pan, add a little oil, brown the sausage, then move to a plate.
  3. In the same pan, add 1 chopped onion and 1 chopped bell pepper, cook until soft. Add 2 minced garlic cloves and 1 to 2 tablespoons Cajun seasoning, stir for 30 seconds.
  4. Add a can of diced tomatoes with juice, and 1 cup of chicken broth, bring to a simmer.
  5. Stir in 1 cup heavy cream, then add the cooked sausage back to the pan. Let it warm through and thicken a little.
  6. Add the cooked pasta to the sauce, toss to coat. If the sauce is too thick, add some reserved pasta water until you like the texture.
  7. Taste and add salt, pepper, or more Cajun seasoning if you want more spice. Top with chopped parsley and grated Parmesan if you like.

Cajun Sausage Pasta

Why You’ll Love Cajun Sausage Pasta

  • It mixes spicy Cajun flavors with a creamy sauce, for a rich, tasty meal.
  • Sausage gives a smoky, meaty bite that works well with pasta.
  • You can make it fast on a weeknight, and it still feels special.
  • It works as a one pot or nearly one pot meal, so cleanup is easy.
  • You can change the heat level to suit your family, from mild to very spicy.

Tips for success

  • Use good Cajun seasoning or make your own, it makes the main flavor.
  • Brown the sausage well, browning adds depth and more flavor.
  • Save some pasta water, it helps the sauce stick to the noodles.
  • If you want creamier sauce, add a little more cream or a splash of milk.
  • Taste as you go, adjust salt and spice to your liking.
  • Cook the pasta al dente, it will finish cooking in the sauce and not get mushy.

Serving Suggestions

  • Serve with a green salad and a light vinaigrette to balance the rich sauce.
  • Offer crusty bread to soak up the sauce.
  • Top with chopped green onions or parsley for a fresh note.
  • Add a side of roasted vegetables for color and texture.
  • Pair with a crisp white wine or a cold beer to cut the creaminess.

Cajun Sausage Pasta

FAQs

Q: Can I make this dish less spicy?
A: Yes, use less Cajun seasoning, or choose a mild sausage. You can also add more cream to lower the heat.

Q: Can I make it in one pot?
A: Yes, you can brown the sausage, sauté the veggies, add pasta, broth, and finish with cream in the same pan. Stir often so the pasta cooks evenly.

Q: How do I store leftovers?
A: Keep leftovers in a sealed container in the fridge for up to 3 days. Reheat gently on the stove, add a splash of water or cream if the sauce thickened.

Q: Can I use chicken instead of sausage?
A: Yes, cooked chicken works well, but you may want to add a little smoked paprika or liquid smoke for that smoky flavor.

Q: Is there a vegetarian option?
A: Use a plant-based sausage or extra vegetables like mushrooms and eggplant, and use vegetable broth instead of chicken broth.

Conclusion

If you want another version or a one pot take on this spicy, creamy dish, see this recipe for more ideas, One Pot Creamy Cajun Sausage Pasta – Pass Me Some Tasty.

Cajun Sausage Pasta

A quick and bold blend of spicy Cajun seasoning, smoky sausage, and a creamy sauce with pasta, perfect for family meals.

Pasta

  • 12 ounces pasta (Cook in salted water until just tender.)

Sausage and Vegetables

  • 1 pound smoked sausage (Slice into rounds.)
  • 1 large onion, chopped
  • 1 large bell pepper, chopped
  • 2 cloves garlic, minced
  • 1 to 2 tablespoons Cajun seasoning (Adjust to taste.)

Sauce

  • 1 can diced tomatoes with juice
  • 1 cup chicken broth
  • 1 cup heavy cream

Toppings

  • chopped parsley (For garnish.)
  • grated Parmesan cheese (Optional topping.)

Preparation

  1. Cook the pasta in salted water until just tender, drain, and save a cup of pasta water.
  2. Slice the smoked sausage into rounds.
  3. In a large pan, heat a little oil and brown the sausage, then move to a plate.

Cooking

  1. In the same pan, add chopped onion and bell pepper, and cook until soft.
  2. Add minced garlic and Cajun seasoning, stir for 30 seconds.
  3. Add diced tomatoes with juice and chicken broth, bring to a simmer.
  4. Stir in heavy cream, then add the cooked sausage back to the pan.
  5. Let it warm through and thicken a little.
  6. Add the cooked pasta to the sauce and toss to coat. If it’s too thick, add reserved pasta water until the desired texture is reached.
  7. Taste and add salt, pepper or more Cajun seasoning for more spice.
  8. Top with chopped parsley and grated Parmesan if desired.

Use good Cajun seasoning or make your own for the best flavor. Brown the sausage well for depth and more flavor. Save some pasta water to help the sauce stick to the noodles. Adjust cream and spice to your liking. Cook the pasta al dente so it finishes cooking in the sauce and avoids being mushy.

Dinner, Main Course
American, Southern
Cajun Sausage Pasta, Creamy Pasta, One Pot Meal, Quick Dinner, Spicy Pasta

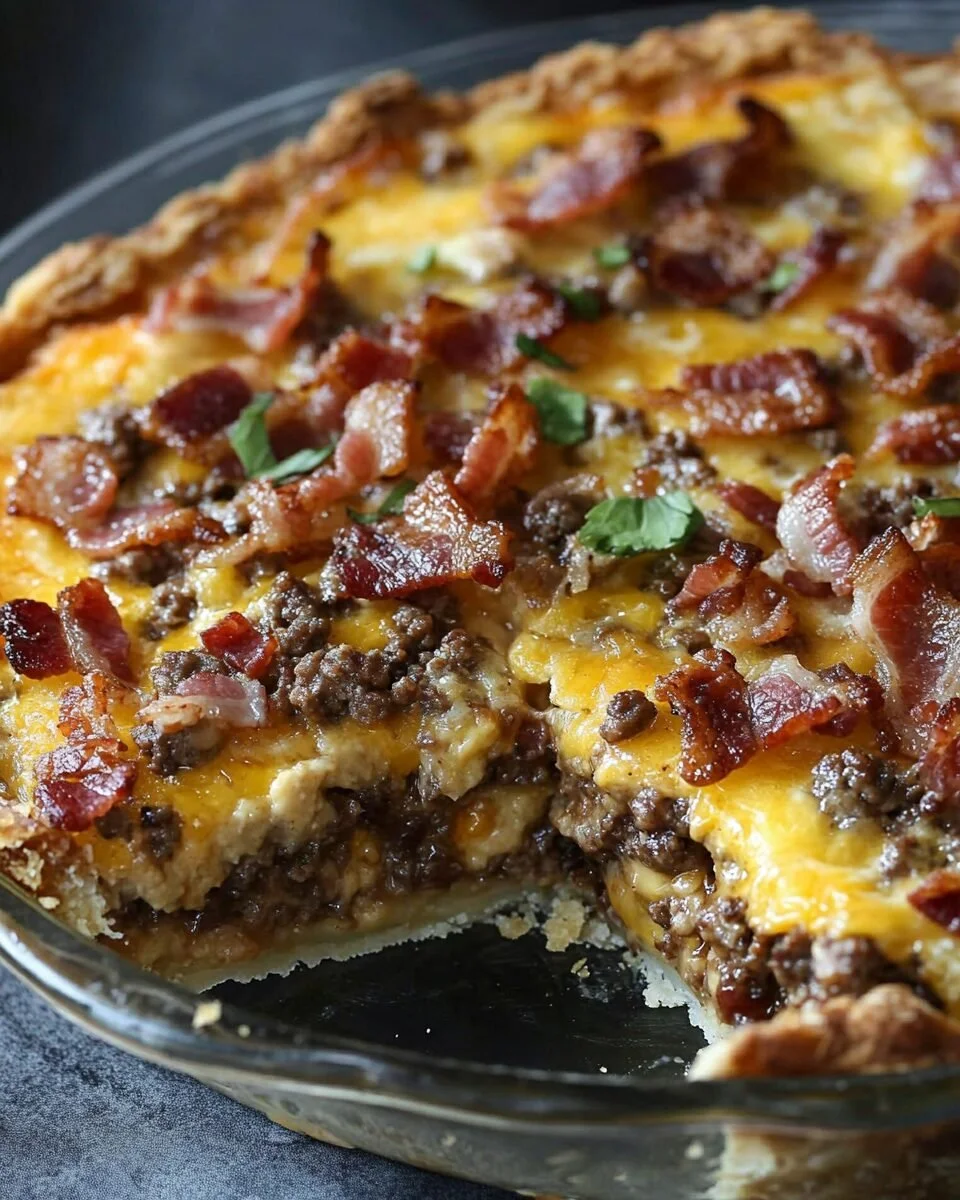
Cheesy Beef and Bacon Bake

Cheesy Beef and Bacon Bake served on a plate, garnished with herbs

This Cheesy Beef and Bacon Bake is a warm, tasty dish that makes people smile. It mixes browned beef, crispy bacon, melty cheese, and simple spices. The dish feels like home food, it is filling, and it cooks in one pan, so it is easy to make for family nights or a potluck. This recipe is a real crowd-pleaser, rich in cheese, smoky from bacon, and full of beefy flavor. Get ready to enjoy gooey cheese and crisp bacon in every bite, you will want to make it again and again.

How to prepare Cheesy Beef and Bacon Bake

Ingredients

  • 1 pound ground beef
  • 6 to 8 slices bacon, chopped
  • 1 small onion, chopped
  • 2 cloves garlic, minced
  • 1 cup frozen corn or 1 cup chopped bell pepper (optional)
  • 1 can (14 oz) diced tomatoes, drained
  • 1 cup shredded cheddar cheese
  • 1/2 cup shredded mozzarella (optional)
  • 1/2 cup sour cream or plain yogurt
  • 1 teaspoon salt
  • 1/2 teaspoon black pepper
  • 1 teaspoon dried oregano or Italian seasoning
  • 1 tablespoon olive oil

Directions

  1. Preheat oven to 375°F (190°C).
  2. In a large skillet, cook chopped bacon over medium heat until crisp. Remove bacon and set aside, leave about 1 tablespoon of bacon fat in the pan.
  3. Add olive oil if needed, then cook chopped onion in the skillet until soft, about 3 minutes. Add garlic and cook 30 seconds.
  4. Add ground beef, salt, pepper, and oregano. Cook and stir until beef is browned and cooked through. Drain excess fat if needed.
  5. Stir in drained diced tomatoes and corn or bell pepper if using. Cook 2 minutes to warm.
  6. Turn off heat. Stir in sour cream and half of the cheddar and mozzarella. Mix well.
  7. Pour the beef mix into a baking dish. Sprinkle the reserved crispy bacon on top and then add the rest of the cheddar and mozzarella.
  8. Bake in the oven for 15 to 20 minutes, until cheese is bubbly and golden.
  9. Let rest 5 minutes before serving.

Cheesy Beef and Bacon Bake

Why You’ll Love Cheesy Beef and Bacon Bake

  • It is simple to make, one pan for the stove work and a short bake.
  • The mix of beef, bacon, and cheese gives strong, comforting flavor.
  • You can change it, add vegetables, or use different cheeses.
  • It makes great leftovers, and it warms up well for quick meals.

Tips for success

  • Cook the bacon until crisp, this adds a nice texture on top.
  • Drain excess fat from the beef so the dish does not get greasy.
  • Use a mix of cheeses for best melt and flavor, cheddar and mozzarella work well.
  • Let it rest after baking, the cheese will set and slice better.
  • If you want less salt, skip added salt and use low-sodium bacon or cheese.

Serving Suggestions

  • Serve with a simple green salad and a light dressing.
  • Spoon over rice, mashed potatoes, or pasta for a fuller meal.
  • Offer pickles or a fresh tomato salad on the side to cut the richness.
  • Top with chopped fresh parsley or green onions for color and a fresh bite.

Cheesy Beef and Bacon Bake

FAQs

Q: Can I make this ahead of time?

A: Yes, cook the beef mix and store it in the baking dish covered, then add cheese and bake when ready. Heat time may be a bit longer from cold.

Q: Can I freeze the bake?

A: Yes, freeze before baking. Thaw in the fridge overnight and bake a bit longer until hot and bubbly.

Q: Can I use turkey or chicken instead of beef?

A: Yes, ground turkey or chicken work well. You may want to add a bit more seasoning for flavor.

Q: How long does it keep in the fridge?

A: Store in an airtight container for 3 to 4 days. Reheat in the oven or microwave until hot.

Q: Can I make it low carb?

A: Yes, skip the corn and serve with cauliflower rice or a salad to lower carbs.

Conclusion

If you want a tasty, simple dinner that fills the table and pleases a crowd, this Cheesy Beef and Bacon Bake is a great pick. For another similar idea with a low-carb twist, check this recipe, Low-Carb Bacon Cheeseburger Casserole Recipe – Allrecipes.

Cheesy Beef and Bacon Bake

A warm, tasty dish mixing browned beef, crispy bacon, and melty cheese, perfect for family nights or potlucks.

Main ingredients

  • 1 pound ground beef
  • 6 to 8 slices bacon, chopped
  • 1 small onion, chopped
  • 2 cloves garlic, minced
  • 1 cup frozen corn or 1 cup chopped bell pepper (optional) (Choose one or the other, optional)
  • 1 can (14 oz) diced tomatoes, drained
  • 1 cup shredded cheddar cheese
  • 1/2 cup shredded mozzarella (optional) (Optional for extra cheesiness)
  • 1/2 cup sour cream or plain yogurt
  • 1 teaspoon salt (Adjust to taste)
  • 1/2 teaspoon black pepper
  • 1 teaspoon dried oregano or Italian seasoning
  • 1 tablespoon olive oil

Preparation

  1. Preheat oven to 375°F (190°C).
  2. In a large skillet, cook chopped bacon over medium heat until crisp. Remove bacon and set aside, leaving about 1 tablespoon of bacon fat in the pan.
  3. Add olive oil if needed, then cook chopped onion in the skillet until soft, about 3 minutes. Add garlic and cook for 30 seconds.
  4. Add ground beef, salt, pepper, and oregano. Cook and stir until beef is browned and cooked through. Drain excess fat if needed.
  5. Stir in drained diced tomatoes and corn or bell pepper if using. Cook for 2 minutes to warm.
  6. Turn off the heat. Stir in sour cream and half of the cheddar and mozzarella. Mix well.
  7. Pour the beef mix into a baking dish. Sprinkle the reserved crispy bacon on top and then add the rest of the cheddar and mozzarella.
  8. Bake in the oven for 15 to 20 minutes, until cheese is bubbly and golden.
  9. Let rest for 5 minutes before serving.

Cook bacon until crisp for nice texture; drain excess fat from beef to prevent greasiness. Mix cheeses for best melt and flavor; let dish rest after baking for easier slicing. For lower salt content, skip added salt and use low-sodium bacon or cheese. Great leftovers that warm up well.

Dinner, Main Course
American
Bacon, Casserole, Cheesy Beef and Bacon Bake, Comfort Food, Ground Beef

Broccoli Cheese Soup

A bowl of creamy Broccoli Cheese Soup garnished with fresh broccoli and cheese

This warm broccoli cheese soup feels like a hug in a bowl. It is creamy, cheesy, and full of tender broccoli. People love it on cold days and at simple family dinners. The featured recipe is a classic, easy broccoli cheese soup that cooks fast and pleases most tastes. It has a rich cheddar flavor, a smooth texture, and a homey feel that makes it a crowd pleaser, whether you make it for lunch or a cozy dinner. Get ready to make a pot that fills the house with a happy smell, and makes everyone ask for seconds.

How to prepare Broccoli Cheese Soup

Ingredients

  • 4 cups broccoli florets, chopped small
  • 1 small onion, diced
  • 2 cloves garlic, minced
  • 3 tablespoons butter
  • 3 tablespoons all purpose flour
  • 3 cups chicken or vegetable broth
  • 1 cup milk or half and half
  • 2 cups shredded cheddar cheese
  • Salt and pepper to taste
  • Optional, grated carrot or a pinch of mustard powder for extra flavor

Directions

  1. Melt butter in a large pot over medium heat. Add onion and cook until soft, about 5 minutes. Add garlic and cook 1 minute.
  2. Stir in flour, cook 1 minute to make a light roux.
  3. Slowly add broth while stirring, so the soup stays smooth.
  4. Add broccoli, bring to a simmer, cover and cook until broccoli is tender, about 10 minutes.
  5. Use an immersion blender for a smooth soup, or mash some broccoli with a spoon for a chunkier texture.
  6. Stir in milk, then lower heat. Add cheese a little at a time, stirring until melted and smooth. Do not boil after cheese is added.
  7. Taste and add salt and pepper. If the soup is too thick, add a splash of milk or broth.
  8. Serve hot, with extra cheese on top if you like.

Broccoli Cheese Soup

Why You’ll Love Broccoli Cheese Soup

  • Simple to make with common kitchen ingredients.
  • Comforting, creamy texture that kids and adults enjoy.
  • Flexible, you can make it thick or thin, smooth or chunky.
  • Good use of fresh or frozen broccoli, so it works any time.
  • A great base to add bacon, potatoes, or extra veggies.

Tips for success

  • Chop broccoli small so it cooks fast and blends well.
  • Add cheese off the heat or on very low heat, to keep it smooth.
  • Use sharp cheddar for more flavor, mild cheddar for a softer taste.
  • If the soup is grainy after adding cheese, stir in a little milk and heat gently to smooth it.
  • For a richer soup, use half and half or add a splash of cream.
  • Taste and season at the end, cheese can add salt.

Serving Suggestions

  • Serve with crusty bread or garlic toast for dipping.
  • Top with extra shredded cheddar, croutons, or crispy bacon bits.
  • Offer a side salad to make a light meal.
  • Spoon into bread bowls for a fun serving idea.
  • Pair with a sandwich, like a grilled cheese, for a classic combo.

Broccoli Cheese Soup

FAQs

Q, Can I use frozen broccoli?

A, Yes, frozen broccoli works well, add it a little longer if needed.

Q, How do I make the soup thicker?

A, Cook less broth, or mash some broccoli into the broth, or add a little more cheese.

Q, Can I make it ahead of time?

A, Yes, make it ahead and reheat gently. If it gets too thick, thin with a splash of milk or broth.

Q, Is this soup good for kids?

A, Yes, many kids like creamy broccoli cheese soup, and you can blend it smooth for picky eaters.

Q, Can I use a different cheese?

A, Yes, try Monterey Jack, Colby, or a mix with cheddar for different flavors.

Conclusion

If you want another version or step by step photos, check this helpful Broccoli Cheese Soup recipe for more ideas, Broccoli Cheese Soup – Tastes Better from Scratch.

Broccoli Cheese Soup

This warm broccoli cheese soup is creamy, cheesy, and full of tender broccoli, making it a comforting dish for cold days and family dinners.

Main Ingredients

  • 4 cups broccoli florets, chopped small (Chop broccoli small so it cooks fast and blends well.)
  • 1 small onion, diced
  • 2 cloves garlic, minced
  • 3 tablespoons butter
  • 3 tablespoons all purpose flour
  • 3 cups chicken or vegetable broth
  • 1 cup milk or half and half (For a richer soup, use half and half or add a splash of cream.)
  • 2 cups shredded cheddar cheese (Use sharp cheddar for more flavor, mild cheddar for a softer taste.)
  • to taste salt and pepper (Taste and season at the end, cheese can add salt.)
  • optional grated carrot or a pinch of mustard powder (Optional for extra flavor.)

Preparation

  1. Melt butter in a large pot over medium heat. Add onion and cook until soft, about 5 minutes.
  2. Add garlic and cook for 1 minute.
  3. Stir in flour, cook for 1 minute to make a light roux.

Cooking

  1. Slowly add broth while stirring, so the soup stays smooth.
  2. Add broccoli, bring to a simmer, cover and cook until broccoli is tender, about 10 minutes.
  3. Use an immersion blender for a smooth soup, or mash some broccoli with a spoon for a chunkier texture.
  4. Stir in milk, then lower heat. Add cheese a little at a time, stirring until melted and smooth. Do not boil after cheese is added.
  5. Taste and add salt and pepper. If the soup is too thick, add a splash of milk or broth.

Serving

  1. Serve hot, with extra cheese on top if you like.

Serve with crusty bread or garlic toast for dipping. Top with extra shredded cheddar, croutons, or crispy bacon bits. Offer a side salad to make a light meal. Spoon into bread bowls for a fun serving idea. Pair with a sandwich, like a grilled cheese, for a classic combo.

Dinner, lunch, Soup
American
Broccoli Cheese Soup, Cheesy Soup, Comfort Food, Easy Soup, Vegetarian Soup

Cheese Chicken Bake

Delicious Cheese Chicken Bake topped with melted cheese and herbs

Cheese Chicken Bake is warm, simple, and full of melty cheese. This dish feels like a hug on a plate. It is great for busy weeknights, family dinners, and for anyone who loves tasty, easy comfort food. The cheese makes the chicken juicy and rich, and the bake fills the kitchen with a nice smell. This featured recipe is a crowd-pleaser, with tender chicken under a golden, cheesy crust. It tastes creamy, savory, and a little crunchy on top, so people always ask for seconds. Grab your baking dish and get ready to make a dish that everyone will love, and maybe lick their plate a little.

How to prepare Cheese Chicken Bake

Ingredients

  • 4 boneless, skinless chicken breasts
  • 1 teaspoon salt
  • 1/2 teaspoon black pepper
  • 1 teaspoon garlic powder
  • 1 teaspoon paprika
  • 2 tablespoons olive oil
  • 1 cup sour cream or plain Greek yogurt
  • 1/2 cup mayonnaise or 1 can cream of chicken soup
  • 1 cup shredded cheddar cheese
  • 1 cup shredded mozzarella cheese
  • 1/2 cup breadcrumbs, optional for crunch
  • 2 tablespoons chopped fresh parsley or dried parsley

Directions

  1. Preheat oven to 400°F (200°C).
  2. Pat chicken dry, then season both sides with salt, pepper, garlic powder, and paprika.
  3. Heat olive oil in a skillet over medium heat, sear chicken 2 minutes per side, just to brown, then remove.
  4. In a bowl, mix sour cream, mayonnaise or cream soup, half the cheddar, half the mozzarella, and parsley.
  5. Place seared chicken in a baking dish. Spread the cheese sauce over each piece, covering the top.
  6. Sprinkle the remaining cheeses and breadcrumbs on top for a golden crust.
  7. Bake 20 to 25 minutes, until chicken reaches 165°F (74°C) and cheese bubbles.
  8. If you want extra brown on top, broil 2 to 3 minutes, watching closely.
  9. Let rest 5 minutes before serving, this keeps the chicken juicy.

Cheese Chicken Bake

Why You’ll Love Cheese Chicken Bake

This cheesy chicken bake is simple, quick, and full of flavor. It uses everyday ingredients, so you do not need a long shopping list. The cheese keeps the chicken moist, and the top gets a nice golden color. It makes a great easy chicken bake for weeknights or a small party. Kids and adults like it, so it is a real family dinner winner.

Tips for success

  • Pound the chicken to even thickness, it cooks more evenly.
  • Use a meat thermometer to reach 165°F, do not overcook.
  • If you like more sauce, add a little milk or chicken broth to the mix.
  • For extra flavor, add chopped onions or cooked mushrooms to the sauce.
  • Use a mix of cheeses for a richer taste, try cheddar and Monterey Jack.
  • If you use frozen chicken, thaw fully before baking.

Serving Suggestions

  • Serve over rice or pasta to soak up the sauce.
  • Pair with a green salad for a lighter meal.
  • Add roasted vegetables like broccoli, carrots, or green beans.
  • Serve with crusty bread or garlic bread to mop up the cheese.
  • For a low-carb option, serve over cauliflower rice or with steamed veggies.

Cheese Chicken Bake

FAQs

Q, Can I use chicken thighs instead of breasts? A, Yes, bone-in or boneless thighs work well. Thighs may need a few extra minutes to cook.

Q, Can I make this ahead of time? A, Yes, you can assemble in the dish, cover, and refrigerate up to 24 hours. Bake when ready, add a few extra minutes if cold.

Q, How do I store leftovers? A, Cool, then store in an airtight container in the fridge for 3 to 4 days. Reheat in the oven at 350°F (175°C) until warm.

Q, Can I freeze it? A, Yes, freeze the baked dish in a freezer-safe container for up to 2 months. Thaw in the fridge before reheating.

Q, How can I make it crispier on top? A, Add breadcrumbs or broil for 1 to 3 minutes at the end. Watch closely so it does not burn.

Conclusion

If you want a simple, cheesy, and comforting meal, this Cheese Chicken Bake is a great choice for family dinner or an easy weeknight meal. For another tasty one-dish idea with a similar easy dinner feel, try One Dish Queso Chicken Bake {Easy Dinner Recipe}.

Cheese Chicken Bake

This warm and simple Cheese Chicken Bake is full of melty cheese and makes a comforting dish that everyone loves. It features tender chicken under a golden, cheesy crust, perfect for busy weeknights and family dinners.

Chicken and Seasoning

  • 4 pieces boneless, skinless chicken breasts (Pound to even thickness for even cooking)
  • 1 teaspoons salt
  • 1/2 teaspoons black pepper
  • 1 teaspoons garlic powder
  • 1 teaspoons paprika
  • 2 tablespoons olive oil (For searing the chicken)

Cheese and Sauce

  • 1 cup sour cream or plain Greek yogurt
  • 1/2 cup mayonnaise or 1 can cream of chicken soup
  • 1 cup shredded cheddar cheese (Divided use)
  • 1 cup shredded mozzarella cheese (Divided use)
  • 2 tablespoons chopped fresh parsley or dried parsley (For added flavor)

Topping

  • 1/2 cup breadcrumbs (Optional for crunch)

Preparation

  1. Preheat oven to 400°F (200°C).
  2. Pat chicken dry, then season both sides with salt, pepper, garlic powder, and paprika.
  3. Heat olive oil in a skillet over medium heat, sear chicken for 2 minutes per side to brown, then remove.
  4. In a bowl, mix sour cream, mayonnaise or cream soup, half the cheddar, half the mozzarella, and parsley.

Assembly

  1. Place seared chicken in a baking dish. Spread the cheese sauce over each piece, covering the top.
  2. Sprinkle the remaining cheeses and breadcrumbs on top for a golden crust.

Baking

  1. Bake for 20 to 25 minutes, until chicken reaches 165°F (74°C) and cheese bubbles.
  2. If desired, broil for 2 to 3 minutes for extra brown, watching closely.

Serving

  1. Let rest for 5 minutes before serving to keep the chicken juicy.

For extra flavor, add chopped onions or cooked mushrooms to the sauce. For a low-carb option, serve over cauliflower rice or with steamed veggies. Leftovers can be stored in an airtight container for 3 to 4 days.

Dinner, Main Course
American
Cheese Chicken Bake, chicken bake, Comfort Food, Easy Dinner, Family Meal

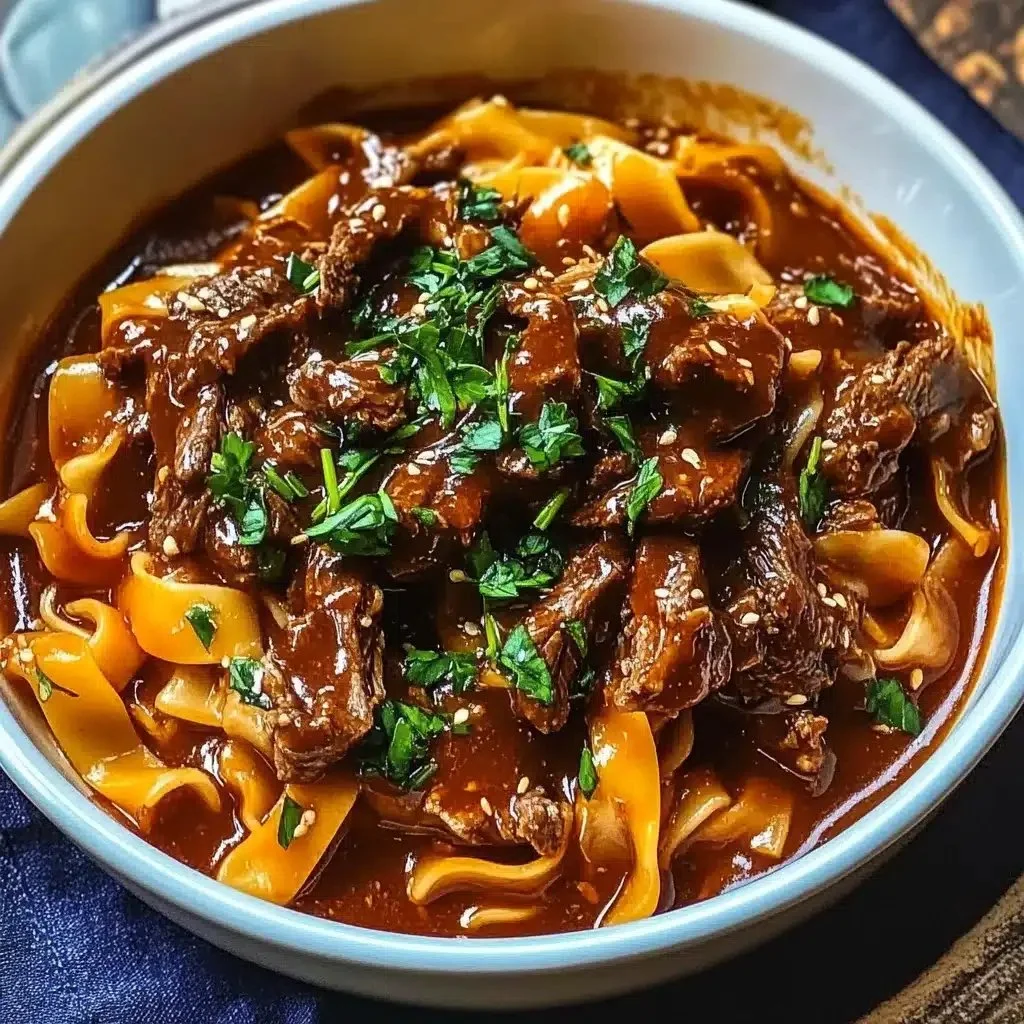
Korean Beef Noodles

Delicious bowl of Korean beef noodles garnished with green onions and sesame seeds

I love a warm bowl that feels like a hug, and Korean Beef Noodles do just that. This dish blends savory beef, bright soy, nutty sesame, and a touch of spice for a rich, tasty noodle bowl. It’s easy to make, fills the house with good smells, and usually makes everyone ask for seconds. The recipe below is a simple crowd-pleaser, full of bold flavor and comfort. Get ready to cook a bowl that will make weeknights feel special, and maybe sneak a taste before serving.

How to prepare Korean Beef Noodles

Ingredients you will need, keep words simple

  • 1 pound ground beef
  • 8 ounces noodles, ramen, udon, or any noodle you like
  • 3 tablespoons soy sauce
  • 1 tablespoon sesame oil
  • 1 tablespoon gochujang or chili paste, optional for spice
  • 1 tablespoon sugar or honey
  • 3 cloves garlic, minced
  • 1 small onion, sliced
  • 1 carrot, thin sliced or matchstick
  • 2 green onions, sliced
  • 1 tablespoon sesame seeds, optional
  • 1 tablespoon vegetable oil
  • 1 cup beef broth or water

Steps, follow each step in order, use simple words

  1. Cook the noodles in a pot of boiling water until they are just soft, drain and set aside.
  2. Heat a large pan over medium heat, add vegetable oil.
  3. Add the ground beef, break it up with a spoon, cook until brown.
  4. Push the beef to one side, add the onion and garlic, cook 1 to 2 minutes until soft.
  5. Stir in the carrot and cook 2 minutes more.
  6. Add soy sauce, sesame oil, gochujang, sugar, and beef broth, stir well.
  7. Let the sauce simmer 2 to 3 minutes so flavors mix and sauce thickens a little.
  8. Add the cooked noodles to the pan, toss everything so the sauce coats the noodles.
  9. Taste and add more soy or a little salt if you need.
  10. Turn off the heat, top with green onions and sesame seeds before serving.

Korean Beef Noodles

Why You’ll Love Korean Beef Noodles

  • Rich, savory beef flavor that mixes well with noodles, simple and bold.
  • Fast to make on busy nights, ready in about 20 to 30 minutes.
  • Flexible recipe, you can add more vegetables or make it spicy with gochujang.
  • Great for leftovers, the noodles soak up flavor and taste even better the next day.
  • A good mix of protein, carbs, and a little spice, it fills you up and feels homey.

Tips for success

  • Cook noodles just until soft, do not overcook, they should hold up when tossed with sauce.
  • Brown the beef well, a little crisp adds nice flavor.
  • Taste the sauce before you add noodles, adjust soy or sugar to balance salty and sweet.
  • If you like more sauce, add a splash more beef broth or water.
  • For a lighter dish, use lean ground beef or replace some beef with mushrooms.

Serving Suggestions

  • Serve with a side of steamed greens like bok choy or spinach.
  • Top with a soft boiled egg for extra richness.
  • Add kimchi on the side for a bright, tangy contrast.
  • Garnish with extra sliced green onion and toasted sesame seeds.
  • Pair with a cold drink or a simple cucumber salad to freshen the meal.

Korean Beef Noodles

FAQs

Q: Can I use other meats instead of ground beef? A: Yes, you can use ground pork, chicken, or thin sliced beef. Cook time may change a little, but the flavor works well.

Q: Is gochujang required for the taste? A: No, gochujang adds a spicy, sweet kick. You can skip it or use a small amount of chili paste or chili flakes instead.

Q: How do I make this gluten free? A: Use gluten free soy sauce and gluten free noodles. Make sure any chili paste you use is also gluten free.

Q: Can I make this ahead of time? A: Yes, cook the noodles and sauce, store them separate in the fridge. Reheat and toss together before serving to keep the noodles from getting too soft.

Q: How spicy is this dish? A: You control the spice. Add little or no gochujang for mild, or more for a medium to hot bowl.

Conclusion

If you want a quick, tasty bowl with bold Korean flavors, this recipe is a great pick. For a different take that still uses simple steps and big flavor, try this version of 20 Minute Korean Beef Sesame Noodles from Half Baked Harvest, it has a nice twist and cooks fast.

Korean Beef Noodles

A warm bowl of Korean Beef Noodles with savory beef, bright soy, nutty sesame, and a touch of spice.

Main ingredients

  • 1 pound ground beef (Use lean ground beef for a lighter option.)
  • 8 ounces noodles, ramen, udon, or any noodle you like (Cook as per package instructions.)
  • 3 tablespoons soy sauce (Add more if needed for taste.)
  • 1 tablespoon sesame oil (For a nutty flavor.)
  • 1 tablespoon gochujang or chili paste (Optional for spice.)
  • 1 tablespoon sugar or honey (Adjust according to sweetness preference.)
  • 3 cloves garlic, minced (For flavor.)
  • 1 small onion, sliced (Yellow or white onion works well.)
  • 1 medium carrot, thin sliced or matchstick (Adds crunch and sweetness.)
  • 2 green onions sliced (For garnish and added flavor.)
  • 1 tablespoon sesame seeds (Optional for garnish.)
  • 1 tablespoon vegetable oil (For cooking the beef.)
  • 1 cup beef broth or water (Can be substituted with water.)

Preparation

  1. Cook the noodles in a pot of boiling water until they are just soft, drain and set aside.
  2. Heat a large pan over medium heat, add vegetable oil.
  3. Add the ground beef, break it up with a spoon, and cook until brown.

Cooking

  1. Push the beef to one side, add the onion and garlic, and cook for 1 to 2 minutes until soft.
  2. Stir in the carrot and cook for 2 minutes more.
  3. Add soy sauce, sesame oil, gochujang, sugar, and beef broth, then stir well.
  4. Let the sauce simmer for 2 to 3 minutes so flavors mix and sauce thickens a little.
  5. Add the cooked noodles to the pan, toss everything so the sauce coats the noodles.
  6. Taste and add more soy or a little salt if needed.
  7. Turn off the heat, and top with green onions and sesame seeds before serving.

Cook noodles just until soft, do not overcook. For a lighter dish, use lean ground beef or replace some beef with mushrooms.

Dinner, Main Course
Korean
Comfort Food, Korean Beef Noodles, Quick Dinner, Savory Noodles

Amish White Bread Recipe

Freshly baked Amish white bread loaf on a wooden table

Amish White Bread is a simple, homemade loaf that many families enjoy. It has a soft crust, tender crumb, and a mild, buttery taste. This recipe is a crowd-pleaser, easy to make, and fits well with everyday meals or Sunday dinners. If you like simple breads, you might also enjoy trying a sweet twist like the Amish apple fritter bread for dessert. Get ready to bake a loaf that will disappear fast, and have fun making it yourself.

how to prepare Amish White Bread Recipe

Ingredients

  • 2 cups warm water (about 110°F)
  • 1/3 cup sugar
  • 1 tablespoon active dry yeast
  • 1/4 cup melted butter or oil
  • 1 tablespoon salt
  • 6 to 7 cups all-purpose flour

Directions

  1. In a large bowl, stir the warm water and sugar until the sugar dissolves. Sprinkle the yeast on top, wait 5 minutes until foamy.
  2. Add melted butter, salt, and 3 cups of flour. Stir to combine.
  3. Add remaining flour, a cup at a time, until dough is soft and slightly sticky.
  4. Turn dough onto a floured surface and knead for 8 to 10 minutes until smooth and elastic.
  5. Place dough in a lightly greased bowl, cover with a clean towel, and let it rise in a warm place until doubled, about 1 hour.
  6. Punch down the dough and divide it into two loaves. Shape each into a loaf and place in greased 9×5-inch pans.
  7. Cover and let rise again until doubled, about 30 to 45 minutes.
  8. Preheat oven to 375°F. Bake 25 to 30 minutes until the tops are golden and the loaves sound hollow when tapped.
  9. Remove from pans and cool on a rack before slicing.


Amish White Bread Recipe

Why You’ll Love Amish White Bread Recipe

  • Simple ingredients you likely already have, this is an easy bread recipe.
  • Soft crust and tender crumb make it perfect for sandwiches and toast.
  • Works well as a side for soups, stews, or family dinners.
  • The mild flavor appeals to picky eaters and children.

tips for success

  • Use water that is warm, not hot, to avoid killing the yeast.
  • Measure flour by spooning it into the cup and leveling, avoid packing it down.
  • If dough seems too sticky, add a little flour, a tablespoon at a time.
  • Let the dough rise in a warm, draft-free place for best results.
  • Test for doneness by tapping the bottom of the loaf, it should sound hollow.

Serving Suggestions

  • Slice for sandwiches, grilled cheese, or PB&J.
  • Toast with butter and jam for breakfast.
  • Serve warm with soup or a salad for a simple meal.
  • Make french toast with slightly stale slices for a tasty breakfast treat.


Amish White Bread Recipe

FAQs

Q: Can I use bread flour instead of all-purpose flour? A: Yes, bread flour will give a slightly chewier texture and good rise.

Q: How long will this bread stay fresh? A: Store at room temperature in a bread box or plastic bag for 2 to 3 days, or freeze slices for longer storage.

Q: Can I make this in a bread machine? A: Yes, add ingredients to the machine in the order recommended by your machine and use the basic white bread setting.

Q: Can I make one large loaf instead of two smaller loaves? A: Yes, you can bake one large loaf but watch the baking time, it may need a bit longer in the oven.

Conclusion

If you want another easy version to compare, you can check this classic Amish White Bread Recipe – Allrecipes for tips and variations.

Amish White Bread

A simple, homemade loaf with a soft crust and mild, buttery taste, perfect for sandwiches and everyday meals.

Dough Ingredients

  • 2 cups warm water (about 110°F) (Make sure the water is warm, not hot.)
  • 1/3 cup sugar
  • 1 tablespoon active dry yeast
  • 1/4 cup melted butter or oil
  • 1 tablespoon salt
  • 6 to 7 cups all-purpose flour (Use spooned flour to avoid packing.)

Preparation

  1. In a large bowl, stir the warm water and sugar until the sugar dissolves. Sprinkle the yeast on top and wait 5 minutes until foamy.
  2. Add melted butter, salt, and 3 cups of flour to the mixture. Stir to combine.
  3. Gradually add the remaining flour, a cup at a time, until the dough is soft and slightly sticky.
  4. Turn the dough onto a floured surface and knead for 8 to 10 minutes until smooth and elastic.
  5. Place the dough in a lightly greased bowl, cover with a clean towel, and let it rise in a warm place until doubled, about 1 hour.
  6. Punch down the dough and divide it into two loaves. Shape each into a loaf and place in greased 9×5-inch pans.
  7. Cover and let rise again until doubled, about 30 to 45 minutes.

Baking

  1. Preheat oven to 375°F.
  2. Bake for 25 to 30 minutes until the tops are golden and the loaves sound hollow when tapped.
  3. Remove from pans and cool on a rack before slicing.

For best results, let the dough rise in a warm, draft-free place. Measure flour carefully and use water at the right temperature.

Bread, Side Dish
American
Amish White Bread, Classic Bread, Easy Bread Recipe, Homemade Bread

Loaded Potato Taco Bowl

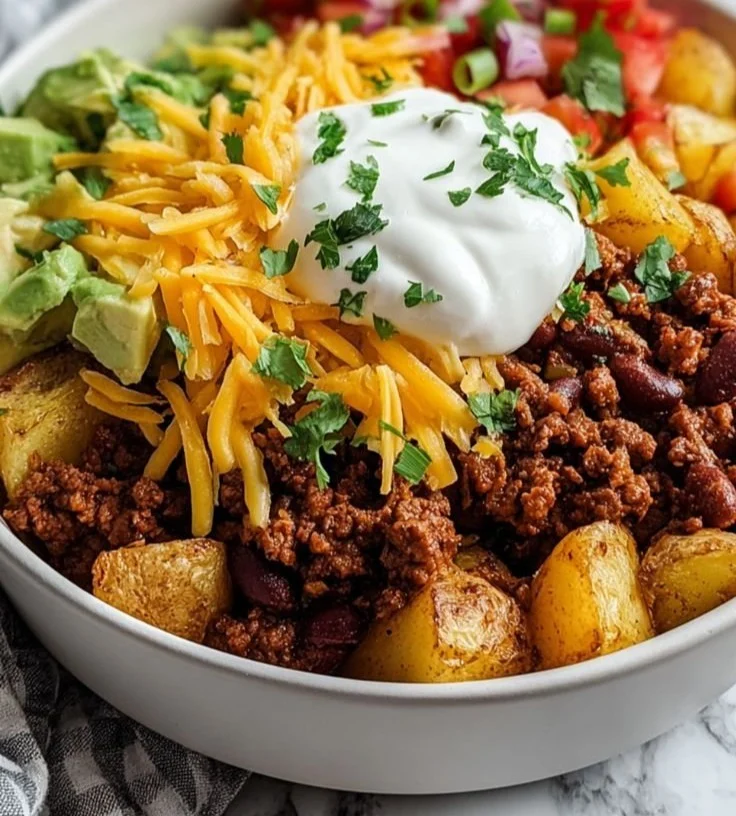
Delicious Loaded Potato Taco Bowl with toppings and garnishes

This Loaded Potato Taco Bowl brings together two favorites, baked potato and taco flavors. It makes a warm, comforting meal that tastes bright and fresh. The crispy potato, savory taco meat, and creamy toppings please a crowd and make a simple weeknight dinner feel special. Give it a try, and enjoy the fun of piling on all your favorite taco toppings, one bite at a time.

How to prepare Loaded Potato Taco Bowl

  1. Preheat your oven to 400°F (200°C). Wash the potatoes, dry them, and rub with a little oil and salt.
  2. Bake whole potatoes for 45 to 60 minutes, until a fork goes in easily, or roast small diced potatoes for 30 to 40 minutes, until tender and slightly crisp.
  3. While potatoes cook, heat a skillet over medium heat. Add a little oil, then add 1 pound ground beef or turkey, or use plant protein for a vegetarian version.
  4. Cook the meat, breaking it up with a spoon, until brown. Drain extra fat if needed.
  5. Stir in 1 to 2 tablespoons taco seasoning and 1/4 cup water, simmer for 2 to 3 minutes until the sauce thickens and flavors coat the meat.
  6. Warm canned black beans and corn in a small pot, or drain and rinse before heating.
  7. When potatoes are ready, cut them open or mash the roasted pieces a little to make a bowl shape.
  8. Fill each potato or bowl of potatoes with taco meat, then add black beans, corn, shredded cheese, sour cream, salsa, chopped tomatoes, green onions, avocado, and cilantro.
  9. Finish with lime juice and a little hot sauce if you like it spicy.
  10. Serve right away while the potato is warm and the cheese is melty.


Loaded Potato Taco Bowl

Why You’ll Love Loaded Potato Taco Bowl

  • It mixes comfort food and Mexican flavors in one bowl, with filling roasted potato, seasoned meat, and fresh toppings.
  • It is easy to change for picky eaters, use beef, turkey, or a vegetarian protein.
  • It feeds a group or works as a quick family meal, and everyone can pick their own toppings.
  • The textures work well together, soft potato, crunchy toppings, and melty cheese, all in a single bowl.

tips for success

  • Use medium to large russet potatoes for a fluffy inside and crispy skin.
  • Dry the potato skin well and rub with oil, it helps to get a nice crisp outside.
  • Don’t overcook the meat, just brown it and add taco seasoning toward the end for best flavor.
  • Warm the toppings slightly, cheese melts better and the bowl stays hot.
  • If you roast diced potatoes, toss them in oil and salt so they crisp up.
  • Taste and adjust salt, lime, and spices before serving.

Serving Suggestions

  • Serve with a simple green salad or a cabbage slaw for a fresh bite.
  • Add tortilla chips or warm tortillas on the side for dipping and scooping.
  • Offer lime wedges, extra salsa, and hot sauce so people can customize heat and tang.
  • Top with pickled red onion or jalapeños for an extra bright note.


Loaded Potato Taco Bowl

FAQs

Q: Can I make this dish vegetarian? A: Yes, use black beans, pinto beans, seasoned lentils, or crumbled tofu in place of meat. Add extra spices and a splash of soy or tamari for depth.

Q: How do I store and reheat leftovers? A: Store components in an airtight container in the fridge for 3 to 4 days. Reheat the potato and filling in the oven at 350°F (175°C) until hot, or microwave in short bursts until warm.

Q: Can I make the bowls ahead of time? A: You can roast potatoes and cook the meat a day ahead, then store separately. Assemble and add fresh toppings just before serving so greens and avocado stay fresh.

Q: Can I freeze these bowls? A: Freeze the cooked meat or beans in a freezer bag for up to 2 months. Potatoes can lose texture when frozen, so freeze them only if needed and reheat slowly.

Conclusion

For a full recipe and extra notes on making this dish, see the Loaded Potato Taco Bowl Recipe – Simple Home Edit.

Loaded Potato Taco Bowl

A comforting bowl combining baked potatoes and taco flavors, topped with savory meat and fresh ingredients.

For the potatoes

  • 4 medium medium to large russet potatoes (For a fluffy inside and crispy skin.)

For the taco meat

  • 1 pound ground beef or turkey (Or plant protein for a vegetarian version.)
  • 1-2 tablespoons taco seasoning (Adjust to taste.)
  • 1/4 cup water (To thicken the sauce.)

Toppings

  • 1 can black beans (Warm before serving.)
  • 1 can corn (Warm before serving.)
  • 1 cup shredded cheese (Use your favorite type.)
  • 1/2 cup sour cream (Optional.)
  • 1/2 cup salsa (Adjust to taste.)
  • 1 cup chopped tomatoes
  • 1/4 cup chopped green onions
  • 1 medium avocado
  • 1/4 cup fresh cilantro (For garnish.)
  • 1 tablespoon lime juice (Add more to taste.)
  • to taste hot sauce (Optional for spice.)

Preparation

  1. Preheat your oven to 400°F (200°C). Wash the potatoes, dry them, and rub with a little oil and salt.
  2. Bake whole potatoes for 45 to 60 minutes, until a fork goes in easily, or roast small diced potatoes for 30 to 40 minutes, until tender and slightly crisp.

Cooking the Meat

  1. While potatoes cook, heat a skillet over medium heat. Add a little oil, then add the ground meat.
  2. Cook the meat, breaking it up with a spoon, until brown. Drain extra fat if needed.
  3. Stir in the taco seasoning and water, and simmer for 2 to 3 minutes until the sauce thickens.

Assembling the Bowls

  1. Warm the canned black beans and corn in a small pot, or drain and rinse before heating.
  2. When potatoes are ready, cut them open or mash the roasted pieces a little to make a bowl shape.
  3. Fill each potato or bowl of potatoes with taco meat, then add black beans, corn, cheese, sour cream, salsa, tomatoes, green onions, avocado, and cilantro.
  4. Finish with lime juice and hot sauce if desired.

Serving

  1. Serve right away while the potato is warm and the cheese is melty.

For best results, dry potato skins well and rub with oil. Warm toppings for better melting and heat retention. Adjust lime, salt, and spices before serving.

Dinner, Main Course
Comfort Food, Mexican
Comfort Food, Loaded Potato Taco Bowl, Quick Dinner, Taco Bowl, Vegetarian Option

Garlic Bread Rolls

Freshly baked garlic bread rolls served warm with herbs and butter

Garlic Bread Rolls are a simple, cozy bread that people love at dinner and parties. They have soft dough, buttery garlic, and a crisp outside. This recipe is a crowd-pleaser, and it pairs well with pasta, soup, or a salad. If you like easy home breads, you might also enjoy Amish apple fritter bread as a different kitchen treat. These garlic rolls taste rich, smell great, and feel like a small celebration every time you pull them from the oven, so you will want to make them again and again.

how to prepare Garlic Bread Rolls

  1. Preheat oven to 375°F (190°C). Line a baking sheet with parchment paper.
  2. If you use store dough, roll it into small balls, about the size of a golf ball. If you make dough from scratch, divide into 12 equal pieces and shape.
  3. In a small bowl, mix 1/2 cup softened butter, 3 cloves minced garlic, 1 tablespoon chopped parsley, and a pinch of salt. Mix until smooth.
  4. Flatten each dough ball a little, spread a little garlic butter inside, then roll up and seal the edges. Place seam side down on the sheet.
  5. Brush the top of each roll with more garlic butter. For a golden top, brush with a little milk or beaten egg.

  6. Bake 15 to 20 minutes, until the rolls are puffed and light brown on top.
  7. Remove from oven and brush once more with garlic butter. Let cool a few minutes, then serve warm.


Garlic Bread Rolls

Why You’ll Love Garlic Bread Rolls

  • They smell amazing, and the kitchen smells like garlic and butter.
  • The rolls are soft inside and have a light crust outside.
  • You can make them fast with store-bought dough, or show off with homemade dough.
  • They work as a side dish, snack, or party appetizer, and almost everyone loves them.

tips for success

  • Use fresh garlic for the best flavor, not garlic powder.
  • Don’t overfill the rolls, or the butter can leak out while baking.
  • Brush with butter right after baking to keep them soft and shiny.
  • If you want extra herbs, add a little oregano or basil to the garlic butter.
  • Check the oven early, all ovens bake a bit differently.

Serving Suggestions

  • Serve with pasta, like spaghetti or lasagna, for a classic combo.
  • Use them with soup, especially tomato or minestrone.
  • Turn them into small sandwiches with slices of cheese or ham.
  • Offer a small dish of marinara or garlic dip for guests to dunk the rolls.


Garlic Bread Rolls

FAQs

Q: Can I make these ahead of time?

A: Yes, shape the rolls and chill them in the fridge. Bake within 24 hours, adding a few minutes to bake time.

Q: Can I freeze Garlic Bread Rolls?

A: Yes, freeze baked rolls in a sealed bag. Reheat in the oven at 350°F (175°C) until warm. You can also freeze unbaked shaped rolls on a tray, then move to a bag.

Q: How do I reheat the rolls?

A: Warm them in the oven at 350°F (175°C) for 8 to 10 minutes. For a quick fix, microwave for 15 to 20 seconds, then crisp in a toaster oven if you like the top crunchy.

Q: Can I make these without butter?

A: You can use olive oil instead of butter, but the taste will change. Butter gives the classic rich flavor.

Conclusion

If you want a similar idea or a different shape of garlic bread, this Garlic-Swirl Rolls Recipe – The Kitchn shows another way to enjoy garlic bread in a swirl form. Try the rolls warm, and share them with friends for a simple, tasty crowd-pleaser.

Garlic Bread Rolls

These cozy Garlic Bread Rolls are soft and buttery, featuring a rich garlic flavor and a crisp outer crust. Perfect for dinner or parties, they pair beautifully with pasta, soup, or salads.

Dough ingredients

  • 12 12 pieces of dough (store-bought or homemade) (If using homemade dough, divide into 12 equal pieces.)

Garlic butter mixture

  • 1/2 cup softened butter (Use fresh, softened butter for easy mixing.)
  • 3 cloves minced garlic (Fresh garlic is recommended for the best flavor.)
  • 1 tablespoon chopped parsley (For garnish and added flavor.)
  • 1 pinch salt

Preparation

  1. Preheat oven to 375°F (190°C) and line a baking sheet with parchment paper.
  2. If using store dough, roll it into small balls, about the size of a golf ball. If making dough from scratch, divide it into 12 equal pieces and shape them.
  3. In a small bowl, mix the softened butter, minced garlic, chopped parsley, and a pinch of salt until smooth.

Assembly

  1. Flatten each dough ball slightly, spread a little garlic butter inside, then roll up and seal the edges. Place seam side down on the baking sheet.
  2. Brush the top of each roll with additional garlic butter. For a golden top, brush with a little milk or a beaten egg.

Baking

  1. Bake the rolls for 15 to 20 minutes, until they are puffed and light brown on top.
  2. Remove from the oven and brush once more with garlic butter. Let cool for a few minutes before serving warm.

Use fresh garlic for the best flavor. Don’t overfill the rolls to prevent butter from leaking out. Brush with butter after baking for extra softness and shine. You may add oregano or basil for additional flavor. Check the oven early as baking times can vary.

Appetizer, Side Dish, Snack
American
Bread Rolls, Comfort Food, Easy Recipe, Garlic Bread, Party Food