Baked Spaghetti Casserole

Delicious baked spaghetti casserole topped with cheese and herbs

This baked spaghetti casserole feels like a warm hug on a plate. It mixes tender pasta, rich tomato sauce, and lots of melty cheese. It is simple to make, feeds a crowd, and tastes like comfort food any night of the week. I call this dish a true crowd-pleaser because it turns pantry staples into a cheesy, oven baked pasta bake that everyone asks for seconds. If you like a spicy twist, try a spicy southern cheesy chicken spaghetti casserole for a different take on cheesy spaghetti.

how to prepare Baked Spaghetti Casserole

  1. Preheat the oven to 350°F, and grease a 9×13 inch baking dish.
  2. Cook 1 pound of spaghetti in salted boiling water until just shy of al dente, drain well.
  3. In a large pan, cook 1 pound of ground beef or turkey until browned, drain excess fat. Add 1 chopped onion and 2 cloves minced garlic, cook until soft.
  4. Stir in a 24 ounce jar of marinara sauce, 1 teaspoon dried oregano, salt and pepper to taste. Let simmer 5 minutes.
  5. Toss the drained spaghetti with the sauce in a large bowl, then stir in 2 cups shredded mozzarella and 1 cup grated Parmesan.
  6. Transfer the pasta mixture to the prepared baking dish, spread evenly. Top with 1 more cup of mozzarella and a little extra Parmesan.
  7. Bake 20 to 25 minutes, until cheese is bubbly and golden. Let rest 5 minutes before serving.

Baked Spaghetti Casserole

Why You’ll Love Baked Spaghetti Casserole

  • It uses simple pantry items, so you can make it any night.
  • The cheese melts into the pasta, making every bite creamy and satisfying.
  • It feeds many people, so it is great for family dinner or potlucks.
  • You can change the meat, add vegetables, or make it vegetarian, it is very flexible.

tips for success

  • Do not overcook the pasta, it will finish cooking in the oven and stay firm.
  • Drain pasta well, excess water can make the casserole watery.
  • Use a good melting cheese, like whole milk mozzarella, for best flavor.
  • Let the casserole rest after baking, it firms up and is easier to serve.
  • Add a pinch of red pepper flakes to the sauce for a small heat boost.

Serving Suggestions

  • Serve with a simple green salad and a splash of vinaigrette.
  • Offer garlic bread or crusty rolls to soak up sauce.
  • Top each plate with extra Parmesan and fresh chopped parsley.
  • Pair with a light red wine or iced tea for an easy meal.

Baked Spaghetti Casserole

FAQs

Q: Can I make baked spaghetti casserole ahead of time?

A: Yes, assemble it in the baking dish, cover and refrigerate up to 24 hours. Bake as directed, you may need a few extra minutes.

Q: Can I freeze this dish?

A: Yes, bake first or freeze unbaked. For unbaked, wrap well and freeze up to 2 months. Thaw overnight before baking and add a few extra minutes in the oven.

Q: How do I make it vegetarian?

A: Skip the meat and add sautéed mushrooms, bell peppers, zucchini, or a mix of vegetables. Use a vegetarian sauce and cheese.

Q: Can I use other pasta shapes?

A: Yes, penne, rigatoni, or rotini work well, they hold the sauce and cheese nicely.

Conclusion

For a reliable, cheesy family meal, this baked spaghetti casserole is hard to beat. For another tested version and more tips, see the Baked Spaghetti Casserole Recipe – Allrecipes.

Baked Spaghetti Casserole

This baked spaghetti casserole combines tender pasta, rich tomato sauce, and lots of melty cheese, perfect for a comforting family meal.

Pasta and Sauce

  • 1 pound spaghetti (Cook until just shy of al dente)
  • 1 pound ground beef or turkey (Browned and drained)
  • 1 large onion, chopped
  • 2 cloves garlic, minced
  • 24 ounces marinara sauce
  • 1 teaspoon dried oregano
  • to taste salt and pepper

Cheese

  • 2 cups shredded mozzarella (Plus 1 cup for topping)
  • 1 cup grated Parmesan (Plus a little extra for topping)

Preparation

  1. Preheat the oven to 350°F, and grease a 9×13 inch baking dish.
  2. Cook the spaghetti in salted boiling water until just shy of al dente, then drain well.
  3. In a large pan, cook the ground beef or turkey until browned, then drain excess fat.
  4. Add the chopped onion and minced garlic, cooking until soft.

Cooking

  1. Stir in the marinara sauce and dried oregano, adding salt and pepper to taste. Let simmer for 5 minutes.
  2. Toss the drained spaghetti with the sauce in a large bowl, then stir in shredded mozzarella and grated Parmesan.
  3. Transfer the pasta mixture to the prepared baking dish and spread evenly.
  4. Top with an additional cup of mozzarella and a little extra Parmesan.
  5. Bake for 20 to 25 minutes, until the cheese is bubbly and golden.
  6. Let rest for 5 minutes before serving.

Do not overcook the pasta, it will finish cooking in the oven and stay firm. Drain pasta well to avoid a watery casserole. Let the casserole rest to make it easier to serve. For added heat, add a pinch of red pepper flakes to the sauce.

Dinner, Main Course
Italian
Baked Spaghetti, Casserole, Cheesy Dish, Comfort Food, Pasta Bake

Ground Beef Sweet Potato Bowl

Ground Beef Sweet Potato Bowl with fresh vegetables and seasonings

This Ground Beef Sweet Potato Bowl feels warm, simple, and full of flavor. It mixes savory ground beef with sweet, soft sweet potato, and a few fresh toppings for a meal the whole family will enjoy. It is a great choice for a quick weeknight dinner, a meal prep lunch, or a cozy comfort food night.

If you like easy bowls with good taste and simple steps, you will love this recipe. For another hearty bowl idea that uses ground beef in a bold way, try this spicy ground beef stir fry bowl for more dinner inspiration.

how to prepare Ground Beef Sweet Potato Bowl

  1. Cook the sweet potatoes, wash and peel if you like, then cut into cubes. Roast or microwave until soft.
  2. In a pan, cook ground beef over medium heat. Break it up and cook until no pink remains.
  3. Add salt, pepper, and any seasonings you like, stir and let flavors blend for a minute.
  4. If you want onions or garlic, sauté them first, then add the beef.
  5. Warm any vegetables you will add, like spinach, corn, or peppers.
  6. To build the bowl, start with a base of sweet potato, add the cooked ground beef, then top with veggies, herbs, and a drizzle of your favorite sauce.
  7. Serve right away, hot and ready.

Ground Beef Sweet Potato Bowl

Why You’ll Love Ground Beef Sweet Potato Bowl

  • It is simple and fast, perfect for busy nights.
  • The sweet potato adds natural sweetness and keeps it healthy.
  • Ground beef gives a good, filling protein boost.
  • You can change toppings to fit your taste, so it never gets boring.
  • It works great for meal prep, and it stays tasty the next day.

tips for success

  • Use firm, even cubes of sweet potato so they cook at the same time.
  • Drain extra fat from the beef for a cleaner taste.
  • Season the beef well, a little salt and pepper go a long way.
  • Roast the sweet potato with a little oil and salt for better flavor.
  • If you cook ahead, store components separately, then heat and assemble when ready.

Serving Suggestions

  • Top with fresh cilantro or parsley for a bright note.
  • Add a spoon of plain yogurt or cottage cheese for creaminess.
  • A splash of hot sauce or a drizzle of honey adds a nice contrast.
  • Serve with a side salad or steamed greens for extra veggies.
  • Try shredded cheddar or crumbled feta for a cheesy touch.

Ground Beef Sweet Potato Bowl

FAQs

Q: Can I use ground turkey instead of ground beef?

A: Yes, ground turkey works fine. Cook the same way and adjust seasoning to taste.

Q: How long will this keep in the fridge?

A: Store in an airtight container for up to 3 to 4 days. Reheat well before eating.

Q: Can I make this gluten free?

A: Yes, this bowl is naturally gluten free if you avoid sauces with gluten. Use gluten free condiments.

Q: Is this dish good for meal prep?

A: Yes, it keeps well. Keep the sweet potato and beef separate until you reheat and serve.

Conclusion

This Ground Beef Sweet Potato Bowl makes a warm, easy meal that is tasty and filling. It mixes simple ingredients for big flavor, and you can change the toppings to match your mood. If you want a similar sweet potato and beef idea with a creative twist, check out this take on a sweet potato beef bowl, Tiktok Hot Honey Cottage Cheese Sweet Potato Beef Bowl, for another way to serve sweet potato and beef together.

Ground Beef Sweet Potato Bowl

A warm, simple, and flavorful bowl featuring savory ground beef and sweet, soft sweet potato, topped with fresh vegetables.

For the Bowl Base

  • 2 medium sweet potatoes (Wash, peel (optional), and cut into cubes.)

For the Beef

  • 1 pound ground beef (Cook until no pink remains. Drain excess fat for a cleaner taste.)
  • 1 teaspoon salt (To taste.)
  • 1 teaspoon pepper (To taste.)

Vegetable Toppings

  • 1 cup spinach (Or substitute with corn, peppers, or any veggies of choice.)
  • 1 tablespoon fresh herbs (Such as parsley or cilantro.)

Optional Add-ons

  • 1 cup plain yogurt or cottage cheese (For creaminess.)
  • to taste hot sauce or honey (For added flavor.)

Preparation

  1. Cook the sweet potatoes until soft, by roasting or microwaving.
  2. In a pan, cook the ground beef over medium heat, breaking it up until no pink remains.
  3. Season the beef with salt, pepper, and any additional seasonings, letting the flavors blend for about a minute.
  4. If desired, sauté onions or garlic before adding the beef for added flavor.
  5. Warm any additional vegetables.

Assembly

  1. In a bowl, start with a base of sweet potato, followed by cooked ground beef and topped with your choice of veggies, herbs, and a drizzle of sauce.
  2. Serve immediately while hot.

For best results, use firm cubes of sweet potato for even cooking. This dish can be made gluten-free by ensuring any sauces used are gluten-free. Store leftovers in an airtight container for up to 3-4 days.

Dinner, Main Course
American
Comfort Food, Easy Dinner, Ground Beef, Meal Prep, Sweet Potato

Grinder Grilled Cheese: 7 Irresistible Ways to Indulge

Seven delicious grilled cheese recipes for a perfect indulgent meal

Grinder Grilled Cheese is a fun twist on a classic grilled cheese sandwich. It mixes the melting cheese comfort we love with the hearty feel of a grinder, or sub style bread. This recipe shows seven simple, tasty ways to enjoy that gooey, golden bite. Each version layers cheese with different fillings like meats, veggies, or sauces, so you can pick what fits your mood. It is a crowd-pleaser because it is easy, fast, and full of flavor. Warm bread, melted cheese, and tasty fillings make it hard to resist. Get ready to make a sandwich that feels both simple and special, and have fun trying each version at home.

how to prepare Grinder Grilled Cheese

Start by gathering your bread, cheese, butter, and any fillings you like. Use a sturdy grinder roll or a long sub roll, split it lengthwise but not all the way through, so the halves stay connected. For best melt, choose cheeses that melt well, such as provolone, mozzarella, cheddar, or a mix. Thinly slice any meats like ham, turkey, or roast beef, and wash and slice vegetables like peppers, onions, or tomatoes.

Butter the outside of the roll on both sides, or brush with olive oil if you prefer. Heat a large skillet or griddle over medium heat. Place the bottom half of the roll in the pan, then layer cheese first, then your chosen fillings, and finish with a final layer of cheese on top. This helps the sandwich stick together when melted. Close the roll and press gently with a spatula or a weight, like another pan, to help the cheese melt evenly.

Cook until the bread is golden and the cheese begins to melt, about 3 to 5 minutes, then carefully flip and press the other side. If the cheese needs more time, lower the heat and cover the pan with a lid for a minute to trap the heat. For a crisp outside and fully melted inside, keep the heat moderate, not too high. Remove the sandwich, let it rest a minute, then slice into portions. Serve warm so each bite is gooey and satisfying.

Why You’ll Love Grinder Grilled Cheese

You will love Grinder Grilled Cheese because it gives you the comfort of grilled cheese with more texture and flavor. The long roll holds more fillings, so you can add meats, pickles, or roasted vegetables without losing the melted cheese focus. Each bite has a crisp outside and a soft, cheesy inside, making it satisfying and filling.

This sandwich is flexible, so you can make it quick for lunch or dressed up for a party. It works with many cheeses and toppings, so picky eaters and food lovers both find a version they enjoy. It also reheats well, and the flavors often taste even better the next day. The mix of warm cheese, toasted bread, and your favorite fillings makes it an easy go-to for comfort food that still feels a bit special.

tips for success

Choose bread that is sturdy enough to hold fillings but not so thick it blocks heat. A good grinder roll or sub roll works best. Use cheeses that melt well, like provolone, mozzarella, cheddar, or fontina. Mixing two cheeses often gives better melt and richer flavor. Slice cheese thinly for even melting.

Don’t use too-high heat, it will brown the bread before the cheese melts. Cook on medium heat and cover briefly if needed to trap steam and help cheese melt. Press gently while cooking to compact the sandwich and make a neat crust. If adding wet items like tomatoes, pat them dry first, or place them between cheese layers to avoid soggy bread.

For even toasting, butter the outside evenly or brush with olive oil. If you like a crunchy top, sprinkle a little grated Parmesan on the outside before toasting. Make extras and wrap them to keep warm in foil, they hold heat well and stay soft inside. Try different fillings in small amounts first to find the combo you love.

Serving Suggestions

Serve Grinder Grilled Cheese with simple sides that balance the richness of the sandwich. A light green salad with a bright vinaigrette cuts through the cheese and adds freshness. Pickles, sliced cucumbers, or a small bowl of coleslaw give a crisp contrast to the meltiness.

For a cozy meal, pair the sandwich with a warm tomato soup, the classic match to any grilled cheese. Offer chips or fries for a more casual plate, or roasted vegetables for a heartier side. If you made a meat-heavy grinder, serve with a small fruit salad for a sweet note.

Sauces help, too, include ketchup, spicy mayo, or a mustard dip for extra flavor. For a party, slice sandwiches into smaller pieces and serve with toothpicks so guests can try different versions. Keep drinks simple, like iced tea or soda, or a light beer for adult gatherings.

FAQs

Q: Can I make these ahead and reheat them?
A: Yes, you can assemble and wrap them in foil, store in the fridge, and reheat in a low oven or a skillet. Reheat slowly so the cheese melts evenly.

Q: What cheeses work best?
A: Provolone, mozzarella, cheddar, fontina, and Swiss all melt well. Mixing a mild cheese with a sharp cheese gives good flavor and melt.

Q: Can I make a vegetarian version?
A: Absolutely, use roasted peppers, mushrooms, spinach, tomatoes, and your favorite cheese. Add a spread like pesto for extra taste.

Q: How do I keep the bread from getting soggy?
A: Place wet items like tomatoes between cheese layers or pat them dry before adding. Butter the outside of the roll, not the inside, to help crisp the bread.

Q: Can these be made in an oven or sandwich press?
A: Yes, you can bake them at 350°F until golden, or use a sandwich press for quick and even toasting.

Conclusion

Try different fillings and find your favorite Grinder Grilled Cheese twist, then enjoy it with simple sides and good company. For bread ideas, check a local bakery menu to find sturdy rolls, like those shown on Our Menu — Grand Central Bakery. If you want another hearty sandwich idea that pairs well with grinder flavors, read a tasty take on subs like the one at Indulge in the Irresistible: Savory & Tender French Dip Subs.

[tasty-recipe id=”5337″]

Grinder Grilled Cheese

Grinder Grilled Cheese is a fun twist on a classic sandwich that combines melting cheese with hearty grinder-style bread and various fillings for a delicious, satisfying meal.

Bread

  • 4 pieces Grinder rolls or sub rolls (Choose sturdy rolls that can hold fillings.)

Cheese

  • 8 oz Provolone, mozzarella, cheddar, or a mix (Use cheeses that melt well.)

Fillings

  • 4 oz Thinly sliced meats (ham, turkey, roast beef) (Choose any preferred meats.)
  • 1 cup Sliced vegetables (peppers, onions, tomatoes) (Wash and slice vegetables.)

Additional Ingredients

  • 4 tbsp Butter or olive oil (For spreading on the outside of the bread.)

Preparation

  1. Gather bread, cheese, butter, and any fillings you like.
  2. Split the grinder roll lengthwise but not all the way through.
  3. Butter the outside of the roll on both sides or brush with olive oil.

Cooking

  1. Heat a large skillet or griddle over medium heat.
  2. Place the bottom half of the roll in the pan, layer cheese first, then fillings, and finish with more cheese on top.
  3. Close the roll and press gently to help melt the cheese evenly.
  4. Cook until the bread is golden and cheese begins to melt, about 3 to 5 minutes.
  5. Carefully flip and press the other side.
  6. If cheese needs more time, lower heat and cover the pan with a lid for a minute.
  7. Once cooked, let the sandwich rest a minute, then slice into portions and serve warm.

Consider using a mix of two cheeses for better melt and richer flavor. For extra crunch, sprinkle grated Parmesan on the outside before toasting. Keep drinks simple and consider side pairings like salad or tomato soup.

lunch, Main Course
American
Comfort Food, Easy Recipes, Grilled Cheese, Quick Meals, Sandwich

Creamy Rotisserie Chicken Mushroom Soup

Creamy rotisserie chicken mushroom soup served in a bowl with herbs

Making Creamy Rotisserie Chicken Mushroom Soup is simple and rewarding. To start, gather your ingredients: rotisserie chicken, mushrooms, onions, garlic, chicken broth, heavy cream, and some seasonings. First, shred the rotisserie chicken and set it aside. In a large pot, sauté the onions and garlic until soft. Add in the mushrooms and cook until they are tender. Next, pour in the chicken broth and bring it to a light boil. Stir in the shredded chicken, and let everything simmer for a bit to blend the flavors. Finally, add the heavy cream and season with salt and pepper to taste. This hearty soup is ready to be enjoyed!

Creamy Rotisserie Chicken Mushroom Soup

Why You’ll Love Creamy Rotisserie Chicken Mushroom Soup

Creamy Rotisserie Chicken Mushroom Soup is not just filling, it’s also incredibly flavorful. The tender chicken paired with the earthy mushrooms creates a delightful mix that warms your soul. This soup is perfect for family dinners or even when you want to impress guests. Plus, it’s made with ingredients you probably already have at home! The comforting creamy texture will remind you of cozy nights spent with loved ones, making it a true crowd-pleaser. Once you try it, you’ll want to make it again and again.

tips for success

To ensure your soup is a hit, here are a few tips:

  • Use fresh mushrooms for the best flavor.
  • Don’t rush the sautéing process; allowing the onions and garlic to caramelize will add depth to your soup.
  • Adjust the thickness by adding more or less heavy cream, depending on your preference.
  • For added flavor, sprinkle some fresh herbs like thyme or parsley before serving.

Serving Suggestions

Creamy Rotisserie Chicken Mushroom Soup pairs wonderfully with crusty bread or a simple side salad. You can also serve it with grilled cheese sandwiches for that classic combination. For a fun twist, consider topping your soup with crispy fried onions or fresh herbs. This versatile dish is great for any occasion!

FAQs

Can I use leftover chicken instead of rotisserie chicken?

Absolutely! Leftover chicken works great in this recipe, just make sure it’s cooked and shredded.

How long does this soup last in the fridge?

This soup can be stored in the refrigerator for up to three days in an airtight container. Just reheat it on the stove when you’re ready to enjoy it again.

Can I freeze Creamy Rotisserie Chicken Mushroom Soup?

Yes, you can freeze it! Just make sure to leave out the heavy cream until you’re ready to serve, as it can change texture when frozen. It will last up to three months in the freezer.

Now that you’re all set, it’s time to gather your ingredients and start cooking up a warm pot of delicious goodness! Happy cooking!

Creamy Rotisserie Chicken Mushroom Soup

This hearty and flavorful soup combines rotisserie chicken and earthy mushrooms in a creamy broth, perfect for family dinners or impressing guests.

Main Ingredients

  • 2 cups shredded rotisserie chicken (Use leftovers if available.)
  • 8 oz fresh mushrooms (Sliced or chopped.)
  • 1 onion (Diced.)
  • 3 cloves garlic (Minced.)
  • 4 cups chicken broth (Low sodium preferred.)
  • 1 cup heavy cream (Adjust for thickness preference.)
  • to taste salt and pepper (For seasoning.)

Preparation

  1. Shred the rotisserie chicken and set it aside.

Cooking

  1. In a large pot, sauté the onions and garlic until soft.
  2. Add in the mushrooms and cook until they are tender.
  3. Pour in the chicken broth and bring it to a light boil.
  4. Stir in the shredded chicken and let everything simmer to blend the flavors.
  5. Add the heavy cream and season with salt and pepper to taste.

To enhance flavor, use fresh herbs like thyme or parsley before serving. Soup pairs wonderfully with crusty bread, simple salads, or grilled cheese sandwiches.

Dinner, Soup
American
Comfort Food, Creamy Soup, Hearty Soup, Mushroom Soup, Rotisserie Chicken

Honey BBQ Chicken Rice: 5 Reasons You’ll Love This Comfort Dish

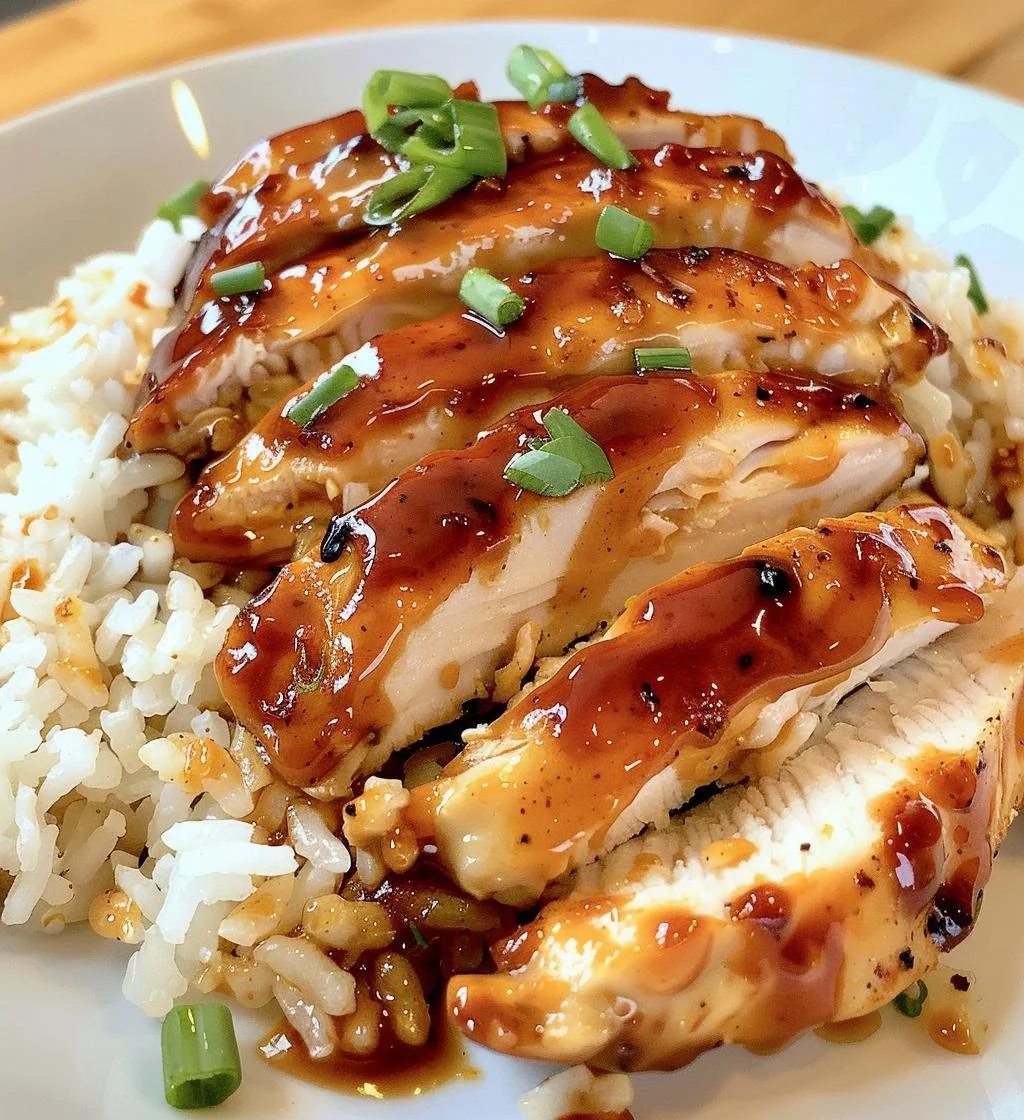
Delicious Honey BBQ Chicken served over rice, a comforting meal option.

Honey BBQ Chicken Rice: 5 Reasons You’ll Love This Comfort Dish

When it comes to comfort food that warms the heart and delights the senses, it’s hard to beat Honey BBQ Chicken Rice. This dish is not just a meal, it’s an experience that brings people together around the table. With juicy, tender chicken coated in a sweet and tangy BBQ sauce, fluffy rice to soak up all the flavors, and a hint of honey to add that irresistible sweetness, this recipe is sure to please anyone who tries it. Whether you’re cooking for your family, friends, or just treating yourself, this dish is a crowd-pleaser that shines in any setting. Trust me, once you make it, you’ll be dreaming about those flavors long after the last bite!

How to prepare Honey BBQ Chicken Rice
To whip up this delicious dish, you’ll need a few key ingredients: chicken breasts, honey, BBQ sauce, rice, and your choice of seasonings. Start by marinating the chicken in honey and BBQ sauce, letting the flavors meld together beautifully. While the chicken is soaking up that goodness, cook your rice according to package instructions. Once the chicken is marinated, grill or bake it until it’s cooked through and caramelized. Finally, serve the chicken over a bed of rice and drizzle any leftover sauce on top for that extra flavor kick. It’s as simple as that!

Honey BBQ Chicken Rice: 5 Reasons You'll Love This Comfort Dish

Why You’ll Love Honey BBQ Chicken Rice

  1. Delicious Flavors: The blend of honey and BBQ sauce creates a mouth-watering taste that everyone loves.
  2. Easy to Make: This dish requires minimal effort and is perfect for busy weeknights.
  3. Comforting and Filling: Hearty rice paired with juicy chicken makes for a satisfying meal.
  4. Customizable: You can easily add your favorite veggies or spices to make it your own.
  5. Great for Leftovers: This dish is just as tasty the next day, making it perfect for meal prep.

Tips for Success
To make the most out of your Honey BBQ Chicken Rice, try these tips:

  • Let the chicken marinate for at least 30 minutes, or overnight for the best flavor.
  • Use a meat thermometer to ensure your chicken is cooked to perfection, reaching 165°F.
  • Feel free to add vegetables like bell peppers or corn to the rice while cooking for added nutrition and flavor.

Serving Suggestions
Serve your Honey BBQ Chicken Rice with a side of steamed broccoli or a crisp salad to balance out the meal. You can also offer some fresh fruit for dessert, keeping the meal light and refreshing. For a fun twist, try serving it inside tortilla wraps for a BBQ chicken burrito!

FAQs

  1. Can I use other meats besides chicken?
    Yes, you can use pork, turkey, or even tofu for a vegetarian option. Just adjust cooking times accordingly.

  2. What if I don’t have BBQ sauce?
    You can make a quick homemade BBQ sauce with ketchup, vinegar, and spices if you’re in a pinch!

  3. Can I make this dish in advance?
    Absolutely! You can prepare the chicken and rice ahead of time and reheat them when you are ready to serve.

So, gather your ingredients, roll up your sleeves, and make some Honey BBQ Chicken Rice tonight. Your taste buds will thank you!

Honey BBQ Chicken Rice

A comforting and flavorful dish featuring juicy chicken coated in a sweet and tangy BBQ sauce served over fluffy rice.

Main Ingredients

  • 4 pieces chicken breasts (Boneless and skinless)
  • 1/4 cup honey (For marinating)
  • 1/2 cup BBQ sauce (Use your favorite brand)
  • 2 cups rice (White or brown rice, cooked according to package instructions)

Optional Additions

  • 1 cup bell peppers (Chopped, can be added to rice)
  • 1 cup corn (Can be added to rice for extra flavor)

Preparation

  1. Marinate the chicken breasts in honey and BBQ sauce for at least 30 minutes, or overnight for best flavor.
  2. Cook the rice according to package instructions.

Cooking

  1. Grill or bake the marinated chicken until cooked through and caramelized, reaching an internal temperature of 165°F.
  2. If desired, add bell peppers or corn to the rice while it’s cooking.

Serving

  1. Serve the grilled chicken over a bed of rice, drizzling any leftover BBQ sauce on top.

For best results, let chicken marinate longer. Serve with steamed broccoli or salad for a balanced meal. This dish makes great leftovers.

Dinner, Main Course
American
Chicken Dish, Comfort Food, Easy Recipe, Honey BBQ Chicken, Meal Prep

Perfect Asparagus Risotto: Creamy & Flavorful

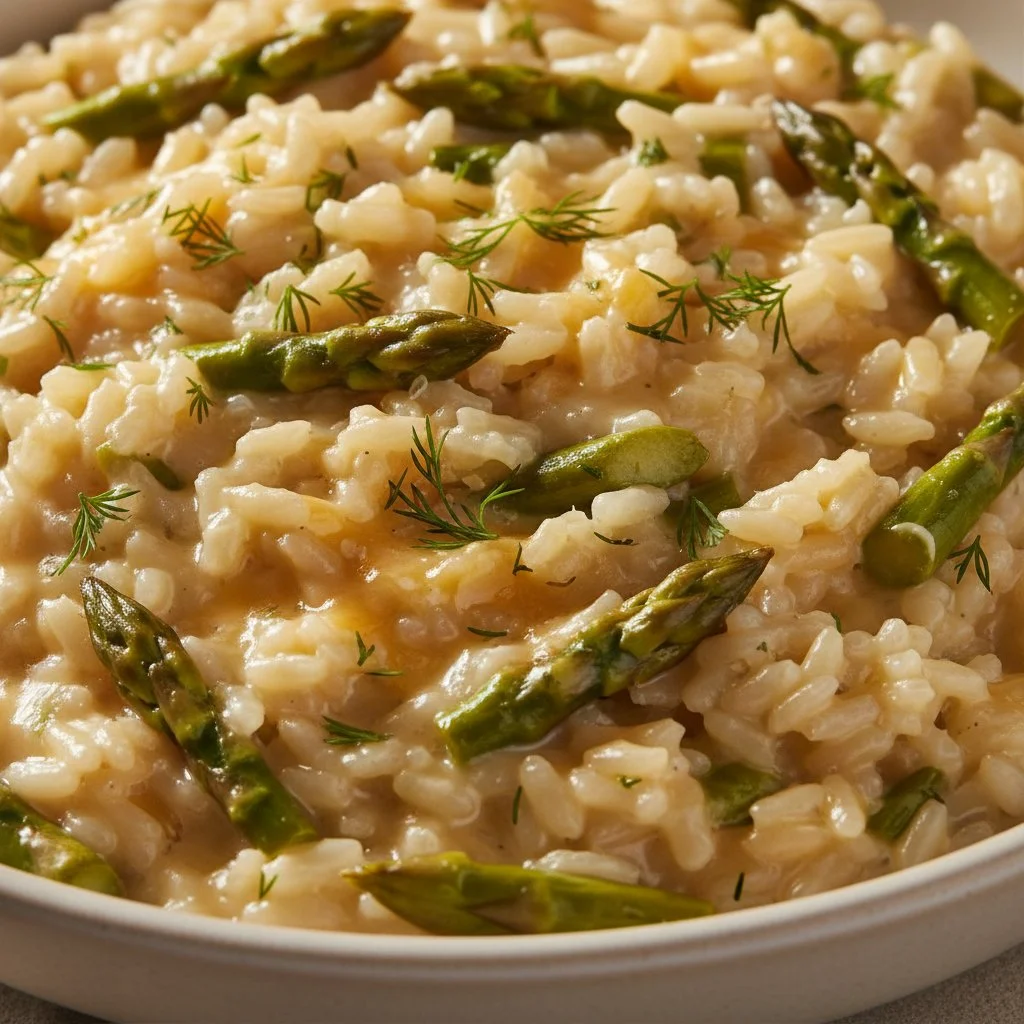
Creamy asparagus risotto served in a bowl with fresh herbs

How to Prepare Perfect Asparagus Risotto: Creamy & Flavorful

Making Perfect Asparagus Risotto is easier than you think. Here’s what you’ll need to do:

  1. Ingredients:

    • 1 cup Arborio rice
    • 1 bunch fresh asparagus, trimmed and cut into 1-inch pieces
    • 4 cups chicken or vegetable broth
    • 1 small onion, chopped
    • 2 cloves garlic, minced
    • 1 cup dry white wine
    • 1 cup grated Parmesan cheese
    • 2 tablespoons butter
    • Salt and pepper to taste
    • Olive oil
  2. Directions:

    1. In a pot, heat the broth over low heat. Keep it warm but not boiling.
    2. In a large pan, heat a bit of olive oil over medium heat. Add the onion and garlic, cooking until soft.
    3. Stir in the Arborio rice, coating it well. Cook for about 1 minute until the rice is slightly translucent.
    4. Pour in the white wine and stir until it’s mostly absorbed by the rice.
    5. Begin adding the warm broth, one ladle at a time, stirring frequently. Wait for the liquid to be absorbed before adding more.
    6. After about 15 minutes, add the asparagus pieces to the risotto.
    7. Continue stirring and adding broth until the rice is creamy and cooked to al dente, about 20-25 minutes total.
    8. Stir in the butter and Parmesan cheese, mixing until smooth. Season with salt and pepper to taste.
    9. Serve hot and enjoy your creamy risotto!

Perfect Asparagus Risotto: Creamy & Flavorful

Why You’ll Love Perfect Asparagus Risotto

This Perfect Asparagus Risotto is a standout dish that captivates your taste buds. The creamy texture of the risotto paired with fresh asparagus makes it both comforting and delightful. Each bite is filled with rich flavor, making it a fantastic choice for dinner parties or family meals. Plus, it’s a great way to showcase seasonal asparagus, bringing a touch of spring to your table.

Tips for Success

  • Use Fresh Asparagus: Fresh asparagus makes a big difference in flavor and texture, so try to choose the best quality available.
  • Keep the Broth Warm: Keeping the broth warm ensures that the cooking process isn’t interrupted when you add it to the rice.
  • Stir Often: Regular stirring helps to release the starches from the rice, giving you that creamy texture everyone loves.

Serving Suggestions

For a complete meal, serve your Perfect Asparagus Risotto with a light salad or grilled chicken. You can also pair it with a glass of white wine for added elegance. If you want a little extra flavor, sprinkle some toasted pine nuts or fresh herbs on top before serving.

FAQs

Can I make this risotto ahead of time?
Risotto is best served fresh, but you can prepare it a few hours ahead. Just reheat gently with a little extra broth or water to loosen it.

What other vegetables can I add?
Feel free to mix in other vegetables like peas, spinach, or mushrooms for added color and nutrition.

Can I use brown rice instead of Arborio rice?
While brown rice is healthier, it won’t give you the same creamy texture. If you’re in love with the health benefits, consider cooking them separately and adding them to the finished dish.

Now that you know how to make this creamy and flavorful Perfect Asparagus Risotto, it’s time to grab your apron and get cooking! Enjoy!

Asparagus Risotto

A creamy and flavorful asparagus risotto that is easy to prepare and perfect for any occasion.

Main Ingredients

  • 1 cup Arborio rice (Specialty rice for risotto.)
  • 1 bunch fresh asparagus, trimmed and cut into 1-inch pieces (Use fresh asparagus for best flavor.)
  • 4 cups chicken or vegetable broth (Keep warm while cooking.)
  • 1 small onion, chopped (For flavor base.)
  • 2 cloves garlic, minced (For added flavor.)
  • 1 cup dry white wine (Adds depth to the risotto.)
  • 1 cup grated Parmesan cheese (For creaminess and flavor.)
  • 2 tablespoons butter (For richness.)
  • Salt and pepper to taste (To season.)
  • Olive oil (For cooking the onion and garlic.)

Preparation

  1. In a pot, heat the broth over low heat. Keep it warm but not boiling.
  2. In a large pan, heat a bit of olive oil over medium heat. Add the onion and garlic, cooking until soft.
  3. Stir in the Arborio rice, coating it well. Cook for about 1 minute until the rice is slightly translucent.
  4. Pour in the white wine and stir until it’s mostly absorbed by the rice.
  5. Begin adding the warm broth, one ladle at a time, stirring frequently. Wait for the liquid to be absorbed before adding more.
  6. After about 15 minutes, add the asparagus pieces to the risotto.
  7. Continue stirring and adding broth until the rice is creamy and cooked to al dente, about 20-25 minutes total.
  8. Stir in the butter and Parmesan cheese, mixing until smooth. Season with salt and pepper to taste.
  9. Serve hot and enjoy your creamy risotto.

Use fresh asparagus for best results. Keep broth warm for a smoother cooking process. Stir often for that creamy texture.

Dinner, Main Course
Italian
Asparagus Risotto, Comfort Food, Creamy Risotto, Spring Recipe, Vegetarian Dish