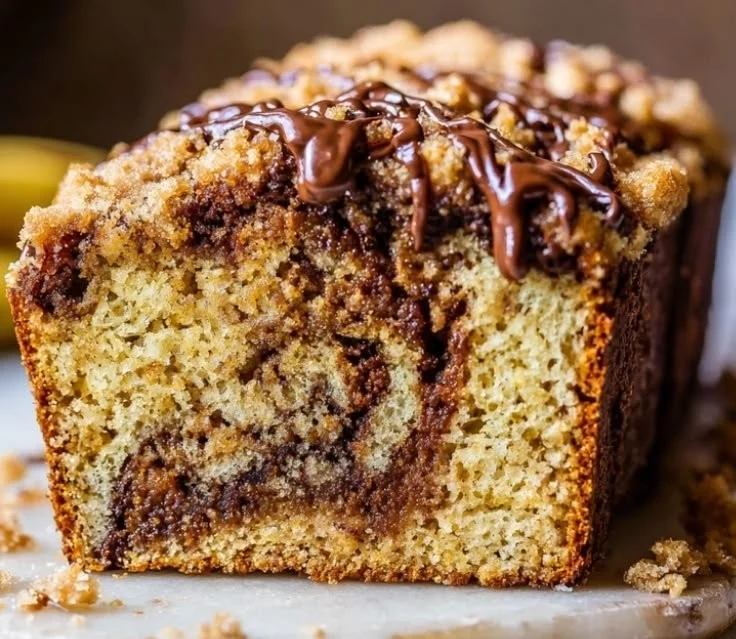
Coffee Cake Banana Bread with Espresso Swirl

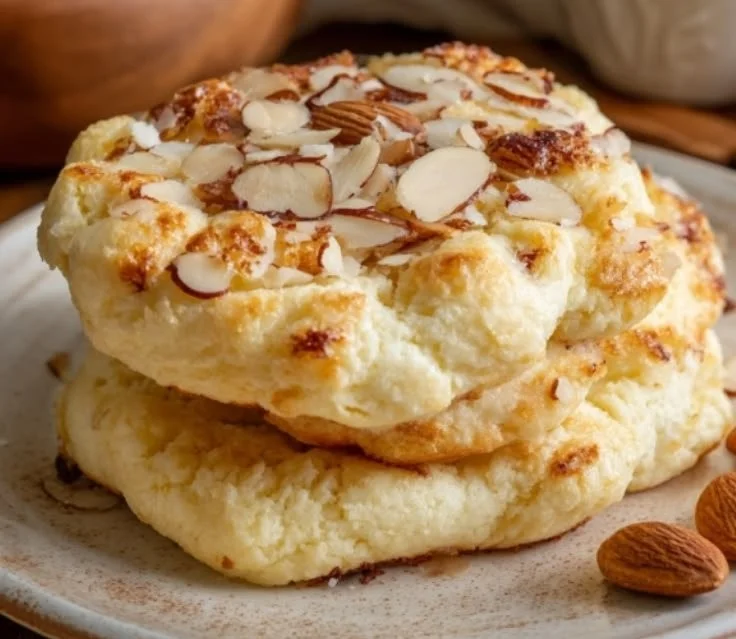
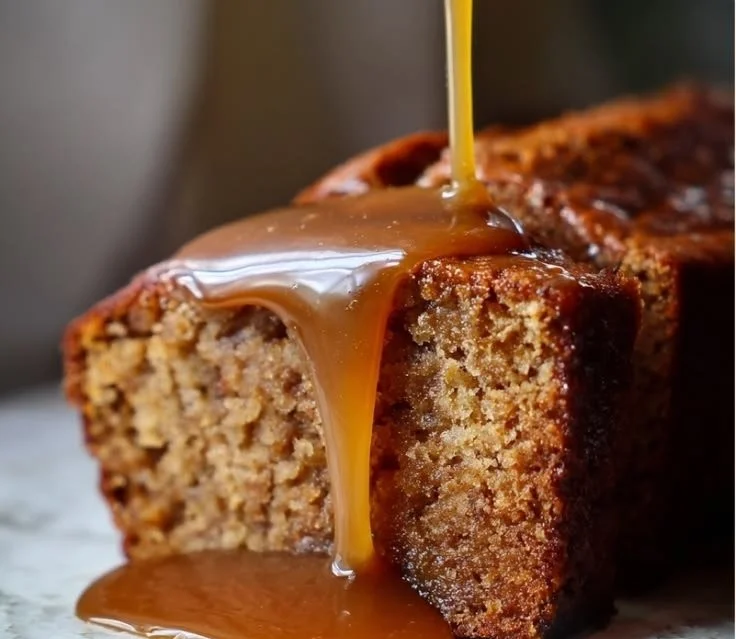
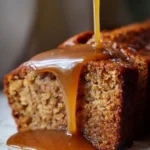
Delicious coffee cake banana bread with espresso swirl slices on a plate

Have you ever found yourself torn between the desire for a cozy banana bread and a delicious coffee cake? Well, you don’t have to choose anymore! This Coffee Cake Banana Bread with Espresso Swirl combines the best of both worlds, creating a sweet, tender loaf that is perfect for breakfast or an afternoon treat. The flavorful espresso swirl adds just the right amount of coffee punch, making it a delightful crowd-pleaser at any gathering. Picture yourself sharing this warm, aromatic bread with friends and family, filling the room with its delightful scents. Trust me, this is a recipe you’ll want to try!

Coffee Cake Banana Bread with Espresso Swirl

How to prepare Coffee Cake Banana Bread with Espresso Swirl

  1. Preheat your oven to 350°F (175°C) and grease a loaf pan.
  2. In a large bowl, mash 3 ripe bananas until smooth.
  3. Stir in 1/3 cup melted butter, then add 1 teaspoon vanilla extract, 1 cup sugar, and 1 egg.
  4. In another bowl, whisk together 1 cup all-purpose flour, 1 teaspoon baking soda, and a pinch of salt.
  5. Gradually mix the dry ingredients into the wet mixture until combined.
  6. For the espresso swirl, mix 2 tablespoons of cocoa powder, 2 tablespoons of brewed espresso, and 1 tablespoon of sugar in a small bowl until smooth.
  7. Pour half of the banana bread batter into the loaf pan. Drizzle half of the espresso mixture over it, then repeat with the remaining batter and espresso.
  8. Using a knife, gently swirl the espresso mixture into the batter.
  9. Bake for 55-60 minutes or until a toothpick comes out clean.
  10. Let it cool for a bit before slicing, and enjoy!

{image_2}

Why You’ll Love Coffee Cake Banana Bread with Espresso Swirl

This Coffee Cake Banana Bread is not just your ordinary banana bread. The blend of sweet banana, rich espresso, and hints of cocoa creates a flavor explosion in each bite. It’s moist, fluffy, and has the perfect amount of sweetness. Plus, the espresso swirl adds a unique twist that makes this bread irresistible. It’s an ideal choice for brunches, picnics, or simply enjoying with a cup of coffee at home.

Coffee Cake Banana Bread with Espresso Swirl

Tips for success

  • Make sure your bananas are very ripe for the best flavor.
  • Don’t overmix the batter, as this can make the bread tough.
  • If you don’t have brewed espresso, you can use strong coffee instead.
  • Allow the bread to cool completely before slicing for neat cuts.

{image_1}

Serving Suggestions

This Coffee Cake Banana Bread is delicious on its own, but you can enhance the experience even more! Serve it with a side of butter or cream cheese for added richness. Pair it with a hot cup of coffee or some cold brew to complement the espresso flavors. Want to elevate it further? Top it with a sprinkle of powdered sugar or serve it alongside some fresh fruit.

FAQs

Can I use frozen bananas for this recipe?

Yes, frozen bananas work great! Just thaw them out and mash once soft.

How should I store leftover banana bread?

Wrap it tightly and store it at room temperature for up to 3 days, or refrigerate it for up to a week. You can also freeze it for longer storage.

Can I add nuts or chocolate chips to the bread?

Absolutely! Feel free to mix in some chopped nuts or chocolate chips for extra texture and flavor. Just be sure to adjust the baking time if needed.

Now, grab your apron and let’s whip up this delightful Coffee Cake Banana Bread with Espresso Swirl! It’s a recipe sure to charm your taste buds and brighten your day.

Coffee Cake Banana Bread with Espresso Swirl

This Coffee Cake Banana Bread with Espresso Swirl combines the best of both worlds, creating a sweet, tender loaf with a delightful espresso twist.

For the banana bread

  • 3 pieces ripe bananas (Make sure the bananas are very ripe for the best flavor.)
  • 1/3 cup melted butter
  • 1 teaspoon vanilla extract
  • 1 cup sugar
  • 1 piece egg
  • 1 cup all-purpose flour
  • 1 teaspoon baking soda
  • pinch none salt

For the espresso swirl

  • 2 tablespoons cocoa powder
  • 2 tablespoons brewed espresso (Strong coffee can be used as a substitute.)
  • 1 tablespoon sugar

Preparation

  1. Preheat your oven to 350°F (175°C) and grease a loaf pan.
  2. In a large bowl, mash the ripe bananas until smooth.
  3. Stir in the melted butter, then add vanilla extract, sugar, and egg.
  4. In another bowl, whisk together the all-purpose flour, baking soda, and salt.
  5. Gradually mix the dry ingredients into the wet mixture until combined.
  6. For the espresso swirl, mix cocoa powder, brewed espresso, and sugar in a small bowl until smooth.
  7. Pour half of the banana bread batter into the loaf pan.
  8. Drizzle half of the espresso mixture over it, then repeat with the remaining batter and espresso.
  9. Using a knife, gently swirl the espresso mixture into the batter.

Baking

  1. Bake for 55-60 minutes or until a toothpick comes out clean.
  2. Let it cool for a bit before slicing, and enjoy!

Allow the bread to cool completely before slicing for neat cuts. Top with powdered sugar or serve alongside fresh fruit for added appeal.

Breakfast, Snack
American
Baking, banana bread, Coffee Cake, Dessert, Espresso Swirl

Green Chilaquiles

Plate of Green Chilaquiles topped with avocado and cilantro

Green Chilaquiles is a delicious dish that brings a burst of flavors to your breakfast or brunch table. This vibrant Mexican dish features crispy tortilla chips smothered in a rich green salsa, making it a perfect crowd-pleaser for family gatherings or weekend feasts. Topped with creamy avocado, crumbled cheese, and a sprinkle of cilantro, Green Chilaquiles is not only tasty but visually appealing too. Whether you’re serving it at a Sunday brunch or enjoying a quiet morning at home, this dish is sure to bring smiles and satisfaction. Get ready to dive into this delightful recipe and enjoy every bite!

Green Chilaquiles

How to prepare Green Chilaquiles

To make Green Chilaquiles at home, you’ll need a handful of simple ingredients and a little bit of your time. Gather these ingredients:

  • Corn tortillas
  • Green salsa (store-bought or homemade)
  • Olive oil
  • Avocado
  • Crumbled queso fresco or feta cheese
  • Fresh cilantro
  • Sour cream (optional)

Here’s how to bring it all together:

Green Chilaquiles

  1. Cut the corn tortillas into triangles and fry them in olive oil until they are golden and crispy.
  2. In a large pan, heat the green salsa over medium heat.
  3. Once the salsa is bubbling, add the fried tortilla chips to the pan and stir until they are well coated.
  4. Remove from heat and let it sit for a couple of minutes.
  5. Serve your chilaquiles warm, topped with avocado slices, crumbled cheese, cilantro, and a dollop of sour cream if desired.

{image_2}

Why You’ll Love Green Chilaquiles

There are many reasons to fall in love with Green Chilaquiles. First, it’s versatile, allowing you to customize the toppings based on your preferences. You can add eggs for extra protein, top it with your favorite hot sauce, or throw in some beans for heartiness. This dish is also perfect for using up leftover tortillas or salsa, making it a clever choice for busy mornings. Plus, with its vibrant colors and fresh flavors, it’s a feast for the eyes as well as the stomach.

Tips for success

  1. Use Fresh Ingredients: Opt for fresh corn tortillas for the best flavor and texture.
  2. Make Your Own Salsa: If you have the time, making homemade green salsa can elevate the dish with personalized flavors.
  3. Don’t Overcook the Tortillas: Fry the tortilla chips until they are just golden; they should remain crispy when coated with salsa.

{image_1}

Serving Suggestions

Green Chilaquiles can be served as a standalone dish or accompanied by sides like black beans, scrambled eggs, or a fresh fruit salad. For a complete meal, consider serving it with a refreshing drink, such as iced coffee or a zesty limeade.

FAQs

Can I make Green Chilaquiles in advance?

Yes, you can prepare the salsa and fry the tortillas in advance. Just assemble when ready to serve, but keep in mind that they are best served immediately to maintain their crunch.

Can I use store-bought salsa?

Absolutely! Store-bought green salsa works perfectly for a quick meal.

Can I make it vegan?

Yes, just skip the cheese and sour cream, or use vegan alternatives to keep it plant-based.

Now that you know how to make Green Chilaquiles, get ready to whip them up in your kitchen and amaze your family and friends with this delightful dish!

Green Chilaquiles

Green Chilaquiles is a delicious Mexican dish featuring crispy tortilla chips smothered in a rich green salsa, topped with avocado, crumbled cheese, and cilantro. Perfect for breakfast or brunch!

Main ingredients

  • 8 pieces Corn tortillas (Cut into triangles)
  • 1 cup Green salsa (Store-bought or homemade)
  • 2 tablespoons Olive oil (For frying)
  • 1 medium Avocado (Sliced for topping)
  • 1 cup Crumbled queso fresco or feta cheese (For topping)
  • 1/4 cup Fresh cilantro (Chopped for garnish)
  • 1/2 cup Sour cream (Optional for serving)

Preparation

  1. Cut the corn tortillas into triangles and fry them in olive oil until they are golden and crispy.
  2. In a large pan, heat the green salsa over medium heat.
  3. Once the salsa is bubbling, add the fried tortilla chips to the pan and stir until they are well coated.
  4. Remove from heat and let it sit for a couple of minutes.
  5. Serve your chilaquiles warm, topped with avocado slices, crumbled cheese, cilantro, and a dollop of sour cream if desired.

Use fresh ingredients for best flavor, and consider making your own salsa for personalized flavors. Fry the tortillas until just golden so they remain crispy.

Breakfast, Brunch
Mexican
Chilaquiles, Easy Brunch, Healthy Breakfast, Mexican Breakfast, Salsa

Keto Cloud Bread

Fluffy and light Keto Cloud Bread served on a plate

Keto Cloud Bread is a delightful low-carb substitute for traditional bread, making it a favorite among those following the ketogenic diet. It’s light, fluffy, and offers a satisfying texture without the carbs. This bread is made from simple ingredients, primarily eggs and cream cheese, which combine beautifully to create a bread-like goodness that everyone can enjoy. Whether you’re using it for sandwiches, a side for soups, or just spreading some butter, Keto Cloud Bread is sure to please your taste buds.

Keto Cloud Bread

To prepare this easy and delicious recipe, gather the following ingredients:

Ingredients:

  • 3 large eggs
  • 3 oz cream cheese, softened
  • 1/4 tsp cream of tartar
  • A pinch of salt

Here’s how to make Keto Cloud Bread:

Keto Cloud Bread

  1. Preheat your oven to 300°F (150°C).
  2. In a bowl, beat the egg whites and cream of tartar together until stiff peaks form.
  3. In another bowl, mix the egg yolks, softened cream cheese, and salt until smooth.
  4. Gently fold the egg whites into the egg yolk mixture until well combined, taking care not to deflate the egg whites.
  5. Line a baking sheet with parchment paper and use a spoon to dollop the mixture onto the sheet in circular shapes (about 2-3 inches wide).
  6. Bake for 25-30 minutes or until the tops are golden brown.
  7. Allow them to cool before enjoying.

{image_2}

Why You’ll Love Keto Cloud Bread

You’re going to love Keto Cloud Bread for so many reasons! First, it’s incredibly low in carbs, making it perfect for anyone on a keto or low-carb diet. Secondly, it’s super easy to whip up, and you probably already have the ingredients in your kitchen. Each bite has a light and airy texture, making it a perfect vessel for all your favorite toppings. Plus, it’s versatile! Use it for breakfast, lunch, or dinner, and enjoy its delightful taste without the guilt.

Tips for success

To make sure your Keto Cloud Bread turns out perfectly every time, here are some handy tips:

  • Beat the egg whites until stiff peaks form to ensure maximum fluffiness.
  • Make sure the cream cheese is softened for easy mixing (you can microwave it for a few seconds).
  • Don’t overmix the egg whites with the yolk mixture; fold gently to keep the airiness.
  • For added flavor, consider adding spices or herbs to the mix before baking.

{image_1}

Serving Suggestions

Keto Cloud Bread can be enjoyed in many ways. Try it as a base for your favorite sandwich fillings, use it to scoop up delicious dips, or simply enjoy it warm with a spread of butter or cream cheese. You might even want to use it for mini pizzas topped with cheese and your favorite toppings. The possibilities are endless!

FAQs

Can I store leftover Keto Cloud Bread?

Yes, you can store Keto Cloud Bread in an airtight container in the fridge for up to a week. Just reheat before serving for the best texture.

Can I freeze Keto Cloud Bread?

Absolutely! You can freeze the cloud bread for up to a month. Just make sure to stack them with parchment paper between each layer to prevent sticking.

Can I use other types of cheese instead of cream cheese?

While cream cheese is the recommended option for the best flavor and texture, you can experiment with other soft cheeses, just keep in mind that it might change the flavor and texture slightly.

Keto Cloud Bread is not just a recipe, it’s an experience waiting to happen in your kitchen. So gather your ingredients, and get ready to bake something fluffy and delightful!

Keto Cloud Bread

A delightful low-carb substitute for traditional bread, Keto Cloud Bread is light, fluffy, and perfect for those on a ketogenic diet.

Main Ingredients

  • 3 large large eggs
  • 3 oz cream cheese, softened (Make sure it is softened for easy mixing.)
  • 1/4 tsp cream of tartar
  • a pinch salt

Preparation

  1. Preheat your oven to 300°F (150°C).
  2. In a bowl, beat the egg whites and cream of tartar together until stiff peaks form.
  3. In another bowl, mix the egg yolks, softened cream cheese, and salt until smooth.
  4. Gently fold the egg whites into the egg yolk mixture until well combined.
  5. Line a baking sheet with parchment paper and dollop the mixture onto the sheet in circular shapes (about 2-3 inches wide).
  6. Bake for 25-30 minutes or until the tops are golden brown.
  7. Allow them to cool before enjoying.

For maximum fluffiness, beat the egg whites until stiff peaks form. Avoid overmixing to keep the airiness. You can add spices or herbs for additional flavor.

Bread, Snack
Keto, Low-Carb
bread substitute, Cloud Bread, Keto Cloud Bread, Keto Recipes, low-carb bread

Smoky Chipotle Shrimp and Grits

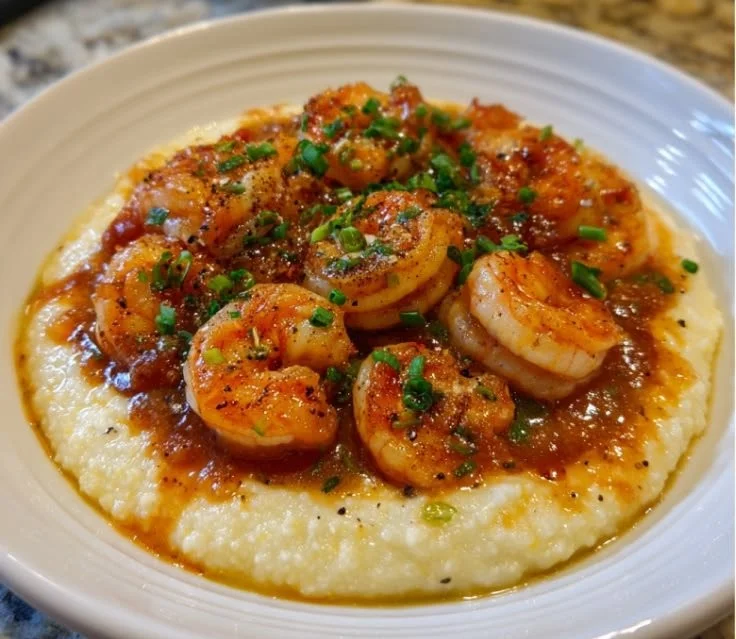
Delicious smoky chipotle shrimp served over creamy grits, a flavorful dish.

There’s something special about a dish that warms your heart and fills your belly, and Smoky Chipotle Shrimp and Grits does just that. This delightful recipe combines succulent shrimp with creamy, cheesy grits, all jazzed up with a smoky chipotle kick. It’s a dish that brings comfort and tantalizes your taste buds, making it a great choice for family gatherings or cozy dinners at home. Invite your friends over or enjoy it on a quiet evening, and watch as everyone savors every bite. So, let’s dive right into this crowd-pleaser that you’re going to love making!

Smoky Chipotle Shrimp and Grits

How to prepare Smoky Chipotle Shrimp and Grits

To make Smoky Chipotle Shrimp and Grits, you’ll need a few fresh ingredients and some spices to bring out the flavors. Gather the following:

Ingredients

  • 1 cup grits
  • 4 cups water
  • 1 cup shredded cheese (cheddar or your choice)
  • 1 pound shrimp, peeled and deveined
  • 1 tablespoon chipotle chili powder
  • 1 tablespoon smoked paprika
  • Salt and pepper to taste
  • 2 tablespoons butter
  • 1 tablespoon olive oil
  • 2 garlic cloves, minced
  • Lemon wedges for serving

Directions

  1. In a pot, bring the water to a boil. Slowly whisk in the grits, reduce heat to low, and cook for about 20-25 minutes, stirring occasionally until thickened.
  2. Once the grits are thick, stir in the cheese, butter, salt, and pepper. Keep warm.
  3. In a large skillet, heat the olive oil over medium heat. Add garlic and sauté for a minute.
  4. Add the shrimp, chipotle chili powder, smoked paprika, salt, and pepper. Cook until the shrimp turns pink and opaque, about 4-5 minutes.
  5. To serve, spoon the creamy grits into bowls and top with the smoky chipotle shrimp. Drizzle any remaining sauce from the skillet over the top.
  6. Serve with lemon wedges on the side.

{image_2}

Smoky Chipotle Shrimp and Grits

Why You’ll Love Smoky Chipotle Shrimp and Grits

You will love Smoky Chipotle Shrimp and Grits for many reasons! The creamy grits serve as the perfect base for the spicy and smoky shrimp, creating a wonderful balance of flavors. The combination of spices makes this dish exciting and comforting at the same time. Plus, it is easy to prepare and appeals to all age groups, making it fantastic for both family dinners and festive occasions.

Tips for success

  • Use fresh shrimp for the best flavor and texture.
  • Feel free to adjust the chipotle chili powder to suit your spice preferences.
  • Make your grits ahead of time and reheat them when you’re ready to serve, just adding a splash of water or milk to loosen them up.
  • Don’t forget to taste as you go, adjusting seasoning as needed.

{image_1}

Serving Suggestions

For a complete meal, serve the Smoky Chipotle Shrimp and Grits with a simple green salad or some sautéed greens. A glass of chilled white wine or a refreshing iced tea pairs nicely with this dish. You can also add some crusty bread on the side to soak up the delicious sauce.

FAQs

Can I use frozen shrimp?

Yes, frozen shrimp works well too. Just thaw them properly before cooking.

What can I substitute for grits?

If you can’t find grits, you can use polenta or another creamy grain option.

How can I make this dish vegetarian?

To make it vegetarian, you can skip the shrimp and use sautéed mushrooms and vegetable broth for flavor in the grits.

Enjoy making Smoky Chipotle Shrimp and Grits; it’s sure to become a favorite in your home!

Smoky Chipotle Shrimp and Grits

A heartwarming dish combining succulent shrimp with creamy, cheesy grits, enhanced by a smoky chipotle kick.

For the Grits

  • 1 cup grits (Use any preferred type of grits.)
  • 4 cups water
  • 1 cup shredded cheese (Cheddar or your choice.)
  • 2 tablespoons butter

For the Shrimp

  • 1 pound shrimp, peeled and deveined (Fresh shrimp is preferred.)
  • 1 tablespoon chipotle chili powder (Adjust to taste based on spice preference.)
  • 1 tablespoon smoked paprika
  • 2 cloves garlic, minced
  • Salt and pepper to taste
  • 1 tablespoon olive oil
  • Lemon wedges for serving

Preparation of Grits

  1. In a pot, bring the water to a boil. Slowly whisk in the grits, reduce heat to low, and cook for about 20-25 minutes, stirring occasionally until thickened.
  2. Once the grits are thick, stir in the cheese, butter, salt, and pepper. Keep warm.

Cooking the Shrimp

  1. In a large skillet, heat the olive oil over medium heat. Add garlic and sauté for a minute.
  2. Add the shrimp, chipotle chili powder, smoked paprika, salt, and pepper. Cook until the shrimp turns pink and opaque, about 4-5 minutes.

Serving

  1. Spoon the creamy grits into bowls and top with the smoky chipotle shrimp. Drizzle any remaining sauce from the skillet over the top.
  2. Serve with lemon wedges on the side.

Use fresh shrimp for the best flavor and texture. Make your grits ahead of time and reheat them when you’re ready to serve, just adding a splash of water or milk to loosen them up. Don’t forget to taste as you go, adjusting seasoning as needed.

Dinner, Main Course
American, Southern
Comfort Food, Easy Dinner, Seafood, Shrimp and Grits, Smoky Chipotle

Shrimp Meal Prep Bowl with Mango Salsa

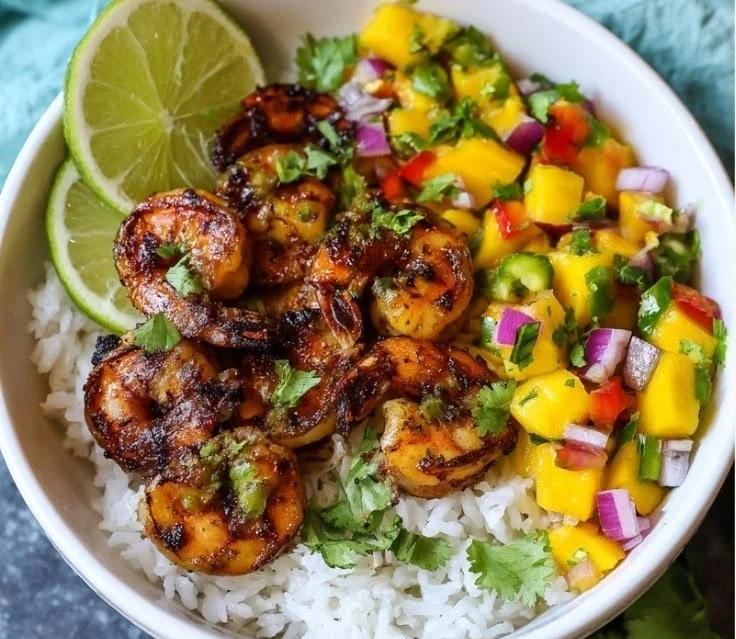
Shrimp meal prep bowl topped with fresh mango salsa, a healthy dish

Imagine a dish that combines the freshness of summer with the satisfying protein of shrimp. The Shrimp Meal Prep Bowl with Mango Salsa is a delightful way to enjoy a meal that bursts with flavor and color. This dish is perfect for meal prep, as it can be enjoyed throughout the week while providing a tasty and healthy option for lunch or dinner. The combination of succulent shrimp, vibrant mango salsa, and wholesome grains makes this bowl a crowd-pleaser that everyone will love. Once you try it, you’ll find it hard not to smile with every mouthful!

Shrimp Meal Prep Bowl with Mango Salsa

How to prepare Shrimp Meal Prep Bowl with Mango Salsa

To make the Shrimp Meal Prep Bowl with Mango Salsa, start by cooking your choice of grain, such as quinoa or brown rice. While the grains are cooking, heat olive oil in a pan and sauté shrimp seasoned with salt, pepper, and garlic until they are pink and cooked through. In the meantime, whip up a quick mango salsa by mixing diced mango, red onion, cilantro, lime juice, and a touch of salt in a bowl. Once everything is ready, assemble your meal prep bowls by layering the grains, shrimp, and a generous scoop of mango salsa on top.

{image_2}

Shrimp Meal Prep Bowl with Mango Salsa

Why You’ll Love Shrimp Meal Prep Bowl with Mango Salsa

There are so many reasons to adore this recipe! First, it’s incredibly flavorful, thanks to the sweet and tangy mango salsa. Additionally, it is packed with protein from the shrimp and healthy carbohydrates from the grains. Not to mention, it’s super easy to make, and you can even customize it with your favorite veggies. This makes it not only delicious but also versatile, catering to different tastes and preferences. Plus, it looks beautiful when served, making it perfect for meal prep or impressing guests at a casual gathering.

Tips for success

  1. Choose Fresh Shrimp: Opt for fresh or properly thawed shrimp for the best taste.
  2. Customize Your Salsa: Feel free to add other fruits or vegetables to the mango salsa, like jalapeños for heat or avocados for creaminess.
  3. Store Properly: When meal prepping, store the bowls in airtight containers to keep everything fresh throughout the week.

{image_1}

Serving Suggestions

Serve the Shrimp Meal Prep Bowl warm or cold, depending on your preference. Pair it with additional lime wedges or some avocado slices for added flavor and creaminess. This bowl can also be enjoyed with a side of tortilla chips or a sprinkle of crumbled feta cheese for an extra touch.

FAQs

  1. Can I use frozen shrimp? Yes, you can use frozen shrimp. Just make sure to thaw and drain them properly before cooking.
  2. What can I substitute for mango? If mango isn’t in season, you can use pineapple or peaches for a similar sweet and fruity flavor.
  3. How long can I store the meal prep bowls? The shrimp meal prep bowls can be stored in the refrigerator for up to four days. Just reheat the shrimp before eating.

Get ready to whip up this delightful Shrimp Meal Prep Bowl with Mango Salsa in your kitchen! Happy cooking!

Shrimp Meal Prep Bowl with Mango Salsa

A delightful meal prep bowl combining succulent shrimp with vibrant mango salsa, perfect for lunch or dinner.

For the grains

  • 2 cups quinoa or brown rice (Cooked according to package instructions.)

For the shrimp

  • 1 lb shrimp (Fresh or properly thawed.)
  • 2 tblsp olive oil (For sautéing.)
  • 1 tsp salt (To season the shrimp.)
  • 1 tsp black pepper (To season the shrimp.)
  • 2 cloves garlic (Minced.)

For the mango salsa

  • 1 cup diced mango (Fresh.)
  • 1/4 cup red onion (Diced.)
  • 1/4 cup cilantro (Chopped.)
  • 1 tblsp lime juice (Freshly squeezed.)
  • 1/4 tsp salt (To taste.)

Preparation

  1. Cook quinoa or brown rice according to package instructions.
  2. In a pan, heat olive oil over medium heat.
  3. Season shrimp with salt, pepper, and garlic, then sauté in the heated pan until pink and cooked through.
  4. In a bowl, combine diced mango, red onion, cilantro, lime juice, and salt to create the mango salsa.

Assembly

  1. Layer cooked grains at the bottom of meal prep bowls.
  2. Add the sautéed shrimp on top.
  3. Finish with a generous scoop of mango salsa.

Serve warm or cold. Store in airtight containers for up to 4 days. Customize salsa with additional fruits or veggies.

Dinner, lunch, Meal Prep
American, Fusion
Healthy Recipe, Mango Salsa, Meal Prep Bowl, Quick Cooking, Shrimp

Ultimate Homemade Shrimp Fried Rice

Delicious homemade shrimp fried rice served in a bowl with fresh vegetables

Making Ultimate Homemade Shrimp Fried Rice at home is easier than you might think. Start by gathering your ingredients: fresh shrimp, cooked rice, eggs, garlic, peas, carrots, and soy sauce. You’ll also want some green onions for garnish, if you like.

Ultimate Homemade Shrimp Fried Rice

Begin by sautéing the shrimp in a pan until they’re pink and cooked through. Then, push them to one side and scramble the eggs in the same pan. Add the garlic, peas, and carrots next, and stir until they’re heated through. Finally, mix in the rice and soy sauce, stirring everything together. Garnish with chopped green onions, and you’re all set!

{image_2}

Ultimate Homemade Shrimp Fried Rice

Why You’ll Love Ultimate Homemade Shrimp Fried Rice

Ultimate Homemade Shrimp Fried Rice is a dish that pleases everyone at the dinner table. It is quick to make, yet it delivers flavors that feel gourmet. Each bite of shrimp blends perfectly with the seasoned rice, while the vegetables add a nice crunch. This dish is versatile, too, allowing you to tweak it according to your taste preferences and pantry items.

The joy of homemade fried rice lies in its comforting familiarity. It’s perfect for a busy weeknight or a casual weekend gathering. Plus, with the shrimp being the star ingredient, it’s a great way to impress family and friends!

Tips for success

To make your fried rice perfect every time, there are a few tips you should keep in mind. First, use day-old rice if possible; it’s drier and will fry better. Second, make sure your pan is hot before adding the ingredients, as this provides the great fry and keeps everything from sticking. Lastly, don’t rush the cooking process, allowing each ingredient to get the attention it deserves.

{image_1}

Serving Suggestions

Ultimate Homemade Shrimp Fried Rice is a complete meal on its own, but you can enhance it with some delicious side dishes. Consider pairing it with a light salad or some crispy spring rolls. For an extra kick, serve it with your favorite Asian dipping sauce or chili sauce.

FAQs

Can I use frozen shrimp for this recipe?

Yes, frozen shrimp is perfectly fine. Just make sure to thaw them properly before cooking, so they cook evenly.

Can I add other vegetables?

Absolutely! Feel free to add bell peppers, broccoli, or any of your favorite veggies.

What if I don’t have cooked rice?

No worries, you can quickly cook some rice while you prepare the other ingredients. Just make sure to let it cool before you add it to the pan!

Ultimate Homemade Shrimp Fried Rice

A quick and delicious homemade shrimp fried rice that combines fresh shrimp, vegetables, and seasoned rice for a gourmet flavor. Perfect for weeknight dinners or casual gatherings.

Main Ingredients

  • 1 lb fresh shrimp (Peeled and deveined)
  • 4 cups cooked rice (Best if day-old)
  • 2 large eggs (Beaten)
  • 2 cloves garlic (Minced)
  • 1 cup peas (Frozen or fresh)
  • 1 cup carrots (Diced)
  • 4 tbsp soy sauce (Adjust to taste)
  • 2 green onions for garnish (Chopped, optional)

Cooking

  1. In a pan, sauté the shrimp until they are pink and fully cooked.
  2. Push the shrimp to one side of the pan and scramble the eggs on the other side.
  3. Add the minced garlic, peas, and diced carrots to the pan, stirring until heated through.
  4. Mix in the cooked rice and soy sauce, stirring everything together until well combined.
  5. Garnish with chopped green onions and serve.

Use day-old rice for better texture. Ensure the pan is hot before adding ingredients for optimal frying.

Dinner, Main Course
Asian, Chinese
Easy Dinner, fried rice, Homemade Fried Rice, Shrimp Fried Rice, Shrimp Recipes

Homemade Banana Syrup

Delicious homemade banana syrup in a glass jar with fresh bananas

There’s something about the sweet aroma of bananas that feels like a warm hug. Homemade Banana Syrup captures that cozy feeling in a jar, making it a delightful addition to pancakes, waffles, and even ice cream. This recipe is easy to follow, and it creates a syrup that’s bursting with banana flavor, which will brighten even the most ordinary breakfast. Whether you’re treating your family on a slow Sunday morning or trying to impress friends with a special brunch, this banana syrup is sure to please everyone. So, let’s dive into this fun culinary adventure and whip up some deliciousness together!

Homemade Banana Syrup

How to prepare Homemade Banana Syrup

To start, gather these ingredients for your Homemade Banana Syrup:

  • 2 ripe bananas
  • 1 cup sugar
  • 1 cup water
  • 1 teaspoon vanilla extract
  • A pinch of salt

Now, let’s get into the steps for preparing your syrup:

Homemade Banana Syrup

  1. In a medium saucepan, combine the sugar and water. Bring the mixture to a gentle boil over medium heat.
  2. While that’s heating, mash the ripe bananas in a bowl until smooth.
  3. Once the sugar has dissolved, add the mashed bananas to the saucepan. Stir well to combine.
  4. Bring the mixture back to a gentle boil and let it cook for about 5-7 minutes, stirring frequently.
  5. Remove from heat, then stir in the vanilla extract and a pinch of salt.
  6. Allow the syrup to cool slightly before pouring it into a clean jar or bottle.

{image_2}

Why You’ll Love Homemade Banana Syrup

You will adore this Homemade Banana Syrup for so many reasons! First, it’s incredibly simple to make, requiring just a few ingredients and minimal effort. Second, the taste is nothing short of delightful, with the natural sweetness of ripe bananas shining through. Additionally, it’s a versatile treat that can be enjoyed on a variety of goodies, from breakfast favorites to desserts. This syrup provides a burst of flavor that adds a personal touch to your meals, making it a perfect way to impress your loved ones.

Tips for success

  • Choose ripe bananas, as they have more natural sweetness and flavor.
  • Don’t skip the vanilla extract, as it enhances the syrup’s taste.
  • Make sure to stir frequently while cooking to prevent the syrup from sticking to the bottom of the pan.

{image_1}

Serving Suggestions

This Homemade Banana Syrup can transform your breakfast table. Drizzle it generously over pancakes or waffles for a sweet morning treat. You can also pour it over ice cream for an easy dessert option, or use it as a topping for yogurt with granola for a delicious snack. The possibilities are endless, and it’s always a hit!

FAQs

Can I store Homemade Banana Syrup?

Yes, you can store it in the refrigerator for up to two weeks. Just make sure to keep it in a sealed container.

Can I use frozen bananas?

Definitely! Just thaw the bananas and mash them as you normally would.

What if I want to make it less sweet?

Feel free to reduce the sugar amount to suit your taste, but be aware it may affect the syrup’s consistency.

Homemade Banana Syrup

Homemade Banana Syrup captures the cozy aroma of bananas, making a delightful addition to pancakes, waffles, and ice cream.

Main ingredients

  • 2 pieces ripe bananas (Choose ripe bananas for better sweetness)
  • 1 cup sugar (Adjust to taste if you want less sweetness)
  • 1 cup water
  • 1 teaspoon vanilla extract (Enhances the syrup’s taste)
  • 1 pinch salt (Adds balance to the flavor)

Preparation

  1. In a medium saucepan, combine the sugar and water. Bring the mixture to a gentle boil over medium heat.
  2. While that’s heating, mash the ripe bananas in a bowl until smooth.
  3. Once the sugar has dissolved, add the mashed bananas to the saucepan. Stir well to combine.
  4. Bring the mixture back to a gentle boil and let it cook for about 5-7 minutes, stirring frequently.
  5. Remove from heat, then stir in the vanilla extract and a pinch of salt.
  6. Allow the syrup to cool slightly before pouring it into a clean jar or bottle.

Store in the refrigerator for up to two weeks in a sealed container. Can be made with frozen bananas that are thawed and mashed.

Breakfast, Condiment, Dessert
American
Banana Syrup, Breakfast Syrup, Easy Recipes, Homemade Syrup, Pancake Topping

Chicken Alfredo Pasta

Delicious Chicken Alfredo Pasta with creamy sauce and tender chicken

Chicken Alfredo Pasta is a delightful dish that quickly becomes a favorite around the dinner table. With its creamy sauce, tender chicken, and perfectly cooked pasta, this meal is a go-to for many families. Not only is it satisfying, but it also brings a taste of Italian cuisine into your home, making it feel special every time you make it. The rich flavors and smooth texture make this dish incredibly appealing, especially to those who love pasta. Whether you’re cooking for a crowd or just for yourself, Chicken Alfredo is sure to please. Let’s dive into how to prepare this delicious meal that you’ll be excited to share with friends and family.

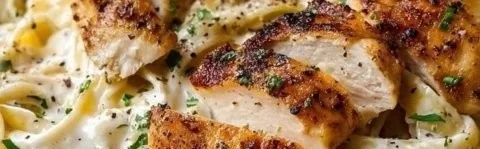
Chicken Alfredo Pasta

{image_2}

Why You’ll Love Chicken Alfredo Pasta

There’s a lot to love about Chicken Alfredo Pasta. First, it’s easy to make, meaning you can whip it up even on a busy weeknight. With just a handful of ingredients, you can create a creamy, rich dish that feels indulgent. The comforting flavors of garlic, butter, and Parmesan cheese come together beautifully. Plus, you can customize it easily by adding vegetables or different seasonings, making it versatile for any taste. Every bite is creamy, cheesy, and utterly satisfying, making it a true crowd-pleaser.

Chicken Alfredo Pasta

Tips for success

To make your Chicken Alfredo Pasta even better, here are some simple tips for success:

  • Use fresh ingredients whenever possible, especially for the chicken and cheese.
  • Don’t overcook the pasta. Aim for al dente, so it has a nice bite to it.
  • Let the sauce simmer gently to develop the flavor, but don’t let it boil to avoid curdling.
  • For extra flavor, consider adding some herbs like parsley or basil right before serving.
  • Make sure to reserve a little pasta water to adjust the sauce’s thickness if needed.

{image_1}

Serving Suggestions

Chicken Alfredo Pasta pairs well with a simple side salad or steamed vegetables for a balanced meal. You could also serve it with warm garlic bread for a delicious treat. A sprinkle of fresh Parmesan cheese on top adds that extra touch of flavor. For drinks, a light white wine or sparkling water can complement the rich flavors of the dish nicely.

FAQs

Can I use other meats with Chicken Alfredo Pasta?

Yes, you can easily substitute the chicken with shrimp or turkey, or even make it vegetarian by using mushrooms or broccoli.

How do I store leftovers?

Store leftovers in an airtight container in the fridge for up to three days. Reheat gently in the microwave or on the stove, adding a splash of cream if needed to refresh the sauce.

Can I freeze Chicken Alfredo Pasta?

It’s best to freeze the chicken and sauce separately from the pasta for the best texture. Thaw in the fridge overnight and reheat gently when you’re ready to enjoy it again.

Chicken Alfredo Pasta is not just a meal; it’s a warm hug on a plate. With this easy recipe and a few simple tips, you’re ready to impress everyone at your table. Enjoy cooking, and happy eating!

Chicken Alfredo Pasta

Chicken Alfredo Pasta is a creamy, satisfying dish featuring tender chicken and perfectly cooked pasta, making it a family favorite.

Main ingredients

  • 8 oz fettuccine pasta (Can substitute with any pasta of choice)
  • 2 cups cooked chicken, diced (Use fresh or leftover chicken)
  • 1 cup heavy cream (For a rich, creamy sauce)
  • 1/2 cup Parmesan cheese, grated (Freshly grated is recommended for best flavor)
  • 2 tbsp butter (Unsalted is preferred)
  • 2 cloves garlic, minced (Can add more for enhanced flavor)
  • salt and pepper to taste salt and pepper (Adjust according to preference)

Optional additions

  • 1 cup vegetables (e.g., broccoli, peas) (For added nutrition and flavor)
  • 1 fresh parsley or basil, chopped (Add just before serving for freshness)

Preparation

  1. Cook fettuccine pasta according to package instructions until al dente; drain and reserve some pasta water.
  2. In a pan, melt butter over medium heat and sauté minced garlic until fragrant.
  3. Add heavy cream and bring to a gentle simmer to combine flavors.
  4. Stir in grated Parmesan cheese and season with salt and pepper to taste.
  5. Combine the cooked chicken and pasta with the sauce, adding reserved pasta water to achieve desired consistency.

Serving

  1. Serve immediately, garnished with fresh herbs and additional Parmesan cheese if desired.

For the best results, use fresh ingredients, avoid overcooking pasta, and let the sauce simmer to enhance flavor.

Dinner, Main Course
Italian
Chicken Alfredo, Creamy Sauce, Easy Dinner, Family Recipe, Pasta

Roasted Chickpea and Veggie Bowl

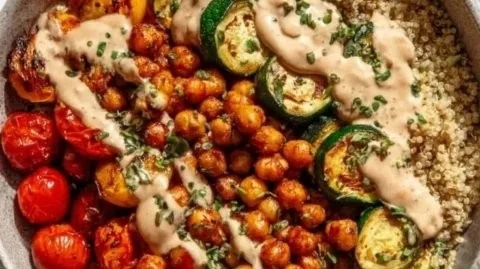
Delicious Roasted Chickpea and Veggie Bowl garnished for a healthy meal.

Roasted Chickpea and Veggie Bowl is a delicious and healthy dish that truly shines on your dinner table. With its vibrant colors and hearty ingredients, this bowl pleases everyone, whether you’re a dedicated vegetarian or just looking for a nutritious meal. The crispy roasted chickpeas add a satisfying crunch, while the fresh veggies bring in bright flavors. You’ll find this dish versatile, easy to make, and perfect for meal prep. Let’s dive into how you can whip up this amazing recipe in your own kitchen.

Roasted Chickpea and Veggie Bowl

{image_2}

Why You’ll Love Roasted Chickpea and Veggie Bowl

There are so many reasons to love Roasted Chickpea and Veggie Bowl. For starters, it’s packed with protein and fiber, making it a filling choice without being heavy. The combination of textures—from crunchy chickpeas to crisp veggies—creates a delightful eating experience. Plus, it’s fully customizable! You can use whatever vegetables you have on hand or swap in your favorite sauces. It’s a clean, wholesome meal that makes for a great lunch or dinner, and you can even serve it as a crowd-pleaser at gatherings. Enjoying wholesome food doesn’t have to be boring, and this bowl proves just that!

Roasted Chickpea and Veggie Bowl

Tips for success

To ensure your Roasted Chickpea and Veggie Bowl turns out perfectly, keep these tips in mind:

  • Drain and dry the chickpeas well: This helps them get crispy while roasting. You can even pat them dry with a clean towel.
  • Use seasonal veggies: Fresh, seasonal vegetables not only taste better, they also add more nutritional value to your bowl.
  • Season generously: Don’t be shy with your spices and herbs; they will enhance the flavor of your bowl.
  • Adjust roasting times: Cooking times may vary based on your oven and the size of your veggies. Keep an eye on them to avoid burning.

{image_1}

Serving Suggestions

For an extra flavor boost, consider adding a drizzle of tahini or a squeeze of fresh lemon juice over your Roasted Chickpea and Veggie Bowl. You can also serve it alongside grain options like quinoa or brown rice for a heartier meal. A sprinkle of feta cheese or avocado slices on top can also elevate the dish further, making it even more appetizing.

FAQs

Can I use canned chickpeas?

Yes, canned chickpeas are a great option. Just make sure to drain and rinse them well before cooking.

How can I store leftovers?

You can store leftovers in an airtight container in the fridge for up to three days. Just note that the chickpeas might lose their crispness.

Can I make this recipe vegan?

Absolutely! The Roasted Chickpea and Veggie Bowl is already vegan. Feel free to adjust toppings and sauces to fit your vegan preferences.

Roasted Chickpea and Veggie Bowl

A delicious and healthy bowl featuring crispy roasted chickpeas and fresh seasonal vegetables, perfect for a nutritious meal or meal prep.

For the roasted chickpeas

  • 2 cups cooked chickpeas (Can use canned chickpeas; drain and rinse them well.)
  • 1 tablespoon olive oil (For roasting the chickpeas.)
  • 1 teaspoon paprika
  • 1 teaspoon garlic powder
  • salt to taste salt

For the veggie bowl

  • 2 cups mixed seasonal vegetables (e.g., bell peppers, zucchini, carrots.)

For serving (optional)

  • 2 tablespoons tahini (For drizzling.)
  • 1 lemon lemon juice (Squeeze over the bowl.)
  • 1/2 cup feta cheese (Optional topping.)
  • 1 avocado sliced avocado (Optional topping.)

Preparation

  1. Preheat your oven to 400°F (200°C).
  2. Drain and rinse the chickpeas thoroughly. Pat them dry with a clean towel.
  3. In a mixing bowl, toss the chickpeas with olive oil, paprika, garlic powder, and salt until evenly coated.

Cooking

  1. Spread the chickpeas in a single layer on a baking sheet and roast for about 25 minutes, flipping them halfway through, until they are crispy.
  2. While the chickpeas are roasting, chop your seasonal vegetables into bite-sized pieces.

Assembly

  1. Once the chickpeas are done roasting, remove them from the oven.
  2. In a serving bowl, layer the roasted chickpeas and mixed vegetables.
  3. Drizzle with tahini, lemon juice, and sprinkle with feta cheese and avocado if desired.

Store leftovers in an airtight container in the fridge for up to three days. Reheat in the oven to regain crispness. This recipe is already vegan, but feel free to customize toppings and sauces.

Dinner, Main Course
Healthy, Vegan, Vegetarian
Healthy Dinner, Meal Prep, Roasted Chickpea Bowl, Vegetarian Recipe, Veggie Bowl

Quick Flatbread Pizza

Delicious homemade quick flatbread pizza topped with fresh ingredients.

There’s something so comforting about pizza, isn’t there? Whether it’s a busy weeknight or a cozy weekend, a delicious slice always hits the spot. Quick Flatbread Pizza takes all the joy of this favorite dish and makes it easy to whip up in no time. This simple recipe is not only fast but also incredibly tasty, making it a crowd-pleaser for families and friends alike. Imagine crispy, warm flatbread topped with fresh ingredients, bubbling cheese, and your favorite flavors coming together in a matter of minutes. You won’t just be making dinner, you’ll be creating smiles all around the table. So grab your ingredients and let’s get started on your new go-to pizza night.

Quick Flatbread Pizza

How to prepare Quick Flatbread Pizza

To make your Quick Flatbread Pizza, gather the following ingredients:

  • Flatbread or naan
  • Olive oil
  • Tomato sauce or pesto
  • Shredded mozzarella cheese
  • Toppings of your choice (vegetables, meats, herbs)
  1. Preheat your oven to 400°F (200°C).
  2. Lay the flatbread on a baking sheet.
  3. Brush the flatbread with olive oil for added flavor.
  4. Spread tomato sauce or pesto evenly over the flatbread.
  5. Sprinkle generously with shredded mozzarella cheese.
  6. Add your favorite toppings on top of the cheese.
  7. Bake in the oven for about 10-12 minutes, or until the cheese is bubbly and golden brown.
  8. Remove from the oven, let it cool for a minute, then slice, and serve warm.

{image_2}

Quick Flatbread Pizza

Why You’ll Love Quick Flatbread Pizza

You will love Quick Flatbread Pizza for its versatility and simplicity. With just a few ingredients, you can create a delicious meal that fits everyone’s taste. It’s perfect for using up leftovers or whatever you have in your fridge. Plus, it cooks quickly, making it a fantastic choice for busy evenings. The crispy flatbread base provides a delightful crunch that pairs wonderfully with any topping. Kids will love it, and it’s easy to make enough for everyone!

Tips for success

  • Use a variety of cheeses for extra flavor, like cheddar or goat cheese.
  • For a crispier base, bake the flatbread for a couple of minutes before adding toppings.
  • Experiment with different sauces, including barbecue sauce or creamy Alfredo.
  • Fresh herbs like basil or oregano can really elevate the flavors.

{image_1}

Serving Suggestions

Serve your Quick Flatbread Pizza with a fresh salad or some crunchy veggies on the side. You can also pair it with a dipping sauce, such as ranch or marinara, for extra fun. For a complete meal, consider serving it with garlic bread or a light soup.

FAQs

1. Can I use store-bought flatbread?

Yes, store-bought flatbread or naan works perfectly for this recipe.

2. How long can I store leftover pizza?

Leftover pizza can be stored in an airtight container in the fridge for up to three days. Simply reheat in the oven for the best results.

3. What toppings work best?

You can use any toppings you like, such as pepperoni, bell peppers, olives, or even pineapple. It’s all about your personal preference!

Quick Flatbread Pizza

A simple and delicious Quick Flatbread Pizza recipe that makes it easy to prepare a crowd-pleasing meal in minutes.

Base Ingredients

  • 4 pieces Flatbread or naan (Use store-bought or homemade flatbread.)
  • 2 tablespoons Olive oil (For brushing the flatbread.)

Toppings

  • 1 cup Tomato sauce or pesto (Spread evenly over the flatbread.)
  • 1 cup Shredded mozzarella cheese (Can add other cheeses for extra flavor.)
  • as desired Toppings of your choice (vegetables, meats, herbs) (Use any toppings you like.)

Preparation

  1. Preheat your oven to 400°F (200°C).
  2. Lay the flatbread on a baking sheet.
  3. Brush the flatbread with olive oil for added flavor.
  4. Spread tomato sauce or pesto evenly over the flatbread.
  5. Sprinkle generously with shredded mozzarella cheese.
  6. Add your favorite toppings on top of the cheese.

Baking

  1. Bake in the oven for about 10-12 minutes, or until the cheese is bubbly and golden brown.
  2. Remove from the oven, let it cool for a minute, then slice, and serve warm.

For a crispier base, bake the flatbread for a couple of minutes before adding toppings. Experiment with different sauces, like barbecue or creamy Alfredo, and use fresh herbs like basil or oregano to elevate the flavors. Serve with a fresh salad or dipping sauces like ranch or marinara.

Main Course, Snack
American, Italian
Easy Dinner, Family Meal, Flatbread Pizza, Healthy Pizza, Quick Pizza