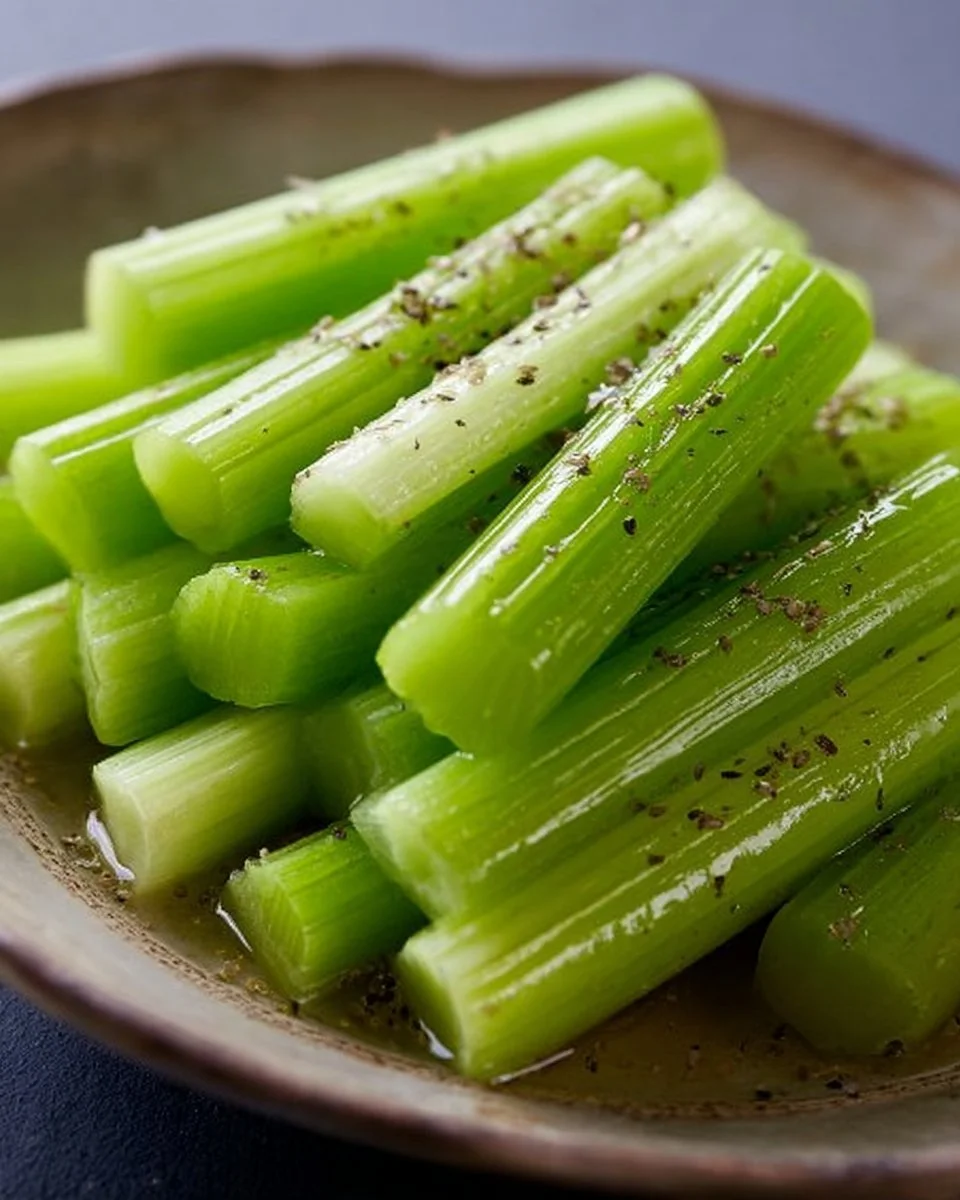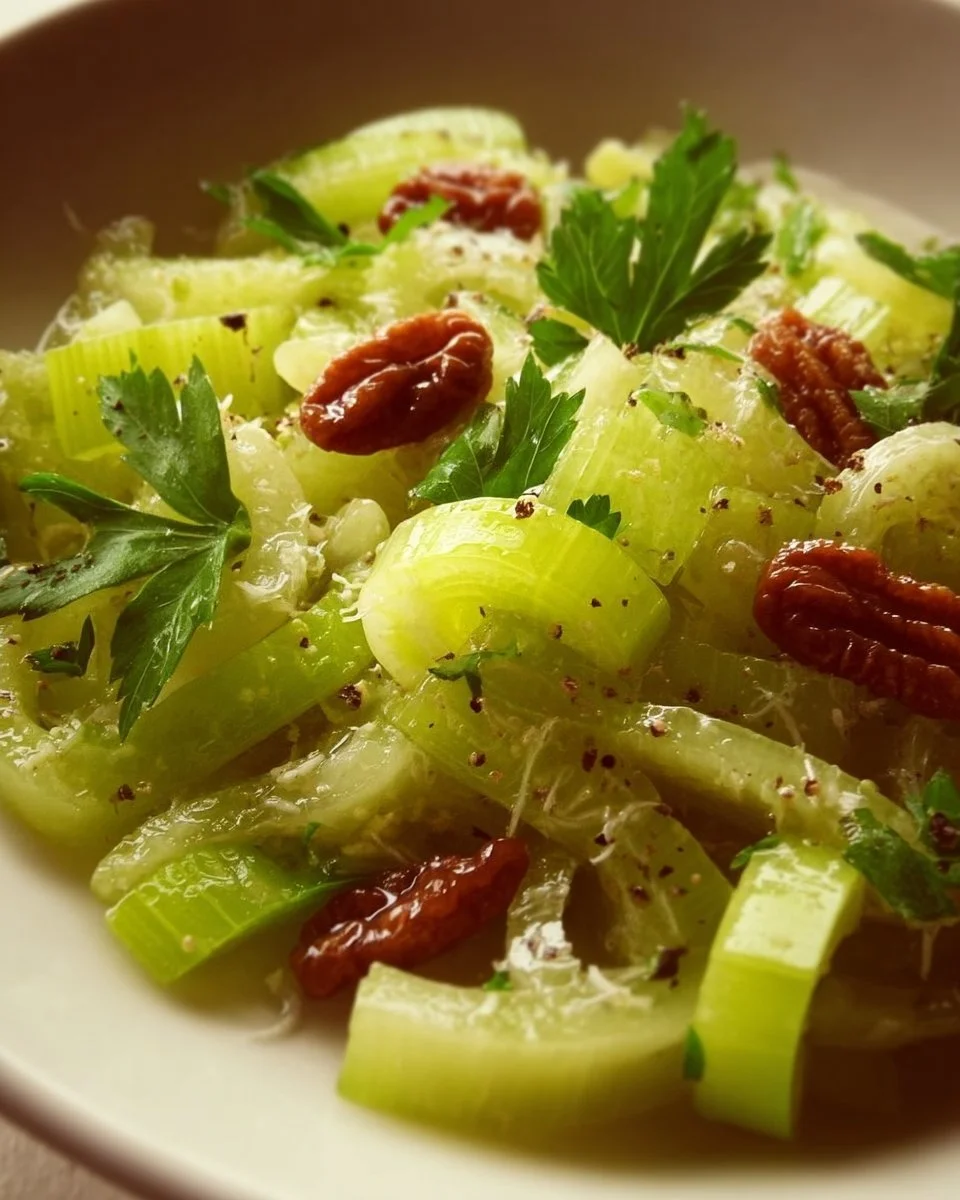
Simple Celery Salad recipe

Simple Celery Salad with fresh ingredients and dressing

When you think of salads, you might picture a bowl full of greens and veggies, but let’s take a moment to appreciate the crisp and refreshing taste of celery salad. This dish brings together the crunchy texture of celery with flavorful ingredients, making it a perfect side dish for any meal. It’s not just healthy, but also incredibly tasty and easy to whip up. Whether you’re hosting a gathering or just craving something light and fresh, this celery salad will surely impress your family and friends.

This featured recipe for celery salad is a crowd-pleaser that combines the crunch of celery with zesty dressing, making it a delightful addition to any table. The combination of flavors enchants your taste buds while providing a satisfying crunch with every bite. Plus, it’s a breeze to prepare, so even the busiest cook can get it done in no time! Get ready to toss together a salad that’s sure to win hearts and tummies alike.

How to prepare Celery Salad

To make this delicious celery salad, you’ll need the following ingredients:

Ingredients:

  • 4 cups of fresh celery, chopped
  • 1 cup of diced apples
  • ½ cup of walnuts, chopped
  • ½ cup of raisins
  • ½ cup of plain yogurt or mayonnaise
  • 1 tablespoon of lemon juice
  • Salt and pepper to taste

Now, let’s dive into the directions:

  1. In a large bowl, combine the chopped celery, diced apples, walnuts, and raisins.
  2. In a separate bowl, mix together the yogurt (or mayonnaise), lemon juice, salt, and pepper.
  3. Pour the dressing over the celery mixture and toss until everything is well coated.
  4. Chill in the refrigerator for at least 30 minutes before serving.

Celery Salad

Why You’ll Love Celery Salad

This salad is not just about good taste, it’s also packed with nutrients. Celery is low in calories and high in fiber, making it a guilt-free option. Plus, the apples add a touch of sweetness, while the walnuts give a satisfying crunch that you won’t be able to resist. It’s an excellent dish for any season, and it pairs well with grilled chicken or fish. It’s also great for picnics and potlucks, as it holds up well and tastes even better when chilled.

Tips for success

  • Choose crisp and fresh celery for the best crunch.
  • Feel free to customize the salad by adding other ingredients like carrots, cranberries, or even a sprinkle of feta cheese for a unique twist.
  • If using mayonnaise, consider a lighter version for a healthier option.

Celery Salad

Serving Suggestions

Celery salad can shine as a side dish alongside grilled meats, sandwiches, or wraps. It also works beautifully as a light lunch with some crusty bread. For an appetizer, serve it in small cups or lettuce wraps for a fun presentation.

FAQs

1. Can I make celery salad ahead of time?

Yes, you can prepare the salad a day in advance. Just keep it covered in the refrigerator and enjoy it chilled!

2. Is celery salad gluten-free?

Absolutely! All the ingredients in this salad are gluten-free, making it suitable for those with gluten sensitivity.

3. How long will the salad last in the fridge?

If stored in an airtight container, celery salad will stay fresh for about 3 days. Just give it a good stir before enjoying it again!

With all these tips and ideas, it’s time to bring out your chopping board and create this delightful celery salad yourself. Happy cooking!

Celery Salad

A crisp and refreshing celery salad with a zesty dressing, perfect as a side dish or light lunch.

Salad Ingredients

  • 4 cups fresh celery, chopped (Choose crisp and fresh celery for the best crunch.)
  • 1 cup diced apples (Apples add sweetness.)
  • ½ cup walnuts, chopped (Gives a satisfying crunch.)
  • ½ cup raisins (Adds sweetness.)

Dressing

  • ½ cup plain yogurt or mayonnaise (Consider a lighter version for a healthier option.)
  • 1 tablespoon lemon juice (Adds zest.)
  • to taste Salt and pepper (Adjust according to preference.)

Preparation

  1. In a large bowl, combine the chopped celery, diced apples, walnuts, and raisins.
  2. In a separate bowl, mix together the yogurt (or mayonnaise), lemon juice, salt, and pepper.
  3. Pour the dressing over the celery mixture and toss until everything is well coated.
  4. Chill in the refrigerator for at least 30 minutes before serving.

This salad pairs well with grilled chicken or fish. It’s great for picnics and potlucks as it holds up well and tastes better when chilled. Feel free to customize with other ingredients like carrots or cranberries.

Salad, Side Dish
American
Celery Salad, Healthy Salad, Quick Salad, Refreshing Salad, Vegetable Salad

Probiotic Ginger Ale

Glass of probiotic ginger ale with fresh ginger and bubbles

If you’re looking for a fun and fizzy drink that also brings health benefits, look no further than Probiotic Ginger Ale. This homemade ginger ale is not only refreshing but also packed with probiotics that support your gut health. Imagine sipping on a bubbly drink that’s bursting with spicy ginger flavor, while also treating your body well. Whether you’re hosting a gathering or simply treating yourself on a sunny day, this probiotic drink will win everyone over with its unique taste and health perks. So let’s roll up our sleeves and get ready to make a crowd-pleaser that’s sure to leave you smiling!

How to prepare Probiotic Ginger Ale

Making Probiotic Ginger Ale at home is easy and fun. With just a few simple ingredients, you can enjoy a delicious, bubbly drink right in your kitchen. Here’s how you can make it:

  1. Gather your ingredients: fresh ginger, water, sugar, lemon juice, and your choice of probiotic starter (like ginger bug or kefir).
  2. In a pot, bring water and sugar to a boil, stirring until the sugar dissolves.
  3. Remove from heat and add grated ginger and lemon juice.
  4. Let the mixture cool down to room temperature.
  5. Once cooled, add your probiotic starter and stir well.
  6. Transfer it to a clean glass jar, leaving some space at the top.
  7. Cover the jar loosely with a cloth or lid and leave it at room temperature for 2-5 days.
  8. Taste and see if it’s fizzy enough; if so, strain it and transfer to bottles.
  9. Store in the refrigerator to chill, and enjoy your homemade probiotic ginger ale!

Probiotic Ginger Ale

Why You’ll Love Probiotic Ginger Ale

You’ll love Probiotic Ginger Ale not just because it’s fizzy and fun, but also for all the health benefits it brings. The ginger gives the drink a spicy kick, while the probiotics promote a healthy gut. It’s a great alternative to commercial sodas and is super easy to make. Plus, you can adjust the sweetness, tartness, and spice to your liking. It’s a perfect drink for any occasion, and making it together with friends or family adds a special touch. Get ready to impress everyone with your DIY skills!

Tips for success

  1. Use Fresh Ingredients: Fresh ginger and organic lemons will give your ginger ale the best flavor.
  2. Fermentation Time: Keep an eye on the fermentation process, as the taste can change quickly. Taste it every day to see if it fits your preference.
  3. Bottling: When bottling, make sure to leave some space at the top of the bottle for carbonation.
  4. Soda Bottle: You can use a plastic soda bottle to store, as you can feel the pressure build up.

Probiotic Ginger Ale

Serving Suggestions

Enjoy your homemade Probiotic Ginger Ale on its own, or mix it with your favorite spirits for a refreshing cocktail. You can also serve it over ice with fresh mint or lemon slices for an extra zing. For a fun twist, try adding a splash of fruit juice, like cranberry or pineapple, before serving.

FAQs

Can I use dried ginger instead of fresh ginger?

Using fresh ginger will give the best flavor, but if you only have dried ginger, you can use it as a substitute; just use a smaller amount.

How long does Probiotic Ginger Ale last?

Once refrigerated, your homemade ginger ale should be consumed within a week for the best taste and freshness.

What if I don’t have a probiotic starter?

You can easily make a ginger bug at home with sugar and ginger, or you can use water kefir grains as an alternative.

Now that you know how to make delicious Probiotic Ginger Ale, it’s time to get started! This refreshing drink is begging to be made, and your taste buds will thank you for it. Happy brewing!

Probiotic Ginger Ale

A fun and fizzy homemade ginger ale packed with probiotics that support gut health, perfect for any occasion.

Main Ingredients

  • 2 cups water (To boil and dissolve the sugar.)
  • 1 cup sugar (Granulated sugar; can be adjusted to taste.)
  • 1 piece fresh ginger (Grated ginger for a spicy flavor.)
  • 1 tablespoon lemon juice (Freshly squeezed for tartness.)
  • 1/4 cup probiotic starter (Such as ginger bug or kefir.)

Preparation

  1. Gather all your ingredients: fresh ginger, water, sugar, lemon juice, and your probiotic starter.
  2. In a pot, bring water and sugar to a boil, stirring until the sugar dissolves.
  3. Remove from heat and add grated ginger and lemon juice.
  4. Let the mixture cool down to room temperature.
  5. Once cooled, add your probiotic starter and stir well.
  6. Transfer the mixture to a clean glass jar, leaving some space at the top.
  7. Cover the jar loosely with a cloth or lid and leave it at room temperature for 2-5 days.
  8. Taste and see if it’s fizzy enough; if so, strain it and transfer to bottles.
  9. Store in the refrigerator to chill, and enjoy your homemade probiotic ginger ale!

Use fresh ingredients for the best flavor. Keep an eye on the fermentation process and taste it daily to find your preferred level of fizziness. When bottling, leave space at the top for carbonation. You can use a plastic soda bottle to store, allowing you to feel the pressure build up.

Beverage, Drink
American, Healthy
Fermented Beverage, Gut Health, Healthy Drink, Homemade Soda, Probiotic Ginger Ale

Garlic Sourdough Focaccia

Homemade Garlic Sourdough Focaccia topped with fresh herbs and garlic

There’s something magical about freshly baked bread, and when it comes to comfort food, Garlic Sourdough Focaccia truly steals the spotlight. This soft, golden flatbread is infused with the rich aroma of garlic and a hint of herbs, making it an irresistible treat for any gathering. Whether served warm as an appetizer, enjoyed with a hearty meal, or simply dipped in olive oil, this focaccia is sure to impress your friends and family. Plus, it’s easy to make and requires just a few simple ingredients. So, let’s dive into how you can whip up this delightful bread that everyone will rave about.

How to prepare Garlic Sourdough Focaccia

To make this Garlic Sourdough Focaccia, gather your ingredients and get ready to embark on a baking adventure. It’s all about mixing, kneading, and letting your dough rise to achieve that perfect texture. Here’s how to do it:

  1. Ingredients:
  • 2 cups active sourdough starter
  • 3 cups all-purpose flour
  • 1 ½ teaspoons salt
  • 1 cup water (lukewarm)
  • 4 tablespoons olive oil
  • 6 cloves garlic (minced)
  • Fresh herbs (like rosemary or thyme)
  • Flaky sea salt (for topping)
  1. Directions:
  2. In a large bowl, combine the sourdough starter, flour, salt, and water. Mix until a rough dough forms.
  3. Add 2 tablespoons of olive oil and the minced garlic to the dough, mixing until well incorporated.
  4. Turn the dough out onto a floured surface and knead for about 5-7 minutes until it’s smooth and elastic.
  5. Place the dough in a greased bowl, cover it, and let it rise for 4-6 hours, or until doubled in size.
  6. Once risen, punch down the dough and spread it in a greased baking pan.
  7. Dimple the surface with your fingers, drizzle the remaining olive oil, and sprinkle with herbs and flaky sea salt.
  8. Allow it to rise again for 1-2 hours.
  9. Preheat the oven to 425°F (220°C) and bake the focaccia for 20-25 minutes or until golden.
  10. Let it cool slightly before slicing and enjoying.

Garlic Sourdough Focaccia

Why You’ll Love Garlic Sourdough Focaccia

This focaccia is not just about its delicious taste, it also embodies a wonderful variety of textures. The crust is crisp and golden, while the inside is light and soft, inviting you to take another slice. The garlic enhances the flavors, making it a delightful addition to any meal. It’s perfect for sharing at parties, family gatherings, or even a cozy night in. Plus, it’s a great way to use your sourdough starter, making every bite a testament to your baking skills.

Tips for success

  • Use an active sourdough starter: It’s crucial for achieving that airy and fluffy focaccia.
  • Don’t skip the rising times: Allowing the dough to rise properly is key to developing flavor and texture.
  • Experiment with toppings: Feel free to top your focaccia with cheeses, olives, or different herbs to suit your taste.

Garlic Sourdough Focaccia

Serving Suggestions

Serve your Garlic Sourdough Focaccia warm to really savor its amazing flavor. It pairs wonderfully with a side of marinara sauce for dipping, or simply drizzle it with extra olive oil and balsamic vinegar. It also makes a fantastic base for sandwiches or can be enjoyed alongside soups and salads.

FAQs

Can I make this focaccia without sourdough starter? Yes, you can substitute the sourdough with instant yeast, although the flavor and texture will differ slightly.

How do I store leftover focaccia? Store it in an airtight container at room temperature for up to three days. You can also freeze it for longer storage.

Can I add cheese or other toppings to the focaccia? Absolutely! Cheese, olives, sun-dried tomatoes, or even vegetables can add a delightful twist to your focaccia. Enjoy experimenting!

Now that you know how to make this Garlic Sourdough Focaccia, why not gather your ingredients and start baking? Your kitchen is about to smell heavenly!

Garlic Sourdough Focaccia

This soft, golden flatbread is infused with the rich aroma of garlic and a hint of herbs, making it an irresistible treat perfect for any gathering.

Dough Ingredients

  • 2 cups active sourdough starter (Make sure it’s active for best results.)
  • 3 cups all-purpose flour
  • 1.5 teaspoons salt
  • 1 cup water (lukewarm) (Should be warm to the touch.)
  • 4 tablespoons olive oil (Divided for the dough and topping.)
  • 6 cloves garlic (minced) (Can adjust to taste.)

Toppings

  • to taste Fresh herbs (like rosemary or thyme) (Choose your favorite herbs.)
  • to taste Flaky sea salt (for topping)

Preparation

  1. In a large bowl, combine the sourdough starter, flour, salt, and lukewarm water. Mix until a rough dough forms.
  2. Add 2 tablespoons of olive oil and the minced garlic to the dough, mixing until well incorporated.
  3. Turn the dough out onto a floured surface and knead for about 5-7 minutes until it’s smooth and elastic.
  4. Place the dough in a greased bowl, cover it, and let it rise for 4-6 hours, or until doubled in size.
  5. Once risen, punch down the dough and spread it in a greased baking pan.
  6. Dimple the surface with your fingers, drizzle the remaining olive oil, and sprinkle with herbs and flaky sea salt.

Baking

  1. Allow it to rise again for 1-2 hours.
  2. Preheat the oven to 425°F (220°C) and bake the focaccia for 20-25 minutes or until golden.
  3. Let it cool slightly before slicing and enjoying.

Use an active sourdough starter for the best texture. Don’t skip the rising times for optimal flavor. Experiment with various toppings like cheeses or olives for added flair.

Appetizer, Bread
Italian
Bread Recipe, Comfort Food, Easy Focaccia, Garlic Sourdough Focaccia, Sourdough Bread

Lemon Ginger Water

Glass of lemon ginger water with lemon slices and ginger root

Lemon ginger water is a wonderful drink that brightens up your day with its zesty combination of flavors. This drink has been adored by many for its refreshing qualities and health benefits. It’s not only a thirst-quencher, but it also offers a hint of spice from the ginger and a tangy kick from the lemon. With its crisp taste and healing properties, this drink is great for any occasion. Whether you’re looking for a morning boost or something delightful to sip during a summer gathering, lemon ginger water is sure to win over your friends and family. Plus, it’s super simple to make, so let’s dive into the recipe and start exploring this invigorating drink!

How to prepare Lemon Ginger Water

To make the perfect lemon ginger water, you’ll need the following ingredients:

Ingredients

  • 1 lemon
  • 1-inch piece of fresh ginger
  • 4 cups of water
  • Honey (optional)

Here’s how you can make it in just a few steps:

  1. Start by heating the water in a pot, but don’t let it boil.
  2. While the water is warming, squeeze the juice from the lemon into a cup.
  3. Peel the ginger and slice it thinly.
  4. Once the water is warm, add the lemon juice and ginger slices.
  5. Let the mixture steep for about 10 minutes.
  6. If you like it sweet, stir in some honey to taste.
  7. Pour into a glass, and enjoy your refreshing lemon ginger water!

Lemon Ginger Water

Why You’ll Love Lemon Ginger Water

You’ll find many reasons to love lemon ginger water! First off, it’s incredibly refreshing, especially on a hot day. The bright and zesty flavors awaken your taste buds and leave you feeling revitalized. Besides, ginger adds a mild spiciness that makes every sip a little exciting. This drink not only hydrates, but it also promotes digestion and boosts your immune system. It’s truly a win-win!

Tips for success

  1. Use fresh ingredients: Fresh lemons and ginger give the best flavor, so try to avoid bottled lemon juice and dried ginger.
  2. Adjust to your taste: Feel free to use more or less ginger and lemon, according to what you prefer.
  3. Make it ahead: You can prepare a larger batch and store it in the fridge for a couple of days, but drinking it fresh is always best.

Serving Suggestions

Lemon Ginger Water

You can serve lemon ginger water in a tall glass with ice for a cool summer drink. Garnish with lemon slices or a sprig of mint for an extra touch. It also pairs perfectly with breakfast or as a refreshing afternoon drink.

FAQs

Can I drink lemon ginger water every day?

Yes, drinking lemon ginger water every day can be beneficial. Just listen to your body and adjust if you feel any discomfort.

What are the health benefits of lemon ginger water?

Lemon ginger water is known for aiding digestion, boosting the immune system, and providing antioxidants that help detoxify the body.

Can I add other fruits or herbs?

Absolutely! You can experiment with adding mint, cucumber slices, or berries to give your drink different flavors while keeping it refreshing.

Now that you know how easy it is to whip up this delightful drink, grab your ingredients and start making lemon ginger water today! Cheers to delicious hydration!

Lemon Ginger Water

A refreshing drink that combines the tangy taste of lemon with the spicy kick of ginger, perfect for hydration and health benefits.

Main ingredients

  • 1 whole lemon (Fresh lemon is preferred for best flavor.)
  • 1 inch piece of fresh ginger (Use fresh ginger for optimal flavor.)
  • 4 cups water (Heat water but do not boil.)
  • to taste optional Honey (Optional for sweetness.)

Preparation

  1. Start by heating the water in a pot, but don’t let it boil.
  2. While the water is warming, squeeze the juice from the lemon into a cup.
  3. Peel the ginger and slice it thinly.
  4. Once the water is warm, add the lemon juice and ginger slices.
  5. Let the mixture steep for about 10 minutes.
  6. If you like it sweet, stir in some honey to taste.
  7. Pour into a glass and enjoy your refreshing lemon ginger water!

Use fresh ingredients for the best flavor. Adjust ginger and lemon amounts according to taste. Make a larger batch and store it in the fridge, but fresh is always best.

Drink, Refreshment
American, Healthy
Detox Drink, Healthy Drink, Hydration, Lemon Ginger Water, Refreshing Drink

Fermented Ginger Carrot Slaw

Bowl of fermented ginger carrot slaw with vibrant colors and fresh ingredients.

Fermented Ginger Carrot Slaw is one of those delightful dishes that never fails to impress. With its bright colors and zesty flavors, it’s not just a side dish, but a downright experience. The crunch of the carrots combined with the kick of ginger creates a refreshing, tangy taste that compliments any meal. Plus, it brings a nutritious twist to your plate. This slaw is popular among friends and family gatherings, making it a perfect crowd-pleaser. If you’re looking for something wholesome yet exciting to serve, this is the recipe you need to try—trust me, you won’t be able to get enough!

How to prepare Fermented Ginger Carrot Slaw

To make this vibrant slaw, gather your ingredients which include fresh carrots, ginger, salt, and a few other flavorful additions to bring everything together. Start by grating the carrots and ginger, then mix them with salt and let them sit. This process allows the veggies to release their natural juices, creating the perfect brine for fermentation. After that, pack everything into a jar and let it sit for several days. The result is a tangy, crispy slaw that tastes fantastic right out of the jar or as a side dish!

Fermented Ginger Carrot Slaw

Why You’ll Love Fermented Ginger Carrot Slaw

There are many reasons to adore this recipe. First, it’s simple to prepare, requiring minimal cooking and just a bit of patience while it ferments. Second, the flavors are absolutely incredible. The crunchy carrots paired with spicy ginger make for a perfect match, bringing a little zing to your taste buds. Additionally, this slaw is packed with probiotics thanks to the fermentation process, making it great for gut health. It’s not just a salad, it’s a healthy, tasty addition to your meals!

Tips for success

  1. Use Fresh Ingredients: Always opt for fresh, organic carrots and ginger for the best flavor and nutrition.
  2. Mind the Salt: Don’t skimp on the salt! It’s essential for the fermentation process.
  3. Keep It Clean: Make sure all your utensils and jars are clean to prevent unwanted bacteria during fermentation.
  4. Taste Test: After a few days, taste your slaw. If you prefer a stronger flavor, let it ferment a bit longer.

Fermented Ginger Carrot Slaw

Serving Suggestions

Fermented Ginger Carrot Slaw is incredibly versatile. Serve it alongside grilled meats for a refreshing crunch, or add it to sandwiches and wraps for an extra layer of flavor. You can also mix it into rice bowls or tacos. The possibilities are endless, and it’s a fantastic way to brighten up your meals!

FAQs

How long does it take to ferment the slaw?

Typically, it takes about 5 to 7 days at room temperature for your slaw to ferment properly.

Can I use other vegetables in the slaw?

Absolutely! Feel free to mix in other crunchy veggies like radishes or cabbage for added flavor and texture.

How long can I store fermented ginger carrot slaw?

Once fermented, you can store your slaw in the fridge for about 4 to 6 weeks. The flavor may continue to develop, making it even tastier over time!

So why wait? Dive in and start making your own Fermented Ginger Carrot Slaw today! You’ll love the refreshing taste and the health benefits it brings to your table. Happy cooking!

Fermented Ginger Carrot Slaw

A vibrant and tangy slaw made with fresh carrots, ginger, and probiotic benefits from fermentation, perfect for any meal.

Main Ingredients

  • 4 cups shredded fresh carrots (Use organic carrots for best flavor.)
  • 1 tbsp grated fresh ginger (Adjust the amount to taste.)
  • 1 tbsp salt (Essential for fermentation.)

Preparation

  1. Grate the fresh carrots and ginger.
  2. In a large bowl, mix the grated carrots, ginger, and salt thoroughly.
  3. Let the mixture sit for about 15 minutes to release natural juices.
  4. Pack the mixture tightly into a clean jar, ensuring the liquid covers the solids.
  5. Seal the jar and let it sit at room temperature for 5 to 7 days to ferment.

Serving

  1. After fermentation, taste the slaw. If preferred, let it ferment longer for a stronger flavor.
  2. Store in the fridge for 4 to 6 weeks, and serve as a refreshing side dish or topping.

Use fresh and organic vegetables for the best taste, and keep all utensils clean to prevent unwanted bacteria during fermentation. Feel free to experiment by adding other crunchy vegetables like radishes or cabbage!

Salad, Side Dish
Healthy, Vegetarian
Fermented Slaw, Ginger Carrot Slaw, Healthy Side Dish, Probiotics, Simple Recipe

Sourdough Discard Scones

Delicious sourdough discard scones on a wooden board

If you love baking, you likely have some sourdough discard sitting around. Instead of tossing it away, why not turn it into something delicious? Sourdough Discard Scones are light, flaky, and simply delightful. They’re not just tasty, but they’re also a great way to use up that extra sourdough starter. Picture golden-brown scones with a hint of tanginess and buttery goodness, perfect with a cup of tea or coffee. They’re sure to impress your family and friends, and you’ll find yourself baking these scones again and again. Let’s dive into this simple recipe that will soon become a favorite in your kitchen!

How to prepare Sourdough Discard Scones

To make these scrumptious scones, you will need the following ingredients:

  • 1 cup sourdough discard
  • 2 cups all-purpose flour
  • 1/3 cup sugar
  • 1 tablespoon baking powder
  • 1/2 teaspoon baking soda
  • 1/2 teaspoon salt
  • 1/2 cup cold butter, cubed
  • 1/2 cup milk
  • 1 teaspoon vanilla extract
  • Optional: chocolate chips, dried fruits, or nuts
  1. Preheat your oven to 400°F (200°C).
  2. In a large bowl, mix the flour, sugar, baking powder, baking soda, and salt.
  3. Add the cold, cubed butter to the dry ingredients. Use a pastry cutter or your fingers to mix until the mixture resembles coarse crumbs.
  4. Stir in the sourdough discard, milk, and vanilla extract until just combined. If you want to add chocolate chips or dried fruits, now is the time!
  5. Turn the dough out onto a floured surface and knead gently until it comes together, being careful not to overwork it.
  6. Pat the dough into a circle about 1 inch thick. Cut into wedges or use a biscuit cutter to make rounds.
  7. Place the scones on a baking sheet lined with parchment paper and bake for 15-20 minutes, until they are golden brown.
  8. Allow to cool slightly before serving.

Sourdough Discard Scones

Why You’ll Love Sourdough Discard Scones

These scones are a fantastic way to use up your sourdough discard, and they come together quickly. The scones are light and fluffy, with a delightful texture that everyone loves. The subtle tang from the sourdough adds depth to the flavor, making them unique from regular scones. You can easily customize them with different add-ins like chocolate chips or nuts, which makes them even more appealing. It’s hard to resist having one (or two) fresh from the oven!

Tips for success

  1. Cold butter is key: Make sure your butter is very cold. This helps the scones rise and become flaky.
  2. Don’t overmix: Mix until just combined. Overworking the dough can lead to dense scones.
  3. Customize it: Feel free to play around with your favorite mix-ins to make these scones truly your own!

Sourdough Discard Scones

Serving Suggestions

Serve these scones warm with butter, jam, or clotted cream. Pair them with a hot cup of tea or coffee for the perfect afternoon snack. They’re great for breakfast or as a delicious treat any time of day!

FAQs

Can I freeze Sourdough Discard Scones?

Yes, you can freeze the baked scones. Just let them cool completely and store in an airtight container. They will last for about 2 months in the freezer.

Can I use whole wheat flour instead?

Absolutely! You can substitute some or all of the all-purpose flour with whole wheat flour, but the texture may be denser.

How can I make these scones sweeter?

Feel free to add more sugar to the dough or top the scones with a light glaze made from powdered sugar and milk for extra sweetness.

Get ready to impress your friends and family with these delightful Sourdough Discard Scones. You’ll find that baking them is as enjoyable as eating them!

Sourdough Discard Scones

Deliciously light and flaky scones made with sourdough discard, perfect for pairing with tea or coffee.

Dry Ingredients

  • 2 cups all-purpose flour
  • 1/3 cup sugar
  • 1 tablespoon baking powder
  • 1/2 teaspoon baking soda
  • 1/2 teaspoon salt

Wet Ingredients

  • 1 cup sourdough discard
  • 1/2 cup milk
  • 1 teaspoon vanilla extract

Fat

  • 1/2 cup cold butter, cubed (Ensure butter is very cold for best results.)

Optional Add-Ins

  • chocolate chips, dried fruits, or nuts (Optional for customization.)

Preparation

  1. Preheat your oven to 400°F (200°C).
  2. In a large bowl, mix the flour, sugar, baking powder, baking soda, and salt.
  3. Add the cold, cubed butter to the dry ingredients. Use a pastry cutter or your fingers to mix until the mixture resembles coarse crumbs.
  4. Stir in the sourdough discard, milk, and vanilla extract until just combined. If you want to add chocolate chips or dried fruits, now is the time!
  5. Turn the dough out onto a floured surface and knead gently until it comes together, being careful not to overwork it.
  6. Pat the dough into a circle about 1 inch thick. Cut into wedges or use a biscuit cutter to make rounds.

Baking

  1. Place the scones on a baking sheet lined with parchment paper and bake for 15-20 minutes, until they are golden brown.
  2. Allow to cool slightly before serving.

Serve these scones warm with butter, jam, or clotted cream. They are great for breakfast or as a delicious treat any time of day. Tips: Use cold butter for flakiness, don’t overmix, and feel free to customize with your favorite mix-ins.

Breakfast, Dessert, Snack
American
Baking, Easy Recipes, Scones, sourdough discard, Use Up Discard

Sourdough English Muffins

Freshly baked sourdough English muffins on a wooden surface.

There’s something special about homemade bread, and when it comes to breakfast, Sourdough English Muffins take the cake, or should I say muffin? These delightful treats are soft inside, crusty outside, and filled with nooks and crannies perfect for holding your favorite spreads and toppings. The slightly tangy flavor from the sourdough adds a fascinating twist, making them a crowd-pleaser for family and friends. Whether you enjoy them with butter and jam or alongside your morning eggs, these muffins are sure to brighten your day. So, let’s get ready to whip up a batch that will have everyone asking for seconds!

How to prepare Sourdough English Muffins

Making Sourdough English Muffins is easier than you think. Here’s how:

  1. Ingredients:
  • 1 cup sourdough starter
  • 1 cup all-purpose flour
  • 1 cup whole wheat flour
  • 1 teaspoon salt
  • 1 tablespoon honey
  • 1 cup water
  • Cornmeal for dusting
  1. Directions:
  2. In a large mixing bowl, combine the sourdough starter, honey, and water. Mix until smooth.
  3. Gradually add the flours and salt. Stir until a soft dough forms.
  4. Knead the dough on a floured surface for about 5-7 minutes until it’s smooth.
  5. Place the dough in a lightly greased bowl, cover it, and let it rise in a warm place for about 1-2 hours, or until doubled in size.
  6. Once risen, punch down the dough and divide it into 8 pieces. Shape each piece into a ball and flatten slightly.
  7. Dust both sides with cornmeal and place on a parchment-lined baking sheet. Cover and let rise for another hour.
  8. Heat a skillet or griddle over medium heat. Cook muffins for about 7-10 minutes on each side, or until golden brown and cooked through.
  9. Cool on a wire rack before serving.

Sourdough English Muffins

Why You’ll Love Sourdough English Muffins

The wonderful thing about Sourdough English Muffins is their versatility and flavor. You can enjoy them toasted for breakfast, serve them with brunch, or even turn them into mini pizzas. The chewy texture and hint of sour make each bite crave-worthy. Plus, you get to experience the joy of baking with sourdough, which adds a fun challenge and a delicious result. Who wouldn’t love that?

Tips for success

  • Make sure your sourdough starter is active and bubbly; this ensures the muffins rise well.
  • Don’t skip the cornmeal; it adds a delightful crunch and prevents sticking.
  • Adjust the cooking time based on your heat level; everyone’s stove is a little different, and you want a nice golden finish without burning.

Sourdough English Muffins

Serving Suggestions

Sourdough English Muffins are excellent served warm with butter and your choice of jam or honey. You can also pile on smashed avocado, a fried egg, or some bacon for a hearty brunch meal. Don’t forget to experiment with different toppings like cream cheese or peanut butter, depending on your mood!

FAQs

Q: Can I use all-purpose flour only?

A: Yes, you can use all-purpose flour if you prefer, but using a mix with whole wheat adds more flavor and nutrition.

Q: How do I store leftover muffins?

A: Keep them in an airtight container at room temperature for a few days, or freeze them for longer storage. Just toast them before enjoying!

Q: Can I make these muffins without a sourdough starter?

A: While the sourdough starter is key for flavor and texture, you can make English muffins using yeast as an alternative if you don’t have a starter. Just follow a traditional English muffin recipe.

With these tips and tricks, you’re all set to enjoy your baking adventure with Sourdough English Muffins. Happy baking!

Sourdough English Muffins

Delightfully soft and crusty, these Sourdough English Muffins are perfect for any topping and bring a tangy flavor that makes breakfast a treat.

Main ingredients

  • 1 cup sourdough starter (Active and bubbly for best results.)
  • 1 cup all-purpose flour
  • 1 cup whole wheat flour (Adds flavor and nutrition.)
  • 1 teaspoon salt
  • 1 tablespoon honey
  • 1 cup water
  • Cornmeal for dusting (Adds crunch and prevents sticking.)

Preparation

  1. In a large mixing bowl, combine the sourdough starter, honey, and water. Mix until smooth.
  2. Gradually add the flours and salt. Stir until a soft dough forms.
  3. Knead the dough on a floured surface for about 5-7 minutes until it’s smooth.
  4. Place the dough in a lightly greased bowl, cover it, and let it rise in a warm place for about 1-2 hours, or until doubled in size.
  5. Once risen, punch down the dough and divide it into 8 pieces. Shape each piece into a ball and flatten slightly.
  6. Dust both sides with cornmeal and place on a parchment-lined baking sheet. Cover and let rise for another hour.

Cooking

  1. Heat a skillet or griddle over medium heat. Cook muffins for about 7-10 minutes on each side, or until golden brown and cooked through.
  2. Cool on a wire rack before serving.

Serve warm with butter and your choice of jam, honey, or toppings like avocado or eggs. For storage, keep in an airtight container for a few days or freeze them for longer storage.

Breakfast, Brunch
American
Baking, Breakfast Muffins, Homemade Muffins, Sourdough English Muffins, Sourdough Recipes

Easy Fermented Celery Sticks

Easy fermented celery sticks in a jar with spices and herbs

Fermented foods are a fantastic way to boost your gut health while enjoying delicious flavors. If you’re looking for a simple recipe that packs a punch, you’ll love these Easy Fermented Celery Sticks. This recipe is not just nutritious; it’s also a crowd-pleaser that combines the refreshing crunch of celery with a tangy twist. Their vibrant taste and satisfying crunch make them a perfect snack or a great side dish for meals. Trust me, once you try making these, you’ll wonder why you didn’t start earlier!

How to prepare Easy Fermented Celery Sticks

Making fermented celery sticks is straightforward and fun. Start by gathering your ingredients. You’ll need fresh celery, water, salt, and optional spices like garlic or dill for extra flavor.

  1. First, wash and cut the celery into sticks.
  2. Next, prepare a brine by mixing water and salt until the salt dissolves.
  3. Place the celery sticks in a clean jar, packing them tightly.
  4. Pour the brine over the celery, ensuring they are fully submerged.
  5. If you’re using spices, add them in before sealing the jar.
  6. Cover the jar with a lid or a cloth and let it sit at room temperature for about 5-7 days.
  7. Taste them after a few days to see if they are to your liking.
  8. Once fermented, store them in the fridge to enjoy later!

Easy Fermented Celery Sticks

Why You’ll Love Easy Fermented Celery Sticks

These fermented celery sticks are not only easy to make but also incredibly tasty. The lively crunch and zesty flavor elevate any snack time. Plus, you can customize them with various spices to fit your taste. They are perfect as a quick snack, delicious on a cheese platter, or even as a crunchy addition to salads. With benefits for your digestive health and an addictive taste, these little snacks will quickly become a staple in your kitchen!

Tips for success

  • Ensure your celery is fresh, as this will enhance the final flavor and texture.
  • Use filtered water if possible to promote better fermentation.
  • Don’t hesitate to experiment with different spices and herbs until you find your perfect combination.

Easy Fermented Celery Sticks

Serving Suggestions

Serve your Easy Fermented Celery Sticks as a healthy appetizer or alongside your favorite dips like hummus or ranch dressing. They can also be a delightful addition to sandwiches or salads, adding crunch and flavor. Enjoy them alone for a quick snack or share them with friends at your next gathering!

FAQs

How long do fermented celery sticks last?

Fermented celery sticks can last several weeks in the fridge as long as they are fully submerged in the brine.

Can I use other vegetables?

Absolutely! You can ferment a variety of vegetables like carrots, cucumbers, or radishes using the same method.

Is it necessary to ferment for a whole week?

Not necessarily, you can ferment for a shorter period, but letting them sit longer gives you a stronger flavor. Taste them every few days to find what you like best!

Easy Fermented Celery Sticks

A simple and delicious recipe to make tangy and crunchy fermented celery sticks, perfect as a snack or side dish.

Main Ingredients

  • 1 bunch Fresh celery (Ensure it’s fresh for the best flavor and texture.)
  • 4 cups Filtered water (Use filtered water for better fermentation.)
  • 2 tablespoons Salt (Non-iodized salt is preferred.)

Optional Spices

  • 2 cloves Garlic (Crushed or whole for added flavor.)
  • 1 tablespoon Dill (For a herby twist.)

Preparation

  1. Wash and cut the celery into sticks.
  2. Prepare a brine by mixing water and salt until the salt dissolves.
  3. Place the celery sticks in a clean jar, packing them tightly.
  4. Pour the brine over the celery, ensuring they are fully submerged.
  5. If using spices, add them in before sealing the jar.
  6. Cover the jar with a lid or a cloth and let it sit at room temperature for about 5-7 days.
  7. Taste them after a few days to see if they are to your liking.
  8. Once fermented, store them in the fridge to enjoy later.

Experiment with different spices and herbs until you find your perfect combination. Fermented celery sticks can last several weeks in the fridge if fully submerged in brine.

Appetizer, Snack
American
Celery Sticks, Easy Recipes, Fermented Foods, Gut Health, Healthy Snacks

Cottage Cheese Quinoa Bread

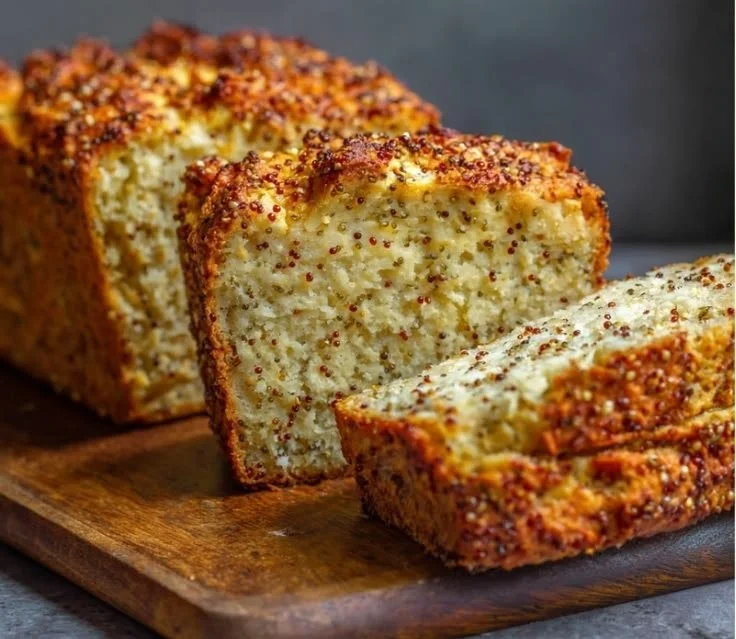
Freshly baked Cottage Cheese Quinoa Bread with a golden crust

Cottage Cheese Quinoa Bread is a unique and delicious treat that blends wholesome ingredients into a soft and fluffy loaf. Made with protein-rich quinoa and creamy cottage cheese, this bread is not just tasty but also a healthy option for breakfast, lunch, or any snack time. It’s a crowd-pleaser thanks to its subtle flavors and tender texture, perfect for sandwiches or simply toasted with a bit of butter. Once you try it, you’ll understand why everyone is raving about this delightful recipe. Let’s jump in and get baking!

Cottage Cheese Quinoa Bread

{image_2}

Why You’ll Love Cottage Cheese Quinoa Bread

This Cottage Cheese Quinoa Bread is packed with nutrients, making it a great choice for health-conscious eaters. The combination of quinoa and cottage cheese adds a delightful protein boost, helping to keep you full longer. The bread has a slightly nutty flavor thanks to the quinoa, and the cottage cheese contributes a moistness that keeps it from being dry. It’s perfect for those who want a bread that’s not only tasty but also good for you. Plus, it’s simple enough for bakers of all skill levels!

Cottage Cheese Quinoa Bread

Tips for success

To ensure your Cottage Cheese Quinoa Bread turns out perfectly, here are a few tips:

  • Measure your ingredients accurately to achieve the right texture.
  • If you can, use leftover quinoa for an even quicker preparation.
  • Let the bread cool completely before slicing to prevent it from crumbling.
  • Experiment with adding herbs or spices to customize the flavor to your liking.

Serving Suggestions

{image_1}

Enjoy your Cottage Cheese Quinoa Bread in many ways! Here are some tasty ideas:

  • Toast a slice and spread it with avocado for a nutritious breakfast.
  • Use it to make a delicious sandwich filled with your favorite ingredients.
  • Pair it with a hearty soup or salad for a complete meal.
  • Slice it thin for tasty hors d’oeuvres topped with cheese or sliced meats.

FAQs

Can I use a different type of cheese instead of cottage cheese?

Yes, you can try using ricotta or even cream cheese for a different flavor and texture.

Is this bread gluten-free?

Yes, as long as you use gluten-free oats and quinoa, this bread is a great gluten-free option.

How do I store the bread?

Keep the bread in an airtight container at room temperature for up to three days, or freeze slices for longer storage.

Cottage Cheese Quinoa Bread

A unique and delicious treat that blends wholesome ingredients into a soft and fluffy loaf, perfect for breakfast, lunch, or snacks.

Dry Ingredients

  • 1 cup quinoa, rinsed and cooked (You can use leftover quinoa to speed up the preparation.)
  • 1 cup oats, ground into flour (Make sure to use gluten-free oats if necessary.)
  • 1 teaspoon baking powder
  • 1/2 teaspoon salt

Wet Ingredients

  • 1 cup cottage cheese (Can substitute with ricotta or cream cheese.)
  • 2 large eggs
  • 1/4 cup honey or maple syrup (For sweetness.)
  • 1/4 cup olive oil

Preparing the Batter

  1. Preheat your oven to 350°F (175°C) and grease a loaf pan.
  2. In a large mixing bowl, combine the cooked quinoa, oat flour, baking powder, and salt.
  3. In another bowl, whisk together the cottage cheese, eggs, honey, and olive oil until smooth.
  4. Mix the wet ingredients into the dry ingredients until fully combined.

Baking the Bread

  1. Pour the batter into the greased loaf pan and smooth the top.
  2. Bake in the preheated oven for 45 minutes, or until a toothpick inserted in the center comes out clean.
  3. Let the bread cool in the pan for 10 minutes before transferring it to a wire rack to cool completely.

Measure ingredients accurately for the best texture. Allow the bread to cool completely before slicing to prevent crumbling. Customize flavor by adding herbs or spices as desired.

Breakfast, Snack
American
Cottage Cheese Bread, Gluten-Free Bread, Healthy Bread, Protein Bread, Quinoa Bread

Cinnamon Roll Banana Bread

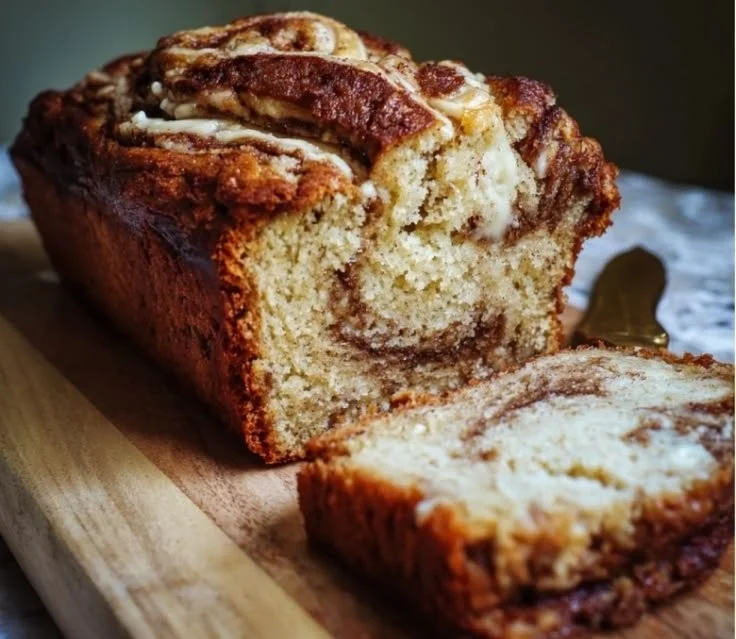
Delicious cinnamon roll banana bread with swirls and icing

Cinnamon Roll Banana Bread is a delightful twist on two beloved treats, bringing together the sweet, rich flavors of cinnamon rolls and the moist, comforting texture of banana bread. With its warm, inviting aroma wafting through your kitchen, this recipe is sure to make your mouth water. It’s a crowd-pleaser that’s perfect for breakfast, brunch, or even as a cozy snack with your coffee. The combination of gooey cinnamon swirl and banana makes this bread utterly irresistible. Plus, it’s so easy to make that you might find yourself baking it again and again. So, grab your overripe bananas and let’s dive into making this scrumptious treat!

Cinnamon Roll Banana Bread

How to prepare Cinnamon Roll Banana Bread

To create this delicious Cinnamon Roll Banana Bread, gather the following ingredients:

Ingredients

  • 3 ripe bananas
  • 1/3 cup melted butter
  • 1 teaspoon baking soda
  • Pinch of salt
  • 3/4 cup sugar
  • 1 large egg
  • 1 teaspoon vanilla extract
  • 1 1/2 cups all-purpose flour
  • 2 teaspoons cinnamon
  • 1/4 cup brown sugar
  1. Preheat your oven to 350°F (175°C) and grease a 9×5 inch loaf pan.
  2. In a mixing bowl, mash the ripe bananas with a fork until smooth.
  3. Stir in the melted butter until well combined.
  4. Mix in the baking soda and salt.
  5. Add the sugar, egg, and vanilla, then mix until everything is blended.
  6. Gradually stir in the flour until just combined.
  7. In a small bowl, mix the cinnamon and brown sugar together.
  8. Pour half of the batter into the prepared loaf pan.
  9. Sprinkle half of the cinnamon-sugar mixture over the batter.
  10. Add the remaining batter, followed by the rest of the cinnamon-sugar mixture on top.
  11. Use a knife to swirl the cinnamon mixture into the batter by gently running it through the loaf.
  12. Bake for 50-60 minutes, or until a toothpick comes out clean.
  13. Allow the bread to cool in the pan for about 10 minutes before transferring to a wire rack.

{image_2}

Cinnamon Roll Banana Bread

Why You’ll Love Cinnamon Roll Banana Bread

You will love Cinnamon Roll Banana Bread because it brings out the best of both worlds. The moist and fluffy banana bread is enhanced by the sweet, cinnamon swirls, making every slice a delightful experience. It’s the perfect go-to treat for breakfast, dessert, or a snack. With just a few simple ingredients, you can create a show-stopping loaf that everyone will enjoy. Whether you are sharing it with friends or keeping it all to yourself, this bread is sure to satisfy your cravings.

Tips for success

  • Make sure your bananas are really ripe for the best flavor.
  • Don’t overmix the batter; mixing just until combined will keep your bread tender.
  • If you want an extra boost of flavor, consider adding nuts or chocolate chips into the batter.

{image_1}

Serving Suggestions

Enjoy your Cinnamon Roll Banana Bread warm with a pat of butter, or serve it with a scoop of ice cream for a perfect dessert. Drizzling a little maple syrup over the top can also elevate the flavors. Pair it with a hot cup of coffee or tea for a relaxing afternoon treat.

FAQs

Can I freeze Cinnamon Roll Banana Bread?

Yes, this bread freezes very well. Just wrap it tightly in plastic wrap and then in aluminum foil before storing it in the freezer. It can last for up to three months.

What can I substitute for sugar?

You can use honey, maple syrup, or coconut sugar as alternatives to granulated sugar, though it might change the texture slightly.

How do I know when the bread is done?

The bread is done when a toothpick inserted into the center comes out clean or with few crumbs. Also, the top should be golden brown and spring back when lightly touched.

Cinnamon Roll Banana Bread

A delightful twist on two beloved treats, this Cinnamon Roll Banana Bread features gooey cinnamon swirls and moist banana bread, making it perfect for breakfast or as a cozy snack.

For the bread

  • 3 pieces ripe bananas (Make sure your bananas are really ripe for the best flavor.)
  • 1/3 cup melted butter
  • 1 teaspoon baking soda
  • 1 pinch salt
  • 3/4 cup sugar (Can be substituted with honey, maple syrup, or coconut sugar.)
  • 1 large egg
  • 1 teaspoon vanilla extract
  • 1 1/2 cups all-purpose flour

For the cinnamon swirl

  • 2 teaspoons cinnamon
  • 1/4 cup brown sugar

Preparation

  1. Preheat your oven to 350°F (175°C) and grease a 9×5 inch loaf pan.
  2. In a mixing bowl, mash the ripe bananas with a fork until smooth.
  3. Stir in the melted butter until well combined.
  4. Mix in the baking soda and salt.
  5. Add the sugar, egg, and vanilla, then mix until everything is blended.
  6. Gradually stir in the flour until just combined.

Assembly

  1. In a small bowl, mix the cinnamon and brown sugar together.
  2. Pour half of the batter into the prepared loaf pan.
  3. Sprinkle half of the cinnamon-sugar mixture over the batter.
  4. Add the remaining batter, followed by the rest of the cinnamon-sugar mixture on top.
  5. Use a knife to swirl the cinnamon mixture into the batter by gently running it through the loaf.

Baking

  1. Bake for 50-60 minutes, or until a toothpick comes out clean.
  2. Allow the bread to cool in the pan for about 10 minutes before transferring to a wire rack.

Don’t overmix the batter; mixing just until combined will keep your bread tender. For an extra boost of flavor, consider adding nuts or chocolate chips into the batter.

Breakfast, Dessert, Snack
American
Baking, banana bread, Cinnamon Roll, Comfort Food, Easy Recipes