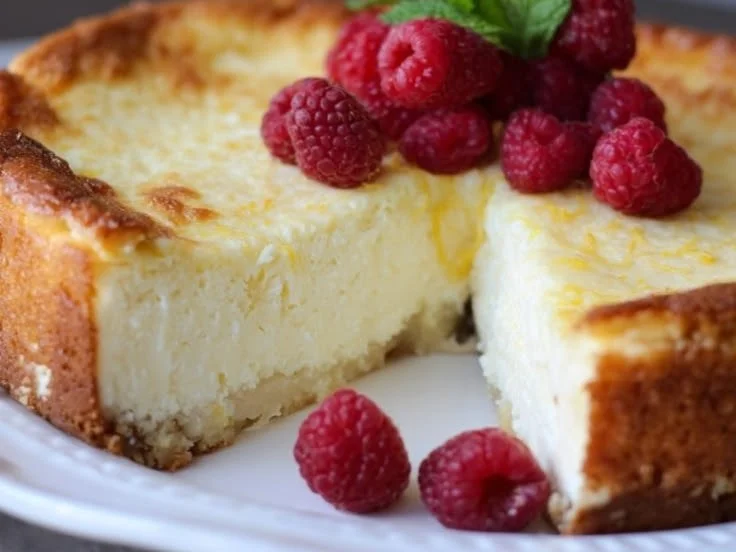
No-Bake Cheesecake

No-Bake Cheesecake is a delightful dessert that manages to be both simple and impressive. This creamy treat is perfect for any gathering, as it combines the rich flavors of cream cheese and sweetness without the need for an oven. Best of all, it’s a crowd-pleaser, making it an ideal choice for parties, gatherings, or a sweet treat after dinner. If you’re looking for a fun and delicious dessert to make at home, this no-bake cheesecake is just what you need. Get ready to satisfy your sweet tooth and impress your friends and family with this delightful recipe!

How to Prepare No-Bake Cheesecake

  1. Start by crushing your favorite cookies for the crust. Mix the crushed cookies with melted butter until combined. Press the mixture firmly into the bottom of a springform pan.
  2. In a bowl, beat the cream cheese until it’s smooth. Gradually add sugar and vanilla extract, mixing well.
  3. Fold in whipped cream until the mixture is fluffy and well combined.
  4. Pour the cream cheese filling over the crust and spread it evenly.
  5. Refrigerate for at least four hours, or until set.

No-Bake Cheesecake

Why You’ll Love No-Bake Cheesecake

You’ll absolutely love this No-Bake Cheesecake for many reasons. Firstly, it is extremely easy to prepare, making it perfect even for novice bakers. Moreover, it’s wonderfully creamy and can be topped with an array of fruits or sauces to suit your taste. It’s a versatile dessert that can change depending on the season or your preference. Additionally, if you’re looking to inspire your baking adventures, check out this No-Bake Pastel Oreo Cheesecake Cups for a colorful twist on the classic.

Tips for Success

  • Always use room temperature cream cheese for the best texture. Cold cream cheese will create lumps in your filling.
  • Whip the cream until stiff peaks form for a light and airy cheesecake.
  • You can experiment with different flavors by adding fruit purees or extracts into the filling.

No-Bake Cheesecake

Serving Suggestions

Serve your No-Bake Cheesecake chilled, topped with fresh fruits like strawberries or blueberries. You can also add a drizzle of chocolate or caramel sauce for extra flavor. Consider pairing it with a scoop of vanilla ice cream for an extra indulgent treat.

FAQs

1. How long does a No-Bake Cheesecake last in the fridge?

A No-Bake Cheesecake can last up to five days in the refrigerator if properly covered.

2. Can I freeze No-Bake Cheesecake?

Yes, you can freeze it! Wrap it tightly in plastic wrap and store it in an airtight container. It can last for about a month in the freezer.

3. What can I use for the crust besides cookies?

You can use graham crackers, crushed nuts, or even a combination of oats and nuts for a gluten-free option.

No-Bake Cheesecake

A delightful and simple dessert that combines rich cream cheese flavors without the need for baking, making it perfect for any gathering.

For the crust

  • 1 cup Crushed cookies (your favorite)
  • 1/4 cup Melted butter

For the filling

  • 16 oz Cream cheese, room temperature (Using room temperature ensures the best texture.)
  • 2/3 cup Sugar
  • 1 tsp Vanilla extract
  • 1 cup Whipped cream (Whip until stiff peaks form.)

Preparation

  1. Crush your favorite cookies for the crust.
  2. Mix the crushed cookies with melted butter until combined.
  3. Press the mixture firmly into the bottom of a springform pan.
  4. In a bowl, beat the cream cheese until smooth.
  5. Gradually add sugar and vanilla extract, mixing well.
  6. Fold in whipped cream until the mixture is fluffy and well combined.
  7. Pour the cream cheese filling over the crust and spread it evenly.
  8. Refrigerate for at least four hours, or until set.

Serve chilled, topped with fresh fruits or sauces. Can be frozen for about a month in an airtight container.

Dessert
American
Cream Cheese Dessert, Easy Cheesecake, No-Bake Cheesecake

High Protein Cheesecake

High protein cheesecake with a creamy texture and healthy toppings

High Protein Cheesecake

There’s something delightful about indulging in a sweet treat that also offers a healthy boost, and that’s exactly what the High Protein Cheesecake brings to the table. This dessert is not just any cheesecake; it’s a perfect blend of creamy texture and rich flavor, all while packing a punch of protein. Whether you’re looking to enjoy a guilt-free dessert or impress friends at a gathering, this cheesecake is sure to please everyone. The taste is so divine that you might just forget it’s healthy, making it a fantastic choice for any occasion. So, grab your apron and get ready to whip up a treat that will have everyone asking for seconds!

How to prepare High Protein Cheesecake

To create this delicious High Protein Cheesecake, you’ll need some simple ingredients and a fun attitude. Here’s how to do it:

  1. Ingredients:

    • 2 cups low-fat cottage cheese
    • 1 cup Greek yogurt
    • 1/2 cup honey or agave syrup
    • 3 eggs
    • 1 tsp vanilla extract
    • 1/2 cup almond flour
    • A pinch of salt
  2. Directions:

    • Preheat your oven to 325°F (160°C).
    • In a blender, combine the cottage cheese and Greek yogurt until smooth.
    • Add the honey, eggs, vanilla extract, almond flour, and salt. Blend until everything is well mixed.
    • Grease a cheesecake pan and pour the blended mixture into it.
    • Bake in the oven for about 35-40 minutes or until the center is set.
    • Let it cool before refrigerating for at least 2 hours.
    • Serve chilled and enjoy!

High Protein Cheesecake

Why You’ll Love High Protein Cheesecake

This High Protein Cheesecake stands out because it satisfies your sweet tooth without compromising your health goals. With high protein content, it’s perfect for muscle recovery or just maintaining a balanced diet. Plus, it’s simple to make, which is a bonus for those with busy schedules. The creamy goodness combined with a slight sweetness makes it the ultimate comfort food that everyone can enjoy. Once you try it, you’ll see why people rave about this dessert!

Tips for success

Here are a few tips to ensure your High Protein Cheesecake turns out perfectly every time:

  • Use Fresh Ingredients: Fresh cottage cheese and Greek yogurt will enhance the taste and texture.
  • Blend Thoroughly: Make sure your mixture is smooth before pouring it into the pan, as this creates a creamier cheesecake.
  • Cooling Time: Allow enough time for the cheesecake to cool completely before refrigerating, as this helps improve the texture.

High Protein Cheesecake

Serving Suggestions

Pair your High Protein Cheesecake with fresh fruit like berries or a drizzle of low-sugar chocolate sauce for an extra treat. You could also top it with chopped nuts or a sprinkle of cinnamon for added flavor. Serve it as a delightful dessert after dinner or as a nutritious snack during the day.

FAQs

Can I substitute the cottage cheese?
Yes, you can use ricotta cheese for a different texture, but cottage cheese is recommended for its high protein content.

How long does the cheesecake last in the fridge?
It should stay fresh for about 4-5 days when stored in an airtight container in the fridge.

Can I freeze High Protein Cheesecake?
Yes, you can freeze it! Just be sure to wrap it tightly to prevent freezer burn, and let it thaw in the refrigerator before serving.

Elevate your dessert game and try making this High Protein Cheesecake; it’s an easy way to enjoy something sweet while staying healthy! If you’re looking for more nutritious options, check out easy high protein breakfast boxes to fuel your day.

High Protein Cheesecake

A creamy and delicious cheesecake packed with protein, perfect for satisfying your sweet tooth while staying healthy.

Cheesecake Base

  • 2 cups low-fat cottage cheese (Use fresh cottage cheese for best taste)
  • 1 cup Greek yogurt (Fresh yogurt enhances texture)
  • 1/2 cup honey or agave syrup (Sweetener of your choice)
  • 3 pcs eggs
  • 1 tsp vanilla extract
  • 1/2 cup almond flour (For a gluten-free option)
  • a pinch salt

Preparation

  1. Preheat your oven to 325°F (160°C).
  2. In a blender, combine the cottage cheese and Greek yogurt until smooth.
  3. Add the honey, eggs, vanilla extract, almond flour, and salt. Blend until everything is well mixed.
  4. Grease a cheesecake pan and pour the blended mixture into it.
  5. Bake in the oven for about 35-40 minutes or until the center is set.
  6. Let it cool before refrigerating for at least 2 hours.

Serving

  1. Serve chilled and enjoy!

To ensure perfect results, use fresh ingredients and blend thoroughly for a smooth mixture. Allow enough cooling time before refrigerating to improve texture.

Dessert, Snack
American
Easy Cheesecake Recipe, Healthy Dessert, High Protein Cheesecake, Low Fat Cheesecake, Protein Packed Dessert

Orange Creamsicle Cheesecake

Delicious slice of Orange Creamsicle Cheesecake with vibrant orange topping.

The Orange Creamsicle Cheesecake is a delightful dessert that captures the essence of summer in every bite. Made with simple ingredients and easy steps, this cheesecake is perfect for any occasion, whether it’s a birthday party, a family gathering, or just a sweet treat for yourself. The combination of creamy cheesecake and the bright flavor of orange creates a refreshing taste that is hard to resist.

One of the best things about this cheesecake is its nostalgic flavor. Many people remember enjoying creamsicle popsicles on hot days, and this dessert turns that memory into a rich and satisfying treat. With its vibrant color and creamy texture, the Orange Creamsicle Cheesecake is not only delicious but also visually appealing.

Making this cheesecake at home allows you to control the ingredients and customize it to your taste. You can use fresh oranges for an even more natural flavor or adjust the sweetness to suit your preference. Plus, it’s a great way to impress your friends and family with your baking skills. Whether you are an experienced baker or just starting, this recipe is simple enough for everyone to try. Enjoy the satisfaction of creating a yummy, homemade dessert that is sure to bring smiles to all who taste it!

How to Make Orange Creamsicle Cheesecake

To make Orange Creamsicle Cheesecake, you’ll need to gather your ingredients first. The main ingredients include cream cheese, sugar, eggs, vanilla extract, orange zest, and orange juice. You will also need a graham cracker crust and heavy cream.

Start by preheating your oven to 325°F (160°C). In a large mixing bowl, beat the cream cheese until it’s soft and creamy. Add the sugar and blend well. Next, mix in the eggs, one at a time, making sure to beat well after each addition. Then, mix in the vanilla extract, orange zest, and freshly squeezed orange juice. Stir until everything is combined.

Next, pour this creamy mixture over the prepared graham cracker crust in a springform pan. Smooth the top with a spatula for even baking. Place the cheesecake into the preheated oven, and bake for about 50-60 minutes or until the center is set but still slightly jiggly. Once baked, turn off the oven and let the cheesecake cool with the door slightly open. This helps to prevent cracking.

After cooling, refrigerate the cheesecake for at least four hours, or overnight if possible. This resting time will help set its texture. Once chilled, you can add whipped cream on top and garnish with fresh orange slices to enhance its look and flavor.

How to Serve Orange Creamsicle Cheesecake

Serving Orange Creamsicle Cheesecake is a joyful experience. Begin by slicing the chilled cheesecake into wedges using a sharp knife. For clean cuts, warm the knife under hot water before slicing and wipe it dry between each cut. Arrange the slices on individual dessert plates for a lovely presentation.

You can add a dollop of whipped cream on top of each slice to elevate the dessert’s creaminess. Additionally, consider garnishing with a sprinkle of orange zest or a slice of fresh orange for a pop of color. This adds an inviting touch and enhances its flavor too.

The cheesecake pairs wonderfully with a glass of cold milk or a cup of coffee. For a tropical twist, serve it with a side of fresh fruit, such as berries or kiwi. Guests will enjoy the creamy and fruity combination, transforming each bite into a refreshing treat. This dessert can be enjoyed at room temperature as well, making it versatile for different serving occasions.

How to Store Orange Creamsicle Cheesecake

To store your Orange Creamsicle Cheesecake properly, first ensure it is fully cooled to room temperature. Once it has cooled, cover it with plastic wrap or aluminum foil to protect it from drying out. You can also use a cake carrier or container with a lid for added security.

Refrigerate the cheesecake for up to five days. Keeping it in the fridge will help maintain its creamy texture and fresh flavor. If you need to store it longer, you can freeze the cheesecake. To freeze, wrap individual slices tightly in plastic wrap, then place them in a freezer-safe container. This way, you can easily enjoy a piece anytime you crave something sweet.

When ready to enjoy a frozen slice, move it to the refrigerator to thaw overnight. This helps it gradually regain its texture. Avoid thawing at room temperature to keep the cake from becoming too soft. Enjoy every bite of your stored cheesecake!

Tips to Make Orange Creamsicle Cheesecake

To perfect your Orange Creamsicle Cheesecake, consider these helpful tips. First, ensure your cream cheese is at room temperature before mixing. This helps achieve a smooth and creamy texture without lumps. Take your eggs out early too, so they are also at room temperature when mixing.

When adding the orange zest and juice, use fresh oranges for the best flavor. Store-bought orange juice may not taste as vibrant. For a richer flavor, you can add a bit of orange extract along with the zest and juice.

If cracks appear on the top of your cheesecake after baking, do not worry! This can happen, but it can be disguised with whipped cream or fruit topping. Also, avoid opening the oven door too early while baking; this can cause temperature fluctuations and lead to cracking.

Lastly, let your cheesecake chill overnight if possible. This extra time allows the flavors to meld nicely, resulting in a more flavorful dessert. With these tips, you’ll create a delightful Orange Creamsicle Cheesecake every time.

Variation

For a different twist on the Orange Creamsicle Cheesecake, consider adding a layer of orange jelly or preserves on top after cooling. This creates a vibrant and tasty layer that complements the cheesecake. Additionally, you can experiment with different crust types, such as using crushed Nilla wafers or even a chocolate crust for a unique flavor combination.

FAQs

1. Can I use store-bought crust for the cheesecake?
Yes, you can easily use a store-bought graham cracker crust to save time. Just ensure it fits your springform pan properly.

2. How long should I chill the cheesecake?
Chill the cheesecake for at least four hours, but overnight is best to allow the flavors to develop fully.

3. Can I add more orange flavor?
Definitely! You can increase the amount of orange zest and juice if you prefer a stronger citrus taste. Just be cautious with liquid to keep the texture right.

4. Can I freeze the cheesecake?
Yes, Orange Creamsicle Cheesecake can be frozen. Wrap it tightly and store it in the freezer for up to three months.

5. Is it possible to make this cheesecake without eggs?
Yes, you can use egg substitutes like applesauce or commercial egg replacers. The texture may differ slightly, but it will still be delicious!

[tasty-recipe id=”4954″]

Orange Creamsicle Cheesecake

A delightful dessert that captures the essence of summer with creamy cheesecake and bright orange flavors, making it perfect for any occasion.

For the Cheesecake Filling

  • 16 oz cream cheese (at room temperature)
  • 1 cup sugar
  • 3 eggs (at room temperature)
  • 1 tsp vanilla extract
  • 2 tbsp orange zest (freshly grated)
  • 1/2 cup orange juice (freshly squeezed)

For the Crust

  • 1.5 cups graham cracker crumbs
  • 1/2 cup butter (melted)

For Serving

  • 1 cup heavy cream (for whipped topping)
  • 1 cup fresh orange slices (for garnish)

Preparation

  1. Preheat your oven to 325°F (160°C).
  2. In a large mixing bowl, beat the cream cheese until it’s soft and creamy.
  3. Add the sugar and blend well.
  4. Mix in the eggs, one at a time, beating well after each addition.
  5. Stir in the vanilla extract, orange zest, and freshly squeezed orange juice until everything is combined.

Baking

  1. Pour the creamy mixture over the prepared graham cracker crust in a springform pan.
  2. Smooth the top with a spatula for even baking.
  3. Bake for about 50-60 minutes or until the center is set but slightly jiggly.
  4. Turn off the oven and let the cheesecake cool with the door slightly open.

Chilling

  1. Refrigerate the cheesecake for at least four hours, or overnight if possible.

Serving

  1. Slice the chilled cheesecake into wedges using a sharp knife.
  2. Add a dollop of whipped cream on top of each slice and garnish with fresh orange slices.

Store the cheesecake wrapped in plastic wrap or aluminum foil in the fridge for up to five days. It can also be frozen for longer storage. Thaw frozen slices in the refrigerator overnight.

Dessert
American
cheesecake, creamsicle, dessert recipe, orange, Summer Treat

Cheesecake Bites

Delicious cheesecake bites perfect for dessert lovers

Cheesecake Bites are small, creamy, and sweet treats that everyone will love. They feel special, but they are easy to make. These little cheesecakes have a crunchy base, a soft cream cheese center, and you can top them with fruit, chocolate, or jam. They work well for parties, snacks, or a simple dessert after dinner.

The recipe here is a crowd-pleaser, with a rich, smooth taste and a light, bite-sized shape. You get all the flavor of a full cheesecake, in small pieces that are easy to share. Ready to bake a tray of smiles, and maybe sneak one or two before guests arrive?

How to prepare Cheesecake Bites

  1. Preheat your oven to 325°F, and line a mini muffin tin with paper liners or spray with pan spray.
  2. Make the crust by crushing about 1 cup graham crackers into fine crumbs, mix with 2 tablespoons sugar, and 3 tablespoons melted butter. Press a small spoonful into the bottom of each mini cup.
  3. In a bowl, beat 8 ounces room temperature cream cheese until smooth. Add 1/3 cup sugar and 1 teaspoon vanilla, beat until creamy. Add one egg, and mix until just combined.
  4. Spoon about a tablespoon of filling over each crust, filling cups almost to the top. Tap the pan gently to remove air bubbles.
  5. Bake 12 to 18 minutes, until edges are set and centers still jiggle a little. Let cool on a rack for 30 minutes.
  6. Chill in the fridge for at least 2 hours before removing from the tin. Top with fresh berries, jam, or chocolate before serving.

Cheesecake Bites

Why You’ll Love Cheesecake Bites

  • They are small and easy to eat, perfect for parties and kids.
  • The rich cream cheese filling tastes like classic cheesecake, but in a quick bite.
  • You can change the toppings, use different crusts, and make them your own.
  • They store well in the fridge, so you can make them ahead and save time.

Tips for success

  • Use room temperature cream cheese, it mixes smooth and makes no lumps.
  • Press the crust firmly into the cups so it holds when you serve.
  • Do not overbake, the centers should still jiggle a little when you take them out. They set more as they cool.
  • Chill well before serving, cold cheesecake holds shape and tastes best.
  • If you want no-bake, skip the oven and chill the filling on a crumb crust until firm.

Serving Suggestions

  • Top with fresh strawberries, blueberries, or raspberries.
  • Drizzle with chocolate sauce or caramel.
  • Add a small spoon of lemon curd or fruit jam for extra flavor.
  • Serve on a small platter for parties, or pack a few in a lunch box for a sweet treat.

Cheesecake Bites

FAQs

Q: Can I make Cheesecake Bites ahead of time?
A: Yes, make them a day ahead and keep them covered in the fridge.

Q: Can I freeze them?
A: Yes, freeze in a single layer on a tray, then store in a container. Thaw in the fridge before serving.

Q: Can I use low-fat cream cheese?
A: Yes, you can, but the texture and flavor will be slightly different, and they may be less rich.

Q: How long do they last in the fridge?
A: They stay good for 3 to 5 days when covered.

Conclusion

If you want another simple take on mini cheesecakes, try this helpful guide for small portions at Cheesecake Bites (in mini muffin tins) – Danas Table.

Cheesecake Bites

These Cheesecake Bites are small, creamy, and sweet treats with a crunchy base and soft cream cheese center, perfect for parties and snacks.

For the crust

  • 1 cup graham cracker crumbs (Crushed graham crackers)
  • 2 tablespoons sugar
  • 3 tablespoons melted butter

For the filling

  • 8 ounces cream cheese (Room temperature)
  • 1/3 cup sugar
  • 1 teaspoon vanilla extract
  • 1 large egg

Toppings

  • Fresh berries (Strawberries, blueberries, or raspberries)
  • Chocolate sauce (For drizzling)
  • Caramel sauce (For drizzling)
  • Fruit jam (Optional for extra flavor)

Preparation

  1. Preheat your oven to 325°F (163°C), and line a mini muffin tin with paper liners or spray with pan spray.
  2. Make the crust by crushing about 1 cup of graham crackers into fine crumbs, mix with 2 tablespoons of sugar, and 3 tablespoons of melted butter.
  3. Press a small spoonful of the crust mixture into the bottom of each mini cup.
  4. In a bowl, beat 8 ounces of room temperature cream cheese until smooth.
  5. Add 1/3 cup of sugar and 1 teaspoon of vanilla, beat until creamy.
  6. Add one egg, and mix until just combined.
  7. Spoon about a tablespoon of filling over each crust, filling cups almost to the top.
  8. Tap the pan gently to remove air bubbles.

Baking

  1. Bake for 12 to 18 minutes, until edges are set and centers still jiggle a little.
  2. Let cool on a rack for 30 minutes.

Chilling

  1. Chill in the fridge for at least 2 hours before removing from the tin.
  2. Top with fresh berries, jam, or chocolate before serving.

Use room temperature cream cheese for smooth mixing. Press the crust firmly into the cups so it holds when you serve. Do not overbake, the centers should still jiggle a little when you take them out. Chill well before serving as cold cheesecake holds shape and tastes best.

Dessert, Party
American
Cheesecake Bites, easy dessert, Mini Cheesecakes, No-Bake Option, Party Treats