Healthy Chilaquiles

Healthy chilaquiles with fresh toppings and vibrant flavors

Chilaquiles are a beloved traditional Mexican dish that often brings people together for breakfast or a festive brunch. You may think of them as a crunchy, savory treat loaded with flavor. Today, I’m excited to share a healthier twist on this classic dish, making it a perfect choice for those who want to enjoy a hearty meal without compromising on health. Our Healthy Chilaquiles are packed with fresh ingredients and wholesome goodness, making it a crowd-pleaser that everyone will love. So get ready to whip up a dish that’s not only delicious but also nourishes your body. Trust me, you’ll find yourself wanting to make this again and again!

Healthy Chilaquiles

How to prepare Healthy Chilaquiles

To start, gather the following ingredients:

  • Corn tortillas (6, cut into triangles)
  • Olive oil (1 tablespoon)
  • Garlic (2 cloves, minced)
  • Tomatoes (2, diced)
  • Chicken or vegetable broth (1 cup)
  • Cumin (1 teaspoon)
  • Red chili powder (1/2 teaspoon)
  • Salt (to taste)
  • Black beans (1 cup, cooked)
  • Avocado (1, sliced)
  • Fresh cilantro (for garnish)
  • Queso fresco (optional, for topping)
  1. Preheat your oven to 375°F (190°C) and prepare a baking sheet.
  2. On the baking sheet, spread the tortilla triangles evenly and drizzle them with olive oil. Bake for about 10-12 minutes, or until they are crispy and golden.
  3. In a large skillet, heat a little more olive oil over medium heat. Add the minced garlic and cook for about 1 minute, until fragrant.
  4. Stir in the diced tomatoes, chicken or vegetable broth, cumin, chili powder, and salt. Bring to a simmer and let it cook for about 5 minutes.
  5. Add the crispy tortilla triangles and black beans to the skillet, stirring gently until everything is combined and the tortillas are slightly softened.
  6. Serve hot, topped with avocado slices and fresh cilantro. Feel free to sprinkle some queso fresco on top if you desire!

{image_1}

Healthy Chilaquiles

Why You’ll Love Healthy Chilaquiles

You will adore Healthy Chilaquiles because they hit all the right notes! They are crunchy, savory, and satisfying. Not only do they taste amazing, but they are also a great way to use up leftover tortillas. Plus, they are easy to customize by adding your favorite veggies or proteins. This recipe is also perfect for a family brunch or a casual gathering with friends. Everyone can help themselves, and it’s always a hit at the table.

Tips for success

  1. Choose Fresh Tortillas: Fresh corn tortillas will give you the best flavor and texture.
  2. Don’t Skip the Broth: The broth adds moisture and flavor to the dish, so be generous!
  3. Experiment with Toppings: Feel free to swap in your favorite toppings, like sour cream or diced onions, to make the dish your own.

{image_2}

Serving Suggestions

Serve your Healthy Chilaquiles with a side of scrambled eggs or a refreshing fruit salad. A splash of lime juice can brighten up the flavors even more. For those who enjoy a bit of heat, consider adding some sliced jalapeños!

FAQs

1. Can I make Healthy Chilaquiles ahead of time?

Yes, you can prepare the sauce and bake the tortillas ahead of time. Just combine everything right before serving to maintain the crunch.

2. Are Healthy Chilaquiles gluten-free?

If you use corn tortillas that are labeled gluten-free, then this dish can be made gluten-free.

3. Can I add meat to this recipe?

Absolutely! Shredded chicken or ground turkey can be added for more protein and added flavor. Just mix it in with the beans before serving.

These Healthy Chilaquiles are calling your name, so gather your ingredients and give this recipe a try! With its vibrant flavors and hearty texture, it’s sure to become a favorite in your kitchen.

Healthy Chilaquiles

A healthier twist on the classic Mexican dish, packed with fresh ingredients and wholesome goodness, perfect for breakfast or brunch.

Tortilla Preparation

  • 6 pieces Corn tortillas, cut into triangles (Fresh tortillas will provide better flavor and texture.)
  • 1 tablespoon Olive oil (Used for drizzling over the tortillas before baking.)

Sauce Ingredients

  • 2 cloves Garlic, minced (Added for flavor.)
  • 2 pieces Tomatoes, diced (Fresh tomatoes add taste and moisture.)
  • 1 cup Chicken or vegetable broth (Provides moisture and flavor; be generous.)
  • 1 teaspoon Cumin (Adds distinct flavor.)
  • 0.5 teaspoon Red chili powder (Adjust to taste.)
  • to taste Salt (Seasoning.)

Toppings

  • 1 cup Black beans, cooked (Add protein and texture.)
  • 1 piece Avocado, sliced (For freshness.)
  • Fresh cilantro, for garnish (Adds brightness.)
  • Queso fresco, optional, for topping (Adds creaminess if desired.)

Preparation

  1. Preheat your oven to 375°F (190°C) and prepare a baking sheet.
  2. On the baking sheet, spread the tortilla triangles evenly and drizzle them with olive oil. Bake for about 10-12 minutes, or until they are crispy and golden.

Cooking

  1. In a large skillet, heat a little more olive oil over medium heat. Add the minced garlic and cook for about 1 minute, until fragrant.
  2. Stir in the diced tomatoes, chicken or vegetable broth, cumin, chili powder, and salt. Bring to a simmer and let it cook for about 5 minutes.
  3. Add the crispy tortilla triangles and black beans to the skillet, stirring gently until everything is combined and the tortillas are slightly softened.

Serving

  1. Serve hot, topped with avocado slices and fresh cilantro. Sprinkle some queso fresco on top if you desire.

You can prepare the sauce and bake the tortillas ahead of time. Just combine everything right before serving to maintain the crunch. Experiment with toppings, like sour cream or diced onions, to make the dish your own.
Breakfast, Brunch
Mexican
Brunch, Chilaquiles, Healthy, Healthy Recipes, Mexican Breakfast

Healthy Chicken Salad

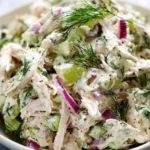
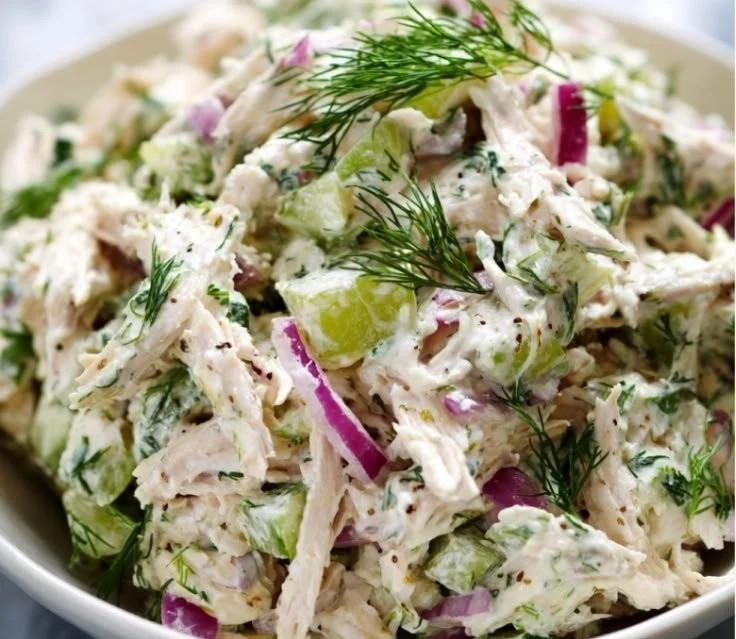
Bowl of healthy chicken salad with fresh vegetables and herbs

Healthy Chicken Salad is a delightful dish that brings together vibrant ingredients and delicious flavors. This salad is not just a meal, it’s a celebration in a bowl, perfect for lunch or as a light dinner. With tender chicken, crisp veggies, and a creamy yet healthy dressing, this recipe is sure to impress your family and friends. It’s healthy, quick to prepare, and vibrant, making it a great go-to for any occasion. Whether you’re serving it at a picnic, potluck, or enjoying it at home, this Healthy Chicken Salad is guaranteed to please.

Healthy Chicken Salad

So, grab your apron and get ready to create a dish bursting with flavor and nutrition!

How to prepare Healthy Chicken Salad

To make this Healthy Chicken Salad, you’ll need the following ingredients:

Healthy Chicken Salad

  • 2 cups cooked chicken, shredded
  • 1 cup Greek yogurt
  • 1 tablespoon Dijon mustard
  • 1 tablespoon apple cider vinegar
  • 1 celery stalk, chopped
  • 1/2 cup red grapes, halved
  • 1/4 cup chopped walnuts
  • 1/4 cup green onions, sliced
  • Salt and pepper, to taste
  • Mixed greens, for serving

Now, let’s walk through the steps:

  1. In a mixing bowl, combine the Greek yogurt, Dijon mustard, and apple cider vinegar, stirring until smooth.
  2. Add the shredded chicken, celery, grapes, walnuts, and green onions. Mix everything together until well combined.
  3. Season the mixture with salt and pepper to taste.
  4. Serve the chicken salad over a bed of mixed greens.

{image_2}

Why You’ll Love Healthy Chicken Salad

You will love this Healthy Chicken Salad for several reasons. First, it is an excellent source of protein, thanks to the chicken and Greek yogurt, which keeps you full and energized throughout the day. Second, the combination of fresh veggies and fruits adds crunch and sweetness, making every bite exciting. Additionally, this recipe is very versatile; feel free to swap in your favorite vegetables or nuts! All of these elements come together to create a meal that is satisfying, nutritious, and simply delicious.

Tips for success

  1. Use leftover chicken: To make this salad even easier, use leftover rotisserie chicken or any cooked chicken you have on hand.
  2. Customize it: Don’t hesitate to add your favorite veggies or nuts, like bell peppers or almonds, to make this salad your own.
  3. Make it ahead: This chicken salad can be made in advance and stored in the fridge for 3-4 days, making it perfect for meal prep.

{image_1}

Serving Suggestions

Enjoy this Healthy Chicken Salad by itself, or pair it with whole-grain crackers or a slice of whole-grain bread for a more filling meal. It also goes great with a light soup or roasted sweet potatoes for a hearty lunch or dinner.

FAQs

Can I use canned chicken for this recipe?

Yes, canned chicken can work in a pinch! Just be sure to drain it well before using.

Is this salad gluten-free?

Yes, all the ingredients listed are gluten-free. Just check any added seasonings if you have gluten concerns.

Can I make this salad vegetarian?

Absolutely! You can replace the chicken with chickpeas or tofu for a tasty vegetarian option.

Healthy Chicken Salad

A delightful dish that brings together vibrant ingredients and delicious flavors, perfect for lunch or as a light dinner.

Main ingredients

  • 2 cups cooked chicken, shredded (Can use leftover rotisserie chicken)
  • 1 cup Greek yogurt (Adds creaminess and protein)
  • 1 tablespoon Dijon mustard (Adds tanginess)
  • 1 tablespoon apple cider vinegar (For acidity)
  • 1 stalk celery, chopped (For crunch)
  • 1/2 cup red grapes, halved (For sweetness)
  • 1/4 cup chopped walnuts (Can substitute with other nuts)
  • 1/4 cup green onions, sliced (For flavor)
  • Salt and pepper, to taste
  • Mixed greens, for serving (For serving)

Preparation

  1. In a mixing bowl, combine the Greek yogurt, Dijon mustard, and apple cider vinegar, stirring until smooth.
  2. Add the shredded chicken, celery, grapes, walnuts, and green onions. Mix everything together until well combined.
  3. Season the mixture with salt and pepper to taste.
  4. Serve the chicken salad over a bed of mixed greens.

Customize the salad by adding your favorite veggies or nuts. The salad can be made ahead and stored in the fridge for 3-4 days. It pairs well with whole-grain crackers, bread, light soup, or roasted sweet potatoes.

Dinner, lunch
American
Healthy Chicken Salad, Light Meal, Nutritious

Spicy Baked Chicken Strips

Spicy baked chicken strips served on a plate with dipping sauce

Warm up your kitchen with the mouthwatering aroma of Spicy Baked Chicken Strips. This recipe is not just about heat; it combines tender chicken with crunchy breading, creating a delicious dish that everyone will love. Perfect for a family dinner or a friendly gathering, these chicken strips will have your guests coming back for more. With a kick of spice and a satisfying crunch, they are sure to be a hit. Plus, they’re baked, making them a healthier option that’s easy to whip up any night of the week. So, let’s dive into this fantastic recipe!

How to prepare Spicy Baked Chicken Strips

Spicy Baked Chicken Strips

Start by gathering your ingredients: chicken breasts, breadcrumbs, flour, and a mix of spices like paprika, cayenne pepper, and garlic powder. Preheat your oven to 400°F (200°C) and line a baking sheet with parchment paper. Cut the chicken breasts into strips. Set up three bowls: one with flour, the second with beaten eggs, and the third with a mixture of breadcrumbs and spices. Dredge the chicken strips in flour, dip them in the egg, and then coat them with the seasoned breadcrumbs. Place the strips on the baking sheet and bake for about 20-25 minutes until golden and crispy.

Spicy Baked Chicken Strips

Why You’ll Love Spicy Baked Chicken Strips

These Spicy Baked Chicken Strips are undeniably easy to make and full of flavor. You get that delightful crunch every bite, along with a subtle kick that won’t overwhelm your taste buds. They are perfect for dipping into your favorite sauces, making them an excellent addition to any game day spread or a quick weeknight meal. You can customize the spice level to suit your family’s taste preferences, ensuring everyone can enjoy them.

Tips for success

To make sure your chicken strips turn out perfectly, here are a few tips: First, don’t skip the dredging step, as it helps the coating stick better. Second, use fresh breadcrumbs for a crunchier finish. Lastly, for added flavor, let the chicken strips sit in the spices for at least 30 minutes before baking. This allows the spices to really soak in, enhancing every bite.

Serving Suggestions

Serve your Spicy Baked Chicken Strips with a side of creamy ranch or tangy barbecue sauce for dipping. They pair wonderfully with a fresh salad or crispy fries. For a complete meal, add some roasted vegetables or a side of rice. If you’re looking for more ideas, check out this baked chicken parmesan pasta recipe for another delicious chicken dish.

FAQs

How can I make these chicken strips healthier?

You can substitute regular breadcrumbs with whole wheat breadcrumbs or crush some oats for a healthier coating.

Can I freeze the chicken strips?

Yes, you can freeze the uncooked, breaded chicken strips. Just make sure to freeze them in a single layer before transferring them to a zip-top bag for long-term storage.

What is the best way to store leftovers?

Store any leftover chicken strips in an airtight container in the fridge for up to three days. Reheat them in the oven for the best texture.

Spicy Baked Chicken Strips

These Spicy Baked Chicken Strips combine tender chicken and crunchy breading for a delicious dish that’s both flavorful and healthier.

Main ingredients

  • 1 lb chicken breasts (Cut into strips)
  • 1 cup breadcrumbs (Use fresh breadcrumbs for a crunchier finish)
  • 1/2 cup all-purpose flour (For dredging)
  • 2 large eggs (Beaten, for coating)

Spice mix

  • 1 tbsp paprika (Adjust spice level as desired)
  • 1/2 tbsp cayenne pepper (Use less for a milder flavor)
  • 1 tbsp garlic powder

Preparation

  1. Preheat your oven to 400°F (200°C) and line a baking sheet with parchment paper.
  2. Cut the chicken breasts into strips.
  3. Set up three bowls: one with flour, the second with beaten eggs, and the third with a mixture of breadcrumbs and spices.
  4. Dredge the chicken strips in flour, dip them in the egg, and then coat them with the seasoned breadcrumbs.

Baking

  1. Place the strips on the baking sheet and bake for about 20-25 minutes until golden and crispy.

For extra flavor, let the chicken strips sit in the spices for at least 30 minutes before baking to enhance the taste.

Appetizer, Main Course
American
Baked Chicken Strips, Easy Chicken Dinner, Finger Food, Healthy Chicken Recipe, Spicy Chicken

Balsamic Steak Gorgonzola Salad with Grilled Corn

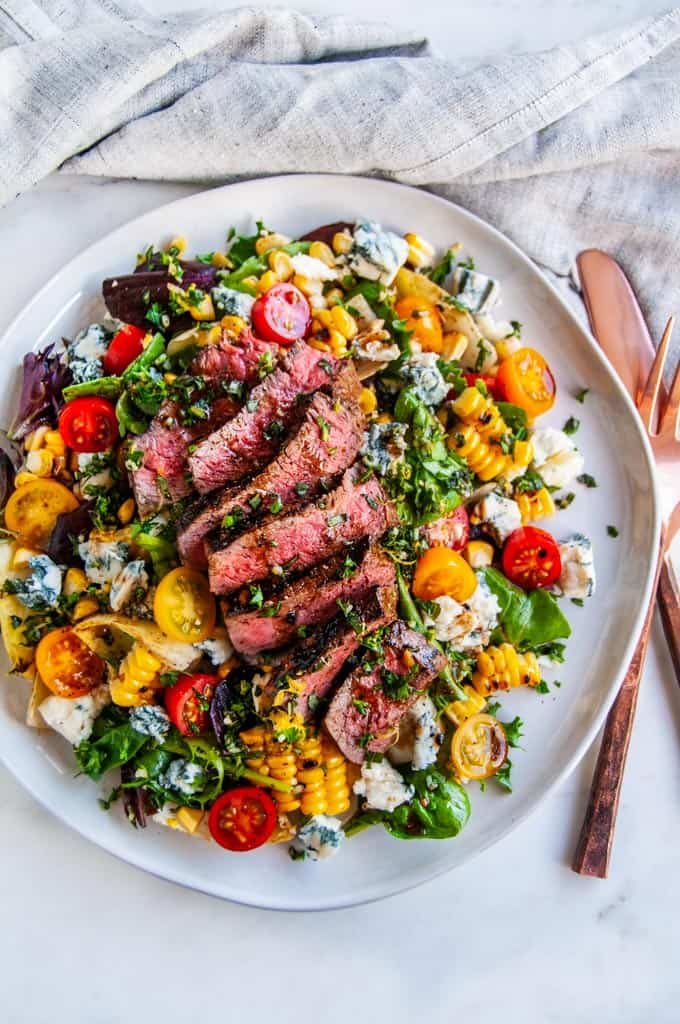
Balsamic Steak Gorgonzola Salad with grilled corn and fresh vegetables

If you’re looking for a tasty dish to impress your friends and family, the Balsamic Steak Gorgonzola Salad with Grilled Corn is just the recipe you need. This delightful salad combines juicy grilled steak, creamy Gorgonzola cheese, and sweet grilled corn, all drizzled with a rich balsamic dressing. It’s a crowd-pleaser that’s full of flavor and freshness, making it an ideal choice for a summer gathering or a cozy dinner at home. You’ll love the way the savory steak, tangy cheese, and sweet corn come together in every bite, and we can guarantee this dish will have everyone coming back for seconds. Get ready to whip up this delicious salad, and let the compliments roll in!

How to prepare Balsamic Steak Gorgonzola Salad with Grilled Corn

  1. Start by marinating the steak in balsamic vinaigrette for at least 30 minutes.
  2. Preheat your grill to medium-high heat.
  3. Grill the corn on the cob for about 10 minutes, turning occasionally, until charred and tender. Let it cool, then cut the kernels off the cob.
  4. Grill the marinated steak for about 5-7 minutes on each side, or until cooked to your desired doneness. Let it rest before slicing.
  5. In a large salad bowl, combine mixed greens, grilled corn, sliced steak, and crumbled Gorgonzola cheese.
  6. Drizzle with more balsamic vinaigrette and toss gently to combine.
  7. Serve immediately and enjoy your fresh, flavorful salad!

Balsamic Steak Gorgonzola Salad with Grilled Corn

Why You’ll Love Balsamic Steak Gorgonzola Salad with Grilled Corn

This salad truly has it all! It features a perfect balance of flavors with the savory notes of the steak paired with the creamy richness of Gorgonzola. The addition of sweet corn adds a nice crunch and a hint of sweetness that elevates the dish. Plus, it’s a versatile recipe that can be prepared for any occasion, whether it’s a backyard barbecue or a light weeknight dinner. If you enjoy delicious salads that are both filling and satisfying, this recipe is a must-try.

Tips for success

To ensure your Balsamic Steak Gorgonzola Salad is a hit, keep these tips in mind:

  • Use a meat thermometer for perfectly cooked steak, aiming for about 135°F for medium-rare.
  • Opt for fresh, in-season corn for the sweetest flavor.
  • If you’re short on time, use pre-cooked steak or rotisserie chicken as substitutes.
  • Pair the salad with a light white wine or sparkling water for a refreshing drink.

Serving Suggestions

This salad is hearty enough to be a main dish, but it pairs beautifully with various sides. Consider serving it alongside crusty bread or a simple vegetable soup. You can also enjoy it with a side of roasted veggies or potato wedges for a more substantial meal. For a variation, try adding nuts like walnuts or pecans for an added crunch or a dash of fruits like pear or apples for sweetness.

Balsamic Steak Gorgonzola Salad with Grilled Corn

FAQs

Can I make this salad ahead of time?

Yes, you can prepare the components ahead of time. Just keep the dressing separate and combine everything just before serving to maintain freshness.

What can I substitute for Gorgonzola cheese?

If you’re not a fan of Gorgonzola, you can use feta or goat cheese for a different flavor profile.

How do I store leftovers?

Store leftover salad in an airtight container in the fridge for up to two days. Keep the dressing separate to avoid sogginess.

If you’re also interested in another tasty salad, check out this Paleo Grilled Chicken Cobb Salad for a flavorful option.

Balsamic Steak Gorgonzola Salad with Grilled Corn

A delightful salad featuring juicy grilled steak, creamy Gorgonzola cheese, and sweet grilled corn, drizzled with rich balsamic dressing.

For the salad

  • 1 lb steak (Use your preferred cut (e.g., sirloin, ribeye))
  • 1 cup Gorgonzola cheese, crumbled (Can substitute with feta or goat cheese)
  • 2 ears corn on the cob (Use fresh, in-season corn for the best flavor)
  • 4 cups mixed greens
  • 1/2 cup balsamic vinaigrette (For marinating steak and drizzling)

Preparation

  1. Marinate the steak in balsamic vinaigrette for at least 30 minutes.

Grilling

  1. Preheat your grill to medium-high heat.
  2. Grill the corn on the cob for about 10 minutes, turning occasionally, until charred and tender. Let it cool, then cut the kernels off the cob.
  3. Grill the marinated steak for about 5-7 minutes on each side, or until cooked to your desired doneness. Let it rest before slicing.

Assembly

  1. In a large salad bowl, combine mixed greens, grilled corn, sliced steak, and crumbled Gorgonzola cheese.
  2. Drizzle with more balsamic vinaigrette and toss gently to combine.
  3. Serve immediately and enjoy your fresh, flavorful salad!

For best results, use a meat thermometer for perfectly cooked steak, aiming for about 135°F for medium-rare. If you’re short on time, consider using pre-cooked steak or rotisserie chicken. This salad pairs beautifully with a light white wine or sparkling water.

Main Course, Salad
American
Balsamic Salad, Gorgonzola Cheese, Grilled Steak, Healthy Salad, Summer Recipe

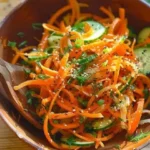
Cucumber Carrot Salad

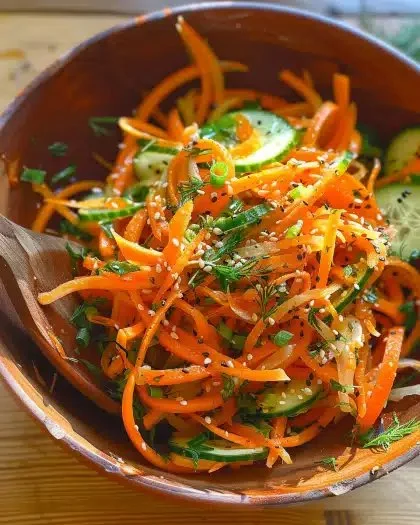
Cucumber Carrot Salad with fresh ingredients on a plate

Cucumber Carrot Salad is a refreshing and vibrant dish, perfect for warm days or as a crunchy side. Imagine the crispness of cucumbers paired with the sweetness of carrots, all dressed in a tangy dressing that brings everything together. This salad is not only delicious but also a crowd-pleaser at gatherings. It’s light yet filling, making it a wonderful addition to any meal. Let’s dive into making this tasty salad which is sure to brighten up your plate!

How to prepare Cucumber Carrot Salad

To make a delightful Cucumber Carrot Salad, you will need the following ingredients:

  • 2 medium cucumbers
  • 2 large carrots
  • 2 tablespoons olive oil
  • 1 tablespoon apple cider vinegar
  • Salt and pepper to taste
  • Optional: fresh herbs like parsley or cilantro for added flavor

Directions:

  1. Start by washing the cucumbers and carrots thoroughly. Peel the carrots if you prefer, but the skin can add a nice texture.
  2. Slice the cucumbers and julienne the carrots into thin strips.
  3. In a large bowl, combine the sliced cucumbers and julienned carrots.
  4. In a small bowl, whisk together the olive oil, apple cider vinegar, and a pinch of salt and pepper.
  5. Pour the dressing over the cucumber and carrot mixture. Toss gently to coat all the vegetables evenly.
  6. For best flavor, let the salad sit for at least 10 minutes before serving. You can also garnish it with fresh herbs if desired.

Cucumber Carrot Salad

Why You’ll Love Cucumber Carrot Salad

Cucumber Carrot Salad is incredibly versatile. Whether you’re serving it at a BBQ, enjoying it on the side of grilled chicken, or simply having it as a light lunch, this salad fits perfectly into any occasion. The fresh, crunchy texture will keep you coming back for more. Plus, it’s healthy, packed with vitamins, and takes very little time to prepare!

Tips for success

  • Use fresh vegetables for the best flavor and crunch.
  • Feel free to experiment with different dressings. A splash of lemon juice can also enhance the taste.
  • If you like a bit of sweetness, add honey or maple syrup to the dressing.

Serving Suggestions

This salad pairs wonderfully with grilled meats, seafood, or even as part of a vegetarian meal. You can also serve it alongside other salads, like an Asian Carrot Salad, for a colorful spread on your table.

Cucumber Carrot Salad

FAQs

Can I make this salad ahead of time?

Yes, you can prepare the salad a few hours in advance. Just keep it in the fridge and add the dressing before serving for the best freshness.

What other ingredients can I add?

You can add bell peppers, cherry tomatoes, or even nuts for some crunch. The options are endless!

Is this salad suitable for meal prep?

Absolutely! Just store it in an airtight container in the fridge, and it will stay fresh for a few days.

Cucumber Carrot Salad is a delightful addition to any meal and a fantastic way to enjoy fresh vegetables. With its simple ingredients and quick preparation, it’s perfect for busy days or entertaining guests. If you want to explore more delicious salads, check out this Cucumber and Carrot Salad (Asian inspired) to inspire your next culinary adventure. Happy cooking!

Cucumber Carrot Salad

A refreshing and vibrant salad combining crisp cucumbers and sweet carrots, all dressed in a tangy dressing.

Salad Ingredients

  • 2 medium cucumbers (Fresh and crisp)
  • 2 large carrots (Peel if desired)

Dressing

  • 2 tablespoons olive oil (Extra virgin for best flavor)
  • 1 tablespoon apple cider vinegar (Add more for tanginess)
  • to taste Salt (Adjust according to preference)
  • to taste Pepper (Freshly ground is best)
  • Optional: fresh herbs (parsley or cilantro) (For added flavor and garnish)

Preparation

  1. Wash the cucumbers and carrots thoroughly.
  2. Peel the carrots if you prefer, but the skin can add a nice texture.
  3. Slice the cucumbers and julienne the carrots into thin strips.

Mixing

  1. In a large bowl, combine the sliced cucumbers and julienned carrots.
  2. In a small bowl, whisk together the olive oil, apple cider vinegar, salt, and pepper.
  3. Pour the dressing over the cucumber and carrot mixture, tossing gently to coat.

Serving

  1. Let the salad sit for at least 10 minutes before serving for best flavor.
  2. Garnish with fresh herbs if desired.

Use fresh vegetables for the best flavor and crunch. You can experiment with different dressings, such as adding lemon juice or a bit of honey for sweetness.

Salad, Side Dish
American, Healthy
Carrot Salad, Cucumber Salad, Easy Salad, Healthy Salad, Refreshing Salad

Lemon Orzo Pasta Salad

Delicious Lemon Orzo Pasta Salad served in a bowl with fresh ingredients

Lemon Orzo Pasta Salad is a bright and refreshing dish that will add a burst of flavor to any meal. This delightful salad combines the lightness of orzo pasta with the zesty taste of lemon, fresh vegetables, and a hint of herbs. It’s a dish that feels both hearty and refreshing, making it perfect for warm days, picnics, or family gatherings. Imagine serving this colorful salad to your friends and hearing their delighted reactions, it’s sure to become a crowd-pleaser. You’ll find that its combination of tangy lemon, vibrant vegetables, and tender orzo creates a charming dish that everyone will enjoy. So, roll up your sleeves, grab some ingredients, and let’s whip up this tasty Lemon Orzo Pasta Salad!

How to prepare Lemon Orzo Pasta Salad

To prepare this delightful Lemon Orzo Pasta Salad, follow these simple steps:

  1. Cook the Orzo: Start by boiling a pot of salted water. Once it’s boiling, add the orzo pasta and cook it according to the package instructions until it’s al dente. Drain the pasta and set it aside to cool.
  2. Prepare the Vegetables: While the orzo cools, chop your vegetables. Dice the cucumbers, bell peppers, and cherry tomatoes. Thinly slice the red onion and place all the vegetables in a large bowl.
  3. Make the Lemon Dressing: In a small bowl, whisk together olive oil, lemon juice, salt, and pepper. You can add some chopped fresh herbs, like parsley or basil, for extra flavor.
  4. Combine: Once the orzo has cooled, add it to the bowl with the vegetables. Drizzle the lemon dressing over everything and toss gently until well combined.
  5. Serve: Let the salad sit for at least 15 minutes to allow the flavors to meld together. This salad can be served chilled or at room temperature.

Lemon Orzo Pasta Salad

Why You’ll Love Lemon Orzo Pasta Salad

You will love this Lemon Orzo Pasta Salad for many reasons. First, it’s so easy to make, which means you can whip it up quickly for last-minute gatherings. Second, the freshness of the ingredients brings a vibrant taste to your plate, making it perfect for summer barbecues or any occasion. Plus, it’s packed with healthy vegetables, so you can feel great about serving it to your family and friends. Best of all, it’s a versatile dish – feel free to add your favorite veggies, proteins, or even nuts to tailor it to your taste!

Tips for success

  1. Cook the Orzo Perfectly: Make sure not to overcook the orzo. It should be tender but still firm to the bite, known as al dente.
  2. Let It Chill: Allowing the salad to sit for a bit helps the flavors blend beautifully. If you have time, chill it in the fridge before serving.
  3. Add Fresh Herbs: Fresh herbs can elevate the flavor, so don’t hesitate to include parsley, basil, or even dill!

Serving Suggestions

Lemon Orzo Pasta Salad is a fantastic side dish for grilled chicken or fish, adding a fresh touch to your meal. It also works well as a light lunch by tossing in cooked shrimp or grilled veggies. For a complete meal, pair it with a loaf of hearty bread and a refreshing drink.

FAQs

Can I make Lemon Orzo Pasta Salad a day ahead?

Yes, you can make it a day in advance. Store it in the refrigerator and let it sit at room temperature for about 15 minutes before serving.

What other ingredients can I add?

Feel free to add ingredients like feta cheese, olives, or even avocado for a creamier texture.

How long does the salad last in the fridge?

The salad can last up to 3 days in the refrigerator. Just be aware that the vegetables may lose some crunch over time.

Lemon Orzo Pasta Salad

Lemon Orzo Pasta Salad

A bright and refreshing salad that combines the lightness of orzo pasta with zesty lemon, fresh vegetables, and herbs, perfect for warm days and gatherings.

For the Salad

  • 8 oz orzo pasta (Cook according to package instructions.)
  • 1 cup cucumbers, diced (Fresh and crunchy.)
  • 1 cup bell peppers, diced (Any color you prefer.)
  • 1 cup cherry tomatoes, halved (Adds sweetness.)
  • 1/2 small red onion, thinly sliced (For flavor.)

For the Lemon Dressing

  • 1/4 cup olive oil (Use extra virgin for best flavor.)
  • 2 tbsp lemon juice (Freshly squeezed for brightness.)
  • 1/2 tsp salt (To taste.)
  • 1/4 tsp pepper (To taste.)
  • 1 tbsp fresh herbs (parsley or basil), chopped (Optional for added flavor.)

Preparation

  1. Boil a pot of salted water and cook the orzo pasta until al dente. Drain and set aside to cool.
  2. Meanwhile, chop the cucumbers, bell peppers, cherry tomatoes, and slice the red onion. Place the vegetables in a large bowl.
  3. In a small bowl, whisk together olive oil, lemon juice, salt, and pepper. Add chopped fresh herbs if desired.

Combining

  1. Once the orzo has cooled, add it to the bowl with the vegetables.
  2. Drizzle the lemon dressing over everything and toss gently until well combined.

Serving

  1. Let the salad sit for at least 15 minutes to allow the flavors to meld. Serve chilled or at room temperature.

For best results, do not overcook the orzo. Let the salad sit to blend flavors, and consider chilling it in the fridge. Add fresh herbs for extra flavor.

Salad, Side Dish
American, Mediterranean
Easy Recipes, Lemon Orzo Pasta Salad, pasta salad, Refreshing Salad, Vegetable Salad

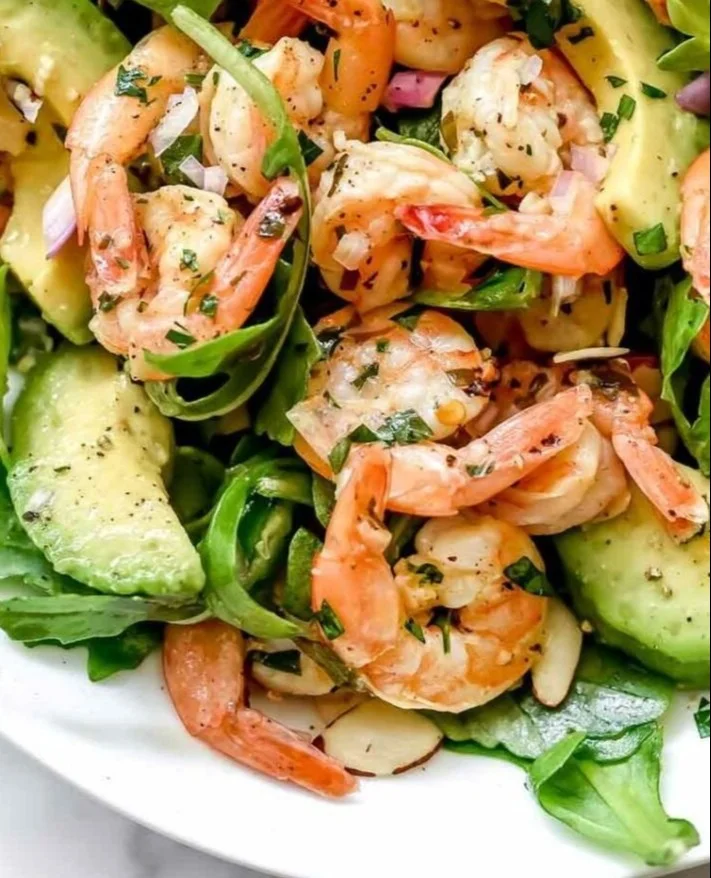
Citrus Shrimp and Avocado Salad

Citrus Shrimp and Avocado Salad in a bowl with vibrant ingredients

This Citrus Shrimp and Avocado Salad feels like sunshine on a plate. It mixes bright citrus, juicy shrimp, creamy avocado, and leafy greens. The mix gives sweet, tangy, and rich flavors in each bite. Friends and family love it at lunch and at summer dinners. It works as a light meal or a side dish for a cookout. If you like bright salads, try a similar arugula citrus salad recipe for more ideas. This recipe is a crowd-pleaser, easy to make, and full of fresh taste, so you will want to make it again and again, and maybe twice this week.

How to prepare Citrus Shrimp and Avocado Salad

  1. Peel and devein 1 pound of shrimp, rinse, and pat dry.
  2. In a bowl, mix juice of 1 orange and 1 lime, 1 tablespoon olive oil, 1 teaspoon honey, salt and pepper.
  3. Add the shrimp to the citrus mix and let them sit for 10 minutes.
  4. Heat a skillet over medium heat. Cook shrimp 2 minutes per side, until pink and firm. Remove and cool slightly.
  5. In a large bowl, combine 4 cups mixed greens, 1 diced avocado, 1 small red onion thinly sliced, and segments from 1 orange.
  6. Toss the cooled shrimp with the salad. Drizzle a little extra olive oil and a squeeze of lime. Add salt and pepper to taste.
  7. Serve right away so the avocado stays fresh.

Citrus Shrimp and Avocado Salad

Why You’ll Love Citrus Shrimp and Avocado Salad

  • It is bright and fresh, with citrus that wakes up the shrimp.
  • The avocado adds a rich, creamy bite that balances the tang.
  • It comes together fast, so it is perfect for weeknights.
  • It looks colorful and inviting on the table, a great choice for guests.

Tips for success

  • Use fresh citrus for the best flavor.
  • Do not overcook the shrimp, they cook fast.
  • Cut the avocado last to keep it from browning.
  • Taste the dressing and adjust salt, honey, or lime to your liking.
  • If you want more crunch, add toasted almonds or pepitas.

Serving Suggestions

  • Serve on a bed of mixed greens or baby spinach.
  • Pair with crusty bread or warm tortillas.
  • Add quinoa or couscous to make it more filling.
  • Offer extra lime wedges on the side for a bright finish.

Citrus Shrimp and Avocado Salad

FAQs

Q: Can I use frozen shrimp?

A: Yes, thaw and pat dry before marinating and cooking.

Q: Can I make this ahead?

A: You can cook the shrimp ahead, but toss avocado and dressing right before serving to keep it fresh.

Q: Is there a good substitute for avocado?

A: Try sliced cucumber or cooked chickpeas for a different texture.

Q: Can I grill the shrimp instead of pan cook?

A: Yes, grill shrimp 2 to 3 minutes per side for a nice char.

Conclusion

This salad is quick, tasty, and fresh, and it makes a great light lunch or a bright side dish. For a tested quick version and more tips, see 20-Minute Citrus Shrimp and Avocado Salad – FoodieCrush.com.

Citrus Shrimp and Avocado Salad

A bright and refreshing salad featuring juicy shrimp, creamy avocado, and a tangy citrus dressing.

For the Shrimp

  • 1 pound shrimp, peeled and deveined (Thaw and pat dry if using frozen shrimp)
  • 1 tablespoon olive oil (Extra for drizzling)
  • 1 teaspoon honey (Adjust to taste)
  • 1 orange juice of (Use fresh citrus for best flavor)
  • 1 lime juice of (Use fresh citrus for best flavor)
  • salt and pepper (To taste)

For the Salad

  • 4 cups mixed greens (Or baby spinach)
  • 1 small red onion, thinly sliced
  • 1 avocado, diced (Cut last to prevent browning)
  • 1 orange segments from

Preparation

  1. Peel and devein the shrimp, then rinse and pat dry.
  2. In a bowl, mix the juice of one orange, the juice of one lime, one tablespoon of olive oil, one teaspoon of honey, and season with salt and pepper.
  3. Add the shrimp to the citrus mixture and let them sit for 10 minutes.

Cooking

  1. Heat a skillet over medium heat and cook the shrimp for 2 minutes per side, until pink and firm. Remove from heat and cool slightly.

Assembly

  1. In a large bowl, combine mixed greens, diced avocado, sliced red onion, and orange segments.
  2. Toss in the cooled shrimp and drizzle with extra olive oil and a squeeze of lime. Add salt and pepper to taste.
  3. Serve immediately to prevent the avocado from browning.

For added crunch, you can mix in toasted almonds or pepitas. Pair with crusty bread or warm tortillas for a heartier meal. Offer extra lime wedges on the side.

lunch, Salad, Side Dish
American, Seafood
Avocado Salad, Citrus Salad, Healthy Recipe, Shrimp Salad, summer salad

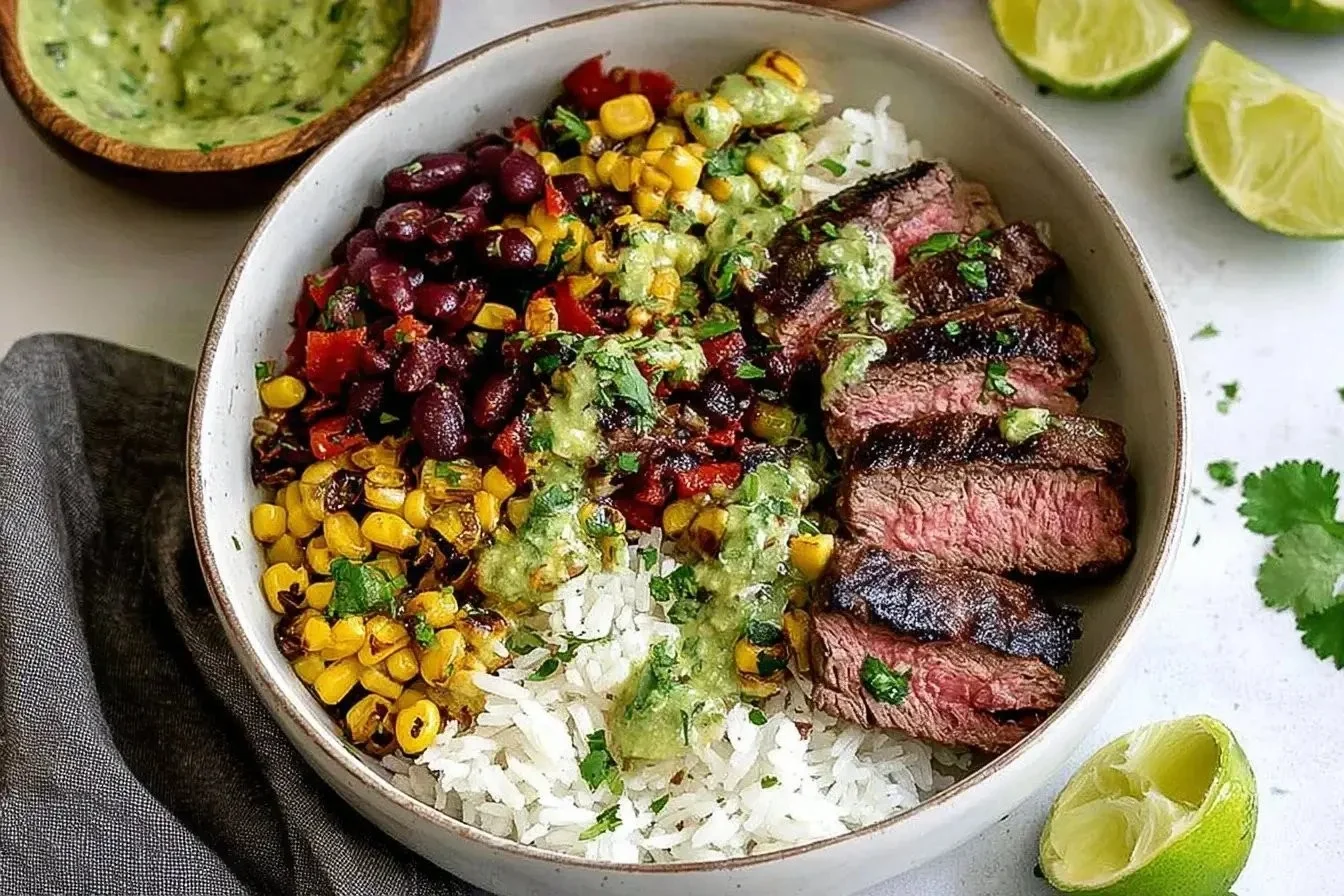
Cilantro Lime Steak Bowls

Cilantro lime steak bowls with fresh ingredients and vibrant colors

Cilantro Lime Steak Bowls are a delicious and healthy meal option that packs a punch of flavor. Fresh ingredients and bold spices create a dish that is both satisfying and nutritious. The combination of juicy steak, zesty lime, and fresh cilantro will tantalize your taste buds. This recipe is easy to prepare and perfect for lunch or dinner.

Making Cilantro Lime Steak Bowls at home allows you to control the ingredients and flavors. You can adjust the spices to your taste and add or omit ingredients based on your preferences. These bowls are also versatile; you can serve them with rice, quinoa, or salad greens.

Another reason to make this recipe is that it is perfect for meal prep. You can cook a large batch of steak and vegetables, then assemble your bowls throughout the week. Not only will you save time, but you’ll also have a delicious and healthy meal ready whenever hunger strikes.

Lastly, this recipe is crowd-pleaser. Whether you are cooking for your family or hosting friends, everyone will enjoy the vibrant flavors of this dish. With simple preparation and easy-to-find ingredients, Cilantro Lime Steak Bowls are a great option for anyone looking for a quick and tasty meal.

How to Make Cilantro Lime Steak Bowls

To make Cilantro Lime Steak Bowls, start with the ingredients. You will need steak, lime juice, garlic, olive oil, salt, pepper, fresh cilantro, and your choice of base such as rice or quinoa.

Begin by marinating the steak. In a bowl, mix lime juice, minced garlic, olive oil, salt, and pepper. Place the steak in the bowl and let it marinate for at least 30 minutes to absorb the flavors. After marinating, heat a grill or skillet over medium-high heat. Cook the steak for about 4-5 minutes on each side for medium-rare, depending on the thickness. Once cooked, let the steak rest for a few minutes before slicing it into thin strips.

Next, prepare your base. If using rice, cook according to the package instructions. If using quinoa, rinse it and cook it with water in a pot until fluffy.

Finally, assemble your bowls. Add a portion of your chosen base, top it with sliced steak, and garnish with fresh chopped cilantro over the top for added flavor. You can also add extra toppings like avocado, salsa, or corn if desired.

How to Serve Cilantro Lime Steak Bowls

Serving Cilantro Lime Steak Bowls is all about presentation and personal preference. Begin by placing a generous scoop of your chosen base, such as rice or quinoa, at the bottom of a bowl. Then, layer the sliced steak on top of the base to make it the star of the dish.

Consider adding some fresh vegetables for color and crunch. Diced tomatoes, bell peppers, or corn add freshness and texture. You can also add sliced avocado for creaminess and extra flavor.

For a zesty finish, drizzle some extra lime juice over the top or add a dollop of sour cream or yogurt. Fresh cilantro should be sprinkled on top to enhance the dish’s flavors and presentation.

These bowls are great for both casual and formal settings. Serve them as a hearty lunch option or as a light dinner. You can also set up a build-your-own bowl station for gatherings, allowing guests to customize their bowls based on their favorite toppings.

How to Store Cilantro Lime Steak Bowls

To store leftover Cilantro Lime Steak Bowls, first, let the ingredients cool to room temperature. You want to prevent condensation from forming inside the storage container.

Use airtight containers to keep the ingredients fresh. Each component—steak, base, and toppings—can be stored separately. This helps maintain the texture and flavor of each item. Store the steak in one container, the base in another, and any veggies or sauces in separate containers.

Refrigerate the food and consume it within 3-4 days for the best flavor and safety. If you want to keep these bowls for longer, consider freezing the cooked steak. Wrap the steak tightly in plastic wrap or aluminum foil and place it in a freezer-safe bag. It can be frozen for up to 3 months. When ready to eat, just thaw in the refrigerator overnight and reheat.

Tips to Make Cilantro Lime Steak Bowls

Here are some helpful tips to ensure your Cilantro Lime Steak Bowls turn out delicious. First, choose the right cut of steak. Cuts like flank steak or skirt steak are ideal as they are flavorful and tender when marinated properly.

Make sure to marinate the steak for at least 30 minutes, but allowing it to sit in the marinade for a few hours can enhance the flavor even further. If you’re short on time, you can also make a quick marinade and grill the steak immediately, although the flavor may not be as strong.

For a meal prep option, cook extra steak so that you have leftovers for the week. You can use the extra steak in sandwiches, salads, or tacos as well. Also, feel free to gather seasonal vegetables for toppings; this adds variety and nutrients to your bowls.

Use fresh cilantro for garnish as it enhances the freshness of the dish. If you don’t like cilantro, parsley can be a good substitute. Lastly, always taste and adjust the seasoning before serving to ensure that your flavors shine.

Variation

Cilantro Lime Steak Bowls can easily be adapted to suit different diets or tastes. For a vegetarian version, replace the steak with grilled tofu or tempeh, which can be marinated similarly. You can also use grilled chicken or shrimp if you prefer seafood.

Feel free to experiment with different grains or bases as well, such as cauliflower rice or whole wheat couscous. Adding beans like black beans or chickpeas can also boost the protein and fiber content. Customize your toppings to include your favorites, like pickled jalapeños or diced red onion for extra flavor.

FAQs

1. Can I use a different type of meat?
Yes! You can substitute steak with chicken, shrimp, or even tofu for a vegetarian option.

2. How long can I keep leftovers?
Leftovers can be stored in the refrigerator for 3-4 days. For longer storage, freeze the cooked steak.

3. What can I serve with these bowls?
These bowls are delicious on their own, but you can also serve them with tortilla chips, salsa, or a side salad for a fuller meal.

Cilantro Lime Steak Bowls

Delicious and healthy meal options packed with juicy steak, zesty lime, and fresh cilantro. Perfect for lunch or dinner, these bowls are versatile and ideal for meal prep.

For the Marinate

  • 1 lb steak (Flank or skirt steak recommended)
  • 1/4 cup lime juice (Freshly squeezed for best flavor)
  • 3 cloves garlic, minced
  • 2 tbsp olive oil
  • 1 tsp salt
  • 1/2 tsp pepper

For Serving

  • 2 cups cooked rice or quinoa (Cook according to package instructions)
  • 1/4 cup fresh cilantro, chopped (Optional for garnish)
  • 1 avocado sliced (Optional for topping)
  • 1/2 cup salsa (Optional for topping)
  • 1/2 cup corn (Optional for topping)
  • 1 cup diced tomatoes or bell peppers (Optional for added freshness)

Preparation

  1. In a bowl, mix lime juice, minced garlic, olive oil, salt, and pepper.
  2. Place the steak in the marinade and let it marinate for at least 30 minutes.

Cooking

  1. Heat a grill or skillet over medium-high heat.
  2. Cook the marinated steak for about 4-5 minutes on each side for medium-rare.
  3. Let the steak rest for a few minutes before slicing into thin strips.

Assembly

  1. Add a portion of cooked rice or quinoa to a bowl.
  2. Top with sliced steak and garnish with fresh chopped cilantro.
  3. Add any additional toppings like avocado, salsa, or corn.

For meal prep, store each component separately in airtight containers. Use fresh cilantro for garnish, and consider parsley as a substitute if needed. Taste and adjust seasoning as necessary before serving.

Dinner, lunch
Healthy, Mexican
Cilantro Lime Steak Bowls, Healthy Dinner, Meal Prep, quick recipe, Steak Bowls


Cilantro Lime Steak Bowls

Delicious and healthy meal options packed with juicy steak, zesty lime, and fresh cilantro. Perfect for lunch or dinner, these bowls are versatile and ideal for meal prep.

For the Marinade

  • 1 lb steak (Flank or skirt steak recommended)
  • 1/4 cup lime juice (Freshly squeezed for best flavor)
  • 3 cloves garlic, minced
  • 2 tbsp olive oil
  • 1 tsp salt
  • 1/2 tsp pepper

For Serving

  • 2 cups cooked rice or quinoa (Cook according to package instructions)
  • 1/4 cup fresh cilantro, chopped (Optional for garnish)
  • 1 each avocado, sliced (Optional for topping)
  • 1/2 cup salsa (Optional for topping)
  • 1/2 cup corn (Optional for topping)
  • 1 cup diced tomatoes or bell peppers (Optional for added freshness)

Preparation

  1. In a bowl, mix lime juice, minced garlic, olive oil, salt, and pepper.
  2. Place the steak in the marinade and let it marinate for at least 30 minutes.

Cooking

  1. Heat a grill or skillet over medium-high heat.
  2. Cook the marinated steak for about 4-5 minutes on each side for medium-rare.
  3. Let the steak rest for a few minutes before slicing into thin strips.

Assembly

  1. Add a portion of cooked rice or quinoa to a bowl.
  2. Top with sliced steak and garnish with fresh chopped cilantro.
  3. Add any additional toppings like avocado, salsa, or corn.

For meal prep, store each component separately in airtight containers. Use fresh cilantro for garnish, and consider parsley as a substitute if needed. Taste and adjust seasoning as necessary before serving.

Dinner, lunch
Healthy, Mexican
Cilantro Lime Steak Bowls, Healthy Recipes, Meal Prep, Quick Dinner, Steak Bowls

Garlic Chickpea Soup

Delicious Garlic Chickpea Soup in a bowl garnished with herbs

Garlic Chickpea Soup is a delightful dish that warms the soul and fills the belly. With its rich flavors and comforting texture, this soup is sure to please anyone who tries it. Imagine a bowl filled with hearty chickpeas, fragrant garlic, and a splash of wholesome broth, all coming together to create one delicious meal. Whether you are cooking for family or friends, this soup is a wonderful choice that feels both cozy and satisfying. Plus, it’s perfect for those chilly days when you just want something warm to sip on. Let’s dive into this crowd-pleasing recipe that’s as easy to make as it is delicious, and soon you will be craving it again and again!

How to Prepare Garlic Chickpea Soup

To make Garlic Chickpea Soup, you will need a few ingredients to start: chickpeas, garlic, vegetable broth, onion, carrots, celery, and seasonings. Begin by heating some olive oil in a large pot over medium heat. Next, finely chop the onion, carrots, and celery, and sauté them until they are soft, about 5 minutes. Then, add minced garlic and cook for another minute until it becomes fragrant.

Now it’s time to add the canned chickpeas (drained and rinsed) and pour in the vegetable broth. Bring everything to a boil, and then reduce the heat to let it simmer for about 15-20 minutes. Use an immersion blender to blend the soup until it’s creamy, or leave it chunky if you prefer. Season with salt and pepper to taste. Finally, serve your warm garlic chickpea soup with fresh herbs on top and enjoy this comforting bowl of goodness.

Why You’ll Love Garlic Chickpea Soup

Garlic Chickpea Soup is a fantastic choice for many reasons. First, it is packed with healthy ingredients that nourish the body, making it a great option for anyone looking for a wholesome meal. Chickpeas provide plant-based protein and fiber while garlic adds an aromatic flavor and health benefits.

Second, this soup is incredibly versatile. You can enjoy it on its own or pair it with crusty bread or a fresh salad. It is also easy to customize. Feel free to add your favorite vegetables or spices to make it uniquely yours.

Finally, it’s perfect for meal prep, as it stores well in the fridge or freezer. You can make a big batch and have delicious lunches waiting for you during the week. Once you try it, you’ll find yourself reaching for this recipe time and again.

Tips for Success with Garlic Chickpea Soup

To ensure your Garlic Chickpea Soup turns out perfect, here are some helpful tips. First, use fresh garlic for the best flavor. You can adjust the amount based on your preference and how much you love garlic.

Second, if you want a thicker soup, add more chickpeas or reduce the broth. Conversely, if you prefer a lighter soup, simply add more broth to thin it out to your liking.

Third, don’t rush the sautéing process. Allowing the onions, carrots, and celery to soften will build a solid flavor base for the soup.

Lastly, taste the soup before serving and adjust the seasonings as needed. Adding a squeeze of lemon juice at the end can elevate the flavors and add brightness to your delicious soup. Enjoying your Garlic Chickpea Soup will surely bring joy to your taste buds with these tips!

Serving Suggestions for Garlic Chickpea Soup

When it comes to serving Garlic Chickpea Soup, there are many delightful options. One simple way to enjoy it is by serving it with crusty bread. A slice of sourdough or whole-grain bread can soak up the soup and complement the flavors perfectly.

For a heartier meal, consider adding a side salad. A fresh green salad with a light vinaigrette can balance the richness of the soup. You might also want to sprinkle some grated cheese on top of the soup before serving for an extra layer of flavor.

If you want to turn it into a complete meal, pair the soup with a grain dish, like quinoa or brown rice. This will make your meal even more filling and nutritious. No matter how you serve it, Garlic Chickpea Soup is sure to delight your guests or family at the table.

FAQs

Can I freeze Garlic Chickpea Soup?
Yes, you can freeze the soup. Just let it cool completely and store it in an airtight container. It will last for up to 3 months in the freezer.

Can I use dried chickpeas instead of canned?
Absolutely! If you prefer dried chickpeas, soak them overnight and cook them until tender before adding them to the soup.

How long does Garlic Chickpea Soup last in the fridge?
The soup can be stored in the fridge for about 4-5 days. Make sure to keep it in a sealed container for freshness.

Can I add other vegetables to the soup?
Yes, definitely! Feel free to add vegetables like spinach, kale, or bell peppers to customize your soup according to your taste.

Is this soup vegan-friendly?
Yes, Garlic Chickpea Soup is entirely vegan and made with plant-based ingredients. Enjoy this nourishing soup without worry!

[tasty-recipe id=”5059″]

Garlic Chickpea Soup

A comforting and nourishing soup filled with hearty chickpeas and aromatic garlic, perfect for chilly days.

Main Ingredients

  • 1 can canned chickpeas, drained and rinsed (Alternatively, use dried chickpeas, soaked overnight and cooked until tender.)
  • 4 cloves garlic, minced (Use fresh garlic for the best flavor.)
  • 4 cups vegetable broth (Adjust for desired soup thickness.)
  • 1 medium onion, finely chopped
  • 2 medium carrots, diced
  • 2 stalks celery, diced
  • 2 tablespoons olive oil (For sautéing.)
  • to taste salt (Adjust seasonings to preference.)
  • to taste pepper (Adjust seasonings to preference.)
  • 1 lemon juice, optional (Add for brightness before serving.)

Preparation

  1. Heat olive oil in a large pot over medium heat.
  2. Finely chop the onion, carrots, and celery, and sauté until soft, about 5 minutes.
  3. Add minced garlic and cook for another minute until fragrant.

Cooking

  1. Add the canned chickpeas and pour in the vegetable broth.
  2. Bring to a boil, then reduce heat and let simmer for 15-20 minutes.
  3. Use an immersion blender to blend the soup until creamy, or leave it chunky if preferred.
  4. Season with salt and pepper to taste.

Serving

  1. Serve warm with fresh herbs on top. Enjoy!

Perfect for meal prep, Garlic Chickpea Soup stores well in the fridge for 4-5 days and can be frozen for up to 3 months. Add more chickpeas for a thicker soup or more broth for a lighter texture.

Main Course, Soup
Mediterranean, Vegan
Chickpeas, Cozy Meal, Garlic Chickpea Soup, Healthy Soup, Vegan Soup

Carnivore Loaded Chicken Salad

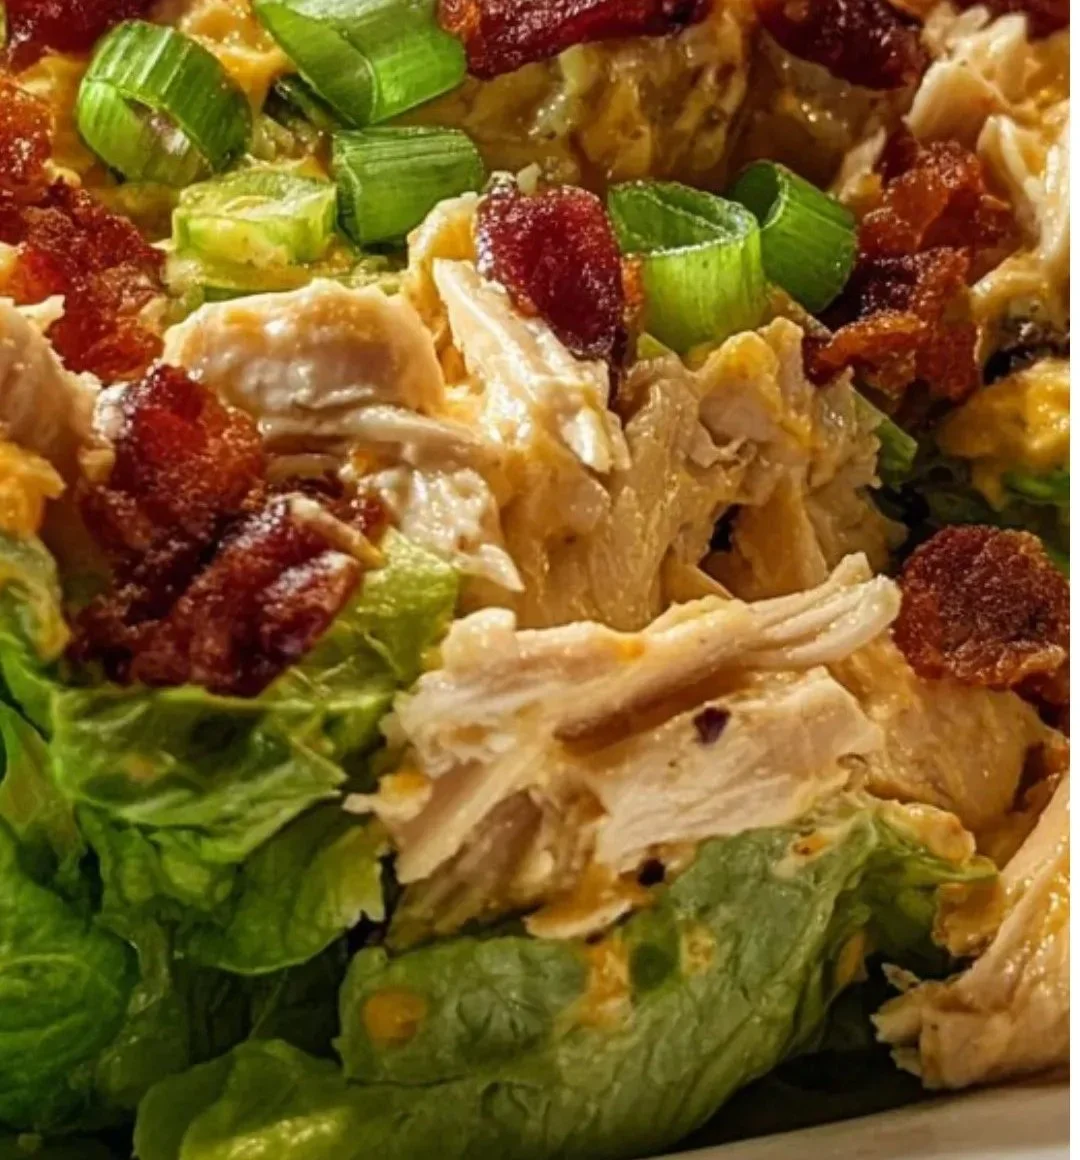
Delicious carnivore loaded chicken salad topped with fresh ingredients.

Carnivore Loaded Chicken Salad is a hearty and delicious meal that caters to those who enjoy a meat-centric diet. It combines tender chicken with an array of satisfying ingredients, making it not only tasty but also filling. This salad is perfect for anyone looking to follow a low-carb or high-protein diet. It’s a quick and easy recipe that you can whip up at home without needing advanced cooking skills. You can serve it as lunch, dinner, or even a snack.

Another great reason to make this recipe is its versatility. You can customize it with your favorite meats and toppings, allowing you to suit your personal taste. The combination of the ingredients offers a range of flavors and textures that will satisfy anyone’s cravings. Additionally, this salad is perfect for meal prep, as it can be made ahead of time and stored in the fridge for easy access throughout the week. The Carnivore Loaded Chicken Salad brings together simplicity, taste, and nutrition in one bowl. It’s an excellent choice for busy individuals or families who want a quick meal that packs a punch.

How to Make Carnivore Loaded Chicken Salad

To make Carnivore Loaded Chicken Salad, start by gathering your ingredients. You will need cooked chicken — either grilled, baked, or rotisserie works best. Cut the chicken into bite-sized pieces. Next, gather crispy bacon, shredded cheese (like cheddar or mozzarella), and any additional meats you want to add, such as salami or pepperoni.

In a large bowl, combine the chopped chicken with cooked bacon and shredded cheese. For extra flavor, you might want to add some diced pickles or chopped green onions. You can also include a dollop of mayonnaise or sour cream for creaminess. Mix everything well until fully combined.

Season the mixture with salt, pepper, or any herbs you prefer. For more zest, consider adding hot sauce or mustard. Once everything is mixed, place it in the fridge for about 30 minutes to let the flavors meld together. After chilling, your hearty Carnivore Loaded Chicken Salad is ready to serve!

How to Serve Carnivore Loaded Chicken Salad

When it comes to serving Carnivore Loaded Chicken Salad, there are several ways to enjoy it. You can serve it in a bowl on its own, as it is satisfying enough to be a meal on its own. For extra flair, consider placing the salad in a large lettuce leaf or a hollowed-out bell pepper for added crunch and flavor.

This salad also pairs well with various sides. You can serve it alongside crispy vegetable chips, crunchy pickles, or even a side of hard-boiled eggs. If you’re in the mood for something warm, consider serving it with hot soup or a cheesy cauliflower bake.

Additionally, you can make it more interactive by creating a salad bar. Place the salad in the center, along with extra toppings such as croutons, sliced olives, or different types of cheese. This allows everyone to customize their own bowl, making mealtime fun and engaging!

How to Store Carnivore Loaded Chicken Salad

Storing your Carnivore Loaded Chicken Salad is simple and allows you to enjoy it later. To store it, place the salad in an airtight container. Make sure to push out as much air as possible to keep it fresh. You can store it in the refrigerator for up to three days.

If you plan to make it in advance, it’s best not to add any mayonnaise or creamy ingredients until you are ready to serve. This will help prevent the salad from becoming soggy. Instead, keep these dressings separate so you can mix them in just before eating.

If you have leftovers, consider using them in different ways. You can stuff the salad into a wrap or incorporate it into an omelet for breakfast. Being creative with leftovers helps minimize waste and lets you enjoy the dish in new ways!

Tips to Make Carnivore Loaded Chicken Salad

To make your Carnivore Loaded Chicken Salad even better, here are some handy tips. First, use high-quality meats. The chicken and bacon you choose can greatly impact the flavor of the dish, so pick fresh ingredients.

Don’t shy away from experimenting with additional ingredients. For a spicy kick, add jalapeños or a splash of your favorite hot sauce. For texture, consider adding nuts or seeds that complement the other ingredients, such as sunflower seeds or chopped almonds.

Make sure to chill the salad long enough to let the flavors blend well; this step enhances the overall taste. If you want to make the salad more filling, you can serve it on a bed of greens like spinach or arugula.

Lastly, if desired, you can add avocados or guacamole for extra creaminess. This gives a nice contrast to the crispy elements in the salad and makes it even more delightful.

Variation

If you’re looking for variations, feel free to swap out the chicken for turkey, pork, or any other preferred meat. You could also add various types of cheese, such as feta or blue cheese, for added flavor. Adding some cooked egg or an assortment of herbs can also change the dynamics of the taste.

FAQs

Can I make this salad ahead of time?
Yes, you can make the salad ahead of time! Just store it in the refrigerator, and it will stay fresh for up to three days. Remember to add creamy dressings right before serving.

Is this salad suitable for meal prep?
Absolutely! This salad is great for meal prep. You can portion it out into containers for lunches or dinners during the week.

Can I use different meats in the recipe?
Yes, you can use different meats like turkey, ham, or even seafood like shrimp or crab for variety in flavor and texture.

Carnivore Loaded Chicken Salad

A hearty and satisfying salad combining tender chicken with bacon, cheese, and optional toppings, perfect for low-carb or high-protein diets.

Main Ingredients

  • 2 cups cooked chicken, cut into bite-sized pieces (Grilled, baked, or rotisserie chicken works best.)
  • 6 slices crispy bacon, chopped
  • 1 cup shredded cheese (cheddar or mozzarella)
  • 1/2 cup diced pickles (Optional for flavor.)
  • 1/4 cup chopped green onions (Optional for flavor.)
  • 1/2 cup mayonnaise or sour cream (For added creaminess.)
  • 1 tsp salt (To taste.)
  • 1 tsp pepper (To taste.)
  • 1 tbsp hot sauce or mustard (Optional for extra zest.)

Preparation

  1. Gather your ingredients: cooked chicken, crispy bacon, shredded cheese, and any additional meats like salami or pepperoni.
  2. In a large bowl, combine chopped chicken, cooked bacon, and shredded cheese.
  3. Add diced pickles, chopped green onions, and mayonnaise or sour cream. Mix until well combined.
  4. Season the mixture with salt, pepper, and any desired herbs. Add hot sauce or mustard for extra flavor.
  5. Chill the salad in the fridge for about 30 minutes to let the flavors meld together.

Serving Suggestions

  1. Serve in a bowl, or for added flair, place in a large lettuce leaf or hollowed-out bell pepper.
  2. Pair with sides such as vegetable chips, crunchy pickles, or hard-boiled eggs.
  3. Consider creating a salad bar with extra toppings like croutons, sliced olives, or various cheeses.

Storage

  1. Store the salad in an airtight container, pushing out as much air as possible. It can stay fresh in the refrigerator for up to three days.
  2. Avoid adding creamy ingredients until ready to serve to prevent sogginess.

Use high-quality meats for the best flavor. Chill the salad to enhance taste. For variety, try adding jalapeños, nuts, or avocados for extra creaminess and texture.

Dinner, lunch, Snack
American
Chicken Salad, High Protein Salad, low carb meal, Meal Prep