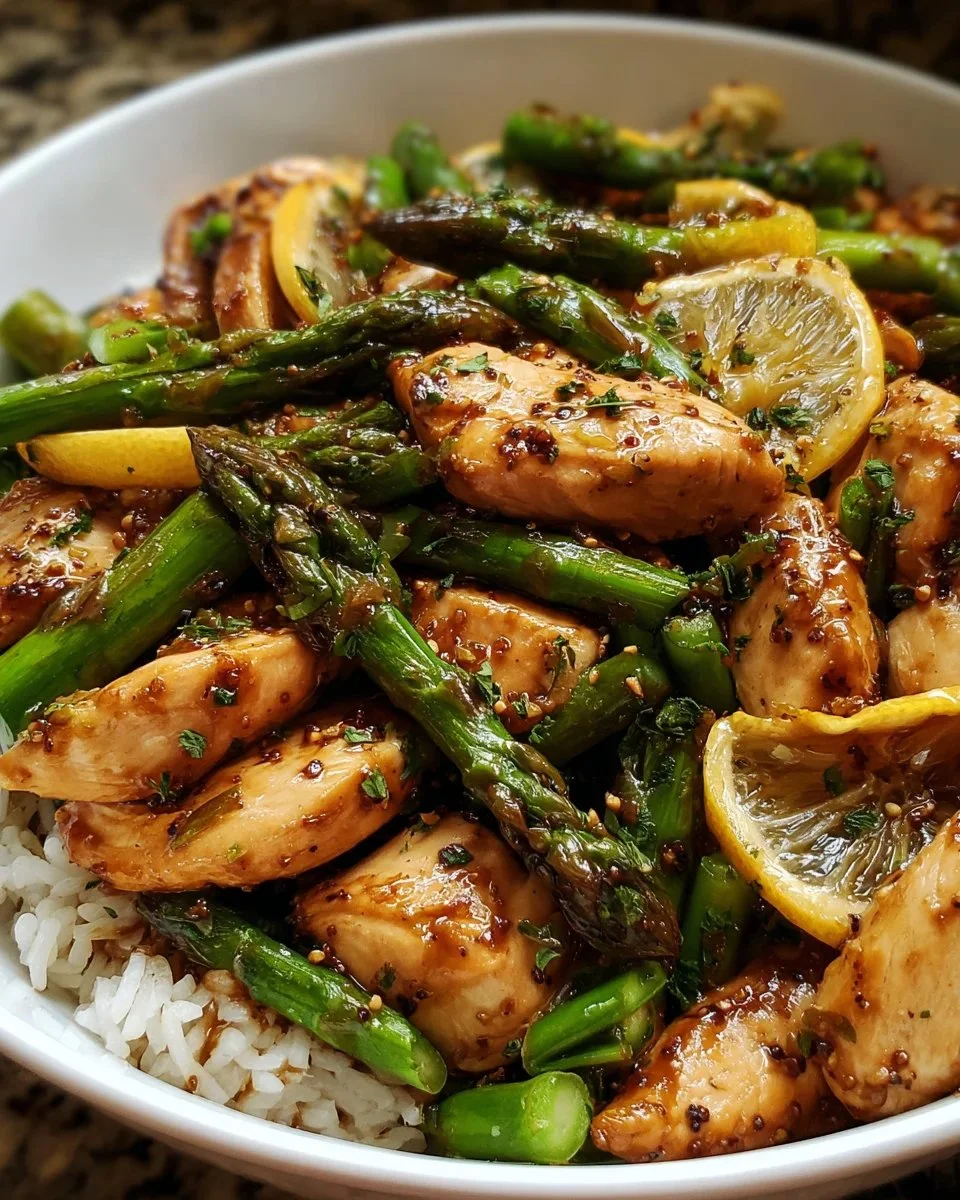
Lemon Chicken Asparagus Stir-Fry

Lemon Chicken Stir-Fry with asparagus in a vibrant stir-fry dish

This Lemon Chicken Asparagus Stir-Fry is bright, simple, and full of fresh flavor. It mixes juicy, tender chicken with crisp asparagus and a lemon sauce that wakes up every bite. The dish cooks fast, cleans up fast, and feeds a hungry family or a small crowd with little fuss. It is a true crowd-pleaser, with a tangy lemon taste, a touch of garlic, and a bit of sweetness that many people love. Get ready to make a tasty, healthy meal that feels special, but comes together like a weeknight classic, and have fun cooking it tonight.

how to prepare Lemon Chicken Asparagus Stir-Fry

  1. Cut 1 pound of boneless chicken into thin strips, pat dry, and season with salt and pepper.
  2. Trim and cut 1 bunch of asparagus into 2 inch pieces. Prepare 2 cloves garlic, minced, and 1 teaspoon lemon zest.
  3. Mix the sauce in a bowl, use 3 tablespoons lemon juice, 2 tablespoons soy sauce, 1 tablespoon honey or sugar, and 1 teaspoon cornstarch, stir until smooth.
  4. Heat 1 to 2 tablespoons oil in a large pan over medium-high heat. Add chicken in a single layer, cook 3 to 4 minutes until lightly browned and cooked through, then remove from pan.
  5. In the same pan, add a little more oil if needed, cook asparagus 2 to 3 minutes until bright green and just tender. Add garlic and cook 30 seconds until fragrant.
  6. Return chicken to the pan, pour in the lemon sauce, stir and cook 1 to 2 minutes until sauce thickens and coats the chicken and asparagus. Taste and adjust salt or lemon if needed.
  7. Turn off heat, sprinkle lemon zest and chopped green onions if you like, serve hot over rice or noodles.

Lemon Chicken Asparagus Stir-Fry

Why You’ll Love Lemon Chicken Asparagus Stir-Fry

  • Quick to make, it works well for busy weeknights.
  • Bright lemon flavor lifts the whole dish, it tastes fresh and light.
  • The asparagus stays crisp and adds a nice texture, while the chicken stays tender.
  • One pan, simple sauce, and easy clean up, perfect for a fast, healthy dinner.
  • The recipe is flexible, you can swap vegetables or use thighs or breasts with good results.

tips for success

  • Cut chicken thin and even, it cooks fast and cooks evenly.
  • Use a hot pan and do not crowd the chicken, brown it in one layer.
  • Cook asparagus until bright green, avoid overcooking to keep a nice crunch.
  • Use fresh lemon juice and a little zest for the best citrus taste.
  • Mix cornstarch with cold water first, then add to sauce to avoid lumps.
  • Taste the sauce before serving, add a pinch of sugar if it needs balance.
  • Make extra sauce if you like a saucier stir-fry.

Serving Suggestions

  • Serve over steamed white rice, brown rice, or quick-cooking noodles.
  • Try it with quinoa for a healthy, gluten-free side.
  • Add sesame seeds or sliced green onions on top for extra flavor.
  • Serve with lemon wedges on the side for extra brightness.
  • Pair with a simple green salad for a full, light meal.

Lemon Chicken Asparagus Stir-Fry

FAQs

Q: Can I use chicken thighs instead of chicken breast?

A: Yes, chicken thighs work well, they stay juicy and add a bit more flavor. Cut them into thin pieces and cook until done.

Q: How long will leftovers keep?

A: Store in an airtight container in the fridge for 3 to 4 days. Reheat gently in a pan or microwave, add a splash of water to keep it moist.

Q: Can I make this gluten-free?

A: Yes, use gluten-free soy sauce or tamari and make sure any other sauces you use are gluten-free.

Q: What can I use instead of asparagus?

A: Broccoli, snap peas, green beans, or bell peppers are good swaps and cook quickly in the pan.

Q: Can I prepare this ahead of time?

A: You can cut the chicken and vegetables ahead, and mix the sauce. Cook fresh for best texture, but you can reheat leftovers.

Conclusion

If you want another simple take or a quick reference for a similar lemon chicken and asparagus recipe, check this easy version at Lemon Chicken and Asparagus Stir Fry {20 Min Meal} | Lil’ Luna, it can give you a helpful step by step and ideas to try.

Lemon Chicken Asparagus Stir-Fry

This Lemon Chicken Asparagus Stir-Fry is quick, bright, and full of fresh flavor, mixing juicy chicken with crisp asparagus and a tangy lemon sauce.

Main Ingredients

  • 1 pound boneless chicken, cut into thin strips (Pat dry and season with salt and pepper.)
  • 1 bunch asparagus, trimmed and cut into 2-inch pieces
  • 2 cloves garlic, minced
  • 1 teaspoon lemon zest (For garnishing.)

Sauce Ingredients

  • 3 tablespoons lemon juice (Freshly squeezed for best flavor.)
  • 2 tablespoons soy sauce (Use gluten-free if needed.)
  • 1 tablespoon honey or sugar (For a touch of sweetness.)
  • 1 teaspoon cornstarch (Mix with cold water before adding to avoid lumps.)

For Cooking

  • 1-2 tablespoons oil (For frying; use as needed.)

Preparation

  1. Cut the chicken into thin strips, pat dry, and season with salt and pepper.
  2. Trim and cut the asparagus into 2-inch pieces.
  3. Prepare the garlic by mincing it and zest the lemon.
  4. Mix the sauce in a bowl: combine lemon juice, soy sauce, honey or sugar, and cornstarch. Stir until smooth.

Cooking

  1. Heat oil in a large pan over medium-high heat.
  2. Add chicken in a single layer and cook for 3 to 4 minutes until lightly browned and cooked through, then remove from pan.
  3. In the same pan, add a little more oil if needed. Cook asparagus for 2 to 3 minutes until bright green and just tender.
  4. Add garlic and cook for 30 seconds until fragrant.
  5. Return chicken to the pan, pour in lemon sauce, stir and cook for 1 to 2 minutes until the sauce thickens and coats the chicken and asparagus.
  6. Taste and adjust salt or lemon as needed.
  7. Turn off heat and sprinkle with lemon zest and chopped green onions if desired.
  8. Serve hot over rice or noodles.

Cut chicken thin and evenly for fast cooking. Use fresh lemon juice for the best flavor. Taste the sauce before serving and add a pinch of sugar if it needs balance.

Dinner, Main Course
Asian, Healthy
Asparagus, Healthy Meal, Lemon Chicken, Quick Dinner, Stir-Fry

Greek Yogurt Chicken Salad with Dill & Lemon Zest (Healthy & Easy)

Delicious Greek yogurt chicken salad with dill and lemon zest in a bowl.

Few things compare to a fresh, satisfying meal that nourishes your body while still delivering amazing flavor. In my kitchen, this vibrant Greek yogurt chicken salad has become both a weeknight favorite and a reliable meal-prep option. It’s a lighter, healthier alternative to classic mayonnaise-based chicken salads, making it perfect when you want something wholesome yet filling. Best of all, it’s simple to make, loaded with protein, and finished with a fresh, herby touch that makes every bite feel bright and memorable

How make Greek yogurt chicken salad

Ingredients:

  • 2 cups cooked chicken, shredded
  • 1 cup Greek yogurt
  • 1/4 cup mayonnaise (optional for creaminess)
  • 1/4 cup diced celery
  • 1/4 cup chopped onion
  • 1/4 cup fresh dill, chopped (or 1 tablespoon dried dill)
  • Zest of 1 lemon
  • Juice of 1/2 lemon
  • Salt and pepper to taste

Directions:

  1. In a large bowl, combine the shredded chicken, Greek yogurt, and mayonnaise (if using).
  2. Add the diced celery, chopped onion, dill, lemon zest, and lemon juice.
  3. Mix everything together until well combined.
  4. Season with salt and pepper to taste.
  5. Chill in the fridge for at least 30 minutes before serving for the best flavor.

Greek Yogurt Chicken Salad with Dill & Lemon Zest (Healthy & Easy)

Why You’ll Love Greek Yogurt Chicken Salad with Dill & Lemon Zest

This Greek Yogurt Chicken Salad is not just another boring salad! It’s packed with flavors that come together beautifully. The Greek yogurt gives a creamy texture without all the extra calories, and the lemon zest adds a bright, zesty twist that you will love. Plus, the fresh dill infuses the salad with a delightful herbaceous flavor, making every bite a treat. It’s a perfect dish for lunch, a picnic, or any gathering, and it’s sure to impress your friends and family!

tips for success

  1. Cook Your Chicken Right: You can use leftover cooked chicken, rotisserie chicken, or poach your chicken breast for this recipe. Just make sure it’s fully cooked and shredded well.
  2. Balance the Flavors: Taste your salad before serving and adjust the salt, pepper, or lemon juice if needed. Everyone’s palate is different, so make it your own!
  3. Chill: Letting the salad chill in the fridge enhances the flavors. Try to prepare it a few hours in advance for the best result.

Serving Suggestions

This Greek Yogurt Chicken Salad pairs wonderfully with whole-grain bread, lettuce wraps, or even on top of a fresh garden salad. You can also serve it as a dip with crackers or fresh veggie sticks for a healthy snack. It’s versatile enough to fit any occasion!

FAQs

Q: Can I make this salad ahead of time?

A: Yes, you can make this chicken salad a day in advance. Just keep it stored in the fridge, and it will taste even better the next day!

Q: What can I substitute if I don’t have dill?

A: If you don’t have dill, you can substitute with parsley, basil, or chives for a different yet delicious flavor.

Q: Is this salad gluten-free?

A: Yes, this Greek Yogurt Chicken Salad is naturally gluten-free as long as you serve it with gluten-free bread or veggies.

Get ready to enjoy a light, refreshing meal that’s full of flavor! You’ll love how easy and satisfying this Greek Yogurt Chicken Salad with Dill & Lemon Zest is. Give it a try, and let me know how you like it!

Greek Yogurt Chicken Salad

A lighter, healthier alternative to classic chicken salads, bursting with flavors from fresh dill and lemon zest, making it perfect for any meal occasion.

Main Ingredients

  • 2 cups cooked chicken, shredded (Use leftover chicken, rotisserie chicken, or poach your chicken breast.)
  • 1 cup Greek yogurt (For a creamy texture with less calories.)
  • 1/4 cup mayonnaise (Optional for extra creaminess.)
  • 1/4 cup diced celery
  • 1/4 cup chopped onion
  • 1/4 cup fresh dill, chopped (Or 1 tablespoon of dried dill.)
  • 1 unit zest of 1 lemon
  • 1/2 unit Juice of 1/2 lemon
  • Salt and pepper to taste

Preparation

  1. In a large bowl, combine the shredded chicken, Greek yogurt, and mayonnaise (if using).
  2. Add the diced celery, chopped onion, dill, lemon zest, and lemon juice.
  3. Mix everything together until well combined.
  4. Season with salt and pepper to taste.
  5. Chill in the fridge for at least 30 minutes before serving for the best flavor.

Taste your salad before serving and adjust the seasonings as necessary. Make it a few hours in advance for the best flavor enhancement.

Healthy, lunch, Salad
Greek, Mediterranean
Dill and Lemon Salad, Greek Yogurt Chicken Salad, Healthy Chicken Salad, High Protein Salad, Meal Prep

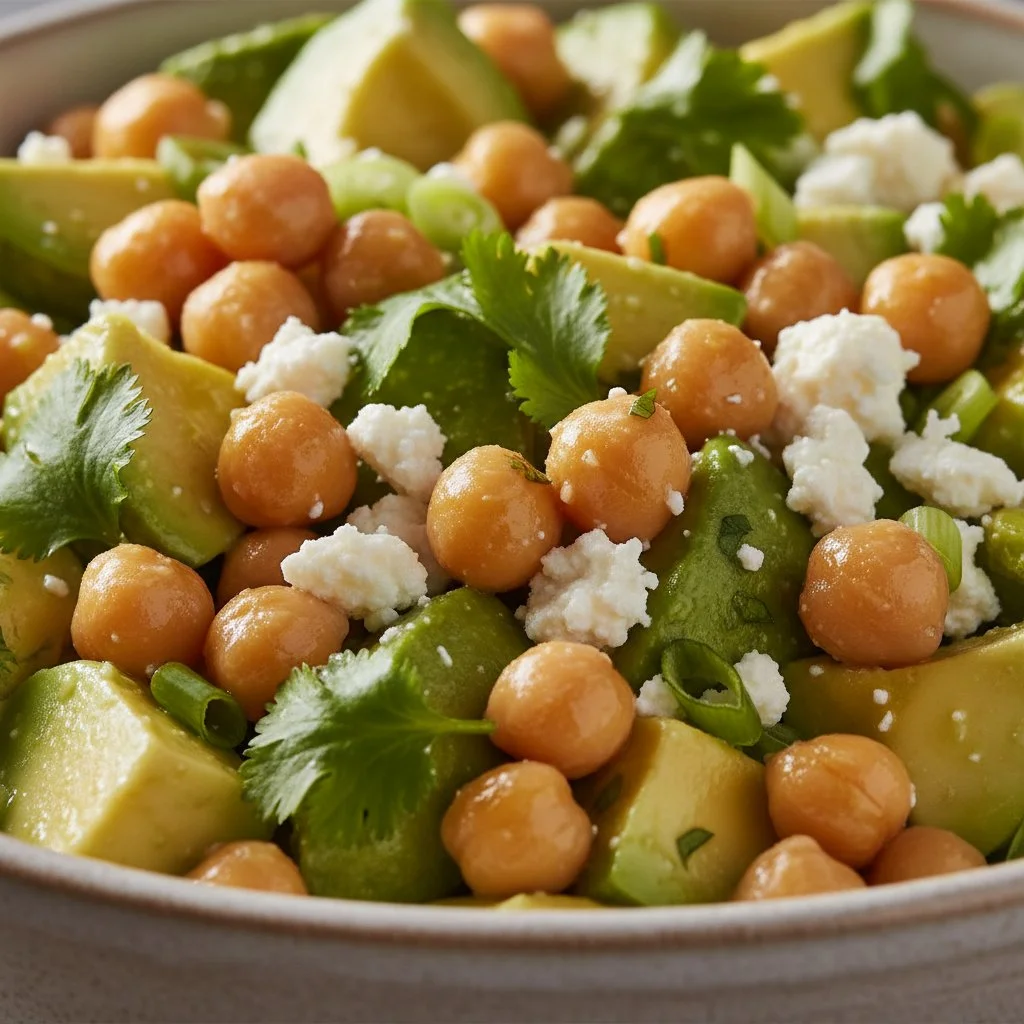
Creamy Chickpea Feta Avocado Salad with Zesty Tahini Twist

Creamy chickpea feta salad with avocado and zesty tahini dressing

If you’re looking for a refreshing and hearty salad that can steal the show at any gathering, look no further! The Creamy Chickpea Feta Avocado Salad with Zesty Tahini Twist is a delightful mix that’s not only packed with flavor but also loaded with nutrition. This salad combines creamy avocado, protein-rich chickpeas, and tangy feta cheese, all brought together with a zesty tahini dressing. It’s a true crowd-pleaser that makes for a perfect side dish or light lunch. Imagine digging into a bowl of vibrant colors and satisfying textures; you’re sure to impress your friends and family. Ready to whip up a batch? Let’s get started!

How to Prepare Creamy Chickpea Feta Avocado Salad with Zesty Tahini Twist

  1. Gather the Ingredients: You will need:
  • 1 can of chickpeas, rinsed and drained
  • 1 ripe avocado, diced
  • 1 cup cherry tomatoes, halved
  • 1/2 cup crumbled feta cheese
  • 1/4 cup red onion, finely chopped
  • 2 tablespoons fresh parsley, chopped
  • Salt and pepper to taste
  1. Make the Zesty Tahini Dressing:
  • In a bowl, whisk together 3 tablespoons of tahini, 2 tablespoons of lemon juice, 1 tablespoon of olive oil, and a bit of water to thin it out. Season with salt and pepper to taste.
  1. Combine the Salad:
  • In a large bowl, mix together the chickpeas, avocado, cherry tomatoes, feta cheese, red onion, and parsley.
  1. Add the Dressing:
  • Drizzle the zesty tahini dressing over the salad and toss gently to combine all the flavors.
  1. Serve and Enjoy:
  • Serve immediately or let it chill in the fridge for a bit to let the flavors meld together.

Creamy Chickpea Feta Avocado Salad with Zesty Tahini Twist

Why You’ll Love Creamy Chickpea Feta Avocado Salad with Zesty Tahini Twist

This delicious salad is not just easy to make, it’s also incredibly satisfying. The creaminess of the avocado paired with the salty feta creates a delightful contrast, while the chickpeas offer a hearty base that fills you up without weighing you down. The zesty tahini dressing adds a unique twist that elevates the overall taste. Perfect for warm summer days, picnics, or even as a healthy meal prep option, this salad is sure to become a favorite in your recipe collection!

Tips for Success

  • Choose the Right Avocado: Make sure your avocado is ripe but not overripe to prevent a mushy salad.
  • Chill the Salad: Let the salad sit in the fridge for 30 minutes. This will help the flavors blend together beautifully.
  • Customize it: Feel free to add additional veggies like cucumber or bell peppers for extra crunch and nutrition.

Serving Suggestions

Serve this Creamy Chickpea Feta Avocado Salad as a light lunch alongside crusty bread or pair it with grilled chicken or fish for a more filling dinner. It also makes an excellent side dish for barbecues or family gatherings. Either way, you’ll love how versatile it is!

FAQs

Can I make this salad ahead of time?

Yes, you can prepare the salad a few hours in advance and store it in the fridge. Just hold off on adding the avocado until just before serving to keep it fresh.

What can I substitute for tahini?

If you don’t have tahini on hand, you can use peanut butter or almond butter as a substitute, though the flavor will be slightly different.

Can I make this salad vegan?

Absolutely! Just skip the feta cheese or replace it with a plant-based cheese alternative. The salad will still be delicious and packed with flavor!

Dive into this scrumptious Creamy Chickpea Feta Avocado Salad with Zesty Tahini Twist, and you won’t regret it! Enjoy your fresh, tasty creation!

Creamy Chickpea Feta Avocado Salad

A refreshing and hearty salad featuring creamy avocado, protein-rich chickpeas, and tangy feta, all combined with a zesty tahini dressing.

Salad Ingredients

  • 1 can chickpeas, rinsed and drained
  • 1 ripe avocado, diced (Choose a ripe avocado for best texture.)
  • 1 cup cherry tomatoes, halved
  • 1/2 cup crumbled feta cheese (Can be replaced with a plant-based cheese for vegan option.)
  • 1/4 cup red onion, finely chopped
  • 2 tablespoons fresh parsley, chopped
  • to taste Salt and pepper

Zesty Tahini Dressing

  • 3 tablespoons tahini
  • 2 tablespoons lemon juice
  • 1 tablespoon olive oil
  • to thin as needed water

Preparation

  1. Gather all salad ingredients.
  2. In a bowl, whisk together tahini, lemon juice, olive oil, and water to thin it out. Season with salt and pepper to taste.

Combine the Salad

  1. In a large bowl, mix together the chickpeas, avocado, cherry tomatoes, feta cheese, red onion, and parsley.

Add the Dressing

  1. Drizzle the zesty tahini dressing over the salad and toss gently to combine all the flavors.

Serve

  1. Serve immediately or let it chill in the fridge for 30 minutes to let the flavors meld.

Choose a ripe avocado for the best texture. Letting the salad chill allows the flavors to blend beautifully. Customize by adding other veggies like cucumber or bell peppers.

lunch, Salad, Side Dish
Healthy, Mediterranean
Avocado Salad, Chickpea Salad, Feta Cheese, Healthy Salad, Tahini Dressing

Spring Roll Salad: 5 Delicious Ways to Elevate It

Colorful Spring Roll Salad with fresh vegetables and herbs, served in a bowl

Spring Roll Salad is a vibrant and delightful dish that brings the fresh flavors of traditional spring rolls to your bowl. This salad combines crispy vegetables, aromatic herbs, and a splash of zesty dressing, making it a favorite among friends and family. It’s the kind of dish that not only looks beautiful but also tastes amazing, hitting all the right notes of crunch and zest. Whether you’re hosting a gathering or preparing a light, healthy meal, this salad is sure to impress. So, let’s dig in and discover some delicious ways to elevate your Spring Roll Salad!

How to Prepare Spring Roll Salad

To make a Spring Roll Salad, you’ll need a mix of fresh ingredients. Gather up some rice noodles, colorful vegetables like bell peppers, carrots, and cucumbers, along with fresh herbs such as mint and cilantro. You can also add protein options like grilled shrimp or tofu for a heartier meal. Start by cooking the rice noodles according to package instructions, then rinse them under cold water. Chop your veggies and herbs, then toss them all together in a large bowl. Drizzle with a tasty dressing made from soy sauce, lime juice, and a pinch of sugar. Mix well, and you have a refreshing Spring Roll Salad that is sure to satisfy!

Spring Roll Salad: 5 Delicious Ways to Elevate It

Why You’ll Love Spring Roll Salad

Spring Roll Salad is not just good for your taste buds, it’s also a feast for your eyes. It’s colorful, fresh, and super easy to customize. You can swap out vegetables or proteins based on what you have or love. Plus, it’s a perfect meal for warm weather or a light lunch. The crunch of the veggies combined with the bright dressing makes every bite refreshing! This dish is healthy and packed with nutrients, making it a meal you can feel good about.

Tips for Success

  1. Use Fresh Ingredients: Fresh, crunchy vegetables like lettuce, carrots, and herbs make a big difference in flavor.
  2. Make Your Own Dressing: Try mixing soy sauce, lime juice, and a hint of sesame oil to elevate your salad’s taste.
  3. Don’t Overcook Noodles: Make sure not to overcook rice noodles; they should be firm to hold up in the salad.
  4. Chill the Ingredients: If possible, chill your veggies and herbs before mixing them for an extra refreshing bite.

Serving Suggestions

Serve your Spring Roll Salad in bowls or on a large platter for sharing. Garnish with extra herbs, sliced chili peppers, or chopped peanuts for added crunch. Pair it with spring rolls for a perfect meal or serve it alongside grilled meats for a heartier option. This salad also works as a fantastic side dish for picnics and barbecues, bringing a fresh twist to any summer spread.

FAQs

Can I make Spring Roll Salad ahead of time?
Yes, you can prep your ingredients ahead of time, but it’s best to add the dressing just before serving to keep the salad fresh and crisp.

What can I substitute for rice noodles?
You can substitute rice noodles with quinoa, soba noodles, or even spiralized vegetables for a gluten-free version.

How long does Spring Roll Salad last in the fridge?
If stored in an airtight container, Spring Roll Salad can last around 2-3 days in the fridge. Just keep in mind that the veggies may lose their crunch over time.

Making this Spring Roll Salad is not only easy but also a fun and tasty way to enjoy your veggies. Gather your ingredients, have fun mixing, and treat yourself to this delightful dish!

Spring Roll Salad

A vibrant and delightful dish that brings the fresh flavors of traditional spring rolls into a healthy salad bowl, combining crispy vegetables, aromatic herbs, and a zesty dressing.

Main Ingredients

  • 2 cups rice noodles (Cook according to package instructions.)
  • 1 cup bell peppers, chopped (Use a mix of colors for more visual appeal.)
  • 1 cup carrots, julienned (Fresh, crunchy carrots enhance flavor.)
  • 1 cup cucumbers, chopped (Can be peeled or unpeeled based on preference.)
  • 1/2 cup fresh mint, chopped (Adds a refreshing flavor.)
  • 1/2 cup fresh cilantro, chopped (Enhances the herbaceous notes.)
  • 1 cup grilled shrimp or tofu (Optional protein addition.)

Dressing

  • 3 tablespoons soy sauce (Provides the main flavor base.)
  • 2 tablespoons lime juice (Adds a tangy zest.)
  • 1 teaspoon sugar (Balances flavors.)

Preparation

  1. Cook the rice noodles according to package instructions, then rinse under cold water.
  2. Chop the bell peppers, carrots, cucumbers, mint, and cilantro.
  3. In a large bowl, combine the cooked rice noodles, chopped vegetables, herbs, and grilled shrimp or tofu (if using).

Dressing and Serving

  1. In a small bowl, whisk together soy sauce, lime juice, and sugar.
  2. Drizzle the dressing over the salad and mix well.
  3. Serve immediately, garnished with extra herbs, sliced chili peppers, or chopped peanuts.

Use fresh ingredients for the best flavor. Make your own dressing to elevate the taste. Don’t overcook the noodles and chill ingredients for extra freshness.

lunch, Salad, Side Dish
Asian, Healthy
Fresh Salad, Healthy Meal, Light Lunch, Spring Roll Salad, Vegetable Salad

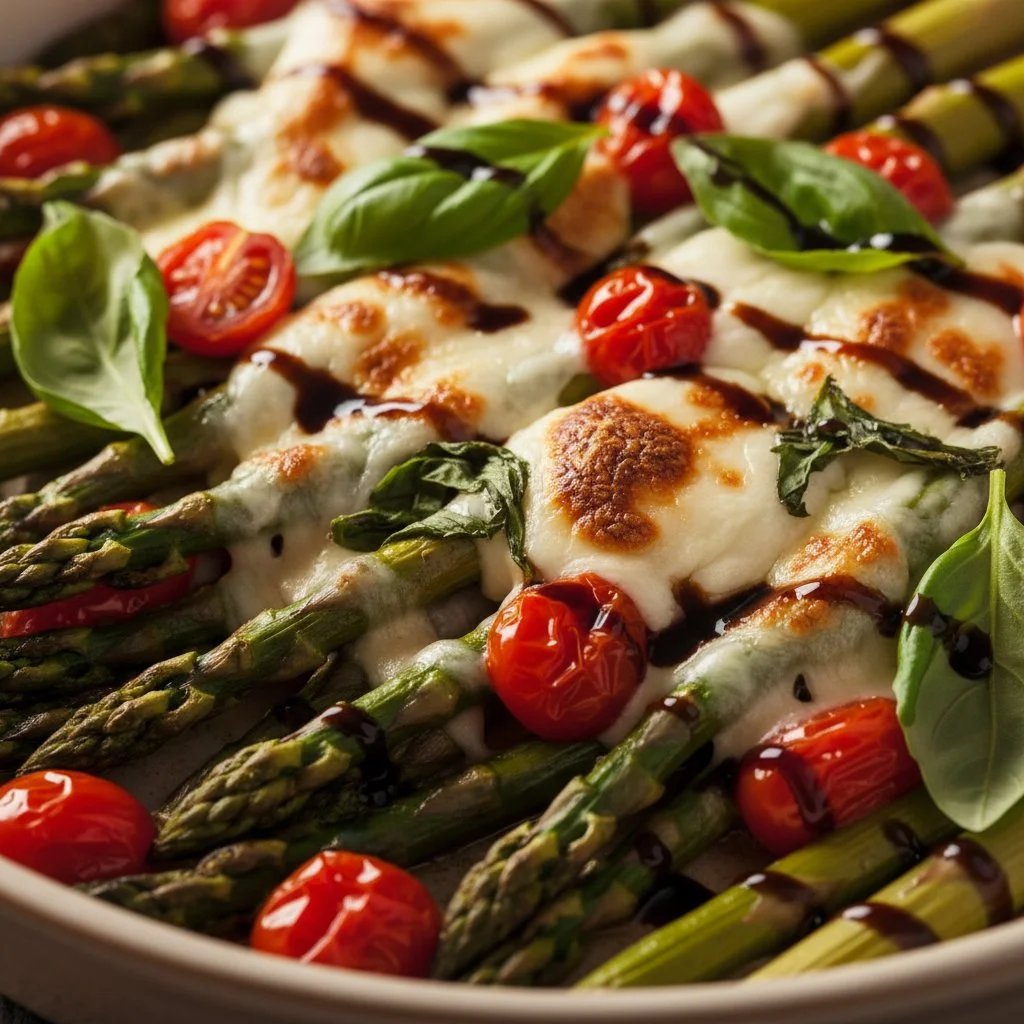
Caprese Roasted Asparagus: Easy, Flavorful Side Dish with a Twist

Plated Caprese Roasted Asparagus with tomatoes, mozzarella, and balsamic drizzle.

How to Prepare Caprese Roasted Asparagus

If you are looking for an easy and tasty side dish, look no further than Caprese Roasted Asparagus. This simple recipe combines fresh asparagus with the classic flavors of a Caprese salad. You will love how the juicy tomatoes, creamy mozzarella, and fragrant basil come together to elevate the humble asparagus. Plus, it looks beautiful on your plate, making it a perfect dish for both casual dinners and festive gatherings.

To start making this delightful side dish, gather these ingredients:

Ingredients

  • 1 pound asparagus, trimmed
  • 1 cup cherry tomatoes, halved
  • 1 cup mozzarella balls, halved or torn
  • 2 tablespoons olive oil
  • 1 teaspoon balsamic vinegar
  • Salt and pepper, to taste
  • Fresh basil leaves, for garnish

Now let’s dive into the steps to prepare Caprese Roasted Asparagus:

  1. Preheat your oven to 400°F (200°C).
  2. On a large baking sheet, lay out the asparagus. Add the cherry tomatoes and mozzarella.
  3. Drizzle olive oil and balsamic vinegar over the vegetables. Season with salt and pepper, then toss everything together to ensure all ingredients are well-coated.
  4. Roast in the oven for 15 to 20 minutes, or until the asparagus is tender and slightly crispy.
  5. Remove from the oven, and top with fresh basil leaves before serving.

Now you’re ready to enjoy your delicious Caprese Roasted Asparagus!

Caprese Roasted Asparagus: Easy, Flavorful Side Dish with a Twist

Why You’ll Love Caprese Roasted Asparagus

This dish is a true crowd-pleaser, bursting with flavor and color. The combination of roasted asparagus with fresh tomatoes and mozzarella creates a delightful contrast that makes each bite exciting. It’s not just a side dish, it is a delightful experience.

Whether you’re serving it at a family dinner or a holiday feast, Caprese Roasted Asparagus is sure to impress. Its bright flavors and vibrant look will leave everyone asking for seconds. Plus, it’s quick to prepare, which means you can spend less time in the kitchen and more time enjoying precious moments with your loved ones. It’s the perfect recipe to add a delicious twist to your meal!

Tips for Success

  • Choose fresh asparagus: Look for bright green stalks that are firm but not woody.
  • Don’t overcrowd the pan: Give the asparagus enough space on the baking sheet to roast perfectly.
  • Adjust cooking time: If your asparagus is thicker or thinner, adjust the roasting time accordingly to ensure it’s cooked just right.

Serving Suggestions

Caprese Roasted Asparagus pairs wonderfully with a variety of main dishes. Try serving it alongside grilled chicken or fish for a light and balanced meal. You can also mix it into pasta or serve it as part of a fresh salad. This dish can even stand alone as a light lunch with some crusty bread on the side.

FAQs

Can I use regular mozzarella instead of mozzarella balls?
Yes, you can use regular mozzarella cheese, just cut it into small cubes to maintain the dish’s texture.

Is it possible to make this dish ahead of time?
While it’s best fresh, you can roast the asparagus and tomatoes ahead of time and warm it briefly before serving. Just add the fresh basil afterward for that vibrant flavor.

Can I add other vegetables to this dish?
Absolutely! Bell peppers, zucchini, or even mushrooms would be great additions to enhance the flavor and nutrition of the dish. Feel free to get creative!

Now go ahead, give this Caprese Roasted Asparagus a try, and enjoy the delightful flavors it brings to your table!

Caprese Roasted Asparagus

A delicious and colorful side dish that combines roasted asparagus with juicy tomatoes, creamy mozzarella, and fragrant basil, perfect for any occasion.

Main ingredients

  • 1 pound asparagus, trimmed (Look for bright green stalks that are firm but not woody.)
  • 1 cup cherry tomatoes, halved
  • 1 cup mozzarella balls, halved or torn (Regular mozzarella can be used, cut into small cubes.)

Seasoning and dressing

  • 2 tablespoons olive oil
  • 1 teaspoon balsamic vinegar
  • to taste Salt and pepper
  • for garnish leaves Fresh basil

Preparation

  1. Preheat your oven to 400°F (200°C).
  2. On a large baking sheet, lay out the asparagus. Add the cherry tomatoes and mozzarella.
  3. Drizzle olive oil and balsamic vinegar over the vegetables. Season with salt and pepper, then toss everything together to ensure all ingredients are well-coated.

Cooking

  1. Roast in the oven for 15 to 20 minutes, or until the asparagus is tender and slightly crispy.
  2. Remove from the oven, and top with fresh basil leaves before serving.

This dish is best served fresh. You can roast the asparagus and tomatoes ahead of time and warm briefly before serving. Add fresh basil afterward for vibrant flavor.

Side Dish, Vegetarian
Italian
Caprese Salad, Easy Side Dish, Healthy Eating, Roasted Asparagus, Summer Recipe

Vegan Blueberry Muffins

vegan blueberry muffins

There’s something almost nostalgic about the scent of blueberry muffins wafting through the kitchen. For me, it started one rainy Sunday morning when I realized I had nothing but a half-empty fridge and a craving I couldn’t shake. No eggs. No milk. Just a bag of frozen blueberries, some flour, and a quiet determination. That first batch? Let’s just say it wasn’t pretty — but it was the beginning of something oddly comforting.

This vegan blueberry muffin recipe is for those moments — when you want something warm, tender, and sweet, but don’t want to wrestle with 12 different ingredients or specialty tools. It’s simple. It’s forgiving. And it delivers that classic golden-top, juicy-inside muffin magic — no dairy, no eggs, no fuss.

Whether you’re a seasoned plant-based baker or just dipping your toe into vegan recipes, these muffins hit the sweet spot. Moist, fluffy, and dotted with bursts of tart-sweet blueberries in every bite — they’re the kind of treat you’ll find yourself baking more than once. Maybe even twice this week. (Been there.)

By the end of this guide, you’ll not only know how to make the perfect vegan blueberry muffins, but you’ll understand why each step works — so you can make them your own, confidently.

Why You’ll Love These Vegan Blueberry Muffins

Let’s be honest: the world doesn’t need another bland “healthy muffin” recipe that tastes like compressed oats and regret. What it does need is a plant-based blueberry muffin that doesn’t feel vegan — just a damn good muffin that happens to be dairy- and egg-free.

Here’s why this one stands out:

  • Soft but substantial texture – These muffins strike that rare balance: fluffy interiors with enough structure to avoid falling apart in your hands. They’re moist without being oily, tender without being cake.

  • Bold blueberry flavor – We’re not shy about berries here. Each bite bursts with the sweet-tart pop of blueberries — fresh or frozen — and the batter doesn’t overpower them.

  • No weird ingredients – You won’t find flax eggs or obscure binders unless you want to go that route. This recipe leans on pantry basics and still pulls off that ideal bakery-style crumb.

  • Crowd-friendly – Whether you’re feeding a room full of vegans or skeptical omnivores, these pass the universal muffin test. (Yes, even that uncle who thinks tofu is a conspiracy.)

Optional but Powerful Perks

If you’re looking for something more than “just a muffin,” this base recipe flexes hard. Want a citrus twist? Add lemon zest. Craving crunch? Toss in chopped walnuts. Need it gluten-free? We’ve got you.

Can I Use Frozen Blueberries?

vegan blueberry muffins

Absolutely. In fact, frozen blueberries are often more consistent in flavor and texture than fresh, especially out of season. Just don’t thaw them first — toss them in still frozen, and coat them lightly with flour before adding to the batter to prevent bleeding.

Ingredients

  • 1 heaped cup oat flour (gluten-free if needed – see notes)
  • 1 cup gluten-free flour blend (or regular flour, see notes)
  • 1 ½ tsp baking powder
  • ¼ tsp baking soda
  • ¼ tsp salt
  • ¾ cup plant-based milk (of choice)
  • 1 tbsp lemon juice (or lime juice)
  • ⅓ cup maple syrup (see notes)
  • 2 ½ tbsp oil (see notes)
  • 1 ½ tsp vanilla extract
  • 1 ½ cups blueberries (fresh or frozen)

Directions

  1. Preheat your oven to 360 degrees Fahrenheit (180 degrees Celsius). Line a muffin pan with paper liners or grease the pan.
  2. In a small or medium bowl, mix the plant-based milk and lemon juice together. Stir and let it sit for a few minutes to make “vegan buttermilk.”
  3. In a large mixing bowl, add all the dry ingredients. Whisk them together until well combined.
  4. Add the wet ingredients to the dry ingredients. Mix with a spatula or whisk until combined, but do not overmix. Gently fold in the blueberries.
  5. Divide the batter equally among the muffin wells. You should have enough batter for about 8 muffins.
  6. Bake for 25-30 minutes or until the tops of the muffins are cracked. You can check if they’re done by inserting a toothpick in the center. It should come out clean or slightly crumbly, but not wet.
  7. Allow the muffins to cool. Enjoy! Store any leftovers in an airtight container in the refrigerator for up to 5-6 days, or freeze for up to 3 months. If stored in the fridge, reheat them in the oven for a softer texture.

How to Serve Vegan Blueberry Muffins

These muffins are perfect on their own, but you can serve them with a spread of vegan butter or some nut butter for an extra treat. A sprinkle of powdered sugar on top can also make them look more inviting if you’re serving them for guests.

How to Store Vegan Blueberry Muffins

Store any leftover muffins in an airtight container in your refrigerator for up to 5-6 days. If you’d like to keep them longer, you can freeze them for up to 3 months. Just remember, if they’ve been in the fridge, you might want to warm them in the oven to regain their softness.

Tips & Tricks: Get Bakery-Style Muffins Every Time

Making muffins is easy. Making great muffins — with golden tops, perfect texture, and zero regrets — takes just a few tweaks. These aren’t hacks for the sake of it; they’re the quiet tricks that separate “meh” from “more, please.”

Don’t Overmix the Batter

Let’s put this one at the top, because it’s the difference-maker. Stir until the flour is just absorbed. Overmixing activates the gluten and leads to rubbery muffins. A few streaks of flour? Totally okay.

 Use Room Temperature Ingredients

If you’ve ever had muffins that look baked but feel gummy inside, cold milk might be the culprit. Room temp liquid blends better with oil and helps create that smooth, even texture.

Let the Batter Sit

After mixing, let your batter rest for 5–10 minutes before baking. It allows the flour to hydrate and the leavening agents to activate slightly, which gives your muffins better lift.

 Bake at a Slightly Higher Temp for the First 5 Minutes

If you want that iconic domed top, start at 400°F (200°C) for 5 minutes, then lower to 375°F (190°C) for the rest of the bake. The quick burst of heat gives them lift before the crumb sets.

 . Don’t Skip the Flour-Coated Blueberries

This tiny step helps berries stay suspended in the batter instead of sinking to the bottom. Especially helpful when using frozen blueberries.

Can I Make the Batter Ahead of Time?

You can, but you’ll lose some rise. If needed, mix the dry and wet ingredients separately and store them overnight. Combine just before baking for the best texture. Fully mixed batter tends to overdevelop and bake up denser if left sitting too long.

Variation

You can change up the mix-ins! Try incorporating chopped nuts, coconut flakes, or even a dash of cinnamon for different flavors. You can also replace blueberries with other berries like raspberries or strawberries.

FAQs

Q: Can I use regular flour instead of gluten-free flour?
A: Yes, you can use regular flour. Just keep in mind that the texture may be slightly different.

Q: How can I make these muffins oil-free?
A: You can substitute the oil with unsweetened applesauce for a healthier, oil-free version.

Q: Can I use a different sweetener than maple syrup?
A: Absolutely! You can use agave nectar, coconut sugar, or even brown sugar if you prefer. Just adjust the amount to taste.

[tasty-recipe id=”2158″]

Vegan Blueberry Muffins

These fluffy, moist vegan blueberry muffins are easy to make and bursting with sweet-tart blueberries, perfect for any occasion.

Dry Ingredients

  • 1 cup oat flour (gluten-free if needed)
  • 1 cup gluten-free flour blend (or regular flour)
  • 1.5 tsp baking powder
  • 0.25 tsp baking soda
  • 0.25 tsp salt

Wet Ingredients

  • 0.75 cup plant-based milk (of choice)
  • 1 tbsp lemon juice (or lime juice)
  • 0.33 cup maple syrup
  • 2.5 tbsp oil
  • 1.5 tsp vanilla extract
  • 1.5 cups blueberries (fresh or frozen) (Do not thaw if using frozen.)

Preparation

  1. Preheat your oven to 360°F (180°C). Line a muffin pan with paper liners or grease the pan.
  2. In a small bowl, mix the plant-based milk and lemon juice together. Stir and let it sit for a few minutes to make vegan buttermilk.
  3. In a large mixing bowl, add all the dry ingredients. Whisk them together until well combined.
  4. Add the wet ingredients to the dry ingredients. Mix with a spatula or whisk until combined, but do not overmix. Gently fold in the blueberries.

Baking

  1. Divide the batter equally among the muffin wells, enough for about 8 muffins.
  2. Bake for 25-30 minutes or until the tops are cracked. You can check for doneness by inserting a toothpick in the center; it should come out clean or slightly crumbly, but not wet.

Serving

  1. Allow the muffins to cool. Serve as is, or with vegan butter or nut butter for an extra treat. A sprinkle of powdered sugar on top can enhance presentation.
  2. Store any leftovers in an airtight container in the refrigerator for up to 5-6 days, or freeze for up to 3 months.

Let the batter sit for 5-10 minutes before baking to allow the flour to hydrate. For a bakery-style muffin, start baking at 400°F (200°C) for the first 5 minutes, then lower the temperature to 375°F (190°C).

Breakfast, Snack
American, Vegan
Easy Muffin Recipe, Gluten-Free Options, Healthy Muffins, Plant-Based Baking, Vegan Blueberry Muffins