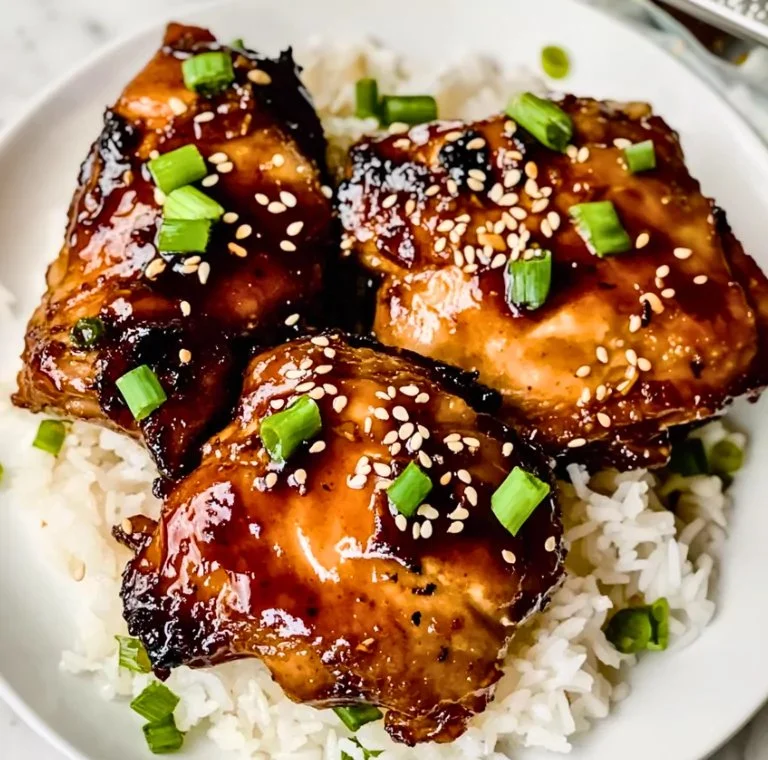
Hawaiian Chicken Sheet Pan

Hawaiian chicken sheet pan with colorful vegetables and pineapple slices

Hawaiian Chicken Sheet Pan is the perfect dish for family dinners or easy weeknight gatherings. This delightful recipe brings together the vibrant flavors of chicken, pineapple, and colorful veggies all roasted together on one pan. It’s a dish that appeals to everyone, with its sweet and savory notes making it a real crowd-pleaser. The combination of tender chicken infused with Hawaiian-inspired flavors will have your taste buds dancing. Plus, the ease of cleanup makes it even more appealing. Who wouldn’t want to dive into this deliciousness?

How to prepare Hawaiian Chicken Sheet Pan

To whip up this scrumptious Hawaiian Chicken Sheet Pan, start by gathering your ingredients. You’ll need chicken thighs or breasts, fresh pineapple chunks, bell peppers, onions, garlic, soy sauce, brown sugar, and some spices for the perfect flavor blend. Begin by preheating your oven, then marinate the chicken in soy sauce and brown sugar while you chop the veggies.

Arrange everything on a large sheet pan, making sure to distribute the ingredients evenly. This helps everything cook beautifully together. Roast in the oven and let the wonderful aroma fill your kitchen. Just wait until it’s time to dig in!

Hawaiian Chicken Sheet Pan

Why You’ll Love Hawaiian Chicken Sheet Pan

One of the best things about the Hawaiian Chicken Sheet Pan is how versatile it is. You can swap in your favorite veggies, and even adjust the sweetness to your liking. It’s not just a meal; it’s a whole experience. This dish loves to please and is bound to be a hit at any dinner table. Plus, it takes hardly any time to prepare, making it an ideal choice for those bustling weeknights.

Tips for success

  1. Use fresh ingredients: Opt for fresh pineapple and colorful vegetables to enhance the dish’s vibrant flavors.
  2. Marinate well: Allow your chicken to marinate in the soy sauce and brown sugar for at least 20-30 minutes for the best flavor absorption.
  3. Watch the timing: Keep an eye on the cooking time depending on the size of your chicken pieces to ensure they don’t overcook.

Hawaiian Chicken Sheet Pan

Serving Suggestions

For the best experience, serve your Hawaiian Chicken Sheet Pan over a bed of fluffy rice or quinoa. You can also top it with some chopped green onions or sesame seeds for an extra crunch. Pair it with a fresh side salad or some steamed broccoli to complete your meal.

FAQs

Can I use chicken breasts instead of thighs?

Yes, you can! Just ensure that the cooking time is adjusted as chicken breasts may cook faster.

What can I substitute for soy sauce?

If you’re looking for a soy-free option, try using coconut aminos or tamari as a great alternative.

Can I prepare this dish ahead of time?

Absolutely! You can marinate the chicken and chop the veggies a day in advance. Just store everything in the fridge until you’re ready to cook.

To explore more easy recipes, check out this Parmesan Crusted Chicken Sheet Pan Dinner. It’s another fantastic option for quick weeknight meals!

Hawaiian Chicken Sheet Pan

A delightful one-pan dish featuring chicken, pineapple, and colorful veggies, perfect for family dinners or easy weeknight gatherings.

Main ingredients

  • 1 lbs chicken thighs or breasts (Use your preference for taste.)
  • 1 cup fresh pineapple chunks (Fresh pineapple enhances flavor.)
  • 2 cups bell peppers, chopped (Any color of bell pepper can be used.)
  • 1 medium onion, sliced (Yellow or red onions work well.)
  • 3 cloves garlic, minced
  • 1/4 cup soy sauce (Can substitute with coconut aminos or tamari.)
  • 2 tablespoons brown sugar (Adjust sweetness to taste.)

Preparation

  1. Preheat your oven.
  2. Marinate the chicken in soy sauce and brown sugar for at least 20-30 minutes.
  3. Chop the vegetables while the chicken marinating.

Cooking

  1. Arrange chicken, pineapple, and veggies on a large sheet pan, distributing evenly.
  2. Roast in the preheated oven until the chicken is cooked through and veggies are tender.

For serving, plate over rice or quinoa, topped with green onions or sesame seeds. Pair with a fresh salad or steamed broccoli. Adjust cooking time based on chicken size to prevent overcooking.
Dinner, Main Course
Asian, Hawaiian
Easy Weeknight Meal, Family Dinner, Hawaiian Chicken, One Pan Meal, Sheet Pan Dinner

Easy Baked Honey Dijon Chicken

Easy baked honey dijon chicken recipe on a plate

If you’re looking for a simple yet delicious dinner idea, look no further than Easy Baked Honey Dijon Chicken. This dish combines the sweet richness of honey with the tangy flavor of Dijon mustard, creating a delightful taste that everyone will love. Perfect for busy weeknights or casual gatherings, this recipe is sure to become a family favorite. With its easy preparation and tantalizing aroma wafting through your kitchen, you’ll be eager to whip this up time and again.

Why You’ll Love Easy Baked Honey Dijon Chicken

What’s not to love about this chicken? It’s moist, flavorful, and incredibly easy to make. The honey and Dijon glaze caramelizes beautifully in the oven, giving the chicken a nice golden finish. Plus, it pairs well with a variety of side dishes, making it a versatile option for any meal. If you’re looking for dishes that bring smiles to the dinner table, this chicken recipe definitely hits the mark!

Tips for success

To achieve the best results with your Easy Baked Honey Dijon Chicken, consider these helpful tips:

  • Marinate for Extra Flavor: Allow the chicken to marinate in the honey Dijon mixture for at least 30 minutes. This will enhance the flavors and tenderness of the meat.
  • Use Fresh Ingredients: Fresh honey and Dijon mustard make a noticeable difference in taste.
  • Adjust Cooking Time: Depending on the size of your chicken pieces, be mindful of the cooking time to ensure they are cooked through. A meat thermometer should read 165°F (75°C) to confirm they are safe to eat.

Serving Suggestions

This flavorful chicken dish goes well with many sides. Consider pairing it with steamed vegetables, roasted potatoes, or a fresh salad. You can also serve it with rice or quinoa for a complete meal. For a delightful twist, try drizzling some additional honey over the chicken right before serving.

Easy Baked Honey Dijon Chicken

FAQs

Can I use other types of chicken?

Yes, you can use other cuts, such as chicken thighs or drumsticks. Just ensure they are cooked through to the right temperature.

How do I store leftovers?

Store any leftovers in an airtight container in the refrigerator for up to three days. You can reheat them in the oven or microwave.

Can I freeze this dish?

Absolutely! You can freeze the uncooked marinated chicken for up to three months. Just remember to thaw it completely before baking.

For another delicious chicken option, check out this easy hot honey chicken thighs recipe!

Easy Baked Honey Dijon Chicken

Easy Baked Honey Dijon Chicken

A simple yet delicious chicken dish combining honey and Dijon mustard for a flavorful glaze, perfect for busy weeknights and gatherings.

For the marinade

  • 1/4 cup honey (Use fresh honey for best flavor.)
  • 1/4 cup Dijon mustard (Use fresh Dijon mustard.)

Main ingredients

  • 4 pieces chicken breasts (Can substitute with chicken thighs or drumsticks.)

Preparation

  1. In a bowl, mix honey and Dijon mustard to create the marinade.
  2. Place chicken breasts in a resealable bag or dish and pour the marinade over them.
  3. Marinate the chicken in the refrigerator for at least 30 minutes.

Cooking

  1. Preheat the oven to 375°F (190°C).
  2. Remove the chicken from the marinade and place it in a baking dish.
  3. Bake in the preheated oven for about 30 minutes, or until chicken reaches an internal temperature of 165°F (75°C).

For added flavor, drizzle extra honey over the chicken before serving. Store leftovers in an airtight container in the refrigerator for up to three days. Can freeze marinated chicken for up to three months.

Dinner, Main Course
American
Baked Chicken, easy chicken recipe, Family Favorite, Honey Dijon Chicken, Simple Dinner

Sheet Pan Chicken Pitas

Sheet Pan Chicken Pitas with fresh vegetables and sauce

Who doesn’t love a meal that comes together quickly and satisfies everyone at the table? Sheet Pan Chicken Pitas are just that kind of dish. This delightful recipe features juicy chicken, vibrant veggies, and warm pita bread. If you are hosting friends or enjoying a cozy dinner at home, you will find this recipe pleases the taste buds of both adults and kids.

Imagine the aroma of herbs and spices wafting through your kitchen, as tender chicken roasts alongside colorful bell peppers and onions. Each bite, wrapped in soft pita bread, brings a burst of flavor that’s simply irresistible. If you’re looking for a tasty and fulfilling meal, this crowd-pleaser might just become a family favorite.

How to prepare Sheet Pan Chicken Pitas

First, gather your ingredients:

  • 1 pound of chicken breast, cut into strips
  • 1 bell pepper, sliced
  • 1 onion, sliced
  • 2 tablespoons of olive oil
  • 2 teaspoons of paprika
  • 1 teaspoon of garlic powder
  • Salt and pepper to taste
  • Pita bread for serving
  • Optional toppings: lettuce, tomatoes, tzatziki sauce, or feta cheese

Begin by preheating your oven to 400°F (200°C). On a large sheet pan, toss the chicken, bell peppers, and onions with olive oil, paprika, garlic powder, salt, and pepper. Spread everything out in an even layer and roast for about 20 minutes, until the chicken is cooked through and the veggies are tender.

Once done, transfer the mixture into warm pita bread, and add any additional toppings you prefer for an even tastier experience. Serve immediately, and enjoy every delicious bite!

Sheet Pan Chicken Pitas

Why You’ll Love Sheet Pan Chicken Pitas

This recipe shines for many reasons. First, it’s incredibly easy to prepare, making it a perfect choice for busy weeknights. The one-pan aspect means less cleanup, which is always a bonus. Plus, you can customize the veggies and toppings according to what you have on hand or what you prefer. Need a little crunch? Add some fresh lettuce. Want more flavor? Try some tzatziki sauce.

Everyone loves a meal that is both good for the taste buds and the belly. By using lean protein and fresh vegetables, you are also ensuring a healthy meal option.

A fun fact: Sheet Pan Chicken Pitas are not only delicious but also ideal for meal prep. If you’re planning ahead, simply store the chicken and veggies in the fridge, and fill the pitas just before serving.

Tips for success

  1. Even Cooking: Cut the chicken and veggies into similar sizes, so they cook evenly.
  2. Marinate if Possible: For enhanced flavor, let the chicken marinate in the spices and olive oil for an hour before cooking.
  3. Adjust Seasonings: Feel free to play with the spices according to your taste preferences. Add cayenne for heat or lemon juice for brightness.

Serving Suggestions

Serve your Sheet Pan Chicken Pitas with a side of Greek salad for a refreshing crunch. You can also add some homemade fries or roasted potatoes for a filling meal. If you love dipping, consider having some hummus or tzatziki sauce as a tasty side.

FAQs

  1. Can I use other meats for this recipe? Yes, you can easily substitute chicken with turkey or even tofu for a vegetarian option.
  2. How long can leftovers be stored? Leftover chicken and veggies can be stored in an airtight container in the fridge for up to three days.
  3. Can I freeze these pitas? You can freeze the cooked chicken and veggies, and then reheat them when ready to serve. Fill the fresh pitas before eating for the best taste.

Ready to make this quick and delicious meal for yourself? Try out the Sheet Pan Chicken Pitas recipe and enjoy every moment in the kitchen!

Sheet Pan Chicken Pitas

A quick and satisfying meal featuring juicy chicken, vibrant veggies, and warm pita bread, perfect for every dinner table.

Main Ingredients

  • 1 pound chicken breast, cut into strips (Lean protein for a healthy meal)
  • 1 medium bell pepper, sliced (Adds color and flavor)
  • 1 medium onion, sliced (Enhances sweetness when roasted)
  • 2 tablespoons olive oil (For roasting)
  • 2 teaspoons paprika (Adds a smoky flavor)
  • 1 teaspoon garlic powder (For added depth of flavor)
  • to taste Salt and pepper (Season to preference)
  • 4 pieces Pita bread for serving (Serve warm)
  • optional toppings: lettuce, tomatoes, tzatziki sauce, or feta cheese (Customize to your liking)

Preparation

  1. Preheat your oven to 400°F (200°C).
  2. On a large sheet pan, toss the chicken, bell peppers, and onions with olive oil, paprika, garlic powder, salt, and pepper.
  3. Spread everything out in an even layer.

Cooking

  1. Roast for about 20 minutes, until the chicken is cooked through and the veggies are tender.
  2. Transfer the mixture into warm pita bread.
  3. Add any additional toppings you prefer and serve immediately.

For best results, cut the chicken and veggies into similar sizes for even cooking. Consider marinating the chicken in the spices and olive oil for enhanced flavor.

Dinner, Main Course
Mediterranean
Chicken Pitas, Family Friendly, Healthy Dinner, Quick Meal, Sheet Pan Dinner

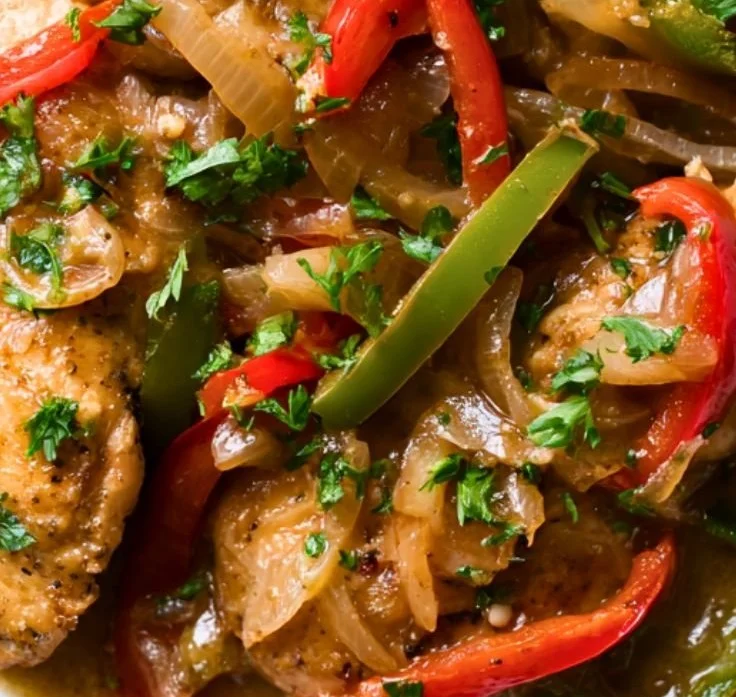
Chicken with Bell Peppers

Delicious Chicken with Bell Peppers served on a plate

Chicken with bell peppers is warm, simple, and full of flavor. The chicken cooks in a soft bed of peppers, onions, and a light sauce, so every bite feels homey. This dish is a real crowd-pleaser, great for weeknight dinners or a relaxed weekend meal. If you like stuffed pepper flavors, try this Mediterranean chicken stuffed peppers for another easy dinner idea. You will smile when the house smells good, and you will want to make this again and again.

How to prepare Chicken with Bell Peppers

Ingredients

  • 4 boneless, skinless chicken breasts
  • 2 tablespoons olive oil
  • 1 large onion, thinly sliced
  • 2 bell peppers, one red, one green, sliced into strips
  • 3 cloves garlic, minced
  • 1 teaspoon paprika
  • 1 teaspoon dried oregano
  • 1/2 teaspoon salt, or to taste
  • 1/2 teaspoon black pepper
  • 1 cup chicken broth
  • 1/2 cup heavy cream or half and half
  • 1 cup shredded cheddar or Monterey Jack cheese (optional)
  • Fresh parsley, chopped, for garnish

Directions

  1. Pat the chicken dry and season both sides with salt, pepper, paprika, and oregano.
  2. Heat 1 tablespoon olive oil in a large skillet over medium heat. Add the chicken and brown for 3 to 4 minutes per side, until golden. Remove chicken and set aside.
  3. Add the other tablespoon of oil to the same skillet. Add the onion and bell peppers, cook for 5 to 7 minutes until soft. Stir in the garlic and cook 30 seconds more.
  4. Pour in the chicken broth and scrape the bottom of the pan to loosen any browned bits. Let the broth simmer 2 minutes.
  5. Stir in the cream, bring to a low simmer, then return the chicken to the pan. Spoon some sauce and peppers over the chicken. Cover and cook 8 to 10 minutes, until the chicken reaches 165°F and the sauce thickens slightly.
  6. If you like cheese, sprinkle it over the chicken in the last 2 minutes, cover until melted.
  7. Garnish with chopped parsley and serve hot.

Smothered Chicken with Bell Peppers

Why You’ll Love Chicken with Bell Peppers

  • It is simple and quick, perfect for weeknights.
  • The peppers and onions give sweet, bright flavor to the chicken.
  • The light creamy sauce keeps the chicken moist and tasty.
  • It pairs well with rice, pasta, or bread for a full meal.
  • It uses common ingredients you likely have on hand.

Tips for success

  • Pound thicker chicken breasts to an even thickness so they cook the same.
  • Don’t crowd the pan, brown the chicken in batches if needed for a better sear.
  • Use low to medium heat when simmering the sauce, this keeps it smooth.
  • Taste the sauce before serving, add a little more salt or pepper if needed.
  • For a lighter option, use low-fat milk instead of cream, but watch the sauce for thinning.

Serving Suggestions

  • Serve over steamed white rice or brown rice for a simple plate.
  • Toss with cooked pasta and a little extra cheese for a hearty bowl.
  • Spoon over mashed potatoes for comfort food style.
  • Add a green salad or roasted vegetables on the side to round the meal.

Smothered Chicken with Bell Peppers

FAQs

Q: Can I use chicken thighs instead of breasts?

A: Yes, boneless thighs work well and stay juicy. Cut larger pieces to even size so they cook evenly.

Q: How long will leftovers last?

A: Store in an airtight container in the fridge for 3 to 4 days. Reheat gently on the stove or in the microwave.

Q: Can I make this ahead of time?

A: You can cook it, then cool and refrigerate. Reheat with a splash of broth to refresh the sauce.

Q: Can I freeze smothered chicken?

A: Yes, freeze in a freezer-safe container for up to 2 months. Thaw in the fridge before reheating.

Conclusion

This smothered chicken with bell peppers gives you a tasty, easy meal that feels like home. For a spicy Cajun take on a smothered chicken recipe, see this Cajun smothered chicken breasts recipe for more ideas.

Chicken with Bell Peppers

Warm, simple, and full of flavor, this chicken dish cooks in a bed of peppers and onions with a light sauce, making it perfect for weeknight dinners or relaxed weekend meals.

Main Ingredients

  • 4 pieces boneless, skinless chicken breasts (Pound to an even thickness for even cooking.)
  • 2 tablespoons olive oil (Divided for cooking.)
  • 1 large onion, thinly sliced
  • 2 pieces bell peppers, one red, one green, sliced into strips
  • 3 cloves garlic, minced
  • 1 teaspoon paprika
  • 1 teaspoon dried oregano
  • 1/2 teaspoon salt, or to taste
  • 1/2 teaspoon black pepper (Or to taste.)
  • 1 cup chicken broth
  • 1/2 cup heavy cream or half and half (For a lighter option, use low-fat milk.)
  • 1 cup shredded cheddar or Monterey Jack cheese (optional) (Add for the last 2 minutes of cooking.)
  • to taste none Fresh parsley, chopped, for garnish

Preparation

  1. Pat the chicken dry and season both sides with salt, pepper, paprika, and oregano.
  2. Heat 1 tablespoon olive oil in a large skillet over medium heat.
  3. Add the chicken and brown for 3 to 4 minutes per side, until golden. Remove chicken and set aside.
  4. Add the other tablespoon of oil to the same skillet.
  5. Add the onion and bell peppers, cook for 5 to 7 minutes until soft.
  6. Stir in the garlic and cook 30 seconds more.

Cooking

  1. Pour in the chicken broth and scrape the bottom of the pan to loosen any browned bits.
  2. Let the broth simmer for 2 minutes.
  3. Stir in the cream, bring to a low simmer, then return the chicken to the pan.
  4. Spoon some sauce and peppers over the chicken.
  5. Cover and cook for 8 to 10 minutes, until the chicken reaches 165°F and the sauce thickens slightly.
  6. If you like cheese, sprinkle it over the chicken in the last 2 minutes, cover until melted.

Serving

  1. Garnish with chopped parsley and serve hot.

Serve over steamed rice, pasta, or mashed potatoes to round out the meal. For additional taste, consider pairing with a green salad or roasted vegetables. Leftovers can be refrigerated for 3 to 4 days and reheated gently.

Dinner, Main Course
American
Chicken with Bell Peppers, Comfort Food, Easy Dinner, Quick Meals, Weeknight Dinner

Slow Cooker Honey Garlic Chicken

Delicious slow cooker honey garlic chicken served with vegetables

This Slow Cooker Honey Garlic Chicken is a warm, simple meal that feels like a hug on a plate. The sauce is sweet, garlicky, and a little sticky, and the chicken comes out tender and full of flavor. It is a real crowd-pleaser for weeknights and easy family dinners. If you like a quick twist or another method, check out the air fryer honey butter garlic chicken tenders recipe for a faster, crispier version. Get ready, this dish is easy to make and fun to share with friends and family.

How to prepare Slow Cooker Honey Garlic Chicken

Ingredients

  • 2 pounds boneless chicken thighs or breasts
  • 1/2 cup honey
  • 1/2 cup low sodium soy sauce
  • 1/4 cup ketchup or tomato sauce
  • 3 to 4 garlic cloves, minced
  • 2 tablespoons brown sugar (optional)
  • 1 tablespoon rice vinegar or apple cider vinegar
  • 1/2 teaspoon black pepper
  • 1 tablespoon cornstarch mixed with 2 tablespoons water, for thickening
  • Sesame seeds and chopped green onions for garnish

Directions

  1. Put the chicken in the slow cooker in a single layer.
  2. In a bowl, mix honey, soy sauce, ketchup, minced garlic, vinegar, brown sugar, and pepper until smooth.
  3. Pour the sauce over the chicken, make sure it is covered.
  4. Cook on low for 4 to 5 hours, or on high for 2 to 3 hours, until the chicken is very tender.
  5. Remove the chicken to a plate. Stir the cornstarch mixture into the sauce in the slow cooker.
  6. Turn the slow cooker to high, let the sauce thicken for 5 to 10 minutes, stirring once or twice.
  7. Put the chicken back into the thickened sauce, spoon the sauce over the chicken to coat.
  8. Garnish with sesame seeds and green onions, serve warm.

Slow Cooker Honey Garlic Chicken

Why You’ll Love Slow Cooker Honey Garlic Chicken

  • It uses simple ingredients you likely have on hand, like honey and garlic.
  • The slow cooker makes the chicken very tender, so it falls apart and soaks up the sauce.
  • The sauce is sweet and savory, it sticks to rice, noodles, or bread.
  • It is a great make-ahead meal, you can cook it in the morning and eat it later.
  • It makes good leftovers and works well for meal prep.

Tips for success

  • Use thighs for more flavor and juiciness, breasts work too if you prefer lean meat.
  • Trim excess fat from the chicken to keep the sauce clean and not greasy.
  • Do not overcook, even in a slow cooker, check at the lower time range if your slow cooker runs hot.
  • If the sauce is too thin, mix cornstarch and cold water, then stir in and cook until thick.
  • Taste the sauce before serving, add a little more honey if you want it sweeter, or a splash of vinegar for more tang.
  • For more garlic flavor, add an extra clove or use garlic paste.

Serving Suggestions

  • Serve over steamed white rice, brown rice, or cauliflower rice for a low carb option.
  • Toss with cooked noodles for a simple honey garlic chicken pasta.
  • Place on a bed of salad greens for a warm chicken salad.
  • Add steamed broccoli, snap peas, or roasted vegetables on the side.
  • Try it in a sandwich or wrap, with extra sauce for a sticky, tasty lunch. You can also try the air fryer version for a different texture, if you want something crispier.

Slow Cooker Honey Garlic Chicken

FAQs

Q: Can I use frozen chicken in the slow cooker? A: Yes, you can, but add about 1 hour to the cooking time. It is best to check the internal temperature, it should reach 165 F.

Q: How do I thicken the sauce if it is too runny? A: Mix 1 tablespoon cornstarch with 2 tablespoons cold water, stir it into the sauce, and cook on high for 5 to 10 minutes until it thickens.

Q: Can I make this gluten free? A: Yes, use a gluten free soy sauce, like tamari, and check all labels for hidden gluten.

Q: How long will leftovers last? A: Store in an airtight container in the fridge for 3 to 4 days. Reheat gently on the stove or in the microwave.

Q: Can I double the recipe for a crowd? A: Yes, you can double it, but check that your slow cooker is not overfilled. Cook time may increase a little if the slow cooker is very full.

Slow Cooker Honey Garlic Chicken

A warm, sweet, and garlicky chicken dish that is tender and perfect for family dinners.

Main Ingredients

  • 2 pounds boneless chicken thighs or breasts (Thighs are recommended for more flavor.)
  • 1/2 cup honey
  • 1/2 cup low sodium soy sauce (Use tamari for gluten-free option.)
  • 1/4 cup ketchup or tomato sauce
  • 3 to 4 cloves garlic, minced (Add more for a garlicky flavor.)
  • 2 tablespoons brown sugar (optional) (Adjust sweetness to taste.)
  • 1 tablespoon rice vinegar or apple cider vinegar
  • 1/2 teaspoon black pepper
  • 1 tablespoon cornstarch (Mixed with 2 tablespoons water for thickening.)
  • 2 tablespoons water (For mixing with cornstarch.)
  • Sesame seeds for garnish
  • Chopped green onions for garnish

Preparation

  1. Put the chicken in the slow cooker in a single layer.
  2. In a bowl, mix honey, soy sauce, ketchup, minced garlic, vinegar, brown sugar, and pepper until smooth.
  3. Pour the sauce over the chicken, ensuring it’s covered.

Cooking

  1. Cook on low for 4 to 5 hours, or on high for 2 to 3 hours, until the chicken is very tender.
  2. Remove the chicken to a plate.
  3. Stir the cornstarch mixture into the sauce in the slow cooker.
  4. Turn the slow cooker to high, let the sauce thicken for 5 to 10 minutes, stirring occasionally.
  5. Put the chicken back into the thickened sauce, spoon the sauce over to coat.

Serving

  1. Garnish with sesame seeds and green onions, and serve warm.

Use thighs for more juiciness. Trim excess fat to prevent a greasy sauce. Adjust sweetness and tang according to preference. Great leftovers for meal prep.

Dinner, Main Course
American, Asian
Easy Dinner, Family Meal, Honey Garlic Chicken, Slow Cooker, Tender Chicken

Cheese Chicken Bake

Delicious Cheese Chicken Bake topped with melted cheese and herbs

Cheese Chicken Bake is warm, simple, and full of melty cheese. This dish feels like a hug on a plate. It is great for busy weeknights, family dinners, and for anyone who loves tasty, easy comfort food. The cheese makes the chicken juicy and rich, and the bake fills the kitchen with a nice smell. This featured recipe is a crowd-pleaser, with tender chicken under a golden, cheesy crust. It tastes creamy, savory, and a little crunchy on top, so people always ask for seconds. Grab your baking dish and get ready to make a dish that everyone will love, and maybe lick their plate a little.

How to prepare Cheese Chicken Bake

Ingredients

  • 4 boneless, skinless chicken breasts
  • 1 teaspoon salt
  • 1/2 teaspoon black pepper
  • 1 teaspoon garlic powder
  • 1 teaspoon paprika
  • 2 tablespoons olive oil
  • 1 cup sour cream or plain Greek yogurt
  • 1/2 cup mayonnaise or 1 can cream of chicken soup
  • 1 cup shredded cheddar cheese
  • 1 cup shredded mozzarella cheese
  • 1/2 cup breadcrumbs, optional for crunch
  • 2 tablespoons chopped fresh parsley or dried parsley

Directions

  1. Preheat oven to 400°F (200°C).
  2. Pat chicken dry, then season both sides with salt, pepper, garlic powder, and paprika.
  3. Heat olive oil in a skillet over medium heat, sear chicken 2 minutes per side, just to brown, then remove.
  4. In a bowl, mix sour cream, mayonnaise or cream soup, half the cheddar, half the mozzarella, and parsley.
  5. Place seared chicken in a baking dish. Spread the cheese sauce over each piece, covering the top.
  6. Sprinkle the remaining cheeses and breadcrumbs on top for a golden crust.
  7. Bake 20 to 25 minutes, until chicken reaches 165°F (74°C) and cheese bubbles.
  8. If you want extra brown on top, broil 2 to 3 minutes, watching closely.
  9. Let rest 5 minutes before serving, this keeps the chicken juicy.

Cheese Chicken Bake

Why You’ll Love Cheese Chicken Bake

This cheesy chicken bake is simple, quick, and full of flavor. It uses everyday ingredients, so you do not need a long shopping list. The cheese keeps the chicken moist, and the top gets a nice golden color. It makes a great easy chicken bake for weeknights or a small party. Kids and adults like it, so it is a real family dinner winner.

Tips for success

  • Pound the chicken to even thickness, it cooks more evenly.
  • Use a meat thermometer to reach 165°F, do not overcook.
  • If you like more sauce, add a little milk or chicken broth to the mix.
  • For extra flavor, add chopped onions or cooked mushrooms to the sauce.
  • Use a mix of cheeses for a richer taste, try cheddar and Monterey Jack.
  • If you use frozen chicken, thaw fully before baking.

Serving Suggestions

  • Serve over rice or pasta to soak up the sauce.
  • Pair with a green salad for a lighter meal.
  • Add roasted vegetables like broccoli, carrots, or green beans.
  • Serve with crusty bread or garlic bread to mop up the cheese.
  • For a low-carb option, serve over cauliflower rice or with steamed veggies.

Cheese Chicken Bake

FAQs

Q, Can I use chicken thighs instead of breasts? A, Yes, bone-in or boneless thighs work well. Thighs may need a few extra minutes to cook.

Q, Can I make this ahead of time? A, Yes, you can assemble in the dish, cover, and refrigerate up to 24 hours. Bake when ready, add a few extra minutes if cold.

Q, How do I store leftovers? A, Cool, then store in an airtight container in the fridge for 3 to 4 days. Reheat in the oven at 350°F (175°C) until warm.

Q, Can I freeze it? A, Yes, freeze the baked dish in a freezer-safe container for up to 2 months. Thaw in the fridge before reheating.

Q, How can I make it crispier on top? A, Add breadcrumbs or broil for 1 to 3 minutes at the end. Watch closely so it does not burn.

Conclusion

If you want a simple, cheesy, and comforting meal, this Cheese Chicken Bake is a great choice for family dinner or an easy weeknight meal. For another tasty one-dish idea with a similar easy dinner feel, try One Dish Queso Chicken Bake {Easy Dinner Recipe}.

Cheese Chicken Bake

This warm and simple Cheese Chicken Bake is full of melty cheese and makes a comforting dish that everyone loves. It features tender chicken under a golden, cheesy crust, perfect for busy weeknights and family dinners.

Chicken and Seasoning

  • 4 pieces boneless, skinless chicken breasts (Pound to even thickness for even cooking)
  • 1 teaspoons salt
  • 1/2 teaspoons black pepper
  • 1 teaspoons garlic powder
  • 1 teaspoons paprika
  • 2 tablespoons olive oil (For searing the chicken)

Cheese and Sauce

  • 1 cup sour cream or plain Greek yogurt
  • 1/2 cup mayonnaise or 1 can cream of chicken soup
  • 1 cup shredded cheddar cheese (Divided use)
  • 1 cup shredded mozzarella cheese (Divided use)
  • 2 tablespoons chopped fresh parsley or dried parsley (For added flavor)

Topping

  • 1/2 cup breadcrumbs (Optional for crunch)

Preparation

  1. Preheat oven to 400°F (200°C).
  2. Pat chicken dry, then season both sides with salt, pepper, garlic powder, and paprika.
  3. Heat olive oil in a skillet over medium heat, sear chicken for 2 minutes per side to brown, then remove.
  4. In a bowl, mix sour cream, mayonnaise or cream soup, half the cheddar, half the mozzarella, and parsley.

Assembly

  1. Place seared chicken in a baking dish. Spread the cheese sauce over each piece, covering the top.
  2. Sprinkle the remaining cheeses and breadcrumbs on top for a golden crust.

Baking

  1. Bake for 20 to 25 minutes, until chicken reaches 165°F (74°C) and cheese bubbles.
  2. If desired, broil for 2 to 3 minutes for extra brown, watching closely.

Serving

  1. Let rest for 5 minutes before serving to keep the chicken juicy.

For extra flavor, add chopped onions or cooked mushrooms to the sauce. For a low-carb option, serve over cauliflower rice or with steamed veggies. Leftovers can be stored in an airtight container for 3 to 4 days.

Dinner, Main Course
American
Cheese Chicken Bake, chicken bake, Comfort Food, Easy Dinner, Family Meal

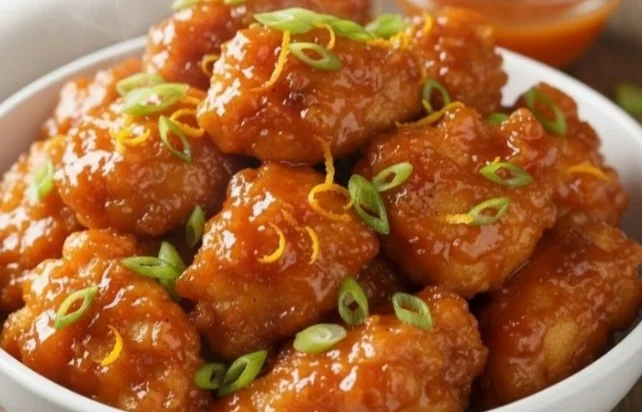
Orange Chicken

Plate of crispy orange chicken with a tangy sauce and garnishes

Orange Chicken is a bright, warm dish many people love. It mixes crisp chicken with a sweet and tangy orange sauce. This dish feels like happy takeout at home, and it fills the room with a fresh citrus smell. The featured recipe is a crowd-pleaser, with a sticky orange glaze that clings to every bite, and a nice crunch from the fried chicken. It tastes sweet, a little sour, and a bit spicy if you like heat, so it makes people smile. If you like orange flavors, try my take on orange cranberry chicken thighs for another easy meal. Get ready to make this and enjoy a plate that feels like your favorite takeout, right at home.

how to prepare Orange Chicken

  1. Cut boneless chicken into bite sized pieces. Pat dry with paper towel.
  2. Toss chicken in a little salt and pepper. Coat with flour or cornstarch for a crisp crust.
  3. Heat oil in a pan or deep fryer to medium high heat. Fry chicken until golden and cooked through, drain on paper towel.
  4. Make the orange sauce, mix orange juice, sugar, soy sauce, vinegar, garlic, and a bit of ginger in a small pot. Add a splash of water and taste, add chili flakes if you want heat.
  5. Bring sauce to a simmer, then stir in a cornstarch slurry to thicken. Cook until glossy and sticky.
  6. Toss the fried chicken in the sauce until every piece is coated. Serve hot with rice or noodles, and top with sesame seeds and sliced green onion.

Orange Chicken

Why You’ll Love Orange Chicken

  • It has a sweet and tangy orange flavor that feels fresh.
  • The sauce is sticky and clings to crispy chicken for a great texture.
  • It is fast to make and works for weeknights or a party.
  • You can change the heat level or make it more sweet, so it fits your taste.
  • It tastes like takeout, but it is homemade and you control the ingredients.

tips for success

  • Dry the chicken well before coating, this keeps it crisp.
  • Use cornstarch or a mix of flour and cornstarch for a light, crunchy crust.
  • Fry at the right oil temperature, not too low, so the chicken does not get soggy.
  • Make the sauce a little thicker than you think, it will thin a bit when you toss the chicken.
  • Taste the sauce as you cook, add more soy sauce for salt, or more sugar for sweetness.
  • If you want less oil, you can bake or air fry the chicken, then toss with the sauce.

Serving Suggestions

  • Serve with steamed white rice or brown rice to soak the sauce.
  • Try it with fried rice, lo mein, or steamed vegetables for a full meal.
  • Add steamed broccoli or snap peas for color and crunch.
  • Garnish with sesame seeds, sliced green onion, or thin orange slices for a fresh look.

Orange Chicken

FAQs

Q: Can I make the sauce without fresh orange juice?

A: Yes, you can use bottled orange juice. Fresh juice is brighter, but bottled works fine.

Q: Can I bake the chicken instead of frying?

A: Yes, bake or air fry the chicken for a lighter dish, then toss with sauce for the same flavor.

Q: How do I store leftovers?

A: Put chicken and sauce in an airtight box in the fridge. Eat within 2 to 3 days. Reheat in a pan or oven to keep it crisp.

Q: Can I make this gluten free?

A: Yes, use tamari or a gluten free soy sauce and cornstarch to coat the chicken.

Conclusion

I hope this simple Orange Chicken recipe helps you enjoy a sweet and tangy meal at home. For another take on orange flavored chicken, you can compare methods with Chinese Orange Chicken – Modern Honey, which shows a classic style and more sauce tips. Give this recipe a try and have fun cooking a bright, tasty dinner.

Orange Chicken

A bright and tangy dish featuring crisp chicken coated in a sweet orange sauce, reminiscent of your favorite takeout.

For the Chicken

  • 1 pound boneless chicken, cut into bite-sized pieces (Pat dry with a paper towel)
  • 1 teaspoon salt
  • 1/2 teaspoon black pepper
  • 1/2 cup flour or cornstarch (For coating chicken)

For the Sauce

  • 1 cup orange juice (Freshly squeezed recommended)
  • 1/2 cup sugar
  • 1/4 cup soy sauce (Use tamari for gluten-free option)
  • 2 tablespoons vinegar (White or rice vinegar)
  • 1 clove garlic, minced
  • 1/2 teaspoon ginger, minced (Optional for flavor)
  • 1 cup water (Add splash to taste)
  • 1 tablespoon cornstarch (Mixed with water to form slurry)
  • 1/2 teaspoon chili flakes (Optional for heat)

Preparation

  1. Cut boneless chicken into bite-sized pieces and pat dry with paper towel.
  2. Toss chicken with salt and pepper, then coat with flour or cornstarch.

Cooking Chicken

  1. Heat oil in a pan or deep fryer to medium-high heat.
  2. Fry chicken until golden and cooked through, then drain on paper towels.

Making the Sauce

  1. In a small pot, mix together orange juice, sugar, soy sauce, vinegar, garlic, ginger, and a splash of water.
  2. Bring sauce to a simmer, then stir in a cornstarch slurry to thicken.
  3. Cook until the sauce is glossy and sticky.

Combining

  1. Toss the fried chicken in the sauce until every piece is coated.
  2. Serve hot with rice or noodles, and top with sesame seeds and sliced green onion.

Dry the chicken well before coating, fry at the right temperature, and adjust sauce according to taste. Baking or air frying is an alternative for reduced oil without losing flavor.

Dinner, Main Course
Asian, Chinese
Crispy Chicken, Orange Chicken, Quick Dinner, Sweet and Tangy, Takeout Style

Air Fryer Teriyaki Chicken

Delicious air fryer teriyaki chicken served with vegetables

I love simple meals that taste like you spent hours cooking, and Air Fryer Teriyaki Chicken is one of those. It cooks fast, it smells great, and it has sweet, sticky sauce that everyone will want more of. This recipe is a crowd-pleaser, great for weeknights and for feeding friends. If you like quick air fryer meals, you might also enjoy an air fryer grilled cheese hot dogs recipe for a fun side or snack. Get ready, this dish is easy, tasty, and fun to make, you will want to make it again and again.

how to prepare Air Fryer Teriyaki Chicken

  • Pat the chicken pieces dry, then season lightly with salt and pepper.
  • Mix teriyaki sauce, a little honey, garlic, and soy sauce in a bowl. Add a splash of sesame oil if you like.
  • Put the chicken in the sauce and let it marinate for 15 to 30 minutes, if you have time.
  • Preheat the air fryer to 380°F, about 5 minutes.
  • Place the chicken in the air fryer basket in a single layer. Do not crowd the pieces.
  • Cook for 10 minutes, flip the chicken, then cook 5 to 8 more minutes, until the chicken reaches 165°F and looks golden.
  • Brush extra teriyaki sauce on the chicken in the last 2 minutes to make it sticky and shiny.
  • Let the chicken rest for a few minutes, then slice or serve whole.

Air Fryer Teriyaki Chicken

Why You’ll Love Air Fryer Teriyaki Chicken

  • It cooks fast, so dinner is ready in under 30 minutes.
  • The air fryer makes the outside a little crisp, and the sauce stays sticky.
  • The taste is sweet, salty, and savory, it pleases many palates.
  • You use fewer pans, so cleanup is easy.
  • It works with chicken breasts, thighs, or tenders, you can pick what you like.

tips for success

  • Do not crowd the air fryer basket, leave space for air to move.
  • Dry the chicken first, the skin or surface will crisp better.
  • Check the internal temp, aim for 165°F for safe, juicy chicken.
  • If your sauce is thin, simmer it on the stove to thicken before brushing.
  • Add sesame seeds or green onions at the end for fresh color and flavor.

Serving Suggestions

  • Serve with steamed rice and simple steamed vegetables.
  • Add a side salad with a light dressing for a fresh contrast.
  • Put the chicken into bowls with rice, avocado, and pickled veggies.
  • Use the sliced chicken in sandwiches, wraps, or on top of noodles.
  • Garnish with green onion and sesame seeds for a nice finish.

Air Fryer Teriyaki Chicken

FAQs

Q: Can I use frozen chicken in the air fryer? A: You can, but thawing first gives more even cook and better sauce stick. If you cook from frozen, add time and check the center.

Q: How do I make the teriyaki sauce thicker? A: Simmer the sauce in a small pan until it reduces, or mix a bit of cornstarch with water and stir into the hot sauce, cook until it thickens.

Q: Can I make this gluten free? A: Yes, use gluten free soy sauce or tamari instead of regular soy sauce.

Q: How long does leftover teriyaki chicken keep? A: Store in the fridge in a covered container for up to 3 days. Reheat gently in the air fryer or microwave.

Q: Can I double the recipe for a crowd? A: Yes, but cook in batches so the air can circulate and chicken stays crisp.

Conclusion

For another simple take on air fryer meals, you can follow the detailed steps from Air fryer Teriyaki Chicken – Rachna cooks to compare tips and sauce ideas. If you want a version with different spices and sides, see the notes in Air Fryer Teriyaki Chicken – Hungry Lankan for more ideas.

Air Fryer Teriyaki Chicken

Quick and easy Air Fryer Teriyaki Chicken with a sweet and sticky sauce, ready in under 30 minutes.

Chicken and Marinade

  • 1 lb chicken pieces (breasts, thighs, or tenders) (Pat dry before seasoning.)
  • 1/4 cup teriyaki sauce (You can thicken it if desired.)
  • 1 tbsp honey (Adds sweetness.)
  • 2 cloves garlic (Minced.)
  • 2 tbsp soy sauce (Use gluten-free if necessary.)
  • 1 tbsp sesame oil (Optional for added flavor.)
  • salt to taste (Season the chicken.)
  • pepper to taste (Season the chicken.)

Garnishes

  • 1 tbsp sesame seeds (For topping.)
  • 2 tbsp green onions (Chopped, for garnishing.)

Preparation

  1. Pat the chicken pieces dry, then season lightly with salt and pepper.
  2. Mix teriyaki sauce, honey, minced garlic, and soy sauce in a bowl. Add sesame oil if desired.
  3. Marinate the chicken in the sauce for 15 to 30 minutes if time allows.
  4. Preheat the air fryer to 380°F (about 5 minutes).

Cooking

  1. Place the chicken in the air fryer basket in a single layer, ensuring not to crowd the pieces.
  2. Cook for 10 minutes, flip the chicken, then cook for an additional 5 to 8 minutes until the chicken reaches 165°F and is golden.
  3. Brush extra teriyaki sauce on the chicken in the last 2 minutes of cooking for a sticky finish.

Serving

  1. Let the chicken rest for a few minutes, then slice or serve whole.

Serve with steamed rice and vegetables. Add salad for a fresh contrast. Store leftovers in the fridge for up to 3 days.

Dinner, Main Course
Asian, Japanese
Air Fryer, Dinner Recipe, easy chicken recipe, Quick Meal, Teriyaki Chicken

Air Fryer Sweet Chili Chicken and Brussels Sprouts

Plate of Air Fryer Sweet Chili Chicken and Brussels Sprouts

This Air Fryer Sweet Chili Chicken and Brussels Sprouts recipe is warm, friendly, and easy. It mixes sweet, sticky chili sauce with tender chicken, and crispy, caramelized Brussels sprouts. The flavors are bright, a little sweet, and a little spicy, and the air fryer makes them both quick and nicely crisp.

If you like simple air fryer dinners, try another easy idea, air fryer grilled cheese hot dogs for more quick meal inspiration. This recipe is a crowd-pleaser, great for weeknights, and fun to share. You will want to make it again and again, and maybe lick the plate, no shame there.

how to prepare Air Fryer Sweet Chili Chicken and Brussels Sprouts

Ingredients

  • 1 pound boneless chicken breasts or thighs, cut into bite-size pieces
  • 1 pound Brussels sprouts, trimmed and halved
  • 3 tablespoons sweet chili sauce
  • 1 tablespoon soy sauce or tamari
  • 1 tablespoon olive oil
  • 1 teaspoon garlic powder
  • Salt and pepper to taste
  • Optional, sesame seeds and sliced green onion for garnish

Directions

  1. In a bowl, mix sweet chili sauce, soy sauce, olive oil, garlic powder, salt, and pepper.
  2. Add chicken pieces, toss to coat, and let sit 5 to 10 minutes.
  3. Toss Brussels sprouts with a little oil, salt, and pepper.
  4. Preheat the air fryer to 400°F (200°C) for a few minutes.
  5. Place Brussels sprouts in the basket in one layer. Cook 5 minutes.
  6. Add the chicken pieces on top of the Brussels sprouts in one layer. Cook 10 to 12 more minutes, shake basket or stir halfway, until chicken is cooked and sprouts are crisp.
  7. If you want more glaze, toss the cooked chicken with a little extra sweet chili sauce.
  8. Garnish with sesame seeds and green onion, serve hot.

Air Fryer Sweet Chili Chicken and Brussels Sprouts

Why You’ll Love Air Fryer Sweet Chili Chicken and Brussels Sprouts

  • Fast, cooks in about 20 minutes from start to finish.
  • Uses one air fryer basket, so cleanup is quick.
  • Bright sweet chili flavor that both kids and adults enjoy.
  • Crisp sprouts and juicy chicken, great mix of textures.
  • Healthy dinner option with protein and veggies.

tips for success

  • Cut chicken into similar size pieces so it cooks evenly.
  • Don’t crowd the basket, shake or stir halfway for even browning.
  • If your air fryer heats hot, lower temp to 380°F and add 2 to 4 minutes.
  • Taste sauce before cooking, add a splash of soy or a pinch of salt if needed.
  • Use dried garlic or fresh minced garlic for stronger flavor, add with the sauce.

Serving Suggestions

  • Serve over steamed rice or cauliflower rice for a full meal.
  • Add a side of pickled cucumber or a simple salad to balance the sweet sauce.
  • Wrap leftovers in a tortilla for a quick lunch wrap.
  • Garnish with lime wedges for a fresh squeeze of juice.

Air Fryer Sweet Chili Chicken and Brussels Sprouts

FAQs

Q: Can I use frozen Brussels sprouts?

A: Yes, but thaw and pat dry first, they crisp better if not wet.

Q: Can I make this with thighs instead of breasts?

A: Yes, thighs work well and stay juicy. Cut into even pieces.

Q: Is sweet chili sauce spicy?

A: It is mildly spicy and sweet, adjust by adding more soy or a little hot sauce if you want heat.

Q: Can I double the recipe?

A: You can, but cook in batches or use a larger air fryer, do not overcrowd the basket.

Q: How do I store leftovers?

A: Cool, place in an airtight container, and keep in the fridge up to 3 days.

Conclusion

This recipe is a quick, tasty weeknight winner that gives you crisp Brussels sprouts and sticky sweet chili chicken with very little fuss. For another version focused on roasted sprouts with sweet chili flavor, see this take on Sweet Chili Roasted Brussels Sprouts – Easy Side Dish. If you want to compare a different method that still uses the air fryer for fast meals, check out this Air Fryer Sweet Chili Chicken and Brussels Sprouts – Mason Woodruff write-up for more tips.

Air Fryer Sweet Chili Chicken and Brussels Sprouts

This quick and easy Air Fryer Sweet Chili Chicken and Brussels Sprouts recipe features tender chicken and crispy Brussels sprouts coated in a sweet and spicy chili sauce.

Main Ingredients

  • 1 pound boneless chicken breasts or thighs, cut into bite-size pieces (Thighs work well and stay juicy.)
  • 1 pound Brussels sprouts, trimmed and halved (Can use frozen but must thaw and pat dry.)

Sauce and Seasoning

  • 3 tablespoons sweet chili sauce (Adjust for more spice.)
  • 1 tablespoon soy sauce or tamari (Add a splash to taste.)
  • 1 tablespoon olive oil
  • 1 teaspoon garlic powder (Use fresh minced garlic for stronger flavor.)
  • to taste Salt and pepper

Optional Garnish

  • as needed sesame seeds (Optional)
  • as needed sliced green onion (Optional)

Preparation

  1. In a bowl, mix sweet chili sauce, soy sauce, olive oil, garlic powder, salt, and pepper.
  2. Add chicken pieces, toss to coat, and let sit for 5 to 10 minutes.
  3. Toss Brussels sprouts with a little oil, salt, and pepper.
  4. Preheat the air fryer to 400°F (200°C) for a few minutes.

Cooking

  1. Place Brussels sprouts in the basket in one layer. Cook for 5 minutes.
  2. Add the chicken pieces on top of the Brussels sprouts in one layer. Cook for an additional 10 to 12 minutes, shaking the basket or stirring halfway, until chicken is cooked and sprouts are crisp.
  3. If you want more glaze, toss the cooked chicken with a little extra sweet chili sauce.

Serving

  1. Garnish with sesame seeds and green onion, serve hot.

Cut chicken into similar size pieces for even cooking. Avoid overcrowding the basket for even browning.

Dinner, Main Course
American, Asian
Air Fryer Chicken, Brussels Sprouts, Easy Recipe, Quick Dinner, Sweet Chili Chicken

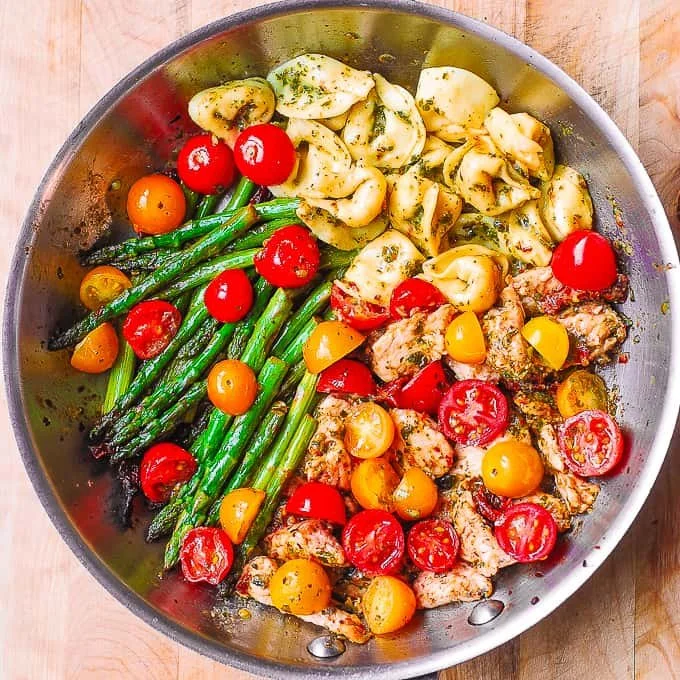
Pesto Chicken Tortellini and Veggies

Pesto Chicken Tortellini garnished with fresh vegetables

I love meals that come together fast, taste fresh, and make people smile, and this Pesto Chicken Tortellini and Veggies does just that. It mixes tender chicken, cheesy tortellini, bright basil pesto, and colorful vegetables for a warm, satisfying dish. The flavors feel fresh, the pesto gives a lovely herbal lift, and the veggies add crunch and color, so it looks as good as it tastes. This is a great weeknight dinner, a simple potluck dish, or a quick family meal that gets eaten fast, so get ready to enjoy something cozy and bright.

How to prepare Pesto Chicken Tortellini and Veggies

  1. Cook the tortellini according to package directions, drain, and set aside. Use fresh or frozen cheese tortellini for best texture.
  2. While the pasta cooks, cut chicken into bite size pieces. Season with salt and pepper.
  3. Heat a little oil in a large skillet over medium heat. Add the chicken and cook until browned and cooked through, about 5 to 7 minutes. Remove chicken and set aside.
  4. In the same skillet, add a bit more oil if needed. Sauté chopped onion and minced garlic until soft and fragrant, about 2 minutes.
  5. Add chopped veggies, such as bell peppers, cherry tomatoes, and zucchini. Cook until just tender, about 4 to 5 minutes.
  6. Return the chicken to the skillet. Add the cooked tortellini and a few big spoonfuls of pesto. Toss gently to coat everything. If you like a creamy sauce, stir in a splash of cream or a spoon of cream cheese, and warm through.
  7. Taste and adjust salt, pepper, or more pesto as needed. Garnish with extra basil or a sprinkle of Parmesan cheese. Serve warm.

Pesto Chicken Tortellini and Veggies

Why You’ll Love Pesto Chicken Tortellini and Veggies

  • It is quick to make, perfect for busy weeknights.
  • The pesto adds fresh basil flavor, with garlic and cheese notes that pair well with chicken and pasta.
  • The dish is flexible, so you can use whatever vegetables you have.
  • It is colorful and looks great on the table, so it is a crowd pleaser.

tips for success

  • Use good quality store bought pesto or homemade pesto for best flavor.
  • Do not overcook the tortellini, cook until al dente so it holds shape when tossed.
  • Cut vegetables in similar sizes so they cook evenly.
  • If the sauce seems thick, add a splash of pasta water or cream to loosen it.
  • Keep flavors bright by adding a squeeze of lemon at the end if you want more freshness.

Serving Suggestions

  • Serve with a side salad, like arugula with lemon vinaigrette, to add a peppery contrast.
  • Offer warm crusty bread or garlic bread to soak up extra pesto sauce.
  • Top with extra grated Parmesan and fresh basil for color and taste.
  • For a lighter option, skip the cream and add more veggies for a veggie heavy meal.

Pesto Chicken Tortellini and Veggies

FAQs

Q, Can I use frozen tortellini?

A, Yes, frozen tortellini works great. Cook it directly from frozen according to package instructions.

Q, Can I make this vegetarian?

A, Yes, leave out the chicken and add more vegetables or use cooked chickpeas for protein.

Q, How long does leftovers keep?

A, Store in an airtight container in the fridge for 3 to 4 days. Reheat gently on the stove with a splash of water or cream.

Q, Can I use jarred pesto?

A, Yes, good quality jarred pesto saves time and still gives great flavor.

Q, Is this dish freezer friendly?

A, Cooked tortellini can get soft after freezing, so it is best to freeze only the chicken and vegetables in pesto, then boil fresh tortellini when ready to eat.

Conclusion

If you want a tested, tasty idea for dinner that mixes pasta, pesto, chicken, and veggies, check this version for more tips and a full recipe at Pesto Chicken Tortellini – Chelsea’s Messy Apron. Enjoy making this simple, flavorful meal.

Pesto Chicken Tortellini and Veggies

A quick and vibrant dish combining tender chicken, cheesy tortellini, and colorful vegetables, all tossed in fresh basil pesto for a delightful weeknight meal.

For the Tortellini

  • 12 ounces cheese tortellini (Use fresh or frozen for best texture.)

For the Chicken

  • 1 pound chicken breast (Cut into bite-sized pieces.)
  • 1 teaspoon salt (For seasoning.)
  • 1 teaspoon black pepper (For seasoning.)

For the Vegetables

  • 1 medium onion (Chopped.)
  • 2 cloves garlic (Minced.)
  • 1 cup bell pepper (Chopped.)
  • 1 cup cherry tomatoes (Halved.)
  • 1 medium zucchini (Chopped.)

For the Sauce

  • 1 cup basil pesto (Store-bought or homemade.)
  • 1 splash heavy cream (Optional for a creamier sauce.)
  • 1 tablespoon olive oil (For cooking.)
  • 1 tablespoon lemon juice (Optional for brightness.)
  • 1/2 cup Parmesan cheese (Grated, for garnish.)

Preparation

  1. Cook the tortellini according to package directions, drain, and set aside.
  2. Cut chicken into bite-size pieces and season with salt and pepper.

Cooking

  1. Heat a little oil in a large skillet over medium heat. Add the chicken and cook until browned and cooked through, about 5 to 7 minutes. Remove chicken and set aside.
  2. In the same skillet, add a bit more oil if needed. Sauté chopped onion and minced garlic until soft and fragrant, about 2 minutes.
  3. Add chopped veggies and cook until just tender, about 4 to 5 minutes.
  4. Return the chicken to the skillet. Add the cooked tortellini and pesto. Toss gently to coat. Stir in cream or cream cheese if desired, and warm through.
  5. Taste and adjust salt, pepper, or more pesto as needed. Garnish with extra basil or Parmesan cheese.

Serve with a side salad or warm bread. For a vegetarian option, omit chicken and add more veggies.

Dinner, Main Course
Italian
Comfort Food, One-Pan Dinner, Pesto Chicken Tortellini, Quick Dinner, Weeknight Meal