Italian Lemon Cream Cake

Slice of Italian Lemon Cream Cake with lemon zest decoration

It was a sunny afternoon when I first tasted Italian Lemon Cream Cake at a small family gathering. Everyone was gathered, chatting and laughing, but the moment I took a bite of that soft, zesty cake, it was like the sun had brightened even more. The blend of lemon and creamy goodness was irresistible. Since then, this delightful cake has become a staple at our family events, always bringing smiles and sweet memories.

Why Make This Recipe

Italian Lemon Cream Cake is a perfect dessert for any occasion. Its light and refreshing lemon flavor pairs beautifully with the creamy filling, making it a great choice for spring and summer gatherings. Plus, it’s not just delicious but also visually appealing with its beautiful layers. Whether it’s a birthday, anniversary, or a simple weekend treat, this cake is sure to impress your guests and delight your taste buds.

How to Make Italian Lemon Cream Cake

Ingredients:

  • 1 15.25-ounce package white cake mix
  • ¾ cup milk
  • 1 tablespoon milk
  • 3½ tablespoons vegetable oil
  • 2 eggs
  • 2 tablespoons unsalted butter (melted)
  • ½ teaspoon vanilla extract
  • 4 ounces cream cheese (softened)
  • ⅔ cup confectioners’ sugar (divided, plus more for dusting)
  • 3 tablespoons lemon juice
  • 1 teaspoon grated lemon zest
  • 2 cups heavy whipping cream

Directions:

  1. Preheat the oven to 350°F (175°C). Lightly coat the bottom of a 10-inch springform pan with cooking spray.
  2. Set aside 1 cup of the cake mix for the crumb topping. Place the remaining cake mix in a large bowl. Add ¾ cup plus 1 tablespoon of milk, the vegetable oil, and the eggs. Use an electric mixer to beat the mixture until well combined, about 2 minutes. Pour the batter into the prepared pan.
  3. In another bowl, whisk together the melted butter and vanilla extract. Stir in the reserved 1 cup of cake mix until you have a crumbly texture. Sprinkle this over the cake batter evenly.
  4. Bake the cake in the preheated oven for 30 to 35 minutes, or until a toothpick inserted into the center comes out clean. Let the cake cool in the pan until it reaches room temperature.
  5. To prepare the filling, beat the cream cheese, ⅓ cup of confectioners’ sugar, lemon juice, and lemon zest in a bowl until smooth. In another bowl, whip the heavy cream with the remaining ⅓ cup of confectioners’ sugar until stiff peaks form. Gently fold the cream cheese mixture into the whipped cream.
  6. Carefully remove the cake from the springform pan. Use a serrated knife to slice the cake horizontally into two layers. Spread the cream filling evenly over the bottom layer, then place the top layer over it. Refrigerate the cake for at least 4 hours. Before serving, dust the top of the cake with extra confectioners’ sugar.

How to Serve Italian Lemon Cream Cake

Serve Italian Lemon Cream Cake chilled. It is best enjoyed after it has been refrigerated for a few hours. You can slice it into wedges and garnish it with fresh berries or extra lemon zest for an appealing presentation.

How to Store Italian Lemon Cream Cake

Store any leftovers in an airtight container in the refrigerator. The cake is best eaten within 3 to 4 days to enjoy its freshness. If you need to keep it longer, consider freezing the slices. Wrap them tightly in plastic wrap and then in aluminum foil before placing them in the freezer.

Tips to Make Italian Lemon Cream Cake

  • Ensure that the cream cheese is softened to room temperature for a smooth filling.
  • Don’t skip the resting time in the refrigerator. It helps the flavors meld together and the cake to set properly.
  • Feel free to experiment with more lemon zest or a splash of limoncello in the cream filling for an extra burst of flavor.

Variation

For a different twist, you can substitute the lemon with orange or lime, making an Orange Cream or Lime Cream Cake. The process remains the same, just switch out the citrus ingredients.

FAQs

1. Can I use homemade cake instead of cake mix?
Yes, you can make a homemade white cake instead of using a mix. Just ensure it has a similar texture to work with the filling.

2. Can I freeze Italian Lemon Cream Cake?
Yes, you can freeze the cake. Just wrap it well before placing it in the freezer. Thaw it overnight in the fridge before serving.

3. How do I make the cake more lemony?
You can add more lemon zest and juice to the filling for a stronger flavor. Adjust to your taste preference!

[tasty-recipe id=”3323″]

Italian Lemon Cream Cake

A light and refreshing dessert featuring layers of zesty lemon cake and creamy filling, perfect for any spring or summer gathering.

For the Cake

  • 1 package 15.25-ounce package white cake mix (Set aside 1 cup for crumb topping)
  • ¾ cup milk (Plus 1 tablespoon)
  • 3½ tablespoons vegetable oil
  • 2 large eggs
  • 2 tablespoons unsalted butter (melted)
  • ½ teaspoon vanilla extract

For the Filling

  • 4 ounces cream cheese (softened) (Ensure it’s softened to room temperature)
  • ⅔ cup confectioners’ sugar (divided) (Reserve ⅓ cup for whipping cream)
  • 3 tablespoons lemon juice
  • 1 teaspoon grated lemon zest
  • 2 cups heavy whipping cream

Preparation

  1. Preheat the oven to 350°F (175°C). Lightly coat the bottom of a 10-inch springform pan with cooking spray.
  2. In a large bowl, combine the remaining cake mix, ¾ cup plus 1 tablespoon of milk, vegetable oil, and eggs. Beat with an electric mixer for about 2 minutes until well combined. Pour the batter into the prepared pan.
  3. In another bowl, whisk together the melted butter and vanilla extract. Stir in the reserved 1 cup of cake mix until you have a crumbly texture. Sprinkle this crumb mixture evenly over the cake batter.

Baking

  1. Bake the cake in the preheated oven for 30 to 35 minutes, or until a toothpick inserted into the center comes out clean. Let the cake cool in the pan until it reaches room temperature.

Filling Preparation

  1. In a bowl, beat the cream cheese, ⅓ cup confectioners’ sugar, lemon juice, and lemon zest until smooth.
  2. In another bowl, whip the heavy cream with the remaining ⅓ cup of confectioners’ sugar until stiff peaks form. Gently fold the cream cheese mixture into the whipped cream.

Assembly

  1. Carefully remove the cake from the springform pan. Use a serrated knife to slice the cake horizontally into two layers.
  2. Spread the cream filling evenly over the bottom layer, then place the top layer over it.
  3. Refrigerate the cake for at least 4 hours.
  4. Before serving, dust the top of the cake with extra confectioners’ sugar.

Serve chilled. Best enjoyed after refrigerating for a few hours. Garnish with fresh berries or extra lemon zest if desired. Store leftovers in an airtight container in the refrigerator for up to 3-4 days. Can freeze leftovers wrapped in plastic wrap and aluminum foil.

Dessert
Italian
Cream Cake, Italian Dessert, Layered Cake, Lemon Cake, Spring Dessert

Lemon Blueberry Cake

Delicious Lemon Blueberry Cake topped with blueberries and lemon zest

This Lemon Blueberry Cake is bright, fresh, and easy to love. It mixes tangy lemon and sweet blueberries into a soft, moist cake that feels like sunshine in every bite. The cake works for a casual tea, a picnic, or a simple family dessert, and it makes the house smell wonderful while baking. If you enjoy cakes with citrus and fruit, you might also like a carrot cake twist like the Carrot Date Cake with Honey Lemon Glaze, it has a lovely lemon touch too. Get ready to bake something the whole room will smile at.

How to prepare Lemon Blueberry Cake

  1. Preheat your oven to 350°F, grease a 9-inch pan, and line the bottom with parchment.
  2. In a bowl, whisk 2 cups flour, 1 1/2 teaspoons baking powder, and 1/2 teaspoon salt.
  3. In another bowl, beat 1/2 cup butter and 1 cup sugar until light. Add 2 eggs one at a time, then stir in 1/4 cup milk, 1/4 cup fresh lemon juice, and the zest of 1 lemon.
  4. Fold the dry mix into the wet mix gently, do not overmix. Then fold in 1 cup fresh blueberries, tossed in a teaspoon of flour so they do not sink.
  5. Pour batter into the pan and smooth the top. Bake 35 to 40 minutes, until a toothpick comes out clean. Cool in the pan 10 minutes, then turn out to a rack to cool completely.
  6. For a simple glaze, mix 1 cup powdered sugar with 2 to 3 tablespoons lemon juice, drizzle over the cooled cake.

Lemon Blueberry Cake

Why You’ll Love Lemon Blueberry Cake

  • The cake is moist and tender, with a bright lemon flavor that is not too strong.
  • Fresh blueberries add soft bursts of sweetness in every bite.
  • It is quick to make with common ingredients, and it looks pretty on the table.
  • The glaze adds a tart finish that balances the sweet crumbs.

Tips for success

  • Use fresh blueberries when you can, they give the best taste and texture.
  • Toss berries in a little flour before folding, this helps them stay in the batter and not sink.
  • Do not overmix the batter, stir until just combined for a light cake.
  • Measure flour by spooning it into the cup and leveling, do not pack it down.
  • Let the cake cool well before glazing, so the glaze does not melt away.

Serving Suggestions

  • Serve warm with a scoop of vanilla ice cream for a cozy treat.
  • Pair a slice with a cup of tea or coffee for a simple afternoon break.
  • Cut into small squares for a party platter, the cake holds up well.
  • Add a dollop of whipped cream and extra berries for a pretty dessert.

Lemon Blueberry Cake

FAQs

Q: Can I use frozen blueberries?

A: Yes, you can use frozen blueberries, do not thaw them, toss in flour and fold in frozen to limit color bleeding.

Q: How long will the cake stay fresh?

A: Keep it in an airtight container at room temperature for 2 days, or refrigerate up to 5 days.

Q: Can I make this into cupcakes?

A: Yes, fill cupcake liners two thirds full and bake 18 to 22 minutes, check with a toothpick.

Q: Can I add poppy seeds for extra texture?

A: Yes, add a tablespoon of poppy seeds to the batter for a nice crunch and look.

Conclusion

This Lemon Blueberry Cake is a simple, bright dessert that brings summer flavor to any table. For another lovely lemon and blueberry idea, see Lemon Blueberry Layer Cake – Sally’s Baking Addiction, it has more tips and a layered version to try.

Lemon Blueberry Cake

This Lemon Blueberry Cake is bright, fresh, and easy to love, combining tangy lemon and sweet blueberries into a moist cake.

For the Cake

  • 2 cups flour (Measure by spooning into the cup and leveling.)
  • 1.5 teaspoons baking powder
  • 0.5 teaspoon salt
  • 0.5 cups butter, softened (Needs to be at room temperature.)
  • 1 cups sugar
  • 2 pieces eggs (Add one at a time.)
  • 0.25 cups milk
  • 0.25 cups fresh lemon juice
  • 1 pieces lemon zest (Zest one lemon.)
  • 1 cup fresh blueberries (Toss in a teaspoon of flour to prevent sinking.)

For the Glaze

  • 1 cup powdered sugar
  • 2-3 tablespoons lemon juice

Preparation

  1. Preheat your oven to 350°F, grease a 9-inch pan, and line the bottom with parchment.
  2. In a bowl, whisk together the flour, baking powder, and salt.
  3. In another bowl, beat the butter and sugar until light. Add eggs one at a time, then stir in milk, lemon juice, and lemon zest.
  4. Fold the dry mix into the wet mix gently, being careful not to overmix.
  5. Fold in the blueberries, which should be tossed in flour to prevent sinking.

Baking

  1. Pour the batter into the prepared pan and smooth the top.
  2. Bake for 35 to 40 minutes, until a toothpick comes out clean.
  3. Cool in the pan for 10 minutes, then turn out to a rack to cool completely.

Glazing

  1. To make the glaze, mix powdered sugar with lemon juice and drizzle over the cooled cake.

Use fresh blueberries for best taste. Do not overmix the batter, and let the cake cool well before glazing.

Dessert, Snack
American
Citrus Cake, Easy Cake, Fruit Dessert, Lemon Blueberry Cake, Summer Dessert

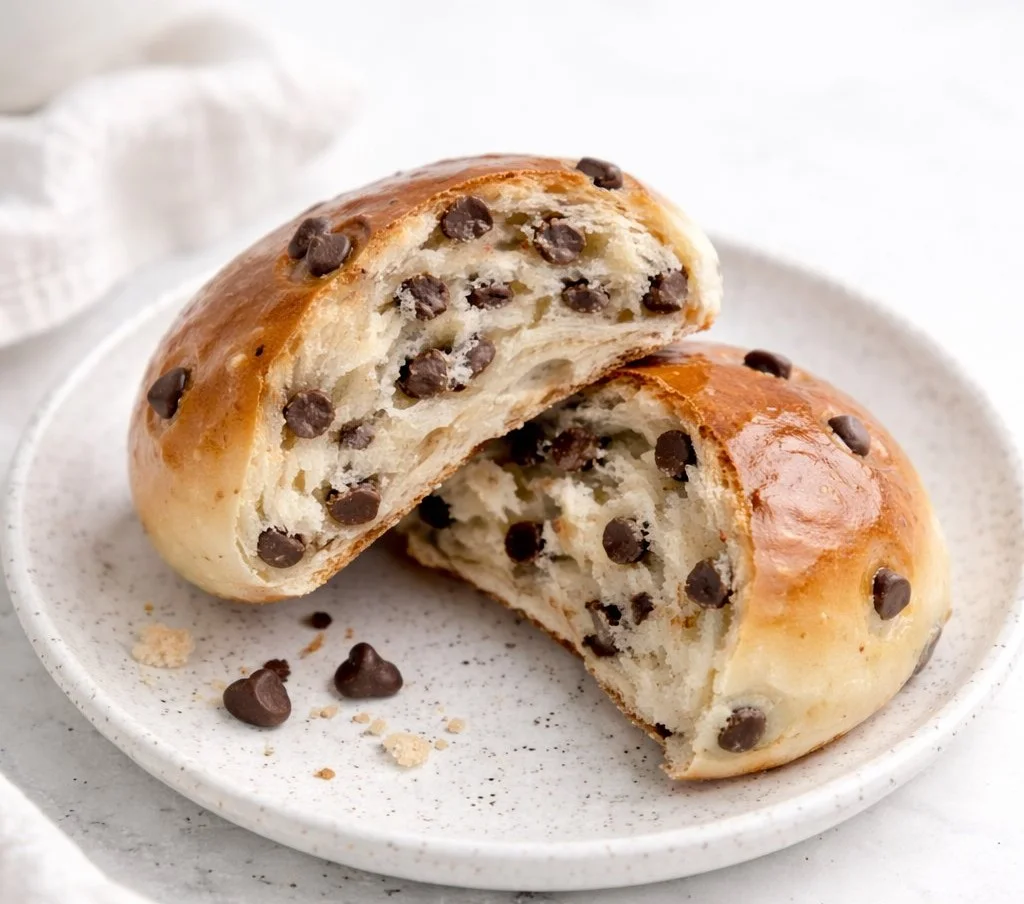
Fluffiest Chocolate Chip Milk Buns

Fluffiest chocolate chip milk buns fresh out of the oven

These milk buns feel like a warm hug, soft and light, with chocolate chips in every bite. They stay tender for days, and they make great snacks, breakfast, or a sweet treat after dinner. I call them The Fluffiest Chocolate Chip Milk Buns because they puff up soft and airy, with a mild sweet milk flavor that pairs perfectly with chocolate. If you like similar cozy bakes, you might enjoy this banana chocolate chip pumpkin bread for a different twist.

This recipe is a real crowd-pleaser, easy to share, and fun to make with kids. The dough is simple, and the small buns bake fast, giving you warm, soft chocolate chip buns in under two hours. Ready to make them and fill your kitchen with that sweet, bakery smell?

How to prepare The Fluffiest Chocolate Chip Milk Buns

  1. Warm milk and mix with yeast and a little sugar, let sit until foamy, about 5 to 10 minutes.
  2. In a bowl, mix flour, sugar, salt. Add the foamy milk, an egg, softened butter, and knead until smooth and elastic, about 8 to 10 minutes by hand, or 5 with a mixer.
  3. Fold in chocolate chips evenly into the dough.
  4. Cover and let the dough rise in a warm place until doubled, about 1 hour.
  5. Punch down the dough, divide into equal pieces, shape into small rounds, place on a baking tray with space between each.
  6. Let the shaped buns rise again, about 30 to 40 minutes, until puffy.
  7. Brush the tops with milk or an egg wash for shine.
  8. Bake in a preheated 350°F (175°C) oven for 12 to 15 minutes, until light golden.
  9. Cool slightly on a rack, serve warm or at room temperature.

The Fluffiest Chocolate Chip Milk Buns

Why You’ll Love The Fluffiest Chocolate Chip Milk Buns

These buns are soft, light, and tender, not dense. The milk in the dough gives a gentle sweetness and keeps the crumb moist. Chocolate chips add small pockets of rich flavor in each bite. They are perfect for school lunches, coffee time, or a quick dessert. The recipe works well as a basic soft bread base, so you can try other mix-ins to make sweet rolls or soft chocolate chip bread.

Tips for success

  • Use warm, not hot, milk to activate yeast, around 105°F to 110°F, it should feel warm to your wrist.
  • Measure flour by spooning into the cup and leveling, or weigh it if you can, to avoid dry dough.
  • Knead until the dough is smooth and slightly springy, this builds gluten for good lift and fluff.
  • Keep butter and egg at room temperature so they mix evenly.
  • Let the dough rise in a warm, draft-free spot, cover with a damp towel or plastic wrap.
  • Do not overbake, they should stay pale golden to keep soft centers.
  • Freeze any leftover buns safely in a zip bag, then thaw and warm before serving.

Serving Suggestions

  • Serve warm with butter for a simple treat.
  • Slice and spread with jam, Nutella, or cream cheese for a richer snack.
  • Make mini sandwiches with ham and cheese for a savory twist.
  • Pack in lunch boxes, or serve on a brunch table with fruit and coffee.
  • These milk buns pair well with milk, tea, or coffee for a cozy snack.

The Fluffiest Chocolate Chip Milk Buns

FAQs

Q: Can I use instant yeast instead of active dry yeast?

A: Yes, use about the same amount, mix it directly with dry ingredients, and reduce proof time slightly if needed.

Q: How do I keep the buns soft for longer?

A: Store in an airtight container at room temperature for up to 2 days, or freeze for longer. Reheat briefly to refresh softness.

Q: Can I use different chocolate, like chunks or white chocolate?

A: Yes, you can use any chips or chopped chocolate, just fold them in evenly so every bun gets chocolate.

Q: Can I make the dough in advance?

A: Yes, you can refrigerate the dough after the first rise for up to 24 hours. Let it come to room temperature before shaping and the second rise.

Q: Are these buns good for breakfast?

A: Definitely, they are soft and mild, perfect with coffee or milk, and kids love them for morning or snack time.

Conclusion

If you want a reliable, soft, and fluffy chocolate chip milk bun recipe, this one is easy and satisfying, and it gives you bakery-style buns at home. For another tested version with step by step tips, see this Most Amazing Fluffy Chocolate Chip Milk Buns Recipe – Bakeomaniac, it offers helpful photos and tweaks you might like.

Chocolate Chip Milk Buns

Soft and light milk buns filled with chocolate chips, perfect for snacks, breakfast, or a sweet treat.

Dough Ingredients

  • 1 cup warm milk (Should be between 105°F to 110°F)
  • 2 teaspoons active dry yeast (or instant yeast)
  • 2 tablespoons sugar (for yeast activation)
  • 4 cups all-purpose flour (spooned and leveled or weighed)
  • 1 teaspoon salt (for flavor)
  • 1 large egg (at room temperature)
  • 1/2 cup unsalted butter (softened and at room temperature)
  • 1 cup chocolate chips (use any type or mix-ins)

Preparing the Dough

  1. Warm the milk and mix it with yeast and a little sugar; let sit until foamy, about 5 to 10 minutes.
  2. In a bowl, mix flour, sugar, and salt. Add the foamy milk, an egg, and softened butter; knead until smooth and elastic, about 8 to 10 minutes by hand, or 5 with a mixer.
  3. Fold in the chocolate chips evenly into the dough.
  4. Cover and let the dough rise in a warm place until doubled, about 1 hour.

Shaping and Baking

  1. Punch down the dough, divide it into equal pieces, shape into small rounds, and place on a baking tray with space between each.
  2. Let the shaped buns rise again for about 30 to 40 minutes, until puffy.
  3. Brush the tops with milk or an egg wash for shine.
  4. Bake in a preheated 350°F (175°C) oven for 12 to 15 minutes, until light golden.
  5. Cool slightly on a rack, serve warm or at room temperature.

Store leftovers in an airtight container for up to 2 days or freeze. Reheat briefly to refresh softness. Avoid overbaking.

Breakfast, Dessert, Snack
American, Bakery
Chocolate Chip Milk Buns, Easy Baking, Fluffy Buns, Homemade Bread, Kid-Friendly Recipe

Oatmeal Raisin Cookies

oatmeal raisin cookies

I still remember the smell of fresh oatmeal raisin cookies filling the kitchen when my grandmother baked them on weekends. The warm scent of cinnamon and sweet raisins made the whole house feel cozy, and she would let us sneak a soft, warm cookie before they even cooled. Oatmeal raisin cookies are loved for their chewy texture and comforting flavor, making them a perfect snack or a cozy treat with a cup of tea. They are easy to prepare and bring a homemade touch to any day.

Why Make This Recipe

Oatmeal raisin cookies are a classic treat loved by many. They have a perfect balance of chewy oats and sweet raisins, making them a comfort food that brings back happy memories. Whether you’re baking for a family gathering, a school event, or just for yourself, these cookies are a delightful choice. They are simple to make and can fill your kitchen with a wonderful aroma that will entice anyone nearby.

How to Make Oatmeal Raisin Cookies

Ingredients:

  • 2 cups all-purpose flour
  • 1 teaspoon baking powder
  • 1 teaspoon salt
  • 3/4 teaspoon cinnamon
  • 1/4 teaspoon nutmeg
  • 1 1/2 cups (3 sticks) butter, softened
  • 1 cup granulated sugar
  • 1 cup brown sugar, packed
  • 2 eggs
  • 1 teaspoon vanilla extract
  • 3 cups old-fashioned rolled oats
  • 1 1/2 cups raisins

Directions:

  1. In a medium bowl, whisk together the flour, baking powder, salt, cinnamon, and nutmeg.
  2. In a large bowl, cream the softened butter and both sugars together until they are light and fluffy, about 3-4 minutes.
  3. Add the eggs one at a time, followed by the vanilla extract, mixing well after each addition.
  4. Gradually incorporate the dry ingredients into the wet mixture on low speed until everything is just combined.
  5. Use a spatula to fold in the oats and raisins until they are evenly distributed throughout the dough.
  6. Chill the dough in the refrigerator for at least 1 hour.
  7. Preheat your oven to 350°F (175°C) and line baking sheets with parchment paper.
  8. Scoop tablespoons of dough onto the prepared sheets, making sure to space them about 2 inches apart.
  9. Bake in the preheated oven for 12-14 minutes until the edges are golden, but the centers still look slightly underdone.
  10. Allow the cookies to cool on the baking sheets for 5 minutes before transferring them to wire racks to cool completely.

How to Serve Oatmeal Raisin Cookies

Oatmeal raisin cookies are best enjoyed fresh from the oven. Pair them with a glass of milk, a cup of coffee, or some herbal tea for a comforting snack. They also make a great addition to lunchboxes or as a sweet treat after dinner.

How to Store Oatmeal Raisin Cookies

To keep your cookies fresh, store them in an airtight container at room temperature. They can last for about a week. You can also freeze the cookies for longer storage. Just place them in a freezer-safe container or bag, and they can last for up to three months.

Tips to Make Oatmeal Raisin Cookies

  • Make sure your butter is softened, as this helps to create a light and fluffy texture.
  • Chilling the dough is important; it helps the cookies hold their shape while baking.
  • If you prefer a chewier cookie, slightly underbake them. They will continue to cook on the baking sheet after being removed from the oven.

Variation

For a twist on the classic recipe, consider adding chocolate chips or nuts. You can also substitute dried cranberries or cherries for the raisins for a fruity variation.

FAQs

Q: Can I use quick oats instead of rolled oats?
A: Yes, you can use quick oats, but keep in mind that the texture may be slightly different. Rolled oats give more chewiness.

Q: Why are my cookies spreading too much?
A: If your cookies spread too much, it may be due to the butter being too warm or not chilling the dough long enough. Ensure the dough is firm when you scoop it.

Q: Can I make the dough ahead of time?
A: Absolutely! You can prepare the dough, chill it, and store it in the refrigerator for a couple of days before baking. You can also freeze it for later use.

[tasty-recipe id=”4391″]

Oatmeal Raisin Cookies

Delightfully chewy oatmeal raisin cookies are a classic treat that fill your kitchen with a wonderful aroma. Perfect for any occasion, they are easy to make and truly comforting.

Dry Ingredients

  • 2 cups all-purpose flour
  • 1 teaspoon baking powder
  • 1 teaspoon salt
  • 3/4 teaspoon cinnamon
  • 1/4 teaspoon nutmeg

Wet Ingredients

  • 1 1/2 cups (3 sticks) butter, softened (Make sure butter is softened for a light texture.)
  • 1 cup granulated sugar
  • 1 cup brown sugar, packed
  • 2 large eggs
  • 1 teaspoon vanilla extract

Other Ingredients

  • 3 cups old-fashioned rolled oats (Rolled oats give the best chewiness.)
  • 1 1/2 cups raisins (Consider substituting with dried cranberries for variation.)

Preparation

  1. In a medium bowl, whisk together the flour, baking powder, salt, cinnamon, and nutmeg.
  2. In a large bowl, cream the softened butter and both sugars together until they are light and fluffy, about 3-4 minutes.
  3. Add the eggs one at a time, followed by the vanilla extract, mixing well after each addition.
  4. Gradually incorporate the dry ingredients into the wet mixture on low speed until everything is just combined.
  5. Use a spatula to fold in the oats and raisins until they are evenly distributed throughout the dough.
  6. Chill the dough in the refrigerator for at least 1 hour.

Baking

  1. Preheat your oven to 350°F (175°C) and line baking sheets with parchment paper.
  2. Scoop tablespoons of dough onto the prepared sheets, making sure to space them about 2 inches apart.
  3. Bake in the preheated oven for 12-14 minutes until the edges are golden, but the centers still look slightly underdone.
  4. Allow the cookies to cool on the baking sheets for 5 minutes before transferring them to wire racks to cool completely.

Store cookies in an airtight container at room temperature for about a week. Freezing is an option to last up to three months.

Dessert, Snack
American
Baking, Comfort Food, Cookies, Dessert Recipes, Oatmeal Raisin Cookies


Oatmeal Raisin Cookies

Delightfully chewy oatmeal raisin cookies are a classic treat that fill your kitchen with a wonderful aroma. Perfect for any occasion, they are easy to make and truly comforting.

Dry Ingredients

  • 2 cups all-purpose flour
  • 1 teaspoon baking powder
  • 1 teaspoon salt
  • 3/4 teaspoon cinnamon
  • 1/4 teaspoon nutmeg

Wet Ingredients

  • 1 1/2 cups (3 sticks) butter, softened (Make sure butter is softened for a light texture.)
  • 1 cup granulated sugar
  • 1 cup brown sugar, packed
  • 2 large eggs
  • 1 teaspoon vanilla extract

Other Ingredients

  • 3 cups old-fashioned rolled oats (Rolled oats give the best chewiness.)
  • 1 1/2 cups raisins (Consider substituting with dried cranberries for variation.)

Preparation

  1. In a medium bowl, whisk together the flour, baking powder, salt, cinnamon, and nutmeg.
  2. In a large bowl, cream the softened butter and both sugars together until they are light and fluffy, about 3-4 minutes.
  3. Add the eggs one at a time, followed by the vanilla extract, mixing well after each addition.
  4. Gradually incorporate the dry ingredients into the wet mixture on low speed until everything is just combined.
  5. Use a spatula to fold in the oats and raisins until they are evenly distributed throughout the dough.
  6. Chill the dough in the refrigerator for at least 1 hour.

Baking

  1. Preheat your oven to 350°F (175°C) and line baking sheets with parchment paper.
  2. Scoop tablespoons of dough onto the prepared sheets, making sure to space them about 2 inches apart.
  3. Bake in the preheated oven for 12-14 minutes until the edges are golden, but the centers still look slightly underdone.
  4. Allow the cookies to cool on the baking sheets for 5 minutes before transferring them to wire racks to cool completely.

Store cookies in an airtight container at room temperature for about a week. Freezing is an option to last up to three months.

Dessert, Snack
American
Baking, Cookies, Dessert, Oatmeal Raisin Cookies, Snack

Raspberry Filled Almond Snowball Cookies

Raspberry filled almond snowball cookies on a decorative plate

Raspberry Filled Almond Snowball Cookies are delightful little treats that combine the rich flavors of almonds with the tartness of fresh raspberries, all wrapped up in a soft, buttery cookie. These cookies are perfect for any occasion, whether you’re hosting a holiday party or simply want a sweet snack with your afternoon tea. With their unique flavor and pretty presentation, they’re sure to impress family and friends. The cookies have a soft center filled with a burst of raspberry and a light, crumbly exterior dusted with powdered sugar, making every bite a delightful experience.

Why Make This Recipe

Making Raspberry Filled Almond Snowball Cookies is a joy for several reasons. Firstly, they are simple to make and require only a few ingredients. This means that even beginner bakers can feel confident whipping up a batch. The combination of almond flavor and raspberry filling gives these cookies a unique taste that stands out from regular sugar cookies. They not only look beautiful but also make fantastic gifts. Who wouldn’t love receiving a box of these snowy, sweet treats?

Moreover, these cookies are perfect for many occasions. Whether it’s a festive holiday gathering, a birthday party, or just because you want something sweet, these cookies fit the bill perfectly. The versatility of this recipe allows you to experiment with other fruit fillings as well, making it easy to innovate and personalize to your preferences. Lastly, they bring a touch of elegance to any dessert table, making them a fantastic choice to impress guests. Therefore, making Raspberry Filled Almond Snowball Cookies is not just about baking; it’s about creating delightful memories.

How to Make Raspberry Filled Almond Snowball Cookies

Creating Raspberry Filled Almond Snowball Cookies is an enjoyable and straightforward process. First, gather your ingredients: almond flour, butter, sugar, vanilla extract, salt, and raspberry preserves. Start by creaming the butter and sugar together until it becomes light and fluffy. This will give your cookies a wonderful base.

Next, mix in the almond flour, vanilla extract, and a pinch of salt. Once the dough comes together, cover it and place it in the fridge to chill for about 30 minutes. This step is essential as it helps to firm up the dough, making it easier to handle later.

After chilling, preheat your oven to 350°F (175°C). While the oven warms, take small portions of the dough and roll them into small balls. Make an indentation in the center of each ball and add a spoonful of raspberry preserves. Carefully encase the filling with the dough and roll it into a smooth ball again. Place them on a baking sheet lined with parchment paper.

Bake for roughly 12-15 minutes, or until they are lightly golden. Once they cool, dust them with powdered sugar for that snowy appearance. Enjoy your homemade Raspberry Filled Almond Snowball Cookies!

How to Serve Raspberry Filled Almond Snowball Cookies

Raspberry Filled Almond Snowball Cookies can be served in many delightful ways! For the perfect presentation, arrange the cookies on a beautiful platter or cake stand. This lets the snowy exterior catch the eye of your guests. You might even want to dust them with a little extra powdered sugar right before serving to enhance their delicious look.

They pair wonderfully with tea or coffee, making them a great accompaniment for afternoon gatherings or brunch. If you’re hosting a festive event, consider serving these cookies alongside other holiday treats for a colorful dessert table.

For a special touch, you could also offer a side of whipped cream or a scoop of vanilla ice cream to dip or serve alongside the cookies. This added indulgence will surely surprise your guests. Lastly, these cookies also make great gifts; wrap them in a clear bag with a ribbon for a personal touch that is sure to please.

How to Store Raspberry Filled Almond Snowball Cookies

Storing Raspberry Filled Almond Snowball Cookies is simple if you follow a few easy steps. To keep them fresh, allow the cookies to cool completely after baking. Once cooled, store them in an airtight container. This will help maintain their texture and flavor for several days.

For longer storage, consider placing a sheet of wax paper between layers of cookies in the container. This prevents them from sticking together and maintains their delicate shape. Stored this way, the cookies can last up to a week at room temperature.

If you need to store them for an even longer period, freeze the cookies. Before freezing, arrange them in a single layer on a baking sheet and pop them in the freezer until they are firm. Once frozen, place them in a freezer-safe bag or container. When you’re ready to enjoy them, thaw them at room temperature for a few hours, and they will taste just as delicious!

Tips to Make Raspberry Filled Almond Snowball Cookies

Making the perfect Raspberry Filled Almond Snowball Cookies can be easy with a few helpful tips! First, choose high-quality raspberry preserves to get a rich, fruity filling. This will enhance the overall flavor of your cookies.

Be sure to chill the cookie dough adequately before shaping the cookies. This makes handling the dough easier and helps keep them from spreading too much during baking. If the dough feels too sticky, add a bit more almond flour until you reach the right consistency.

When shaping your cookies, make sure to seal the raspberry filling completely within the dough. This will prevent any leakage while baking. Also, keep an eye on the baking time. Every oven can be different, so practice will help you find the right time for perfectly baked cookies.

Lastly, don’t skip the powdered sugar coating! It gives the cookies a lovely snowy appearance and adds an extra layer of sweetness that complements the tart raspberry filling perfectly. Enjoy the baking process!

Variation

You can easily customize Raspberry Filled Almond Snowball Cookies! If raspberries aren’t your favorite, feel free to swap the berry preserves for other flavors like strawberry, blueberry, or even lemon curd for a citrusy twist. You can also experiment with nut flavors; using hazelnut flour in place of almond flour can create a delightful variation!

FAQs

1. Can I use fresh raspberries instead of preserves?
Using fresh raspberries is not recommended, as they can make the cookie dough too wet. Stick with preserves for the best results.

2. Can I make the dough ahead of time?
Yes! You can prepare the dough a day ahead and store it in the refrigerator until ready to bake.

3. How can I tell when the cookies are done baking?
The cookies are done when they are lightly golden around the edges. They may look slightly underbaked in the center, but they will firm up as they cool!

4. Can I freeze these cookies?
Absolutely! Once cooled, you can freeze the cookies in an airtight container. Just be sure to thaw them at room temperature before serving.

5. What if I don’t have almond flour?
If you don’t have almond flour, you can substitute it with all-purpose flour, but keep in mind that the texture and flavor may differ slightly.

[tasty-recipe id=”4945″]

Raspberry Filled Almond Snowball Cookies

Delightful treats combining rich almond flavors with tart raspberry preserves, wrapped in soft, buttery cookies.

Main Ingredients

  • 1 cup Almond flour
  • 1/2 cup Butter, softened (Use high-quality butter for best flavor.)
  • 1/2 cup Sugar
  • 1 tsp Vanilla extract
  • 1/4 tsp Salt
  • 1/2 cup Raspberry preserves (Choose high-quality preserves for richer flavor.)
  • Powdered sugar for dusting (For a snowy appearance after baking.)

Preparation

  1. Cream the butter and sugar together until light and fluffy.
  2. Mix in the almond flour, vanilla extract, and a pinch of salt.
  3. Cover the dough and chill in the fridge for about 30 minutes.

Baking

  1. Preheat your oven to 350°F (175°C).
  2. Roll small portions of chilled dough into balls and make an indentation in the center.
  3. Add a spoonful of raspberry preserves and encase the filling with the dough.
  4. Place on a baking sheet lined with parchment paper.
  5. Bake for 12-15 minutes or until lightly golden.
  6. Dust with powdered sugar after cooling.

These cookies can be stored in an airtight container for up to a week. Place wax paper between layers to prevent sticking. These cookies are also great for freezing.

Dessert, Snack
American, Holiday
Almond Snowball Cookies, Baking Recipes, Easy Cookies, Holiday Treats, Raspberry Cookies

Cranberry Orange Sour Cream Scones

Cranberry orange sour cream scones on a plate with fresh cranberries and orange zest.

Cranberry Orange Sour Cream Scones are a delightful treat perfect for breakfast or afternoon tea. With the tang of fresh cranberries and the brightness of orange zest, these scones are both sweet and savory. They are easy to make and offer a warm, comforting flavor that everyone will love. Serve them fresh out of the oven for a delightful experience!

why make this recipe

These scones are not just delicious; they are also simple to prepare. The combination of cranberries and orange zest brings a unique flavor that sets them apart from regular scones. The sour cream adds a moist texture, making them soft and tender. This recipe uses basic ingredients you probably have in your kitchen, so it’s convenient, too!

Making Cranberry Orange Sour Cream Scones allows you to enjoy a taste of homemade goodness without fuss. Whether you are entertaining guests, having family over, or simply enjoying a quiet morning at home, these scones elevate any occasion. They pair perfectly with a cup of tea or coffee, making them a perfect snack.

Another great reason to make this recipe is its versatility. You can easily tailor the sweetness according to your preference. Plus, the bright color of the cranberries gives a festive touch, making them ideal for holiday gatherings and special occasions. Enjoy baking these scones and impress your family and friends with a delightful homemade treat that brings a smile to everyone’s face!

how to make Cranberry Orange Sour Cream Scones

To make Cranberry Orange Sour Cream Scones, start by gathering your ingredients: 2 cups all-purpose flour, 1/3 cup sugar, 1 tablespoon baking powder, 1/2 teaspoon salt, 1/2 cup cold butter (cubed), 1 cup fresh cranberries (chopped), 1 tablespoon orange zest, 1/2 cup sour cream, and 1 egg.

Begin by preheating your oven to 400°F (200°C). In a large bowl, mix the flour, sugar, baking powder, and salt together. Next, add in the cold cubed butter. Use a pastry cutter or your fingers to blend until the mixture resembles coarse crumbs. Gently fold in the cranberries and orange zest until combined.

In a separate bowl, whisk together the sour cream and egg until smooth. Add this mixture to the dry ingredients and stir gently until just combined. Avoid overmixing to keep the scones light.

On a floured surface, turn the dough out and shape it into a circle about 1-inch thick. Cut it into wedges and place them on a baking sheet lined with parchment paper. Bake for 15-20 minutes or until golden brown on top. Let them cool slightly before enjoying your homemade scones warm!

how to serve Cranberry Orange Sour Cream Scones

Serving Cranberry Orange Sour Cream Scones is simple yet elegant. For a delightful breakfast treat or afternoon snack, arrange the scones on a large plate or serving platter. You can dust them lightly with powdered sugar for an extra touch of sweetness and a lovely presentation.

These scones pair wonderfully with a hot beverage, such as coffee or tea. You can also serve them with a dollop of clotted cream or butter, which complements the scones perfectly. Alternatively, a drizzle of honey or a smear of orange marmalade brings out the flavors even more.

For a festive touch, consider garnishing the plate with some fresh orange slices or whole cranberries. This not only enhances the visual appeal but also adds an aromatic element to the serving. Whether at a gathering or a simple family breakfast, these delightful scones will surely impress your guests and provide a warm, inviting atmosphere.

how to store Cranberry Orange Sour Cream Scones

Storing Cranberry Orange Sour Cream Scones properly ensures they stay fresh and enjoyable. If you are not eating them right away, let the scones cool completely on a wire rack. Once cooled, place them in an airtight container at room temperature. They can last this way for about 2-3 days.

If you want to keep them longer, consider freezing the scones. Wrap each scone in plastic wrap and place them in a freezer-safe bag or container. You can store them in the freezer for up to 2 months. To enjoy, simply thaw them in the fridge and reheat in the oven for a few minutes until warm and fresh.

Remember not to refrigerate the scones, as the cold temperature can make them dry out. Proper storage will help maintain their soft texture and delightful flavor, ensuring you can savor them at your convenience.

tips to make Cranberry Orange Sour Cream Scones

To make your Cranberry Orange Sour Cream Scones even better, here are some helpful tips. First, use cold butter directly from the fridge. Cold butter helps create flaky layers in your scones, making them light and tender.

Make sure to chop the cranberries into smaller pieces to evenly distribute their flavor throughout the scones. If you prefer a sweeter scone, you can slightly increase the sugar amount.

Another tip is to avoid over-mixing the dough. Mix it gently until just combined to keep the scones fluffy. Using fresh orange zest adds a bright flavor, so do not skip this step.

If you want to enhance the flavor further, consider adding a teaspoon of vanilla extract or a pinch of cinnamon to the dough. Finally, brush the tops of the scones with a little cream or milk before baking for a lovely golden color.

variation

You can easily adapt this scone recipe to suit your taste! For example, you can substitute cranberries with dried apricots or blueberries for different flavors. For a nutty twist, add chopped nuts like walnuts or almonds to the dough.

If you want a richer taste, try using buttermilk instead of sour cream. For those who enjoy spice, adding ground cinnamon, nutmeg, or ginger can complement the sweetness of the fruits. Experimenting with these variations can lead you to discover your perfect scone creation!

FAQs

1. Can I use dried cranberries instead of fresh ones?
Yes, you can use dried cranberries if you prefer. However, reduce the sugar slightly as dried cranberries are sweeter.

2. How can I make the scones sweeter?
You can increase the sugar slightly or add a glaze made from powdered sugar and orange juice over the cooled scones for extra sweetness.

3. What if I don’t have sour cream?
You can substitute sour cream with Greek yogurt or buttermilk for similar results. Both will keep the scones moist and flavorful.

4. Can I make the dough ahead of time?
Yes, you can prepare the dough ahead and store it in the fridge for up to 24 hours. Simply shape and bake it when you’re ready!

5. How do I know when my scones are done?
Scones should be golden brown on top and firm to touch. A toothpick inserted into the center should come out clean, indicating they are fully baked.

[tasty-recipe id=”4942″]

Cranberry Orange Sour Cream Scones

Delightful scones with fresh cranberries and orange zest, perfect for breakfast or afternoon tea.

Dry Ingredients

  • 2 cups all-purpose flour
  • 1/3 cup sugar (Adjust for sweetness preference)
  • 1 tablespoon baking powder
  • 1/2 teaspoon salt

Wet Ingredients

  • 1/2 cup cold butter (cubed) (Keep butter cold for flaky texture)
  • 1 cup fresh cranberries (chopped) (Can substitute with dried cranberries)
  • 1 tablespoon orange zest (Fresh zest recommended)
  • 1/2 cup sour cream (Can substitute with Greek yogurt or buttermilk)
  • 1 large egg

Preparation

  1. Preheat your oven to 400°F (200°C).
  2. In a large bowl, mix the flour, sugar, baking powder, and salt together.
  3. Add in the cold cubed butter and blend until the mixture resembles coarse crumbs.
  4. Gently fold in the cranberries and orange zest until combined.
  5. In a separate bowl, whisk together the sour cream and egg until smooth.
  6. Add the sour cream mixture to the dry ingredients and stir gently until just combined.
  7. On a floured surface, turn the dough out and shape it into a circle about 1-inch thick.
  8. Cut the dough into wedges and place on a baking sheet lined with parchment paper.

Baking

  1. Bake for 15-20 minutes or until golden brown on top.
  2. Let them cool slightly before serving.

Serve with powdered sugar, clotted cream, or honey. For a festive touch, add fresh orange slices or whole cranberries as garnish.

Breakfast, Dessert, Snack
American, Baked Goods
afternoon tea, Baking, Breakfast Recipes, cranberry orange scones, scone

Easy Apple Pie

Slice of easy apple pie with cinnamon and apple filling on a wooden table

This easy apple pie is a classic dessert that many people love. It is warm, sweet, and filled with delicious apples. The recipe is simple, making it perfect for everyone, from beginners to experienced bakers. It brings comfort and joy, whether you serve it at family gatherings, special occasions, or just because you want to treat yourself. The flaky crust paired with a sugary apple filling creates a delightful dessert that can melt hearts. Plus, it fills your home with a lovely aroma that makes everyone eager for a slice.

Making apple pie is also a great way to celebrate the fall season when apples are plentiful. You can pick apples from local farms or buy them at the store. No matter where they come from, using fresh apples makes this pie even better. Now, let’s dive into why you should try making this easy apple pie.

Why Make This Recipe

This Easy Apple Pie recipe is perfect for several reasons. First, it uses simple ingredients that are often already in your kitchen, such as apples, sugar, and flour. You don’t need fancy equipment or baking skills to whip this up. Just grab a few apples and a rolling pin, and you’ll be on your way.

Second, this pie is an excellent dessert for any occasion. It works well for holidays like Thanksgiving and Christmas, family dinners, or even just a cozy night at home. The warm filling and flaky crust give a sense of home and comfort.

Additionally, making apple pie is a fun activity that you can do with family or friends. It’s a great way to bond while creating something delicious. You can get children involved in peeling apples or rolling the dough, making it a shared experience.

Lastly, homemade apple pie is far tastier than store-bought versions. You can customize the sweetness, spice levels, and type of apples you use. By making it yourself, you control every aspect, ensuring a pie that is just right for your taste buds.

How to Make Easy Apple Pie

Making Easy Apple Pie starts with gathering your ingredients. You will need 6 to 8 cups of peeled and sliced apples, 1 cup of sugar, 2 tablespoons of flour, 1 teaspoon of cinnamon, and a pinch of salt. For the crust, you will need 2 ½ cups of all-purpose flour, 1 cup of unsalted butter (chilled and diced), and a bit of water.

To prepare the crust, combine the flour, sugar, and salt. Add the diced butter and mix until the mixture resembles coarse crumbs. Gradually add cold water, a tablespoon at a time, until the dough comes together. Divide the dough in half, shape it into discs, wrap them in plastic, and chill for at least an hour.

Next, preheat your oven to 425°F (220°C). Roll out one disc of dough on a floured surface to fit your pie pan. Place it in the pan and fill it with the sliced apples. In a bowl, mix the sugar, flour, cinnamon, and salt, then sprinkle it over the apples. Roll out the second dough disc and place it on top of the filling. Crimp the edges to seal and cut a few slits in the top for steam to escape.

Bake for 15 minutes, then reduce the temperature to 350°F (175°C) and continue baking for 30-35 minutes until the apples are tender and the crust is golden brown. Let it cool before serving. Enjoy your delicious apple pie!

How to Serve Easy Apple Pie

Serving Easy Apple Pie is as delightful as making it. It can be enjoyed warm or at room temperature. For a tasty twist, consider adding a scoop of vanilla ice cream or a dollop of whipped cream on top when serving. This combination enhances the flavors and makes the dessert extra special.

You can also sprinkle a little cinnamon on the whipped cream for an added touch of flavor. When serving, slice the pie into wedges for a clean look and ease of serving. Consider pairing it with coffee or hot cider for a classic autumn feel.

If you’re hosting a party, serve slices of apple pie on colorful dessert plates. You can also top each slice with a cherry or a sprinkle of nuts for extra flair. Another idea is to serve it with a side of caramel sauce for dipping, which adds a sweet contrast to the apples.

No matter how you choose to serve it, easy apple pie is sure to bring smiles and satisfaction to everyone at your table.

How to Store Easy Apple Pie

Proper storage of Easy Apple Pie ensures it stays fresh and delicious for days. If you have leftover pie, let it cool completely at room temperature before storing it.

To store apple pie, cover it loosely with plastic wrap or aluminum foil. You can also place it in an airtight container. In the refrigerator, apple pie can last for about 3 to 4 days. Make sure to keep it in a cool spot to maintain its freshness.

If you want to store it for a longer period, consider freezing it. Wrap individual slices or the whole pie in plastic wrap and then in aluminum foil to prevent freezer burn. When properly sealed, apple pie can be stored in the freezer for up to 3 months.

When you’re ready to enjoy the pie again, thaw it in the refrigerator overnight. You can reheat slices in the oven at 350°F (175°C) for about 10 minutes to bring back the freshness and warmth.

Tips to Make Easy Apple Pie

To make the best Easy Apple Pie, follow these helpful tips. First, use a mix of apple varieties. Combining sweet and tart apples, like Granny Smith and Honeycrisp, creates a balanced flavor that enhances the pie.

Second, do not skip the chilling step for the crust. A cold dough makes for a flakier crust. If possible, chill your dough for longer than an hour.

Third, taste the apple mixture before filling the pie to adjust the sugar and spice according to your preference. Some apples are sweeter than others, so you may need to reduce the sugar.

Also, ensure to cut slits in the top crust to allow steam to escape, which helps prevent a soggy bottom crust.

Lastly, keep an eye on the pie as it bakes. Oven temperatures can vary, so check for doneness. The crust should be golden, and the filling should bubble. If the edges brown too quickly, cover them with aluminum foil to prevent burning during baking.

Variation

You can easily customize this Easy Apple Pie recipe. For a bit of extra flavor, consider adding a handful of raisins or chopped nuts to the apple filling. You can also include spices like nutmeg or allspice to change up the traditional taste.

If you want to try something different, use peaches or berries instead of apples for a fruity twist. A crumb topping made of brown sugar, flour, and butter is another delicious alternative that gives a crunchy texture on top.

FAQs

  1. Can I use store-bought pie crust instead of making my own?
    Yes, using store-bought pie crust is a great time-saver. Just ensure it fits your pie pan and follow the baking instructions.
  2. Can I prepare the pie in advance?
    Absolutely! You can prepare and assemble the pie a day ahead, just refrigerate it until you are ready to bake.
  3. What type of apples are best for apple pie?
    The best apples for pie are firm varieties like Granny Smith, Honeycrisp, and Braeburn, as they hold their shape and provide a good balance of sweetness and tartness.
  4. Can I freeze the apple pie before baking?
    Yes, you can freeze it. Assemble the pie, wrap it well, and freeze it. When ready to bake, you can bake it straight from the freezer, just add a few extra minutes to the baking time.

Easy Apple Pie

A classic, warm dessert filled with delicious apples, perfect for any occasion.

For the filling

  • 6-8 cups peeled and sliced apples (A mix of sweet and tart apples is recommended.)
  • 1 cup sugar (Adjust based on the sweetness of the apples.)
  • 2 tablespoons flour (Helps thicken the filling.)
  • 1 teaspoon cinnamon (Can add more for extra flavor.)
  • 1 pinch salt

For the crust

  • 2.5 cups all-purpose flour
  • 1 cup unsalted butter (Chilled and diced.)
  • water as needed (Cold water, added gradually to form the dough.)

Prepare the crust

  1. Combine flour, sugar, and salt in a bowl.
  2. Add diced butter and mix until the mixture resembles coarse crumbs.
  3. Gradually add cold water, a tablespoon at a time, until the dough comes together.
  4. Divide the dough in half, shape into discs, wrap in plastic, and chill for at least 1 hour.

Prepare the filling

  1. Preheat oven to 425°F (220°C).
  2. Roll out one disc of dough on a floured surface to fit your pie pan.
  3. Place it in the pie pan and fill it with sliced apples.
  4. In a bowl, mix sugar, flour, cinnamon, and salt, then sprinkle over the apples.
  5. Roll out the second dough disc and place it on top of the filling. Crimp the edges to seal and cut a few slits in the top for steam to escape.

Bake the pie

  1. Bake for 15 minutes, then reduce the temperature to 350°F (175°C).
  2. Continue baking for 30-35 minutes until apples are tender and crust is golden brown.
  3. Let the pie cool before serving.

Serve warm or at room temperature. Can add ice cream or whipped cream for extra flavor.

Baked Goods, Dessert
American
apple pie, classic dessert, easy dessert, fall dessert, homemade pie

Delicious Cinnamon Rolls with Cream Cheese Icing

Delicious cinnamon rolls drizzled with cream cheese icing on a wooden table

I love the warm smell of cinnamon in the morning, and these rolls make the whole house feel cozy. Soft dough, sweet cinnamon, and a tangy cream cheese icing come together in a simple way, thanks to the bread machine. This version, The BEST Bread Machine Cinnamon Rolls with Cream Cheese Icing, is easy to make and will please a crowd, whether you bake them for a Sunday breakfast or a special treat. If you like cream cheese desserts, try the easy baked cream cheese rangoon rolls recipe for another tasty idea. Get ready to roll, bake, and enjoy a sticky, gooey bite that makes mornings better.

How to prepare Cinnamon Rolls with Cream Cheese Icing

Ingredients

  • 1 cup warm milk (about 110°F, warm to touch)
  • 1/3 cup butter, melted
  • 1 egg
  • 4 cups all purpose flour
  • 1/3 cup sugar
  • 1 teaspoon salt
  • 2 1/4 teaspoons active dry yeast (one packet)
  • Filling, 1/2 cup butter soft, 3/4 cup brown sugar, 2 tablespoons ground cinnamon
  • Cream cheese icing, 4 oz cream cheese soft, 1/4 cup butter soft, 1 cup powdered sugar, 1/2 teaspoon vanilla, 1-2 tablespoons milk

Directions

  1. Add dough ingredients to the bread machine pan in the order your machine suggests, usually liquids first, then flour, then yeast. Start the dough cycle.
  2. When the dough cycle finishes, remove dough to a lightly floured surface. Roll into a rectangle about 15×10 inches.
  3. Spread the softened 1/2 cup butter over the dough. Mix brown sugar and cinnamon, sprinkle evenly over the butter.
  4. Tightly roll the dough from the long side into a log. Pinch the seam to seal.
  5. Cut into 12 equal pieces with a sharp knife or dental floss. Place rolls in a greased 9×13 inch pan.
  6. Cover with a clean towel, let rise in a warm place until puffy, about 30 to 45 minutes.
  7. Preheat the oven to 350°F. Bake rolls for 20 to 25 minutes, until golden and cooked through.
  8. While rolls bake, beat cream cheese and butter until smooth. Add powdered sugar and vanilla, mix. Add milk as needed for spreadable texture.
  9. Remove rolls from oven, let cool 5 minutes, then spread cream cheese icing over warm rolls. Serve warm.

The BEST Bread Machine Cinnamon Rolls with Cream Cheese Icing

Why You’ll Love Cinnamon Rolls with Cream Cheese Icing

  • Easy, the bread machine does the hard work of mixing and rising the dough.
  • Soft and tender rolls with a sweet cinnamon center.
  • Cream cheese icing adds a tangy, rich finish that cuts the sweetness.
  • Great for guests, they look bakery-made but take less effort.
  • You can make them ahead, freeze, or bake fresh for a warm treat.

Tips for success

  • Use warm, not hot, milk, about 105 to 115°F, so yeast wakes up without dying.
  • Measure flour by spooning it into the cup and leveling, avoid packing.
  • Make sure your yeast is fresh, it should foam when mixed with warm liquid and sugar if you test it.
  • Roll the dough evenly so all rolls bake the same.
  • If rolls brown too fast, cover loosely with foil for last 5 to 10 minutes.
  • For thicker icing, add less milk, for thinner icing, add more a teaspoon at a time.

Serving Suggestions

  • Serve warm with a cup of coffee or hot tea.
  • Add sliced fruit on the side, like berries or orange segments, to balance the sweet roll.
  • Make mini rolls for a party, or bake in a muffin tin for single servings.
  • Pair with bacon or sausage for a full breakfast plate.
  • Leftovers warm well in a microwave for 10 to 15 seconds.

The BEST Bread Machine Cinnamon Rolls with Cream Cheese Icing

FAQs

Q, Can I use a stand mixer or mix by hand instead of a bread machine?

A, Yes, you can. Mix and knead the dough until smooth, then follow the same rise and bake steps.

Q, Can I freeze the rolls?

A, Yes, freeze before the second rise or after baking. Thaw before baking or reheating, then add icing when warm.

Q, How long do they stay fresh?

A, Keep in an airtight container at room temperature for 2 days, or refrigerate up to 4 days. Warm before serving.

Q, Can I use instant yeast?

A, Yes, you can use instant yeast. You may add it directly to the flour and use the dough cycle as usual.

Q, Can I make smaller or larger rolls?

A, Yes, change the number of cuts for size. Baking time will change, check often to avoid overbaking.

Cinnamon Rolls with Cream Cheese Icing

These soft dough cinnamon rolls with sweet cinnamon filling and tangy cream cheese icing are easy to make in a bread machine and perfect for any occasion.

Dough Ingredients

  • 1 cup warm milk (about 110°F, warm to touch) (Use warm milk, not hot, to activate yeast.)
  • 1/3 cup butter, melted
  • 1 egg
  • 4 cups all purpose flour (Measure by spooning into the cup and leveling.)
  • 1/3 cup sugar
  • 1 teaspoon salt
  • 2 1/4 teaspoons active dry yeast (one packet) (Ensure yeast is fresh and foams with warm liquid.)

Filling Ingredients

  • 1/2 cup butter, soft (Spread over the dough.)
  • 3/4 cup brown sugar
  • 2 tablespoons ground cinnamon

Cream Cheese Icing

  • 4 oz cream cheese, soft
  • 1/4 cup butter, soft
  • 1 cup powdered sugar
  • 1/2 teaspoon vanilla
  • 1-2 tablespoons milk (Add as needed for spreadable texture.)

Preparation

  1. Add dough ingredients to the bread machine pan in the order your machine suggests, usually liquids first, then flour, then yeast. Start the dough cycle.
  2. When the dough cycle finishes, remove the dough to a lightly floured surface. Roll into a rectangle about 15 x 10 inches.
  3. Spread the softened 1/2 cup of butter over the dough. Mix brown sugar and cinnamon, sprinkle evenly over the butter.
  4. Tightly roll the dough from the long side into a log. Pinch the seam to seal.
  5. Cut into 12 equal pieces with a sharp knife or dental floss. Place rolls in a greased 9 x 13 inch pan.
  6. Cover with a clean towel, let rise in a warm place until puffy, about 30 to 45 minutes.

Baking

  1. Preheat the oven to 350°F. Bake rolls for 20 to 25 minutes, until golden and cooked through.

Icing

  1. While rolls bake, beat cream cheese and butter until smooth. Add powdered sugar and vanilla, mix. Add milk as needed for spreadable texture.
  2. Remove rolls from oven, let cool for 5 minutes, then spread cream cheese icing over warm rolls. Serve warm.

These rolls are great for guests and can be made ahead. Store in an airtight container for 2 days at room temperature or refrigerate for up to 4 days.

Breakfast, Snack
American
Baked Goods, Bread Machine, Cinnamon Rolls, Cream Cheese Icing, Easy Recipe

Soft Chocolate Chip Cookies

Deliciously soft chocolate chip cookies stacked on a plate

Soft Chocolate Chip Cookies are truly a timeless classic that brings joy to any gathering. With their warm, gooey centers and slightly crisp edges, these cookies appeal to both kids and adults alike. The rich aroma of melting chocolate combined with buttery goodness fills your kitchen and warms your heart. This recipe is a real crowd-pleaser, perfect for cookie lovers everywhere. Whether you need a sweet treat for a party or just want to indulge yourself, these cookies are the way to go. Get ready to dive into the deliciousness of Soft Chocolate Chip Cookies, and prepare to make some sweet memories!

How to Prepare Soft Chocolate Chip Cookies

To prepare Soft Chocolate Chip Cookies, start by gathering your ingredients. You will need 2 ¼ cups of all-purpose flour, 1 teaspoon of baking soda, ½ teaspoon of salt, 1 cup of unsalted butter (softened), ¾ cup of granulated sugar, ¾ cup of brown sugar, 1 teaspoon of vanilla extract, and 2 large eggs. Don’t forget the star of the show, 2 cups of semi-sweet chocolate chips!

First, preheat your oven to 350°F (175°C) and line a baking sheet with parchment paper. In a bowl, combine the flour, baking soda, and salt. In another bowl, beat the softened butter, granulated sugar, brown sugar, and vanilla until creamy. Add the eggs, one at a time, mixing well. Gradually add the flour mixture to the butter mix, then fold in the chocolate chips.

Using a spoon, scoop out dough balls and place them on the prepared baking sheet, spacing them about 2 inches apart. Bake for 10-12 minutes, or until the edges are golden and the centers are soft. Let them cool for a few minutes before transferring them to a wire rack. Enjoy the soft, melty goodness of your Soft Chocolate Chip Cookies.

Why You’ll Love Soft Chocolate Chip Cookies

You will absolutely love Soft Chocolate Chip Cookies for their irresistible texture and taste. The chewy centers are packed with delightful pockets of gooey chocolate. Each bite is a sweet combination of buttery flavor and crunchy edges. They are perfect for sharing, but beware, they are so good that you might want to keep them all to yourself! Plus, they are super easy to make. Even novice bakers can whip them up quickly. These cookies warm up beautifully, making them a perfect choice for any occasion, from cozy family nights to exciting gatherings with friends.

Tips for Success

To ensure your Soft Chocolate Chip Cookies turn out perfectly every time, here are some handy tips. First, make sure your butter is really soft but not melted; this will help create the perfect texture. When measuring flour, spoon it into your measuring cup and level it off for accuracy. Avoid overmixing the dough, as this can lead to tougher cookies. For extra softness, consider chilling the dough for at least 30 minutes before baking. This helps prevent spreading and keeps the cookies nice and thick. Lastly, remember to let the cookies cool slightly on the baking sheet before moving them to a wire rack. Following these tips will help you create delectable Soft Chocolate Chip Cookies that everyone will rave about!

Serving Suggestions

Soft Chocolate Chip Cookies are versatile and can be enjoyed in various ways. Serve them warm with a scoop of vanilla ice cream for an indulgent dessert. If you want a fun twist, try making ice cream sandwiches using two cookies and your favorite ice cream flavor. Pair the cookies with a glass of cold milk or a cup of hot coffee for a delightful treat any time of day. Want to impress your friends? Serve the cookies alongside fresh fruit or chocolate-covered strawberries for an elegant touch. There’s no wrong way to enjoy these cookies, so get creative and have fun!

FAQs

1. Can I use dark chocolate chips instead of semi-sweet?

Yes! Dark chocolate chips will add a richer flavor to your cookies, and they will still be delicious.

2. How do I store Soft Chocolate Chip Cookies?

Store the cookies in an airtight container at room temperature for up to a week. If you want to keep them longer, freeze them in a freezer-safe bag for up to three months.

3. Can I add nuts to the cookie dough?

Absolutely! Chopped walnuts or pecans make a great addition to your Soft Chocolate Chip Cookies for some extra crunch. Just fold them in with the chocolate chips.

Chocolate Chip Cookies

Delightfully soft and chewy chocolate chip cookies with a rich and gooey center, perfect for any gathering or a treat at home.

Dry Ingredients

  • 2 1/4 cups all-purpose flour
  • 1/2 teaspoon baking soda
  • 1 teaspoon salt

Wet Ingredients

  • 1 cup unsalted butter, softened (Make sure it is at room temperature)
  • 3/4 cup granulated sugar
  • 3/4 cup brown sugar, packed
  • 1 teaspoon vanilla extract
  • 2 large eggs (Make sure they are at room temperature)

Add-ins

  • 2 cups chocolate chips (Use semi-sweet or dark chocolate chips based on preference)

Preparation

  1. Preheat your oven to 350°F (175°C).
  2. In a bowl, whisk together the flour and baking soda, then set aside.
  3. In a separate large bowl, cream the softened butter, granulated sugar, brown sugar, and salt until smooth.
  4. Add the vanilla extract and eggs, mixing until well combined.
  5. Gradually mix in the dry ingredients, then fold in the chocolate chips.
  6. Drop rounded tablespoons of dough onto a baking sheet lined with parchment paper.

Baking

  1. Bake for 10-12 minutes, or until the edges are lightly golden.
  2. Let the cookies cool on the baking sheet for a few minutes before transferring them to a wire rack.

For success, ensure room temperature ingredients, avoid overbaking, and chill the dough for thicker cookies.

Dessert, Snack
American
Baking, Chocolate Chip Cookies, dessert recipe, Easy Cookies, soft batch cookies

Whipped Shortbread Cookies

Delicious whipped shortbread cookies arranged on a plate

Whipped shortbread cookies are a delightful treat that brings warmth and nostalgia with every bite. These cookies are smooth, buttery, and melt in your mouth. With their simple ingredients and easy preparation, they’re perfect for both novice bakers and seasoned pros. Imagine serving these delicate treats at holiday gatherings or enjoying them with a cup of tea. They are a total crowd-pleaser, charming everyone with their sweet flavor and crumbly texture. If you’re looking for a recipe that is as enjoyable to make as it is to savor, whipped shortbread cookies are calling your name, ready to be whisked up in your kitchen!

How to Prepare Whipped Shortbread Cookies

Preparing whipped shortbread cookies is a breeze. Start by gathering your ingredients: 1 cup of softened butter, ½ cup of powdered sugar, 2 cups of all-purpose flour, and 1 teaspoon of vanilla extract.

  1. Begin by creaming the butter and powdered sugar in a large mixing bowl until light and fluffy.
  2. Add in the vanilla extract and mix well.
  3. Gradually sift in the flour, mixing until just combined. The dough should be soft and smooth.
  4. Preheat your oven to 350°F (175°C) and line a baking sheet with parchment paper.
  5. Using a piping bag or a cookie scoop, shape the cookies onto the prepared baking sheet.
  6. Bake for 15-20 minutes, or until the edges are lightly golden.
  7. Allow them to cool on the sheet for 5 minutes before transferring them to a wire rack.

Why You’ll Love Whipped Shortbread Cookies

These whipped shortbread cookies are beloved for their incredible taste and texture. They are rich in butter and have a subtly sweet flavor that everyone adores. The light and airy feel makes them perfect for any occasion, whether it’s a holiday celebration or just a cozy night in. Additionally, they are easy to customize; you can add chocolate chips, nuts, or even dip them in chocolate for an extra treat. What’s more, these cookies do not require chilling time, making them a quick and convenient dessert option. Once you try them, you’ll understand why they have become a favorite for cookie enthusiasts everywhere!

Tips for Success

To ensure your whipped shortbread cookies turn out perfectly, follow these handy tips:

  1. Butter Temperature: Make sure your butter is softened to room temperature, as this helps create a light texture.
  2. Mixing Method: Beat the butter and sugar well until fluffy. This adds air to the mixture, contributing to the cookies’ lightness.
  3. Avoid Over-Mixing: Once you add the flour, mix just until combined. Over-mixing can lead to dense cookies.
  4. Piping Tips: If using a piping bag, choose a star tip for beautiful cookie shapes that look as good as they taste.
  5. Storage: Store your cookies in an airtight container to keep them fresh, and enjoy them within a week for the best flavor.

By following these tips, your whipped shortbread cookies will be a hit every time!

Serving Suggestions

Whipped shortbread cookies can be enjoyed in many delightful ways. Here are some serving suggestions to elevate your cookie experience:

  1. Tea Time Treat: Pair these cookies with a warm cup of tea for a charming afternoon snack.
  2. Gifting: Package them in a cute box or jar with a ribbon. They make a wonderful gift for holidays or special occasions.
  3. Decoration: Dust with extra powdered sugar or drizzle with chocolate for a fancy touch when hosting parties.
  4. Dessert Platter: Serve them on a dessert platter alongside other treats like brownies or fruit for a fun dessert table.

These little cookies have a charm that makes them perfect for sharing and enjoying in every situation.

FAQs

1. Can I use salted butter for these cookies?
Yes, you can use salted butter, just skip adding any extra salt to the recipe.

2. How should I store the cookies?
Store your whipped shortbread cookies in an airtight container at room temperature for up to a week.

3. Can I freeze the dough?
Absolutely! You can freeze the cookie dough for up to three months. Just thaw it in the refrigerator before baking.

4. What can I add to the recipe for variety?
Feel free to mix in chocolate chips, nuts, or dried fruit to add different flavors and textures to your cookies.

These FAQs will help you navigate any questions as you whip up your delicious shortbread cookies!

Whipped Chocolate Chip Shortbread

A delightful combination of buttery shortbread and sweet chocolate chips, perfect for any gathering.

Main Ingredients

  • 1 cup unsalted butter, softened (Make sure butter is at room temperature.)
  • ½ cup powdered sugar
  • 2 cups all-purpose flour
  • ½ cup chocolate chips (Feel free to use different types of chocolate.)
  • 1 teaspoon vanilla extract
  • 1 pinch salt (Reduce or skip if using salted butter.)

Preparation

  1. Preheat your oven to 325°F (160°C).
  2. In a large mixing bowl, beat the softened butter and powdered sugar together until light and fluffy.
  3. Add in the vanilla extract and salt, mixing until combined.
  4. Gradually add the all-purpose flour, mixing until the dough just comes together.
  5. Fold in the chocolate chips gently.
  6. Scoop out small portions of the dough and shape them into balls. Place them on a baking sheet lined with parchment paper.
  7. Gently flatten each ball with a fork or your hand.

Baking

  1. Bake in the preheated oven for 15-18 minutes, or until the edges are lightly golden.
  2. Let the cookies cool on the baking sheet for a few minutes before transferring them to a wire rack to cool completely.

These cookies are perfect for quick baking sessions, and they store well for several days. You can freeze the dough for up to three months. For different flavor options, consider adding nuts or using various types of chocolate chips.

Dessert, Snack
American
Baking, Chocolate Chip Cookies, Dessert, Easy Cookies, shortbread