Egg Muffins with Smashed Tater Tot Crust

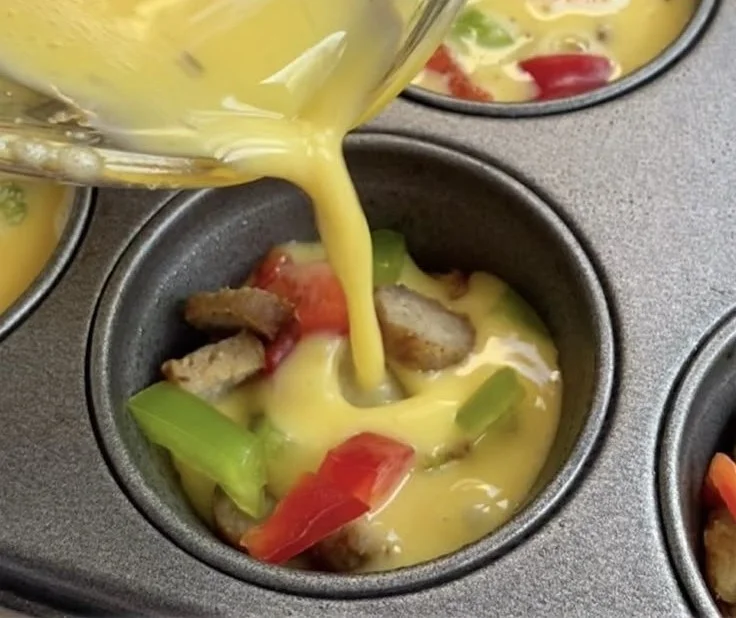
Delicious egg muffins with a crispy smashed tater tot crust garnished with herbs.

If breakfast had a personality, these Tater Tot Egg Cups would be the fun, dependable friend who always shows up with snacks. They’re crispy, cheesy, packed with bacon, and incredibly easy to make. Think brunch-worthy flavor that also works perfectly for busy weekday mornings a total win.

This recipe came together one Sunday when I was looking at a bag of tater tots and a nearly empty carton of eggs, wondering how to turn them into something special. It worked better than expected, and now I always keep a batch in my fridge or freezer. Whether you’re meal prepping, feeding a group, or just trying to make mornings easier, these little bites do the job.If you enjoy other egg muffin ideas, try a similar twist like egg muffins with spinach and feta.

How to prepare Egg Muffins with Smashed Tater Tot Crust

  1. Preheat your oven to 400°F (200°C). Lightly grease a 12-cup muffin tin.
  2. Place frozen tater tots on a plate to thaw a little, or use them straight from frozen. Put 3 tater tots in each muffin cup. Press them down with a spoon or the bottom of a glass to form a thin crust on the bottom and up the sides.
  3. Bake the pressed tater tot shells for 10 minutes, until they start to brown and set. Remove the tin from the oven.
  4. In a bowl, whisk 8 large eggs with 1/4 cup milk or cream, 1/2 teaspoon salt, and 1/4 teaspoon black pepper. Stir in 1 cup shredded cheddar cheese and any cooked add-ins like chopped cooked bacon, cooked sausage, or sautéed peppers and onions.
  5. Spoon the egg mix into each tater tot cup, filling about 3/4 full. The eggs will rise as they bake.
  6. Bake for 12 to 18 minutes, until the eggs are set in the center and a toothpick comes out clean. Let the muffins cool in the tin for 5 minutes, then run a knife around each and lift them out. Serve warm.

Egg Muffins with Smashed Tater Tot Crust

Why You’ll Love Egg Muffins with Smashed Tater Tot Crust

  • Easy to make, with simple steps and few tools.
  • Crispy outside, soft inside, great texture in every bite.
  • Flexible, you can use any cheese, meat, or veggies you like.
  • Make ahead and reheat, perfect for busy mornings.
  • Kid friendly, and good for brunch with friends.

Tips for success

  • Press the tater tots well into the tin so the crust holds the egg mix.
  • Par-bake the crust so it stays crispy and does not get soggy.
  • Use a metal muffin tin for better browning.
  • Let muffins cool a little before removing, they hold shape better.
  • For easy clean up, use a little oil or spray in the tin, or use silicone liners.

Serving Suggestions

  • Serve with ketchup, hot sauce, or salsa on the side.
  • Add a green salad for a light lunch or brunch.
  • Pair with fresh fruit or roasted potatoes for a full breakfast plate.
  • Pack them in a lunchbox with a small cooler for a morning on the go.

Egg Muffins with Smashed Tater Tot Crust

FAQs

Q: Can I make these ahead and freeze them?

A: Yes, cool them fully, wrap in foil or a bag, and freeze. Reheat in the oven or microwave until hot.

Q: Can I use fresh potatoes instead of tater tots?

A: You can, but tater tots give the best crunch. For fresh potatoes, grate and squeeze out water, then press and par-bake the crust.

Q: How long do they keep in the fridge?

A: Store in an airtight container for 3 to 4 days. Reheat in the oven or microwave.

Q: Can I make them dairy free?

A: Use dairy free cheese or skip the cheese and add more herbs and veggies for flavor.

Q: What oven time works best for a full muffin tin?

A: If your tin is full, check at 12 minutes and add a few more minutes until eggs are set.

Conclusion

If you want another take on mini egg muffins with a tater tot crust, check this recipe for more ideas and a step by step guide, Mini Breakfast Omelets (Egg Muffins With A Tater Tot Crust) – Instrupix.

Tater Tot Egg Cups

Crispy, cheesy, and packed with bacon, these Tater Tot Egg Cups are perfect for breakfast or brunch. Easy to make and great for meal prep.

For the Tater Tot Crust

  • 36 pieces 36 frozen tater tots (You can use them straight from frozen.)

For the Egg Mixture

  • 8 large large eggs
  • 1/4 cup milk or cream (Can substitute with dairy-free options.)
  • 1/2 teaspoon salt
  • 1/4 teaspoon black pepper
  • 1 cup shredded cheddar cheese (Feel free to use any cheese you like.)
  • cooked add-ins (like chopped cooked bacon, cooked sausage, or sautéed peppers and onions) (Optional, adjust quantity to preference.)

Preparation

  1. Preheat your oven to 400°F (200°C) and lightly grease a 12-cup muffin tin.
  2. Place frozen tater tots on a plate to thaw a little. Put 3 tater tots in each muffin cup and press them down to form a thin crust.

Baking the Crust

  1. Bake the pressed tater tot shells for 10 minutes until they start to brown and set. Remove the tin from the oven.

Preparing the Egg Mixture

  1. In a bowl, whisk together the eggs, milk or cream, salt, and pepper.
  2. Stir in the shredded cheese and any cooked add-ins.

Final Baking

  1. Spoon the egg mixture into each tater tot cup, filling about 3/4 full.
  2. Bake for 12 to 18 minutes until the eggs are set and a toothpick comes out clean.
  3. Let the muffins cool in the tin for 5 minutes, then run a knife around each and lift them out. Serve warm.

Press the tater tots well into the tin and par-bake them for better texture. Use a metal muffin tin for more even browning and allow muffins to cool a bit for easier removal.
Breakfast, Brunch
American
Breakfast Muffins, Easy Egg Recipe, Egg Muffins, Make Ahead Breakfast, Tater Tot Egg Cups

2 Ingredient Cottage Cheese Flatbread Recipe

Delicious cottage cheese flatbread made with just two ingredients.

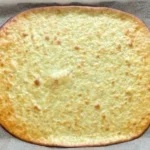
This 2 Ingredient Cottage Cheese Flatbread Recipe is quick, simple, and tasty. It feels fresh from the oven, soft in the middle, and a little crisp on the edges. People love it because it uses just cottage cheese and eggs, so you can make flatbread fast for breakfast, lunch, or a snack. If you want a similar easy idea for low carb flatbread, check this helpful guide for a related version, two ingredient cottage cheese bread tips. This flatbread is a crowd-pleaser, mild in flavor, and very flexible, so you can top it any way you like, and you will want to make it again, trust me, it’s fun to cook.

How to prepare 2 Ingredient Cottage Cheese Flatbread

Ingredients

  • 1 cup cottage cheese
  • 2 large eggs
  • pinch of salt, optional
  • a little oil or butter for the pan, optional

Directions

  1. Put cottage cheese and eggs in a blender or food processor. Blend until smooth and well mixed.
  2. Add a pinch of salt if you want. Mix again a few seconds.
  3. Heat a nonstick pan on medium low. Add a little oil or butter if you like.
  4. Pour about 1/4 to 1/3 cup batter into the pan for each flatbread. Spread a bit with the back of the spoon.
  5. Cook 2 to 3 minutes until edges look set and the bottom is light brown. Flip and cook 1 to 2 minutes more.
  6. Repeat with the rest of the batter. Serve warm.

2 Ingredient Cottage Cheese Flatbread Recipe

Why You’ll Love 2 Ingredient Cottage Cheese Flatbread

  • Fast to make, you can mix and cook in 10 to 15 minutes.
  • Uses few ingredients, great when you want simple food.
  • Low carb and high in protein, it fits many simple diets.
  • Mild taste works with sweet or savory toppings, it feels like a blank canvas.
  • Soft and tender, but you can make it a bit crisp with more pan time.

Tips for success

  • Blend well, smooth batter makes a nicer flatbread.
  • Use a nonstick pan or a small amount of oil to avoid sticking.
  • Cook on medium low so the inside cooks without burning the outside.
  • Make pieces small if you want fast, even cooking.
  • Let the batter sit a minute if it seems runny, it firms up slightly.

Serving Suggestions

  • Top with avocado, tomato, and a sprinkle of salt for a light lunch.
  • Use as a base for eggs and smoked salmon at breakfast.
  • Spread peanut butter and sliced banana for a quick sweet snack.
  • Serve with soup or salad instead of bread.
  • Make mini pizzas, add sauce, cheese, and bake briefly.

2 Ingredient Cottage Cheese Flatbread Recipe

FAQs

Q: Is this flatbread gluten free?

A: Yes, the recipe uses only cottage cheese and eggs, so it is naturally gluten free.

Q: Can I use ricotta instead of cottage cheese?

A: You can try ricotta, but the texture may be softer. Blend well to get a smooth batter.

Q: How long does it keep in the fridge?

A: Store cooked flatbreads in an airtight container for 2 to 3 days, reheat in a pan or oven.

Q: Can I make the batter ahead?

A: You can mix the batter and keep it in the fridge for a day, stir before cooking.

Q: Is this low carb?

A: Yes, with cottage cheese and eggs the carbs are low compared to regular flour bread.

Conclusion

This 2 Ingredient Cottage Cheese Flatbread Recipe is a quick, flexible choice for any meal. It makes a soft, tasty flatbread with little work, and you can top it any way you like. For another take on a simple low carb cottage cheese flatbread, see this helpful recipe online, 2 Ingredient Cottage Cheese Flatbread – Instrupix. Enjoy making it, and have fun with your toppings.

2 Ingredient Cottage Cheese Flatbread

This quick and simple flatbread recipe uses just cottage cheese and eggs, making it a delicious option for breakfast, lunch, or a snack.

Main ingredients

  • 1 cup cottage cheese
  • 2 large eggs
  • pinch salt (optional)
  • a little oil or butter for the pan (optional)

Preparation

  1. Put cottage cheese and eggs in a blender or food processor. Blend until smooth and well mixed.
  2. Add a pinch of salt if desired. Mix again for a few seconds.

Cooking

  1. Heat a nonstick pan on medium low. Add a little oil or butter if preferred.
  2. Pour about 1/4 to 1/3 cup batter into the pan for each flatbread. Spread with the back of the spoon.
  3. Cook for 2 to 3 minutes until edges look set and the bottom is light brown. Flip and cook for an additional 1 to 2 minutes.
  4. Repeat with the remaining batter. Serve warm.

Tips for success include blending well for a smoother batter, using a nonstick pan or oil to avoid sticking, cooking on medium low heat, making small pieces for even cooking, and letting the batter sit for a minute if it seems runny.

Breakfast, Snack
American
Cottage Cheese Flatbread, Easy Recipe, High Protein, Low Carb Bread, Quick Flatbread

Lazy Lasagna (Cheesy Baked Ravioli)

Lazy Lasagna with cheesy baked ravioli topped with marinara sauce and melted cheese

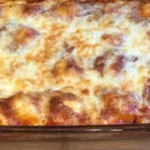
This Lazy Baked Frozen Ravioli Lasagna is a simple, no-fuss dinner that’s perfect for busy nights. Made with frozen cheese ravioli, pasta sauce, and mozzarella, it comes together quickly and turns into a tasty meal everyone at the table will enjoy, good for busy weeknights or when you want cozy food without long prep. If you like simple baked dishes, you might also enjoy a baked apple fritters recipe that is just as easy to make. Get ready to bake, eat, and smile, you will want to make this again and again.

How to prepare Lazy Lasagna Cheesy Baked Ravioli

Ingredients

  • 1 pound frozen cheese ravioli, not cooked
  • 3 cups marinara sauce, store bought or homemade
  • 2 cups shredded mozzarella cheese
  • 1/2 cup grated Parmesan cheese
  • 1 teaspoon dried Italian seasoning or a mix of oregano and basil
  • Salt and pepper to taste
  • Fresh basil or parsley, optional for garnish

Directions

  1. Preheat your oven to 375°F, and grease a 9×13 inch baking dish with a little oil or nonstick spray.
  2. Spread 1 cup of marinara sauce on the bottom of the dish to stop the ravioli from sticking.
  3. Place a single layer of frozen ravioli on the sauce. Try to keep them in one even layer so they cook the same.
  4. Spoon another cup of sauce over the ravioli, spread a third of the mozzarella on top, and sprinkle a little Parmesan and some Italian seasoning.
  5. Add a second layer of ravioli, pour the remaining sauce over them, and top with the rest of the mozzarella and Parmesan.
  6. Cover the dish tightly with foil and bake for 30 minutes. Then remove the foil and bake 10 to 15 more minutes, until the cheese is bubbly and slightly golden.
  7. Let the dish rest for 5 minutes before serving, then garnish with fresh basil or parsley if you like.

Lazy Lasagna (Cheesy Baked Ravioli)

Why You’ll Love Lazy Lasagna Cheesy Baked Ravioli

  • It is fast, you skip boiling noodles and layering ricotta, so you save time.
  • It is cheesy and comforting, with a crisp top and soft ravioli inside.
  • It uses simple ingredients you likely have at home, so it is easy to pull together.
  • It feeds a crowd and reheats well, so it is great for leftovers.

Tips for success

  • Use a good marinara sauce for better flavor, or add a splash of red wine to your sauce for depth.
  • If your ravioli are large or extra thick, add 5 to 10 minutes to covered bake time.
  • Do not skip the rest time, it helps the sauce settle and makes serving cleaner.
  • For a richer bake, stir 1 cup ricotta with an egg and dollop between layers.
  • If you like more herbs, add fresh chopped basil into the sauce before baking.

Serving Suggestions

  • Serve with a simple green salad and a light vinaigrette for balance.
  • Offer garlic bread or crusty rolls to mop up the sauce.
  • Add a side of steamed vegetables, like broccoli or green beans, for color and nutrients.
  • Finish with a small scoop of lemon sorbet or a simple fruit salad for dessert.

Lazy Lasagna (Cheesy Baked Ravioli)

FAQs

Q, Can I use fresh ravioli instead of frozen? A, Yes, fresh ravioli will cook faster. Check after 15 to 20 minutes covered, then finish uncovered until cheese is bubbly.

Q, Can I make this ahead and bake later? A, Yes, assemble the dish, cover, and refrigerate for up to 24 hours. Add 10 to 15 minutes to the baking time if cold from the fridge.

Q, Is it okay to use a different cheese? A, Yes, you can swap part of the mozzarella for provolone, fontina, or a bit of smoked cheese for flavor.

Q, How do I make the top extra crispy? A, Remove the foil for the last 10 to 15 minutes and turn the oven to 400°F if you want extra browning, watching closely so it does not burn.

Q, Can I add meat or vegetables? A, Yes, browned ground beef, Italian sausage, or sautéed vegetables like spinach, mushrooms, or zucchini work well between layers.

Conclusion

Lazy Lasagna (Cheesy Baked Ravioli) is a simple, tasty meal that brings comfort without long work. For a similar three ingredient, no-fuss baked ravioli idea, see Lazy Lasagna (Easy 3 Ingredient Dinner) – Instrupix, it gives another quick way to enjoy this cozy dish.

Lazy Lasagna Cheesy Baked Ravioli

A simple and comforting baked dish made with frozen cheese ravioli, marinara sauce, and melted mozzarella cheese, perfect for busy weeknights.

Main Ingredients

  • 1 pound frozen cheese ravioli, not cooked
  • 3 cups marinara sauce, store bought or homemade (Use a good marinara sauce for better flavor.)
  • 2 cups shredded mozzarella cheese
  • 1/2 cup grated Parmesan cheese
  • 1 teaspoon dried Italian seasoning or a mix of oregano and basil
  • Salt and pepper to taste
  • Fresh basil or parsley, optional for garnish

Preparation

  1. Preheat your oven to 375°F, and grease a 9×13 inch baking dish with a little oil or nonstick spray.
  2. Spread 1 cup of marinara sauce on the bottom of the dish to stop the ravioli from sticking.
  3. Place a single layer of frozen ravioli on the sauce. Keep them in one even layer.
  4. Spoon another cup of sauce over the ravioli, spread a third of the mozzarella on top, and sprinkle a little Parmesan and some Italian seasoning.
  5. Add a second layer of ravioli, pour the remaining sauce over them, and top with the rest of the mozzarella and Parmesan.

Baking

  1. Cover the dish tightly with foil and bake for 30 minutes.
  2. Remove the foil and bake for an additional 10 to 15 minutes, until the cheese is bubbly and slightly golden.
  3. Let the dish rest for 5 minutes before serving, then garnish with fresh basil or parsley if desired.

For a richer bake, stir 1 cup ricotta with an egg and dollop between layers. If you like more herbs, add fresh chopped basil into the sauce before baking.

Dinner, Main Course
Italian
Baked Ravioli, Cheesy Pasta, Comfort Food, Easy Dinner, Ravioli Lasagna

Crispy Cheese Squares

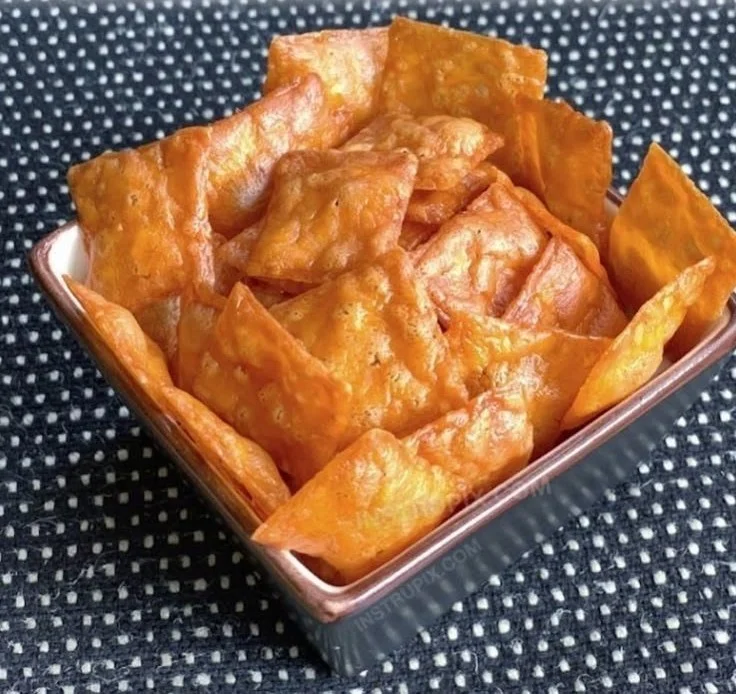
Crispy cheese squares served on a plate, golden and delicious.

Crispy Cheese Squares are a warm, tasty snack that feels like a little party in your mouth. The outside turns golden and crunchy, the inside stays cheesy and full of flavor. This recipe is a crowd-pleaser at parties, a quick appetizer, or a simple treat for movie night. It is easy to make, needs few ingredients, and gives you that salty, cheesy crunch everyone loves. If you like quick cheese snacks, you might also enjoy a similar simple bake like 2-ingredient cottage cheese bread. Get ready to bake a tray of crunchy, melty joy, and have fun making them for friends or family.

How to prepare Crispy Cheese Squares

Ingredients

  • 2 cups shredded sharp cheddar cheese
  • 1/2 teaspoon garlic powder
  • 1/4 teaspoon paprika
  • A pinch of salt and pepper
  • Optional, chopped fresh parsley for garnish

Directions

  1. Preheat your oven to 400°F (200°C). Line a baking sheet with parchment paper.
  2. Mix the shredded cheese with garlic powder, paprika, salt, and pepper in a bowl.
  3. Scoop about 1 tablespoon of the cheese mixture and place it on the baking sheet, leaving space between each scoop. Flatten each scoop slightly into a square shape with the back of a spoon.
  4. Bake for 6 to 8 minutes, or until the edges turn golden brown and the cheese looks bubbly and crisp.
  5. Let the squares cool on the sheet for 2 minutes, then transfer to a wire rack to finish crisping.
  6. Garnish with parsley if you want, and serve warm or at room temperature.

Crispy Cheese Squares

Why You’ll Love Crispy Cheese Squares

You will love these crispy cheese squares because they are fast, cheesy, and crunchy. They use simple pantry ingredients and take only minutes to bake. They are low-carb and full of flavor, so they make a great snack, appetizer, or party bite. The cheese browns and becomes crisp, giving a strong, salty cheese taste that most people enjoy.

Tips for success

  • Use sharp cheddar or another strong cheese for better flavor and crisping.
  • Shred the cheese yourself if you can, it melts and crisps better than pre-shredded cheese with anti-caking agents.
  • Make each square about the same size so they bake evenly.
  • Do not bake too long, the edges should be golden, not burnt.
  • Let them cool fully on a rack to get maximum crispness.

Serving Suggestions

  • Serve with a small bowl of marinara sauce for dipping.
  • Add a sprinkle of chili flakes or paprika on top for a spicy kick.
  • Pair with fresh veggies for a simple appetizer plate.
  • Use them as a crunchy topping for salads or soups for an extra cheese crunch.

Crispy Cheese Squares

FAQs

Q: How long do they stay crispy? A: Stored in an airtight container at room temperature, they stay crisp for 1 to 2 days. If they soften, re-crisp in a hot oven for a few minutes.

Q: Can I use other cheeses? A: Yes, Parmesan, Asiago, or a mix with cheddar works well. Hard cheeses crisp best.

Q: Are these gluten free? A: Yes, the basic cheese squares are gluten free, if you use only cheese and spices.

Q: Can I make them larger or smaller? A: Yes, adjust the scoop size, but check baking time, larger squares may need a bit longer.

Conclusion

For another simple cheese crisp idea, see this Basic Keto Cheese Crisps Recipe – Allrecipes, it has tips that pair well with this recipe. Enjoy your crispy, cheesy snack and share with friends.

Crispy Cheese Squares

Crispy Cheese Squares are a warm, tasty snack that offers a crunchy exterior with a cheesy interior, making them the perfect appetizer or party treat.

Main Ingredients

  • 2 cups shredded sharp cheddar cheese (Use freshly shredded cheese for best results.)
  • 1/2 teaspoon garlic powder
  • 1/4 teaspoon paprika
  • a pinch salt and pepper (Adjust to taste.)
  • chopped fresh parsley (Optional, for garnish.)

Preparation

  1. Preheat your oven to 400°F (200°C). Line a baking sheet with parchment paper.
  2. Mix the shredded cheese with garlic powder, paprika, salt, and pepper in a bowl.
  3. Scoop about 1 tablespoon of the cheese mixture and place it on the baking sheet, leaving space between each scoop. Flatten each scoop slightly into a square shape with the back of a spoon.

Baking

  1. Bake for 6 to 8 minutes, or until the edges turn golden brown and the cheese looks bubbly and crisp.
  2. Let the squares cool on the sheet for 2 minutes, then transfer to a wire rack to finish crisping.

Serving

  1. Garnish with parsley if desired, and serve warm or at room temperature.

Use sharp cheddar for better flavor. Shred your cheese fresh for best melting. Bake until golden, but watch for burning. Store in an airtight container for up to 1-2 days.

Appetizer, Snack
American
Cheese Snack, Crispy Cheese Squares, Low-Carb Snack, Party Appetizer, Quick Appetizer

Easy Baked Cream Cheese Rangoon Rolls

Delicious baked cream cheese rangoon rolls ready to serve

I don’t know if you have ever had the pleasure of eating the cream cheese rangoons from Panda Express, but just to give you an idea, they’re basically heaven in your mouth. This recipe is very similar, only they’re baked instead of fried, and rolled into fun little sticks. Anyone who loves cream cheese will certainly enjoy them, try the baked beef and cheese sliders recipe I link to for more simple snacks. You will smile making these, and you might make them again the same week.

How to prepare Easy Baked Cream Cheese Rangoon Rolls

Ingredients

  • 8 oz cream cheese, softened
  • 1/2 cup finely chopped green onion
  • 1/2 cup finely chopped cooked crab or imitation crab, optional
  • 1 teaspoon garlic powder
  • 1 teaspoon soy sauce (optional)
  • 24 wonton wrappers
  • 1 tablespoon oil or cooking spray
  • 1 egg beaten, for egg wash (optional)

Directions

  1. Preheat oven to 400°F (200°C). Line a baking sheet with parchment.
  2. In a bowl, mix cream cheese, green onion, crab if used, garlic powder, and soy sauce until smooth.
  3. Place one wonton wrapper on a clean surface. Put about 1 teaspoon of filling in the center.
  4. Fold the wrapper into a roll or triangle, sealing edges with a little water or egg wash. Repeat with all wrappers.
  5. Place rolls on the baking sheet. Brush lightly with oil or egg wash, or spray with cooking spray.
  6. Bake 8 to 12 minutes, until the wrappers are golden and crisp. Let cool a few minutes before serving.

Easy Baked Cream Cheese Rangoon Rolls

Why You’ll Love Easy Baked Cream Cheese Rangoon Rolls

  • They are simple to make with few ingredients, so they fit busy nights.
  • Baking keeps them lighter than frying, and they still get crisp and golden.
  • The inside is creamy and rich, the outside is crisp, a great contrast.
  • You can make them ahead and bake when guests arrive, easy party food.
  • They work with or without crab, so you can make them vegetarian or not.

Tips for success

  • Soften the cream cheese well, it mixes smooth and fills easily.
  • Do not overfill the wrappers, one teaspoon is usually enough.
  • Seal edges with a little water or egg so they do not open while baking.
  • Space rolls on the sheet so hot air can crisp them evenly.
  • Watch the oven near the end, they go from golden to dark fast.

Serving Suggestions

  • Serve with sweet chili sauce, soy sauce, or a simple plum sauce.
  • Put them on a party plate with veggies for a fuller snack spread.
  • Make smaller or larger rolls to match your crowd.
  • These fit well with other finger foods and dips for a buffet or game night.

Easy Baked Cream Cheese Rangoon Rolls

FAQs

Q: Can I freeze these before baking?

A: Yes, freeze the raw rolls on a tray, then put in a bag. Bake from frozen, add a few minutes to the time.

Q: Can I make them without crab?

A: Yes, leave out crab and add more green onion, or a bit of finely chopped bell pepper for crunch.

Q: Are they healthy if baked?

A: Baking cuts the oil from frying, so they are lighter. Still, they are a snack, so enjoy in small portions.

Q: Can I use cream cheese packets or flavored cream cheese?

A: You can use flavored cream cheese for different taste, but reduce added salt or soy sauce if it’s already salty.

Conclusion

These Easy Baked Cream Cheese Rangoon Rolls make a warm, tasty snack that is quick to make and loved by many. For another take on baked party food ideas, see Baked Cream Cheese Rangoon Rolls – Instrupix, it offers a clear view of how these rolls can turn out and other tips to try.

Easy Baked Cream Cheese Rangoon Rolls

These baked cream cheese rangoons are a lighter version of the classic, crunchy on the outside and creamy on the inside, perfect for parties or quick snacks.

Filling Ingredients

  • 8 oz cream cheese, softened (Make sure it’s well softened for easy mixing.)
  • 1/2 cup finely chopped green onion
  • 1/2 cup finely chopped cooked crab or imitation crab, optional (Can be omitted for a vegetarian option.)
  • 1 teaspoon garlic powder
  • 1 teaspoon soy sauce, optional

Wrapper Ingredients

  • 24 pieces wonton wrappers
  • 1 tablespoon oil or cooking spray (For brushing or spraying the rolls.)
  • 1 piece egg, beaten, for egg wash, optional

Preparation

  1. Preheat the oven to 400°F (200°C) and line a baking sheet with parchment paper.
  2. In a bowl, mix the cream cheese, green onion, crab (if used), garlic powder, and soy sauce until smooth.
  3. Place one wonton wrapper on a clean surface and put about 1 teaspoon of the filling in the center.
  4. Fold the wrapper into a roll or triangle and seal the edges with a little water or egg wash. Repeat with all wrappers.
  5. Place the rolls on the baking sheet. Brush lightly with oil or egg wash, or spray with cooking spray.
  6. Bake for 8 to 12 minutes, until the wrappers are golden and crisp. Let cool for a few minutes before serving.

These rangoons are lighter than the fried versions and still delicious. Serve with sweet chili sauce or soy sauce for dipping. Can be frozen before baking and cooked from frozen, just add a few extra minutes.

Appetizer, Snack
American, Asian
Baked Appetizers, Cream Cheese Rangoons, easy snacks, Finger Foods, Party Snacks

Easy Spanish Cauliflower Rice (Healthy & Low Carb)

Bowl of easy Spanish cauliflower rice with spices and vegetables

This Easy Spanish Cauliflower Rice is warm, bright, and full of flavor, yet light and low carb. It uses riced cauliflower, tomatoes, peppers, and simple spices to give you the taste of Spanish rice without the carbs. It cooks fast, it smells great while it cooks, and it fits well with a busy weeknight or a relaxed weekend meal.

If you like easy, healthy swaps, you might also enjoy a hearty slow cooker option like slow cooker lemon herb chicken with rice for another simple family meal. This cauliflower rice recipe is a crowd-pleaser, with smoky paprika, bright tomato, and soft cauliflower that soaks up flavor. Give it a try, and get ready to make it again and again, because it’s both simple and satisfying.

How to prepare Spanish Cauliflower Rice.

  • Heat 1 tablespoon olive oil in a large pan over medium heat.
  • Add 1 small chopped onion and 1 chopped red bell pepper, cook, stir for 4 minutes, until soft.
  • Add 2 cloves minced garlic, 1 teaspoon smoked paprika, 1/2 teaspoon ground cumin, and salt and pepper to taste, cook and stir for 30 seconds, until fragrant.
  • Stir in 1 cup canned diced tomatoes, drain lightly, and simmer 2 minutes.
  • Add 4 cups riced cauliflower to the pan, stir to mix with the tomato and spices.
  • Cook 5 to 7 minutes, stirring often, until cauliflower is tender but not mushy.
  • Taste and adjust salt, pepper, or a squeeze of lime if you like a bright finish.
  • Easy Spanish Cauliflower Rice (Healthy & Low Carb)

Why You’ll Love Spanish Cauliflower Rice.

  • Low carb, light, and full of flavor, so you get the Spanish rice taste without the extra carbs.
  • Quick to make, ready in about 15 to 20 minutes, great for busy nights.
  • Uses simple pantry spices like paprika and cumin, no hard-to-find items.
  • Versatile, you can add protein like chicken, shrimp, or beans to make it a full meal.

Tips for success

  • Use fresh or frozen riced cauliflower, if frozen thaw and drain excess water first.
  • Do not overcook, keep the cauliflower tender, not mushy.
  • Use smoked paprika for the best Spanish flavor, or regular paprika if needed.
  • Keep heat medium so the vegetables soften but do not burn.
  • Taste and add salt at the end, flavors blend as it cools a bit.

Serving Suggestions

  • Serve with grilled chicken, shrimp, or fish for a low carb dinner.
  • Top with fresh cilantro, chopped green onion, or a squeeze of lime.
  • Add a fried egg on top for a fast, filling meal.
  • Serve as a side for tacos, fajitas, or other Spanish style dishes.

Easy Spanish Cauliflower Rice (Healthy & Low Carb)

FAQs

Q: Is cauliflower rice a good low carb substitute for white rice? A: Yes, cauliflower rice is much lower in carbs and calories, and it soaks up flavor like rice.

Q: Can I freeze this Spanish cauliflower rice? A: You can freeze it, but texture may change slightly. Cool fully, store in a freezer bag, and reheat gently.

Q: Can I make this in advance? A: Yes, cook and cool, then store in the fridge for 3 to 4 days. Reheat in a pan or microwave.

Q: Can I add more vegetables? A: Yes, add peas, corn, or chopped zucchini for more color and texture.

Conclusion

This Easy Spanish Cauliflower Rice is a simple, healthy swap that keeps big taste and cuts carbs, perfect for quick weeknight meals or as a fresh side. For another take on Spanish inspired cauliflower rice, see the full Spanish cauliflower rice recipe at Dr. Davinah’s Eats.

Spanish Cauliflower Rice

This Easy Spanish Cauliflower Rice is warm, bright, and full of flavor, yet light and low carb. It delivers the taste of Spanish rice without the carbs, using riced cauliflower, tomatoes, and spices.

For the vegetables

  • 1 tablespoon olive oil (For cooking)
  • 1 small chopped onion
  • 1 chopped red bell pepper
  • 2 cloves minced garlic

For seasoning

  • 1 teaspoon smoked paprika (Use regular paprika if needed)
  • 1/2 teaspoon ground cumin
  • to taste salt and pepper (Adjust according to preference)

For the main ingredient

  • 1 cup canned diced tomatoes (Drain lightly)
  • 4 cups riced cauliflower (Fresh or frozen (thaw if frozen and drain excess water))

Preparation

  1. Heat olive oil in a large pan over medium heat.
  2. Add chopped onion and chopped red bell pepper, cook and stir for 4 minutes, until soft.
  3. Add minced garlic, smoked paprika, ground cumin, salt, and pepper to taste, cook and stir for 30 seconds, until fragrant.

Cooking

  1. Stir in canned diced tomatoes and simmer for 2 minutes.
  2. Add riced cauliflower to the pan, stirring to mix with the tomato and spices.
  3. Cook for 5 to 7 minutes, stirring often, until the cauliflower is tender but not mushy.
  4. Taste and adjust with salt, pepper, or a squeeze of lime for a bright finish.

Use fresh or frozen cauliflower. Do not overcook to keep cauliflower tender. Serve with grilled chicken, shrimp, or fish. Top with fresh cilantro or a squeeze of lime.

Side Dish, Vegetarian
Healthy, Spanish
Cauliflower Rice, Easy Recipe, Healthy Swap, Low Carb, Quick Dinner

Easy Cinnamon Sugar Pecans

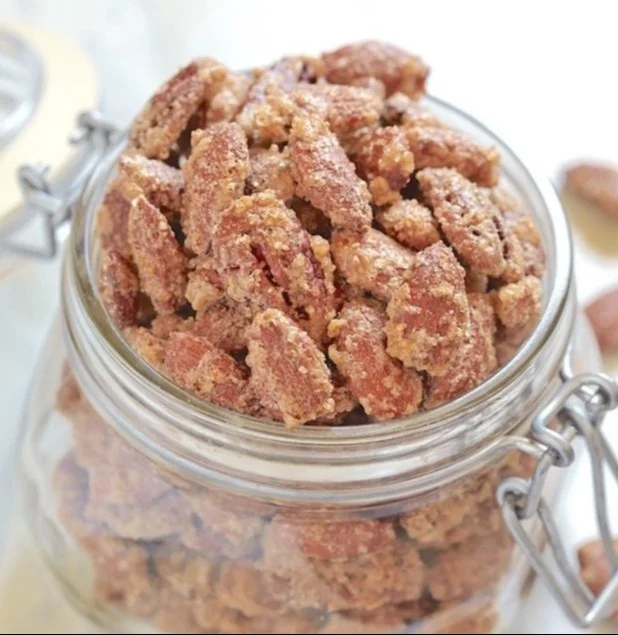
Delicious homemade cinnamon sugar pecans in a bowl

These Easy Cinnamon Sugar Pecans are sweet, crunchy, and ready in minutes. They smell like warm spice and make a great snack, gift, or topping for salads and desserts. The mix of cinnamon and sugar coats roasted pecans for a caramel-like crunch that most people love. If you like simple sweet treats, you might also enjoy cinnamon sugar donut bread, it has a similar cozy flavor. This recipe is a crowd-pleaser, and you will want to make a double batch, trust me.

How to prepare Easy Cinnamon Sugar Pecans

Ingredients

  • 2 cups pecan halves
  • 1 large egg white
  • 1 tablespoon water
  • 1/2 cup granulated sugar
  • 1 1/2 teaspoons ground cinnamon
  • 1/4 teaspoon salt
  • 1/2 teaspoon vanilla extract (optional)

Directions

  1. Preheat the oven to 300°F (150°C). Line a baking sheet with parchment paper.
  2. In a small bowl, whisk the egg white and water until frothy. Stir in the vanilla if you use it.
  3. In a separate bowl, mix sugar, cinnamon, and salt.
  4. Put the pecans in a large bowl, pour the egg white mixture over them and stir to coat.
  5. Sprinkle the cinnamon sugar mixture over the pecans and stir until the nuts are well coated.
  6. Spread the pecans in one layer on the lined baking sheet.
  7. Bake for 20 to 25 minutes, stirring once or twice, until the pecans are dry and golden. Watch so they do not burn.
  8. Remove from the oven and let cool on the sheet, they will crisp more as they cool.

Easy Cinnamon Sugar Pecans

Why You’ll Love Easy Cinnamon Sugar Pecans

  • They are fast to make, no special tools needed.
  • The flavor is warm and sweet, with a nice cinnamon kick.
  • They keep well in an airtight jar, so you can make them ahead.
  • Use them as a snack, salad topper, or homemade gift, they work in many ways.

Tips for success

  • Use room temperature egg white for even coating.
  • Stir the pecans on the sheet once or twice to avoid hot spots and burning.
  • Cool fully before storing, or they will get soft from trapped steam.
  • If you want less sugar, cut the sugar by a few tablespoons and taste the mix.
  • For extra flavor, add a pinch of nutmeg or a little sea salt on top after baking.

Serving Suggestions

  • Serve warm in a bowl for a party snack.
  • Chop and sprinkle over ice cream or yogurt.
  • Add to a green salad for crunch and sweet contrast.
  • Package in a small jar with a ribbon for a simple gift.

Easy Cinnamon Sugar Pecans

FAQs

Q: How long do these cinnamon sugar pecans last?

A: Store in an airtight container at room temperature for up to two weeks, they stay crunchy.

Q: Can I use other nuts?

A: Yes, use walnuts, almonds, or cashews the same way, adjust bake time if needed.

Q: Do I need to use egg white?

A: The egg white helps sugar stick, you can use 1 tablespoon of melted butter instead, it will change texture a bit.

Q: Can I make them without sugar?

A: Try a light coating of maple syrup or honey, but they will be stickier and need more time to dry in the oven.

Conclusion

If you want another easy take on candied nuts, check this recipe for more ideas, see Cinnamon Sugar Pecans (Candied Pecans) – JoyFoodSunshine.

Easy Cinnamon Sugar Pecans

These Cinnamon Sugar Pecans are sweet, crunchy, and perfect as a snack, gift, or topping for various dishes.

Main ingredients

  • 2 cups pecan halves (Use fresh pecans for the best flavor.)
  • 1 large egg white (Room temperature for even coating.)
  • 1 tablespoon water
  • 1/2 cup granulated sugar (Reduce for less sweetness if desired.)
  • 1 1/2 teaspoons ground cinnamon (Adjust to taste.)
  • 1/4 teaspoon salt
  • 1/2 teaspoon vanilla extract (Optional, adds extra flavor.)

Preparation

  1. Preheat the oven to 300°F (150°C) and line a baking sheet with parchment paper.
  2. In a small bowl, whisk the egg white and water until frothy, then stir in the vanilla if using.
  3. In a separate bowl, mix sugar, cinnamon, and salt.
  4. Put the pecans in a large bowl, pour the egg white mixture over them and stir to coat.
  5. Sprinkle the cinnamon sugar mixture over the pecans and stir until the nuts are well coated.
  6. Spread the pecans in one layer on the lined baking sheet.

Baking

  1. Bake for 20 to 25 minutes, stirring once or twice, until the pecans are dry and golden. Keep an eye on them to prevent burning.
  2. Remove from the oven and let cool on the sheet, as they will crisp more as they cool.

Store in an airtight jar for up to two weeks at room temperature. For added flavor, try a pinch of nutmeg or sea salt after baking.

Dessert, Snack
American
candied nuts, cinnamon sugar pecans, easy snacks, Party Food, Sweet Treats

Best Broccoli Pasta Salad

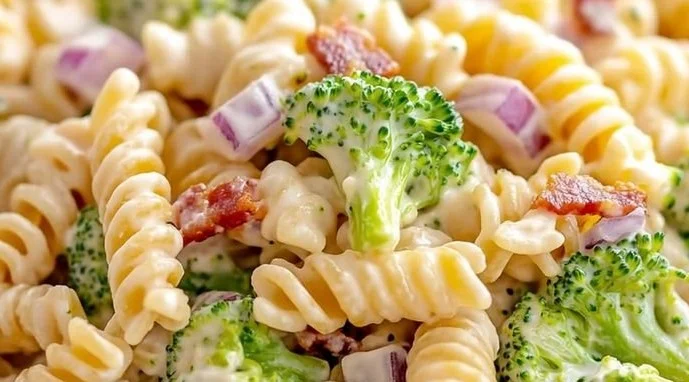
Fresh broccoli pasta salad with vibrant vegetables and dressing

Broccoli Pasta Salad is bright, crunchy, and full of flavor. It mixes tender pasta, crisp broccoli, and a creamy dressing for a salad that is easy to make and loved by many. This pasta salad makes a great side for picnics, potlucks, or a quick family meal. If you like different pasta salads, try a tangy dill pickle pasta salad for a new twist. This dish is a crowd-pleaser, tasty, and simple, and you will want to make it again and again, so let’s get started and have some fun in the kitchen.

How to prepare Best Broccoli Pasta Salad

  1. Cook 12 ounces of pasta in salted water until just tender, drain and cool.
  2. Cut 3 cups of broccoli into small florets, blanch in boiling water for 1 minute, then cool in ice water to keep the color.
  3. In a large bowl, mix the cooled pasta and broccoli.
  4. Add 1 cup of halved cherry tomatoes, 1/2 cup sliced red onion, and 1/2 cup shredded cheddar or feta, if you like.
  5. In a jar, shake together 1 cup mayonnaise, 2 tablespoons lemon juice, 1 tablespoon honey, 1 teaspoon Dijon mustard, salt and pepper to taste.
  6. Pour the dressing over the pasta mix, toss well so everything is coated.
  7. Chill the salad for at least 30 minutes so the flavors blend.
  8. Taste and add more salt, pepper, or lemon if needed before serving.

Best Broccoli Pasta Salad

Why You’ll Love Best Broccoli Pasta Salad

  • It is crunchy and creamy, a nice mix of textures.
  • The broccoli stays bright and fresh, even after dressing.
  • You can make it ahead and save time on the day you need it.
  • It is easy to change, add chicken, bacon, or nuts for more protein.
  • It works for summer cookouts, school lunches, and weeknight dinners.

Tips for success

  • Do not overcook the broccoli, blanch briefly to keep crunch.
  • Cool the pasta before adding the dressing, to stop it from getting soggy.
  • Let the salad chill for at least 30 minutes so the flavors join.
  • Use fresh lemon juice for a brighter taste than bottled.
  • If you like a lighter sauce, mix half yogurt and half mayo.

Serving Suggestions

  • Serve on a picnic table with grilled chicken or burgers.
  • Put it in lunch boxes with a fork for an easy meal.
  • Top with toasted almonds or sunflower seeds for extra crunch.
  • Let guests add bacon bits or extra cheese at the table.

Best Broccoli Pasta Salad

FAQs

Q: How long will this pasta salad keep in the fridge? A: It will keep 3 to 4 days in a sealed container.

Q: Can I use frozen broccoli? A: Yes, just thaw and pat dry, but fresh blanched broccoli keeps the best texture.

Q: Can I make this salad without mayo? A: Yes, use plain yogurt or a mix of olive oil and lemon for a lighter dressing.

Q: Is this salad good for meal prep? A: Yes, make it ahead and store in the fridge, it holds up well for a few days.

Q: Can I add protein to make it a main dish? A: Yes, add cooked chicken, tuna, or chickpeas to make it more filling.

Conclusion

For another tested version and more tips on a classic, popular recipe, see the Broccoli Pasta Salad – Spend With Pennies page for extra ideas and a nice reference.

Broccoli Pasta Salad

A bright and crunchy salad made with tender pasta, crisp broccoli, and a creamy dressing that’s perfect for picnics, potlucks, or quick family meals.

Pasta and Vegetables

  • 12 ounces pasta (Cook in salted water until just tender.)
  • 3 cups broccoli florets (Cut into small florets and blanch briefly.)
  • 1 cup halved cherry tomatoes
  • 1/2 cup sliced red onion
  • 1/2 cup shredded cheddar or feta (Optional cheese.)

Dressing

  • 1 cup mayonnaise
  • 2 tablespoons lemon juice (Use fresh for better taste.)
  • 1 tablespoon honey
  • 1 teaspoon Dijon mustard
  • Salt and pepper to taste

Preparation

  1. Cook 12 ounces of pasta in salted water until just tender, drain, and cool.
  2. Cut 3 cups of broccoli into small florets, blanch in boiling water for 1 minute, then cool in ice water to keep the color.

Mixing

  1. In a large bowl, mix the cooled pasta and broccoli.
  2. Add 1 cup of halved cherry tomatoes, 1/2 cup sliced red onion, and 1/2 cup shredded cheddar or feta, if desired.

Dressing

  1. In a jar, shake together 1 cup mayonnaise, 2 tablespoons lemon juice, 1 tablespoon honey, 1 teaspoon Dijon mustard, salt, and pepper to taste.
  2. Pour the dressing over the pasta mix, and toss well so everything is coated.

Chilling

  1. Chill the salad for at least 30 minutes so the flavors blend.
  2. Taste and add more salt, pepper, or lemon if needed before serving.

Do not overcook the broccoli; blanch briefly to keep crunch. Cool the pasta before adding the dressing to prevent sogginess. Use fresh lemon juice for a brighter taste than bottled. For a lighter sauce, mix half yogurt and half mayo.

Salad, Side Dish
American
Broccoli Pasta Salad, Creamy Salad, pasta salad, Picnic Side, Vegetable Salad

Pineapple Cucumber Salad

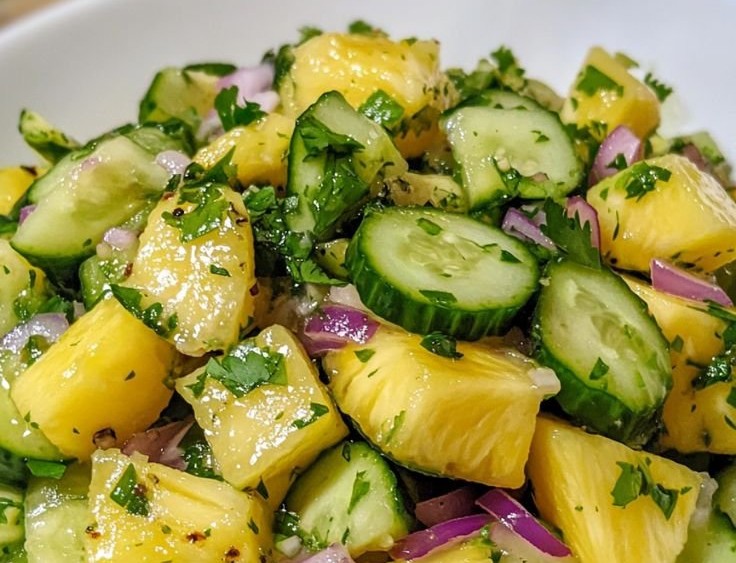
Fresh and vibrant pineapple cucumber salad in a bowl

Pineapple Cucumber Salad is fresh, bright, and easy to make. It mixes sweet pineapple with cool, crunchy cucumber for a light summer salad that many people will enjoy. The lime and a little honey add a tangy, sweet dressing that brings the flavors together. If you like simple cucumber salads with a kick, you might also enjoy an Asian spicy cucumber salad for a different, bold taste. This salad is a crowd pleaser, and you will smile when you taste the first forkful.

How to prepare Pineapple Cucumber Salad

Ingredients:

  • 2 cups fresh pineapple, cut into bite size pieces
  • 2 medium cucumbers, thinly sliced
  • 1 small red onion, thinly sliced
  • 1 lime, juiced
  • 1 tablespoon honey or maple syrup
  • 1 tablespoon chopped fresh mint or cilantro
  • Salt and black pepper, to taste

Directions:

  1. Put the pineapple and cucumber in a large bowl.
  2. Add the thin red onion slices.
  3. In a small bowl, mix lime juice and honey, stir until smooth.
  4. Pour the dressing over the pineapple and cucumber, toss gently.
  5. Add mint, salt, and pepper, mix once more.
  6. Let the salad sit for 5 to 10 minutes so the flavors come together, then serve.

Pineapple Cucumber Salad

Why You’ll Love Pineapple Cucumber Salad

  • Fresh and light, perfect for hot days.
  • Sweet pineapple pairs well with crisp cucumber for a great texture.
  • Quick to make, you can finish it in 10 minutes.
  • It works as a side dish, snack, or a simple lunch.
  • Uses few ingredients you likely already have.

Tips for success

  • Use ripe pineapple for the best sweet flavor.
  • Peel and seed the cucumber if you want a softer bite.
  • Slice ingredients thin so the dressing coats everything well.
  • Let the salad sit a few minutes before serving, the lime juice softens flavors.
  • Taste and adjust salt and honey, balance sweet and tangy to your liking.

Serving Suggestions

  • Serve with grilled chicken or fish for a light meal.
  • Add chopped avocado for creaminess.
  • Spoon over greens for a bigger salad.
  • Serve with tortilla chips as a fresh salsa style snack.
  • Pair with coconut rice to emphasize tropical flavors.

Pineapple Cucumber Salad

FAQs

Q: How long does this salad stay fresh? A: Keep it in an airtight container in the fridge, it stays fresh for 1 to 2 days. Cucumber can get soft, so eat it soon for best crunch.

Q: Can I use canned pineapple? A: Yes, drain the canned pineapple well. Fresh gives better texture and flavor, but canned will work in a pinch.

Q: Is this salad vegan? A: Yes, this recipe is vegan if you use maple syrup instead of honey.

Q: Can I add other fruits or vegetables? A: Yes, mango, bell pepper, or cherry tomatoes work well. Keep flavors simple so the pineapple and cucumber still shine.

Q: Can I make this ahead? A: You can chop ingredients ahead, but mix dressing just before serving to keep cucumber crisp.

Conclusion

This Pineapple Cucumber Salad is a simple, fresh dish you can make in minutes, and it brightens any meal with sweet and tangy flavors. For another take on cucumber salad ideas and inspiration, see this Pineapple Cucumber Salad – Mom On Timeout.

Pineapple Cucumber Salad

A fresh and bright summer salad that combines sweet pineapple with crunchy cucumber, dressed in a tangy lime and honey mix.

Main Ingredients

  • 2 cups fresh pineapple, cut into bite size pieces (Use ripe pineapple for the best flavor.)
  • 2 medium cucumbers, thinly sliced (Peel and seed if you want a softer bite.)
  • 1 small red onion, thinly sliced

Dressing Ingredients

  • 1 lime juiced (Use fresh lime juice for a bright flavor.)
  • 1 tablespoon honey or maple syrup (Maple syrup makes it vegan.)
  • 1 tablespoon chopped fresh mint or cilantro (Choose your preferred herb.)

Seasoning

  • to taste Salt and black pepper (Adjust according to preference.)

Preparation

  1. Put the pineapple and cucumber in a large bowl.
  2. Add the thin red onion slices.
  3. In a small bowl, mix lime juice and honey, stir until smooth.
  4. Pour the dressing over the pineapple and cucumber, toss gently.
  5. Add mint, salt, and pepper, and mix once more.
  6. Let the salad sit for 5 to 10 minutes so the flavors come together, then serve.

Let the salad sit a few minutes before serving to enhance the flavors. Taste and adjust salt and honey to balance sweet and tangy to your liking.

Salad, Side Dish
American, Vegan
Fresh Salad, Healthy Recipe, Pineapple Cucumber Salad, Quick Salad, summer salad

Easter Salad

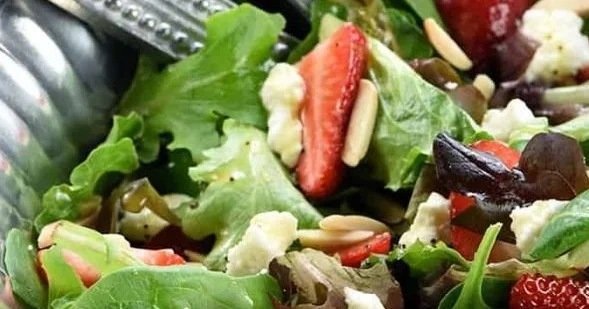
Colorful Easter salad with seasonal vegetables and eggs for a festive meal.

Easter salad can lift any Easter table, It mixes crisp greens, sweet strawberries, creamy goat cheese, and crunchy almonds for a light, colorful dish. The flavors feel like spring, easy to make, and loved by kids and grownups. If you enjoy fresh salads, you might also like this Asian spicy cucumber salad for a spicy twist. This Easter Salad is a crowd-pleaser that tastes sweet, tangy, and a little nutty, and it looks lovely on the table. Get your bowl ready, because this one is fun to make and hard to stop eating.

How to prepare Easter Salad

Ingredients (simple list)

  • 6 cups mixed salad greens, washed and dried
  • 1 cup sliced strawberries
  • 1/2 cup crumbled goat cheese, or feta if you prefer
  • 1/3 cup sliced almonds, toasted
  • 2 hard boiled eggs, sliced (optional, for Easter feel)
  • 2 tablespoons fresh lemon juice
  • 1 tablespoon honey
  • 3 tablespoons olive oil
  • Salt and black pepper, to taste

Directions, step by step

  1. Make the dressing, whisk lemon juice, honey, olive oil, a pinch of salt, and pepper in a small bowl until smooth.
  2. Toast the almonds in a dry pan over medium heat for 2 to 3 minutes, shake the pan so they do not burn, then set aside to cool.
  3. Toss the greens in a large bowl with half the dressing so leaves get a light coat.
  4. Add sliced strawberries and most of the goat cheese, toss gently to mix.
  5. Arrange salad on a serving plate, top with sliced eggs if using, toasted almonds, and the rest of the goat cheese.
  6. Drizzle extra dressing on top if you like, or serve it on the side for guests to add.
  7. Taste and add salt or pepper if needed, serve right away.

Easter Salad

Why You’ll Love Easter Salad

  • It looks bright and festive, perfect for spring and Easter gatherings.
  • The mix of sweet strawberries and tangy goat cheese gives a nice balance.
  • Toasted almonds add a good crunch, and lemon-honey dressing keeps it light.
  • It is easy to scale up for a crowd, and many parts you can prep ahead.

Tips for success

  • Dry the greens well, wet leaves make the salad soggy.
  • Toast almonds just until they smell nutty, they burn fast.
  • Add dressing right before serving to keep the salad crisp.
  • Use ripe strawberries for the best flavor, not too soft though.
  • If you make ahead, keep dressing and crunchy toppings separate until serving.

Serving Suggestions

  • Serve with a simple roast chicken or ham for an Easter meal.
  • Add sliced avocado or cucumber for extra creaminess and freshness.
  • Offer crusty bread or dinner rolls on the side.
  • For a vegetarian main, add cooked quinoa or chickpeas for protein.

Easter Salad

FAQs

Q: Can I use a different cheese?

A: Yes, feta or ricotta salata are good swaps if you do not have goat cheese.

Q: How far ahead can I prep this salad?

A: You can wash and dry the greens and slice strawberries a few hours ahead, keep dressing and nuts separate until serving.

Q: Can I make this dairy free?

A: Yes, skip the cheese and add extra nuts or seeds, or use a dairy-free cheese.

Q: What if strawberries are not in season?

A: Try thin apple slices, orange segments, or dried cranberries for sweet notes.

Conclusion

For a bright, spring-ready dish that guests will love, try a proven favorite like The BEST Easter Salad recipe on FIVEheartHOME, it has a similar fresh mix and a lovely lemon-honey vinaigrette.

Easter Salad

A colorful mix of crisp greens, sweet strawberries, creamy goat cheese, and crunchy almonds, perfect for Easter gatherings.

Salad Ingredients

  • 6 cups mixed salad greens, washed and dried (Use a mix of your favorite salad greens.)
  • 1 cup sliced strawberries (Use ripe strawberries for the best flavor.)
  • 1/2 cup crumbled goat cheese (Feta can be used as an alternative.)
  • 1/3 cup sliced almonds, toasted (Toast just until they smell nutty.)
  • 2 pieces hard boiled eggs, sliced (Optional for an Easter feel.)
  • 2 tablespoons fresh lemon juice (Freshly squeezed lemon juice is recommended.)
  • 1 tablespoon honey
  • 3 tablespoons olive oil (Use extra virgin olive oil for better flavor.)
  • to taste Salt and black pepper (Adjust according to preference.)

Preparation

  1. Make the dressing by whisking lemon juice, honey, olive oil, a pinch of salt, and pepper in a small bowl until smooth.
  2. Toast the almonds in a dry pan over medium heat for 2 to 3 minutes, shaking the pan to prevent burning, then set aside to cool.
  3. In a large bowl, toss the greens with half of the dressing to lightly coat the leaves.
  4. Gently mix in the sliced strawberries and most of the goat cheese.
  5. Arrange the salad on a serving plate and top with sliced eggs (if using), toasted almonds, and the remaining goat cheese.
  6. Drizzle extra dressing on top or serve it on the side for guests to add.
  7. Taste and adjust seasoning with salt or pepper if needed, and serve right away.

Dry the greens well to prevent sogginess. Add dressing just before serving to keep the salad crisp. You can prep some ingredients ahead but keep dressing and toppings separate until serving.

Salad, Side Dish
American, Mediterranean
Easter Salad, Fresh Ingredients, Healthy Salad, Light Meal, Spring Salad