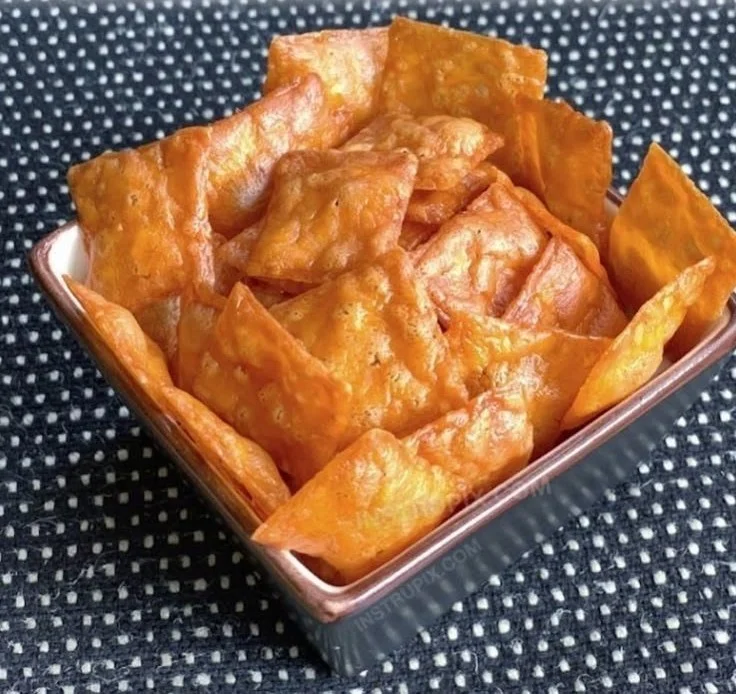
Crispy Onion Ring Chips

Crispy Onion Ring Chips are a delicious and addictive snack that everyone loves. They are perfect for parties, game nights, or just as a tasty treat at home. These onion ring chips have a satisfying crunch and a delightful flavor that will leave your taste buds wanting more. When you take a bite, you experience the savory onion taste combined with a crispy coating, making them a true crowd-pleaser. If you enjoy snacks that are easy to prepare and absolutely enjoyable, you are in for a treat. Get ready to whip up this irresistible recipe yourself!

How to prepare Crispy Onion Ring Chips

Making Crispy Onion Ring Chips is simple and fun. Here’s how you can prepare them quickly.

Crispy Onion Ring Chips

Ingredients:

  • 2 large onions
  • 1 cup of flour
  • 1 cup of breadcrumbs
  • 2 eggs
  • Salt and pepper to taste
  • Oil for frying

Directions:

  1. Start by slicing the onions into rings.
  2. In one bowl, whisk the eggs and season with salt and pepper.
  3. Place the flour in another bowl, and the breadcrumbs in a third bowl.
  4. Dip each onion ring first into the flour, then into the egg mixture, and finally into the breadcrumbs. Coat them well.
  5. Heat the oil in a frying pan over medium heat.
  6. Fry the coated onion rings until golden brown, about 2-3 minutes on each side.
  7. Remove them from the oil and place them on paper towels to drain excess oil.

Crispy Onion Ring Chips

Why You’ll Love Crispy Onion Ring Chips

One bite of these Crispy Onion Ring Chips and you’ll understand why they are such a hit. They’re crunchy, flavorful, and can be enjoyed on their own or as a perfect side to burgers and sandwiches. The combination of textures gives you that satisfying crunch in every mouthful. Plus, they are easy to customize; you can add your favorite spices or dips, making them even more enjoyable. You might even want to pair them with some delicious recipes, like this panko chicken for an extra special meal.

Tips for success

To make the best Crispy Onion Ring Chips, keep these tips in mind:

  • Make sure your oil is hot enough before frying, so the onion rings cook evenly and get that golden-brown color.
  • You can use different types of breading if you’d like, such as seasoned panko or crushed cornflakes for a variation in texture.
  • For a healthier option, consider baking the onion rings in the oven instead of frying, just remember to spray them lightly with oil for that crunch!

Crispy Onion Ring Chips

Serving Suggestions

Crispy Onion Ring Chips can be served as a standalone snack, or with a variety of dips like ranch dressing, barbecue sauce or even spicy ketchup. They also make a great side dish alongside burgers, sandwiches, or salads. Try mixing them into your favorite salad for an unexpected crunch!

FAQs

Can I bake these onion ring chips instead of frying them?

Yes, you can! For a healthier version, bake them in the oven at 425°F (220°C) for about 15-20 minutes, flipping halfway through for even crispiness.

What type of onion is best for onion rings?

Yellow onions are commonly used for their sweet flavor, but you can also use red onions for a milder taste or even sweet onions like Vidalia for extra sweetness.

Can I store leftover onion ring chips?

While they are best fresh, you can store them in an airtight container for up to 2 days. To maintain their crunch, reheating in the oven is recommended.

Crispy Onion Ring Chips

Crispy Onion Ring Chips are a delicious and addictive snack that are easy to prepare and perfect for any occasion.

Main Ingredients

  • 2 large large onions (Yields crispy onion rings.)
  • 1 cup flour
  • 1 cup breadcrumbs (Can use panko for extra crunch.)
  • 2 pieces eggs (Whisked for coating.)
  • Salt and pepper to taste
  • as needed Oil for frying (Ensure oil is hot before frying.)

Preparation

  1. Start by slicing the onions into rings.
  2. In one bowl, whisk the eggs and season with salt and pepper.
  3. Place the flour in another bowl, and the breadcrumbs in a third bowl.
  4. Dip each onion ring first into the flour, then into the egg mixture, and finally into the breadcrumbs. Coat them well.

Cooking

  1. Heat the oil in a frying pan over medium heat.
  2. Fry the coated onion rings until golden brown, about 2-3 minutes on each side.
  3. Remove them from the oil and place them on paper towels to drain excess oil.

For a healthier option, consider baking the onion rings in the oven at 425°F (220°C) for about 15-20 minutes, flipping halfway through.

Appetizer, Snack
American
Crispy Snacks, Fried Snacks, Onion Rings, Party Food

Crab Rangoon Egg Rolls

These Crab Rangoon Egg Rolls are a crispy, creamy fusion appetizer you’ll love! Imagine biting into a perfectly fried egg roll, only to find a delicious mixture of rich crab meat and cream cheese inside. This delightful treat is not only a crowd-pleaser but also a fun way to switch up your typical appetizer game. With their crunchy exterior and savory filling, these egg rolls bring an irresistible taste experience to any gathering. Trust me, once you try these, you’ll be excited to share this recipe with family and friends!

How to Prepare Crab Rangoon Egg Rolls

To make these tasty crab rangoon egg rolls, you’ll need some basic ingredients. The preparation is quite simple, allowing you to enjoy the cooking process. Start by mixing crab meat with cream cheese, green onions, garlic, and seasoning. Once everything is blended nicely, you’ll wrap the mixture in egg roll wrappers and then fry them until golden brown.

These Crab Rangoon Egg Rolls are a crispy, creamy fusion appetizer you’ll love! Filled with a rich blend of crab meat, c… | What to serve with crab egg rolls, Crab and onion egg rolls, Crab and egg egg roll

Why You’ll Love Crab Rangoon Egg Rolls

You will love these crab rangoon egg rolls for many reasons. First, they are wonderfully crispy on the outside, making every bite delightful. The creamy filling is packed with flavor, and the hint of garlic enhances the overall taste. Additionally, they are perfect as a party snack or a dish to enjoy during game nights. Feeling adventurous? Try pairing them with a sweet chili sauce for an added kick. For more tasty ideas, check out these Mediterranean Quesadillas that also make great appetizers.

Tips for Success

  1. Make sure your oil is hot enough before frying the egg rolls to achieve that perfect crispy texture.
  2. Do not overfill the wrappers, as this can cause them to burst while frying.
  3. Allow your egg rolls to drain on a paper towel after frying to remove excess oil.

Always remember to serve these amazing egg rolls with your favorite dipping sauce to enhance their flavor.

Serving Suggestions

Serve these crab rangoon egg rolls with a side of sweet and sour sauce or a spicy chili sauce for a delicious dipping experience. They also pair well with a refreshing salad or some bright, tangy pickled vegetables. Your guests will love trying them with different sauces!

FAQs

Can I bake these egg rolls instead of frying them?

Yes, you can bake them! Brush them with oil and bake at 425°F for about 20 minutes, flipping halfway through.
Can I use imitation crab meat?

Absolutely! Imitation crab meat can be a cost-effective substitute, and it will still taste delicious in the filling.

How do I store leftovers?

Store any leftovers in an airtight container in the refrigerator for up to three days. Reheat them in the oven for the best texture.

Crab Rangoon Egg Rolls

These Crab Rangoon Egg Rolls are a delicious fusion appetizer filled with crab meat and cream cheese, perfectly fried for a crispy exterior and savory filling.

For the Filling

  • 8 oz crab meat
  • 8 oz cream cheese (softened)
  • 2 tbls green onions (finely chopped)
  • 1 clove garlic (minced)
  • to taste seasoning (such as salt and pepper)

For Frying

  • 12 pieces egg roll wrappers
  • 2 cups oil (for frying)

Preparation

  1. In a bowl, mix the crab meat, cream cheese, green onions, garlic, and seasoning until well blended.
  2. Take an egg roll wrapper and place about 2 tablespoons of the filling in the center.
  3. Fold the bottom of the wrapper over the filling, then fold in the sides and roll tightly to seal.

Frying

  1. Heat oil in a deep fryer or large pot to 350°F (175°C).
  2. Carefully add the egg rolls to the hot oil, a few at a time, and fry until golden brown, about 3-4 minutes.
  3. Remove egg rolls from oil and drain on paper towels.

For an added kick, serve with sweet chili sauce. Make sure your oil is hot enough for perfect crispiness. Do not overfill wrappers to prevent bursting. Refrigerate leftovers for up to three days and reheat in the oven.

Appetizer, Snack
Fusion
Appetizer, Crab Rangoon, Egg Rolls, Fried Snacks, Party Food

Crispy Air Fryer Apple Fries

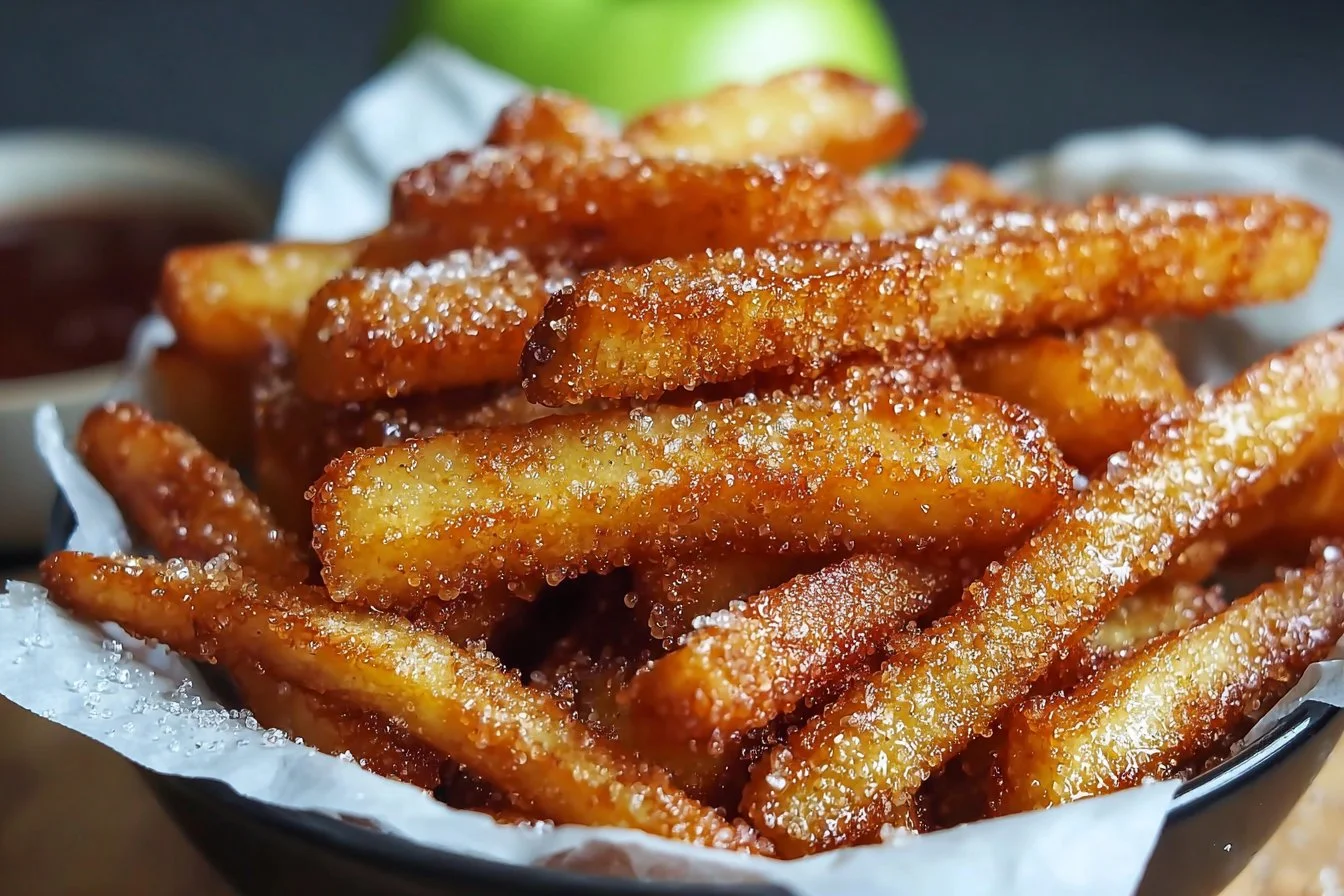
Crispy air fryer apple fries garnished and ready to serve.

Making Crispy Air Fryer Apple Fries is a delightful experience you won’t want to miss. These treats are sweet, crunchy, and perfect for both kids and adults alike. Whether you’re looking for a fun snack or a creative way to use up those apples, this recipe is sure to become a favorite. With every bite, you’ll get a delicious taste of warm apples enveloped in a crispy coating, giving you both comfort and joy. Plus, because they are made in an air fryer, you can enjoy a lighter version without sacrificing any flavor. So, roll up your sleeves and get ready to make a treat that is not only easy to prepare but also sure to impress your friends and family!

How to Prepare Crispy Air Fryer Apple Fries

To make Crispy Air Fryer Apple Fries, start by gathering your ingredients. You will need 2 large apples, 1 cup of all-purpose flour, 2 large eggs, 1 cup of breadcrumbs, 1 teaspoon of cinnamon, and a pinch of salt. First, peel and core the apples, then slice them into thin strips, resembling fries. In three separate bowls, place the flour in one bowl, beat the eggs in another, and mix breadcrumbs with cinnamon and salt in the third.

Next, take each apple strip and dip it into the flour, then the eggs, and finally coat it with the breadcrumb mixture. Make sure each strip is well coated for that perfect crunch. Place the coated apple fries in the air fryer basket in a single layer. Set the temperature to 375°F and cook for about 10-12 minutes or until golden brown and crispy, shaking the basket halfway through to ensure even cooking. Once done, let them cool for a few moments, and they are ready to enjoy!

Why You’ll Love Crispy Air Fryer Apple Fries

There are so many reasons to love Crispy Air Fryer Apple Fries! First of all, they are incredibly easy to whip up, making them a perfect go-to snack or dessert. The combination of sweet apples with a crunchy coating is simply irresistible. These apple fries are not only tasty but also offer a healthier alternative to traditional fried desserts, as they are made with minimal oil.

Moreover, they are versatile! You can serve them as a dessert or a quick snack and even dip them in caramel sauce or yogurt for an extra treat. Kids will enjoy helping in the kitchen, making it a fun cooking experience for the whole family. Best of all, these fries look impressive, making them a great crowd-pleaser at gatherings. Who wouldn’t want to dive into a plate of warm, crispy apple fries?

Tips for Success

To ensure your Crispy Air Fryer Apple Fries turn out perfect, here are some helpful tips. First, choose the right apples. Varieties like Fuji or Honeycrisp work best because they hold their shape and sweetness well when cooked. Make sure to slice the apple strips evenly so they cook uniformly.

Don’t overcrowd the air fryer basket; give the fries some space to crisp up nicely. If you have a lot, consider cooking in batches. Another tip is to spray the apple fries with a light coating of cooking oil before air frying. This will help them achieve a beautifully golden and crispy texture. Lastly, serve them immediately after cooking for the best taste and texture. Enjoying them warm is part of the fun!

Serving Suggestions

Crispy Air Fryer Apple Fries lend themselves well to a variety of serving suggestions. For a fun twist, serve them with a side of caramel sauce or chocolate dip; kids love it! You can also pair them with yogurt or whipped cream for a light dessert option. For added flair, dust the apple fries with powdered sugar or a sprinkle of cinnamon after they’re cooked.

These apple fries are great as a playful snack for gatherings, picnics, or even movie nights at home. You can serve them on a festive platter, adding slices of fresh fruit or nuts for color. They also make a tasty addition to brunch, offering something sweet alongside savory dishes. No matter how you serve them, these apple fries are sure to bring a smile!

FAQs

1. Can I use other types of fruit?

Yes! You can try using pears or even bananas for a different take on this recipe. Just be mindful of the cooking time, as softer fruits may require less time in the air fryer.

2. How do I store leftover apple fries?

Store any leftover apple fries in an airtight container in the refrigerator. They are best enjoyed fresh, but you can reheat them for a quick snack the next day.

3. Can I make these apple fries gluten-free?

Absolutely! Replace all-purpose flour with your favorite gluten-free flour and use gluten-free breadcrumbs. They will still taste delicious!

4. What can I add to the coating for more flavor?

You could mix in some sugar, nutmeg, or even vanilla extract to the egg mixture for added flavor. Experimenting with spices can give your fries a unique twist!

5. Can I make these without an air fryer?

Yes, you can bake them in a traditional oven. Preheat the oven to 400°F and bake them on a parchment-lined baking sheet for about 15-20 minutes, flipping halfway through.

[tasty-recipe id=”5039″]

Crispy Air Fryer Apple Fries

Enjoy these delightful, crunchy apple fries, made healthier in an air fryer without sacrificing flavor. Perfect as a snack or dessert for all ages.

Main Ingredients

  • 2 large apples (Varieties like Fuji or Honeycrisp are recommended for their sweetness and ability to hold shape.)
  • 1 cup all-purpose flour (Can be substituted with gluten-free flour for a gluten-free version.)
  • 2 large eggs (Beaten for coating.)
  • 1 cup breadcrumbs (Use gluten-free breadcrumbs for a gluten-free version.)
  • 1 teaspoon cinnamon (For flavor enhancement.)
  • 1 pinch salt (To taste.)

Optional Serving Suggestions

  • caramel sauce (For dipping.)
  • yogurt or whipped cream (For a lighter dessert option.)
  • powdered sugar (For dusting on cooked fries.)
  • chocolate dip (Another fun dipping option.)

Preparation

  1. Peel and core the apples, then slice them into thin strips resembling fries.
  2. In the first bowl, place the flour. In the second bowl, beat the eggs. In the third bowl, mix breadcrumbs with cinnamon and salt.

Coating

  1. Dip each apple strip into the flour, then the eggs, and finally coat with the breadcrumb mixture, ensuring each strip is well coated.

Cooking

  1. Place the coated apple fries in the air fryer basket in a single layer.
  2. Set the temperature to 375°F (190°C) and cook for about 10-12 minutes or until golden brown and crispy, shaking the basket halfway through.
  3. Let the apple fries cool for a few moments before serving.

For best results, do not overcrowd the air fryer basket. If needed, cook in batches. Spray the apple fries lightly with cooking oil before air frying for added crispiness. These fries are best served warm.

Dessert, Snack
American
Air Fryer, Apple Fries, Dessert, Easy Recipe, Healthy Snack

Crispy Cheese Squares

Crispy cheese squares served on a plate, golden and delicious.

Crispy Cheese Squares are a warm, tasty snack that feels like a little party in your mouth. The outside turns golden and crunchy, the inside stays cheesy and full of flavor. This recipe is a crowd-pleaser at parties, a quick appetizer, or a simple treat for movie night. It is easy to make, needs few ingredients, and gives you that salty, cheesy crunch everyone loves. If you like quick cheese snacks, you might also enjoy a similar simple bake like 2-ingredient cottage cheese bread. Get ready to bake a tray of crunchy, melty joy, and have fun making them for friends or family.

How to prepare Crispy Cheese Squares

Ingredients

  • 2 cups shredded sharp cheddar cheese
  • 1/2 teaspoon garlic powder
  • 1/4 teaspoon paprika
  • A pinch of salt and pepper
  • Optional, chopped fresh parsley for garnish

Directions

  1. Preheat your oven to 400°F (200°C). Line a baking sheet with parchment paper.
  2. Mix the shredded cheese with garlic powder, paprika, salt, and pepper in a bowl.
  3. Scoop about 1 tablespoon of the cheese mixture and place it on the baking sheet, leaving space between each scoop. Flatten each scoop slightly into a square shape with the back of a spoon.
  4. Bake for 6 to 8 minutes, or until the edges turn golden brown and the cheese looks bubbly and crisp.
  5. Let the squares cool on the sheet for 2 minutes, then transfer to a wire rack to finish crisping.
  6. Garnish with parsley if you want, and serve warm or at room temperature.

Crispy Cheese Squares

Why You’ll Love Crispy Cheese Squares

You will love these crispy cheese squares because they are fast, cheesy, and crunchy. They use simple pantry ingredients and take only minutes to bake. They are low-carb and full of flavor, so they make a great snack, appetizer, or party bite. The cheese browns and becomes crisp, giving a strong, salty cheese taste that most people enjoy.

Tips for success

  • Use sharp cheddar or another strong cheese for better flavor and crisping.
  • Shred the cheese yourself if you can, it melts and crisps better than pre-shredded cheese with anti-caking agents.
  • Make each square about the same size so they bake evenly.
  • Do not bake too long, the edges should be golden, not burnt.
  • Let them cool fully on a rack to get maximum crispness.

Serving Suggestions

  • Serve with a small bowl of marinara sauce for dipping.
  • Add a sprinkle of chili flakes or paprika on top for a spicy kick.
  • Pair with fresh veggies for a simple appetizer plate.
  • Use them as a crunchy topping for salads or soups for an extra cheese crunch.

Crispy Cheese Squares

FAQs

Q: How long do they stay crispy? A: Stored in an airtight container at room temperature, they stay crisp for 1 to 2 days. If they soften, re-crisp in a hot oven for a few minutes.

Q: Can I use other cheeses? A: Yes, Parmesan, Asiago, or a mix with cheddar works well. Hard cheeses crisp best.

Q: Are these gluten free? A: Yes, the basic cheese squares are gluten free, if you use only cheese and spices.

Q: Can I make them larger or smaller? A: Yes, adjust the scoop size, but check baking time, larger squares may need a bit longer.

Conclusion

For another simple cheese crisp idea, see this Basic Keto Cheese Crisps Recipe – Allrecipes, it has tips that pair well with this recipe. Enjoy your crispy, cheesy snack and share with friends.

Crispy Cheese Squares

Crispy Cheese Squares are a warm, tasty snack that offers a crunchy exterior with a cheesy interior, making them the perfect appetizer or party treat.

Main Ingredients

  • 2 cups shredded sharp cheddar cheese (Use freshly shredded cheese for best results.)
  • 1/2 teaspoon garlic powder
  • 1/4 teaspoon paprika
  • a pinch salt and pepper (Adjust to taste.)
  • chopped fresh parsley (Optional, for garnish.)

Preparation

  1. Preheat your oven to 400°F (200°C). Line a baking sheet with parchment paper.
  2. Mix the shredded cheese with garlic powder, paprika, salt, and pepper in a bowl.
  3. Scoop about 1 tablespoon of the cheese mixture and place it on the baking sheet, leaving space between each scoop. Flatten each scoop slightly into a square shape with the back of a spoon.

Baking

  1. Bake for 6 to 8 minutes, or until the edges turn golden brown and the cheese looks bubbly and crisp.
  2. Let the squares cool on the sheet for 2 minutes, then transfer to a wire rack to finish crisping.

Serving

  1. Garnish with parsley if desired, and serve warm or at room temperature.

Use sharp cheddar for better flavor. Shred your cheese fresh for best melting. Bake until golden, but watch for burning. Store in an airtight container for up to 1-2 days.

Appetizer, Snack
American
Cheese Snack, Crispy Cheese Squares, Low-Carb Snack, Party Appetizer, Quick Appetizer