No-Churn Mulberry Ice Cream

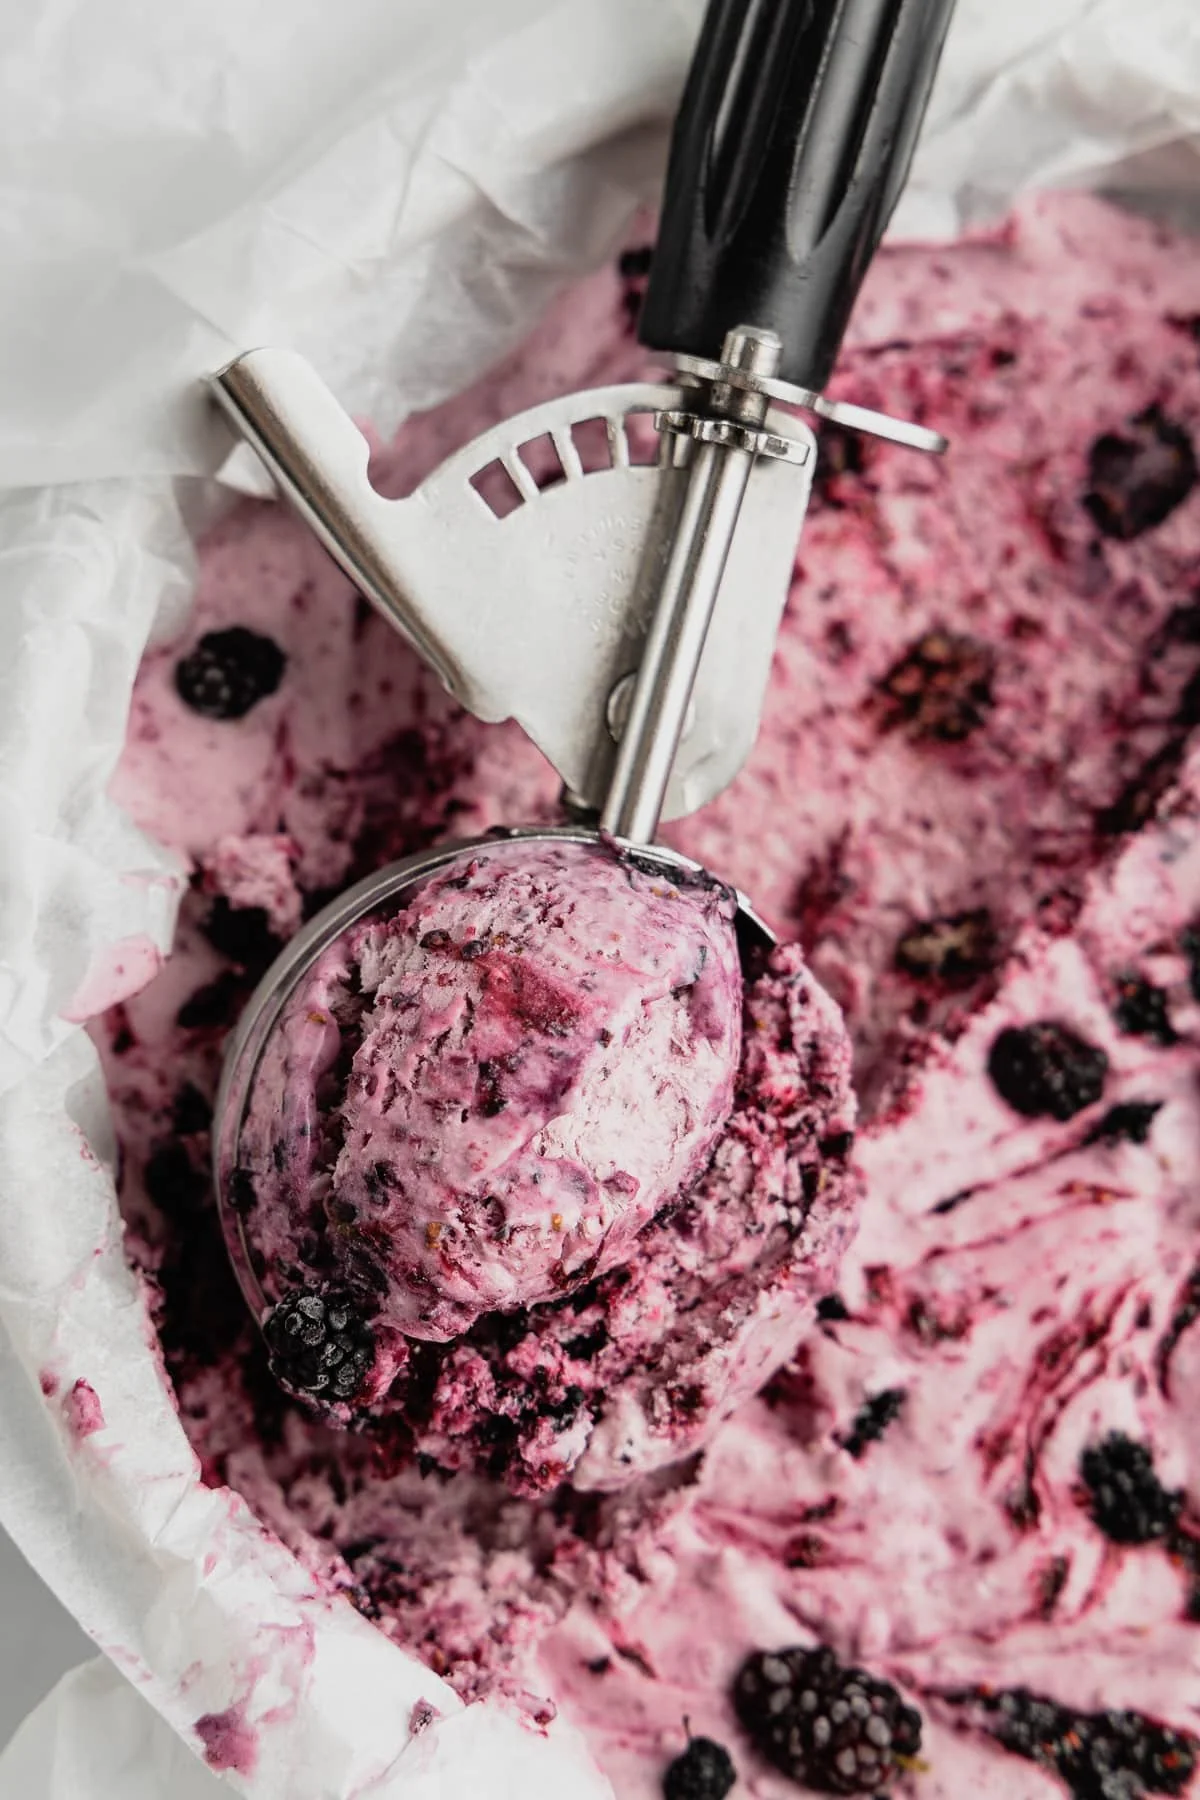
Delicious homemade no-churn mulberry ice cream in a bowl

Mulberries are a delightful fruit that can turn any recipe into something special, and when they are transformed into a creamy, dreamy ice cream, they truly shine. No-Churn Mulberry Ice Cream is the perfect treat for warm days and gatherings with friends and family. This easy recipe is not only delicious but also doesn’t require an ice cream maker, making it accessible for everyone. The sweet and slightly tangy flavor of mulberries combined with rich cream creates a crowd-pleaser that is sure to leave everyone asking for seconds. So, grab your mixing bowl and get ready to make something fun and tasty!

How to prepare No-Churn Mulberry Ice Cream

To prepare your No-Churn Mulberry Ice Cream, you will need the following ingredients:

  • 2 cups fresh mulberries, washed and stems removed
  • 1 cup heavy cream
  • 1 can (14 oz) sweetened condensed milk
  • 1 teaspoon vanilla extract
  • A pinch of salt
  1. In a blender, puree the mulberries until smooth. Set aside a few whole mulberries for garnish.
  2. In a mixing bowl, combine the heavy cream, sweetened condensed milk, vanilla extract, and salt. Beat with an electric mixer until the mixture is thick and smooth.
  3. Gently fold the mulberry puree into the cream mixture until well combined. Be careful not to over-mix; you want to keep that beautiful color.
  4. Pour the mixture into a freezer-safe container and spread it evenly.
  5. Cover with a lid or plastic wrap and freeze for at least 6 hours, or until firm.
  6. Scoop into bowls and top with reserved whole mulberries for a pretty and tasty finish.

No-Churn Mulberry Ice Cream

Why You’ll Love No-Churn Mulberry Ice Cream

This No-Churn Mulberry Ice Cream is a delightful balance of creamy and fruity flavors. It’s simple to make, and you can impress your guests with a homemade dessert that feels indulgent. Plus, using fresh mulberries not only adds a unique twist but also provides a burst of nutrients. Whether you are enjoying it on a hot summer day or serving it as a sweet treat after dinner, this ice cream is sure to be a hit.

Tips for success

  • For the best flavor, use ripe mulberries that are sweet and juicy.
  • If you don’t have mulberries, feel free to substitute them with other berries like blackberries or raspberries.
  • Make sure to whip the cream well for a light and fluffy texture.

Serving Suggestions

Serve your No-Churn Mulberry Ice Cream in waffle cones for a fun experience, or pour it into bowls topped with chocolate syrup, chopped nuts, or fresh mint. You can also accompany it with a slice of your favorite cake, or use it to make a stunning sundae with various toppings.

FAQs

  1. Can I use frozen mulberries for this recipe? Yes, frozen mulberries can be used, but be sure to thaw and drain them before blending.
  2. How long does this ice cream last in the freezer? Properly stored, No-Churn Mulberry Ice Cream can last for about 2-3 weeks in the freezer.
  3. Can I make this ice cream dairy-free? You can use coconut cream and a dairy-free sweetened condensed milk alternative for a dairy-free version of this recipe.

If you’re looking for more delicious recipes, check out this creamy chicken and rice dish that pairs perfectly with your sweet ice cream treat. Enjoy your homemade No-Churn Mulberry Ice Cream and share it with loved ones!

No-Churn Mulberry Ice Cream

A delightful creamy ice cream made with fresh mulberries that’s easy to prepare without an ice cream maker.

For the Ice Cream Base

  • 1 cup heavy cream (Whipped well for light texture.)
  • 1 can sweetened condensed milk
  • 1 teaspoon vanilla extract
  • a pinch salt

For the Mulberry Puree

  • 2 cups fresh mulberries, washed and stems removed (Set aside a few for garnish.)

Preparation

  1. In a blender, puree the mulberries until smooth. Set aside a few whole mulberries for garnish.
  2. In a mixing bowl, combine the heavy cream, sweetened condensed milk, vanilla extract, and salt. Beat with an electric mixer until the mixture is thick and smooth.
  3. Gently fold the mulberry puree into the cream mixture until well combined, being careful not to over-mix.

Freezing

  1. Pour the mixture into a freezer-safe container and spread it evenly.
  2. Cover with a lid or plastic wrap and freeze for at least 6 hours or until firm.

Serving

  1. Scoop into bowls and top with reserved whole mulberries for a pretty and tasty finish.

For the best flavor, use ripe mulberries that are sweet and juicy. If you don’t have mulberries, you can substitute them with other berries like blackberries or raspberries. Properly stored, the ice cream can last for 2-3 weeks in the freezer.

Dessert
American
dessert recipe, Easy Ice Cream, Mulberry Ice Cream, No-Churn Ice Cream, Summer Dessert

Creamy Sausage Rigatoni (One-Pan, 30-Minute Meal)

Creamy sausage rigatoni served in a bowl, garnished with parsley.

There’s something truly special about a hearty pasta dish that brings everyone together. Creamy Sausage Rigatoni is just that, a warm and comforting recipe that is sure to please family and friends alike. With its rich flavors and creamy sauce, this one-pan meal is quick to make and even quicker to disappear from the table. It combines savory sausage, perfectly cooked rigatoni, and a luscious cream sauce that creates a delightful harmony of taste. Plus, it can be whipped up in just 30 minutes, making it perfect for those busy weeknights when you want something delicious but don’t have much time. You’ll be ready to dive in before you know it!

How to prepare Creamy Sausage Rigatoni

To start, gather your ingredients. You will need rigatoni pasta, Italian sausage, garlic, onion, heavy cream, and some seasonings. Begin by cooking the sausage in a large skillet until browned, then add in the chopped onions and garlic. Sauté them until soft, which will fill your kitchen with an irresistible aroma. Next, add the rigatoni and enough water to cook the pasta. Stir everything together, ensuring the pasta absorbs all those flavorful juices. Once the rigatoni is tender, pour in the heavy cream and mix well until you achieve that creamy texture.

Don’t forget, this recipe is so easy and requires just one pan, meaning less cleanup is a huge bonus!

Creamy Sausage Rigatoni (One-Pan, 30-Minute Meal)

Why You’ll Love Creamy Sausage Rigatoni

This dish shines as a crowd-pleaser, combining simplicity and flavor in every bite. The creaminess balances perfectly with the spicy sausage, making it a great option for all taste buds. Plus, it’s adaptable with other ingredients you might have on hand, like spinach or bell peppers. This flexibility is especially helpful for families, allowing you to cater to different preferences or use up leftover veggies. With such an appealing and satisfying meal, who wouldn’t love Creamy Sausage Rigatoni?

Tips for success

  • Make sure to cook the sausage thoroughly before adding the other ingredients. This helps develop a rich flavor.
  • Don’t hesitate to adjust the creaminess by adding more or less heavy cream, depending on your preference.
  • To avoid overcooking the pasta, keep an eye on it as it simmers in the skillet.
  • For added flavor, sprinkle some Parmesan cheese on top before serving.

Serving Suggestions

Serve your Creamy Sausage Rigatoni warm with a simple side salad or some fresh garlic bread. A light, crisp green salad can balance out the richness of the dish nicely. You could also pair it with a glass of white wine for a lovely dinner experience. It’s great for family dinners or even casual gatherings with friends, ensuring everyone walks away satisfied.

FAQs

  1. Can I use a different type of pasta?
  2. Absolutely! You can substitute with penne, fusilli, or any pasta you have on hand.
  3. Is it possible to make this dish dairy-free?
  4. Yes, you can replace heavy cream with coconut milk or a dairy-free cream alternative to keep it creamy without the dairy.
  5. How can I store leftovers?
  6. Store any leftovers in an airtight container in the fridge for up to 3 days. Reheat on the stove with a splash of water or cream to keep it moist.

Check out this link for more delicious pasta recipes that will surely delight your taste buds!

Now that you have this quick and easy recipe, it’s your turn to bring a taste of comfort into your kitchen with Creamy Sausage Rigatoni! Happy cooking!

Creamy Sausage Rigatoni

A warm and comforting one-pan pasta dish that combines savory sausage, rigatoni, and a luscious cream sauce, perfect for busy weeknights.

Main Ingredients

  • 12 ounces rigatoni pasta
  • 1 pound Italian sausage (Cooked until browned.)
  • 2 cloves garlic (Chopped.)
  • 1 medium onion (Chopped.)
  • 1 cup heavy cream (Adjust according to desired creaminess.)

Seasonings

  • to taste salt and pepper
  • optional Parmesan cheese (For serving.)

Preparation

  1. Cook the sausage in a large skillet over medium heat until browned.
  2. Add the chopped onions and garlic, sautéing until softened.
  3. Stir in the rigatoni and enough water to cook the pasta, ensuring it absorbs the flavorful juices.
  4. Once the rigatoni is tender, pour in the heavy cream and mix well until creamy.

This dish can be adapted with other ingredients like spinach or bell peppers. Store any leftovers in an airtight container in the fridge for up to 3 days. Reheat on the stove with a splash of water or cream.

Dinner, Main Course
Italian
Comfort Food, Creamy Pasta, Easy Dinner, One-Pan Meal, Sausage Rigatoni

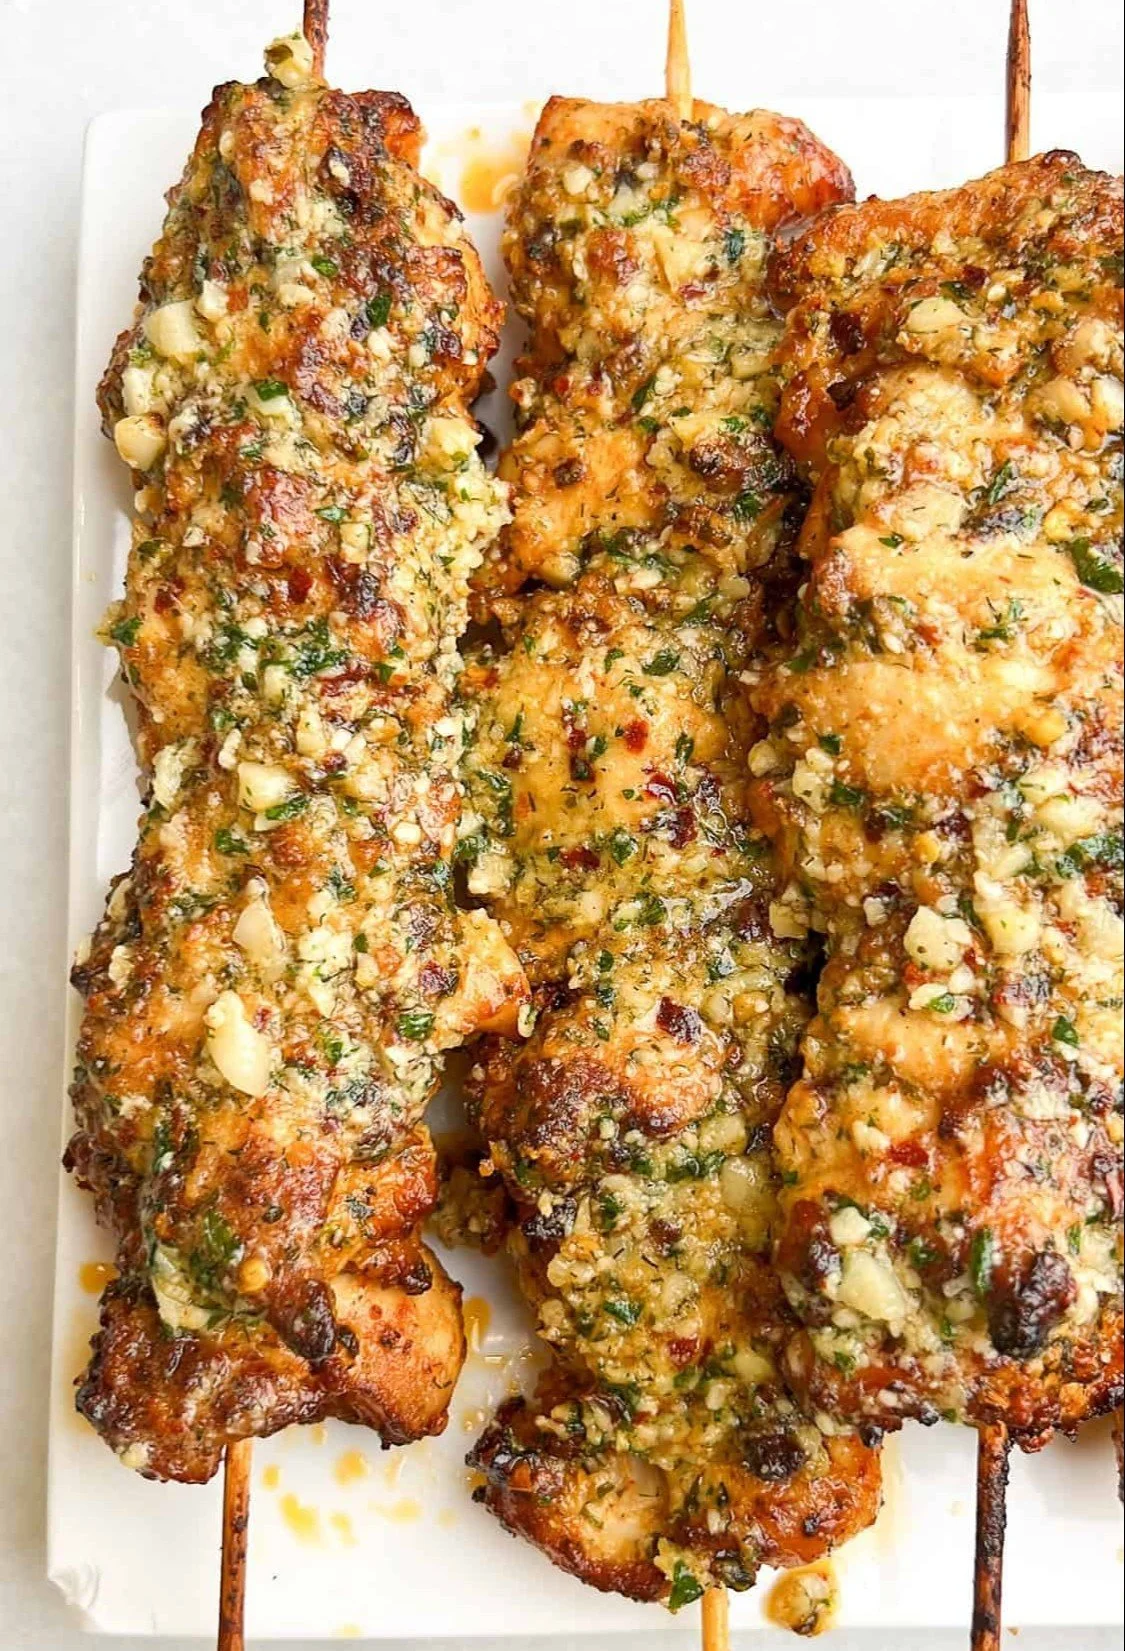
Ranch Garlic Parmesan Chicken Skewers

Ranch garlic parmesan chicken skewers grilled to perfection

Ranch Garlic Parmesan Chicken Skewers are a delightful treat that bring together savory flavors everyone loves. Imagine juicy pieces of chicken coated in a creamy ranch dressing, sprinkled with zesty garlic and Parmesan cheese, then grilled to perfection. This dish not only makes for a perfect weeknight meal but also serves as a fantastic party snack. Friends and family will gather around the grill, drawn in by the mouthwatering aroma of these tasty skewers. Get ready for some delicious bites that will have everyone asking for seconds!

How to prepare Ranch Garlic Parmesan Chicken Skewers

To make these scrumptious skewers, gather your ingredients and follow these easy steps:

  1. Ingredients:
  • 2 pounds of chicken breast, cut into bite-sized pieces
  • 1 cup of ranch dressing
  • 1 teaspoon of garlic powder
  • 1/2 cup of grated Parmesan cheese
  • Salt and pepper to taste
  • Skewers (wooden or metal)
  1. Directions:
  • In a bowl, combine the ranch dressing, garlic powder, salt, and pepper.
  • Add the chicken pieces to the bowl and mix well. Let it marinate for at least 30 minutes, or longer for more flavor.
  • Preheat your grill to medium heat.
  • Thread the marinated chicken onto skewers, leaving some space between each piece.
  • Grill the skewers for about 15-20 minutes, turning occasionally, until the chicken is cooked through.
  • In the last few minutes of grilling, sprinkle the grated Parmesan cheese over the chicken skewers for an extra cheesy touch.
  • Remove from the grill and let cool slightly before serving.

Ranch Garlic Parmesan Chicken Skewers

Why You’ll Love Ranch Garlic Parmesan Chicken Skewers

These Ranch Garlic Parmesan Chicken Skewers are loaded with flavor and texture. The creamy ranch dressing pairs beautifully with the savory cheese and tender chicken. As they grill, the edges become slightly crispy while the inside stays juicy. They are perfect for any occasion, whether it’s a family dinner or a backyard barbecue. Plus, the ease of preparation means you can whip them up quickly, making them a hit for busy nights or spontaneous gatherings.

If you enjoy easy chicken recipes, you might also like this air fryer chicken Parmesan which delivers delicious chicken with minimal effort!

Tips for success

  • Soak wooden skewers in water for about 30 minutes before grilling to prevent them from burning.
  • Don’t skip on the marinating time, as it enhances the flavor of the chicken.
  • Keep the grill at medium heat to ensure the chicken cooks evenly without burning.

Serving Suggestions

These skewers can stand alone as a tasty appetizer, but they also pair well with various sides. Serve them with a fresh garden salad, grilled vegetables, or even over a bed of seasoned rice. A dip of extra ranch dressing on the side will surely please everyone too!

FAQs

Can I use other types of meat?

Yes, you can substitute chicken with shrimp or even tofu for a vegetarian option.

How long can I marinate the chicken?

It’s best to marinate for at least 30 minutes, but you can keep it in the refrigerator for up to 2 hours for deeper flavors.

Can I bake these skewers instead of grilling?

Absolutely! Preheat your oven to 400°F (200°C) and bake them on a lined baking sheet for about 20-25 minutes, until fully cooked.

These Ranch Garlic Parmesan Chicken Skewers are a simple yet delicious way to enjoy a flavorful meal. Perfect for any occasion, your friends and family will love these tasty bites! So, gather your ingredients and get ready to grill up some mouthwatering skewers that are sure to impress. Enjoy!

Ranch Garlic Parmesan Chicken Skewers

Juicy chicken pieces marinated in creamy ranch dressing, zesty garlic, and Parmesan cheese, grilled to perfection for a delightful treat.

Marinade

  • 1 cup ranch dressing
  • 1 teaspoon garlic powder
  • Salt and pepper to taste (Adjust according to preference)

Chicken

  • 2 pounds chicken breast, cut into bite-sized pieces

Toppings

  • 1/2 cup grated Parmesan cheese (Add during last few minutes of grilling)

Skewers

  • Skewers (wooden or metal) (Soak wooden skewers in water for about 30 minutes before grilling)

Preparation

  1. In a bowl, combine the ranch dressing, garlic powder, salt, and pepper.
  2. Add the chicken pieces to the bowl and mix well. Let it marinate for at least 30 minutes, or longer for more flavor.

Grilling

  1. Preheat your grill to medium heat.
  2. Thread the marinated chicken onto skewers, leaving some space between each piece.
  3. Grill the skewers for about 15-20 minutes, turning occasionally, until the chicken is cooked through.
  4. In the last few minutes of grilling, sprinkle the grated Parmesan cheese over the chicken skewers.
  5. Remove from the grill and let cool slightly before serving.

These skewers can be served with a fresh garden salad, grilled vegetables, or over a bed of seasoned rice. A dip of extra ranch dressing is a nice touch!

Appetizer, Main Course
American
easy chicken recipes, grilled chicken, Parmesan Chicken, Party Snacks, Ranch chicken skewers

Cilantro-Lime Black Bean Rice

Bowl of cilantro-lime black bean rice garnished with fresh cilantro and lime

Cilantro-Lime Black Bean Rice is the perfect dish to brighten up your meals. With its vibrant colors and refreshing flavors, it’s a recipe that not only tastes good but is also simple to make. This dish is a wonderful blend of zesty lime, fresh cilantro, and hearty black beans, creating a side that everyone will adore. Known for being a crowd-pleaser, it can easily steal the show at your next gathering or family dinner. Once you make this delightful rice dish, you will find yourself craving its refreshing flavor, so let’s dive into how to prepare it!

How to Prepare Cilantro-Lime Black Bean Rice

Cilantro-Lime Black Bean Rice

  1. Start by cooking rice according to package instructions.
  2. In a large bowl, combine the cooked rice with drained and rinsed black beans.
  3. Add chopped cilantro, lime juice, salt, and pepper to taste, mixing well to combine all the ingredients.
  4. If you like, add chopped red onion or diced tomatoes for extra flavor and color.
  5. Serve warm and enjoy!
  6. Cilantro-Lime Black Bean Rice

Why You’ll Love Cilantro-Lime Black Bean Rice

This recipe stands out for so many reasons. First, it is packed with nutrients from the black beans, making it not only tasty but also healthy. The cilantro and lime add a fresh kick, which balances perfectly with the richness of the beans. Whether served as a side dish or a main meal topped with proteins, this dish can fit any occasion. Plus, it’s quick to prepare, ensuring you spend more time enjoying your meal and less time in the kitchen.

If you want to learn even more ways to enjoy black beans and rice together, check out this article on 5 comforting ways to savor it.

Tips for Success

To make your Cilantro-Lime Black Bean Rice even better, here are a few tips:

  • Use fresh lime juice instead of bottled for a more vibrant flavor.
  • Experiment with different herbs like parsley or green onions to change the flavor profile.
  • Consider adding diced avocado on top for extra creaminess.

Serving Suggestions

This recipe pairs wonderfully with grilled chicken, tacos, or even as a filling for burritos. You can also serve it alongside a fresh salad or guacamole for a complete meal. Don’t hesitate to make it a part of your next BBQ or picnic—it is sure to impress!

FAQs

Q: Can I make this dish ahead of time?

A: Yes! You can prepare Cilantro-Lime Black Bean Rice in advance and store it in the fridge for a day or two. Just give it a good stir before serving.

Q: Is it okay to use quinoa instead of rice?

A: Absolutely! You can substitute rice with quinoa for a different texture and nutritional value.

Q: Can I make this dish vegan?

A: Yes! This recipe is naturally vegan-friendly since it contains no animal products.

Cilantro-Lime Black Bean Rice is more than just a dish; it’s an experience packed with flavor and freshness. So, gather your ingredients and let the cooking adventure begin!

Cilantro-Lime Black Bean Rice

A vibrant and refreshing dish featuring zesty lime, fresh cilantro, and hearty black beans, perfect as a side or main meal.

Main Ingredients

  • 1 cup rice (Cooked according to package instructions)
  • 1 can black beans (Drained and rinsed)
  • 1/4 cup fresh cilantro (Chopped)
  • 2 tablespoons lime juice (Use fresh for best flavor)
  • to taste salt
  • to taste pepper

Optional Add-Ins

  • 1/2 cup red onion (Chopped, optional)
  • 1/2 cup diced tomatoes (Optional for extra flavor and color)

Preparation

  1. Start by cooking rice according to package instructions.
  2. In a large bowl, combine the cooked rice with drained and rinsed black beans.
  3. Add chopped cilantro, lime juice, salt, and pepper to taste, mixing well to combine all the ingredients.
  4. If desired, add chopped red onion or diced tomatoes for extra flavor and color.
  5. Serve warm and enjoy!

Use fresh lime juice for a more vibrant flavor. Experiment with different herbs like parsley or green onions to change the flavor profile. Consider adding diced avocado on top for extra creaminess. This dish can be prepared ahead of time and stored in the fridge for a day or two, just give it a good stir before serving.

Side Dish
Mexican, Vegan
Black Bean Rice, Cilantro-Lime Rice, Healthy Side Dish, quick recipe, Refreshing Rice

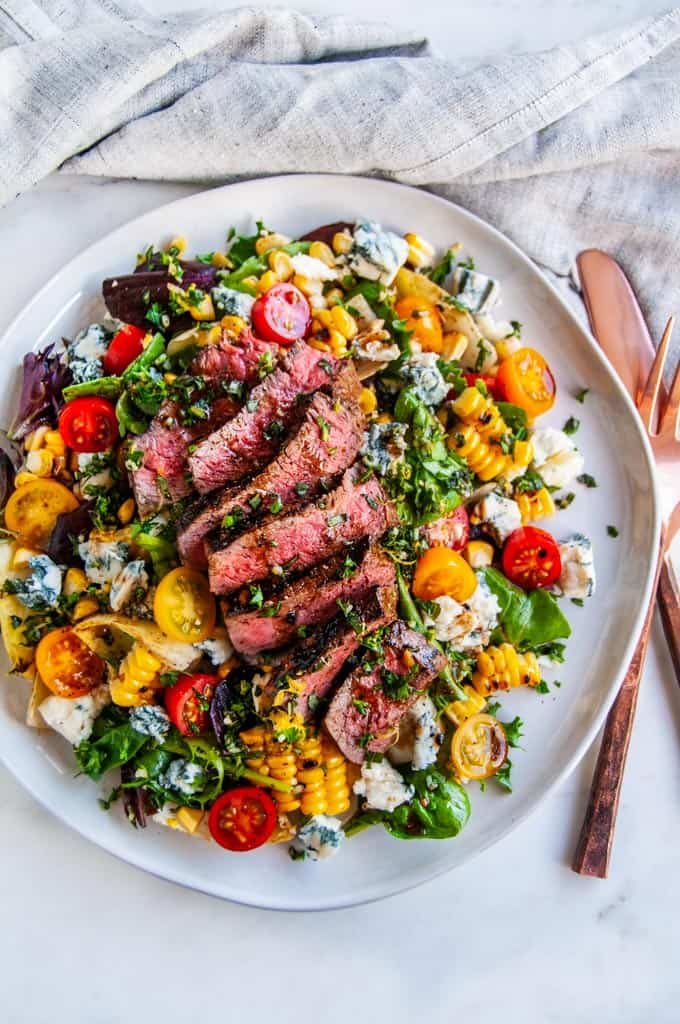
Balsamic Steak Gorgonzola Salad with Grilled Corn

Balsamic Steak Gorgonzola Salad with grilled corn and fresh vegetables

If you’re looking for a tasty dish to impress your friends and family, the Balsamic Steak Gorgonzola Salad with Grilled Corn is just the recipe you need. This delightful salad combines juicy grilled steak, creamy Gorgonzola cheese, and sweet grilled corn, all drizzled with a rich balsamic dressing. It’s a crowd-pleaser that’s full of flavor and freshness, making it an ideal choice for a summer gathering or a cozy dinner at home. You’ll love the way the savory steak, tangy cheese, and sweet corn come together in every bite, and we can guarantee this dish will have everyone coming back for seconds. Get ready to whip up this delicious salad, and let the compliments roll in!

How to prepare Balsamic Steak Gorgonzola Salad with Grilled Corn

  1. Start by marinating the steak in balsamic vinaigrette for at least 30 minutes.
  2. Preheat your grill to medium-high heat.
  3. Grill the corn on the cob for about 10 minutes, turning occasionally, until charred and tender. Let it cool, then cut the kernels off the cob.
  4. Grill the marinated steak for about 5-7 minutes on each side, or until cooked to your desired doneness. Let it rest before slicing.
  5. In a large salad bowl, combine mixed greens, grilled corn, sliced steak, and crumbled Gorgonzola cheese.
  6. Drizzle with more balsamic vinaigrette and toss gently to combine.
  7. Serve immediately and enjoy your fresh, flavorful salad!

Balsamic Steak Gorgonzola Salad with Grilled Corn

Why You’ll Love Balsamic Steak Gorgonzola Salad with Grilled Corn

This salad truly has it all! It features a perfect balance of flavors with the savory notes of the steak paired with the creamy richness of Gorgonzola. The addition of sweet corn adds a nice crunch and a hint of sweetness that elevates the dish. Plus, it’s a versatile recipe that can be prepared for any occasion, whether it’s a backyard barbecue or a light weeknight dinner. If you enjoy delicious salads that are both filling and satisfying, this recipe is a must-try.

Tips for success

To ensure your Balsamic Steak Gorgonzola Salad is a hit, keep these tips in mind:

  • Use a meat thermometer for perfectly cooked steak, aiming for about 135°F for medium-rare.
  • Opt for fresh, in-season corn for the sweetest flavor.
  • If you’re short on time, use pre-cooked steak or rotisserie chicken as substitutes.
  • Pair the salad with a light white wine or sparkling water for a refreshing drink.

Serving Suggestions

This salad is hearty enough to be a main dish, but it pairs beautifully with various sides. Consider serving it alongside crusty bread or a simple vegetable soup. You can also enjoy it with a side of roasted veggies or potato wedges for a more substantial meal. For a variation, try adding nuts like walnuts or pecans for an added crunch or a dash of fruits like pear or apples for sweetness.

Balsamic Steak Gorgonzola Salad with Grilled Corn

FAQs

Can I make this salad ahead of time?

Yes, you can prepare the components ahead of time. Just keep the dressing separate and combine everything just before serving to maintain freshness.

What can I substitute for Gorgonzola cheese?

If you’re not a fan of Gorgonzola, you can use feta or goat cheese for a different flavor profile.

How do I store leftovers?

Store leftover salad in an airtight container in the fridge for up to two days. Keep the dressing separate to avoid sogginess.

If you’re also interested in another tasty salad, check out this Paleo Grilled Chicken Cobb Salad for a flavorful option.

Balsamic Steak Gorgonzola Salad with Grilled Corn

A delightful salad featuring juicy grilled steak, creamy Gorgonzola cheese, and sweet grilled corn, drizzled with rich balsamic dressing.

For the salad

  • 1 lb steak (Use your preferred cut (e.g., sirloin, ribeye))
  • 1 cup Gorgonzola cheese, crumbled (Can substitute with feta or goat cheese)
  • 2 ears corn on the cob (Use fresh, in-season corn for the best flavor)
  • 4 cups mixed greens
  • 1/2 cup balsamic vinaigrette (For marinating steak and drizzling)

Preparation

  1. Marinate the steak in balsamic vinaigrette for at least 30 minutes.

Grilling

  1. Preheat your grill to medium-high heat.
  2. Grill the corn on the cob for about 10 minutes, turning occasionally, until charred and tender. Let it cool, then cut the kernels off the cob.
  3. Grill the marinated steak for about 5-7 minutes on each side, or until cooked to your desired doneness. Let it rest before slicing.

Assembly

  1. In a large salad bowl, combine mixed greens, grilled corn, sliced steak, and crumbled Gorgonzola cheese.
  2. Drizzle with more balsamic vinaigrette and toss gently to combine.
  3. Serve immediately and enjoy your fresh, flavorful salad!

For best results, use a meat thermometer for perfectly cooked steak, aiming for about 135°F for medium-rare. If you’re short on time, consider using pre-cooked steak or rotisserie chicken. This salad pairs beautifully with a light white wine or sparkling water.

Main Course, Salad
American
Balsamic Salad, Gorgonzola Cheese, Grilled Steak, Healthy Salad, Summer Recipe

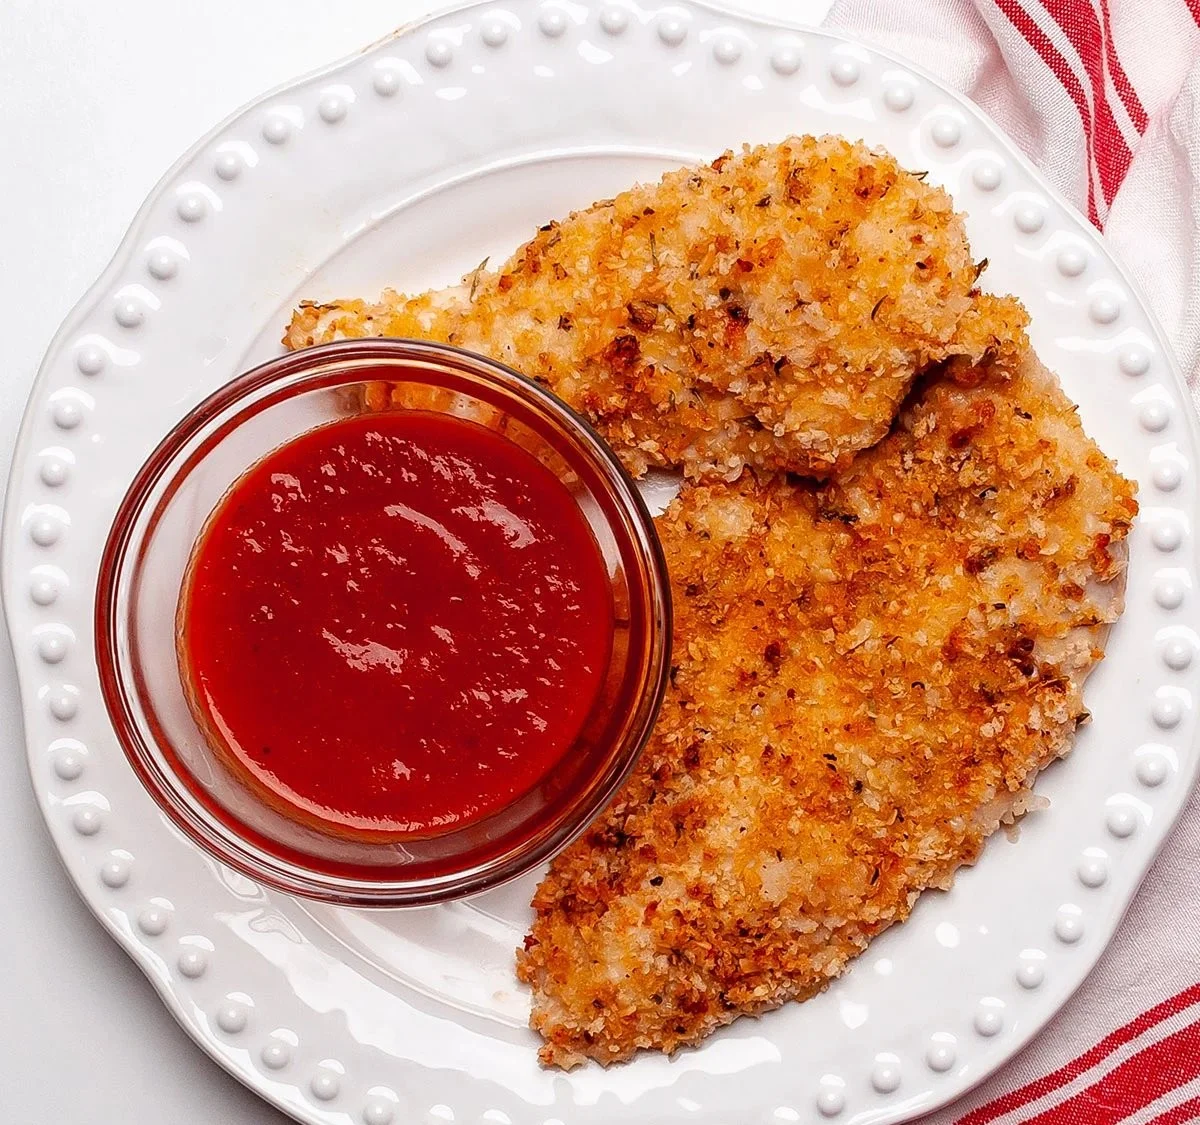
BEST Crispy Baked Panko Chicken Recipe

Crispy baked panko chicken on a plate garnished with herbs

There’s something truly wonderful about the crunch of crispy chicken that brings smiles to faces. The BEST Crispy Baked Panko Chicken Recipe is a simple dish that nearly everyone loves, making it perfect for family dinners or gatherings with friends. This delightful chicken has a golden, crispy coating thanks to the panko breadcrumbs, giving it a satisfying texture without frying. You’ll love how easy it is to prepare, and the flavor is just incredible! Gather your ingredients, roll up your sleeves, and let’s make a dish that will have everyone asking for seconds.

How to prepare BEST Crispy Baked Panko Chicken

  1. Preheat the oven to 400°F (200°C).
  2. Prepare the chicken: Take boneless, skinless chicken breasts and pound them a bit for even cooking.
  3. Make the coating: In a bowl, mix panko breadcrumbs, grated Parmesan cheese, garlic powder, onion powder, salt, and pepper together.
  4. Egg wash: In another bowl, beat a couple of eggs and dip each chicken piece in the egg, ensuring it is well coated.
  5. Coat the chicken: Roll each piece in the panko mixture, pressing gently so it sticks well.
  6. Place on a baking sheet: Lay the coated chicken on a lined baking sheet, making sure they don’t touch.
  7. Bake: Cook for 20-25 minutes, or until golden brown and cooked through, checking with a meat thermometer to ensure it reaches 165°F (75°C).
  8. Serve and enjoy: Let the chicken sit for a few minutes, then serve hot with your favorite sides.

BEST Crispy Baked Panko Chicken Recipe

Why You’ll Love BEST Crispy Baked Panko Chicken

You’ll absolutely love this recipe for a few reasons. First, it’s a healthier alternative to fried chicken while still delivering that beloved crunch. The panko breadcrumbs not only provide a crispy texture but also soak up lovely flavors. Plus, it’s a versatile dish that pairs wonderfully with various sides and dips. Whether you’re doing a cozy family night or hosting, this chicken is guaranteed to be a crowd-pleaser!

Tips for success

  • Make sure to not overcrowd the baking sheet so each piece gets the right amount of heat for that crispy finish.
  • Let the chicken rest after baking. This helps ensure all the juices stay inside for a moist bite.
  • Get creative with seasonings! Adding herbs can bring a fresh twist to your chicken, opening up even more flavor combinations.

Serving Suggestions

This crispy baked panko chicken serves well alongside a fresh salad, mashed potatoes, or some roasted veggies. You could also pair it with dips like honey mustard or barbecue sauce for a flavor burst. Consider serving it with rice or pasta to take a more filling approach to your meal.

FAQs

Can I make this chicken ahead of time?

Yes, you can prepare the chicken earlier in the day and refrigerate it before baking. Just remember to add a few extra minutes to the baking time if it’s cold from the fridge!

Can I use regular breadcrumbs instead of panko?

While you can use regular breadcrumbs, you won’t achieve the same level of crunch. Panko breadcrumbs are lighter and result in a crispier texture.

What should I do with leftovers?

Store any leftovers in an airtight container in the fridge for up to 3 days. Reheat them in the oven or air fryer for the best results in maintaining the crispiness.

BEST Crispy Baked Panko Chicken Recipe

If you’re looking for more tasty chicken ideas, check out this delicious air fryer honey butter garlic chicken tenders recipe for another savory treat!

Crispy Baked Panko Chicken

Enjoy the crunchy goodness of this healthier alternative to fried chicken, featuring a golden panko breadcrumb coating.

Chicken Preparation

  • 4 pieces Boneless, skinless chicken breasts (Pounded for even cooking)

Coating

  • 1 cup Panko breadcrumbs (Provides crispiness)
  • 1/2 cup Grated Parmesan cheese (Adds flavor)
  • 1 teaspoon Garlic powder
  • 1 teaspoon Onion powder
  • 1 teaspoon Salt (Adjust to taste)
  • 1/2 teaspoon Black pepper (Adjust to taste)

Egg Wash

  • 2 large Eggs (Beaten for coating)

Preparation

  1. Preheat the oven to 400°F (200°C).
  2. Prepare the chicken by pounding the boneless, skinless chicken breasts for even cooking.

Coating

  1. In a bowl, mix panko breadcrumbs, grated Parmesan cheese, garlic powder, onion powder, salt, and pepper together.
  2. In another bowl, beat the eggs and dip each chicken piece in the egg, ensuring it is well coated.
  3. Roll each piece in the panko mixture, pressing gently so it sticks well.

Baking

  1. Place the coated chicken on a lined baking sheet, ensuring they don’t touch.
  2. Bake for 20-25 minutes, or until golden brown and cooked through, reaching an internal temperature of 165°F (75°C).
  3. Let the chicken sit for a few minutes before serving hot with your favorite sides.

Do not overcrowd the baking sheet to ensure each piece gets the right amount of heat for a crispy finish. Get creative with seasonings by adding herbs for a fresh twist.

Dinner, Main Course
American
Baked Chicken, Crispy Chicken, Family Dinner, Healthy Chicken, Panko Chicken

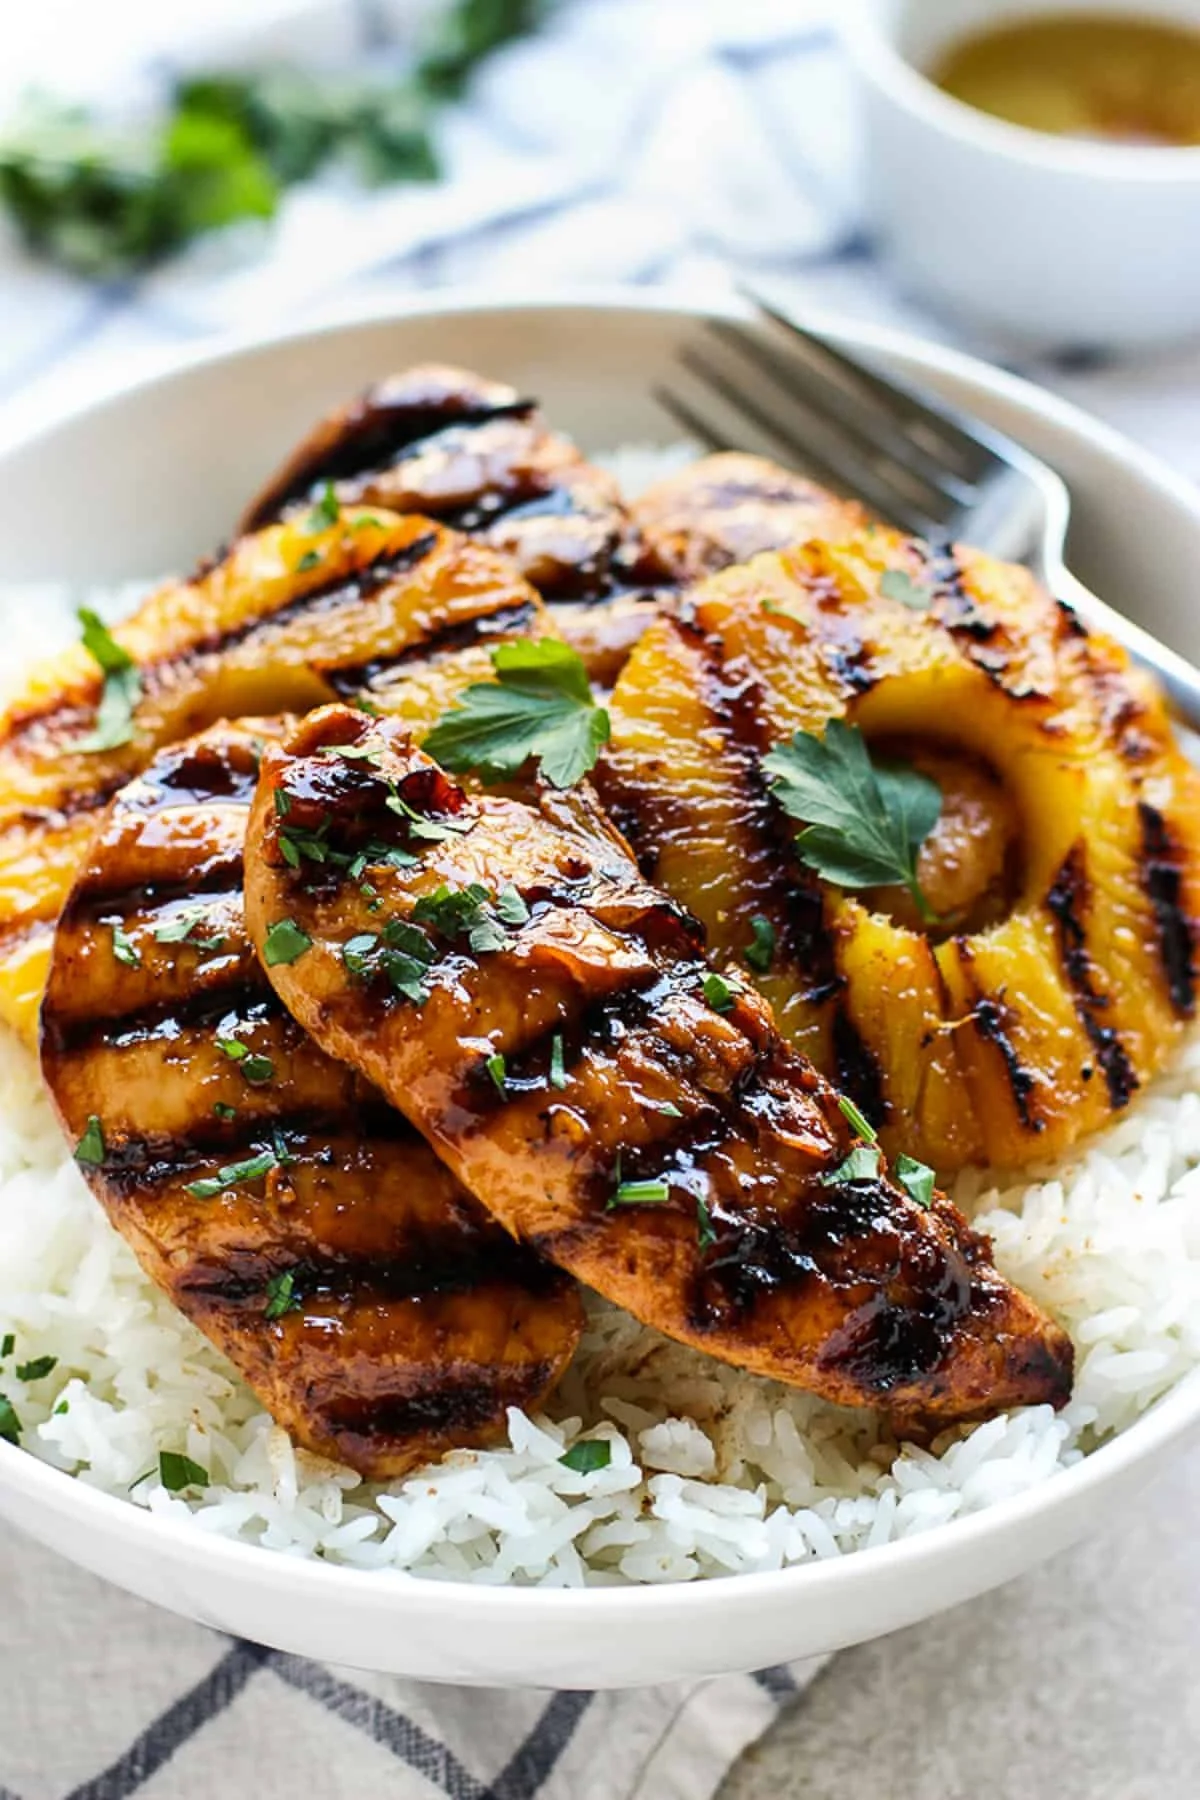
Hawaiian Chicken with Coconut Rice

Hawaiian Chicken served with coconut rice on a plate.

Hawaiian Chicken with Coconut Rice is a delightful dish that transports you straight to a tropical paradise with every bite. This recipe beautifully combines juicy chicken with the subtle sweetness of coconut-infused rice. It’s perfect for family dinners or gatherings, and trust me, everyone will be asking for seconds. The unique flavor profile and vibrant colors make it a feast for both the eyes and the taste buds. Get ready to impress your loved ones with this crowd-pleaser that’s not only delicious but also easy to make!

How to prepare Hawaiian Chicken with Coconut Rice

  1. Ingredients:
  • 4 boneless, skinless chicken breasts
  • 1 can (13.5 oz) coconut milk
  • 1 cup jasmine rice
  • 1 cup chicken broth
  • 2 tablespoons soy sauce
  • 2 tablespoons brown sugar
  • 1 teaspoon garlic powder
  • 1 teaspoon ginger powder
  • Salt and pepper to taste
  • Fresh cilantro for garnish
  1. Directions:
  • Start by marinating the chicken. In a bowl, combine soy sauce, brown sugar, garlic powder, ginger powder, salt, and pepper. Add the chicken breasts, ensuring they are well-coated. Let them marinate for at least 30 minutes.
  • In a medium saucepan, combine jasmine rice, coconut milk, and chicken broth. Bring to a boil, then reduce heat to low and cover. Cook for about 18-20 minutes, or until the rice is tender and liquid is absorbed.
  • While the rice cooks, heat a skillet over medium heat. Add the marinated chicken and cook for about 6-7 minutes on each side until golden brown and cooked through.
  • Once the chicken is done, slice it and serve on a bed of coconut rice, garnished with fresh cilantro.

Hawaiian Chicken with Coconut Rice

Why You’ll Love Hawaiian Chicken with Coconut Rice

This dish is not only easy to prepare but also features bold flavors that are sure to tantalize your taste buds. The sweetness from the coconut rice perfectly balances the savory marinated chicken, making it a delightful combination. It’s a perfect recipe for anyone who loves some Hawaiian flair in their meals, and it’s a fantastic dish to share with friends and family. Plus, it makes for great leftovers!

Tips for Success

  • Make sure to let the chicken marinate for a while to absorb all the flavors.
  • For an extra kick, consider adding some diced pineapple or bell peppers to the chicken while cooking.
  • Adjust the seasoning according to your taste. You can always add more soy sauce or sugar if you prefer a sweeter profile.

Hawaiian Chicken with Coconut Rice

Serving Suggestions

Serve Hawaiian Chicken with Coconut Rice alongside a simple green salad or fresh fruit for a light and refreshing meal. You can also offer some grilled vegetables on the side for added color and nutrition. This dish pairs wonderfully with a tropical drink, like a fruity mocktail or a refreshing iced tea.

FAQs

1. Can I use brown rice instead of jasmine rice?

Yes, you can substitute brown rice, but remember that it will take longer to cook.

2. Is there a vegetarian option for this recipe?

Absolutely! You could use tofu or chickpeas as a protein substitute and continue with the same marinade for flavor.

3. How do I store leftovers?

Store any leftovers in an airtight container in the fridge for up to 3 days. Reheat thoroughly before serving again.

For more delicious meal ideas, check out this other chicken recipe that pairs beautifully with our Hawaiian Chicken!

Hawaiian Chicken with Coconut Rice

A delightful dish that combines juicy chicken with coconut-infused rice, perfect for family dinners or gatherings.

For the Marinade

  • 2 tablespoons soy sauce
  • 2 tablespoons brown sugar
  • 1 teaspoon garlic powder
  • 1 teaspoon ginger powder
  • to taste salt and pepper

For the Chicken and Rice

  • 4 pieces boneless, skinless chicken breasts
  • 1 can (13.5 oz) coconut milk
  • 1 cup jasmine rice
  • 1 cup chicken broth
  • Fresh cilantro for garnish

Marinating the Chicken

  1. In a bowl, combine soy sauce, brown sugar, garlic powder, ginger powder, salt, and pepper. Add the chicken breasts, ensuring they are well-coated. Let them marinate for at least 30 minutes.

Cooking the Rice

  1. In a medium saucepan, combine jasmine rice, coconut milk, and chicken broth. Bring to a boil, then reduce heat to low and cover. Cook for about 18-20 minutes, or until the rice is tender and liquid is absorbed.

Cooking the Chicken

  1. Heat a skillet over medium heat. Add the marinated chicken and cook for about 6-7 minutes on each side until golden brown and cooked through.

Serving

  1. Once the chicken is done, slice it and serve on a bed of coconut rice, garnished with fresh cilantro.

For an extra kick, consider adding some diced pineapple or bell peppers to the chicken while cooking. Adjust the seasoning according to your taste. You can always add more soy sauce or sugar if you prefer a sweeter profile.

Dinner, Main Course
Hawaiian, Tropical
Coconut Rice, Easy Recipe, Family Dinner, Hawaiian Chicken, Tropical Dish

Berry French Toast Casserole

Delicious Berry French Toast Casserole with fresh berries on top

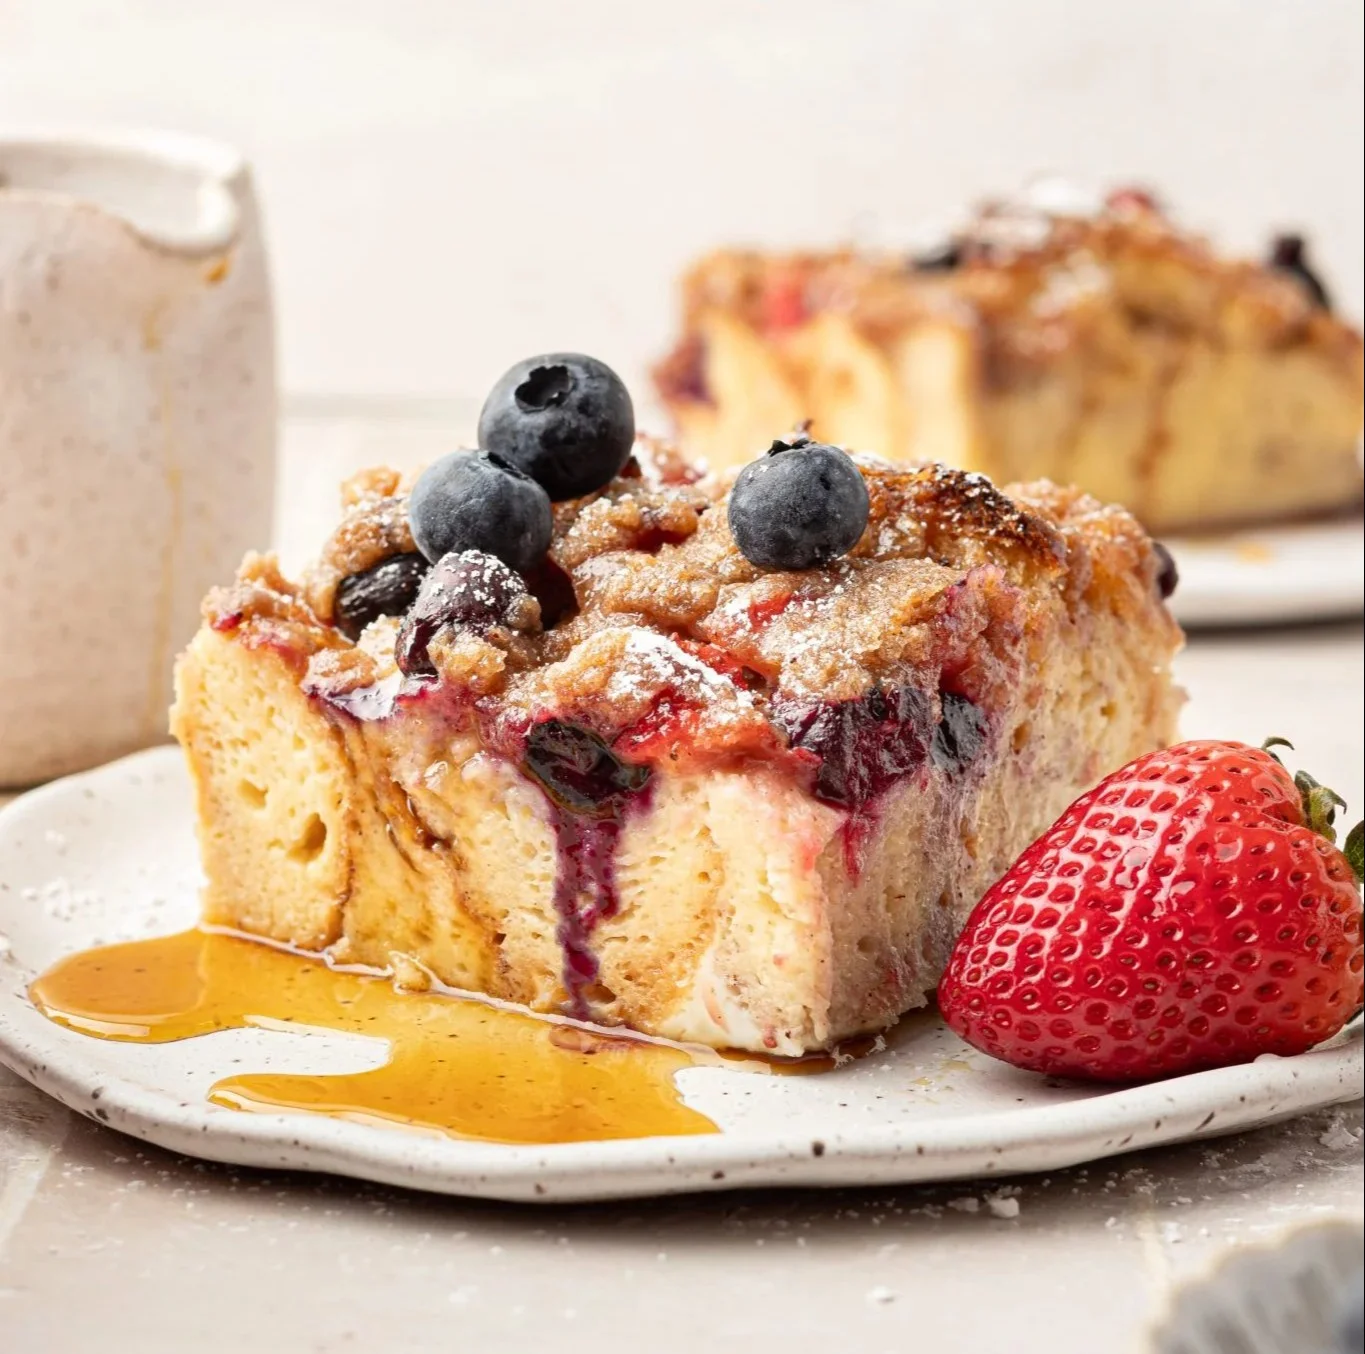
Berry French Toast Casserole is a cozy make-ahead on a classic French toast. Bread cubes are layered in a baking dish, soaked in a rich sweetened egg custard, topped with berries then oven baked to perfection. You can prepare it the night before and pop it in the oven in the morning, making it a hassle-free option for busy weekends or festive occasions. Trust me, once you try this crowd-pleaser, you’ll want to make it on repeat!

How to prepare Berry French Toast Casserole

To get started on this delicious Berry French Toast Casserole, you’ll need the following simple ingredients:

  • 1 loaf of bread, preferably French or challah
  • 2 cups of mixed berries (strawberries, blueberries, raspberries)
  • 4 large eggs
  • 2 cups of milk
  • 1/2 cup of sugar
  • 1 teaspoon of vanilla extract
  • 1 teaspoon of ground cinnamon
  • A pinch of salt
  • Butter, for greasing the baking dish
  • Powdered sugar, for serving

Directions

  1. Preheat the oven to 350°F (175°C) and grease a 9×13-inch baking dish with butter.
  2. Cut the loaf of bread into cubes and place half of the cubes in the greased baking dish.
  3. Spread the mixed berries over the bread cubes, and then top with the remaining cubes of bread.
  4. In a bowl, whisk together the eggs, milk, sugar, vanilla extract, cinnamon, and salt until combined.
  5. Pour the egg mixture evenly over the bread and berries. Press down gently to make sure all the bread is soaked.
  6. Allow it to sit for about 15 minutes to soak in the flavors.
  7. Bake in the preheated oven for 30-35 minutes or until the top is golden brown and a knife comes out clean.
  8. Let it cool for a few minutes before serving. Dust with powdered sugar and enjoy!

Berry French Toast Casserole

Why You’ll Love Berry French Toast Casserole

There are many reasons to fall in love with this Berry French Toast Casserole. For one, it’s an easy recipe that requires minimal effort but delivers maximum flavor. The combination of juicy berries with a custard-y bread mixture creates a perfect blend of textures and tastes. Additionally, this casserole is a great way to feed a crowd, making it ideal for brunch parties, holiday breakfasts, or family gatherings. Plus, you can customize it with any berries you have on hand or even add nuts for extra crunch.

Tips for success

  • Use day-old bread for the best texture; it will soak up the custard mixture better.
  • Let the casserole sit overnight in the fridge for even more flavor.
  • Experiment with different fruits or even chocolate chips if you want to add a sweet twist.
  • Make sure to keep an eye on it while baking to avoid overcooking, as ovens can vary.

Berry French Toast Casserole

Serving Suggestions

Serve your Berry French Toast Casserole warm, topped with a sprinkle of powdered sugar. You can also add a drizzle of maple syrup or a dollop of whipped cream for extra indulgence. A side of fresh fruit or crispy bacon complements this dish beautifully, balancing the sweetness perfectly.

FAQs

Can I prepare the Berry French Toast Casserole the night before?

Absolutely! This dish is perfect for making ahead of time. Simply assemble it the night before, and let it sit in the fridge overnight.

Can I use frozen berries?

Yes, you can use frozen berries. Just ensure you thaw and drain them before adding to the casserole to prevent excess moisture.

How do I store leftovers?

Store any leftovers in an airtight container in the fridge. It can be reheated in the oven or microwave, but the texture may change slightly.

Now that you know how easy and delicious this Berry French Toast Casserole can be, why not try making it yourself? It’s a recipe that’s sure to impress and create lovely breakfast memories!

Berry French Toast Casserole

A cozy, make-ahead casserole layered with bread cubes and mixed berries, soaked in a sweet egg custard and baked to perfection.

Main ingredients

  • 1 loaf loaf of bread, preferably French or challah (Use day-old bread for best texture.)
  • 2 cups mixed berries (strawberries, blueberries, raspberries) (You can also use frozen berries; thaw and drain them before use.)
  • 4 large eggs
  • 2 cups milk
  • 1/2 cup sugar
  • 1 teaspoon vanilla extract
  • 1 teaspoon ground cinnamon
  • a pinch salt
  • Butter, for greasing the baking dish
  • Powdered sugar, for serving

Preparation

  1. Preheat the oven to 350°F (175°C) and grease a 9×13-inch baking dish with butter.
  2. Cut the loaf of bread into cubes and place half of the cubes in the greased baking dish.
  3. Spread the mixed berries over the bread cubes, then top with the remaining cubes of bread.
  4. In a bowl, whisk together the eggs, milk, sugar, vanilla extract, cinnamon, and salt until combined.
  5. Pour the egg mixture evenly over the bread and berries, and press down gently to ensure all the bread is soaked.
  6. Allow it to sit for about 15 minutes to soak in the flavors.

Baking

  1. Bake in the preheated oven for 30-35 minutes or until the top is golden brown and a knife comes out clean.
  2. Let it cool for a few minutes before serving. Dust with powdered sugar and enjoy!

This casserole is a great way to feed a crowd, ideal for brunch parties or holiday breakfasts. Customize with any berries or add nuts for extra crunch.

Breakfast, Brunch
American
Berry French Toast Casserole, Brunch Recipe, Easy Casserole, Make-Ahead Breakfast, oven baked French toast

Pumpkin Banana Muffins

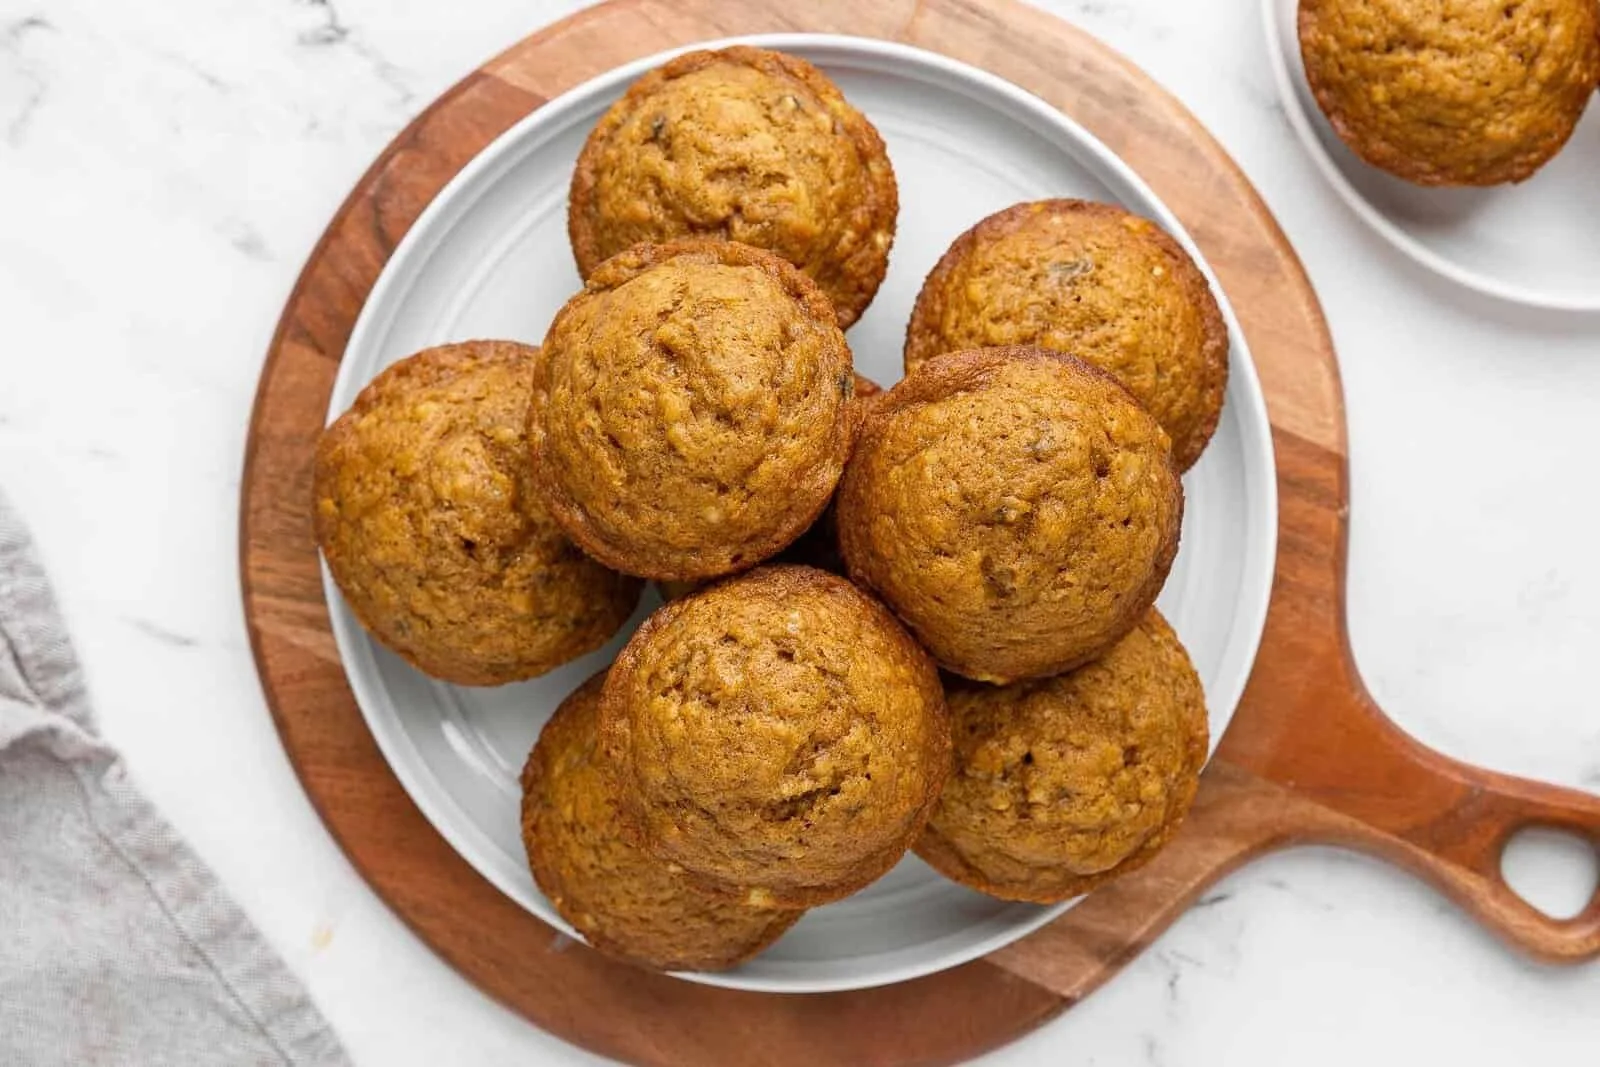
Freshly baked Pumpkin Banana Muffins on a wooden table

There’s something cozy about the smell of baked goods filling the kitchen, especially when it comes to Pumpkin Banana Muffins. These delightful muffins bring together the warm, familiar flavors of pumpkin and ripe bananas, creating a tasty treat perfect for breakfast or a snack. They are wonderfully soft, with a hint of sweetness and spices that make them irresistible. Whether you’re enjoying them with a cup of coffee in the morning or savoring one in the afternoon, these muffins are sure to please everyone.

So, get ready to whip up a batch of these delightful Pumpkin Banana Muffins that are not only delicious but also simple to make. You’ll be excited to share these with family and friends, or even keep them all to yourself!

How to prepare Pumpkin Banana Muffins

To start off, gather your ingredients:

Ingredients:

  • 1 cup mashed ripe bananas (about 2-3 bananas)
  • 1 cup pumpkin puree
  • 2 eggs
  • 1/3 cup melted butter
  • 1 cup brown sugar
  • 1 teaspoon vanilla extract
  • 2 cups all-purpose flour
  • 1 teaspoon baking soda
  • 1/2 teaspoon salt
  • 1 teaspoon cinnamon
  • 1/2 teaspoon nutmeg

Directions:

  1. Preheat your oven to 350°F (175°C) and prepare a muffin tin with muffin liners.
  2. In a large bowl, mix the mashed bananas, pumpkin puree, eggs, melted butter, brown sugar, and vanilla extract until combined.
  3. In another bowl, whisk together the flour, baking soda, salt, cinnamon, and nutmeg.
  4. Gradually add the dry ingredients to the wet ingredients, stirring until just combined. Be careful not to overmix.
  5. Spoon the batter into the muffin tins, filling each liner about 2/3 full.
  6. Bake for 20-25 minutes, or until a toothpick inserted in the center comes out clean.
  7. Allow the muffins to cool for a few minutes before transferring them to a wire rack to cool completely.

Pumpkin Banana Muffins

Why You’ll Love Pumpkin Banana Muffins

You’ll fall in love with these muffins from the first bite. The combination of pumpkin and banana gives them a unique flavor that is both moist and fluffy. Plus, they are packed with fiber and nutrients, making them a great choice for a quick breakfast or healthy snack. The warm spices like cinnamon and nutmeg give them a delightful aroma, filling your kitchen with a feeling of home. No wonder they are such a crowd-pleaser!

Tips for success

To ensure your Pumpkin Banana Muffins turn out perfectly every time, consider these helpful tips:

  • Use overripe bananas for extra sweetness and moisture.
  • Don’t overmix the batter, as this can lead to tough muffins.
  • Feel free to add in some nuts or chocolate chips for extra texture and flavor.
  • Store leftover muffins in an airtight container to keep them fresh.

Pumpkin Banana Muffins

Serving Suggestions

These muffins are perfect on their own, but you can also pair them with a spread of nut butter or cream cheese for added richness. They make a delightful addition to a brunch spread or a packed lunch. Serve them warm, with a sprinkle of powdered sugar on top for a touch of sweetness!

FAQs

Can I freeze Pumpkin Banana Muffins?

Yes, these muffins freeze well! Just place them in an airtight container or freezer bag and store them in the freezer. They’ll last for about 2-3 months.

How long do these muffins stay fresh?

Stored in an airtight container at room temperature, they can last about 3-5 days. For extended storage, consider freezing them.

Can I use whole wheat flour instead of all-purpose flour?

Absolutely! Whole wheat flour can be used for a healthier option, just keep in mind it may change the texture a bit.

For another delicious banana-based treat, take a look at these 3-ingredient banana oatmeal muffins! Happy baking.

Pumpkin Banana Muffins

Delightful muffins combining the warm flavors of pumpkin and ripe bananas, perfect for breakfast or a snack.

Wet Ingredients

  • 1 cup mashed ripe bananas (about 2-3 bananas) (Use overripe bananas for extra sweetness and moisture.)
  • 1 cup pumpkin puree
  • 2 pieces eggs
  • 1/3 cup melted butter
  • 1 cup brown sugar
  • 1 teaspoon vanilla extract

Dry Ingredients

  • 2 cups all-purpose flour (Can substitute with whole wheat flour.)
  • 1 teaspoon baking soda
  • 1/2 teaspoon salt
  • 1 teaspoon cinnamon
  • 1/2 teaspoon nutmeg

Preparation

  1. Preheat your oven to 350°F (175°C) and prepare a muffin tin with muffin liners.
  2. In a large bowl, mix the mashed bananas, pumpkin puree, eggs, melted butter, brown sugar, and vanilla extract until combined.
  3. In another bowl, whisk together the flour, baking soda, salt, cinnamon, and nutmeg.
  4. Gradually add the dry ingredients to the wet ingredients, stirring until just combined. Be careful not to overmix.
  5. Spoon the batter into the muffin tins, filling each liner about 2/3 full.

Baking

  1. Bake for 20-25 minutes, or until a toothpick inserted in the center comes out clean.
  2. Allow the muffins to cool for a few minutes before transferring them to a wire rack to cool completely.

These muffins are best enjoyed fresh but can be stored in an airtight container. They freeze well for up to 2-3 months. For extra texture and flavor, consider adding nuts or chocolate chips.

Breakfast, Snack
American
Baked Goods, Banana Muffins, fall recipes, Healthy Snacks, Pumpkin Muffins

Almond Butter Energy Balls

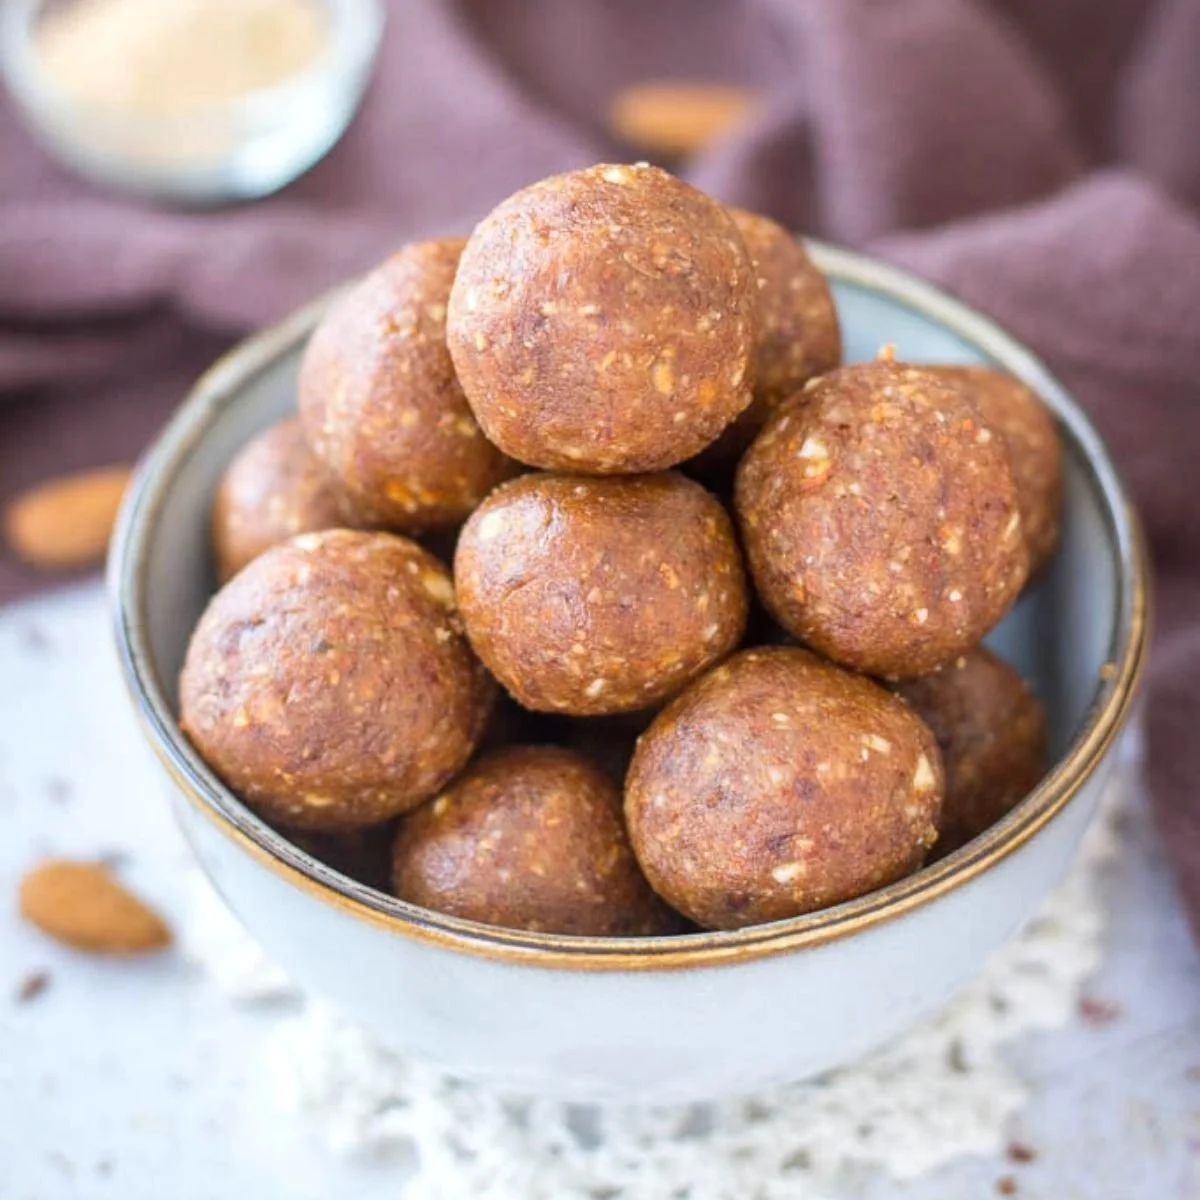
Homemade almond butter energy balls arranged on a wooden platter.

Almond Butter Energy Balls are the perfect snack for anyone on the go. They are easy to make delicious, and packed with nutrients. These little bites are great for a post-workout snack or a midday pick-me-up. The sweet, nutty flavor of almond butter combined with oats and honey creates a delightful treat that is sure to satisfy your cravings. Plus, they are no-bake, making them super simple to whip up.

Ingredients

  • 1 cup almond butter
  • 1 cup rolled oats
  • 1/4 cup honey
  • 1/4 cup mini chocolate chips (optional)
  • 1/4 cup chopped nuts or seeds (optional)
  • 1 tsp vanilla extract
  • A pinch of salt

Directions

  1. In a large bowl, mix together almond butter, rolled oats, honey, and vanilla extract until well combined.
  2. If using, fold in chocolate chips and chopped nuts or seeds for added texture and taste.
  3. Once the mixture is evenly blended, use your hands to form small balls, about 1 inch in diameter.
  4. Place the energy balls on a baking sheet lined with parchment paper.
  5. Refrigerate for about 30 minutes to firm them up.
  6. Enjoy them as a snack throughout the week, storing any leftovers in an airtight container in the fridge.

Almond Butter Energy Balls

Why You’ll Love Almond Butter Energy Balls

These energy balls are a crowd-pleaser, thanks to their delightful taste and simple preparation. Everyone will love the velvety almond butter combined with the hearty oats, creating a satisfying snack option. They’re not just delicious, but also nutritious, packed with good fats and protein to keep your energy levels up. Perfect for any time of the day, these energy balls are your new go-to treat. Plus, they’re fun to make with family or friends, making it an enjoyable activity in the kitchen.

Tips for success

  • Measure your ingredients accurately for the best results.
  • Use natural almond butter without added sugars or oils for a healthier option.
  • Feel free to customize by adding your favorite mix-ins, such as dried fruits or seeds.
  • If the mixture is too dry, add a touch more almond butter or honey to achieve the right consistency.
  • Keep them stored in the fridge for a cool, refreshing snack anytime.

Serving Suggestions

Serve these energy balls in a bowl on your kitchen table for a quick snack or pack them in your bag for a hike or picnic. They also make a great addition to school lunches or can be served as after-school snacks for the kids. For a tasty dessert, try them alongside some fresh fruit or yogurt.

Almond Butter Energy Balls

FAQs

How long do almond butter energy balls last?

These energy balls will stay fresh in the fridge for about a week. Make sure to store them in an airtight container to maintain their texture and flavor.

Can I freeze almond butter energy balls?

Yes, you can freeze these energy balls! Just store them in a freezer-safe bag or container, and they will last for up to three months. Be sure to let them thaw for a few minutes before eating.

What if I don’t have almond butter?

If almond butter is not available, peanut butter can be a great substitute. The flavor will be different, but still delicious!

These Almond Butter Energy Balls are sure to become a favorite in your home. They’re tasty, healthy, and extremely easy to make, so what are you waiting for? Get started on this great recipe and enjoy a wholesome snack that everyone will love! For another tasty treat, check out the delightful Butterfinger Balls that are perfect for any occasion.

Almond Butter Energy Balls

Almond Butter Energy Balls are an easy, no-bake snack packed with nutrients, perfect for post-workout or a midday pick-me-up.

Main ingredients

  • 1 cup almond butter (Use natural almond butter without added sugars or oils.)
  • 1 cup rolled oats
  • 1/4 cup honey (Adjust based on desired sweetness.)
  • 1/4 cup mini chocolate chips (Optional for added sweetness.)
  • 1/4 cup chopped nuts or seeds (Optional for extra texture.)
  • 1 tsp vanilla extract
  • 1 pinch salt

Preparation

  1. In a large bowl, mix together almond butter, rolled oats, honey, and vanilla extract until well combined.
  2. If using, fold in chocolate chips and chopped nuts or seeds for added texture and taste.
  3. Once the mixture is evenly blended, use your hands to form small balls, about 1 inch in diameter.
  4. Place the energy balls on a baking sheet lined with parchment paper.
  5. Refrigerate for about 30 minutes to firm them up.

These energy balls can be customized with your favorite mix-ins such as dried fruits or seeds. Store leftovers in an airtight container in the fridge for up to a week.

Dessert, Snack
American
Almond Butter, Energy Balls, Healthy Snacks, No-Bake, quick recipes