Oatmeal Raisin Cookies

oatmeal raisin cookies

I still remember the smell of fresh oatmeal raisin cookies filling the kitchen when my grandmother baked them on weekends. The warm scent of cinnamon and sweet raisins made the whole house feel cozy, and she would let us sneak a soft, warm cookie before they even cooled. Oatmeal raisin cookies are loved for their chewy texture and comforting flavor, making them a perfect snack or a cozy treat with a cup of tea. They are easy to prepare and bring a homemade touch to any day.

Why Make This Recipe

Oatmeal raisin cookies are a classic treat loved by many. They have a perfect balance of chewy oats and sweet raisins, making them a comfort food that brings back happy memories. Whether you’re baking for a family gathering, a school event, or just for yourself, these cookies are a delightful choice. They are simple to make and can fill your kitchen with a wonderful aroma that will entice anyone nearby.

How to Make Oatmeal Raisin Cookies

Ingredients:

  • 2 cups all-purpose flour
  • 1 teaspoon baking powder
  • 1 teaspoon salt
  • 3/4 teaspoon cinnamon
  • 1/4 teaspoon nutmeg
  • 1 1/2 cups (3 sticks) butter, softened
  • 1 cup granulated sugar
  • 1 cup brown sugar, packed
  • 2 eggs
  • 1 teaspoon vanilla extract
  • 3 cups old-fashioned rolled oats
  • 1 1/2 cups raisins

Directions:

  1. In a medium bowl, whisk together the flour, baking powder, salt, cinnamon, and nutmeg.
  2. In a large bowl, cream the softened butter and both sugars together until they are light and fluffy, about 3-4 minutes.
  3. Add the eggs one at a time, followed by the vanilla extract, mixing well after each addition.
  4. Gradually incorporate the dry ingredients into the wet mixture on low speed until everything is just combined.
  5. Use a spatula to fold in the oats and raisins until they are evenly distributed throughout the dough.
  6. Chill the dough in the refrigerator for at least 1 hour.
  7. Preheat your oven to 350°F (175°C) and line baking sheets with parchment paper.
  8. Scoop tablespoons of dough onto the prepared sheets, making sure to space them about 2 inches apart.
  9. Bake in the preheated oven for 12-14 minutes until the edges are golden, but the centers still look slightly underdone.
  10. Allow the cookies to cool on the baking sheets for 5 minutes before transferring them to wire racks to cool completely.

How to Serve Oatmeal Raisin Cookies

Oatmeal raisin cookies are best enjoyed fresh from the oven. Pair them with a glass of milk, a cup of coffee, or some herbal tea for a comforting snack. They also make a great addition to lunchboxes or as a sweet treat after dinner.

How to Store Oatmeal Raisin Cookies

To keep your cookies fresh, store them in an airtight container at room temperature. They can last for about a week. You can also freeze the cookies for longer storage. Just place them in a freezer-safe container or bag, and they can last for up to three months.

Tips to Make Oatmeal Raisin Cookies

  • Make sure your butter is softened, as this helps to create a light and fluffy texture.
  • Chilling the dough is important; it helps the cookies hold their shape while baking.
  • If you prefer a chewier cookie, slightly underbake them. They will continue to cook on the baking sheet after being removed from the oven.

Variation

For a twist on the classic recipe, consider adding chocolate chips or nuts. You can also substitute dried cranberries or cherries for the raisins for a fruity variation.

FAQs

Q: Can I use quick oats instead of rolled oats?
A: Yes, you can use quick oats, but keep in mind that the texture may be slightly different. Rolled oats give more chewiness.

Q: Why are my cookies spreading too much?
A: If your cookies spread too much, it may be due to the butter being too warm or not chilling the dough long enough. Ensure the dough is firm when you scoop it.

Q: Can I make the dough ahead of time?
A: Absolutely! You can prepare the dough, chill it, and store it in the refrigerator for a couple of days before baking. You can also freeze it for later use.

[tasty-recipe id=”4391″]

Oatmeal Raisin Cookies

Delightfully chewy oatmeal raisin cookies are a classic treat that fill your kitchen with a wonderful aroma. Perfect for any occasion, they are easy to make and truly comforting.

Dry Ingredients

  • 2 cups all-purpose flour
  • 1 teaspoon baking powder
  • 1 teaspoon salt
  • 3/4 teaspoon cinnamon
  • 1/4 teaspoon nutmeg

Wet Ingredients

  • 1 1/2 cups (3 sticks) butter, softened (Make sure butter is softened for a light texture.)
  • 1 cup granulated sugar
  • 1 cup brown sugar, packed
  • 2 large eggs
  • 1 teaspoon vanilla extract

Other Ingredients

  • 3 cups old-fashioned rolled oats (Rolled oats give the best chewiness.)
  • 1 1/2 cups raisins (Consider substituting with dried cranberries for variation.)

Preparation

  1. In a medium bowl, whisk together the flour, baking powder, salt, cinnamon, and nutmeg.
  2. In a large bowl, cream the softened butter and both sugars together until they are light and fluffy, about 3-4 minutes.
  3. Add the eggs one at a time, followed by the vanilla extract, mixing well after each addition.
  4. Gradually incorporate the dry ingredients into the wet mixture on low speed until everything is just combined.
  5. Use a spatula to fold in the oats and raisins until they are evenly distributed throughout the dough.
  6. Chill the dough in the refrigerator for at least 1 hour.

Baking

  1. Preheat your oven to 350°F (175°C) and line baking sheets with parchment paper.
  2. Scoop tablespoons of dough onto the prepared sheets, making sure to space them about 2 inches apart.
  3. Bake in the preheated oven for 12-14 minutes until the edges are golden, but the centers still look slightly underdone.
  4. Allow the cookies to cool on the baking sheets for 5 minutes before transferring them to wire racks to cool completely.

Store cookies in an airtight container at room temperature for about a week. Freezing is an option to last up to three months.

Dessert, Snack
American
Baking, Comfort Food, Cookies, Dessert Recipes, Oatmeal Raisin Cookies


Oatmeal Raisin Cookies

Delightfully chewy oatmeal raisin cookies are a classic treat that fill your kitchen with a wonderful aroma. Perfect for any occasion, they are easy to make and truly comforting.

Dry Ingredients

  • 2 cups all-purpose flour
  • 1 teaspoon baking powder
  • 1 teaspoon salt
  • 3/4 teaspoon cinnamon
  • 1/4 teaspoon nutmeg

Wet Ingredients

  • 1 1/2 cups (3 sticks) butter, softened (Make sure butter is softened for a light texture.)
  • 1 cup granulated sugar
  • 1 cup brown sugar, packed
  • 2 large eggs
  • 1 teaspoon vanilla extract

Other Ingredients

  • 3 cups old-fashioned rolled oats (Rolled oats give the best chewiness.)
  • 1 1/2 cups raisins (Consider substituting with dried cranberries for variation.)

Preparation

  1. In a medium bowl, whisk together the flour, baking powder, salt, cinnamon, and nutmeg.
  2. In a large bowl, cream the softened butter and both sugars together until they are light and fluffy, about 3-4 minutes.
  3. Add the eggs one at a time, followed by the vanilla extract, mixing well after each addition.
  4. Gradually incorporate the dry ingredients into the wet mixture on low speed until everything is just combined.
  5. Use a spatula to fold in the oats and raisins until they are evenly distributed throughout the dough.
  6. Chill the dough in the refrigerator for at least 1 hour.

Baking

  1. Preheat your oven to 350°F (175°C) and line baking sheets with parchment paper.
  2. Scoop tablespoons of dough onto the prepared sheets, making sure to space them about 2 inches apart.
  3. Bake in the preheated oven for 12-14 minutes until the edges are golden, but the centers still look slightly underdone.
  4. Allow the cookies to cool on the baking sheets for 5 minutes before transferring them to wire racks to cool completely.

Store cookies in an airtight container at room temperature for about a week. Freezing is an option to last up to three months.
Dessert, Snack
American
Baking, Cookies, Dessert, Oatmeal Raisin Cookies, Snack

Crispy Air Fryer Apple Fries

Crispy air fryer apple fries garnished and ready to serve.

Making Crispy Air Fryer Apple Fries is a delightful experience you won’t want to miss. These treats are sweet, crunchy, and perfect for both kids and adults alike. Whether you’re looking for a fun snack or a creative way to use up those apples, this recipe is sure to become a favorite. With every bite, you’ll get a delicious taste of warm apples enveloped in a crispy coating, giving you both comfort and joy. Plus, because they are made in an air fryer, you can enjoy a lighter version without sacrificing any flavor. So, roll up your sleeves and get ready to make a treat that is not only easy to prepare but also sure to impress your friends and family!

How to Prepare Crispy Air Fryer Apple Fries

To make Crispy Air Fryer Apple Fries, start by gathering your ingredients. You will need 2 large apples, 1 cup of all-purpose flour, 2 large eggs, 1 cup of breadcrumbs, 1 teaspoon of cinnamon, and a pinch of salt. First, peel and core the apples, then slice them into thin strips, resembling fries. In three separate bowls, place the flour in one bowl, beat the eggs in another, and mix breadcrumbs with cinnamon and salt in the third.

Next, take each apple strip and dip it into the flour, then the eggs, and finally coat it with the breadcrumb mixture. Make sure each strip is well coated for that perfect crunch. Place the coated apple fries in the air fryer basket in a single layer. Set the temperature to 375°F and cook for about 10-12 minutes or until golden brown and crispy, shaking the basket halfway through to ensure even cooking. Once done, let them cool for a few moments, and they are ready to enjoy!

Why You’ll Love Crispy Air Fryer Apple Fries

There are so many reasons to love Crispy Air Fryer Apple Fries! First of all, they are incredibly easy to whip up, making them a perfect go-to snack or dessert. The combination of sweet apples with a crunchy coating is simply irresistible. These apple fries are not only tasty but also offer a healthier alternative to traditional fried desserts, as they are made with minimal oil.

Moreover, they are versatile! You can serve them as a dessert or a quick snack and even dip them in caramel sauce or yogurt for an extra treat. Kids will enjoy helping in the kitchen, making it a fun cooking experience for the whole family. Best of all, these fries look impressive, making them a great crowd-pleaser at gatherings. Who wouldn’t want to dive into a plate of warm, crispy apple fries?

Tips for Success

To ensure your Crispy Air Fryer Apple Fries turn out perfect, here are some helpful tips. First, choose the right apples. Varieties like Fuji or Honeycrisp work best because they hold their shape and sweetness well when cooked. Make sure to slice the apple strips evenly so they cook uniformly.

Don’t overcrowd the air fryer basket; give the fries some space to crisp up nicely. If you have a lot, consider cooking in batches. Another tip is to spray the apple fries with a light coating of cooking oil before air frying. This will help them achieve a beautifully golden and crispy texture. Lastly, serve them immediately after cooking for the best taste and texture. Enjoying them warm is part of the fun!

Serving Suggestions

Crispy Air Fryer Apple Fries lend themselves well to a variety of serving suggestions. For a fun twist, serve them with a side of caramel sauce or chocolate dip; kids love it! You can also pair them with yogurt or whipped cream for a light dessert option. For added flair, dust the apple fries with powdered sugar or a sprinkle of cinnamon after they’re cooked.

These apple fries are great as a playful snack for gatherings, picnics, or even movie nights at home. You can serve them on a festive platter, adding slices of fresh fruit or nuts for color. They also make a tasty addition to brunch, offering something sweet alongside savory dishes. No matter how you serve them, these apple fries are sure to bring a smile!

FAQs

1. Can I use other types of fruit?

Yes! You can try using pears or even bananas for a different take on this recipe. Just be mindful of the cooking time, as softer fruits may require less time in the air fryer.

2. How do I store leftover apple fries?

Store any leftover apple fries in an airtight container in the refrigerator. They are best enjoyed fresh, but you can reheat them for a quick snack the next day.

3. Can I make these apple fries gluten-free?

Absolutely! Replace all-purpose flour with your favorite gluten-free flour and use gluten-free breadcrumbs. They will still taste delicious!

4. What can I add to the coating for more flavor?

You could mix in some sugar, nutmeg, or even vanilla extract to the egg mixture for added flavor. Experimenting with spices can give your fries a unique twist!

5. Can I make these without an air fryer?

Yes, you can bake them in a traditional oven. Preheat the oven to 400°F and bake them on a parchment-lined baking sheet for about 15-20 minutes, flipping halfway through.

[tasty-recipe id=”5039″]

Crispy Air Fryer Apple Fries

Enjoy these delightful, crunchy apple fries, made healthier in an air fryer without sacrificing flavor. Perfect as a snack or dessert for all ages.

Main Ingredients

  • 2 large apples (Varieties like Fuji or Honeycrisp are recommended for their sweetness and ability to hold shape.)
  • 1 cup all-purpose flour (Can be substituted with gluten-free flour for a gluten-free version.)
  • 2 large eggs (Beaten for coating.)
  • 1 cup breadcrumbs (Use gluten-free breadcrumbs for a gluten-free version.)
  • 1 teaspoon cinnamon (For flavor enhancement.)
  • 1 pinch salt (To taste.)

Optional Serving Suggestions

  • caramel sauce (For dipping.)
  • yogurt or whipped cream (For a lighter dessert option.)
  • powdered sugar (For dusting on cooked fries.)
  • chocolate dip (Another fun dipping option.)

Preparation

  1. Peel and core the apples, then slice them into thin strips resembling fries.
  2. In the first bowl, place the flour. In the second bowl, beat the eggs. In the third bowl, mix breadcrumbs with cinnamon and salt.

Coating

  1. Dip each apple strip into the flour, then the eggs, and finally coat with the breadcrumb mixture, ensuring each strip is well coated.

Cooking

  1. Place the coated apple fries in the air fryer basket in a single layer.
  2. Set the temperature to 375°F (190°C) and cook for about 10-12 minutes or until golden brown and crispy, shaking the basket halfway through.
  3. Let the apple fries cool for a few moments before serving.

For best results, do not overcrowd the air fryer basket. If needed, cook in batches. Spray the apple fries lightly with cooking oil before air frying for added crispiness. These fries are best served warm.

Dessert, Snack
American
Air Fryer, Apple Fries, Dessert, Easy Recipe, Healthy Snack

Lettuce Wrap Summer Rolls

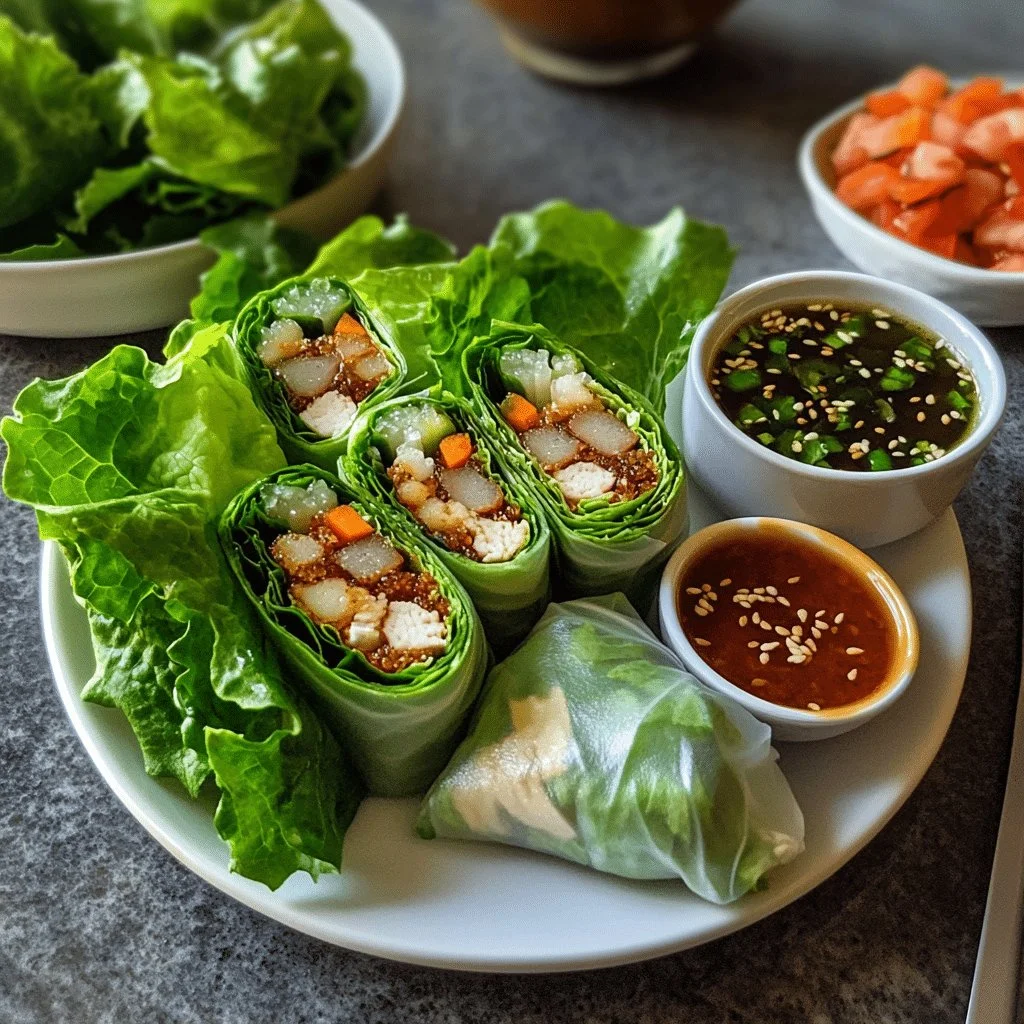
Lettuce Wrap Summer Rolls filled with fresh vegetables and herbs

Lettuce Wrap Summer Rolls a spring roll recipe packed with veggies, chicken, and rolled in lettuce leaves and rice paper for a lite bite. perfect for warm days, potlucks, or quick weeknight meals. The rolls taste fresh, a little sweet, and very satisfying, with a mix of textures that people love. If you like easy finger foods, you might also enjoy cheese garlic rolls for a snack. Get ready to make a simple fresh roll that everyone will ask for again.

How to prepare Lettuce Wrap Summer Rolls

  1. Wash and dry large lettuce leaves well, whole and flat.
  2. Slice veggies thin: carrots, cucumbers, bell pepper, and avocado.
  3. Cook any protein, like tofu, shrimp, or chicken, then cut into strips.
  4. Lay a lettuce leaf flat on a plate.
  5. Place a small handful of rice noodles or cooked quinoa in the center, if using.
  6. Add a few strips of protein and a mix of sliced veggies.
  7. Sprinkle fresh herbs, such as mint or cilantro, over the filling.
  8. Fold the sides of the lettuce over the filling, then roll from the bottom up, like a wrap.
  9. Make a simple dipping sauce, for example soy sauce with lime, a little honey, and chili flakes.
  10. Serve the rolls cold or at room temperature, with sauce on the side.

Lettuce Wrap Summer Rolls

Why You’ll Love Lettuce Wrap Summer Rolls

  • They are light and fresh, perfect for warm weather.
  • You can change the filling, so they work for vegan, gluten-free, or low-carb diets.
  • They come together fast and make a colorful plate.
  • Kids and adults like them because they are fun to eat with hands.
  • They make a great healthy appetizer, snack, or full meal when you add protein.

Tips for success

  • Use very dry lettuce leaves so the wrap holds and does not get soggy.
  • Slice veggies thin and similar size for even bites.
  • Do not overfill, a small amount makes rolling easier.
  • Keep a damp towel nearby to cover leaves and keep them fresh until you serve.
  • Make the dipping sauce ahead to let flavors blend.
  • If serving later, store fillings and lettuce separately and assemble just before serving.

Serving Suggestions

  • Serve with peanut sauce, hoisin sauce, or a lime soy dip.
  • Add fresh herbs like basil, mint, or cilantro for bright flavor.
  • Pair with a light salad or cold noodle salad for a full meal.
  • Offer a platter of different fillings, so guests can build their own fresh rolls.
  • Add a side of pickled veggies for a tangy contrast.

Lettuce Wrap Summer Rolls

FAQs

Q: Can I make these ahead of time? A: You can prep the fillings a few hours ahead, but wrap just before serving to keep lettuce crisp.

Q: Are these gluten-free? A: Yes, they can be gluten-free if you use gluten-free sauce and skip soy sauce or use tamari.

Q: What proteins work best? A: Tofu, shrimp, grilled chicken, or tempeh all work well and taste great with fresh herbs.

Q: How do I keep them from falling apart? A: Use firm, large lettuce leaves and roll snugly without too much filling.

Q: Can I make them vegan? A: Yes, use tofu or tempeh and a vegan dipping sauce, they are easy to make vegan.

Conclusion

For a bit more inspiration and a similar recipe idea, check this detailed version at Lettuce Wrap Summer Rolls – Eat Figs, Not Pigs.

Lettuce Wrap Summer Rolls

A fresh and light spring roll recipe packed with veggies and protein, wrapped in lettuce leaves and rice paper, perfect for warm days and quick meals.

Fresh Ingredients

  • 8 leaves large lettuce leaves (Use very dry to avoid sogginess.)
  • 1 cup rice noodles or cooked quinoa (Optional for added texture.)
  • 1 cup sliced carrots (Sliced thin.)
  • 1 cup sliced cucumbers (Sliced thin.)
  • 1 cup sliced bell pepper (Sliced thin.)
  • 1 medium sliced avocado (Sliced thin.)
  • 1 cup protein of choice (tofu, shrimp, chicken) (Cooked and sliced into strips.)
  • 0.5 cup fresh herbs (mint or cilantro) (For sprinkling over the filling.)

Dipping Sauce

  • 3 tablespoons soy sauce (Or gluten-free tamari.)
  • 1 tablespoon lime juice
  • 1 teaspoon honey (Optional for sweetness.)
  • 0.5 teaspoon chili flakes (For a spicy kick.)

Preparation

  1. Wash and dry large lettuce leaves well, keeping them whole and flat.
  2. Slice veggies thin: carrots, cucumbers, bell pepper, and avocado.
  3. Cook any protein (tofu, shrimp, or chicken) and cut into strips.

Assembly

  1. Lay a lettuce leaf flat on a plate.
  2. Place a small handful of rice noodles or cooked quinoa in the center, if using.
  3. Add a few strips of protein and a mix of sliced veggies.
  4. Sprinkle fresh herbs over the filling.
  5. Fold the sides of the lettuce over the filling, then roll from the bottom up, forming a wrap.

Serving

  1. Make a simple dipping sauce by combining soy sauce, lime juice, honey, and chili flakes.
  2. Serve the rolls cold or at room temperature, with sauce on the side.

Tips for success: Use very dry lettuce leaves, slice vegetables thin and uniformly, do not overfill, keep a damp towel for fresh leaves, prepare dipping sauce ahead, and store fillings separately if serving later.

Appetizer, lunch, Snack
Asian, Gluten-Free, Vegan
Easy Finger Food, Fresh Rolls, Healthy Snack, Lettuce Wrap Summer Rolls, Spring Rolls

Egg Muffins with Smashed Tater Tot Crust

Delicious egg muffins with a crispy smashed tater tot crust garnished with herbs.

If breakfast had a personality, these Tater Tot Egg Cups would be the fun, dependable friend who always shows up with snacks. They’re crispy, cheesy, packed with bacon, and incredibly easy to make. Think brunch-worthy flavor that also works perfectly for busy weekday mornings a total win.

This recipe came together one Sunday when I was looking at a bag of tater tots and a nearly empty carton of eggs, wondering how to turn them into something special. It worked better than expected, and now I always keep a batch in my fridge or freezer. Whether you’re meal prepping, feeding a group, or just trying to make mornings easier, these little bites do the job.If you enjoy other egg muffin ideas, try a similar twist like egg muffins with spinach and feta.

How to prepare Egg Muffins with Smashed Tater Tot Crust

  1. Preheat your oven to 400°F (200°C). Lightly grease a 12-cup muffin tin.
  2. Place frozen tater tots on a plate to thaw a little, or use them straight from frozen. Put 3 tater tots in each muffin cup. Press them down with a spoon or the bottom of a glass to form a thin crust on the bottom and up the sides.
  3. Bake the pressed tater tot shells for 10 minutes, until they start to brown and set. Remove the tin from the oven.
  4. In a bowl, whisk 8 large eggs with 1/4 cup milk or cream, 1/2 teaspoon salt, and 1/4 teaspoon black pepper. Stir in 1 cup shredded cheddar cheese and any cooked add-ins like chopped cooked bacon, cooked sausage, or sautéed peppers and onions.
  5. Spoon the egg mix into each tater tot cup, filling about 3/4 full. The eggs will rise as they bake.
  6. Bake for 12 to 18 minutes, until the eggs are set in the center and a toothpick comes out clean. Let the muffins cool in the tin for 5 minutes, then run a knife around each and lift them out. Serve warm.

Egg Muffins with Smashed Tater Tot Crust

Why You’ll Love Egg Muffins with Smashed Tater Tot Crust

  • Easy to make, with simple steps and few tools.
  • Crispy outside, soft inside, great texture in every bite.
  • Flexible, you can use any cheese, meat, or veggies you like.
  • Make ahead and reheat, perfect for busy mornings.
  • Kid friendly, and good for brunch with friends.

Tips for success

  • Press the tater tots well into the tin so the crust holds the egg mix.
  • Par-bake the crust so it stays crispy and does not get soggy.
  • Use a metal muffin tin for better browning.
  • Let muffins cool a little before removing, they hold shape better.
  • For easy clean up, use a little oil or spray in the tin, or use silicone liners.

Serving Suggestions

  • Serve with ketchup, hot sauce, or salsa on the side.
  • Add a green salad for a light lunch or brunch.
  • Pair with fresh fruit or roasted potatoes for a full breakfast plate.
  • Pack them in a lunchbox with a small cooler for a morning on the go.

Egg Muffins with Smashed Tater Tot Crust

FAQs

Q: Can I make these ahead and freeze them?

A: Yes, cool them fully, wrap in foil or a bag, and freeze. Reheat in the oven or microwave until hot.

Q: Can I use fresh potatoes instead of tater tots?

A: You can, but tater tots give the best crunch. For fresh potatoes, grate and squeeze out water, then press and par-bake the crust.

Q: How long do they keep in the fridge?

A: Store in an airtight container for 3 to 4 days. Reheat in the oven or microwave.

Q: Can I make them dairy free?

A: Use dairy free cheese or skip the cheese and add more herbs and veggies for flavor.

Q: What oven time works best for a full muffin tin?

A: If your tin is full, check at 12 minutes and add a few more minutes until eggs are set.

Conclusion

If you want another take on mini egg muffins with a tater tot crust, check this recipe for more ideas and a step by step guide, Mini Breakfast Omelets (Egg Muffins With A Tater Tot Crust) – Instrupix.

Tater Tot Egg Cups

Crispy, cheesy, and packed with bacon, these Tater Tot Egg Cups are perfect for breakfast or brunch. Easy to make and great for meal prep.

For the Tater Tot Crust

  • 36 pieces 36 frozen tater tots (You can use them straight from frozen.)

For the Egg Mixture

  • 8 large large eggs
  • 1/4 cup milk or cream (Can substitute with dairy-free options.)
  • 1/2 teaspoon salt
  • 1/4 teaspoon black pepper
  • 1 cup shredded cheddar cheese (Feel free to use any cheese you like.)
  • cooked add-ins (like chopped cooked bacon, cooked sausage, or sautéed peppers and onions) (Optional, adjust quantity to preference.)

Preparation

  1. Preheat your oven to 400°F (200°C) and lightly grease a 12-cup muffin tin.
  2. Place frozen tater tots on a plate to thaw a little. Put 3 tater tots in each muffin cup and press them down to form a thin crust.

Baking the Crust

  1. Bake the pressed tater tot shells for 10 minutes until they start to brown and set. Remove the tin from the oven.

Preparing the Egg Mixture

  1. In a bowl, whisk together the eggs, milk or cream, salt, and pepper.
  2. Stir in the shredded cheese and any cooked add-ins.

Final Baking

  1. Spoon the egg mixture into each tater tot cup, filling about 3/4 full.
  2. Bake for 12 to 18 minutes until the eggs are set and a toothpick comes out clean.
  3. Let the muffins cool in the tin for 5 minutes, then run a knife around each and lift them out. Serve warm.

Press the tater tots well into the tin and par-bake them for better texture. Use a metal muffin tin for more even browning and allow muffins to cool a bit for easier removal.

Breakfast, Brunch
American
Breakfast Muffins, Easy Egg Recipe, Egg Muffins, Make Ahead Breakfast, Tater Tot Egg Cups

2 Ingredient Cottage Cheese Flatbread Recipe

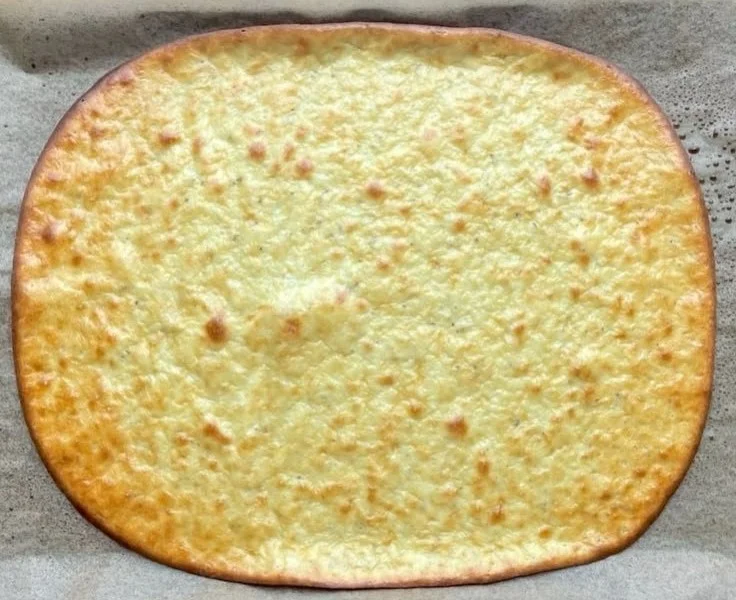
Delicious cottage cheese flatbread made with just two ingredients.

This 2 Ingredient Cottage Cheese Flatbread Recipe is quick, simple, and tasty. It feels fresh from the oven, soft in the middle, and a little crisp on the edges. People love it because it uses just cottage cheese and eggs, so you can make flatbread fast for breakfast, lunch, or a snack. If you want a similar easy idea for low carb flatbread, check this helpful guide for a related version, two ingredient cottage cheese bread tips. This flatbread is a crowd-pleaser, mild in flavor, and very flexible, so you can top it any way you like, and you will want to make it again, trust me, it’s fun to cook.

How to prepare 2 Ingredient Cottage Cheese Flatbread

Ingredients

  • 1 cup cottage cheese
  • 2 large eggs
  • pinch of salt, optional
  • a little oil or butter for the pan, optional

Directions

  1. Put cottage cheese and eggs in a blender or food processor. Blend until smooth and well mixed.
  2. Add a pinch of salt if you want. Mix again a few seconds.
  3. Heat a nonstick pan on medium low. Add a little oil or butter if you like.
  4. Pour about 1/4 to 1/3 cup batter into the pan for each flatbread. Spread a bit with the back of the spoon.
  5. Cook 2 to 3 minutes until edges look set and the bottom is light brown. Flip and cook 1 to 2 minutes more.
  6. Repeat with the rest of the batter. Serve warm.

2 Ingredient Cottage Cheese Flatbread Recipe

Why You’ll Love 2 Ingredient Cottage Cheese Flatbread

  • Fast to make, you can mix and cook in 10 to 15 minutes.
  • Uses few ingredients, great when you want simple food.
  • Low carb and high in protein, it fits many simple diets.
  • Mild taste works with sweet or savory toppings, it feels like a blank canvas.
  • Soft and tender, but you can make it a bit crisp with more pan time.

Tips for success

  • Blend well, smooth batter makes a nicer flatbread.
  • Use a nonstick pan or a small amount of oil to avoid sticking.
  • Cook on medium low so the inside cooks without burning the outside.
  • Make pieces small if you want fast, even cooking.
  • Let the batter sit a minute if it seems runny, it firms up slightly.

Serving Suggestions

  • Top with avocado, tomato, and a sprinkle of salt for a light lunch.
  • Use as a base for eggs and smoked salmon at breakfast.
  • Spread peanut butter and sliced banana for a quick sweet snack.
  • Serve with soup or salad instead of bread.
  • Make mini pizzas, add sauce, cheese, and bake briefly.

2 Ingredient Cottage Cheese Flatbread Recipe

FAQs

Q: Is this flatbread gluten free?

A: Yes, the recipe uses only cottage cheese and eggs, so it is naturally gluten free.

Q: Can I use ricotta instead of cottage cheese?

A: You can try ricotta, but the texture may be softer. Blend well to get a smooth batter.

Q: How long does it keep in the fridge?

A: Store cooked flatbreads in an airtight container for 2 to 3 days, reheat in a pan or oven.

Q: Can I make the batter ahead?

A: You can mix the batter and keep it in the fridge for a day, stir before cooking.

Q: Is this low carb?

A: Yes, with cottage cheese and eggs the carbs are low compared to regular flour bread.

Conclusion

This 2 Ingredient Cottage Cheese Flatbread Recipe is a quick, flexible choice for any meal. It makes a soft, tasty flatbread with little work, and you can top it any way you like. For another take on a simple low carb cottage cheese flatbread, see this helpful recipe online, 2 Ingredient Cottage Cheese Flatbread – Instrupix. Enjoy making it, and have fun with your toppings.

2 Ingredient Cottage Cheese Flatbread

This quick and simple flatbread recipe uses just cottage cheese and eggs, making it a delicious option for breakfast, lunch, or a snack.

Main ingredients

  • 1 cup cottage cheese
  • 2 large eggs
  • pinch salt (optional)
  • a little oil or butter for the pan (optional)

Preparation

  1. Put cottage cheese and eggs in a blender or food processor. Blend until smooth and well mixed.
  2. Add a pinch of salt if desired. Mix again for a few seconds.

Cooking

  1. Heat a nonstick pan on medium low. Add a little oil or butter if preferred.
  2. Pour about 1/4 to 1/3 cup batter into the pan for each flatbread. Spread with the back of the spoon.
  3. Cook for 2 to 3 minutes until edges look set and the bottom is light brown. Flip and cook for an additional 1 to 2 minutes.
  4. Repeat with the remaining batter. Serve warm.

Tips for success include blending well for a smoother batter, using a nonstick pan or oil to avoid sticking, cooking on medium low heat, making small pieces for even cooking, and letting the batter sit for a minute if it seems runny.

Breakfast, Snack
American
Cottage Cheese Flatbread, Easy Recipe, High Protein, Low Carb Bread, Quick Flatbread

Chocolate Strawberry Yogurt Clusters

Chocolate strawberry yogurt clusters featuring rich chocolate and fresh strawberries.

A simple bite of sweet strawberry, creamy yogurt, and rich chocolate makes snack time feel like a small treat. Chocolate Strawberry Yogurt Clusters are easy to make, light, and fun for kids and adults. They freeze firm, hold together well, and taste like a tiny dessert that is also a bit healthy. This recipe is a crowd-pleaser at parties, a quick after-school snack, and a good way to use fresh strawberries. Get ready to make a frozen treat that everyone will ask about, and you will smile when they do.

How to prepare Chocolate Strawberry Yogurt Clusters

Ingredients

  • 1 cup plain or vanilla Greek yogurt
  • 1 tablespoon honey or maple syrup, if you like sweeter yogurt
  • 1 cup strawberries, washed and diced small
  • 1/2 cup dark chocolate chips or chopped dark chocolate
  • 1 teaspoon coconut oil or a little butter, optional for smoother chocolate
  • Parchment paper and a baking sheet

Directions

  1. Mix the yogurt and honey in a bowl, taste, and add more sweetener if needed.
  2. Fold the diced strawberries into the yogurt gently.
  3. Line a baking sheet with parchment paper. Use a small spoon to drop tablespoon-sized mounds of the yogurt-strawberry mix onto the paper. Leave space between each mound.
  4. Freeze the tray for about 1 to 2 hours, until the clusters are firm.
  5. Melt the chocolate chips with the coconut oil in a small bowl over low heat or in 20-second bursts in the microwave, stirring until smooth.
  6. Dip half of each frozen yogurt cluster into the melted chocolate, or drizzle chocolate on top with a spoon.
  7. Place the clusters back on the parchment and freeze for another 10 to 20 minutes, until the chocolate sets.
  8. Store the clusters in an airtight container in the freezer. Eat straight from the freezer for a firm bite, or let sit a minute if you want them softer.

Chocolate Strawberry Yogurt Clusters

Why You’ll Love Chocolate Strawberry Yogurt Clusters

  • They mix fruit and chocolate in one bite, so you get fresh flavor and a sweet touch.
  • You make them in minutes and freeze, so they are ready when you need a snack.
  • They are light, lower in sugar if you use plain yogurt, and good for kids lunch boxes.
  • You can change the yogurt, fruit, or chocolate to match what you have, so they stay simple and flexible.

Tips for success

  • Use firm, ripe strawberries so the clusters hold shape and taste fresh.
  • Freeze the yogurt mounds fully before adding chocolate, this keeps the chocolate from melting into the yogurt.
  • If chocolate is too thick, add a tiny bit of coconut oil to loosen it.
  • Work quickly when dipping, and keep the tray in the freezer so the clusters stay cold.
  • Store in a single layer first to avoid sticking, then you can stack with parchment between layers.

Serving Suggestions

  • Serve straight from the freezer on a small plate for a cool treat.
  • Add a few chopped nuts or shredded coconut on top of the chocolate before it sets for extra texture.
  • Pair with fresh fruit or a small bowl of extra yogurt for dipping.
  • Bring them to a potluck or use them as a sweet finish for a summer picnic.

Chocolate Strawberry Yogurt Clusters

FAQs

Q: How long do these stay good in the freezer?
A: They last about 2 to 3 weeks in an airtight container, and still taste good. For best texture, eat within two weeks.

Q: Can I use frozen strawberries instead of fresh?
A: You can, but thaw and drain them well so the yogurt does not get watery.

Q: Can I make these dairy-free?
A: Yes, use plant-based yogurt and dairy-free chocolate to keep them vegan.

Q: Will the chocolate crack when I bite into the frozen cluster?
A: The chocolate may crack a little, which gives a nice texture contrast. Let clusters sit a minute if you want softer chocolate.

Q: Can I add other fruit or mix-ins?
A: Yes, try blueberries, raspberries, small banana pieces, or a few chopped nuts.

Conclusion

If you want another take or inspiration for making frozen fruit and yogurt treats, check this helpful recipe guide from a registered dietitian, Chocolate-Covered Strawberry Yogurt Clusters | Walder Wellness, RD.

Chocolate Strawberry Yogurt Clusters

A delightful frozen treat combining sweet strawberries, creamy yogurt, and rich chocolate, perfect for snacks or parties.

For the yogurt mixture

  • 1 cup plain or vanilla Greek yogurt (Use plain for lower sugar)
  • 1 tablespoon honey or maple syrup (Optional, adjust to desired sweetness)
  • 1 cup strawberries, washed and diced small (Use firm, ripe strawberries)

For the chocolate coating

  • 1/2 cup dark chocolate chips or chopped dark chocolate (Can substitute with dairy-free chocolate for vegan)
  • 1 teaspoon coconut oil or a little butter (Optional for smoother chocolate)

Equipment

  • Parchment paper (To line the baking sheet)
  • Baking sheet (For freezing the clusters)

Preparation

  1. Mix the yogurt and honey in a bowl, taste, and add more sweetener if needed.
  2. Fold the diced strawberries into the yogurt gently.
  3. Line a baking sheet with parchment paper. Use a small spoon to drop tablespoon-sized mounds of the yogurt-strawberry mix onto the paper. Leave space between each mound.
  4. Freeze the tray for about 1 to 2 hours, until the clusters are firm.

Chocolate Coating

  1. Melt the chocolate chips with the coconut oil in a small bowl over low heat or in 20-second bursts in the microwave, stirring until smooth.
  2. Dip half of each frozen yogurt cluster into the melted chocolate, or drizzle chocolate on top with a spoon.
  3. Place the clusters back on the parchment and freeze for another 10 to 20 minutes, until the chocolate sets.

Storage

  1. Store the clusters in an airtight container in the freezer. Eat straight from the freezer for a firm bite, or let sit a minute if you want them softer.

Use firm, ripe strawberries for best results. Freeze yogurt mounds fully before adding chocolate to avoid melting. Store in a single layer first to avoid sticking.

Dessert, Snack
American
Chocolate Strawberry Yogurt Clusters, Easy Recipes, Frozen Treats, Healthy Desserts, Kid-Friendly Snacks

Air Fryer Cauliflower

Crispy air fryer cauliflower served in a bowl with spices

I love how air fryer cauliflower turns simple veg into a snack or side that everyone asks for again, it gets crispy outside and tender inside with little oil, and it feels a bit like a treat while still being healthy. This Air Fryer Cauliflower recipe is a crowd-pleaser, full of bright flavor and a crunch that makes veggies fun. It is easy to make, works for busy weeknights, and is great for parties, Friends and family will reach for seconds, and you might hide a few pieces for yourself, because yes, you will be excited to make it.

how to prepare Air Fryer Cauliflower

  1. Wash and cut one head of cauliflower into bite sized florets.
  2. In a bowl, toss florets with 1 to 2 tablespoons of olive oil, 1 teaspoon salt, 1/2 teaspoon black pepper, and 1 teaspoon garlic powder, mix until evenly coated.
  3. Preheat the air fryer to 400°F, about 3 to 5 minutes.
  4. Place cauliflower in the air fryer basket in a single layer, do not crowd, you may need two batches.
  5. Air fry at 400°F for 12 to 15 minutes, shake the basket gently at the 6 and 10 minute marks, cook until edges are golden and crisp.
  6. For extra flavor, toss with a squeeze of lemon juice and a sprinkle of chopped parsley before serving.

Air Fryer Cauliflower

Why You’ll Love Air Fryer Cauliflower

  • It cooks fast, you get a crisp finish in about 15 minutes.
  • It uses little oil, so it feels light but still tastes great.
  • It is flexible, you can change spices to make it spicy, smoky, or herby.
  • Kids and adults both enjoy the crisp texture and savory taste.

In case you want another fun air fryer snack idea while you cook, try this simple twist on air fryer grilled cheese hot dogs, it is another easy and fun treat.

tips for success

  • Cut florets to similar sizes so they cook evenly.
  • Do not overcrowd the basket, leave space so air moves and crisps the cauliflower.
  • Shake the basket once or twice while cooking for even browning.
  • If you like it extra crunchy, add 2 to 3 minutes to the cook time, watch closely to avoid burning.
  • Use a light spray of oil if you want a crisp finish but want to limit oil.

Serving Suggestions

  • Serve with a simple yogurt dip, ranch, or spicy mayo.
  • Add to grain bowls with rice, roasted chickpeas, and greens.
  • Toss with parmesan and herbs for a savory side.
  • Use in tacos with slaw and hot sauce for a meatless taco night.

Air Fryer Cauliflower

FAQs

Q: Can I use frozen cauliflower in the air fryer?
A: Yes, but thaw and pat dry first, then toss with oil and spices, cook a bit longer until crisp.

Q: What temperature is best for air frying cauliflower?
A: 400°F gives a good balance of crisp outside and tender inside.

Q: How do I keep the cauliflower from getting soggy?
A: Do not crowd the basket, dry the florets well, and use a little oil so the air fryer can crisp the surface.

Q: Can I add breadcrumbs for extra crunch?
A: Yes, toss florets in a light coating of seasoned breadcrumbs or panko after the oil step for extra crisp texture.

Conclusion

This Air Fryer Cauliflower is an easy, tasty way to make a healthy snack or side, try different spices to find your favorite flavor. For more crispy air fryer cauliflower tips and a slightly different seasoning method, see this Crispy Air Fryer Cauliflower Recipe – Little Sunny Kitchen. If you want another top rated take on air fryer cauliflower with bold seasoning ideas, check out Best Damn Air Fryer Cauliflower – RecipeTeacher.

Air Fryer Cauliflower

This Air Fryer Cauliflower recipe transforms simple vegetables into a crispy snack or side dish that everyone loves, full of flavor and easy to prepare.

Main ingredients

  • 1 head cauliflower (Cut into bite-sized florets)
  • 1-2 tablespoons olive oil (For tossing florets)
  • 1 teaspoon salt
  • 1/2 teaspoon black pepper
  • 1 teaspoon garlic powder

Preparation

  1. Wash and cut one head of cauliflower into bite-sized florets.
  2. In a bowl, toss florets with olive oil, salt, black pepper, and garlic powder until evenly coated.

Cooking

  1. Preheat the air fryer to 400°F for about 3 to 5 minutes.
  2. Place cauliflower in the air fryer basket in a single layer, avoiding crowding. You may need to cook in two batches.
  3. Air fry at 400°F for 12 to 15 minutes, shaking the basket gently at the 6 and 10-minute marks. Cook until edges are golden and crisp.
  4. For extra flavor, toss with a squeeze of lemon juice and a sprinkle of chopped parsley before serving.

Cut florets to similar sizes for even cooking. Use a light spray of oil for a crisp finish while limiting oil usage. If you prefer extra crunch, add 2-3 minutes to the cook time.

Side, Snack
American, Healthy
Air Fryer Cauliflower, Crispy Cauliflower, Easy Recipes, Healthy Snack, Vegetarian Side Dish

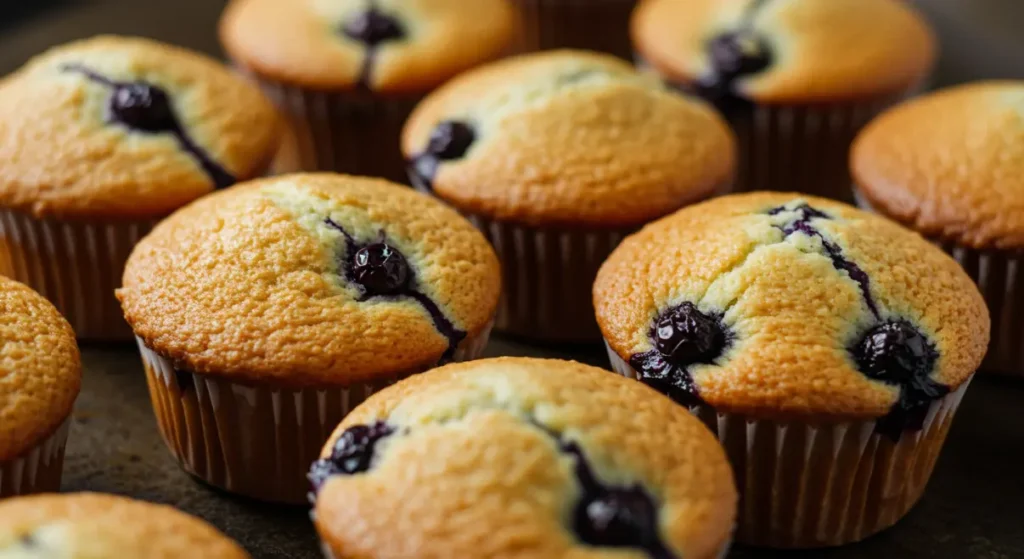
Blueberry Cottage Cheese Muffins

Blueberry Cottage Cheese Muffins

Blueberry Cottage Cheese Muffins are a delightful and healthy choice for breakfast or a snack. These muffins are packed with protein from cottage cheese and full of antioxidants from fresh blueberries. They are also made with whole wheat flour, making them a better alternative to traditional muffins. Plus, they are naturally sweetened with honey, offering a delicious treat without too much sugar. These muffins are easy to make and perfect for the entire family!

How to Make Blueberry Cottage Cheese Muffins

Ingredients:

  • 1 cup cottage cheese
  • 1 cup blueberries
  • 1 cup whole wheat flour
  • 1/4 cup honey
  • 2 eggs
  • 1 teaspoon baking powder
  • 1/2 teaspoon vanilla extract

Directions:

  1. Preheat the oven to 350°F (175°C). Line a muffin tin with paper liners or lightly grease it.
  2. In a large mixing bowl, whisk together the cottage cheese, honey, eggs, and vanilla extract until smooth.
  3. Add the whole wheat flour and baking powder. Stir until just combined—do not overmix.
  4. Gently fold in the blueberries.
  5. Divide the batter evenly among 10 to 12 muffin cups.
  6. Bake for 20–25 minutes, or until a toothpick inserted in the center comes out clean.
  7. Allow the muffins to cool slightly before serving.

How to Serve Blueberry Cottage Cheese Muffins

Blueberry Cottage Cheese Muffins

Blueberry Cottage Cheese Muffins are best enjoyed fresh and slightly warmed to bring out their soft texture and the juicy burst of blueberries. You can warm them in the microwave for about 15-30 seconds or pop them in a toaster oven for a few minutes. Serving them at room temperature is also delicious.

These muffins pair perfectly with a hot cup of coffee or tea, or a cold glass of milk, making them an ideal choice for breakfast or a snack. For an extra touch of flavor, try spreading some butter, cream cheese, or a drizzle of honey on top.

They are versatile enough to be served for breakfast, a quick snack, or even a light dessert. For gatherings like brunch, they make a delightful addition to the table. To enhance presentation, sprinkle powdered sugar or garnish with fresh blueberries. Adding a side of yogurt or fresh fruit can turn them into a more filling treat.

If you’ve stored the muffins in the fridge or freezer, allow them to come to room temperature or warm them slightly before serving to restore their soft and moist texture.

How to Store Blueberry Cottage Cheese Muffins

To keep your blueberry cottage cheese muffins fresh and tasty, proper storage is essential:

  • Room Temperature: Once completely cooled, store muffins in an airtight container or resealable bag. They will stay fresh for about 1-2 days at room temperature. Avoid leaving them uncovered to prevent drying out.

  • Refrigeration: For longer freshness, place muffins in an airtight container and refrigerate. They can last up to a week in the fridge. Note that refrigeration may firm up the muffins slightly, so warming them before eating is recommended.

  • Freezing: Muffins freeze well and can be stored for up to three months. Freeze them on a baking sheet first to prevent sticking, then transfer to a freezer-safe bag or container. When ready to eat, thaw at room temperature or warm in the microwave for a minute. Avoid thawing in the refrigerator to prevent sogginess.

By following these storage tips, you can enjoy your muffins fresh and flavorful well beyond the day they were baked.

Tips for Making Blueberry Cottage Cheese Muffins

To bake moist, fluffy, and flavorful blueberry cottage cheese muffins, keep these helpful tips in mind:

  • Choose full-fat cottage cheese: It adds moisture and richness, resulting in tender muffins without a strong cheese flavor.

  • Mix gently: Combine ingredients until just incorporated to avoid overworking the batter, which can make muffins tough. Fold in blueberries carefully to prevent them from breaking.

  • Use fresh or frozen blueberries: Both work well. If using frozen, add them directly to the batter without thawing to avoid color bleeding and excess moisture.

  • Add citrus zest: Lemon or orange zest adds a bright, fresh flavor that complements the blueberries beautifully.

  • Experiment with flours: Mixing whole grain or oat flour with all-purpose flour can add texture and nutrition while keeping muffins light.

  • Mind your oven temperature: Start baking at a higher temperature for a few minutes to help muffins rise, then lower the heat to finish baking evenly. For example, begin at 425°F for 5 minutes, then reduce to 350°F for 15-20 minutes.

  • Test for doneness: Muffins are ready when the tops are golden and a toothpick inserted into the center comes out clean. An internal temperature near 190°F indicates they are perfectly baked.

  • Customize your muffins: Add nuts, seeds, or chocolate chips for extra flavor and texture. You can also swap out sugar for natural sweeteners like honey or maple syrup.

  • Prevent sticking: Use muffin liners and lightly spray with non-stick spray to ensure easy removal, especially since these muffins contain less oil.

By following these tips, you’ll consistently create delicious blueberry cottage cheese muffins that are moist, fluffy, and packed with flavor.


FAQs

Can I make these muffins gluten-free?
Yes, you can use a gluten-free flour blend instead of whole wheat flour.

How can I make these muffins sweeter?
You can add more honey or a sprinkle of brown sugar on top before baking.

Can I use buttermilk instead of cottage cheese?
Yes, but it may change the texture slightly. You may want to adjust the flour accordingly if the batter seems too runny.

[tasty-recipe id=”2152″]

Blueberry Cottage Cheese Muffins

These Blueberry Cottage Cheese Muffins are a delightful and healthy choice for breakfast or a snack, packed with protein and antioxidants.

Muffin Ingredients

  • 1 cup cottage cheese (Full-fat for moisture.)
  • 1 cup blueberries (Fresh or frozen.)
  • 1 cup whole wheat flour (Can substitute with gluten-free flour.)
  • 1/4 cup honey (Naturally sweetens the muffins.)
  • 2 large eggs (Bind the ingredients together.)
  • 1 teaspoon baking powder (Leavening agent for muffins.)
  • 1/2 teaspoon vanilla extract (Enhances flavor.)

Preparation

  1. Preheat the oven to 350°F (175°C). Line a muffin tin with paper liners or lightly grease it.
  2. In a large mixing bowl, whisk together the cottage cheese, honey, eggs, and vanilla extract until smooth.
  3. Add the whole wheat flour and baking powder. Stir until just combined—do not overmix.
  4. Gently fold in the blueberries.

Baking

  1. Divide the batter evenly among 10 to 12 muffin cups.
  2. Bake for 20–25 minutes, or until a toothpick inserted in the center comes out clean.
  3. Allow the muffins to cool slightly before serving.

Best enjoyed fresh and slightly warmed. Pairs well with coffee, tea, or milk. Can be stored at room temperature for 1-2 days, in the fridge for up to a week, or frozen for up to three months.

Breakfast, Snack
American
Baking, Blueberry Muffins, Breakfast Muffins, Cottage Cheese Muffins, Healthy Muffins