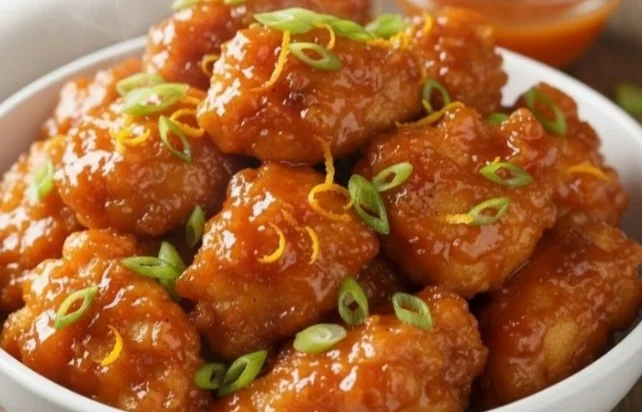
Orange Chicken

Plate of crispy orange chicken with a tangy sauce and garnishes

Orange Chicken is a bright, warm dish many people love. It mixes crisp chicken with a sweet and tangy orange sauce. This dish feels like happy takeout at home, and it fills the room with a fresh citrus smell. The featured recipe is a crowd-pleaser, with a sticky orange glaze that clings to every bite, and a nice crunch from the fried chicken. It tastes sweet, a little sour, and a bit spicy if you like heat, so it makes people smile. If you like orange flavors, try my take on orange cranberry chicken thighs for another easy meal. Get ready to make this and enjoy a plate that feels like your favorite takeout, right at home.

how to prepare Orange Chicken

  1. Cut boneless chicken into bite sized pieces. Pat dry with paper towel.
  2. Toss chicken in a little salt and pepper. Coat with flour or cornstarch for a crisp crust.
  3. Heat oil in a pan or deep fryer to medium high heat. Fry chicken until golden and cooked through, drain on paper towel.
  4. Make the orange sauce, mix orange juice, sugar, soy sauce, vinegar, garlic, and a bit of ginger in a small pot. Add a splash of water and taste, add chili flakes if you want heat.
  5. Bring sauce to a simmer, then stir in a cornstarch slurry to thicken. Cook until glossy and sticky.
  6. Toss the fried chicken in the sauce until every piece is coated. Serve hot with rice or noodles, and top with sesame seeds and sliced green onion.

Orange Chicken

Why You’ll Love Orange Chicken

  • It has a sweet and tangy orange flavor that feels fresh.
  • The sauce is sticky and clings to crispy chicken for a great texture.
  • It is fast to make and works for weeknights or a party.
  • You can change the heat level or make it more sweet, so it fits your taste.
  • It tastes like takeout, but it is homemade and you control the ingredients.

tips for success

  • Dry the chicken well before coating, this keeps it crisp.
  • Use cornstarch or a mix of flour and cornstarch for a light, crunchy crust.
  • Fry at the right oil temperature, not too low, so the chicken does not get soggy.
  • Make the sauce a little thicker than you think, it will thin a bit when you toss the chicken.
  • Taste the sauce as you cook, add more soy sauce for salt, or more sugar for sweetness.
  • If you want less oil, you can bake or air fry the chicken, then toss with the sauce.

Serving Suggestions

  • Serve with steamed white rice or brown rice to soak the sauce.
  • Try it with fried rice, lo mein, or steamed vegetables for a full meal.
  • Add steamed broccoli or snap peas for color and crunch.
  • Garnish with sesame seeds, sliced green onion, or thin orange slices for a fresh look.

Orange Chicken

FAQs

Q: Can I make the sauce without fresh orange juice?

A: Yes, you can use bottled orange juice. Fresh juice is brighter, but bottled works fine.

Q: Can I bake the chicken instead of frying?

A: Yes, bake or air fry the chicken for a lighter dish, then toss with sauce for the same flavor.

Q: How do I store leftovers?

A: Put chicken and sauce in an airtight box in the fridge. Eat within 2 to 3 days. Reheat in a pan or oven to keep it crisp.

Q: Can I make this gluten free?

A: Yes, use tamari or a gluten free soy sauce and cornstarch to coat the chicken.

Conclusion

I hope this simple Orange Chicken recipe helps you enjoy a sweet and tangy meal at home. For another take on orange flavored chicken, you can compare methods with Chinese Orange Chicken – Modern Honey, which shows a classic style and more sauce tips. Give this recipe a try and have fun cooking a bright, tasty dinner.

Orange Chicken

A bright and tangy dish featuring crisp chicken coated in a sweet orange sauce, reminiscent of your favorite takeout.

For the Chicken

  • 1 pound boneless chicken, cut into bite-sized pieces (Pat dry with a paper towel)
  • 1 teaspoon salt
  • 1/2 teaspoon black pepper
  • 1/2 cup flour or cornstarch (For coating chicken)

For the Sauce

  • 1 cup orange juice (Freshly squeezed recommended)
  • 1/2 cup sugar
  • 1/4 cup soy sauce (Use tamari for gluten-free option)
  • 2 tablespoons vinegar (White or rice vinegar)
  • 1 clove garlic, minced
  • 1/2 teaspoon ginger, minced (Optional for flavor)
  • 1 cup water (Add splash to taste)
  • 1 tablespoon cornstarch (Mixed with water to form slurry)
  • 1/2 teaspoon chili flakes (Optional for heat)

Preparation

  1. Cut boneless chicken into bite-sized pieces and pat dry with paper towel.
  2. Toss chicken with salt and pepper, then coat with flour or cornstarch.

Cooking Chicken

  1. Heat oil in a pan or deep fryer to medium-high heat.
  2. Fry chicken until golden and cooked through, then drain on paper towels.

Making the Sauce

  1. In a small pot, mix together orange juice, sugar, soy sauce, vinegar, garlic, ginger, and a splash of water.
  2. Bring sauce to a simmer, then stir in a cornstarch slurry to thicken.
  3. Cook until the sauce is glossy and sticky.

Combining

  1. Toss the fried chicken in the sauce until every piece is coated.
  2. Serve hot with rice or noodles, and top with sesame seeds and sliced green onion.

Dry the chicken well before coating, fry at the right temperature, and adjust sauce according to taste. Baking or air frying is an alternative for reduced oil without losing flavor.

Dinner, Main Course
Asian, Chinese
Crispy Chicken, Orange Chicken, Quick Dinner, Sweet and Tangy, Takeout Style

Air Fryer Calzones

Delicious homemade air fryer calzones filled with cheese and toppings

Warm, cheesy, and ready fast, Air Fryer Calzones are a quick way to get a hot, homemade meal on the table. They give you the same cozy pizza flavors wrapped in a golden pocket, and kids and adults both love them. This recipe is a crowd-pleaser because it is crispy outside, gooey inside, and easy to make with simple ingredients. If you like easy air fryer meals, you might also enjoy the air fryer grilled cheese hot dogs for another fun snack idea. Get your apron on, because you will want to make these again and again.

how to prepare Air Fryer Calzones

Ingredients

  • 1 pound pizza dough, store bought or homemade
  • 1 cup marinara sauce, plus more for dipping
  • 1 1/2 cups shredded mozzarella cheese
  • 12-16 slices pepperoni, or cooked sausage, or vegetables
  • 1 egg, beaten, for egg wash
  • 1 tablespoon olive oil
  • 1/2 teaspoon garlic powder
  • 1/2 teaspoon dried oregano
  • Salt and pepper, to taste
  • Optional, grated Parmesan for topping

Directions

  1. Preheat your air fryer to 370°F, about 3 to 5 minutes.
  2. Lightly flour a clean surface and roll the pizza dough into a rough circle, about 10 to 12 inches across.
  3. Cut the dough into 4 equal pieces, or use a round cutter to make 4 to 6 circles, depending on your size choice.
  4. Mix olive oil, garlic powder, oregano, salt, and pepper. Brush a little oil on the edges of each dough piece.
  5. Spoon 2 tablespoons marinara on one half of each piece, leaving a clean edge. Add a handful of mozzarella and a few pepperoni slices. Do not overfill.
  6. Fold the dough over to cover the filling, press edges to seal, and crimp with a fork or pinch firmly to close.
  7. Brush each calzone with beaten egg for a golden top, and sprinkle a little Parmesan if you want.
  8. Place calzones in the air fryer basket, seam side down, leaving space so air can move. Cook at 370°F for 8 to 12 minutes, until the crust is golden brown and the cheese is melted. You may need to cook in batches.
  9. Let the calzones rest for 2 minutes before serving, they will be very hot inside. Serve with warm marinara for dipping.

Air Fryer Calzones

Why You’ll Love Air Fryer Calzones

  • Fast cooking time, you get a hot meal in under 20 minutes.
  • Crispy outside and melty cheese inside, a perfect contrast.
  • Easy to change the filling, use pepperoni, veggies, or chicken.
  • Less oil than frying, and less heat in your kitchen than an oven.

tips for success

  • Don’t overfill the calzones, too much filling makes them leak.
  • Seal edges well, pinch and crimp or use a fork to press the dough closed.
  • Use parchment or a light spray in the basket to stop sticking.
  • Cook in a single layer with space between calzones so air flows.
  • If the top browns too fast, lower the temperature a little and add a minute or two to the time.
  • Let them cool for a minute or two before cutting, so the cheese sets a bit.

Serving Suggestions

  • Serve with warm marinara sauce for dipping.
  • Add a side salad, simple greens with lemon and olive oil.
  • Try garlic butter brushed on top for extra flavor.
  • Serve with roasted veggies or a cup of soup for a fuller meal.
  • Great as a party snack, cut into smaller pieces for sharing.

Air Fryer Calzones

FAQs

Q: Can I freeze calzones before cooking?

A: Yes, shape and freeze on a tray until firm, then wrap each one and store in a freezer bag. Cook from frozen, add a few extra minutes to the cook time at 370°F.

Q: How do I reheat leftover calzones?

A: Reheat in the air fryer at 350°F for 3 to 5 minutes, or until warm. This keeps the crust crisp.

Q: Can I use store bought pizza sauce?

A: Yes, store bought marinara works great. You can also use pesto or alfredo for a different taste.

Q: What fillings are good for kids?

A: Keep it simple, mozzarella and pepperoni or cooked chicken and cheese are usually a hit.

Q: Do I need to brush with egg?

A: No, egg gives a nice golden color, but olive oil works fine if you want to skip the egg.

Conclusion

Air Fryer Calzones are a simple, tasty way to enjoy pizza flavors fast, and they work for weeknight dinners or weekend snacks. For another easy air fryer calzone idea, check this helpful recipe for Air Fryer Calzones (Crazy Easy) – Momsdish that shows a basic method and tips. If you want a spicy twist, see this version for Air Fryer Buffalo Chicken Calzones – The Creative Bite for a buffalo chicken filling idea.

Air Fryer Calzones

Warm, cheesy, and ready fast, Air Fryer Calzones are a quick way to get a hot, homemade meal with cozy pizza flavors wrapped in a golden pocket.

Dough and Filling

  • 1 pound pizza dough, store bought or homemade
  • 1 cup marinara sauce, plus more for dipping
  • 1.5 cups shredded mozzarella cheese
  • 12-16 slices pepperoni, or cooked sausage, or vegetables (Choose your favorite filling)
  • 1 large egg, beaten, for egg wash (Optional, for golden top)
  • 1 tablespoon olive oil (For brushing)

Spices and Seasoning

  • 0.5 teaspoon garlic powder
  • 0.5 teaspoon dried oregano
  • to taste Salt and pepper
  • optional grated Parmesan for topping (For extra flavor)

Preparation

  1. Preheat your air fryer to 370°F, about 3 to 5 minutes.
  2. Lightly flour a clean surface and roll the pizza dough into a rough circle, about 10 to 12 inches across.
  3. Cut the dough into 4 equal pieces, or use a round cutter to make 4 to 6 circles, depending on your size choice.
  4. Mix olive oil, garlic powder, oregano, salt, and pepper. Brush a little oil on the edges of each dough piece.
  5. Spoon 2 tablespoons marinara on one half of each piece, leaving a clean edge. Add a handful of mozzarella and a few pepperoni slices. Do not overfill.
  6. Fold the dough over to cover the filling, press edges to seal, and crimp with a fork or pinch firmly to close.
  7. Brush each calzone with beaten egg for a golden top, and sprinkle a little Parmesan if you want.

Cooking

  1. Place calzones in the air fryer basket, seam side down, leaving space so air can move.
  2. Cook at 370°F for 8 to 12 minutes, until the crust is golden brown and the cheese is melted. You may need to cook in batches.
  3. Let the calzones rest for 2 minutes before serving, they will be very hot inside.

Tips for success include: Don’t overfill the calzones to prevent leakage, seal edges well, and use parchment or a light spray in the basket to stop sticking.

Dinner, Snack
Italian
Air Fryer Calzones, Easy Calzones, Homemade Calzones, Quick Meals

Air Fryer Stuffed Peppers

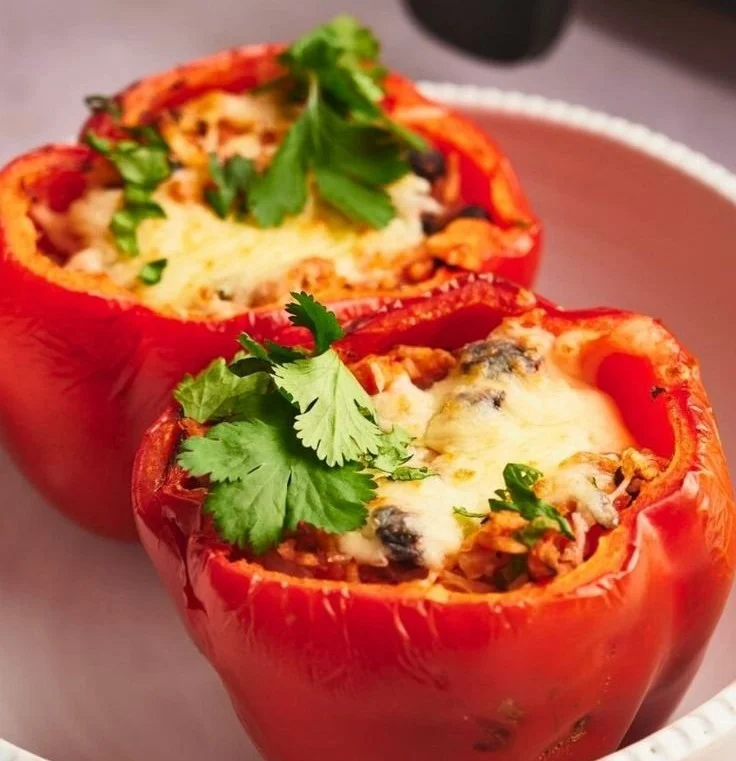
Colorful air fryer stuffed peppers filled with savory ingredients

I love simple meals that taste like you worked hard, when you did not. Air fryer stuffed peppers make a cozy, bright plate with little fuss. This recipe is a crowd-pleaser because it mixes sweet bell peppers, savory meat, and melty cheese in one fun bite. If you like quick air fryer meals, try this dish and later check a fun spin on air fryer sandwiches like air fryer grilled cheese hot dogs for another easy meal idea. You will smile when you see how good it smells, and you might want to make it every week.

How to prepare Air Fryer Stuffed Peppers.

Preheat your air fryer to 350°F (175°C). Wash four bell peppers, cut off the tops, and remove the seeds. In a bowl, cook 1 pound ground beef or turkey with one chopped onion until browned, then drain any extra fat. Stir in 1 cup cooked rice, 1 cup tomato sauce, 1 teaspoon salt, 1/2 teaspoon pepper, and 1/2 cup shredded cheese. Spoon the filling into each pepper, top with a little extra cheese if you like, and place the peppers upright in the air fryer basket. Cook for 10 to 15 minutes, until the peppers are tender and the cheese is melted. Let sit two minutes before serving.

Air Fryer Stuffed Peppers

Why You’ll Love Air Fryer Stuffed Peppers

  • Fast cook time, they are ready in about 20 to 30 minutes.
  • Easy to change, use beef, turkey, or a vegetarian mix with beans and veggies.
  • Healthy and filling, the peppers give color, vitamins, and fiber.
  • Great one-dish meal for kids and guests, this stuffed peppers recipe is simple to scale.

tips for success

  • Choose peppers that sit flat so they stay upright in the basket.
  • Par-cook rice or use leftover rice to save time.
  • Do not overfill, leave a little room so cheese melts on top.
  • Check at 10 minutes, air fryer models cook differently, add time if peppers are still firm.
  • For softer peppers, cook at 350°F for 15 minutes, for firmer peppers, check at 10 minutes.

Serving Suggestions

  • Serve with a simple green salad and a squeeze of lemon for brightness.
  • Add a spoon of sour cream or plain yogurt on top for creaminess.
  • Offer warm crusty bread or garlic bread on the side.
  • Leftovers reheat well in the air fryer for 5 minutes at 350°F.

Air Fryer Stuffed Peppers

FAQs

Q: Can I make stuffed peppers ahead of time?

A: Yes, stuff the peppers and keep them covered in the fridge for up to one day. Air fry when ready.

Q: Can I use frozen peppers?

A: Fresh peppers work best. If frozen, thaw and pat dry, then cook a bit longer.

Q: How do I make this recipe vegetarian?

A: Replace the meat with cooked lentils, chopped mushrooms, or a mix of beans and corn.

Q: Can I add more cheese?

A: Yes, add extra cheese on top before the last few minutes of cooking for a golden finish.

Q: What if my filling is wet?

A: Drain excess liquid from cooked ingredients and add a bit more rice or breadcrumbs to thicken.

Conclusion

Air fryer stuffed peppers bring comfort food to your table with less time and less fuss, they are an easy stuffed peppers recipe you will return to again and again. For another clear step by step air fryer stuffed peppers guide, see this helpful recipe on Air Fryer Stuffed Peppers – The Recipe Critic, and for more tips and variations check the recipe collection at Air Fryer Stuffed Peppers | AirFried.com.

Air Fryer Stuffed Peppers

These air fryer stuffed peppers are a quick, crowd-pleasing dish that combines bell peppers, savory meat, and melty cheese for a flavorful meal.

Main Ingredients

  • 4 pieces bell peppers (Choose peppers that sit flat for stability.)
  • 1 pound ground beef or turkey (Use your preferred type of meat or a vegetarian mix.)
  • 1 cup cooked rice (Par-cook rice or use leftover rice to save time.)
  • 1 cup tomato sauce (For added flavor, use your favorite brand.)
  • 1 teaspoon salt
  • 1/2 teaspoon black pepper
  • 1/2 cup shredded cheese (Add more cheese on top for a golden finish.)

Preparation

  1. Preheat your air fryer to 350°F (175°C).
  2. Wash the bell peppers, cut off the tops, and remove the seeds.
  3. In a bowl, cook the ground beef or turkey with the chopped onion until browned, then drain any extra fat.
  4. Stir in the cooked rice, tomato sauce, salt, pepper, and shredded cheese.
  5. Spoon the filling into each pepper, topping with extra cheese if desired.
  6. Place the peppers upright in the air fryer basket.

Cooking

  1. Cook for 10 to 15 minutes, or until the peppers are tender and the cheese is melted.
  2. Let sit for two minutes before serving.

Check at 10 minutes; air fryer models cook differently. Add time if peppers are still firm. Leftovers can be reheated in the air fryer for 5 minutes at 350°F.

Main Course
American
Air Fryer Stuffed Peppers, Easy Recipes, Healthy Dinners, Quick Meals, Stuffed Peppers

Oven-Roasted Chicken Thighs

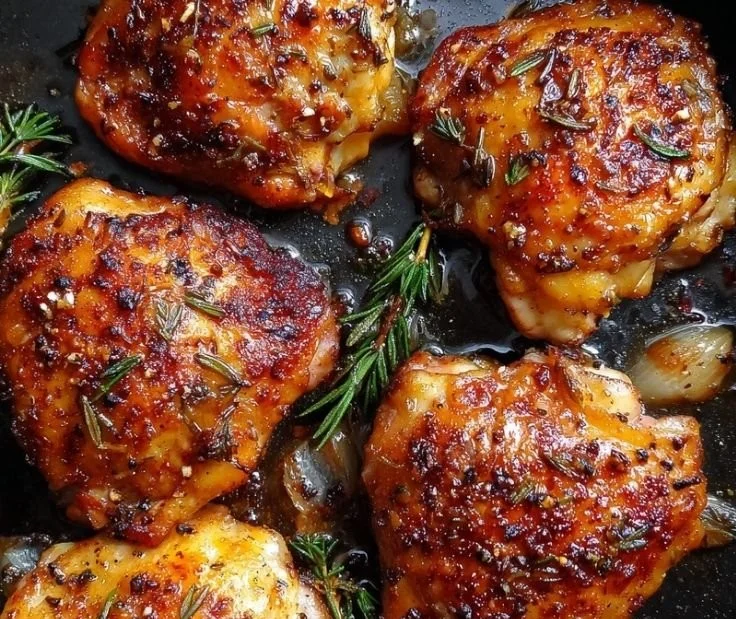
Delicious oven-roasted chicken thighs seasoned and ready to serve

Oven-roasted chicken thighs are simple, cozy, and full of flavor. The skin gets crispy, the meat stays juicy, and the smell fills the kitchen fast. This recipe for Oven-Roasted Chicken Thighs is a real crowd-pleaser, great for weeknights and easy dinners with little fuss. It tastes savory, a bit golden, and very comforting, and many people keep coming back for seconds. If you like bold, easy chicken dishes, you might also enjoy this easy hot honey chicken thighs recipe. Give it a try, you might find a new favorite for busy nights, and you will smile when you see how simple it is to make.

how to prepare Oven-Roasted Chicken Thighs

  1. Preheat your oven to 425°F, this gives a hot blast to crisp the skin.
  2. Pat the chicken thighs dry with paper towels, dry skin gets crispier.
  3. Rub each thigh with a little oil, then season with salt, pepper, garlic powder, and paprika, or your favorite spice mix.
  4. Place the thighs skin-side up on a baking sheet or in a shallow roasting pan, give them some space so air can move around each piece.
  5. Roast for 30 to 40 minutes, until the skin is golden and a meat thermometer reads 165°F at the thickest part.
  6. Let the thighs rest 5 minutes before serving, this keeps the juices inside.

Follow this temperature.

  • At 180°C (350°F), cook for 45–50 minutes.
  • At 200°C (400°F), cook for 35–40 minutes.
  • At 220°C (425°F), cook for 30–35 minutes.

Oven-Roasted Chicken Thighs

Why You’ll Love Oven-Roasted Chicken Thighs

You will love this dish because it is easy and forgiving, the thighs stay juicy even if you are new to cooking. The skin turns crispy, so you get a nice contrast between crunch and tender meat. It works with simple spices, and you can change the seasoning to suit your taste. The recipe fits into a busy week, but it also looks good for guests, so it is a true crowd-pleaser.

Tips for Juicy and Flavorful Chicken

  • Dry the skin well before seasoning, this helps the skin crisp.
  • Use a hot oven, 425°F makes the outside brown fast without drying the meat.
  • Space the thighs apart on the pan, crowded pieces steam and lose crispiness.
  • Check temperature with a meat thermometer, 165°F is safe and keeps the meat juicy.
  • Let the meat rest a few minutes, juices settle and the meat becomes tender.

Serving Suggestions

  • Serve with roasted vegetables, like carrots, potatoes, or Brussels sprouts.
  • Pair with a light salad and a lemon vinaigrette for a fresh balance.
  • Spoon a simple pan sauce over the thighs, or add a touch of hot honey for a sweet glaze.
  • Make a plate with rice or mashed potatoes and steamed greens for a full meal.

Oven-Roasted Chicken Thighs

FAQs

How long do I cook bone-in chicken thighs in the oven?

Roast at 425°F for about 30 to 40 minutes, until the thickest part reads 165°F.

Can I use boneless thighs instead?

Yes, boneless thighs cook faster, about 20 to 30 minutes at 425°F, watch the internal temperature.

How do I keep the skin from getting soggy?

Dry the skin well, use oil, and make sure the oven is hot. Do not cover the pan while roasting.

Can I marinate the thighs ahead of time?

Yes, marinate for a few hours or overnight for more flavor, then bake as usual.

How do I store leftovers?

Cool the chicken, store in an airtight container in the fridge for up to 3 days, reheat in the oven to keep the skin crisp.

Conclusion

For another way to get extra crisp skin and a simple flavor mix, see this detailed guide to Crispy Baked Chicken Thighs – The Salty Marshmallow, it has tips that match well with this oven-roasted method and can help you get an even crispier finish.

Oven-Roasted Chicken Thighs

Simple, cozy, and full of flavor, oven-roasted chicken thighs feature crispy skin and juicy meat, making them a perfect choice for weeknight dinners.

Chicken Thighs

  • 4 pieces bone-in chicken thighs (Skin-on for extra crispiness)

Seasoning

  • 2 tablespoons olive oil (To rub on the chicken)
  • 1 teaspoon salt (To taste)
  • 1 teaspoon black pepper (To taste)
  • 1 teaspoon garlic powder (Optional seasoning)
  • 1 teaspoon paprika (Optional seasoning)

Preparation

  1. Preheat your oven to 425°F (220°C) to get a hot blast for crispy skin.
  2. Pat the chicken thighs dry with paper towels to ensure crispy skin.
  3. Rub each thigh with olive oil and season with salt, pepper, garlic powder, and paprika.
  4. Place the thighs skin-side up on a baking sheet or in a shallow roasting pan, giving them enough space.

Cooking

  1. Roast in the oven for 30 to 40 minutes, until the skin is golden and a meat thermometer reads 165°F at the thickest part.
  2. Let the thighs rest for 5 minutes before serving.

Dry the skin well before seasoning to help it crisp. Make sure to space the thighs apart to avoid steaming. A meat thermometer ensures proper cooking.

Dinner, Main Course
American
Chicken Thighs, Comfort Food, Crispy Chicken, easy chicken recipe, Oven-Roasted Chicken

Baked Boursin Salmon

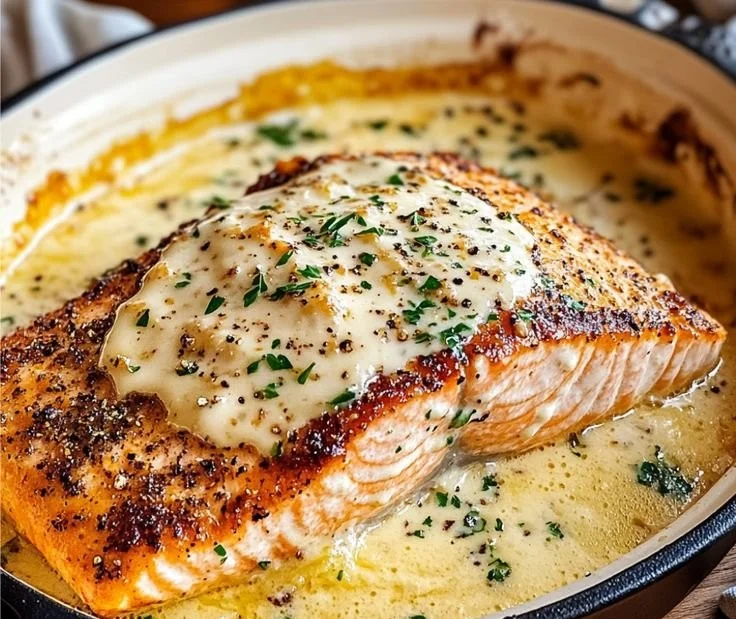
Delicious Baked Boursin Salmon dish served on a plate with herbs

Baked Boursin Salmon is a delightful dish that combines the rich flavor of salmon with the creamy goodness of Boursin cheese. Imagine a perfectly cooked salmon fillet topped with herby, garlicky cheese, creating a dish that is both comforting and elegant. This recipe is sure to impress your family and friends, making it a superb choice for dinner parties or family meals. With its vibrant flavors and easy preparation, it’s a crowd-pleaser that anyone can make. You’ll definitely want to add this delightful recipe to your dinner rotation!

How to prepare Baked Boursin Salmon

To prepare Baked Boursin Salmon, you will need the following ingredients:

Ingredients

  • 2 salmon fillets
  • 4 oz Boursin cheese
  • Fresh chives, chopped
  • Lemon wedges, for serving
  • Salt and pepper, to taste
  • Olive oil

Directions

  1. Preheat your oven to 375°F (190°C).
  2. Line a baking sheet with parchment paper.
  3. Place the salmon fillets on the prepared baking sheet.
  4. Drizzle olive oil over the salmon, and season with salt and pepper.
  5. Spread a generous amount of Boursin cheese over each salmon fillet.
  6. Sprinkle chopped chives on top of the cheese.
  7. Bake in the oven for about 15-20 minutes, or until the salmon is cooked through and flakes easily with a fork.
  8. Serve with lemon wedges for a zesty finish.

Baked Boursin Salmon

Why You’ll Love Baked Boursin Salmon

Baked Boursin Salmon is not just simple to make, it is also packed with flavor. The creamy Boursin cheese brings a rich texture that enhances the salmon’s natural taste. This dish is perfect for both casual family dinners and more formal gatherings, bringing elegance to the table without the stress. Plus, the beauty of this recipe is that it can be prepared in under 30 minutes, making it a go-to favorite for weeknight meals or last-minute entertaining.

Tips for Success

  • Make sure to pat the salmon dry before adding any seasoning, this will help create a nice crust.
  • Feel free to experiment with other herbs or spices, like dill or parsley, to match your taste.
  • For extra flavor, you can add some sliced tomatoes or asparagus to the baking sheet.

Serving Suggestions

Baked Boursin Salmon pairs wonderfully with a fresh salad or roasted vegetables. Consider serving it with garlic mashed potatoes or quinoa for a hearty meal. Add a glass of white wine, like Sauvignon Blanc or Chardonnay, to elevate your dining experience!

FAQs

Can I use a different type of cheese?

Yes, you can substitute Boursin cheese with other soft cheeses like cream cheese or goat cheese for different flavors.

How do I know when the salmon is done?

The salmon is done cooking when it flakes easily with a fork and has an internal temperature of 145°F (63°C).

Can I make this recipe ahead of time?

Yes, you can prepare the salmon and add the cheese mixture in advance, then bake it fresh when you are ready to serve.

Baked Boursin Salmon

Baked Boursin Salmon

A delightful dish combining rich salmon with creamy Boursin cheese, perfect for any meal.

Main Ingredients

  • 2 fillets salmon fillets (Fresh, skinless salmon fillets recommended.)
  • 4 oz Boursin cheese (Can substitute with other soft cheeses if desired.)
  • to taste Fresh chives, chopped (Add according to preference.)
  • as needed Lemon wedges (For serving.)
  • to taste Salt and pepper (For seasoning.)
  • as needed tbsp Olive oil (Use extra virgin for better flavor.)

Preparation

  1. Preheat your oven to 375°F (190°C).
  2. Line a baking sheet with parchment paper.
  3. Place the salmon fillets on the prepared baking sheet.
  4. Drizzle olive oil over the salmon, and season with salt and pepper.
  5. Spread a generous amount of Boursin cheese over each salmon fillet.
  6. Sprinkle chopped chives on top of the cheese.
  7. Bake in the oven for about 15-20 minutes, or until the salmon is cooked through and flakes easily with a fork.
  8. Serve with lemon wedges for a zesty finish.

Pat the salmon dry before seasoning for a better crust. Feel free to experiment with other herbs like dill or parsley. Adding sliced tomatoes or asparagus can enhance the dish.

Dinner, Main Course
American, Elegant
Baked Salmon, Boursin Cheese, Comfort Food, Dinner Party, Easy Recipes

Honey BBQ Chicken Rice: 5 Reasons You’ll Love This Comfort Dish

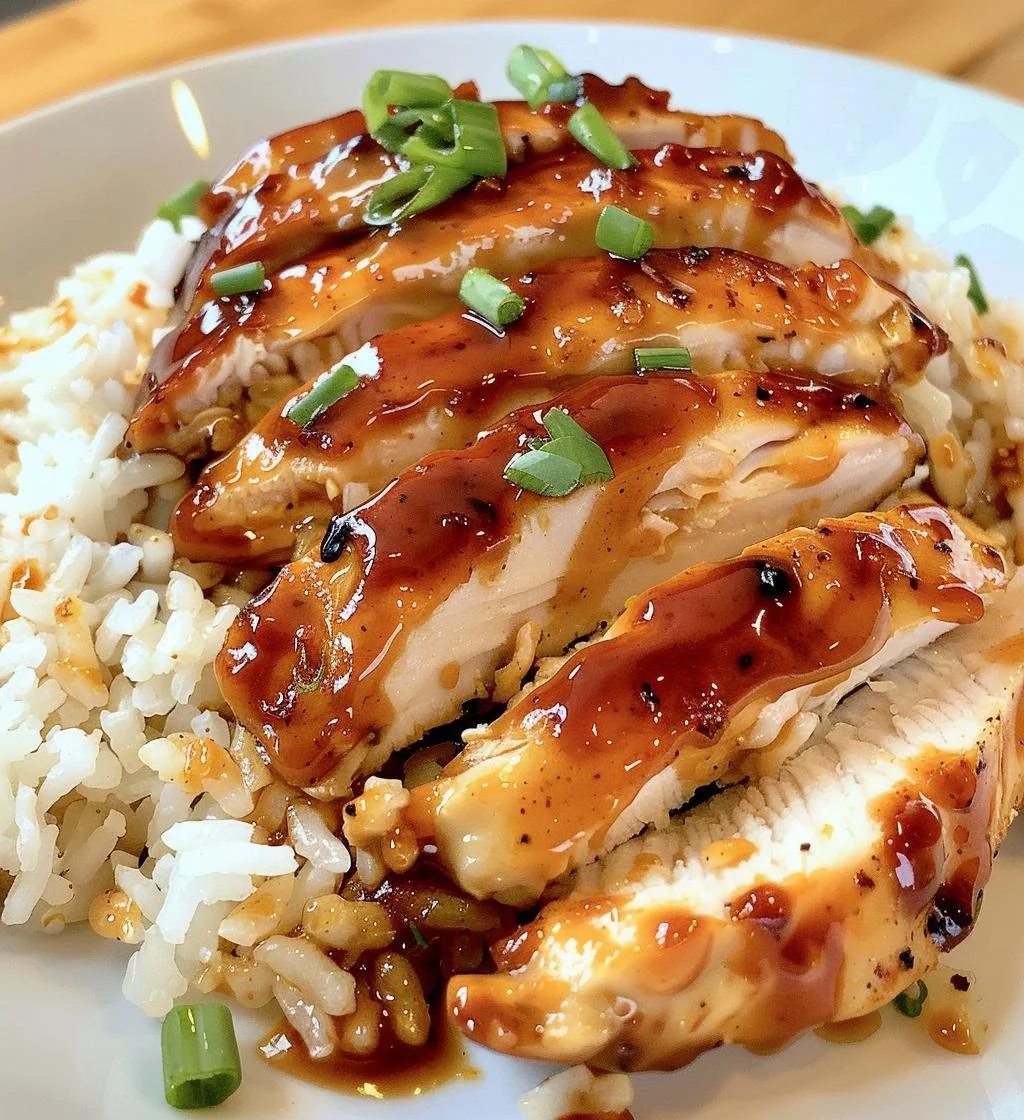
Delicious Honey BBQ Chicken served over rice, a comforting meal option.

Honey BBQ Chicken Rice: 5 Reasons You’ll Love This Comfort Dish

When it comes to comfort food that warms the heart and delights the senses, it’s hard to beat Honey BBQ Chicken Rice. This dish is not just a meal, it’s an experience that brings people together around the table. With juicy, tender chicken coated in a sweet and tangy BBQ sauce, fluffy rice to soak up all the flavors, and a hint of honey to add that irresistible sweetness, this recipe is sure to please anyone who tries it. Whether you’re cooking for your family, friends, or just treating yourself, this dish is a crowd-pleaser that shines in any setting. Trust me, once you make it, you’ll be dreaming about those flavors long after the last bite!

How to prepare Honey BBQ Chicken Rice
To whip up this delicious dish, you’ll need a few key ingredients: chicken breasts, honey, BBQ sauce, rice, and your choice of seasonings. Start by marinating the chicken in honey and BBQ sauce, letting the flavors meld together beautifully. While the chicken is soaking up that goodness, cook your rice according to package instructions. Once the chicken is marinated, grill or bake it until it’s cooked through and caramelized. Finally, serve the chicken over a bed of rice and drizzle any leftover sauce on top for that extra flavor kick. It’s as simple as that!

Honey BBQ Chicken Rice: 5 Reasons You'll Love This Comfort Dish

Why You’ll Love Honey BBQ Chicken Rice

  1. Delicious Flavors: The blend of honey and BBQ sauce creates a mouth-watering taste that everyone loves.
  2. Easy to Make: This dish requires minimal effort and is perfect for busy weeknights.
  3. Comforting and Filling: Hearty rice paired with juicy chicken makes for a satisfying meal.
  4. Customizable: You can easily add your favorite veggies or spices to make it your own.
  5. Great for Leftovers: This dish is just as tasty the next day, making it perfect for meal prep.

Tips for Success
To make the most out of your Honey BBQ Chicken Rice, try these tips:

  • Let the chicken marinate for at least 30 minutes, or overnight for the best flavor.
  • Use a meat thermometer to ensure your chicken is cooked to perfection, reaching 165°F.
  • Feel free to add vegetables like bell peppers or corn to the rice while cooking for added nutrition and flavor.

Serving Suggestions
Serve your Honey BBQ Chicken Rice with a side of steamed broccoli or a crisp salad to balance out the meal. You can also offer some fresh fruit for dessert, keeping the meal light and refreshing. For a fun twist, try serving it inside tortilla wraps for a BBQ chicken burrito!

FAQs

  1. Can I use other meats besides chicken?
    Yes, you can use pork, turkey, or even tofu for a vegetarian option. Just adjust cooking times accordingly.

  2. What if I don’t have BBQ sauce?
    You can make a quick homemade BBQ sauce with ketchup, vinegar, and spices if you’re in a pinch!

  3. Can I make this dish in advance?
    Absolutely! You can prepare the chicken and rice ahead of time and reheat them when you are ready to serve.

So, gather your ingredients, roll up your sleeves, and make some Honey BBQ Chicken Rice tonight. Your taste buds will thank you!

Honey BBQ Chicken Rice

A comforting and flavorful dish featuring juicy chicken coated in a sweet and tangy BBQ sauce served over fluffy rice.

Main Ingredients

  • 4 pieces chicken breasts (Boneless and skinless)
  • 1/4 cup honey (For marinating)
  • 1/2 cup BBQ sauce (Use your favorite brand)
  • 2 cups rice (White or brown rice, cooked according to package instructions)

Optional Additions

  • 1 cup bell peppers (Chopped, can be added to rice)
  • 1 cup corn (Can be added to rice for extra flavor)

Preparation

  1. Marinate the chicken breasts in honey and BBQ sauce for at least 30 minutes, or overnight for best flavor.
  2. Cook the rice according to package instructions.

Cooking

  1. Grill or bake the marinated chicken until cooked through and caramelized, reaching an internal temperature of 165°F.
  2. If desired, add bell peppers or corn to the rice while it’s cooking.

Serving

  1. Serve the grilled chicken over a bed of rice, drizzling any leftover BBQ sauce on top.

For best results, let chicken marinate longer. Serve with steamed broccoli or salad for a balanced meal. This dish makes great leftovers.

Dinner, Main Course
American
Chicken Dish, Comfort Food, Easy Recipe, Honey BBQ Chicken, Meal Prep