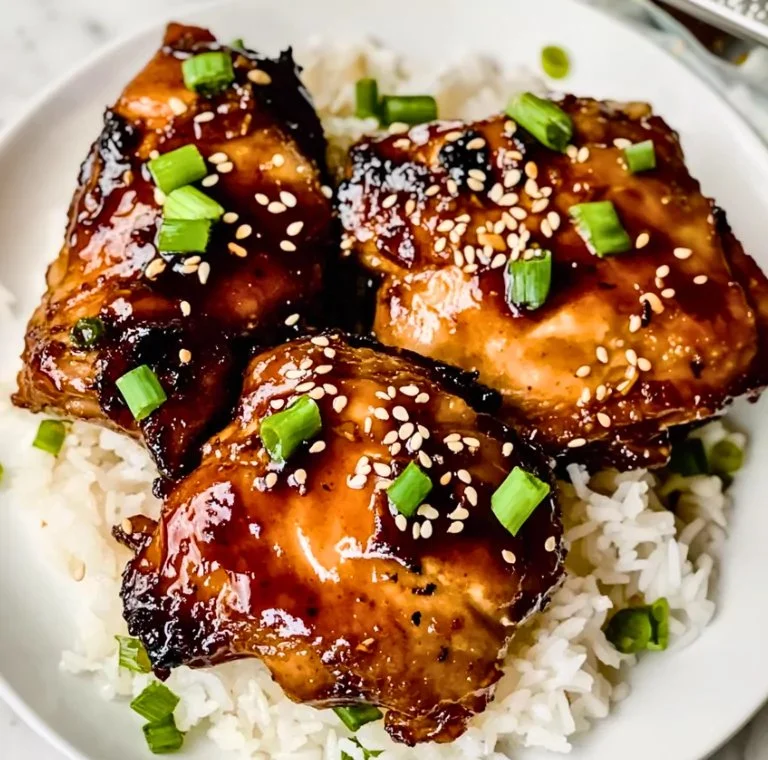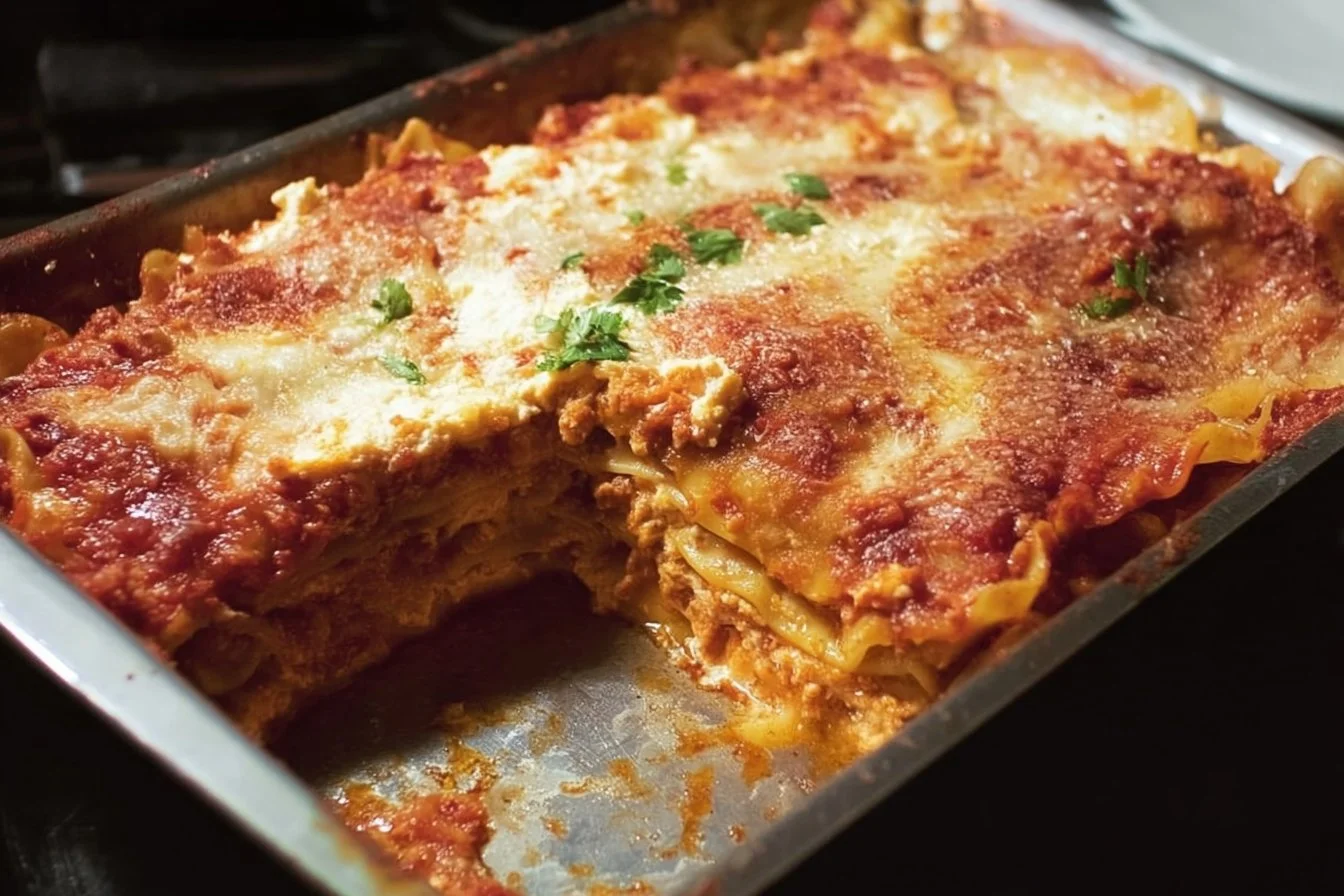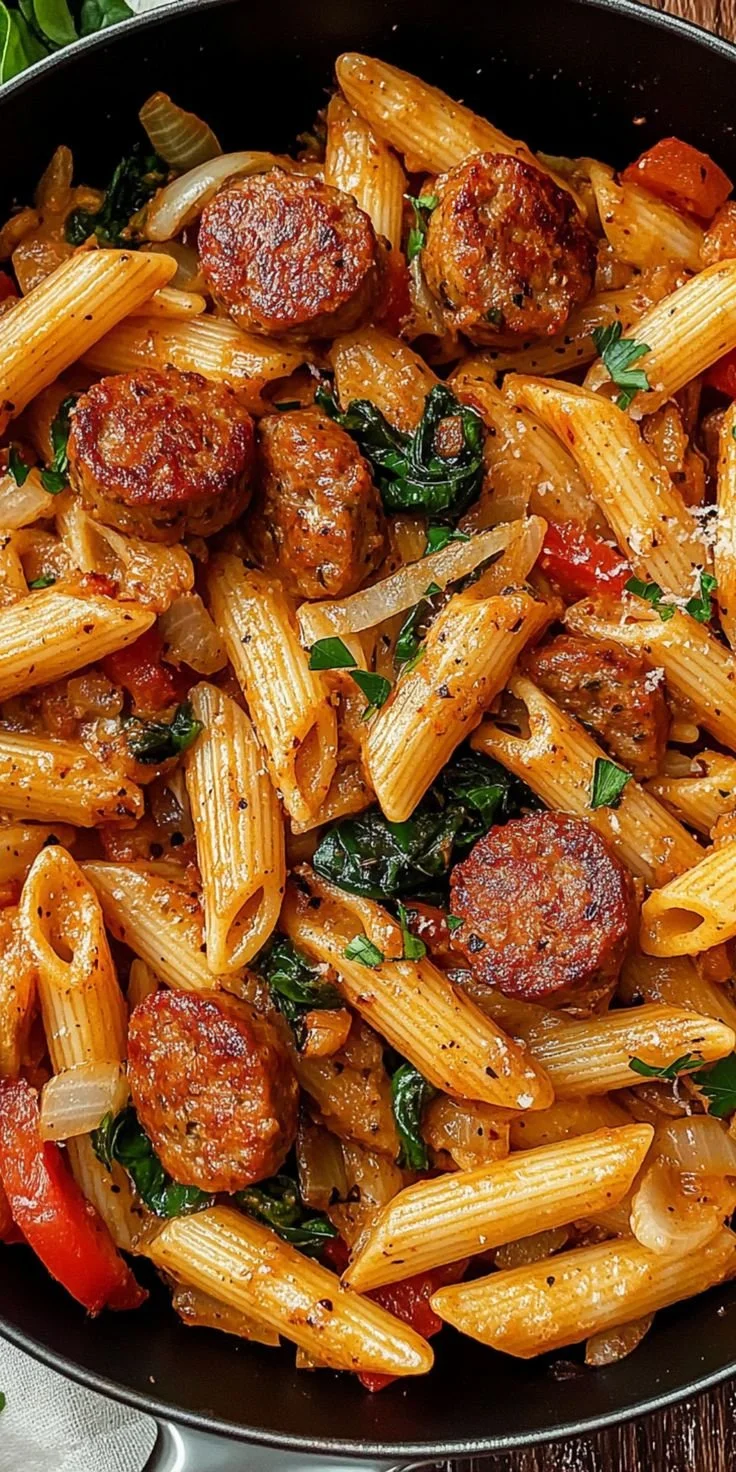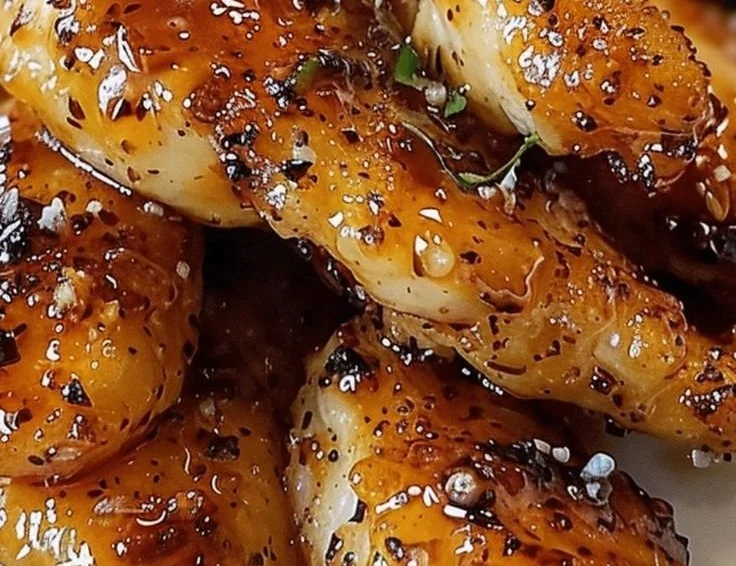
Cheesy Taco Potatoes

Cheesy taco potatoes loaded with toppings for a tasty meal.

Cheesy Taco Potatoes are a fun mix of flavors that everyone loves. They’re the perfect blend of creamy cheese, spicy taco seasoning, and hearty potatoes. This dish is really versatile and can serve as a side or a main dish. Whether you’re hosting a party or just looking for a cozy weeknight meal, these potatoes will surely be a hit. Everyone will be coming back for seconds, and the ooey-gooey cheese will have you dreaming of more! So grab your apron, and let’s get started on making this deliciousness yourself.

How to prepare Cheesy Taco Potatoes

To make Cheesy Taco Potatoes, you will need the following ingredients:

  • 4 medium potatoes, peeled and diced
  • 1 pound ground beef or turkey
  • 1 packet taco seasoning
  • 1 cup shredded cheddar cheese
  • 1 cup sour cream
  • 1 cup diced tomatoes (optional)
  • Chopped green onions (for garnish)
  • Salt and pepper to taste

Directions

  1. Preheat your oven to 350°F (175°C).
  2. In a large pot, boil the diced potatoes until tender, about 10-15 minutes. Drain and set aside.
  3. In a skillet, brown the ground beef or turkey over medium heat. Drain any excess fat.
  4. Stir in the taco seasoning and a little water according to package instructions. Mix well.
  5. In a large bowl, combine the cooked potatoes and the meat mixture. Add the sour cream and half of the cheese, mixing until everything is well combined.
  6. Transfer the mixture to a baking dish. Top with the remaining cheese.
  7. Bake in the oven for 20-25 minutes, or until the cheese is melted and bubbly.
  8. Garnish with diced tomatoes and chopped green onions before serving.

Cheesy Taco Potatoes

Why You’ll Love Cheesy Taco Potatoes

These Cheesy Taco Potatoes are not only tasty, but they are also easy to make. You can whip them up quickly and even customize them with your favorite toppings. Imagine biting into creamy potatoes combined with zesty taco flavors; it’s pure comfort food. Plus, if you’re a fan of tacos and cheese, this dish has both in abundance! They are perfect for family dinners or game day gatherings.

Tips for success

To make your Cheesy Taco Potatoes even better, try these tips:

  • Use different types of cheese, like pepper jack for a spicy kick, or a blend of cheeses for added flavor.
  • Experiment with additional toppings like jalapeños, or avocado to give it your personal touch.
  • You can also use leftover cooked meat, which will save you time!
  • For a quicker option, you can use pre-packed shredded potatoes to skip the boiling step.

Serving Suggestions

Cheesy Taco Potatoes go well with a side salad or some fresh salsa. You can also serve them alongside tortilla chips for a truly festive meal. If you want to add a refreshing drink, consider serving them with a cool lemonade or a classic margarita, as the flavors complement each other perfectly!

FAQs

Can I make Cheesy Taco Potatoes ahead of time?

Yes, you can prepare the potato mixture ahead of time and store it in the fridge. Just bake before serving.

Can I use sweet potatoes instead?

Absolutely! Sweet potatoes can be a delicious twist on this recipe, adding a natural sweetness.

How do I store leftovers?

Store any leftovers in an airtight container in the fridge for 3-5 days. They can be easily reheated in the microwave or oven.

Cheesy Taco Potatoes

Conclusion

Cheesy Taco Potatoes are the ultimate comfort food that everyone will love. The combination of creamy cheese and taco flavors makes for a winning dish. If you want to explore more delicious recipes, don’t forget to check out this recipe for Taco Potatoes. Give these a try, and you’ll see just how quickly they disappear from your table!

Cheesy Taco Potatoes

Cheesy Taco Potatoes are a comforting blend of creamy cheese, spicy taco seasoning, and hearty potatoes, making them perfect for any occasion.

Main Ingredients

  • 4 medium potatoes, peeled and diced
  • 1 pound ground beef or turkey
  • 1 packet taco seasoning
  • 1 cup shredded cheddar cheese (divided)
  • 1 cup sour cream
  • 1 cup diced tomatoes (optional) (for garnish)
  • to taste chopped green onions (for garnish)
  • to taste salt and pepper

Preparation

  1. Preheat your oven to 350°F (175°C).
  2. In a large pot, boil the diced potatoes until tender, about 10-15 minutes. Drain and set aside.
  3. In a skillet, brown the ground beef or turkey over medium heat. Drain any excess fat.
  4. Stir in the taco seasoning and a little water according to package instructions. Mix well.
  5. In a large bowl, combine the cooked potatoes and the meat mixture. Add the sour cream and half of the cheese, mixing until everything is well combined.
  6. Transfer the mixture to a baking dish. Top with the remaining cheese.

Cooking

  1. Bake in the oven for 20-25 minutes, or until the cheese is melted and bubbly.
  2. Garnish with diced tomatoes and chopped green onions before serving.

For a twist, try using sweet potatoes or different types of cheese like pepper jack. You can also use leftover cooked meat to save time.

Main Course, Side Dish
Mexican
baked potatoes, Cheesy Taco Potatoes, Comfort Food, Easy Recipe, taco flavors

Crockpot Lasagna Soup

Bowl of hearty Crockpot Lasagna Soup topped with cheese and herbs

Crockpot Lasagna Soup brings the warm, comforting flavors of traditional lasagna into a deliciously simple soup. This dish is perfect for busy days, as you can set it and forget it. With layers of pasta, juicy meat, and rich sauce, it’s everything you love about lasagna, all in a cozy bowl.

Why Make This Recipe

Crockpot Lasagna Soup is a fantastic choice for anyone looking for an easy and delicious meal. You can prepare it with minimal effort and let your slow cooker work its magic. The ingredients are simple and often things you already have at home, making it a great last-minute dinner option.

Additionally, this soup is versatile. You can tweak the ingredients based on what you have on hand or your family’s preferences. It’s also a perfect dish for feeding a crowd, making it great for gatherings and parties. With a cooking time of several hours, the flavors meld beautifully, making each bite rich and satisfying.

Furthermore, this recipe is a hit with kids and adults alike. It can be a fun way to introduce them to the flavors of lasagna without the fuss of layering. Plus, it’s a one-pot meal, which means less cleaning up afterward. Overall, if you want a hearty, creamy soup that brings comfort and joy, this recipe is a fantastic choice for any night of the week.

How to Make Crockpot Lasagna Soup

Making Crockpot Lasagna Soup is straightforward and requires minimal prep time. Start by gathering your ingredients, which typically include ground beef or sausage, onion, garlic, diced tomatoes, marinara sauce, broth, and lasagna noodles.

Begin by browning the ground meat in a skillet. This step adds flavor. Once browned, transfer it to the crockpot. Add diced onions and minced garlic to the crockpot. Next, pour in the diced tomatoes, marinara sauce, and your choice of broth. Stir everything together to combine the flavors.

Now, break the lasagna noodles into bite-sized pieces and stir them into the mixture. Cover the crockpot and set it on low for about 4-6 hours, or high for 2-3 hours. During the last 30 minutes, you can add ricotta cheese and shredded mozzarella for that creamy lasagna effect.

When the time is up, give the soup a good stir, taste it, and adjust the seasoning if needed. Your delicious lasagna soup is ready to serve!

How to Serve Crockpot Lasagna Soup

Serving Crockpot Lasagna Soup is simple and enjoyable. Ladle the soup into bowls, making sure to get a good mix of noodles, meat, and sauce in each serving. Top each bowl with a generous sprinkle of shredded mozzarella cheese, allowing it to melt slightly for a gooey finish.

You can also add fresh basil or parsley for a pop of color and flavor. For an extra indulgent touch, serve the soup with garlic bread or a side salad. This combination adds a nice crunch and makes the meal feel more complete.

If you’re hosting guests, consider offering a variety of toppings like croutons, Parmesan cheese, or additional herbs. This invites everyone to customize their bowl and makes for a fun dining experience. Enjoy your cozy soup while it’s warm and watch it disappear in no time!

How to Store Crockpot Lasagna Soup

Storing Crockpot Lasagna Soup is easy and convenient. If you have leftovers, let the soup cool down to room temperature before transferring it to an airtight container. This ensures freshness and prevents spoilage.

You can keep the soup in the refrigerator for about 3-5 days. When reheating, simply place it back in a pot on the stove or warm it in the microwave until heated through. If you want to keep it longer, consider freezing it.

To freeze, portion the soup into freezer-safe containers, leaving some space at the top for expansion. The soup can last in the freezer for up to 3 months. When ready to eat, defrost it in the fridge overnight and reheat on the stove or in the microwave.

Remember to stir well before serving, as ingredients may settle or separate during storage.

Tips to Make Crockpot Lasagna Soup

To make the best Crockpot Lasagna Soup, keep some handy tips in mind. First, don’t overcrowd your crockpot. Follow the recommended sizes to ensure even cooking.

When browning the meat, drain any excess fat. This helps to keep the soup from becoming too greasy. Instead of breaking your noodles into random pieces, break them where the lines are for more uniform shapes.

Consider using no-boil lasagna noodles, as they will cook perfectly in the broth without getting mushy. Adjust the thickness of the soup by changing the amount of broth you use based on personal preference.

Adding additional vegetables, like bell peppers or spinach, can enhance flavor and increase nutrition. Finally, tasting and adjusting the seasoning is key. A pinch of salt or a sprinkle of red pepper flakes can elevate the entire dish.

Variation

You can customize your Crockpot Lasagna Soup in several ways. For a vegetarian version, replace the meat with mushrooms or lentils and use vegetable broth instead of meat broth. Adding more vegetables like zucchini or bell peppers can increase the nutrition and flavor profile.

If you want a spicy kick, add red pepper flakes or diced jalapeños during cooking. Alternatively, for a creamy texture, you can stir in some cream cheese or heavy cream towards the end of the cooking process.

FAQs

1. Can I make this soup ahead of time?
Yes, you can prepare the ingredients the night before and store them in the fridge. In the morning, place everything in the crockpot and let it cook during the day.

2. Can I freeze the soup?
Absolutely! Freeze in airtight containers for up to 3 months. Just remember to let it cool before freezing.

3. What if I don’t have lasagna noodles?
You can use any type of pasta you prefer, like rotini or penne. Just adjust the cooking time as needed for the pasta you choose.

4. How spicy is this soup?
The soup is not inherently spicy, but you can add chili flakes or jalapeños to increase the heat.

5. Can I add cheese to the soup?
Yes! Adding ricotta, mozzarella, or even Parmesan cheese enhances the flavor and makes the soup creamier.

[tasty-recipe id=”4889″]

Crockpot Lasagna Soup

A comforting soup that combines the flavors of traditional lasagna into a hearty, slow-cooked dish, perfect for busy days.

Main Ingredients

  • 1 lb ground beef or sausage (Can substitute with mushrooms or lentils for a vegetarian option.)
  • 1 medium onion, diced
  • 2 cloves garlic, minced
  • 1 can diced tomatoes (14.5 oz) (Drained, can add herbs for flavor.)
  • 1 jar marinara sauce (24 oz) (Choose your favorite brand.)
  • 4 cups broth (beef or vegetable)
  • 9 oz lasagna noodles (Break into bite-sized pieces.)
  • 1 cup ricotta cheese (Added at the last 30 minutes of cooking.)
  • 2 cups shredded mozzarella cheese (For topping.)
  • 1 tablespoon olive oil (For browning meat.)

Preparation

  1. Brown the ground meat in a skillet with olive oil.
  2. Transfer the browned meat to the crockpot.
  3. Add diced onions and minced garlic to the crockpot.
  4. Pour in the diced tomatoes, marinara sauce, and broth. Stir to combine.
  5. Break lasagna noodles into bite-sized pieces and stir into the mixture.

Cooking

  1. Cover and cook on low for 4-6 hours or high for 2-3 hours.
  2. In the last 30 minutes, add ricotta and mozzarella cheese.

Serving

  1. Ladle the soup into bowls topped with shredded mozzarella.
  2. Serve with fresh basil or parsley, and garlic bread or salad.

Customize with additional vegetables or spices, and freeze leftovers for up to 3 months. Stir well before serving to mix ingredients.

Main Course, Soup
Italian
Comfort Food, Crockpot Lasagna Soup, easy soup recipe, One-Pot Dinner, Slow Cooker Meal

High Protein Creamy Taco Soup

High protein creamy taco soup with garnishes in a bowl

Creamy Taco Soup is a warm and comforting dish that combines the zing of taco flavors with a creamy finish. It’s a great way to enjoy a hearty meal that’s packed with protein, making it perfect for busy weeknights or for meal prep. This soup is delicious, easy to make, and can be customized to fit your taste preferences. Whether you’re looking for something satisfying after a workout or a cozy dish for a family dinner, this soup is sure to please. Let’s dive into why this recipe is worth making.

Why Make This Recipe

High Protein Creamy Taco Soup is not just delicious; it also offers several benefits. First, it is loaded with protein, making it a perfect meal choice for anyone looking to support their muscle growth or weight loss goals. Ingredients like ground turkey or beef provide a hearty base that is both filling and nutritious. Additionally, the creamy texture comes from healthy additions like Greek yogurt or reduced-fat cream cheese, which adds flavor while keeping the dish light.

Moreover, making this soup is simple and can be done in one pot, saving time on both cooking and cleanup. It is a great choice for families, as kids usually enjoy the familiar taco flavors, ensuring everyone at the table is happy. The soup can also be easily customized with your favorite toppings, such as cheese, avocado, or cilantro, making it versatile enough to suit various tastes. Overall, this recipe is an excellent way to enjoy a delicious and nutritious meal that’s both satisfying and fun to eat.

How to Make High Protein Creamy Taco Soup

To prepare High Protein Creamy Taco Soup, start by gathering your ingredients. You’ll need ground turkey or any lean meat, diced onion, red bell pepper, canned tomatoes, black beans, corn, taco seasoning, and some low-sodium broth. Also, have Greek yogurt or cream cheese on hand for the creamy consistency.

Begin by cooking the ground meat in a large pot over medium heat until browned. Add the diced onion and bell pepper, cooking until they soften and become fragrant. Then stir in the canned tomatoes, black beans, corn, and taco seasoning. Pour in the broth and bring everything to a simmer, allowing the flavors to meld together. After about 15-20 minutes, reduce the heat and stir in the Greek yogurt or cream cheese until it’s well combined. This will give your soup that creamy texture.

Taste your soup and adjust the seasoning as necessary. Cook for an additional few minutes to warm through, then serve hot. This soup is perfect to enjoy right away, or you can let it cool and save it for later.

How to Serve High Protein Creamy Taco Soup

Serving High Protein Creamy Taco Soup is easy and enjoyable. Start by ladling the soup into bowls. For an extra touch, consider adding toppings that enhance the flavors and textures. Shredded cheese, like cheddar or Mexican blend, adds a rich and cheesy element. Fresh avocado slices can give a creamy texture that complements the soup well. A sprinkle of chopped cilantro adds a fresh taste and brightens the dish.

You can also set up a toppings bar where everyone can customize their bowls. Include items like sliced jalapeños, tortilla strips, or sour cream to give each person the chance to create their perfect bowl of taco soup. This interactive approach makes the meal not just tasty but also fun and engaging. Serve with warm, crusty bread or tortilla chips for a complete meal that keeps everyone satisfied.

How to Store High Protein Creamy Taco Soup

To store any leftover High Protein Creamy Taco Soup, let it cool completely at room temperature. Then transfer it to an airtight container. The soup can be kept in the refrigerator for up to three to four days. If you want to save it for a longer period, consider freezing it. Pour the cooled soup into freezer-safe bags or containers, ensuring there’s enough space for expansion. Properly stored, it can last in the freezer for up to three months.

When you’re ready to enjoy your soup again, thaw it in the refrigerator overnight. Reheat it on the stove over low heat, stirring occasionally until it’s heated through. If it seems too thick after reheating, add a little broth or water to reach your desired consistency. Always make sure to check the taste and seasoning again before serving.

Tips to Make High Protein Creamy Taco Soup

Here are some handy tips to ensure your High Protein Creamy Taco Soup turns out great every time. First, don’t skip on browning the meat. This step adds depth of flavor to the soup, making it more delicious. Use lean meat options to keep the soup lighter but still packed with protein.

To enhance the flavor even more, consider making your own taco seasoning. Combining spices like chili powder, cumin, garlic powder, and onion powder can give you a fresh taste that store-bought mixes might lack. If you enjoy a bit of heat, add diced jalapeños or cayenne pepper to your soup.

For those looking to make it healthier, feel free to load the soup with more veggies, such as spinach, zucchini, or carrots. Finally, remember to adjust the creaminess based on your preference. You can use more or less Greek yogurt or cream cheese to customize the texture just right for you.

Variation

You can easily customize this recipe to suit your dietary needs or preferences. For a vegetarian version, use plant-based ground meat or beans as the protein source. You can also substitute regular cream cheese with dairy-free alternatives for a vegan option. Additionally, spice it up with different varieties of beans like kidney or pinto beans for a twist on flavor.

FAQs

1. Can I use other meats besides ground turkey?
Yes, you can use any ground meat you prefer, such as chicken or even beef. You can also make it vegetarian by using plant-based proteins or extra beans.

2. Can I make this soup in advance?
Absolutely! This soup keeps well and flavors may deepen if made a day ahead. Just store it in an airtight container in the fridge.

3. How can I spice up my taco soup?
For extra spice, add diced jalapeños, a dash of hot sauce, or cayenne pepper while cooking. You can also top it with spicy salsa.

4. Is this soup gluten-free?
Yes, as long as you check the labels on your taco seasoning and other ingredients you are using, this soup can be easily made gluten-free.

5. Can I freeze the leftovers?
Yes, you can freeze leftovers for up to three months. Just make sure to let it cool and store it in an airtight container or freezer-safe bag.

[tasty-recipe id=”4912″]

High Protein Creamy Taco Soup

A warm, comforting soup that combines hearty taco flavors with a creamy finish, perfect for busy weeknights or meal prep.

Main Ingredients

  • 1 lb ground turkey or lean meat (Can substitute with chicken or beef.)
  • 1 cup diced onion (For flavor base.)
  • 1 cup diced red bell pepper
  • 1 can canned tomatoes
  • 1 can black beans (Rinsed and drained.)
  • 1 cup corn (Can use frozen corn.)
  • 2 tbsp taco seasoning (Use homemade or store-bought.)
  • 4 cups low-sodium broth (Chicken or vegetable broth works.)
  • 1 cup Greek yogurt or reduced-fat cream cheese (For a creamy texture.)

Preparation

  1. In a large pot over medium heat, cook the ground meat until browned.
  2. Add the diced onion and bell pepper, cooking until softened and fragrant.
  3. Stir in the canned tomatoes, black beans, corn, and taco seasoning.
  4. Pour in the broth and bring to a simmer, allowing flavors to meld for about 15-20 minutes.
  5. Reduce the heat and stir in the Greek yogurt or cream cheese until well combined for creaminess.
  6. Taste and adjust seasoning as necessary, then cook for a few more minutes to warm through.

Serving

  1. Ladle soup into bowls and add desired toppings such as shredded cheese, avocado, or cilantro.
  2. Consider setting up a toppings bar for a customizable meal.

Storage

  1. Let any leftovers cool completely at room temperature and transfer to an airtight container.
  2. Store in the refrigerator for up to 3-4 days or freeze for up to three months.
  3. To reheat, thaw in the refrigerator overnight and warm on the stove, adding broth or water if too thick.

Tip: Browning the meat adds depth of flavor. Customize creaminess with more or less Greek yogurt or cream cheese. Try loading more veggies for a healthier soup.

Main Course, Soup
Mexican
Creamy Taco Soup, Easy Dinner, Healthy Soup, High Protein Soup, Meal Prep

Slow Cooker Honey Garlic Chicken

Delicious slow cooker honey garlic chicken served with vegetables

This Slow Cooker Honey Garlic Chicken is a warm, simple meal that feels like a hug on a plate. The sauce is sweet, garlicky, and a little sticky, and the chicken comes out tender and full of flavor. It is a real crowd-pleaser for weeknights and easy family dinners. If you like a quick twist or another method, check out the air fryer honey butter garlic chicken tenders recipe for a faster, crispier version. Get ready, this dish is easy to make and fun to share with friends and family.

How to prepare Slow Cooker Honey Garlic Chicken

Ingredients

  • 2 pounds boneless chicken thighs or breasts
  • 1/2 cup honey
  • 1/2 cup low sodium soy sauce
  • 1/4 cup ketchup or tomato sauce
  • 3 to 4 garlic cloves, minced
  • 2 tablespoons brown sugar (optional)
  • 1 tablespoon rice vinegar or apple cider vinegar
  • 1/2 teaspoon black pepper
  • 1 tablespoon cornstarch mixed with 2 tablespoons water, for thickening
  • Sesame seeds and chopped green onions for garnish

Directions

  1. Put the chicken in the slow cooker in a single layer.
  2. In a bowl, mix honey, soy sauce, ketchup, minced garlic, vinegar, brown sugar, and pepper until smooth.
  3. Pour the sauce over the chicken, make sure it is covered.
  4. Cook on low for 4 to 5 hours, or on high for 2 to 3 hours, until the chicken is very tender.
  5. Remove the chicken to a plate. Stir the cornstarch mixture into the sauce in the slow cooker.
  6. Turn the slow cooker to high, let the sauce thicken for 5 to 10 minutes, stirring once or twice.
  7. Put the chicken back into the thickened sauce, spoon the sauce over the chicken to coat.
  8. Garnish with sesame seeds and green onions, serve warm.

Slow Cooker Honey Garlic Chicken

Why You’ll Love Slow Cooker Honey Garlic Chicken

  • It uses simple ingredients you likely have on hand, like honey and garlic.
  • The slow cooker makes the chicken very tender, so it falls apart and soaks up the sauce.
  • The sauce is sweet and savory, it sticks to rice, noodles, or bread.
  • It is a great make-ahead meal, you can cook it in the morning and eat it later.
  • It makes good leftovers and works well for meal prep.

Tips for success

  • Use thighs for more flavor and juiciness, breasts work too if you prefer lean meat.
  • Trim excess fat from the chicken to keep the sauce clean and not greasy.
  • Do not overcook, even in a slow cooker, check at the lower time range if your slow cooker runs hot.
  • If the sauce is too thin, mix cornstarch and cold water, then stir in and cook until thick.
  • Taste the sauce before serving, add a little more honey if you want it sweeter, or a splash of vinegar for more tang.
  • For more garlic flavor, add an extra clove or use garlic paste.

Serving Suggestions

  • Serve over steamed white rice, brown rice, or cauliflower rice for a low carb option.
  • Toss with cooked noodles for a simple honey garlic chicken pasta.
  • Place on a bed of salad greens for a warm chicken salad.
  • Add steamed broccoli, snap peas, or roasted vegetables on the side.
  • Try it in a sandwich or wrap, with extra sauce for a sticky, tasty lunch. You can also try the air fryer version for a different texture, if you want something crispier.

Slow Cooker Honey Garlic Chicken

FAQs

Q: Can I use frozen chicken in the slow cooker? A: Yes, you can, but add about 1 hour to the cooking time. It is best to check the internal temperature, it should reach 165 F.

Q: How do I thicken the sauce if it is too runny? A: Mix 1 tablespoon cornstarch with 2 tablespoons cold water, stir it into the sauce, and cook on high for 5 to 10 minutes until it thickens.

Q: Can I make this gluten free? A: Yes, use a gluten free soy sauce, like tamari, and check all labels for hidden gluten.

Q: How long will leftovers last? A: Store in an airtight container in the fridge for 3 to 4 days. Reheat gently on the stove or in the microwave.

Q: Can I double the recipe for a crowd? A: Yes, you can double it, but check that your slow cooker is not overfilled. Cook time may increase a little if the slow cooker is very full.

Slow Cooker Honey Garlic Chicken

A warm, sweet, and garlicky chicken dish that is tender and perfect for family dinners.

Main Ingredients

  • 2 pounds boneless chicken thighs or breasts (Thighs are recommended for more flavor.)
  • 1/2 cup honey
  • 1/2 cup low sodium soy sauce (Use tamari for gluten-free option.)
  • 1/4 cup ketchup or tomato sauce
  • 3 to 4 cloves garlic, minced (Add more for a garlicky flavor.)
  • 2 tablespoons brown sugar (optional) (Adjust sweetness to taste.)
  • 1 tablespoon rice vinegar or apple cider vinegar
  • 1/2 teaspoon black pepper
  • 1 tablespoon cornstarch (Mixed with 2 tablespoons water for thickening.)
  • 2 tablespoons water (For mixing with cornstarch.)
  • Sesame seeds for garnish
  • Chopped green onions for garnish

Preparation

  1. Put the chicken in the slow cooker in a single layer.
  2. In a bowl, mix honey, soy sauce, ketchup, minced garlic, vinegar, brown sugar, and pepper until smooth.
  3. Pour the sauce over the chicken, ensuring it’s covered.

Cooking

  1. Cook on low for 4 to 5 hours, or on high for 2 to 3 hours, until the chicken is very tender.
  2. Remove the chicken to a plate.
  3. Stir the cornstarch mixture into the sauce in the slow cooker.
  4. Turn the slow cooker to high, let the sauce thicken for 5 to 10 minutes, stirring occasionally.
  5. Put the chicken back into the thickened sauce, spoon the sauce over to coat.

Serving

  1. Garnish with sesame seeds and green onions, and serve warm.

Use thighs for more juiciness. Trim excess fat to prevent a greasy sauce. Adjust sweetness and tang according to preference. Great leftovers for meal prep.

Dinner, Main Course
American, Asian
Easy Dinner, Family Meal, Honey Garlic Chicken, Slow Cooker, Tender Chicken

Creamy Marry Me Chicken Soup

Bowl of creamy Marry Me Chicken Soup with herbs and ingredients

Rich, Creamy Marry Me Chicken Soup is a delightful dish that not only warms the body but also brings comfort to the soul. This recipe is perfect for chilly days or anytime you crave something hearty. The combination of tender chicken, rich cream, and flavorful seasonings creates a soup that is truly special. It’s more than just a meal; it’s a heartwarming experience.

One of the great things about this soup is that it’s versatile! You can enjoy it for lunch or dinner, and it even makes for a delicious leftover meal. The ingredients are easy to find, and the cooking process is simple. This is a recipe you can make on a busy weeknight or when you have guests over.

Moreover, Marry Me Chicken Soup is fantastic for feeding a family or a group of friends. Everyone loves a creamy soup, and because it’s packed with chicken and veggies, it’s both filling and nutritious. Sharing this soup with loved ones can turn an ordinary meal into a memorable occasion. Once they taste it, they might even fall head over heels for it—hence the name! Whether it’s a cozy night in or a special gathering, this soup has a way of bringing people together.

How to make Rich, Creamy Marry Me Chicken Soup

Making Rich, Creamy Marry Me Chicken Soup is straightforward and fun. Start by gathering your ingredients: boneless chicken, cream, chicken broth, vegetables like carrots and celery, and your favorite herbs and spices. First, heat some olive oil in a large pot over medium heat. Then, add the pieces of chicken and cook until they are brown on all sides. This will lock in the flavors.

Once the chicken is cooked, remove it from the pot and set it aside. In the same pot, toss in the chopped vegetables and sauté until they are soft. This usually takes about 5 minutes. Next, pour in the chicken broth, stirring to combine. Add in the browned chicken and let it simmer for about 15 minutes so the flavors mix well.

Now it’s time to add the richness! Stir in cream gradually, allowing it to melt into the broth. Season the soup with salt, pepper, and any herbs you enjoy, like thyme or parsley. Let everything cook together for another 10 minutes, stirring occasionally, until the soup is thick and creamy. Once finished, give it a taste and adjust any seasoning as necessary. Now your soup is ready to indulge in!

How to serve Rich, Creamy Marry Me Chicken Soup

Serving Rich, Creamy Marry Me Chicken Soup is simple and delightful. You can ladle the soup into bowls, ensuring each serving has pieces of chicken and plenty of veggies. For a beautiful presentation, you might consider garnishing with a sprinkle of fresh herbs, such as parsley or chives. This adds a pop of color and freshness.

Pair this warm soup with some crusty bread or a light salad for a complete meal. If you’re feeling extra festive, you can serve it with a glass of white wine or iced tea. The creamy texture of the soup complements the crunchy bread perfectly, making each bite a pleasure.

Don’t forget, this soup also works well when served in a bread bowl! It’s a fun way to enjoy the soup while indulging in the delicious bread as you go. Guests will love the attention to detail and the fun twist. Whether for a casual lunch, a cozy family dinner, or a small gathering with friends, this soup will impress everyone at the table.

How to store Rich, Creamy Marry Me Chicken Soup

Storing Rich, Creamy Marry Me Chicken Soup is simple. Once the soup has cooled down to room temperature, you can pour it into airtight containers. Make sure not to fill them to the top; leave some space for expansion if you decide to freeze it. You can store the soup in the refrigerator for about 3 to 4 days. It’s great for a quick lunch or dinner later in the week!

If you want to keep the soup for a longer period, consider freezing it. Make sure to label the containers with the date so you know when to use it. It can last in the freezer for about 2 to 3 months. When you are ready to enjoy it again, just thaw it in the fridge overnight or use the microwave for a quicker method.

When reheating the soup, do it gently. You can warm it on the stove over low heat, stirring occasionally, to prevent it from sticking to the pot. If the soup seems too thick after storing, add a little chicken broth or water to achieve your desired consistency.

Tips to make Rich, Creamy Marry Me Chicken Soup

To make your Rich, Creamy Marry Me Chicken Soup even better, there are several tips you can follow. First, use quality chicken. Fresh or organic chicken often has more flavor compared to frozen or lower-quality options. Also, don’t rush the browning stage; taking your time will enhance the taste of the soup.

Another tip is to add the cream slowly. This helps to ensure that it mixes well with the broth and doesn’t curdle. You can also experiment with different herbs and spices to match your personal taste. Some people love a little heat, so consider adding a pinch of red pepper flakes for a spicy kick.

You might also want to try adding more vegetables. Spinach, kale, or peas can give additional nutrients and colors to the soup. If you like it extra creamy, you can blend a portion of the soup and then mix it back in. This will create a delightfully creamy texture while still keeping some chunks of chicken and veggies.

Finally, don’t hesitate to adjust the seasoning. Every brand of broth and cream can taste different, so it’s always good to taste and tweak as you go!

Variation

There are various ways to modify Rich, Creamy Marry Me Chicken Soup. For a healthier twist, you can use low-fat cream or non-dairy milk options like almond or coconut milk. You can also swap chicken for turkey or even a plant-based protein like chickpeas for a vegetarian version.

If you want a zesty flavor, adding lime or lemon juice right before serving can brighten up the dish. You can also play with different vegetables, like bell peppers or zucchini, for added texture and nutrition.

FAQs

1. Can I use frozen chicken for this recipe?

Yes, you can use frozen chicken. Just ensure it is fully cooked before adding other ingredients. You may need to increase the cooking time slightly to ensure it’s heated through.

2. Can I make this soup in advance?

Absolutely! You can prepare it a day or two ahead. Just store it in the refrigerator and reheat it when you are ready to serve.

3. How can I make the soup spicier?

You can add red pepper flakes, cayenne pepper, or even some diced jalapeños to spice up your soup. Adjust the amount based on your spice preference.

4. Can I use vegetables other than carrots and celery?

Yes! Feel free to add any veggies you enjoy, like bell peppers, peas, or corn. They will all work great in this soup.

5. Is this soup freezer-friendly?

Yes, this soup freezes well! Just store it in an airtight container and consume it within 2 to 3 months for the best taste.

Marry Me Chicken Soup

A delightful chicken soup combining tender chicken, savory herbs, and creamy goodness, perfect for cozy days.

Main ingredients

  • 1 lb chicken breast, diced (Use fresh chicken for the best flavor.)
  • 1 tablespoon olive oil (For sautéing vegetables.)
  • 1 onion, chopped (Adds depth of flavor.)
  • 2 cloves garlic, minced (Use fresh garlic for better taste.)
  • 3 carrots, sliced (Can substitute with any preferred vegetables.)
  • 2 cups chicken broth (Homemade or store-bought.)
  • 1 cup heavy cream (For a rich and creamy texture.)
  • 1 teaspoon Italian seasoning (A blend of dried herbs.)
  • Salt and pepper to taste (Adjust according to preference.)
  • Fresh parsley, for garnish (Adds freshness and color.)

Preparation

  1. In a large pot, heat the olive oil over medium heat.
  2. Add the chopped onion and minced garlic, cooking until tender.
  3. Add in the diced chicken breast, browning it on all sides.
  4. Mix in the sliced carrots and pour the chicken broth into the pot.
  5. Stir in the Italian seasoning, plus salt and pepper to taste.
  6. Let it simmer until the chicken is cooked through and the carrots are tender.
  7. Slowly stir in the heavy cream, allowing it to thicken slightly.
  8. Serve hot and garnish with fresh parsley.

Ensure your chicken is diced evenly for consistent cooking. Adjust the thickness of the soup by adding more or less cream. Experiment with additional vegetables for variation. Fresh herbs like parsley should be added at the end for enhanced flavor.

Main Course, Soup
American
chicken soup, Comfort Food, Creamy Soup, Marry Me Chicken Soup, Quick Meals

Porcupine Casserole

Delicious Porcupine Casserole served in a baking dish with herbs and spices

Porcupine Casserole is a warm, home-style dish with small beef meatballs that look like porcupine quills because of the rice inside. This dish mixes ground beef, rice, and tomato sauce into one pot, so it tastes rich and comforting. It is a real crowd-pleaser for weeknights and potlucks, and people like it for its simple flavors and easy steps. If you enjoy easy casseroles, you might also like a similar one like baked spaghetti casserole, which uses the same one-dish comfort idea. Give this a try tonight, you will smile when you eat it.

How to prepare Porcupine Casserole

Ingredients (basic)

  • 1 pound ground beef
  • 1 cup uncooked long grain rice
  • 1 small onion, chopped
  • 1 can (10.5 oz) condensed tomato soup
  • 1 can (14.5 oz) diced tomatoes, undrained
  • 1 cup beef broth or water
  • 1 teaspoon salt
  • 1/2 teaspoon black pepper
  • 1 cup shredded cheddar cheese (optional)

Directions

  1. Preheat the oven to 350°F (175°C). Lightly grease a 9×13 inch baking dish.
  2. In a large bowl, mix ground beef, rice, chopped onion, salt, and pepper. Mix well with your hands or a spoon.
  3. Shape the mixture into small meatballs, about 1 inch wide. Place them in the baking dish in a single layer.
  4. In a bowl, stir the tomato soup, diced tomatoes with juice, and beef broth. Pour this sauce evenly over the meatballs and rice.
  5. Cover the dish with foil and bake for 45 to 55 minutes, until the rice is tender and the meat is cooked through.
  6. Remove foil, sprinkle cheese on top if you like, and bake 5 more minutes until the cheese melts. Let rest for 5 minutes before serving.

Porcupine Casserole

Why You’ll Love Porcupine Casserole

  • It is simple to make with few ingredients.
  • The rice cooks inside the meat, so each bite holds flavor.
  • It feeds a family or a crowd without fuss.
  • It reheats well, so you can save leftovers for the next day.

Tips for success

  • Use long grain rice for best texture, or follow the rice package for cooking time if different.
  • If you like more sauce, add a little more beef broth or a second can of tomatoes.
  • Make meatballs small and even so they cook at the same time.
  • Check rice near the low end of time to avoid overcooking, ovens vary.
  • For extra flavor, brown the beef and onions in a pan before mixing, but this step is optional.

Serving Suggestions

  • Serve with a green salad and simple vinaigrette.
  • Offer steamed vegetables or roasted carrots on the side.
  • A slice of crusty bread works well to soak up extra sauce.
  • Top with chopped parsley for a fresh touch.

Porcupine Casserole

FAQs

Q: Can I use brown rice in Porcupine Casserole?

A: Yes, but brown rice needs more time and liquid. Cook time will increase and you may need more broth.

Q: Can I make this on the stove instead of baking?

A: Yes, you can simmer meatballs in a covered pan on low heat until rice is tender, about the same time as baking.

Q: Is this dish freezer friendly?

A: Yes, cool fully, then freeze in an airtight container. Thaw in the fridge overnight and reheat in the oven.

Q: Can I use ground turkey instead of beef?

A: Yes, ground turkey works fine. The dish will be leaner, so you may want a little extra sauce for moistness.

Porcupine Casserole

A warm, home-style dish featuring beef meatballs that resemble porcupine quills due to the rice inside, mixed with tomato sauce for a comforting one-pot meal.

For the Casserole

  • 1 pound ground beef (Use lean ground beef for best results.)
  • 1 cup uncooked long grain rice (Long grain rice recommended for texture.)
  • 1 small onion, chopped
  • 1 can 10.5 oz condensed tomato soup
  • 1 can 14.5 oz diced tomatoes, undrained
  • 1 cup beef broth or water (Use beef broth for more flavor.)
  • 1 teaspoon salt
  • 1/2 teaspoon black pepper
  • 1 cup shredded cheddar cheese (optional) (Add on top before final baking for a cheesy finish.)

Preparation

  1. Preheat the oven to 350°F (175°C). Lightly grease a 9×13 inch baking dish.
  2. In a large bowl, mix ground beef, rice, chopped onion, salt, and pepper. Mix well with your hands or a spoon.

Assembly

  1. Shape the mixture into small meatballs, about 1 inch wide. Place them in the baking dish in a single layer.
  2. In a bowl, stir the tomato soup, diced tomatoes with juice, and beef broth. Pour this sauce evenly over the meatballs and rice.

Baking

  1. Cover the dish with foil and bake for 45 to 55 minutes, until the rice is tender and the meat is cooked through.
  2. Remove foil, sprinkle cheese on top if you like, and bake 5 more minutes until the cheese melts.
  3. Let rest for 5 minutes before serving.

For best results, use long grain rice. Optionally, brown beef and onions before mixing to enhance flavor.

Casserole, Main Course
American
Comfort Food, Easy Casserole, meatballs, One Pot Meal, Porcupine Casserole

Porcupine Casserole

A warm, home-style dish featuring beef meatballs that resemble porcupine quills due to the rice inside, mixed with tomato sauce for a comforting one-pot meal.

For the Casserole

  • 1 pound ground beef (Use lean ground beef for best results.)
  • 1 cup uncooked long grain rice (Long grain rice recommended for texture.)
  • 1 small onion, chopped
  • 1 can (10.5 oz) condensed tomato soup
  • 1 can (14.5 oz) diced tomatoes, undrained
  • 1 cup beef broth or water (Use beef broth for more flavor.)
  • 1 teaspoon salt
  • 1/2 teaspoon black pepper
  • 1 cup shredded cheddar cheese (optional) (Add on top before final baking for a cheesy finish.)

Preparation

  1. Preheat the oven to 350°F (175°C). Lightly grease a 9×13 inch baking dish.
  2. In a large bowl, mix ground beef, rice, chopped onion, salt, and pepper. Mix well with your hands or a spoon.

Assembly

  1. Shape the mixture into small meatballs, about 1 inch wide. Place them in the baking dish in a single layer.
  2. In a bowl, stir the tomato soup, diced tomatoes with juice, and beef broth. Pour this sauce evenly over the meatballs and rice.

Baking

  1. Cover the dish with foil and bake for 45 to 55 minutes, until the rice is tender and the meat is cooked through.
  2. Remove foil, sprinkle cheese on top if you like, and bake 5 more minutes until the cheese melts.
  3. Let rest for 5 minutes before serving.

For best results, use long grain rice. Optionally, brown beef and onions before mixing to enhance flavor.

Casserole, Main Course
American
Casserole, Comfort Food, Easy Dinner, One-Pot Meal, Porcupine Casserole

Lasagna with Cottage Cheese

Delicious lasagna layered with cottage cheese, marinara sauce, and fresh herbs

Lasagna with Cottage Cheese is a dish that brings comfort to any table. With its layers of rich sauce, hearty noodles, and creamy cottage cheese, this recipe is sure to please everyone. It’s a wonderful blend of flavors, and the cottage cheese adds a unique twist that makes it both light and satisfying. This dish is perfect for family gatherings or cozy nights in, where the smell of bubbling cheese fills the air and everyone gathers around to enjoy. This lasagna isn’t just another pasta dish, it’s a crowd-pleaser that makes each meal feel special. Plus, who can resist those warm, cheesy layers? Let’s dive into how to prepare this delicious Lasagna with Cottage Cheese and bring some warmth to your dinner table.

How to Prepare Lasagna with Cottage Cheese

To make Lasagna with Cottage Cheese, you will need the following ingredients:

  • 9 lasagna noodles
  • 2 cups cottage cheese
  • 2 cups shredded mozzarella cheese
  • 1 pound ground beef or turkey
  • 1 jar (24 ounces) marinara sauce
  • 1 teaspoon dried Italian herbs
  • Salt and pepper to taste
  • Fresh basil for garnish (optional)

First, preheat your oven to 375°F (190°C). Cook the lasagna noodles according to the package directions, then drain and set them aside. In a skillet, cook the ground meat over medium heat until fully browned. Drain excess grease and add the marinara sauce, stirring to combine. In a bowl, mix the cottage cheese with half of the mozzarella, Italian herbs, salt, and pepper.

In a baking dish, spread a layer of the meat sauce, then place three lasagna noodles on top, followed by the cottage cheese mixture. Repeat this layering until all ingredients are used, finishing with a layer of meat sauce on top. Sprinkle the remaining mozzarella cheese over the top layer. Cover with foil and bake for 25 minutes, uncovering for another 10 minutes until the cheese is bubbly. Let it cool for a few minutes before serving.

Easy Lasagna with Cottage Cheese

Why You’ll Love Lasagna with Cottage Cheese

You will love Lasagna with Cottage Cheese for many reasons. First, it’s incredibly easy to make, making it a perfect choice for busy weeknights or special occasions. The cottage cheese creates a creamy texture that contrasts beautifully with the rich sauce and layers of pasta. Plus, this dish is packed with protein, making it filling without being too heavy.

Another reason to adore this lasagna is its versatility. You can easily customize it by adding your favorite vegetables, like spinach or mushrooms, or swapping the meat for a plant-based alternative. This means everyone can enjoy it, whether they are meat lovers or vegetarians. The warm, cheesy goodness makes it a hit with both kids and adults alike. Once you serve it, be prepared for compliments!

Tips for Success

Getting the perfect Lasagna with Cottage Cheese can be simple if you follow these tips. First, make sure to cook your lasagna noodles until they are al dente, as they will soften further while baking. Use a good quality marinara sauce for the best flavor, or try making your own for an extra special touch.

When layering, don’t overdo the cottage cheese mixture, as you want to maintain a balance between all components. Allow the lasagna to rest for a few minutes after taking it out of the oven. This helps it set and makes it easier to cut into neat slices. If you want extra flavor, sprinkle some grated Parmesan cheese over the top before baking. Lastly, if you like extra cheesy goodness, feel free to add more mozzarella!

Serving Suggestions

Lasagna with Cottage Cheese pairs wonderfully with a crisp green salad and a side of garlic bread. The freshness of a salad complements the rich lasagna, creating a balanced meal. You could use ingredients like romaine lettuce, cherry tomatoes, and a light vinaigrette for a refreshing touch.

For a more Italian-inspired feast, serve it alongside bruschetta or antipasto. Your guests will love nibbling on these appetizers before diving into the main course. If you’re hosting a gathering, consider offering a selection of wines to enjoy with the lasagna, such as a smooth Chianti or a light Pinot Grigio. And don’t forget dessert! A slice of classic Tiramisu would make a lovely finish to your meal.

FAQs

Can I make this lasagna ahead of time?
Yes, you can assemble the lasagna a day in advance and store it in the refrigerator before baking. Just add a few extra minutes to the baking time if it’s cold from the fridge.

Can I freeze leftover lasagna?
Absolutely! You can freeze individual portions or the entire pan. Just wrap it well and store it for up to 3 months.

What can I substitute for cottage cheese?
You can use ricotta cheese if you prefer a creamier texture, or even a vegan alternative made from tofu or cashews if you want a dairy-free option.

Lasagna with Cottage Cheese

A healthier and delicious twist on classic lasagna featuring layers of pasta, marinara sauce, and creamy cottage cheese.

For the Lasagna

  • 9 noodles 9 lasagna noodles (Use no-boil noodles if preferred.)
  • 2 cups 2 cups of cottage cheese (Can substitute with ricotta cheese for richer taste.)
  • 1 large 1 egg (Used to bind the cottage cheese mixture.)
  • 1 teaspoon 1 teaspoon of garlic powder (For added flavor.)
  • 1 teaspoon 1 teaspoon of dried oregano (For seasoning.)
  • 3 cups 3 cups of marinara sauce (Fresh marinara sauce recommended.)
  • 2 cups 2 cups of shredded mozzarella cheese (Reserve some for topping.)

Preparation

  1. Preheat your oven to 375°F (190°C).
  2. In a mixing bowl, combine cottage cheese, egg, garlic powder, and dried oregano. Mix well.
  3. Spread a thin layer of marinara sauce on the bottom of a 9 x 13 inch baking dish.
  4. Layer 3 lasagna noodles over the sauce. Spread half of the cottage cheese mixture over the noodles.
  5. Add another layer of marinara sauce, and then sprinkle with 1 cup of shredded mozzarella cheese.
  6. Repeat the layers: add 3 more noodles, the other half of the cottage cheese mixture, more sauce, and 1 cup of mozzarella.
  7. Top with the final 3 noodles, more marinara sauce, and a sprinkle of remaining mozzarella cheese.

Baking

  1. Cover the dish with foil and bake for 25 minutes.
  2. Remove the foil and bake for another 15 minutes, or until the cheese is bubbly and golden.
  3. Let it cool for a few minutes before slicing and serving.

Use fresh ingredients for the best flavor. Allow lasagna to rest for 10 minutes after baking for easier slicing.

Dinner, Main Course
Italian
Cottage Cheese, Easy Lasagna, Family Dinner, Healthy Recipe, Lasagna

Cajun Sausage Pasta

Bowl of Cajun Sausage Pasta topped with fresh herbs and spices

I love meals that are quick, bold, and fill the whole house with good smells. Cajun Sausage Pasta is one of those dishes. It blends spicy Cajun seasoning, smoky sausage, and a creamy sauce with pasta. This dish is a crowd-pleaser, easy to make, and tastes like a warm hug with a little kick. Get ready to make a bowl that your family will ask for again and again.

How to prepare Cajun Sausage Pasta

  1. Cook 12 ounces of pasta in salted water until just tender, drain and save a cup of pasta water.
  2. Slice 1 pound smoked sausage into rounds. Heat a large pan, add a little oil, brown the sausage, then move to a plate.
  3. In the same pan, add 1 chopped onion and 1 chopped bell pepper, cook until soft. Add 2 minced garlic cloves and 1 to 2 tablespoons Cajun seasoning, stir for 30 seconds.
  4. Add a can of diced tomatoes with juice, and 1 cup of chicken broth, bring to a simmer.
  5. Stir in 1 cup heavy cream, then add the cooked sausage back to the pan. Let it warm through and thicken a little.
  6. Add the cooked pasta to the sauce, toss to coat. If the sauce is too thick, add some reserved pasta water until you like the texture.
  7. Taste and add salt, pepper, or more Cajun seasoning if you want more spice. Top with chopped parsley and grated Parmesan if you like.

Cajun Sausage Pasta

Why You’ll Love Cajun Sausage Pasta

  • It mixes spicy Cajun flavors with a creamy sauce, for a rich, tasty meal.
  • Sausage gives a smoky, meaty bite that works well with pasta.
  • You can make it fast on a weeknight, and it still feels special.
  • It works as a one pot or nearly one pot meal, so cleanup is easy.
  • You can change the heat level to suit your family, from mild to very spicy.

Tips for success

  • Use good Cajun seasoning or make your own, it makes the main flavor.
  • Brown the sausage well, browning adds depth and more flavor.
  • Save some pasta water, it helps the sauce stick to the noodles.
  • If you want creamier sauce, add a little more cream or a splash of milk.
  • Taste as you go, adjust salt and spice to your liking.
  • Cook the pasta al dente, it will finish cooking in the sauce and not get mushy.

Serving Suggestions

  • Serve with a green salad and a light vinaigrette to balance the rich sauce.
  • Offer crusty bread to soak up the sauce.
  • Top with chopped green onions or parsley for a fresh note.
  • Add a side of roasted vegetables for color and texture.
  • Pair with a crisp white wine or a cold beer to cut the creaminess.

Cajun Sausage Pasta

FAQs

Q: Can I make this dish less spicy?
A: Yes, use less Cajun seasoning, or choose a mild sausage. You can also add more cream to lower the heat.

Q: Can I make it in one pot?
A: Yes, you can brown the sausage, sauté the veggies, add pasta, broth, and finish with cream in the same pan. Stir often so the pasta cooks evenly.

Q: How do I store leftovers?
A: Keep leftovers in a sealed container in the fridge for up to 3 days. Reheat gently on the stove, add a splash of water or cream if the sauce thickened.

Q: Can I use chicken instead of sausage?
A: Yes, cooked chicken works well, but you may want to add a little smoked paprika or liquid smoke for that smoky flavor.

Q: Is there a vegetarian option?
A: Use a plant-based sausage or extra vegetables like mushrooms and eggplant, and use vegetable broth instead of chicken broth.

Conclusion

If you want another version or a one pot take on this spicy, creamy dish, see this recipe for more ideas, One Pot Creamy Cajun Sausage Pasta – Pass Me Some Tasty.

Cajun Sausage Pasta

A quick and bold blend of spicy Cajun seasoning, smoky sausage, and a creamy sauce with pasta, perfect for family meals.

Pasta

  • 12 ounces pasta (Cook in salted water until just tender.)

Sausage and Vegetables

  • 1 pound smoked sausage (Slice into rounds.)
  • 1 large onion, chopped
  • 1 large bell pepper, chopped
  • 2 cloves garlic, minced
  • 1 to 2 tablespoons Cajun seasoning (Adjust to taste.)

Sauce

  • 1 can diced tomatoes with juice
  • 1 cup chicken broth
  • 1 cup heavy cream

Toppings

  • chopped parsley (For garnish.)
  • grated Parmesan cheese (Optional topping.)

Preparation

  1. Cook the pasta in salted water until just tender, drain, and save a cup of pasta water.
  2. Slice the smoked sausage into rounds.
  3. In a large pan, heat a little oil and brown the sausage, then move to a plate.

Cooking

  1. In the same pan, add chopped onion and bell pepper, and cook until soft.
  2. Add minced garlic and Cajun seasoning, stir for 30 seconds.
  3. Add diced tomatoes with juice and chicken broth, bring to a simmer.
  4. Stir in heavy cream, then add the cooked sausage back to the pan.
  5. Let it warm through and thicken a little.
  6. Add the cooked pasta to the sauce and toss to coat. If it’s too thick, add reserved pasta water until the desired texture is reached.
  7. Taste and add salt, pepper or more Cajun seasoning for more spice.
  8. Top with chopped parsley and grated Parmesan if desired.

Use good Cajun seasoning or make your own for the best flavor. Brown the sausage well for depth and more flavor. Save some pasta water to help the sauce stick to the noodles. Adjust cream and spice to your liking. Cook the pasta al dente so it finishes cooking in the sauce and avoids being mushy.

Dinner, Main Course
American, Southern
Cajun Sausage Pasta, Creamy Pasta, One Pot Meal, Quick Dinner, Spicy Pasta

Cheese Chicken Bake

Delicious Cheese Chicken Bake topped with melted cheese and herbs

Cheese Chicken Bake is warm, simple, and full of melty cheese. This dish feels like a hug on a plate. It is great for busy weeknights, family dinners, and for anyone who loves tasty, easy comfort food. The cheese makes the chicken juicy and rich, and the bake fills the kitchen with a nice smell. This featured recipe is a crowd-pleaser, with tender chicken under a golden, cheesy crust. It tastes creamy, savory, and a little crunchy on top, so people always ask for seconds. Grab your baking dish and get ready to make a dish that everyone will love, and maybe lick their plate a little.

How to prepare Cheese Chicken Bake

Ingredients

  • 4 boneless, skinless chicken breasts
  • 1 teaspoon salt
  • 1/2 teaspoon black pepper
  • 1 teaspoon garlic powder
  • 1 teaspoon paprika
  • 2 tablespoons olive oil
  • 1 cup sour cream or plain Greek yogurt
  • 1/2 cup mayonnaise or 1 can cream of chicken soup
  • 1 cup shredded cheddar cheese
  • 1 cup shredded mozzarella cheese
  • 1/2 cup breadcrumbs, optional for crunch
  • 2 tablespoons chopped fresh parsley or dried parsley

Directions

  1. Preheat oven to 400°F (200°C).
  2. Pat chicken dry, then season both sides with salt, pepper, garlic powder, and paprika.
  3. Heat olive oil in a skillet over medium heat, sear chicken 2 minutes per side, just to brown, then remove.
  4. In a bowl, mix sour cream, mayonnaise or cream soup, half the cheddar, half the mozzarella, and parsley.
  5. Place seared chicken in a baking dish. Spread the cheese sauce over each piece, covering the top.
  6. Sprinkle the remaining cheeses and breadcrumbs on top for a golden crust.
  7. Bake 20 to 25 minutes, until chicken reaches 165°F (74°C) and cheese bubbles.
  8. If you want extra brown on top, broil 2 to 3 minutes, watching closely.
  9. Let rest 5 minutes before serving, this keeps the chicken juicy.

Cheese Chicken Bake

Why You’ll Love Cheese Chicken Bake

This cheesy chicken bake is simple, quick, and full of flavor. It uses everyday ingredients, so you do not need a long shopping list. The cheese keeps the chicken moist, and the top gets a nice golden color. It makes a great easy chicken bake for weeknights or a small party. Kids and adults like it, so it is a real family dinner winner.

Tips for success

  • Pound the chicken to even thickness, it cooks more evenly.
  • Use a meat thermometer to reach 165°F, do not overcook.
  • If you like more sauce, add a little milk or chicken broth to the mix.
  • For extra flavor, add chopped onions or cooked mushrooms to the sauce.
  • Use a mix of cheeses for a richer taste, try cheddar and Monterey Jack.
  • If you use frozen chicken, thaw fully before baking.

Serving Suggestions

  • Serve over rice or pasta to soak up the sauce.
  • Pair with a green salad for a lighter meal.
  • Add roasted vegetables like broccoli, carrots, or green beans.
  • Serve with crusty bread or garlic bread to mop up the cheese.
  • For a low-carb option, serve over cauliflower rice or with steamed veggies.

Cheese Chicken Bake

FAQs

Q, Can I use chicken thighs instead of breasts? A, Yes, bone-in or boneless thighs work well. Thighs may need a few extra minutes to cook.

Q, Can I make this ahead of time? A, Yes, you can assemble in the dish, cover, and refrigerate up to 24 hours. Bake when ready, add a few extra minutes if cold.

Q, How do I store leftovers? A, Cool, then store in an airtight container in the fridge for 3 to 4 days. Reheat in the oven at 350°F (175°C) until warm.

Q, Can I freeze it? A, Yes, freeze the baked dish in a freezer-safe container for up to 2 months. Thaw in the fridge before reheating.

Q, How can I make it crispier on top? A, Add breadcrumbs or broil for 1 to 3 minutes at the end. Watch closely so it does not burn.

Conclusion

If you want a simple, cheesy, and comforting meal, this Cheese Chicken Bake is a great choice for family dinner or an easy weeknight meal. For another tasty one-dish idea with a similar easy dinner feel, try One Dish Queso Chicken Bake {Easy Dinner Recipe}.

Cheese Chicken Bake

This warm and simple Cheese Chicken Bake is full of melty cheese and makes a comforting dish that everyone loves. It features tender chicken under a golden, cheesy crust, perfect for busy weeknights and family dinners.

Chicken and Seasoning

  • 4 pieces boneless, skinless chicken breasts (Pound to even thickness for even cooking)
  • 1 teaspoons salt
  • 1/2 teaspoons black pepper
  • 1 teaspoons garlic powder
  • 1 teaspoons paprika
  • 2 tablespoons olive oil (For searing the chicken)

Cheese and Sauce

  • 1 cup sour cream or plain Greek yogurt
  • 1/2 cup mayonnaise or 1 can cream of chicken soup
  • 1 cup shredded cheddar cheese (Divided use)
  • 1 cup shredded mozzarella cheese (Divided use)
  • 2 tablespoons chopped fresh parsley or dried parsley (For added flavor)

Topping

  • 1/2 cup breadcrumbs (Optional for crunch)

Preparation

  1. Preheat oven to 400°F (200°C).
  2. Pat chicken dry, then season both sides with salt, pepper, garlic powder, and paprika.
  3. Heat olive oil in a skillet over medium heat, sear chicken for 2 minutes per side to brown, then remove.
  4. In a bowl, mix sour cream, mayonnaise or cream soup, half the cheddar, half the mozzarella, and parsley.

Assembly

  1. Place seared chicken in a baking dish. Spread the cheese sauce over each piece, covering the top.
  2. Sprinkle the remaining cheeses and breadcrumbs on top for a golden crust.

Baking

  1. Bake for 20 to 25 minutes, until chicken reaches 165°F (74°C) and cheese bubbles.
  2. If desired, broil for 2 to 3 minutes for extra brown, watching closely.

Serving

  1. Let rest for 5 minutes before serving to keep the chicken juicy.

For extra flavor, add chopped onions or cooked mushrooms to the sauce. For a low-carb option, serve over cauliflower rice or with steamed veggies. Leftovers can be stored in an airtight container for 3 to 4 days.

Dinner, Main Course
American
Cheese Chicken Bake, chicken bake, Comfort Food, Easy Dinner, Family Meal

Air Fryer Honey Butter Garlic Chicken Tenders Recipe

Air Fryer Honey Butter Garlic Chicken Tenders served with dipping sauce

I love simple recipes that taste like you spent hours cooking, but take just minutes to make, and these air fryer honey butter garlic chicken tenders fit that idea. They are crispy on the outside, soft inside, and have a sweet, garlicky sauce that everyone enjoys. This version is great for weeknights, snacks, or when you want a kid friendly meal that still feels special. If you like sweet and spicy chicken, you might also enjoy easy hot honey chicken thighs, they share the same bright sweet flavor that kids and adults love. Get ready to make a crowd pleaser that comes together fast, and tastes like a treat.

how to prepare Air Fryer Honey Butter Garlic Chicken Tenders

Ingredients

  • 1 pound chicken tenders, trimmed
  • 1 cup plain breadcrumbs or panko
  • 1/2 cup all purpose flour
  • 1 teaspoon salt
  • 1/2 teaspoon black pepper
  • 1 teaspoon garlic powder
  • 2 large eggs, beaten
  • 2 tablespoons oil, for coating
  • 3 tablespoons butter
  • 3 tablespoons honey
  • 2 cloves garlic, minced
  • 1 teaspoon soy sauce or a pinch of salt, optional
  • Lemon wedge, for serving, optional

Directions

  1. Pat the chicken tenders dry with paper towel, this helps them get crispy.
  2. Set up three bowls, one with flour mixed with a pinch of salt and pepper, one with beaten eggs, and one with breadcrumbs mixed with garlic powder.
  3. Dredge each tender in flour, then egg, then breadcrumbs. Press crumbs so they stick.
  4. Lightly brush or spray the tenders with oil, this helps them brown in the air fryer.
  5. Preheat air fryer to 400 F, if your model needs preheating.
  6. Place tenders in a single layer in the air fryer basket, do not crowd. Cook 8 to 10 minutes, turn once at about 4 to 5 minutes, until golden and cooked through, internal temp 165 F.
  7. While tenders cook, make the honey butter garlic sauce. In a small pan, melt butter over low heat. Add minced garlic and cook 30 seconds, do not let it brown. Stir in honey and soy sauce, warm until combined.
  8. Toss cooked tenders in the sauce, or brush sauce over them on a serving plate. Squeeze lemon over top if you like a bright finish.

Air Fryer Honey Butter Garlic Chicken Tenders Recipe - Recipes by Janet

Why You’ll Love Air Fryer Honey Butter Garlic Chicken Tenders

  • Quick, these chicken tenders cook fast in the air fryer, perfect for busy nights.
  • Crispy outside, tender inside, thanks to the breading and hot air cooking.
  • Sweet and savory, the honey butter garlic sauce adds flavor that kids and adults both like.
  • Less oil, air frying uses little oil so the tenders feel lighter than deep fried.
  • Versatile, you can serve them as a snack, main dish, or party finger food.

tips for success

  • Dry the chicken well before breading, this helps the crumbs stick and get crispy.
  • Do not overcrowd the air fryer, cook in batches if needed for even crisp.
  • Use panko for extra crunch if you like a very crispy coating.
  • Warm the sauce gently, do not boil, the butter and honey mix best at low heat.
  • Check internal temperature, chicken is safe at 165 F.
  • If you want extra sticky sauce, brush a second coat on right after cooking.

Serving Suggestions

  • Serve with fries, a simple salad, or steamed veggies for a full meal.
  • Offer ranch, ketchup, or extra honey garlic sauce for dipping.
  • Make sliders by placing tenders in small buns with slaw.
  • Add a side of roasted broccoli or carrots for a kid friendly plate.
  • Pair with rice and a light cucumber salad for a fresh dinner.

Air Fryer Honey Butter Garlic Chicken Tenders Recipe - Recipes by Janet

FAQs

Q: Can I use frozen chicken tenders?

A: Yes, you can, but cook time will be longer. Air fry frozen tenders at 400 F for about 12 to 15 minutes, flip once, check they reach 165 F inside.

Q: How do I make this gluten free?

A: Use gluten free flour and gluten free breadcrumbs or crushed cornflakes. The rest of the recipe stays the same.

Q: Can I bake these instead of using an air fryer?

A: Yes, bake on a rack at 425 F for 12 to 18 minutes, flip once, until golden and cooked through.

Q: Can I make the sauce less sweet?

A: Yes, reduce the honey or add a splash of lemon juice to balance the sweetness.

Q: Can I use chicken thighs instead of tenders?

A: You can use thinly sliced thigh meat, cut to similar size so cooking time is even.

Conclusion

If you want a simple, crispy, and sweet garlic chicken that cooks fast, this air fryer honey butter garlic chicken tenders recipe is a great choice. For another easy air fryer chicken idea, see this helpful guide on Air Fryer Chicken Tenders (Easy, No Breading) – Wholesome Yum, it shows a no breading method you may like. If you want a classic breaded style or different take on chicken fingers, check this tried and true recipe for Breaded Chicken Fingers Recipe – Allrecipes, it has good tips for breading and frying.

Air Fryer Honey Butter Garlic Chicken Tenders

These crispy and tender air fryer chicken tenders are coated in a sweet and garlicky honey butter sauce, perfect for a quick weeknight meal or kid-friendly snack.

Chicken Tenders

  • 1 pound chicken tenders, trimmed

Coating

  • 1 cup plain breadcrumbs or panko (Panko yields a crispier coating.)
  • 1/2 cup all purpose flour (Can use gluten-free flour if needed.)
  • 1 teaspoon salt
  • 1/2 teaspoon black pepper
  • 1 teaspoon garlic powder
  • 2 large eggs, beaten
  • 2 tablespoons oil, for coating (For browning in the air fryer.)

Honey Butter Garlic Sauce

  • 3 tablespoons butter (Melted over low heat.)
  • 3 tablespoons honey
  • 2 cloves garlic, minced
  • 1 teaspoon soy sauce or a pinch of salt, optional (For added depth of flavor.)

Serving

  • 1 wedge lemon, for serving, optional (Adds brightness to the dish.)

Preparation

  1. Pat the chicken tenders dry with paper towel.
  2. Set up three bowls: one with flour mixed with salt and pepper, another with beaten eggs, and the last with breadcrumbs mixed with garlic powder.
  3. Dredge each tender in flour, then egg, then breadcrumbs, pressing crumbs to ensure they stick.
  4. Lightly brush or spray tenders with oil.

Cooking

  1. Preheat air fryer to 400°F if required.
  2. Place tenders in a single layer in the air fryer basket and cook for 8 to 10 minutes, turning halfway through, until golden and cooked through (internal temp 165°F).

Sauce Preparation

  1. While tenders are cooking, melt butter in a small pan over low heat.
  2. Add minced garlic and cook for 30 seconds without browning.
  3. Stir in honey and soy sauce, warming until combined.

Serving

  1. Toss cooked tenders in the sauce or brush sauce over them on a serving plate.
  2. Squeeze lemon over top if desired.

For extra crunch, use panko breadcrumbs. Check chicken’s internal temperature to ensure it’s 165°F for safety. If you want extra sticky sauce, brush a second coat right after cooking.

Main Course, Snack
American
Air Fryer Recipes, chicken tenders, easy chicken recipes, family friendly meals, Quick Meals