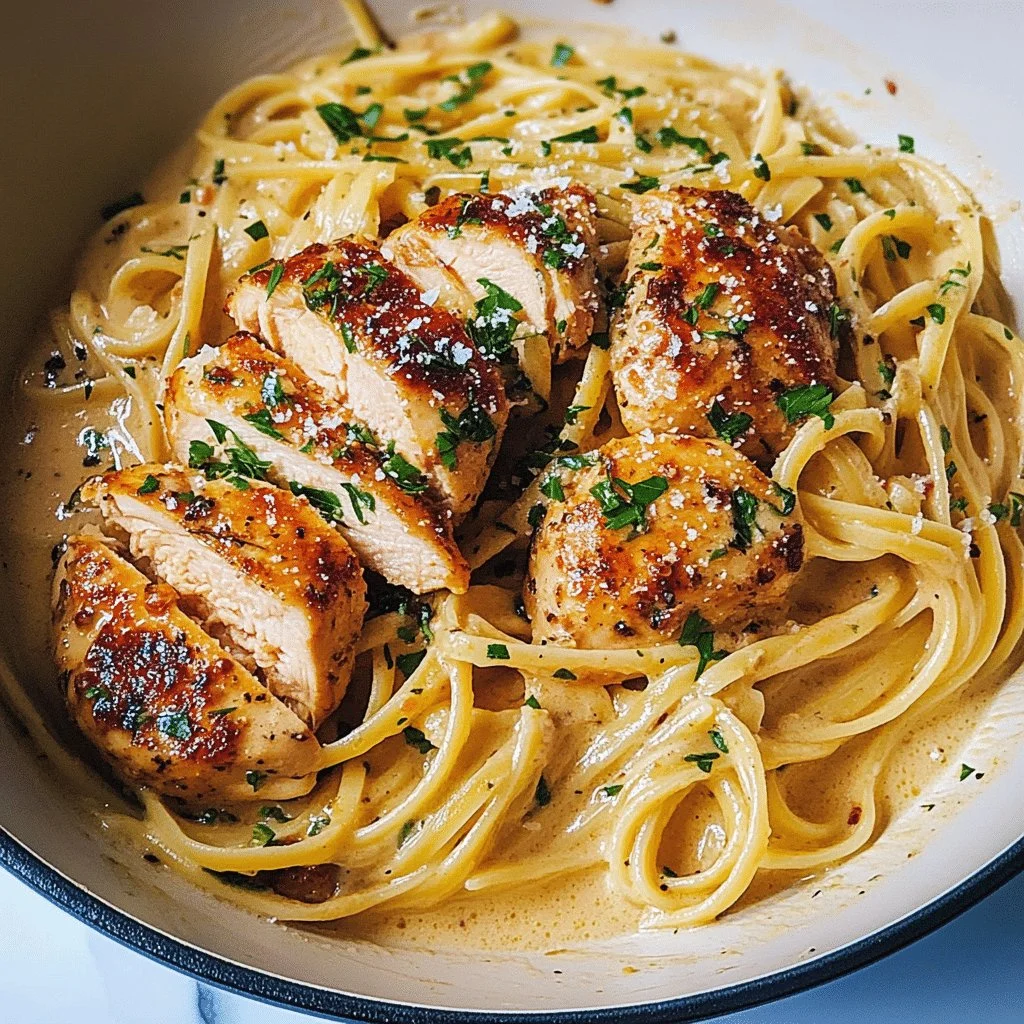
Best-Ever Chicken Carbonara

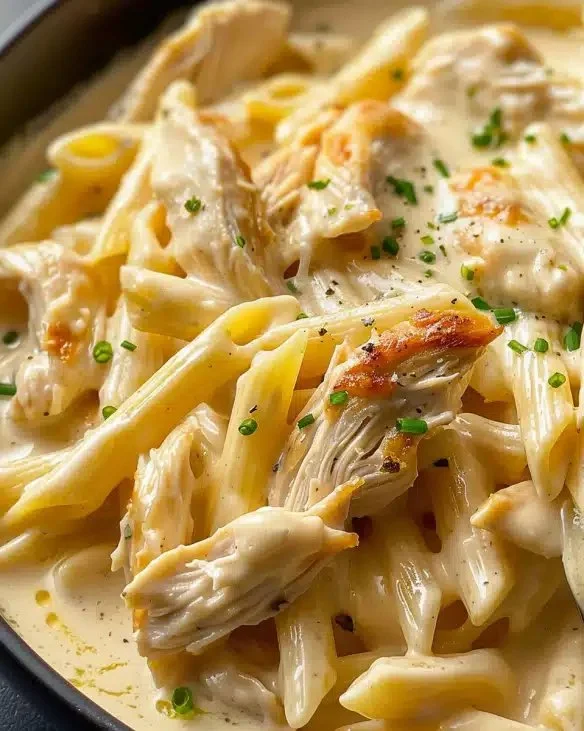
Delicious Chicken Carbonara served with a creamy sauce and crispy bacon

Imagine a dish that wraps you in warmth, with creamy sauce, tender chicken, and just the right amount of cheese. That’s what Best-Ever Chicken Carbonara brings to your table. This recipe is a real crowd-pleaser that combines the comfort of pasta with the savory goodness of chicken and crispy bacon. Perfect for family dinners or gatherings with friends, this dish is sure to impress everyone. The flavors meld beautifully, creating a satisfying meal that’s hard to resist. Trust me, once you make this, you’ll want to whip it up again and again!

How to prepare Best-Ever Chicken Carbonara

Cooking Best-Ever Chicken Carbonara is easier than you might think. Here’s a simple guide to get you started.

  1. Ingredients:
  • 8 ounces of spaghetti
  • 1 tablespoon olive oil
  • 1 pound chicken breast, cooked and diced
  • 4 slices of bacon, chopped
  • 2 cloves garlic, minced
  • 2 large eggs
  • 1 cup grated Parmesan cheese
  • Salt and pepper to taste
  • Fresh parsley, chopped (for garnish)
  1. Directions:
  2. Boil a large pot of salted water and cook the spaghetti according to package instructions.
  3. In a large skillet, heat the olive oil over medium heat. Add the chopped bacon and cook until crispy.
  4. Stir in the minced garlic and cook for about 1 minute, avoiding browning it.
  5. Add the cooked chicken to the skillet and combine well with the bacon and garlic.
  6. In a bowl, whisk together the eggs and Parmesan cheese.
  7. Once the spaghetti is cooked, reserve some pasta water and drain the rest.
  8. Quickly add the spaghetti to the skillet and remove it from the heat. Pour the egg and cheese mixture over the pasta, mixing everything quickly.
  9. If the sauce is too thick, add reserved pasta water a little at a time until creamy.
  10. Season with salt and pepper, and garnish with fresh parsley.

Best-Ever Chicken Carbonara

Why You’ll Love Best-Ever Chicken Carbonara

You’ll fall in love with Best-Ever Chicken Carbonara for so many reasons! First, it’s quick to make, making it perfect for busy weeknights. The creamy texture and robust flavors will make it a hit with anyone, young or old. Plus, it’s a versatile recipe; you can customize it to suit your taste by adding vegetables or making it a bit spicier. And if you’re looking for more delicious ideas, you might want to check out this air fryer Cajun chicken recipe.

Tips for success

  1. Use fresh ingredients: Fresh garlic and quality cheese can elevate the dish.
  2. Monitor heat: It’s important to mix the egg mixture quickly off the heat. This helps to prevent scrambling the eggs.
  3. Adjust the creaminess: Feel free to adjust the amount of pasta water to get the perfect creamy consistency.
  4. Cook pasta al dente: This keeps it firm and gives the dish a nice bite.

Best-Ever Chicken Carbonara

Serving Suggestions

Serve Best-Ever Chicken Carbonara with a light salad or steamed vegetables for a balanced meal. You can also add a sprinkle of extra Parmesan on top for added flavor. If you want to enjoy it even more, a side of garlic bread can make it a complete feast! This dish pairs wonderfully with a glass of white wine.

FAQs

Can I use different types of pasta?

Absolutely! You can use penne, fettuccine, or any pasta you prefer.

Can I make this dish in advance?

While it’s best enjoyed fresh, you can prepare the chicken and sauce ahead of time, then combine with pasta just before serving.

What if I don’t have bacon?

You can substitute it with pancetta, or even turkey bacon for a healthier option.

Best-Ever Chicken Carbonara is a delightful recipe that promises comfort and joy in every bite. It’s simple enough for anyone to make and delicious enough to become a staple in your kitchen. Enjoy!

Chicken Carbonara

A creamy, comforting pasta dish featuring tender chicken, crispy bacon, and cheesy goodness, perfect for family dinners.

Pasta and Sauce Ingredients

  • 8 ounces spaghetti
  • 1 tablespoon olive oil (For cooking)
  • 1 pound chicken breast, cooked and diced
  • 4 slices bacon, chopped (For crispy texture)
  • 2 cloves garlic, minced (Fresh garlic adds flavor)
  • 2 large eggs (For the creamy sauce)
  • 1 cup grated Parmesan cheese (Add more for serving if desired)
  • Salt and pepper to taste
  • Fresh parsley, chopped (for garnish) (For finishing touches)

Preparation

  1. Boil a large pot of salted water and cook the spaghetti according to package instructions.
  2. In a large skillet, heat the olive oil over medium heat. Add the chopped bacon and cook until crispy.
  3. Stir in the minced garlic and cook for about 1 minute, avoiding browning.
  4. Add the cooked chicken to the skillet and combine well with the bacon and garlic.
  5. In a bowl, whisk together the eggs and Parmesan cheese.

Combining

  1. Once the spaghetti is cooked, reserve some pasta water and drain the rest.
  2. Quickly add the spaghetti to the skillet and remove it from the heat. Pour the egg and cheese mixture over the pasta, mixing quickly.
  3. If the sauce is too thick, add reserved pasta water a little at a time until creamy.
  4. Season with salt and pepper, and garnish with fresh parsley.

Use fresh ingredients for the best flavor. It’s important to mix the egg mixture quickly off the heat to prevent scrambling. Adjust the creaminess by adding pasta water to your liking. Cook pasta al dente for optimal texture.
Dinner, Main Course
Italian
Chicken Carbonara, Comfort Food, Creamy Pasta, Easy Dinner, Pasta

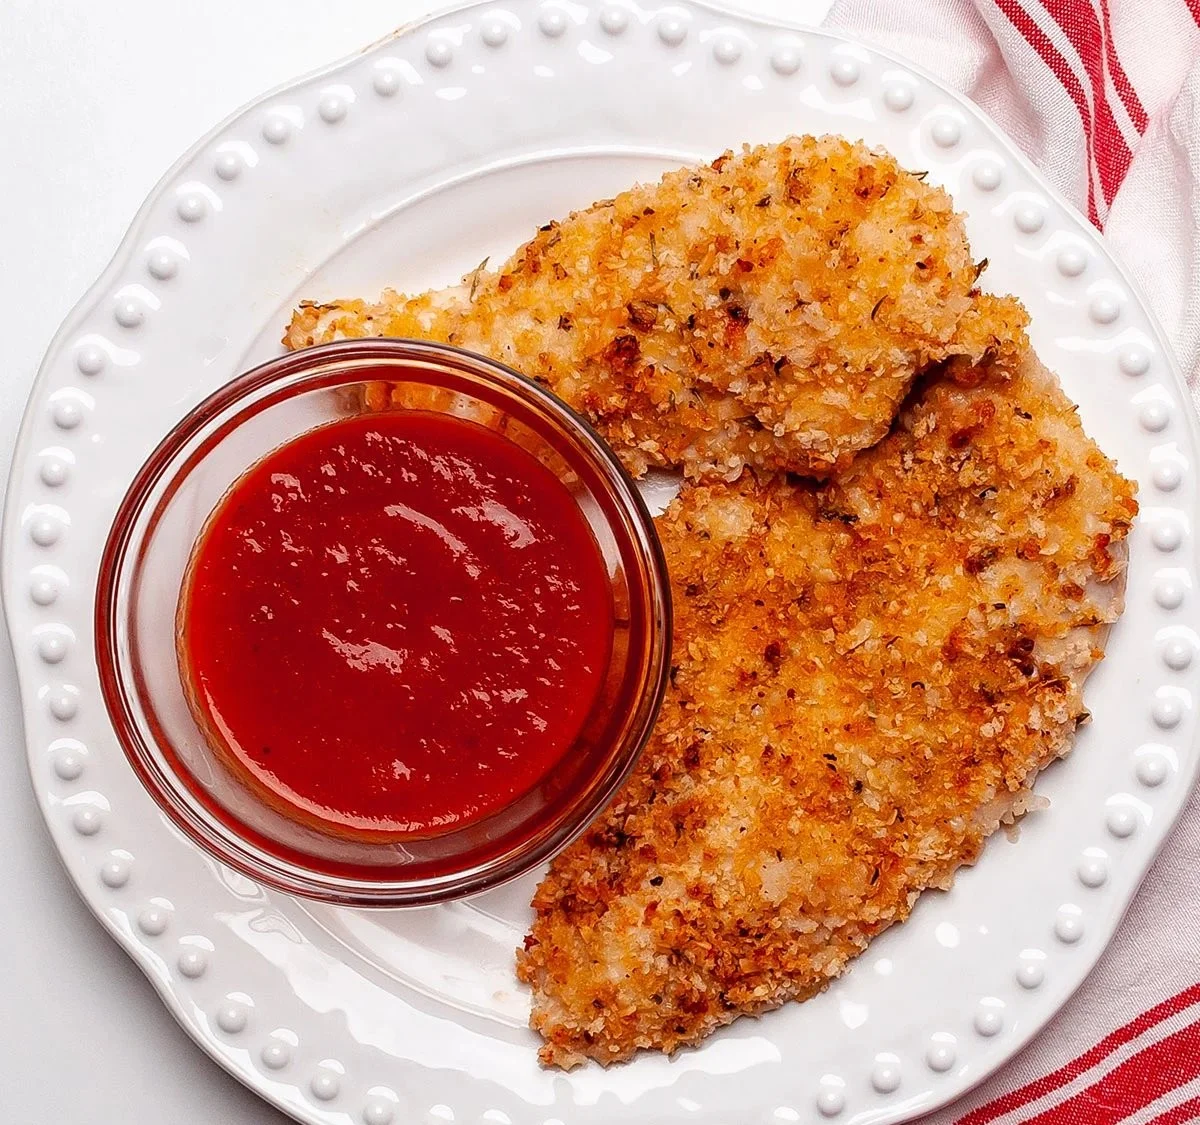
BEST Crispy Baked Panko Chicken Recipe

Crispy baked panko chicken on a plate garnished with herbs

There’s something truly wonderful about the crunch of crispy chicken that brings smiles to faces. The BEST Crispy Baked Panko Chicken Recipe is a simple dish that nearly everyone loves, making it perfect for family dinners or gatherings with friends. This delightful chicken has a golden, crispy coating thanks to the panko breadcrumbs, giving it a satisfying texture without frying. You’ll love how easy it is to prepare, and the flavor is just incredible! Gather your ingredients, roll up your sleeves, and let’s make a dish that will have everyone asking for seconds.

How to prepare BEST Crispy Baked Panko Chicken

  1. Preheat the oven to 400°F (200°C).
  2. Prepare the chicken: Take boneless, skinless chicken breasts and pound them a bit for even cooking.
  3. Make the coating: In a bowl, mix panko breadcrumbs, grated Parmesan cheese, garlic powder, onion powder, salt, and pepper together.
  4. Egg wash: In another bowl, beat a couple of eggs and dip each chicken piece in the egg, ensuring it is well coated.
  5. Coat the chicken: Roll each piece in the panko mixture, pressing gently so it sticks well.
  6. Place on a baking sheet: Lay the coated chicken on a lined baking sheet, making sure they don’t touch.
  7. Bake: Cook for 20-25 minutes, or until golden brown and cooked through, checking with a meat thermometer to ensure it reaches 165°F (75°C).
  8. Serve and enjoy: Let the chicken sit for a few minutes, then serve hot with your favorite sides.

BEST Crispy Baked Panko Chicken Recipe

Why You’ll Love BEST Crispy Baked Panko Chicken

You’ll absolutely love this recipe for a few reasons. First, it’s a healthier alternative to fried chicken while still delivering that beloved crunch. The panko breadcrumbs not only provide a crispy texture but also soak up lovely flavors. Plus, it’s a versatile dish that pairs wonderfully with various sides and dips. Whether you’re doing a cozy family night or hosting, this chicken is guaranteed to be a crowd-pleaser!

Tips for success

  • Make sure to not overcrowd the baking sheet so each piece gets the right amount of heat for that crispy finish.
  • Let the chicken rest after baking. This helps ensure all the juices stay inside for a moist bite.
  • Get creative with seasonings! Adding herbs can bring a fresh twist to your chicken, opening up even more flavor combinations.

Serving Suggestions

This crispy baked panko chicken serves well alongside a fresh salad, mashed potatoes, or some roasted veggies. You could also pair it with dips like honey mustard or barbecue sauce for a flavor burst. Consider serving it with rice or pasta to take a more filling approach to your meal.

FAQs

Can I make this chicken ahead of time?

Yes, you can prepare the chicken earlier in the day and refrigerate it before baking. Just remember to add a few extra minutes to the baking time if it’s cold from the fridge!

Can I use regular breadcrumbs instead of panko?

While you can use regular breadcrumbs, you won’t achieve the same level of crunch. Panko breadcrumbs are lighter and result in a crispier texture.
What should I do with leftovers?

Store any leftovers in an airtight container in the fridge for up to 3 days. Reheat them in the oven or air fryer for the best results in maintaining the crispiness.

BEST Crispy Baked Panko Chicken Recipe

If you’re looking for more tasty chicken ideas, check out this delicious air fryer honey butter garlic chicken tenders recipe for another savory treat!

Crispy Baked Panko Chicken

Enjoy the crunchy goodness of this healthier alternative to fried chicken, featuring a golden panko breadcrumb coating.

Chicken Preparation

  • 4 pieces Boneless, skinless chicken breasts (Pounded for even cooking)

Coating

  • 1 cup Panko breadcrumbs (Provides crispiness)
  • 1/2 cup Grated Parmesan cheese (Adds flavor)
  • 1 teaspoon Garlic powder
  • 1 teaspoon Onion powder
  • 1 teaspoon Salt (Adjust to taste)
  • 1/2 teaspoon Black pepper (Adjust to taste)

Egg Wash

  • 2 large Eggs (Beaten for coating)

Preparation

  1. Preheat the oven to 400°F (200°C).
  2. Prepare the chicken by pounding the boneless, skinless chicken breasts for even cooking.

Coating

  1. In a bowl, mix panko breadcrumbs, grated Parmesan cheese, garlic powder, onion powder, salt, and pepper together.
  2. In another bowl, beat the eggs and dip each chicken piece in the egg, ensuring it is well coated.
  3. Roll each piece in the panko mixture, pressing gently so it sticks well.

Baking

  1. Place the coated chicken on a lined baking sheet, ensuring they don’t touch.
  2. Bake for 20-25 minutes, or until golden brown and cooked through, reaching an internal temperature of 165°F (75°C).
  3. Let the chicken sit for a few minutes before serving hot with your favorite sides.

Do not overcrowd the baking sheet to ensure each piece gets the right amount of heat for a crispy finish. Get creative with seasonings by adding herbs for a fresh twist.

Dinner, Main Course
American
Baked Chicken, Crispy Chicken, Family Dinner, Healthy Chicken, Panko Chicken

Garlic Butter Baked Chicken Breast

Garlic Butter Baked Chicken Breast served on a plate with herbs

Garlic Butter Baked Chicken Breast is one of those dishes that make everyone in the family happy. It combines the rich, savory flavor of garlic butter with tender, juicy chicken, creating a meal that’s both simple and delicious. When you take that first bite, you’ll notice how the melted garlic butter seeps into the chicken, bringing a burst of flavor that’s hard to resist. This dish is not just perfect for weeknight dinners but also a favorite for gatherings with friends. If you love flavorful chicken that is easy to prepare, you’ll want to get started on this delightful recipe right away!

How to prepare Garlic Butter Baked Chicken Breast

  1. Preheat your oven to 400°F (200°C).
  2. In a small bowl, mix melted butter, minced garlic, salt, and pepper.
  3. Place the chicken breasts in a baking dish and pour the garlic butter mixture over them.
  4. Sprinkle with fresh herbs for added flavor.
  5. Bake for 25-30 minutes, until the chicken is cooked through and no longer pink in the center.

Garlic Butter Baked Chicken Breast

Why You’ll Love Garlic Butter Baked Chicken Breast

This dish is packed with flavor and is incredibly easy to make. The garlic butter adds richness, while the herbs complement the chicken perfectly. It’s a versatile meal that pairs well with a variety of sides, such as roasted vegetables or mashed potatoes. Plus, the aroma that fills your kitchen while it bakes will make everyone wonder what’s cooking. You’ll definitely want to keep this recipe in your weekly rotation!

Tips for Success

To make sure your Garlic Butter Baked Chicken Breast is a hit every time, follow these tips:

  • Use fresh garlic for the best flavor.
  • Don’t overcook the chicken, as it can become dry. Check the internal temperature; it should reach 165°F (75°C).
  • Let the chicken rest for a few minutes before slicing to keep it juicy.

Serving Suggestions

Garlic Butter Baked Chicken Breast can be served in many ways. Pair it with a fresh garden salad for a light meal, or go for creamy mashed potatoes for something heartier. It also goes great with pasta or rice, making it a complete dish that everyone will love. Don’t forget to drizzle some of that delicious garlic butter sauce over your sides for extra flavor!

FAQs

1. Can I use frozen chicken breasts? Yes, but make sure to thaw them first for even cooking.

2. How can I store leftovers? Store leftovers in an airtight container in the fridge for up to three days.

3. Can I add vegetables? Absolutely! You can add vegetables to the baking dish for a complete meal. Just make sure they are cut small enough to cook through in the same time as the chicken.

Conclusion

Garlic Butter Baked Chicken Breast is an easy and flavorful recipe that brings comfort to the table. It’s perfect for busy nights or when you want to impress guests with something delicious. For more details and tips on preparing this tasty dish, check out this wonderful resource: Garlic Butter Baked Chicken Breast – Primavera Kitchen. Enjoy your cooking adventure!

Garlic Butter Baked Chicken Breast

A simple yet delicious dish that combines tender chicken breasts with rich, savory garlic butter, perfect for weeknight dinners or gatherings.

Main Ingredients

  • 4 pieces chicken breasts (Use fresh or thawed chicken.)
  • 1/2 cup butter, melted (For best flavor, use unsalted butter.)
  • 4 cloves garlic, minced (Fresh garlic is recommended.)
  • 1 tsp salt
  • 1/2 tsp black pepper
  • to taste fresh herbs (Such as parsley or thyme, for garnishing.)

Preparation

  1. Preheat your oven to 400°F (200°C).
  2. In a small bowl, mix melted butter, minced garlic, salt, and pepper.
  3. Place the chicken breasts in a baking dish and pour the garlic butter mixture over them.
  4. Sprinkle with fresh herbs for added flavor.

Baking

  1. Bake for 25-30 minutes, until the chicken is cooked through and no longer pink in the center.

Let the chicken rest for a few minutes before slicing to keep it juicy. Serve with sides such as roasted vegetables or mashed potatoes. Drizzle the garlic butter sauce over your sides for extra flavor.

Dinner, Main Course
American
Baked Chicken, Comfort Food, easy chicken recipe, Flavorful Chicken, Garlic Butter Chicken

Mexican White Trash Casserole

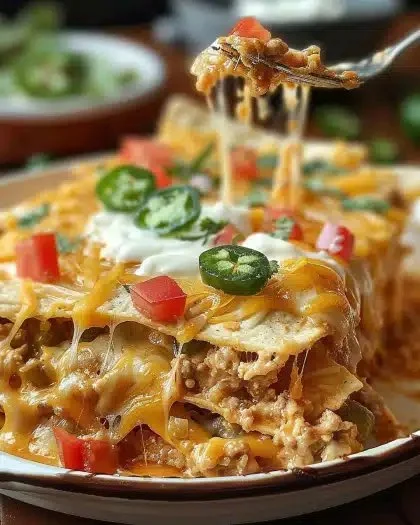
Delicious Mexican White Trash Casserole topped with cheese and spices.

Mexican White Trash Casserole is a delightful dish that brings together the fun and excitement of a potluck with the flavors of Mexican cuisine. This casserole is perfect for gatherings or family dinners, as it is easy to prepare and sure to please even the pickiest of eaters. With creamy textures and savory spices, this recipe is a true comfort food that warms the soul. Once you try it, you’ll understand why it’s become a favorite for many. Grab your ingredients and let’s make some magic happen in the kitchen!

How to prepare Mexican White Trash Casserole

  1. Ingredients:
  • 1 lb ground beef
  • 1 can (15 oz) black beans, drained and rinsed
  • 1 can (15 oz) corn, drained
  • 1 can (10 oz) diced tomatoes with green chilies
  • 1 packet taco seasoning
  • 2 cups cooked rice
  • 1 cup shredded cheese (like cheddar or Mexican blend)
  • 1 cup sour cream
  • 1 can (10 oz) cream of mushroom soup
  • Tortilla chips, for topping
  1. Directions:
  2. Preheat your oven to 350°F (175°C).
  3. In a large skillet, cook the ground beef over medium heat until it’s browned. Drain excess fat.
  4. Stir in the taco seasoning, black beans, corn, diced tomatoes, and cooked rice. Mix well.
  5. In a separate bowl, combine the sour cream and cream of mushroom soup until smooth.
  6. In a greased 9×13 inch baking dish, spread half of the beef mixture on the bottom.
  7. Layer with half of the sour cream mixture and sprinkle with half of the shredded cheese.
  8. Add the remaining beef mixture, followed by the rest of the sour cream mixture and cheese.
  9. Top with crumbled tortilla chips for a crunchy finish.
  10. Bake for 25-30 minutes, until hot and bubbly. Enjoy!

Mexican White Trash Casserole

Why You’ll Love Mexican White Trash Casserole

This casserole has it all—delicious flavors, satisfying textures, and it is super simple to put together. The combination of creamy and crispy elements makes each bite enjoyable. It is perfect for family gatherings or even a cozy night in. Plus, it can easily feed a crowd, making it a great potluck dish. Each ingredient works together to create a savory delight that will leave everyone asking for seconds.

Tips for success

  • Use leftover rice to save time; it adds flavor and helps the casserole come together quickly.
  • Feel free to customize the recipe with your favorite ingredients, like extra veggies or different meats.
  • For added heat, toss in some jalapeños or use a spicier taco seasoning.

Serving Suggestions

Mexican White Trash Casserole goes well with a fresh salad or can be paired with some homemade guacamole and salsa. Serve with warm tortillas for scooping, and don’t forget a dollop of sour cream on top for extra creaminess. This dish is also fantastic for leftovers, making it great for meal prep throughout the week!

Mexican White Trash Casserole

FAQs

Can I make this casserole ahead of time?

Yes, you can prepare the layers a day in advance and store them in the fridge. Just pop it in the oven when you’re ready to cook.

Can I freeze leftovers?

Absolutely! Just make sure to store them in an airtight container. Reheat in the oven or microwave when you are ready to enjoy them again.

What can I substitute for cream of mushroom soup?

You can use a homemade version of cream of mushroom soup or substitute it with cream of chicken soup if you prefer a different flavor.

Mexican White Trash Casserole is not just a meal, it’s a celebration of flavors and a nod to good times with family and friends. With its ease of preparation and comforting taste, this recipe will quickly become a staple in your home. If you want to explore more variations or tips, check out this Mexican White Trash Casserole Recipe for additional inspiration! Happy cooking!

Mexican White Trash Casserole

A delightful and easy-to-make casserole combining the flavors of Mexican cuisine, perfect for gatherings and family dinners.

Main ingredients

  • 1 lb ground beef (Use lean ground beef for less grease.)
  • 1 can (15 oz) black beans, drained and rinsed (Canned beans save time.)
  • 1 can (15 oz) corn, drained (Sweet corn adds flavor.)
  • 1 can (10 oz) diced tomatoes with green chilies (Adds zest and moisture.)
  • 1 packet taco seasoning (Can adjust amount for spice preference.)
  • 2 cups cooked rice (Leftover rice works well.)
  • 1 cup shredded cheese (like cheddar or Mexican blend) (Choose your favorite cheese blend.)
  • 1 cup sour cream (For creaminess.)
  • 1 can (10 oz) cream of mushroom soup (Can substitute with cream of chicken soup.)
  • to taste Tortilla chips, for topping (Provides a crunchy finish.)

Preparation

  1. Preheat your oven to 350°F (175°C).
  2. In a large skillet, cook the ground beef over medium heat until it’s browned. Drain excess fat.
  3. Stir in the taco seasoning, black beans, corn, diced tomatoes, and cooked rice. Mix well.
  4. In a separate bowl, combine the sour cream and cream of mushroom soup until smooth.

Layering

  1. In a greased 9×13 inch baking dish, spread half of the beef mixture on the bottom.
  2. Layer with half of the sour cream mixture and sprinkle with half of the shredded cheese.
  3. Add the remaining beef mixture, followed by the rest of the sour cream mixture and cheese.
  4. Top with crumbled tortilla chips for a crunchy finish.

Baking

  1. Bake for 25-30 minutes, until hot and bubbly.
  2. Enjoy!

Use leftover rice to save time. Customize with your favorite ingredients. For added heat, toss in jalapeños or use spicier taco seasoning. Serve with fresh salad, guacamole, and salsa.

Casserole, Main Course
Mexican
Casserole, Comfort Food, Easy Dinner, Mexican White Trash Casserole, Potluck Recipe

Creamy Crack Chicken Pasta

Creamy Crack Chicken Pasta served in a bowl with herbs and cheese garnish

This Creamy Crack Chicken Pasta is one of those meals that instantly brings comfort and joy to the dinner table. It’s rich, creamy, and packed with flavors that will make everyone coming back for more. If you’re looking for a dish that’s easy to prepare and loved by both adults and kids, you’ve found it! Imagine tender pasta mixed with shredded chicken, crispy bacon, and a creamy sauce that ties it all together. Not only is this recipe a crowd-pleaser, but it also gives you that “homemade with love” feeling. So grab your apron and let’s whip up this delightful dish!

How to prepare Creamy Crack Chicken Pasta

  1. Start by cooking your pasta according to the package instructions. You can use any type of pasta you love.
  2. While the pasta cooks, heat a large skillet over medium heat. Add chopped bacon and cook until crispy. Remove and set aside.
  3. In the same skillet, add diced onion and cook until soft.
  4. Add cooked chicken, cream cheese, ranch seasoning, and garlic powder. Stir until everything is well mixed and creamy.
  5. Once the pasta is cooked, drain it and add it to the skillet. Mix until the pasta is fully coated with the creamy sauce.
  6. Finally, stir in the crispy bacon and garnish with green onions or parsley for a fresh touch.

Creamy Crack Chicken Pasta

Why You’ll Love Creamy Crack Chicken Pasta

This dish is not only delicious but also incredibly easy to make. It’s perfect for busy weeknights or when you’re entertaining guests. The combination of creamy sauce, tender chicken, and crispy bacon is simply irresistible. Plus, you can customize it by adding veggies if you want a bit more color and nutrition on your plate. Everyone will love this dish, and it’s sure to become a family favorite.

Tips for success

  • For extra flavor, consider using grilled or rotisserie chicken instead of boiled chicken.
  • Don’t overcook the pasta; a little bite (al dente) is perfect.
  • Feel free to mix in some of your favorite vegetables, like spinach or bell peppers, for added nutrition.
  • If you want a bit of heat, add red pepper flakes to the creamy sauce.

Serving Suggestions

Serve your Creamy Crack Chicken Pasta with a side of garlic bread and a fresh garden salad. This meal looks beautiful on the plate and makes for a complete dinner experience. You can also pair it with a glass of white wine for a touch of elegance.

FAQs

Can I use different pasta types?

Absolutely! You can use any pasta you prefer, such as penne, rigatoni, or even gluten-free pasta.

Can I make this dish ahead of time?

Yes, you can prepare the chicken and sauce ahead of time and mix them with freshly cooked pasta when you’re ready to serve.

Is there a vegetarian option?

Yes, you can substitute the chicken with grilled vegetables and the bacon with mushrooms or tempeh for a delicious vegetarian twist!

The Creamy Crack Chicken Pasta is a fun, tasty dish that your family will love. With easy steps and ingredients, it can become a weeknight favorite. If you want to explore more recipes like this, check out this Crack Chicken Pasta Recipe that highlights even more deliciousness. Happy cooking!

Creamy Crack Chicken Pasta

A rich and creamy pasta dish featuring tender chicken, crispy bacon, and a flavorful sauce that is sure to delight the whole family.

Main ingredients

  • 12 oz pasta (Any type of pasta you love.)
  • 6 slices bacon (Chopped and cooked until crispy.)
  • 1 onion (Diced.)
  • 2 cups cooked chicken (Shredded.)
  • 8 oz cream cheese (Softened for easier mixing.)
  • 1 packet ranch seasoning
  • 1 tsp garlic powder
  • green onions or parsley (For garnish.)

Preparation

  1. Cook the pasta according to the package instructions until al dente.
  2. While the pasta cooks, heat a large skillet over medium heat and add the chopped bacon. Cook until crispy, then remove and set aside.
  3. In the same skillet, add the diced onion and cook until soft.
  4. Add the cooked chicken, cream cheese, ranch seasoning, and garlic powder to the skillet. Stir until well mixed and creamy.
  5. Once the pasta is cooked, drain it and add it to the skillet. Mix until the pasta is fully coated with the creamy sauce.
  6. Finally, stir in the crispy bacon and garnish with green onions or parsley.

For extra flavor, consider using grilled or rotisserie chicken instead of boiled chicken. Don’t overcook the pasta; al dente is perfect. Feel free to mix in vegetables like spinach or bell peppers for added nutrition. For heat, add red pepper flakes to the sauce.

Dinner, Main Course
American
Chicken, Comfort Food, Creamy Pasta, Pasta, Quick Dinner

Cheesy Taco Potatoes

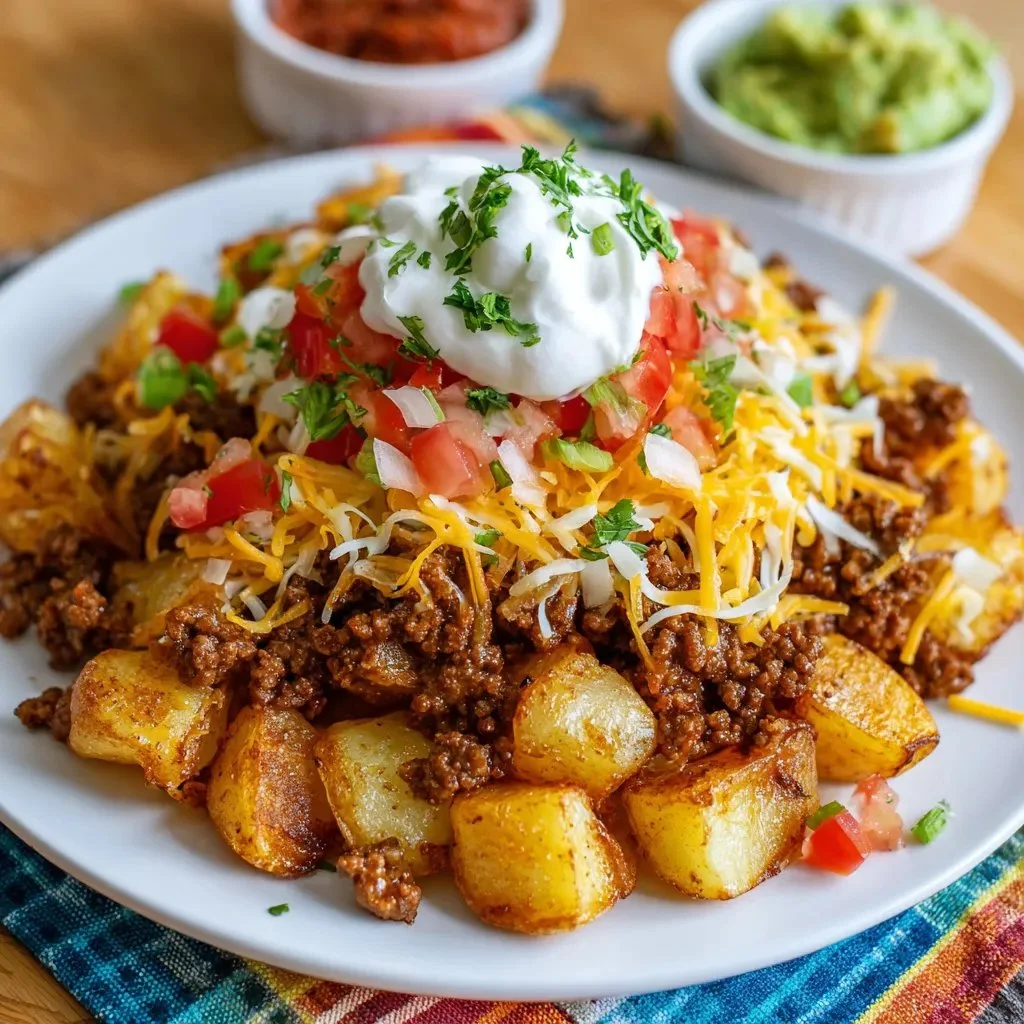
Cheesy taco potatoes loaded with toppings for a tasty meal.

Cheesy Taco Potatoes are a fun mix of flavors that everyone loves. They’re the perfect blend of creamy cheese, spicy taco seasoning, and hearty potatoes. This dish is really versatile and can serve as a side or a main dish. Whether you’re hosting a party or just looking for a cozy weeknight meal, these potatoes will surely be a hit. Everyone will be coming back for seconds, and the ooey-gooey cheese will have you dreaming of more! So grab your apron, and let’s get started on making this deliciousness yourself.

How to prepare Cheesy Taco Potatoes

To make Cheesy Taco Potatoes, you will need the following ingredients:

  • 4 medium potatoes, peeled and diced
  • 1 pound ground beef or turkey
  • 1 packet taco seasoning
  • 1 cup shredded cheddar cheese
  • 1 cup sour cream
  • 1 cup diced tomatoes (optional)
  • Chopped green onions (for garnish)
  • Salt and pepper to taste

Directions

  1. Preheat your oven to 350°F (175°C).
  2. In a large pot, boil the diced potatoes until tender, about 10-15 minutes. Drain and set aside.
  3. In a skillet, brown the ground beef or turkey over medium heat. Drain any excess fat.
  4. Stir in the taco seasoning and a little water according to package instructions. Mix well.
  5. In a large bowl, combine the cooked potatoes and the meat mixture. Add the sour cream and half of the cheese, mixing until everything is well combined.

  6. Transfer the mixture to a baking dish. Top with the remaining cheese.
  7. Bake in the oven for 20-25 minutes, or until the cheese is melted and bubbly.
  8. Garnish with diced tomatoes and chopped green onions before serving.

Cheesy Taco Potatoes

Why You’ll Love Cheesy Taco Potatoes

These Cheesy Taco Potatoes are not only tasty, but they are also easy to make. You can whip them up quickly and even customize them with your favorite toppings. Imagine biting into creamy potatoes combined with zesty taco flavors; it’s pure comfort food. Plus, if you’re a fan of tacos and cheese, this dish has both in abundance! They are perfect for family dinners or game day gatherings.

Tips for success

To make your Cheesy Taco Potatoes even better, try these tips:

  • Use different types of cheese, like pepper jack for a spicy kick, or a blend of cheeses for added flavor.
  • Experiment with additional toppings like jalapeños, or avocado to give it your personal touch.
  • You can also use leftover cooked meat, which will save you time!
  • For a quicker option, you can use pre-packed shredded potatoes to skip the boiling step.

Serving Suggestions

Cheesy Taco Potatoes go well with a side salad or some fresh salsa. You can also serve them alongside tortilla chips for a truly festive meal. If you want to add a refreshing drink, consider serving them with a cool lemonade or a classic margarita, as the flavors complement each other perfectly!

FAQs

Can I make Cheesy Taco Potatoes ahead of time?

Yes, you can prepare the potato mixture ahead of time and store it in the fridge. Just bake before serving.

Can I use sweet potatoes instead?

Absolutely! Sweet potatoes can be a delicious twist on this recipe, adding a natural sweetness.

How do I store leftovers?

Store any leftovers in an airtight container in the fridge for 3-5 days. They can be easily reheated in the microwave or oven.

Cheesy Taco Potatoes

Conclusion

Cheesy Taco Potatoes are the ultimate comfort food that everyone will love. The combination of creamy cheese and taco flavors makes for a winning dish. If you want to explore more delicious recipes, don’t forget to check out this recipe for Taco Potatoes. Give these a try, and you’ll see just how quickly they disappear from your table!

Cheesy Taco Potatoes

Cheesy Taco Potatoes are a comforting blend of creamy cheese, spicy taco seasoning, and hearty potatoes, making them perfect for any occasion.

Main Ingredients

  • 4 medium potatoes, peeled and diced
  • 1 pound ground beef or turkey
  • 1 packet taco seasoning
  • 1 cup shredded cheddar cheese (divided)
  • 1 cup sour cream
  • 1 cup diced tomatoes (optional) (for garnish)
  • to taste chopped green onions (for garnish)
  • to taste salt and pepper

Preparation

  1. Preheat your oven to 350°F (175°C).
  2. In a large pot, boil the diced potatoes until tender, about 10-15 minutes. Drain and set aside.
  3. In a skillet, brown the ground beef or turkey over medium heat. Drain any excess fat.
  4. Stir in the taco seasoning and a little water according to package instructions. Mix well.
  5. In a large bowl, combine the cooked potatoes and the meat mixture. Add the sour cream and half of the cheese, mixing until everything is well combined.
  6. Transfer the mixture to a baking dish. Top with the remaining cheese.

Cooking

  1. Bake in the oven for 20-25 minutes, or until the cheese is melted and bubbly.
  2. Garnish with diced tomatoes and chopped green onions before serving.

For a twist, try using sweet potatoes or different types of cheese like pepper jack. You can also use leftover cooked meat to save time.

Main Course, Side Dish
Mexican
baked potatoes, Cheesy Taco Potatoes, Comfort Food, Easy Recipe, taco flavors

Easy Homemade Chili Recipe

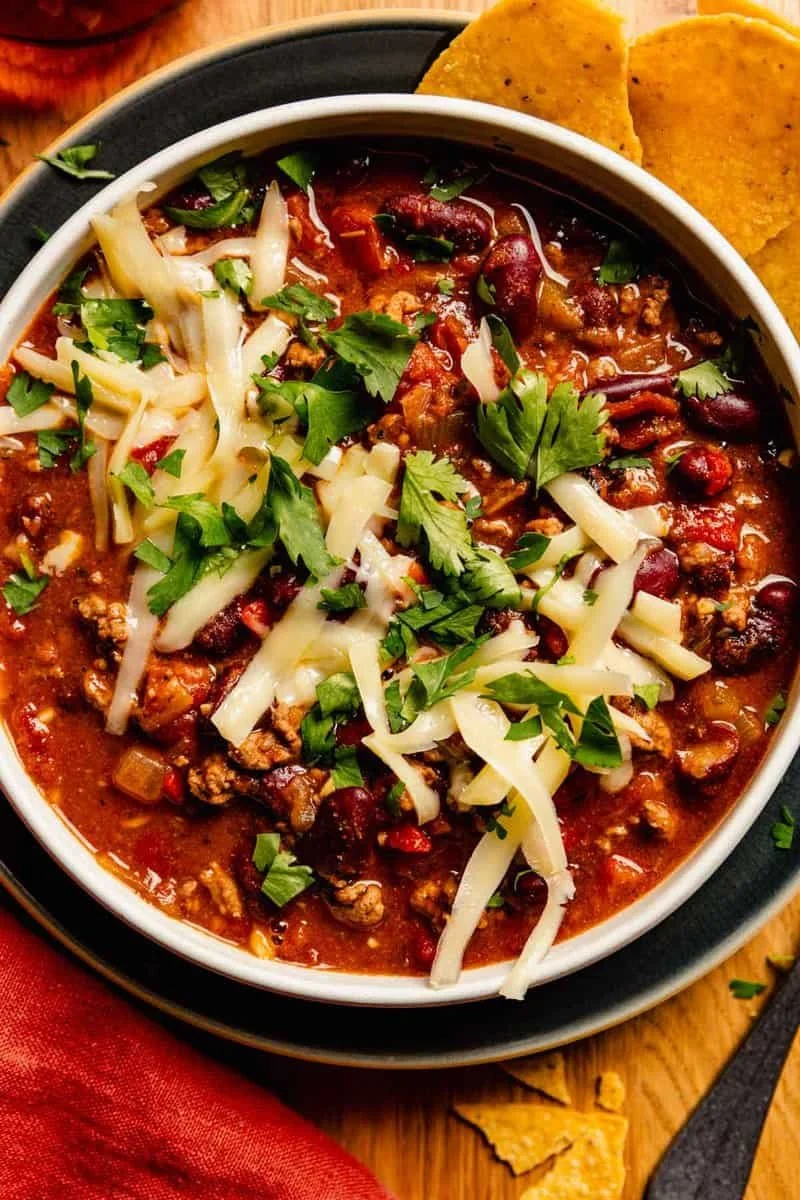
Bowl of easy homemade chili with toppings like cheese and cilantro

This homemade Chili Recipe is full of rich tomato taste, savory beef, and soft beans, it is a classic comfort food that almost everyone loves. The recipe is simple, ready in about an hour, and uses pantry staples, so you can make it on short notice. If you want a warm dessert after chili, try an easy blueberry crisp recipe that is quick and sweet. You will find this chili tasty, easy to change for your family, and fun to cook, so get ready to make a big pot and enjoy.

Why You’ll Love Easy Homemade Chili

This homemade chili is warm, full of flavor, and easy to make. It uses simple ingredients like ground beef, beans, tomatoes, and spices. The chili is hearty, filling, and perfect for family dinners, game days, or cold nights. You will like how the flavors come together in one pot, and how easy it is to change the heat or add more vegetables. This easy chili recipe becomes a crowd-pleaser fast, and it works well as a weeknight meal or for a big batch to share.

How to prepare Easy Homemade Chili

Ingredients

  • 1 pound ground beef or turkey
  • 1 onion, chopped
  • 1 green bell pepper, chopped
  • 2 cloves garlic, minced
  • 1 can (14.5 oz) diced tomatoes
  • 1 can (15 oz) tomato sauce
  • 1 can (15 oz) kidney beans, drained and rinsed
  • 1 can (15 oz) pinto or black beans, drained and rinsed
  • 2 tablespoons chili powder
  • 1 teaspoon ground cumin
  • 1 teaspoon salt, or to taste
  • 1/2 teaspoon black pepper
  • 1 cup beef or chicken broth, or water
  • 1 tablespoon olive oil

Directions

  1. Heat the olive oil in a large pot over medium heat. Add the chopped onion and bell pepper, cook for 4 to 5 minutes until soft.
  2. Add the garlic and cook one more minute, stir so it does not burn.
  3. Add the ground beef, break it up with a spoon, and cook until no pink remains, about 6 to 8 minutes. Drain extra fat if you want a leaner chili.
  4. Stir in the chili powder, cumin, salt, and black pepper. Cook for 1 minute to toast the spices.
  5. Add the diced tomatoes, tomato sauce, beans, and broth. Stir well to combine.
  6. Bring the chili to a low boil, then reduce heat to low and simmer uncovered for 25 to 30 minutes, stirring now and then. The chili will thicken and the flavors will blend.
  7. Taste and add more salt or chili powder for heat if needed. Serve hot.

Easy Homemade Chili Recipe

Tips for success

  • Use lean ground beef to reduce grease, or use ground turkey for a lighter chili.
  • For deeper flavor, brown the meat well and let it brown bits stick to the pan, then deglaze with a little broth.
  • Taste as you go, add salt or chili powder a little at a time.
  • If you like a thicker chili, mash some beans with the back of a spoon while simmering.
  • Make it ahead, chili often tastes better the next day after the flavors meld.

Serving Suggestions

  • Top with shredded cheddar cheese, sour cream, and sliced green onions.
  • Serve with warm cornbread, tortilla chips, or over steamed rice.
  • Add a side salad or roasted vegetables for a fuller meal.
  • For a party, set out toppings like jalapeños, cilantro, diced avocado, and lime wedges.

Easy Homemade Chili Recipe

FAQs

Q: Can I make this chili in a slow cooker?

A: Yes, brown the meat and sauté the onion and pepper first. Then put all ingredients in the slow cooker and cook on low for 6 to 8 hours.

Q: Can I use different beans?

A: Yes, use any canned beans you like, such as black beans, cannellini, or a mix. Drain and rinse them before adding.

Q: How do I make the chili spicier or milder?

A: Add more chili powder or a pinch of cayenne for heat, or reduce the chili powder and use mild diced tomatoes to keep it mild.

Q: Can I freeze leftover chili?

A: Yes, cool the chili, put it in airtight containers, and freeze for up to 3 months. Thaw in the fridge before reheating.

Conclusion

This Easy Homemade Chili Recipe is a simple, hearty meal that warms the body and the soul. If you want another clear, tested version of this classic, see Easy Homemade Chili Recipe – Allrecipes for more tips and variations.

Easy Homemade Chili

This homemade chili is rich in tomato flavor and savory beef, making it a classic comfort food that’s perfect for family dinners or game days.

Main Ingredients

  • 1 pound ground beef or turkey (Use lean ground beef to reduce grease.)
  • 1 medium onion, chopped
  • 1 medium green bell pepper, chopped
  • 2 cloves garlic, minced
  • 1 can (14.5 oz) diced tomatoes
  • 1 can (15 oz) tomato sauce
  • 1 can (15 oz) kidney beans, drained and rinsed
  • 1 can (15 oz) pinto or black beans, drained and rinsed
  • 2 tablespoons chili powder
  • 1 teaspoon ground cumin
  • 1 teaspoon salt, or to taste
  • 1/2 teaspoon black pepper
  • 1 cup beef or chicken broth, or water
  • 1 tablespoon olive oil

Preparation

  1. Heat the olive oil in a large pot over medium heat. Add the chopped onion and bell pepper, cook for 4 to 5 minutes until soft.
  2. Add the garlic and cook for one more minute, stir to prevent burning.
  3. Add the ground beef, breaking it up with a spoon, and cook until no pink remains, about 6 to 8 minutes. Drain extra fat if desired.
  4. Stir in the chili powder, cumin, salt, and black pepper. Cook for 1 minute to toast the spices.
  5. Add the diced tomatoes, tomato sauce, beans, and broth. Stir well to combine.
  6. Bring the chili to a low boil, then reduce heat to low and simmer uncovered for 25 to 30 minutes, stirring occasionally.
  7. Taste the chili and add more salt or chili powder for heat if needed. Serve hot.

For deeper flavor, brown the meat well before adding the spices. If you like a thicker chili, mash some beans with the back of a spoon while simmering. Chili often tastes better the next day after the flavors meld.

Dinner, Main Course
American
Chili, Comfort Food, Easy Recipe, Hearty, Weeknight Meal

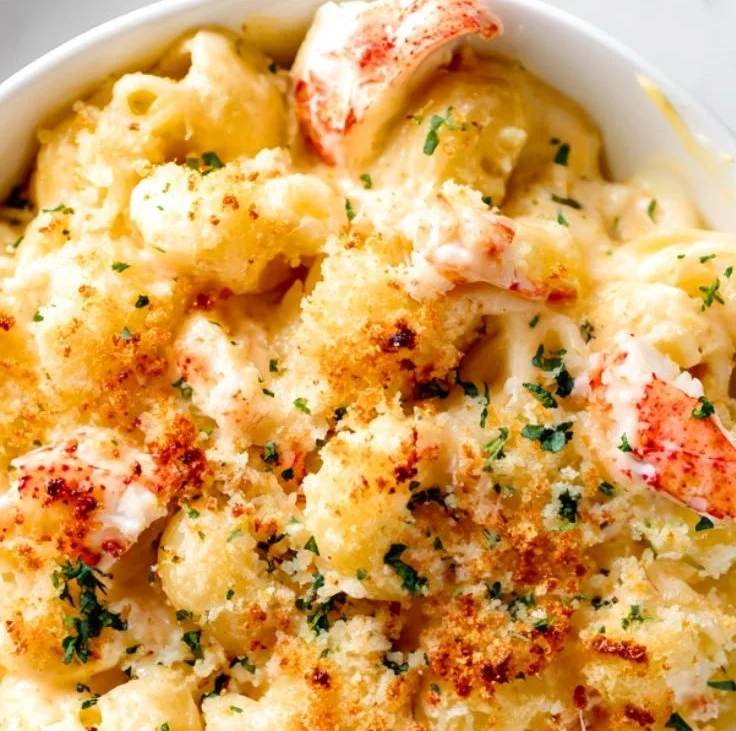
Lobster Mac and Cheese

Delicious Lobster Mac and Cheese topped with breadcrumbs and herbs

Lobster mac and cheese is comfort food with a fancy twist. It mixes tender lobster meat and a creamy cheese sauce with pasta, so every bite feels special. This featured recipe is a crowd pleaser, easy enough for a weeknight but nice for guests too. If you enjoy fun mac and cheese snacks, try air fryer fried macaroni and cheese balls for a party bite. Give this lobster mac a try, you will smile when you taste it.

How to prepare Lobster Mac and Cheese

This recipe makes a rich, creamy lobster mac and cheese that feeds 4 to 6 people. Use cooked lobster meat and simple pantry ingredients for the best taste.

Ingredients

  • 12 oz elbow macaroni or small pasta
  • 8 oz cooked lobster meat, chopped
  • 3 tbsp butter
  • 3 tbsp all purpose flour
  • 2 cups milk, warm
  • 1 cup heavy cream
  • 2 cups shredded sharp cheddar cheese
  • 1 cup shredded Gruyere or Monterey Jack
  • 1/2 tsp salt
  • 1/4 tsp black pepper
  • 1/4 tsp paprika
  • 1/2 cup breadcrumbs, optional
  • 2 tbsp parsley, chopped, for garnish

Directions

  1. Cook the pasta in salted water until just al dente, drain and set aside.
  2. In a large pot, melt butter over medium heat. Stir in flour and cook 1 minute, stir constantly.
  3. Slowly add warm milk and cream, whisk until smooth and thickened, about 3 to 4 minutes.
  4. Remove from heat, add cheeses in batches, stir until melted and smooth.
  5. Season with salt, pepper, and paprika.
  6. Fold in the cooked pasta and chopped lobster meat gently.
  7. If you like a baked top, put in a baking dish, sprinkle breadcrumbs and a little extra cheese, bake at 375°F (190°C) for 10 to 12 minutes until golden.
  8. Garnish with chopped parsley and serve hot.

Lobster Mac and Cheese

Why You’ll Love Lobster Mac and Cheese

  • Creamy, cheesy sauce that clings to every forkful.
  • Sweet, tender lobster pieces that lift the dish, they make it feel special.
  • Simple steps, few hard parts, you can make it at home any night.
  • It works for a cozy dinner or a small holiday meal, guests will praise it.

Tips for success

  • Use good quality cheese, it makes the sauce smooth and rich.
  • Warm the milk before adding it to the roux, this prevents lumps.
  • Do not overcook the lobster, add it at the end so it stays tender.
  • If you bake with breadcrumbs, toast them first for a crisp top.
  • Taste the sauce before baking, adjust salt and pepper as needed.

Serving Suggestions

  • Serve with a simple green salad, light lemon vinaigrette works well.
  • Pair with steamed asparagus or roasted broccoli for color and crunch.
  • Add a squeeze of lemon juice to brighten the rich cheese flavors.
  • Offer crusty bread or garlic toast to scoop up the sauce.

Lobster Mac and Cheese

FAQs

Q: Can I use frozen lobster for this dish?

A: Yes, thaw the lobster slowly in the fridge and pat dry before adding, it will work fine.

Q: Can I make the sauce ahead?

A: Yes, make the sauce and pasta, keep them separate in the fridge, then warm and combine when ready to bake.

Q: What cheeses work best for lobster mac and cheese?

A: Sharp cheddar and Gruyere or Monterey Jack blend well, they give flavor and a smooth melt.

Q: Can I make this gluten free?

A: Use gluten free pasta and a gluten free flour or cornstarch for the sauce, adjust thickness as needed.

Q: How do I reheat leftovers?

A: Reheat gently on the stove with a splash of milk, or bake covered at low heat until warmed through.

Conclusion

This lobster mac and cheese recipe is creamy, simple, and full of flavor, a great way to make a regular mac and cheese into something special. For another take on lobster mac, see Lobster Mac and Cheese – Grandbaby Cakes.

Lobster Mac and Cheese

Creamy lobster mac and cheese featuring tender lobster and a rich cheese sauce, making every bite feel special.

Pasta and Lobster

  • 12 oz elbow macaroni or small pasta (Any small pasta can be used.)
  • 8 oz cooked lobster meat, chopped (Use good quality lobster for best flavor.)

Sauce Ingredients

  • 3 tbsp butter
  • 3 tbsp all purpose flour (Can use gluten free flour for a gluten free option.)
  • 2 cups milk, warm (Warm milk prevents lumps in the sauce.)
  • 1 cup heavy cream
  • 2 cups shredded sharp cheddar cheese (Sharp cheddar provides rich flavor.)
  • 1 cup shredded Gruyere or Monterey Jack (Both give a smooth melt.)
  • 1/2 tsp salt (Adjust to taste.)
  • 1/4 tsp black pepper (Adjust to taste.)
  • 1/4 tsp paprika

Topping

  • 1/2 cup breadcrumbs, optional (Toast before adding for a crisp top.)
  • 2 tbsp parsley, chopped, for garnish (Fresh parsley adds color.)

Cooking the Pasta

  1. Cook the pasta in salted water until just al dente, then drain and set aside.

Making the Sauce

  1. In a large pot, melt butter over medium heat. Stir in flour and cook for 1 minute, stirring constantly.
  2. Slowly add warm milk and cream, whisking until smooth and thickened, about 3 to 4 minutes.
  3. Remove from heat and add the cheeses in batches, stirring until melted and smooth.
  4. Season the sauce with salt, pepper, and paprika.

Combining Ingredients

  1. Gently fold in the cooked pasta and chopped lobster meat into the cheese sauce.

Baking (Optional)

  1. If desired, transfer to a baking dish, sprinkle with breadcrumbs and a little extra cheese. Bake at 375°F (190°C) for 10 to 12 minutes until golden.

Serving

  1. Garnish with chopped parsley and serve hot.

For best results, use high-quality cheese. Taste the sauce before baking to adjust seasoning as needed. Can be made ahead and stored separately.

Dinner, Main Course
American
Cheesy Pasta, Comfort Food, Lobster Mac and Cheese, Rich Mac and Cheese, Seafood Pasta

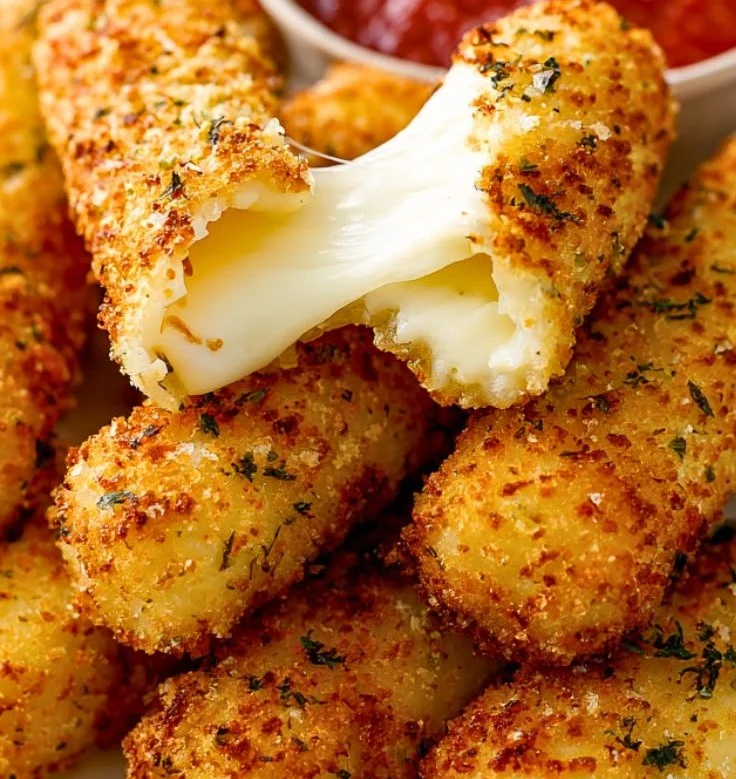
Mozzarella Sticks

Plate of golden brown mozzarella sticks with marinara sauce

Mozzarella sticks are a simple, fun treat. They are crunchy on the outside and gooey on the inside. People love them as a snack or an appetizer at parties. This recipe for Mozzarella Sticks is a crowd-pleaser, with golden, crispy breading and melty, stretchy cheese inside. If you like fried mozzarella or breaded cheese sticks, this recipe will make you smile. If you enjoy other cheesy bites, try a similar idea like Mediterranean quesadillas with spinach, feta and mozzarella, and you will see how great melted cheese can be. Get ready to make a snack that is crunchy, cheesy, and very easy to love.

How to prepare Mozzarella Sticks

  1. Cut low-moisture mozzarella into sticks, about 3 inches long. Pat dry with a paper towel.
  2. Set up three shallow bowls, one with flour, one with beaten eggs, one with plain breadcrumbs or panko. Add salt and pepper to the flour, and a little garlic powder to the breadcrumbs if you like.
  3. Dip each cheese stick in flour, shake off extra, then dip in egg, then press into breadcrumbs. For extra crunch, repeat egg and breadcrumbs for a double coat.
  4. Place the coated sticks on a tray and freeze for at least 30 minutes, this helps the cheese stay inside when frying.
  5. Heat oil in a deep pan to about 350°F, or heat enough oil to cover the sticks. Fry a few at a time until golden brown, about 1 to 2 minutes. Do not overcrowd the pan.
  6. Remove to a paper towel to drain. Let cool for a minute, then serve with warm marinara or your favorite dipping sauce.

Mozzarella Sticks

Why You’ll Love Mozzarella Sticks

  • They are quick to make and fun to eat.
  • Crunchy outside, melty inside, a perfect contrast.
  • Great as an appetizer, party snack, or late night treat.
  • You can bake them for a lighter version, or fry for a crispier crust.
  • They go well with many dipping sauces, like marinara, ranch, or spicy mayo.

Tips for success

  • Use low-moisture mozzarella, it melts well and keeps its shape.
  • Freeze the sticks after breading, this prevents cheese leaks when frying.
  • Keep oil at a steady medium-high heat, too hot will burn the crust, too cool will make them greasy.
  • Double coat with egg and breadcrumbs for extra crunch.
  • Do not fry too many at once, give them room to brown evenly.

Serving Suggestions

  • Serve with warm marinara sauce for dipping.
  • Try ranch or garlic aioli for a different taste.
  • Pair with a simple salad to make a fuller snack or small meal.
  • Add as a side to burgers or sandwiches for a fun twist.

Mozzarella Sticks

FAQs

Q: Can I bake mozzarella sticks instead of frying them?

A: Yes, you can bake them on a lined tray at 425°F for 8 to 10 minutes, turn once, until golden and melted.

Q: How do I stop the cheese from leaking out?

A: Freeze the breaded sticks for at least 30 minutes before cooking, and make sure you use a good double coat of crumbs.

Q: What cheese is best for mozzarella sticks?

A: Low-moisture, part-skim mozzarella is best. It melts well and does not release too much liquid.

Q: Can I make them ahead and freeze?

A: Yes, freeze them on a tray until firm, then store in a sealed bag. Fry or bake from frozen, add a minute or two to the cook time.

Conclusion

These mozzarella sticks are a simple, tasty snack you can make at home for parties or a cozy night in. For a detailed step by step recipe and extra tips, check this helpful guide, Homemade Mozzarella Sticks – Sugar Spun Run.

Mozzarella Sticks

These crunchy, gooey mozzarella sticks are a simple, fun snack or appetizer perfect for any gathering.

For the mozzarella sticks

  • 1 pound low-moisture mozzarella (Cut into sticks, about 3 inches long)
  • 1 cup all-purpose flour (Mixed with salt and pepper)
  • 2 large eggs (Beaten)
  • 1 cup plain breadcrumbs or panko (You can add garlic powder for extra flavor)

Preparation

  1. Cut low-moisture mozzarella into sticks, about 3 inches long. Pat dry with a paper towel.
  2. Set up three shallow bowls: one with flour, one with beaten eggs, and one with breadcrumbs or panko. Add salt and pepper to the flour, and garlic powder to the breadcrumbs if desired.
  3. Dip each cheese stick in flour, shake off the excess, then dip into the egg, and press into breadcrumbs. For extra crunch, repeat egg and breadcrumb coating.
  4. Place the coated sticks on a tray and freeze for at least 30 minutes.

Cooking

  1. Heat oil in a deep pan to about 350°F, or enough oil to cover the sticks.
  2. Fry a few sticks at a time for about 1 to 2 minutes until golden brown. Avoid overcrowding the pan.
  3. Remove the fried sticks to a paper towel to drain and let cool for a minute before serving.

Use low-moisture mozzarella for best results. Freezing the sticks helps prevent the cheese from leaking out when frying. If you prefer a lighter version, you can bake them at 425°F for 8 to 10 minutes. Serve with dipping sauces like marinara, ranch, or garlic aioli.

Appetizer, Snack
American
Appetizers, Cheese Sticks, Fried Snacks, Mozzarella Sticks, Party Food

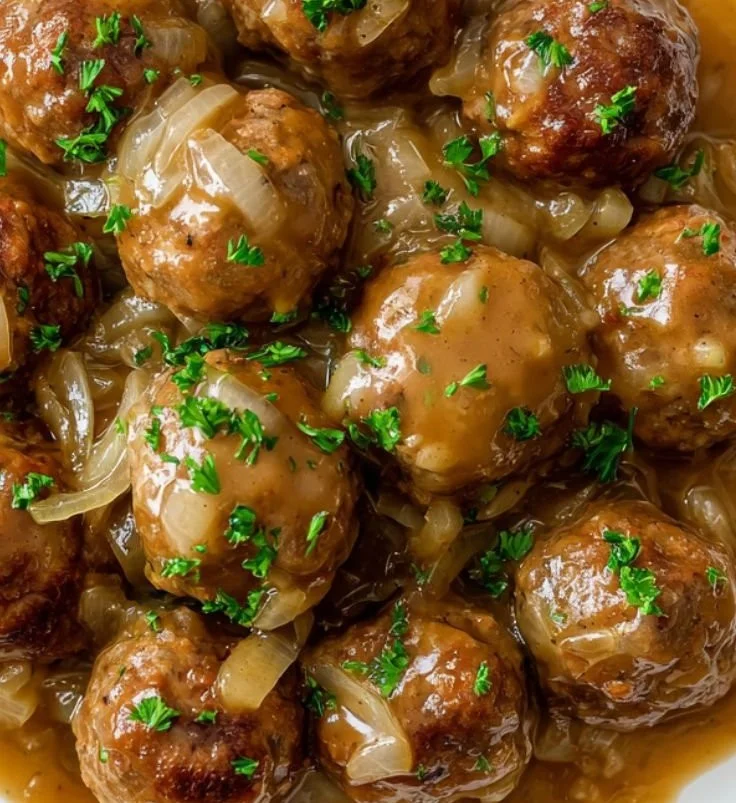
Delicious Smothered Meatballs

Plate of delicious smothered meatballs topped with savory sauce and herbs

Smothered Meatballs are warm, tasty, and full of home-cooked flavor. This dish wraps juicy meatballs in a rich, brown gravy and hugs every bite with comfort. It is a crowd-pleaser for family dinners and simple enough for weeknights. If you like creamy, savory sauces and soft meatballs, you will love this recipe and the way it makes the whole house smell like dinner, and it pairs nicely with other smothered dishes like the creamy smothered chicken I tried recently at a creamy smothered chicken recipe. Get your apron on, because this one feels like a warm hug on a plate.

How to prepare Smothered Meatballs

  1. Mix the meatball mix, use about 1 pound ground beef or a mix of beef and pork, 1/2 cup breadcrumbs, 1 egg, salt, pepper, and a small chopped onion. Mix with your hands until just combined.
  2. Shape the mix into meatballs, about 1 to 1 1/2 inches each. Keep them all about the same size to cook evenly.
  3. Heat 2 tablespoons oil in a large skillet over medium heat. Brown the meatballs on all sides, do not cook all the way through, about 6 to 8 minutes. Remove and set aside.
  4. In the same skillet, add 2 tablespoons butter and 2 tablespoons flour, stir to make a roux, cook 1 minute. Slowly add 2 cups beef broth while stirring, then add 1 teaspoon Worcestershire sauce, 1 teaspoon soy sauce or a pinch of salt, and a sprinkle of black pepper. Bring to a low simmer.
  5. Add the meatballs back into the gravy, cover, and simmer 10 to 15 minutes until meatballs are cooked through and the gravy is thick. Taste and adjust salt and pepper.
  6. Serve the smothered meatballs over mashed potatoes, rice, or buttered egg noodles. Garnish with chopped parsley if you like.

Smothered Meatballs

Why You’ll Love Smothered Meatballs

  • They are simple, using common pantry ingredients, yet very flavorful.
  • The gravy keeps the meatballs moist and adds deep, savory taste.
  • This dish works great for feeding a group, it stretches well and stays warm.
  • Kids and adults both usually enjoy the soft meatballs and rich sauce.

Tips for success

  • Do not overmix the meat, mix until just combined to keep meatballs tender.
  • Brown the meatballs well, the browned bits in the pan add flavor to the gravy.
  • Make the gravy slowly, add broth little by little while stirring to avoid lumps.
  • If the gravy is too thin, simmer uncovered to reduce, if too thick, stir in a splash of broth or milk.
  • For extra flavor add a little garlic powder, or a splash of red wine to the gravy while it simmers.

Serving Suggestions

  • Serve over mashed potatoes, rice, or buttered egg noodles for a classic meal.
  • Add a side of steamed green beans, peas, or a simple green salad to balance the meal.
  • Top with chopped fresh parsley or a little grated Parmesan for color and taste.
  • Leftovers reheat well, spoon extra gravy over when reheating to keep meatballs moist.

Smothered Meatballs

FAQs

Q: Can I bake the meatballs instead of frying?

A: Yes, bake at 400°F (200°C) for 15 to 20 minutes, then add them to the gravy to finish cooking.

Q: Can I make the gravy ahead of time?

A: Yes, make the gravy and meatballs separately, then combine and warm gently before serving.

Q: What meat is best for meatballs?

A: A mix of ground beef and pork gives good flavor and juiciness, but all beef works fine too.

Q: Can I freeze smothered meatballs?

A: Yes, freeze cooked meatballs and gravy in a freezer-safe container for up to 3 months. Thaw overnight in the fridge before reheating.

Q: How do I thicken the gravy if it is too thin?

A: Mix a small spoon of flour or cornstarch with cold water to make a slurry, stir into simmering gravy until it thickens.

Conclusion

Smothered Meatballs make a simple, comforting meal that is full of flavor and easy to share. For another take on meatballs and gravy, you can see a related classic recipe at Meatballs and Gravy – The Cozy Cook. Enjoy making this cozy dish and sharing it with people you love.

Smothered Meatballs

These warm and tasty smothered meatballs are wrapped in a rich, savory gravy that guarantees comfort in every bite. Perfect for family dinners or weeknight meals.

For the Meatballs

  • 1 pound ground beef or a mix of beef and pork (Use a mix for better flavor.)
  • 1/2 cup breadcrumbs
  • 1 egg
  • to taste salt
  • to taste pepper
  • 1 small chopped onion (Finely chopped for mixing.)

For the Gravy

  • 2 tablespoons oil (For browning meatballs.)
  • 2 tablespoons butter
  • 2 tablespoons flour (To make roux.)
  • 2 cups beef broth (Add slowly while stirring.)
  • 1 teaspoon Worcestershire sauce
  • 1 teaspoon soy sauce or pinch of salt
  • to taste black pepper

Preparation

  1. Mix ground meat, breadcrumbs, egg, salt, pepper, and chopped onion in a bowl until just combined.
  2. Shape into meatballs approximately 1 to 1.5 inches in size.

Cooking Meatballs

  1. Heat oil in a large skillet over medium heat and brown the meatballs on all sides for 6 to 8 minutes. Remove meatballs from skillet and set aside.

Making the Gravy

  1. In the same skillet, add butter and flour. Stir to make a roux and cook for 1 minute.
  2. Slowly add beef broth while stirring. Then add Worcestershire sauce, soy sauce, and black pepper. Bring to a low simmer.

Combining

  1. Add browned meatballs back into the gravy, cover, and let them simmer for 10 to 15 minutes until cooked through and gravy thickens. Adjust salt and pepper to taste.

Serving

  1. Serve smothered meatballs over mashed potatoes, rice, or buttered egg noodles, and garnish with chopped parsley if desired.

Do not overmix meat to keep meatballs tender. Brown meatballs well for added flavor. Adjust gravy thickness as needed by simmering uncovered or adding broth/milk.

Dinner, Main Course
American
Comfort Food, Easy Dinner, Gravy, meatballs, Smothered Meatballs