Cinnamon Crumb Banana Bread: A Cozy Twist on Comfort Food

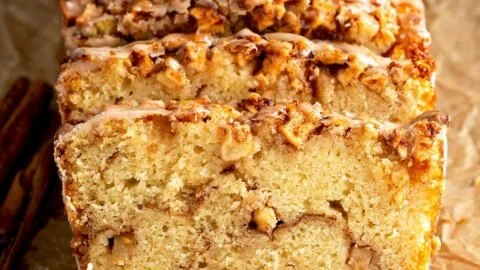
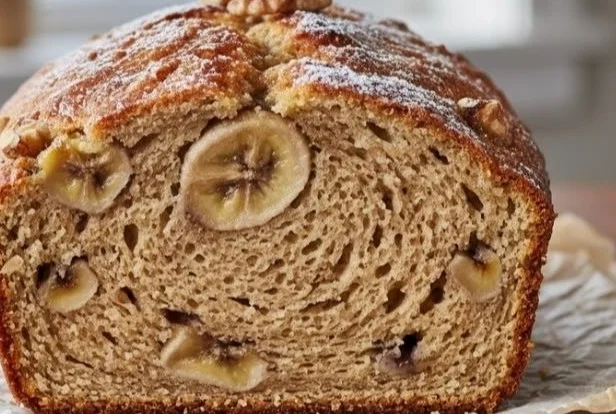
Cinnamon Crumb Banana Bread baked to a golden perfection with a delicious crumb topping.

Warm, cozy smells make a house feel like home, and this cinnamon crumb banana bread does that in one bake. Soft, moist banana bread meets a sweet, cinnamon crumb top. It tastes like breakfast and dessert at once, and people smile when it comes out of the oven. If you like warm comfort food like bacon cheddar gnocchi soup, you will find this bread just as comforting. This recipe is a crowd pleaser, easy to make, and full of banana and cinnamon flavor, so get your loaf pan ready, and have fun baking something that feels like a hug.

How to prepare Cinnamon Crumb Banana Bread

  • Preheat oven to 350 F, and grease a 9×5 inch loaf pan or line it with parchment.
  • In a bowl, mash 3 ripe bananas until smooth.
  • Stir in 1/2 cup melted butter, 1 cup sugar, and 2 beaten eggs until mixed.
  • Add 1 teaspoon vanilla extract.
  • In another bowl, mix 1 1/2 cups all purpose flour, 1 teaspoon baking soda, 1/2 teaspoon salt, and 1/2 teaspoon ground cinnamon.
  • Fold the dry mix into the banana mix, stir until just combined, do not over mix.
  • For the crumb topping, mix 1/3 cup brown sugar, 1/4 cup flour, 1/2 teaspoon cinnamon, and 3 tablespoons cold butter cut into small pieces. Use a fork to mix until crumbly.
  • Pour batter into the pan, sprinkle crumb topping evenly over the batter.
  • Bake 55 to 65 minutes, or until a toothpick in the center comes out clean.
  • Let cool in the pan 10 minutes, then turn out to finish cooling on a rack.
  • Cinnamon Crumb Banana Bread: A Cozy Twist on Comfort Food

Why You’ll Love Cinnamon Crumb Banana Bread

  • It is moist and full of banana flavor, not dry.
  • The cinnamon crumb adds a sweet crunch on top, giving a nice contrast.
  • You can eat it for breakfast, snack, or dessert, it works any time.
  • It uses simple pantry ingredients, and ripened bananas make it even better.
  • It makes a great gift, and it fills the house with warm, cozy smells.

Tips for success

  • Use very ripe bananas, they add natural sweetness and soft texture.
  • Measure flour lightly, pack it not too tight, to keep the bread tender.
  • Do not over mix the batter, mix until just combined for a soft crumb.
  • Keep the butter cold when making the crumb, this helps make good crumbs.
  • Check the bread at 55 minutes, ovens vary, and a clean toothpick means it is done.
  • Cool a bit before slicing, the bread firms up and slices cleanly.

Serving Suggestions

  • Serve warm with a pat of butter or cream cheese.
  • Cut into thick slices for breakfast with coffee.
  • Add a scoop of vanilla ice cream for a simple dessert.
  • Toast slices lightly and spread nut butter for a hearty snack.
  • Pair with fruit, yogurt, or a hot drink for a cozy plate.

Cinnamon Crumb Banana Bread: A Cozy Twist on Comfort Food

FAQs

Q: Can I freeze this banana bread? A: Yes, wrap slices or the whole loaf in foil and freeze up to 3 months, thaw at room temperature.

Q: Can I use less sugar? A: Yes, you can reduce sugar by up to a quarter cup, the bread will be less sweet but still good.

Q: Can I add nuts or chocolate? A: Yes, fold in 1/2 to 3/4 cup chopped nuts or chocolate chips into the batter before baking.

Q: Can I make it gluten free? A: You can try a 1 to 1 gluten free flour blend, baking time may change, check with a toothpick.

Q: How do I make the crumb extra crunchy? A: Use cold butter and do not over mix the crumb, press larger crumbs on top for more texture.

Conclusion

This cinnamon crumb banana bread is simple, cozy, and a real crowd pleaser, it brings sweet cinnamon and ripe banana together in every bite. For a lighter, gluten free take on banana bread, see Healthy Banana Bread: Gluten-Free & Delicious – TraveLynn Eats, it has ideas that may inspire swaps for your next loaf. Enjoy baking, and share a slice with someone you love.

Cinnamon Crumb Banana Bread

This moist and delicious cinnamon crumb banana bread features a sweet crumb topping and is perfect for breakfast or dessert.

For the Banana Bread

  • 3 pieces ripe bananas (Use very ripe bananas for natural sweetness.)
  • 1/2 cup melted butter (Keep the butter cold for the crumb topping.)
  • 1 cup sugar (Can be reduced by up to a quarter cup.)
  • 2 pieces eggs, beaten
  • 1 teaspoon vanilla extract

For the Dry Mix

  • 1 1/2 cups all-purpose flour (Measure lightly and do not pack tightly.)
  • 1 teaspoon baking soda
  • 1/2 teaspoon salt
  • 1/2 teaspoon ground cinnamon

For the Crumb Topping

  • 1/3 cup brown sugar
  • 1/4 cup flour
  • 1/2 teaspoon cinnamon
  • 3 tablespoons cold butter (Cut into small pieces.)

Preparation

  1. Preheat oven to 350°F and grease a 9×5 inch loaf pan or line it with parchment.
  2. In a bowl, mash the ripe bananas until smooth.
  3. Stir in the melted butter, sugar, and beaten eggs until well mixed.
  4. Add the vanilla extract.
  5. In another bowl, mix the all-purpose flour, baking soda, salt, and ground cinnamon.
  6. Fold the dry mix into the banana mix and stir until just combined; do not over mix.

Crumb Topping Preparation

  1. To make the crumb topping, mix the brown sugar, flour, cinnamon, and cold butter in a bowl.
  2. Use a fork to mix until crumbly.

Baking

  1. Pour the batter into the prepared pan and sprinkle the crumb topping evenly over the batter.
  2. Bake for 55 to 65 minutes, or until a toothpick inserted in the center comes out clean.
  3. Let cool in the pan for 10 minutes, then turn out to finish cooling on a rack.

Serve warm with butter or cream cheese. For a heartier snack, toast slices and spread with nut butter.
Breakfast, Dessert, Snack
American
Baking, banana bread, Cinnamon Bread, Comfort Food, Easy Recipes

Garlic Parmesan Herb Bread

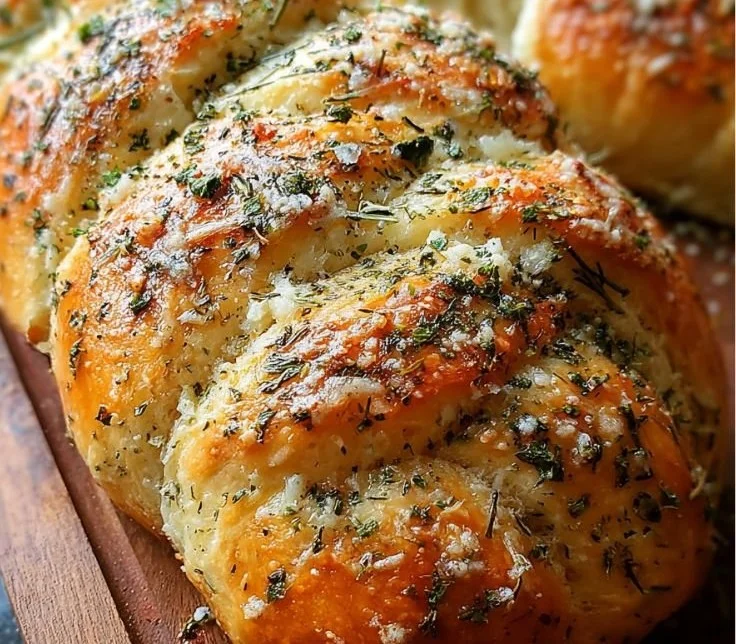
Freshly baked Garlic Parmesan Herb Bread loaf with herbs and cheese

Garlic Parmesan Herb Bread is warm, cheesy, and full of bright herb flavor. This bread is soft inside, crisp on the top, and smells like a cozy kitchen. It is a simple treat that many people love, and it works for weeknight dinners, parties, or a quiet snack. The recipe below shows how to make this crowd-pleaser with garlic, parmesan, and fresh herbs, so you can enjoy easy, tasty garlic bread at home. If you like bold garlic and parmesan flavors, you may also enjoy garlic butter steak bites with parmesan cream sauce. Get ready to bake, and have fun tearing into this cheesy, herby loaf.

How to prepare Garlic Parmesan Herb Bread

Ingredients (simple list)

  • 3 cups all purpose flour
  • 1 cup grated parmesan cheese
  • 2 teaspoons baking powder
  • 1 teaspoon salt
  • 1 tablespoon sugar
  • 1 to 1 1/4 cups milk or beer, enough to make a soft dough
  • 2 tablespoons melted butter plus extra for brushing
  • 3 cloves garlic, minced
  • 2 tablespoons chopped fresh parsley or mixed herbs

Directions, easy steps

  1. Preheat your oven to 375°F (190°C). Grease a loaf pan or line it with parchment.
  2. In a large bowl, mix the flour, parmesan, baking powder, salt, and sugar. Stir so the cheese spreads well.
  3. In a small bowl, combine milk or beer, melted butter, and minced garlic. Pour into dry mix. Stir until a soft dough forms. Do not over mix.
  4. Fold in the chopped herbs. Shape the dough and place it in the prepared loaf pan. Smooth the top.
  5. Brush a little melted butter on the top and sprinkle extra parmesan and a pinch of salt.
  6. Bake for 30 to 40 minutes, until the top is golden and a toothpick comes out clean. Let cool a few minutes before slicing.


Garlic Parmesan Herb Bread

Why You’ll Love Garlic Parmesan Herb Bread

  • It is quick to make and uses common pantry items, like flour, garlic, and parmesan.
  • The bread has a crispy top and a soft, cheesy inside that many people enjoy.
  • Fresh herbs and garlic give a bright, savory taste that pairs well with many meals.
  • You can change it up easily, adding different cheeses, more herbs, or using beer for extra flavor.

tips for success

  • Use freshly grated parmesan for the best melt and flavor.
  • Do not over mix the dough, keep it light for a soft crumb.
  • If you like more garlic, add another clove or brush with garlic butter after baking.
  • Test doneness with a toothpick, avoid underbaking to keep the center from being doughy.
  • Let the loaf cool a bit before slicing so it holds shape and you get neat slices.

Serving Suggestions

  • Serve warm with soup, pasta, or a fresh salad for an easy meal.
  • Slice and toast for sandwiches, or make garlic bruschetta with tomato topping.
  • Offer with soft cheeses or a dipping oil of olive oil and herbs for parties.
  • Turn leftovers into croutons or use in bread pudding for a savory twist.


Garlic Parmesan Herb Bread

FAQs

Q: How long does this bread stay fresh?

A: Store at room temperature in a sealed bag for 2 days, or in the fridge for up to 5 days. Reheat before serving.

Q: Can I use other cheeses?

A: Yes, try cheddar, mozzarella, or asiago. Mix with parmesan for a richer taste.

Q: Do I have to use beer?

A: No, milk or buttermilk works well. Beer adds a light, malty flavor, but it is not required.

Q: Can I make this dairy free?

A: Use a dairy free cheese and a plant milk, and swap butter for oil or vegan butter.

Q: Can I freeze the bread?

A: Yes, wrap cooled slices or the whole loaf tightly and freeze up to 3 months. Thaw and warm before serving.

Conclusion

If you want a version with beer and a tested method, see the recipe for Garlic, Parmesan, and Herb Beer Bread – Food52 for more ideas and tips.

Garlic Parmesan Herb Bread

This warm, cheesy garlic bread is soft inside, crisp on the top, and full of bright herb flavor, making it a perfect addition to dinners, parties, or as a snack.

Bread Ingredients

  • 3 cups all purpose flour
  • 1 cup grated parmesan cheese (Use freshly grated for best results.)
  • 2 teaspoons baking powder
  • 1 teaspoon salt
  • 1 tablespoon sugar
  • 1 to 1 1/4 cups milk or beer (Adjust amount to make a soft dough.)
  • 2 tablespoons melted butter (Plus extra for brushing on top.)
  • 3 cloves garlic, minced (Add more for a stronger flavor.)
  • 2 tablespoons chopped fresh parsley or mixed herbs

Preparation

  1. Preheat your oven to 375°F (190°C). Grease a loaf pan or line it with parchment.
  2. In a large bowl, mix the flour, parmesan, baking powder, salt, and sugar. Stir so the cheese spreads well.
  3. In a small bowl, combine milk or beer, melted butter, and minced garlic. Pour into dry mix. Stir until a soft dough forms. Do not over mix.
  4. Fold in the chopped herbs. Shape the dough and place it in the prepared loaf pan. Smooth the top.
  5. Brush a little melted butter on the top and sprinkle extra parmesan and a pinch of salt.

Baking

  1. Bake for 30 to 40 minutes, until the top is golden and a toothpick comes out clean.
  2. Let cool a few minutes before slicing.

Store at room temperature in a sealed bag for 2 days, or in the fridge for up to 5 days. Reheat before serving. This bread can also be frozen for up to 3 months.

Breads, Side Dish
American
Cheese Bread, Easy Bread Recipe, Garlic Bread, Herb Bread, Homemade Bread

Cinnamon Sugar Donut Bread

Sliced Cinnamon Sugar Donut Bread on a wooden board

This Cinnamon Sugar Donut Bread feels like a hug from a baker, soft inside and coated in sweet cinnamon sugar on top. It smells amazing as it bakes, and the crust has a light crunch while the inside stays tender. The recipe is easy, quick to mix, and perfect for sharing at breakfast, brunch, or as a snack.

If you like sweet cinnamon treats, you may also enjoy irresistible grilled peaches with brown butter cinnamon sugar glaze, they pair well with a warm slice of sweet bread. This Cinnamon Sugar Donut Bread is a crowd-pleaser, full of cinnamon flavor, and very simple to make, so get ready to bake and enjoy a slice warm from the oven.

How to prepare Cinnamon Sugar Donut Bread

Ingredients

  • 2 cups all purpose flour
  • 1 cup sugar
  • 2 teaspoons baking powder
  • 1/2 teaspoon salt
  • 1 teaspoon ground cinnamon
  • 2 large eggs
  • 1 cup milk
  • 1/3 cup melted butter or oil
  • 1 teaspoon vanilla extract

Topping

  • 4 tablespoons melted butter
  • 1/2 cup sugar mixed with 2 teaspoons ground cinnamon

Directions

  1. Preheat the oven to 350°F (175°C). Grease a 9×5 inch loaf pan.
  2. In a bowl, stir flour, sugar, baking powder, salt, and cinnamon.
  3. In another bowl, beat eggs, then add milk, melted butter, and vanilla.
  4. Pour wet mix into dry mix, stir until just combined. Do not over mix.
  5. Pour batter into the prepared pan and smooth the top.
  6. Bake for 45 to 55 minutes, or until a toothpick comes out clean from the center.
  7. Let the bread cool in the pan for 10 minutes, then lift out to a rack.
  8. Brush the top and sides with melted butter while warm, then sprinkle the cinnamon sugar mix over the bread so it sticks and makes a sweet crust.
  9. Slice and serve warm or at room temperature.


Cinnamon Sugar Donut Bread

Why You’ll Love Cinnamon Sugar Donut Bread

This bread tastes like a soft donut in every bite, with a warm cinnamon sugar crust. It is quick to make, uses common pantry ingredients, and fills the house with a lovely baked bread smell. It works well for a simple breakfast or to bring to a potluck. Kids and adults both tend to love the sweet cinnamon flavor and soft crumb.

tips for success

  • Measure the flour by spooning it into the cup and leveling it, do not pack it down.
  • Mix the batter until just combined, a few lumps are okay.
  • If your top browns too fast, cover with foil for the last 10 minutes of baking.
  • Brush butter and add the cinnamon sugar while the bread is still warm so the sugar sticks well.
  • For extra swirl, fold a tablespoon of cinnamon sugar into the batter before baking.

Serving Suggestions

  • Serve warm with coffee or milk.
  • Add a smear of cream cheese or butter on each slice.
  • Pair with fresh fruit or the brown butter glazed peaches from other sweet recipes for a simple treat.
  • Toast leftover slices and top with a little extra cinnamon sugar for a quick snack.


Cinnamon Sugar Donut Bread

FAQs

Q: Can I make this with whole wheat flour? A: Yes, you can replace up to half the flour with whole wheat, the bread will be a bit denser.

Q: How long does the bread stay fresh? A: Store it in an airtight container at room temperature for up to 3 days, or in the fridge for up to a week.

Q: Can I add nuts or raisins? A: Yes, fold in 1/2 cup of chopped nuts or raisins into the batter before baking.

Q: Can I make mini loaves or muffins? A: Yes, bake in muffin tins for about 15 to 20 minutes, or mini loaf pans for 25 to 35 minutes, watch for a clean toothpick.

Conclusion

This Cinnamon Sugar Donut Bread is an easy, tasty treat that brings warm cinnamon flavor to your table. For a similar sweet bread idea and more tips, see Cinnamon Sugar Donut Sweet Bread – From Gate To Plate.

Cinnamon Sugar Donut Bread

This Cinnamon Sugar Donut Bread is soft and tender inside, coated with a sweet cinnamon sugar crust, making it a perfect breakfast or snack treat.

Main Ingredients

  • 2 cups all purpose flour (Spoon and level the flour for accuracy.)
  • 1 cup sugar
  • 2 teaspoons baking powder
  • 1/2 teaspoon salt
  • 1 teaspoon ground cinnamon
  • 2 large eggs (Beaten.)
  • 1 cup milk
  • 1/3 cup melted butter or oil
  • 1 teaspoon vanilla extract

Topping

  • 4 tablespoons melted butter
  • 1/2 cup sugar mixed with 2 teaspoons ground cinnamon (For sprinkling on top.)

Preparation

  1. Preheat the oven to 350°F (175°C). Grease a 9×5 inch loaf pan.
  2. In a bowl, stir together flour, sugar, baking powder, salt, and cinnamon.
  3. In another bowl, beat the eggs, then add milk, melted butter, and vanilla.
  4. Pour the wet mix into the dry mix, stirring until just combined. Do not over mix.
  5. Pour the batter into the prepared pan and smooth the top.

Baking

  1. Bake for 45 to 55 minutes, or until a toothpick comes out clean from the center.
  2. Let the bread cool in the pan for 10 minutes, then lift out to a rack.

Finishing Touches

  1. Brush the top and sides with melted butter while warm, then sprinkle the cinnamon sugar mix over the bread so it sticks.
  2. Slice and serve warm or at room temperature.

For extra swirl, fold a tablespoon of cinnamon sugar into the batter before baking. If the top browns too fast, cover with foil for the last 10 minutes of baking. Store in an airtight container for up to 3 days at room temperature or a week in the fridge.

Breakfast, Snack
American
Breakfast Bread, Cinnamon Sugar Donut Bread, Desserts, Snacks, Sweet Bread

Japanese Milk Bread

Freshly baked Japanese milk bread showcasing its soft and fluffy texture

Japanese Milk Bread, gives you a soft, slightly sweet loaf with a fine crumb. It uses milk and a gentle dough method to stay moist and light. This recipe is a crowd-pleaser, perfect for toast, sandwiches, or eating plain. If you enjoy soft breads, you might also like the gentle flavors in Amish apple fritter bread. Give it a try and you will smile when you pull the warm slices apart.

how to prepare Japanese Milk Bread

Ingredients (simple list)

  • 2 cups bread flour
  • 2 tablespoons sugar
  • 1 teaspoon salt
  • 2 teaspoons instant yeast
  • 1/2 cup milk
  • 1/4 cup water
  • 2 tablespoons butter, soft
  • 1 egg

Directions, simple steps

  1. Make the tangzhong, this keeps the bread very soft. In a small pan, mix 2 tablespoons flour with 1/3 cup milk. Cook on low heat, whisk until it thickens, then cool.
  2. Mix the dry ingredients, flour, sugar, salt, and yeast in a bowl.
  3. Add the tangzhong, the rest of the milk, water, and the egg to the dry mix. Stir until it forms a rough dough.
  4. Add the soft butter, then knead by hand or machine for 8 to 10 minutes, until the dough is smooth and elastic.
  5. Place in a lightly oiled bowl, cover, and let rise until doubled, about 1 hour in a warm spot.
  6. Punch the dough down. Divide into three or four pieces, shape into tight balls, and let rest for 10 minutes.
  7. Roll each ball into a short log. Place logs side by side in a greased loaf pan.
  8. Cover and let rise until the dough fills the pan, about 45 minutes.
  9. Brush the top with a little milk or egg wash.
  10. Bake at 350°F (175°C) for 25 to 30 minutes, until the top is golden and the loaf sounds hollow when tapped.
  11. Cool on a rack before slicing, this keeps the crumb neat.


Japanese Milk Bread

Why You’ll Love Japanese Milk Bread

  • It stays soft for days, thanks to the tangzhong method.
  • The taste is mild and slightly sweet, it pairs with many toppings.
  • The crumb is fine and smooth, perfect for neat sandwiches.
  • It is simple to make with few hard steps, good for home bakers.

tips for success

  • Use warm, not hot, liquids when you mix, yeast likes warm water.
  • Do not add too much flour while kneading, the dough should feel slightly sticky.
  • Let the dough rise in a warm, draft-free place for best results.
  • Cool the loaf fully before slicing, this makes clean slices.
  • Measure ingredients by weight if you can, it makes results steady.

Serving Suggestions

  • Thick slice and toast, spread butter and jam for a sweet treat.
  • Use for soft sandwiches, like egg salad or ham and cheese.
  • Make French toast with thick slices, soak briefly and fry.
  • Serve plain with tea or coffee for a simple snack.


Japanese Milk Bread

FAQs

Q: How long will Japanese milk bread stay fresh?

A: Store it in a bread box or a sealed bag at room temperature for 2 to 3 days. You can freeze slices for longer storage.

Q: Can I use this recipe without tangzhong?

A: Yes, you can skip tangzhong, but the bread may not be as soft or keep as long.

Q: Can I use all-purpose flour?

A: You can, but bread flour gives a better chew and structure. All-purpose works in a pinch.

Q: Can I make this by hand?

A: Yes, knead by hand for about 10 to 15 minutes until the dough is smooth and elastic.

Q: How do I get a shiny top?

A: Brush the loaf with milk or a beaten egg before baking for a light shine.

Conclusion

For a trusted, detailed guide and another clear recipe to compare, check the King Arthur Japanese Milk Bread recipe. It gives step-by-step tips and helps you master this soft, delicious loaf. Enjoy baking!

Japanese Milk Bread

Japanese Milk Bread is a soft, slightly sweet loaf with a fine crumb, perfect for toast, sandwiches, or enjoying plain.

Bread Ingredients

  • 2 cups bread flour
  • 2 tablespoons sugar
  • 1 teaspoon salt
  • 2 teaspoons instant yeast
  • 1/2 cup milk (plus 1/3 cup for tangzhong)
  • 1/4 cup water
  • 2 tablespoons butter, soft
  • 1 egg egg

Preparation

  1. Make the tangzhong by mixing 2 tablespoons of flour with 1/3 cup milk in a small pan. Cook on low heat, whisking until thickened, then cool.
  2. In a bowl, mix the dry ingredients: flour, sugar, salt, and yeast.
  3. Add the tangzhong, the remaining milk, water, and the egg to the dry mixture. Stir until a rough dough forms.
  4. Incorporate the soft butter and knead by hand or with a machine for 8 to 10 minutes until the dough is smooth and elastic.
  5. Place the dough in a lightly oiled bowl, cover it, and let it rise until doubled in size, approximately 1 hour in a warm spot.
  6. Once risen, punch down the dough, divide it into three or four pieces, shape into tight balls, and let rest for 10 minutes.
  7. Roll each ball into a short log and place them side by side in a greased loaf pan.
  8. Cover and let rise until the dough fills the pan, about 45 minutes.
  9. Optionally, brush the top with a little milk or egg wash.
  10. Bake at 350°F (175°C) for 25 to 30 minutes until the top is golden and sounds hollow when tapped.
  11. Cool on a rack before slicing to keep the crumb neat.

Use warm, not hot, liquids for best yeast activation. Avoid adding too much flour while kneading; the dough should remain slightly sticky. Allow the dough to rise in a warm, draft-free area for optimal results. Cool the loaf before slicing for cleaner slices. Measure ingredients by weight for consistent outcomes.

Breakfast, Snack
Japanese
Baking, Bread Recipe, Japanese Bread, Milk Bread, soft bread

Cinnamon Apple Bread

Freshly baked Cinnamon Apple Bread with a fragrant cinnamon glaze

Cinnamon apple bread warms the kitchen and fills the room with a sweet, spicy smell. It is soft, slightly dense, and full of tender apple pieces and warm cinnamon. This bread is easy to bake, and people often ask for seconds. It works for breakfast, snacks, or a simple dessert.

If you like similar quick breads, you might enjoy the flavor of Amish apple fritter bread, which has a similar apple and spice feel. The recipe below is a crowd-pleaser, with a crusty top, soft inside, and just enough cinnamon sugar to feel special. Get ready to bake something cozy and tasty, and have fun sharing it with family or friends.

how to prepare Cinnamon Apple Bread

Ingredients

  • 2 cups all-purpose flour
  • 1 cup granulated sugar
  • 1 tsp baking powder
  • 1/2 tsp baking soda
  • 1 tsp ground cinnamon
  • 1/2 tsp salt
  • 2 large eggs
  • 1/2 cup vegetable oil (or melted butter)
  • 1/2 cup milk
  • 1 tsp vanilla extract
  • 1 1/2 cups peeled and chopped apples (about 2 medium apples)
  • 1/4 cup brown sugar (for topping, optional)
  • 1 tsp extra cinnamon (for topping, optional)

Directions

  1. Preheat the oven to 350°F (175°C). Grease a 9×5 inch loaf pan or line it with parchment paper.
  2. In a large bowl, whisk together the flour, sugar, baking powder, baking soda, cinnamon, and salt.
  3. In another bowl, beat the eggs lightly. Add the oil, milk, and vanilla, stir to mix.
  4. Pour the wet mix into the dry mix. Stir just until combined, do not overmix. Fold in the chopped apples.
  5. Pour the batter into the prepared pan and smooth the top. If you like, mix the brown sugar and extra cinnamon and sprinkle on top for a sweet crust.
  6. Bake for 50 to 60 minutes, or until a toothpick comes out clean or with a few moist crumbs. If the top browns too fast, cover loosely with foil.
  7. Let the bread cool in the pan for 10 minutes, then remove and cool on a rack. Slice and serve warm or at room temperature.


Cinnamon Apple Bread

Why You’ll Love Cinnamon Apple Bread

  • It fills your home with a warm, sweet smell, great for fall or any cozy day.
  • The apples keep the bread moist and tender.
  • It is easy to make with simple ingredients you likely have at home.
  • You can serve it for breakfast, snack, or dessert, and it travels well.

tips for success

  • Use firm apples, like Fuji or Honeycrisp, so the pieces hold shape while baking.
  • Chop apples in even pieces so they bake evenly.
  • Do not overmix the batter, mix just until flour disappears. Overmixing gives a tougher bread.
  • If the loaf browns too fast, tent it with foil for the last 15 minutes.
  • Let the bread cool a bit before slicing, it holds together better once slightly set.

Serving Suggestions

  • Serve warm with a pat of butter or a light drizzle of honey.
  • Top slices with cream cheese or a simple powdered sugar glaze.
  • Pair a slice with coffee, tea, or a warm milk for a cozy treat.
  • Cut into small pieces for a brunch buffet or pack slices for a picnic.


Cinnamon Apple Bread

FAQs

Q: Can I use applesauce instead of chopped apples?

A: You can, but applesauce will change the texture and make the bread moister and denser. Reduce the liquid slightly if you use applesauce.

Q: Can I make this as muffins instead of a loaf?

A: Yes, bake in muffin tins at 350°F (175°C) for about 18 to 22 minutes. Check with a toothpick for doneness.

Q: How long does the bread stay fresh?

A: At room temperature, wrapped or in a container, it stays fresh for 2 to 3 days. In the fridge, it lasts up to a week. You can freeze slices for up to 2 months.

Q: Can I add nuts or raisins?

A: Yes, fold in 1/2 to 3/4 cup chopped nuts or raisins with the apples for extra texture and flavor.

Conclusion

I hope you enjoy baking this cinnamon apple bread and sharing it with people you love. For another take on apple quick breads and a similar recipe idea, see this detailed Homemade Apple Cinnamon Bread Recipe – Erhardts Eat.

Cinnamon Apple Bread

Cinnamon apple bread warms the kitchen with its sweet and spicy aroma, offering a moist and tender loaf enriched with apple pieces and cinnamon, perfect for any meal.

Main Ingredients

  • 2 cups all-purpose flour
  • 1 cup granulated sugar
  • 1 tsp baking powder
  • 1/2 tsp baking soda
  • 1 tsp ground cinnamon
  • 1/2 tsp salt
  • 2 large eggs
  • 1/2 cup vegetable oil (or melted butter)
  • 1/2 cup milk
  • 1 tsp vanilla extract
  • 1 1/2 cups peeled and chopped apples (about 2 medium apples)

Topping (Optional)

  • 1/4 cup brown sugar (for topping)
  • 1 tsp extra cinnamon (for topping)

Preparation

  1. Preheat the oven to 350°F (175°C) and grease a 9×5 inch loaf pan or line it with parchment paper.
  2. In a large bowl, whisk together the flour, sugar, baking powder, baking soda, cinnamon, and salt.
  3. In another bowl, beat the eggs lightly. Add the oil, milk, and vanilla, and stir to mix.
  4. Pour the wet mix into the dry mix. Stir just until combined, avoiding overmixing. Fold in the chopped apples.
  5. Pour the batter into the prepared pan and smooth the top. If desired, mix the brown sugar and extra cinnamon, and sprinkle on top for a sweet crust.

Baking

  1. Bake for 50 to 60 minutes, or until a toothpick comes out clean or with a few moist crumbs. If the top browns too quickly, cover loosely with foil.

Cooling

  1. Let the bread cool in the pan for 10 minutes, then remove and cool on a rack. Slice and serve warm or at room temperature.

Use firm apples like Fuji or Honeycrisp for best texture. Chop apples evenly for consistent baking. Do not overmix batter to keep the bread tender. Allow cooling before slicing for better structure. Can be made into muffins; bake at 350°F for 18-22 minutes.

Breakfast, Dessert, Snack
American
Baking, Cinnamon Apple Bread, Comfort Food, Fall Recipe, Quick Bread

Italian Herb and Cheese Bread

Freshly baked Italian Herb and Cheese Bread with herbs and cheese topping.

Italian Herb and Cheese Bread smells like a warm kitchen and tastes like a hug. This simple loaf mixes soft dough with fresh herbs and gooey cheese. It is great for family meals, parties, or just when you want something tasty with soup or salad. If you like baked breads that are full of flavor, this recipe will be a crowd-pleaser. It pairs well with other easy party foods, for example try it with baked beef and cheese sliders for a full table. You will love the crispy crust and soft inside, so get ready to bake and enjoy, you might not be able to stop at one slice.

how to prepare Italian Herb and Cheese Bread

Ingredients

  • 3 1/2 cups all purpose flour
  • 1 packet active dry yeast, about 2 1/4 tsp
  • 1 cup warm water, about 105 to 115 F
  • 1 tbsp sugar
  • 2 tbsp olive oil
  • 1 tsp salt
  • 2 tbsp dried Italian herbs, or 2 tbsp fresh chopped basil, oregano, rosemary mix
  • 1 cup shredded Parmesan or mozzarella, plus extra for top

Directions

  1. In a small bowl, mix warm water, sugar, and yeast. Wait 5 to 10 minutes until foamy.
  2. In a large bowl, mix flour, salt, and herbs. Add the yeast mix and olive oil.
  3. Stir until a soft dough forms. Add the shredded cheese and fold it in.
  4. Turn dough onto a lightly floured surface. Knead 6 to 8 minutes until smooth.
  5. Place dough in a lightly oiled bowl, cover with a clean towel. Let it rise in a warm place 1 hour, until doubled.
  6. Punch the dough down. Shape it into a loaf or oval. Place on a baking sheet or in a loaf pan.
  7. Cover and let rise 30 to 40 minutes until puffed.
  8. Preheat oven to 375 F. Brush top with a little olive oil and sprinkle extra cheese and herbs.
  9. Bake 25 to 30 minutes until golden and the crust sounds hollow when tapped.
  10. Cool on a rack 10 minutes before slicing, serve warm.

Italian Herb and Cheese Bread

Why You’ll Love Italian Herb and Cheese Bread

  • Simple ingredients you likely have at home, flour, yeast, cheese, herbs.
  • Great aroma, your kitchen will smell amazing while it bakes.
  • Versatile, use for sandwiches, dipping, or as a side for pasta and soup.
  • Crowd-pleaser, the mix of herbs and cheese makes many people happy.

tips for success

  • Use warm water, not hot, to wake the yeast. Too hot water kills the yeast.
  • Measure flour by spooning into the cup and leveling, do not pack it in.
  • If dough is sticky, add a little flour, one tablespoon at a time.
  • Fresh herbs give the best flavor, but dried herbs work well too.
  • Do not overbake, check at 25 minutes and cover with foil if top browns too fast.
  • Let the bread cool a bit, it slices cleaner when it rests.

Serving Suggestions

  • Serve warm with butter or garlic butter for a classic bite.
  • Make a sandwich with roasted vegetables and sliced turkey.
  • Tear into pieces and use as croutons for salad or soup.
  • Turn slices into bruschetta with chopped tomatoes and basil.
  • Pair with pasta dishes, especially marinara or creamy sauces.

Italian Herb and Cheese Bread

FAQs

Q: Can I use dried herbs instead of fresh? A: Yes, use about one third the amount of dried herbs compared to fresh. Dried herbs still give good flavor.

Q: How do I store the bread? A: Cool fully, then keep in a bread box or wrapped in a clean towel for 2 days at room temperature. For longer storage, freeze slices in a sealed bag.

Q: Can I make this with whole wheat flour? A: Yes, replace up to half the flour with whole wheat, the loaf will be denser. Add a little extra water if the dough feels dry.

Q: Can I add other cheeses or mix-ins? A: Yes, try mozzarella, cheddar, or a mix. You can add chopped olives or sun dried tomatoes for extra taste.

Conclusion

If you want a slightly different take or a copycat style loaf, try this Subway Bread Recipe (Italian Herb and Cheese Copycat) for more ideas and tips on a similar herbed, cheesy loaf. Enjoy baking and sharing this warm bread with people you love.

Italian Herb and Cheese Bread

This simple loaf mixes soft dough with fresh herbs and gooey cheese, making it a perfect companion for family meals, parties, or soups and salads.

For the Dough

  • 3.5 cups all purpose flour
  • 1 packet active dry yeast, about 2 1/4 tsp (Use warm water to activate.)
  • 1 cup warm water, about 105 to 115 F (Do not use hot water.)
  • 1 tbsp sugar
  • 2 tbsp olive oil
  • 1 tsp salt
  • 2 tbsp dried Italian herbs, or 2 tbsp fresh chopped basil, oregano, rosemary mix (Fresh herbs give the best flavor.)
  • 1 cup shredded Parmesan or mozzarella, plus extra for top

Preparation

  1. In a small bowl, mix warm water, sugar, and yeast. Wait 5 to 10 minutes until foamy.
  2. In a large bowl, mix flour, salt, and herbs. Add the yeast mix and olive oil.
  3. Stir until a soft dough forms. Add the shredded cheese and fold it in.
  4. Turn dough onto a lightly floured surface. Knead 6 to 8 minutes until smooth.
  5. Place dough in a lightly oiled bowl, cover with a clean towel. Let it rise in a warm place 1 hour, until doubled.
  6. Punch the dough down. Shape it into a loaf or oval. Place on a baking sheet or in a loaf pan.
  7. Cover and let rise 30 to 40 minutes until puffed.
  8. Preheat oven to 375 F. Brush top with a little olive oil and sprinkle extra cheese and herbs.

Baking

  1. Bake for 25 to 30 minutes until golden and the crust sounds hollow when tapped.
  2. Cool on a rack 10 minutes before slicing, serve warm.

Let the bread cool a bit; it slices cleaner when it rests. If the dough is sticky, add flour, one tablespoon at a time. Do not overbake, check at 25 minutes and cover with foil if top browns too fast.

Bread, Side
Italian
Cheese Bread, Herb Bread, Homemade Bread, Italian Bread

Homemade Focaccia Bread

Homemade focaccia bread topped with herbs and olive oil

Focaccia bread is warm, soft, and full of flavor. This homemade focaccia bread makes a great snack, side, or party bread. It has a light, airy inside, a crispy top, and a nice olive oil taste. People love it plain, with herbs, or topped with olives and tomatoes. This recipe is simple and works for cooks of all levels, and it is a crowd-pleaser that fills the kitchen with a fresh, baked smell. If you enjoy easy home bakes, you might also like this Amish apple fritter bread for a sweet treat.

how to prepare Homemade Focaccia Bread

Ingredients

  • 3 1/2 cups all purpose flour
  • 1 packet (2 1/4 tsp) active dry yeast
  • 1 1/4 cups warm water, about 105 to 115 F
  • 2 tbsp olive oil, plus extra for the pan and top
  • 1 tsp sugar
  • 1 1/2 tsp salt
  • Coarse sea salt, for sprinkling
  • Fresh rosemary or other herbs, optional
  • Cherry tomatoes or olives, optional

Directions

  1. In a bowl, mix warm water, sugar, and yeast. Let sit 5 to 10 minutes, until it bubbles a little.
  2. In a large bowl, stir flour and salt. Add the yeast mix and 2 tablespoons olive oil. Mix until a soft dough forms.
  3. Turn the dough onto a floured surface and knead 5 to 7 minutes, until smooth and elastic. You can use a stand mixer with a dough hook.
  4. Lightly oil a bowl, put the dough in, and cover with a towel. Let rise in a warm spot 1 hour, until doubled.
  5. Oil a baking pan or sheet well. Press the dough into the pan to make an even layer about 1/2 to 3/4 inch thick. Cover and let rise 20 to 30 minutes.
  6. Preheat the oven to 425 F (220 C). Use your fingers to make dimples across the dough surface. Drizzle olive oil over the top. Add rosemary, sea salt, tomatoes, or olives as you like.
  7. Bake 20 to 25 minutes, until golden brown on top. Let cool a few minutes, slice, and serve warm.

Homemade Focaccia Bread

Why You’ll Love Homemade Focaccia Bread

  • It tastes fresh, with a rich olive oil flavor and a soft crumb.
  • You can change toppings to match any meal, like herbs, cheese, or veggies.
  • It is easy to make, even for new bakers, and it makes the house smell great.
  • Leftovers keep well and are great for sandwiches or toast the next day.
  • This easy focaccia is a simple way to enjoy classic Italian bread at home.

tips for success

  • Use warm, not hot, water so the yeast wakes up but does not die.
  • Give the dough time to rise, it makes the bread light and airy.
  • Oil the pan well, this gives a crisp bottom and easy release.
  • Press firmly to make dimples, they hold olive oil and herbs for more flavor.
  • Bake until the top is golden, not just pale, for a nice crust.

Serving Suggestions

  • Serve warm with olive oil and balsamic vinegar for dipping.
  • Pair with soups, salads, or pasta for a full meal.
  • Use slices to make sandwiches with cheese and roasted vegetables.
  • Add to a bread basket for parties, it pleases many tastes.

Homemade Focaccia Bread

FAQs

Q: Can I use instant yeast instead of active dry yeast?

A: Yes, you can. If you use instant yeast, mix it with the flour and skip the proof step with warm water. Add water and oil, then continue.

Q: How long does focaccia keep?

A: Store in an airtight container at room temperature for 2 to 3 days. Reheat in the oven to refresh the crust.

Q: Can I make focaccia ahead and bake later?

A: Yes, you can make the dough and keep it in the fridge overnight. Let it come to room temperature and rise a bit before baking.

Q: Can I use whole wheat flour?

A: You can swap part of the flour for whole wheat, but use less or add a bit more water, dough may be denser.

Q: What oven temperature is best?

A: 425 F gives a good rise and a golden crust. You can lower a bit if your oven runs hot.

Conclusion

Homemade focaccia bread is simple, tasty, and flexible. It fits many meals and tastes, from plain olive oil to herbed focaccia or topped versions. For another take on a simple bread recipe and more tips, check this Easy Focaccia Bread Recipe – Inspired Taste.

Focaccia Bread

This homemade focaccia bread is warm, soft, and full of flavor, making it a perfect snack, side, or party bread.

Dough Ingredients

  • 3 1/2 cups all purpose flour
  • 1 packet active dry yeast (2 1/4 tsp)
  • 1 1/4 cups warm water (about 105 to 115 F) (Warm, not hot, to activate yeast.)
  • 2 tbsp olive oil, plus extra for the pan and top
  • 1 tsp sugar
  • 1 1/2 tsp salt
  • Coarse sea salt, for sprinkling
  • Fresh rosemary or other herbs, optional
  • Cherry tomatoes or olives, optional

Preparation

  1. In a bowl, mix warm water, sugar, and yeast. Let sit for 5 to 10 minutes, until it bubbles a little.
  2. In a large bowl, stir flour and salt. Add the yeast mix and 2 tablespoons olive oil. Mix until a soft dough forms.
  3. Turn the dough onto a floured surface and knead for 5 to 7 minutes, until smooth and elastic.
  4. Lightly oil a bowl, put the dough in, and cover with a towel. Let rise in a warm spot for 1 hour, until doubled.
  5. Oil a baking pan or sheet well. Press the dough into the pan to make an even layer about 1/2 to 3/4 inch thick. Cover and let rise for 20 to 30 minutes.

Baking

  1. Preheat the oven to 425 F (220 C). Use your fingers to make dimples across the dough surface.
  2. Drizzle olive oil over the top. Add rosemary, sea salt, tomatoes, or olives as you like.
  3. Bake for 20 to 25 minutes, until golden brown on top. Let cool a few minutes, slice, and serve warm.

Use warm water to wake the yeast without killing it. Make sure to let the dough rise for a light and airy texture. A well-oiled pan gives a crisp bottom and easy release. Bake until the top is golden for the best crust.

Party Food, Side Dish, Snack
Italian
Baking, Easy Bread Recipe, Focaccia Bread, Homemade Focaccia, Italian Bread

Banana Oatmeal Cookies

Freshly baked banana oatmeal cookies on a wooden table

Banana Oatmeal Cookies are warm, soft, and simple to make. They use ripe bananas and oats for a sweet, gentle flavor. These cookies are great for snacks, lunchboxes, or a quick treat after school. They feel homey and healthy at the same time, and people of all ages usually enjoy them.

This featured Banana Oatmeal Cookies recipe is a crowd-pleaser. It tastes like sweet banana with a chewy oat bite. The cookies are easy to make, low fuss, and perfect when you want a quick dessert or a healthy snack. Grab your ripe bananas and let’s make a batch that will vanish fast, you might need to hide a few for yourself!

How to prepare Banana Oatmeal Cookies

  1. Preheat the oven to 350°F (175°C). Line a baking sheet with parchment paper or lightly grease it.
  2. In a bowl, mash 2 very ripe bananas with a fork until smooth.
  3. Add 1 cup rolled oats to the mashed bananas. Stir until mixed.
  4. If you like, add a small pinch of salt, 1/2 teaspoon cinnamon, or a splash of vanilla for more flavor.
  5. Stir in optional mix-ins like 1/4 cup chocolate chips, chopped nuts, or dried fruit.
  6. Drop spoonfuls of the dough onto the baking sheet. Flatten each slightly with the back of the spoon.
  7. Bake for 10 to 15 minutes, until the edges are light golden.
  8. Let the cookies cool on the sheet for a few minutes, then move to a rack to cool fully.

Banana Oatmeal Cookies

Why You’ll Love Banana Oatmeal Cookies

  • They are quick and easy, using just a few simple ingredients like ripe bananas and oats.
  • The cookies are naturally sweet, so you can skip extra sugar if you want a healthier treat.
  • They are soft and chewy, with a warm banana taste that feels homemade.
  • You can change them with add-ins, like chocolate chips or nuts, to suit your taste.

Tips for success

  • Use very ripe bananas, the riper the sweeter and the better the texture.
  • Measure oats by cup, and use rolled oats for the best chew.
  • If the dough is too wet, add a little more oats, one tablespoon at a time.
  • If you want flatter cookies, press them gently before baking.
  • Watch the bake time, ovens vary, and cookies can go from golden to too brown fast.

Serving Suggestions

  • Serve warm with a glass of milk or a cup of tea.
  • Add a spoon of peanut butter on top for extra protein and flavor.
  • Pack them in lunchboxes for an easy snack.
  • Crumble them over yogurt for a quick breakfast boost.

Banana Oatmeal Cookies

FAQs

Q: Can I make these cookies without baking?

A: Yes, you can make no-bake banana oat bites by chilling spoonfuls in the fridge, but the texture will be softer and more like a firm snack.

Q: How long do the cookies keep?

A: Store them in an airtight container at room temperature for 2 days, or in the fridge for up to a week.

Q: Can I use instant oats or steel-cut oats?

A: Instant oats can work but may make cookies softer. Do not use steel-cut oats, they are too hard and will not soften well in this recipe.

Q: Are these cookies gluten-free?

A: They can be, if you use certified gluten-free oats. Check labels to be sure.

Q: Can I add eggs or flour for a firmer cookie?

A: Yes, adding an egg and a little flour will make the cookies firmer and more cookie-like if you prefer that texture.

Conclusion

For another simple, healthy take on banana oat cookies you can try this well-loved recipe online, see Healthy 3-Ingredient Banana Oatmeal Cookies – Skinnytaste.

Banana Oatmeal Cookies

Warm, soft, and simple to make, these Banana Oatmeal Cookies use ripe bananas and oats for a sweet, gentle flavor. A perfect treat for snacks, lunchboxes, or a quick dessert.

Main Ingredients

  • 2 pieces very ripe bananas (The riper, the sweeter and better the texture.)
  • 1 cup rolled oats (Use rolled oats for the best chew.)

Optional Flavorings

  • 1/2 teaspoon cinnamon (For added flavor.)
  • pinch salt (To enhance flavors.)
  • 1/4 cup chocolate chips or chopped nuts or dried fruit (Optional mix-ins to customize your cookies.)

Preparation

  1. Preheat the oven to 350°F (175°C). Line a baking sheet with parchment paper or lightly grease it.
  2. In a bowl, mash the very ripe bananas with a fork until smooth.
  3. Add the rolled oats to the mashed bananas and stir until mixed.
  4. If desired, add a small pinch of salt, cinnamon, and/or vanilla for more flavor.
  5. Stir in optional mix-ins like chocolate chips, chopped nuts, or dried fruit.
  6. Drop spoonfuls of the dough onto the baking sheet and flatten each slightly with the back of the spoon.

Baking

  1. Bake for 10 to 15 minutes, until the edges are light golden.
  2. Let the cookies cool on the sheet for a few minutes, then move to a rack to cool fully.

Use very ripe bananas for best sweetness and texture. Measure oats by cup. If the dough is too wet, add more oats one tablespoon at a time. For flatter cookies, press gently before baking. Watch the bake time as ovens vary.

Dessert, Snack
American
Banana Oatmeal Cookies, easy dessert, Healthy Cookies, Quick Snacks, Ripe Bananas

Sourdough Discard Dinner Rolls

Freshly baked sourdough discard dinner rolls on a wooden table.

These sourdough discard dinner rolls are soft, warm, and full of good flavor. They use leftover sourdough starter, so you waste less and get a tasty bread. The rolls are fluffy on the inside, golden on the outside, and smell like home. This recipe is a simple crowd-pleaser, easy to shape, and great for family dinners or small parties. They pair well with soups, salads, or a roast, and are even delicious on their own with butter, or alongside an autumn chicken dinner with roasted vegetables. Get ready to pull these warm rolls from the oven and watch everyone smile.

how to prepare Sourdough Discard Dinner Rolls

  1. Mix 1 cup sourdough discard, 1/2 cup warm milk, 2 tablespoons sugar, and 1 beaten egg in a bowl. Stir to combine.
  2. Add 2 cups all-purpose flour, 1 teaspoon salt, and 2 teaspoons active dry yeast. Stir until the dough forms.
  3. Turn dough to a floured surface and knead 5 to 7 minutes until smooth and soft. If dough is sticky, add a little flour.
  4. Place dough in a greased bowl, cover with a towel, and let it rest in a warm spot for 30 to 45 minutes, until it has grown a bit.
  5. Divide dough into 12 equal pieces. Shape each into a round roll and place them in a greased 9×13 pan.
  6. Cover the pan and let the rolls rise 20 to 30 minutes, until puffy.
  7. Preheat oven to 375°F, brush rolls with melted butter or egg wash, and bake 15 to 20 minutes until golden brown.
  8. Brush hot rolls with more butter, let cool a few minutes, then serve warm.

Sourdough Discard Dinner Rolls

Why You’ll Love Sourdough Discard Dinner Rolls

  • They use sourdough discard, so you save the starter and cut waste.
  • The rolls are soft, tender, and have a mild, tangy flavor that everyone likes.
  • This recipe is quick and simple, so you can make fresh rolls without a long wait.
  • You can change the rolls easily, adding herbs, cheese, or garlic for more taste.

tips for success

  • Use warm milk, not hot, to help the yeast wake up.
  • If your discard is very thick, stir in a little water to loosen it before mixing.
  • Keep dough slightly sticky, it makes the rolls softer. Add flour slowly, only if needed.
  • Let the rolls rise in a warm spot, like near a warm oven or on top of the fridge.
  • Watch the rolls in the oven, baking times can change by a few minutes with different ovens.
  • Brush with butter right after baking, it gives a soft crust and good shine.

Serving Suggestions

  • Serve warm with salted butter or honey for simple comfort.
  • Pair with soups like tomato or chicken noodle for a cozy meal.
  • Use as a side for roast chicken or pork, they soak up gravy well.
  • Make small sandwiches with ham, cheese, or leftover turkey for lunch.
  • Add garlic butter and bake a few minutes for quick garlic rolls.

Sourdough Discard Dinner Rolls

FAQs

Q: What is sourdough discard, and can I use any starter?

A: Sourdough discard is the extra starter you remove when you feed it. You can use any fed or unfed starter, it will add mild tang and good texture.

Q: Do I need to add yeast if I use discard?

A: Yes, this recipe uses a small amount of yeast to help the rolls rise faster and stay light.

Q: Can I make these ahead and freeze them?

A: Yes, bake the rolls, cool them, then freeze in a bag. Reheat in the oven or microwave when ready to eat.

Q: How do I make them dairy free?

A: Use plant milk and a dairy-free butter or oil for brushing, the rolls will still turn out soft.

Q: Can I add seeds or cheese on top?

A: Yes, sprinkle seeds or shredded cheese before baking for extra flavor and texture.

Conclusion

These sourdough discard dinner rolls are simple, soft, and a smart way to use leftover starter, they make dinner feel special without extra work. For a fast, tested take on discard rolls you can compare with, see One Hour Sourdough Discard Rolls – Amy Bakes Bread.

Sourdough Discard Dinner Rolls

These soft and fluffy sourdough discard dinner rolls are easy to make and perfect for family dinners. They have a mild tangy flavor and pair well with various dishes.

Wet Ingredients

  • 1 cup sourdough discard (Use any type of sourdough starter)
  • 1/2 cup warm milk (Ensure the milk is warm, not hot)
  • 2 tablespoons sugar
  • 1 large beaten egg

Dry Ingredients

  • 2 cups all-purpose flour (Add flour as needed if the dough is sticky)
  • 1 teaspoon salt
  • 2 teaspoons active dry yeast (Helps the rolls rise)

For Baking

  • 2 tablespoons melted butter (For brushing before and after baking)

Mixing

  1. In a bowl, mix the sourdough discard, warm milk, sugar, and beaten egg until well combined.
  2. Add the all-purpose flour, salt, and active dry yeast. Stir until a dough forms.

Kneading

  1. Turn the dough onto a floured surface and knead for 5 to 7 minutes until smooth and soft.
  2. If the dough is sticky, add a little flour as needed.

First Rise

  1. Place the dough in a greased bowl, cover with a towel, and let it rest in a warm spot for 30 to 45 minutes, until it has grown.

Shaping

  1. Divide the dough into 12 equal pieces and shape each piece into a round roll.
  2. Place the rolls in a greased 9×13 pan.

Second Rise

  1. Cover the pan and let the rolls rise for 20 to 30 minutes until puffy.

Baking

  1. Preheat the oven to 375°F (190°C).
  2. Brush the rolls with melted butter or egg wash.
  3. Bake for 15 to 20 minutes until golden brown.
  4. Brush the hot rolls with more butter, let cool for a few minutes, and serve warm.

You can customize the rolls by adding herbs, cheese, or garlic. Let the rolls rise in a warm spot for the best results.

Appetizer, Side Dish
American, Baking
dinner rolls, easy rolls, Homemade Bread, sourdough discard, sourdough rolls

Sourdough Discard Banana Bread

Sourdough discard banana bread made with ripe bananas and sourdough starter.

Sourdough Discard Banana Bread is a warm, homey loaf that feels like a hug. It uses leftover sourdough discard, ripe bananas, simple pantry items, and a little love. This banana bread is moist, mildly tangy, and very easy to make, a real crowd-pleaser at coffee time or for a quick snack. If you like banana treats, try a small twist inspired by a banana bread cookies soft chewy easy recipe, then come back to this classic loaf. You will love how the sourdough discard adds depth, and the smell as it bakes will make everyone smile, so get ready to bake and enjoy.

how to prepare Sourdough Discard Banana Bread

  1. Preheat your oven to 350°F, and grease a 9×5 inch loaf pan or line it with paper.
  2. In a bowl, mash 3 ripe bananas until smooth. Add 1 cup sourdough discard, 1/2 cup melted butter or oil, 1 cup sugar, and 2 large eggs. Stir until mixed.
  3. In another bowl, whisk 1 1/2 cups flour, 1 teaspoon baking soda, 1/2 teaspoon salt, and 1 teaspoon cinnamon if you like.
  4. Add dry mix to wet mix, stir just until combined. Fold in 1/2 cup chopped nuts or chocolate chips if you want. Do not overmix.
  5. Pour batter into the pan, smooth the top, and bake 50 to 60 minutes, until a toothpick comes out clean or with a few crumbs.
  6. Cool in the pan 10 minutes, then turn out onto a rack to cool more before slicing.

Sourdough Discard Banana Bread

Why You’ll Love Sourdough Discard Banana Bread

  • It uses sourdough discard, so you waste less and get more flavor.
  • The bread stays moist for days, great for quick breakfasts.
  • It is simple to make with common ingredients, no fuss or special tools.
  • The mild tang from the discard balances the sweet banana taste, making it rich but not too sweet.

tips for success

  • Use very ripe bananas for the best banana flavor and natural sweetness.
  • Measure flour by spooning into the cup and leveling, do not pack it down.
  • Mix until the dry and wet parts just come together, overmixing can make the bread dense.
  • Check the loaf at 50 minutes, ovens vary, so test with a toothpick.
  • If the top browns too fast, tent with foil for the last 10 to 15 minutes.

Serving Suggestions

  • Serve warm with a thin spread of butter, it melts into the bread nicely.
  • Toast a slice and add cream cheese for a creamy contrast.
  • Pair with coffee or milk for a simple snack or breakfast.
  • Make a quick pudding by tearing slices into a dish, adding milk, eggs, and baking, for a dessert twist.

Sourdough Discard Banana Bread

FAQs

Q: Can I freeze this banana bread?

A: Yes, wrap slices or the whole loaf tight in foil and freeze up to 3 months. Thaw at room temperature.

Q: Do I need active sourdough starter for this recipe?

A: No, use unfed discard, you do not need active starter or to feed it first.

Q: Can I use less sugar?

A: Yes, you can reduce sugar a bit, the ripe bananas add sweetness, but the texture may change slightly.

Q: Can I make this in a muffin tin?

A: Yes, bake muffins at 350°F for about 18 to 22 minutes, check with a toothpick.

Conclusion

For a slightly different take or more tips on sourdough banana bread, you can explore Ultimate Sourdough Banana Bread – The Clever Carrot, it has helpful notes and ideas. Enjoy baking, and share a slice with someone you like.

Sourdough Discard Banana Bread

A moist and mildly tangy banana bread made with sourdough discard and ripe bananas, perfect for coffee time or a quick snack.

Wet Ingredients

  • 3 pieces ripe bananas (Use very ripe bananas for best flavor.)
  • 1 cup sourdough discard (Unfed, active starter is not needed.)
  • 1/2 cup melted butter or oil
  • 1 cup sugar (Can be reduced slightly for less sweetness.)
  • 2 pieces large eggs

Dry Ingredients

  • 1 1/2 cups flour (Measure by spooning into the cup and leveling.)
  • 1 teaspoon baking soda
  • 1/2 teaspoon salt
  • 1 teaspoon cinnamon (Optional, add if desired.)

Optional Add-ins

  • 1/2 cup chopped nuts or chocolate chips (Fold in if desired.)

Preparation

  1. Preheat your oven to 350°F (175°C) and grease a 9×5 inch loaf pan or line it with paper.
  2. In a bowl, mash the ripe bananas until smooth.
  3. Add sourdough discard, melted butter or oil, sugar, and eggs to the bananas and stir until mixed.
  4. In another bowl, whisk together flour, baking soda, salt, and cinnamon.
  5. Gradually mix the dry ingredients into the wet mixture, stirring just until combined.
  6. Fold in the optional nuts or chocolate chips without overmixing.

Baking

  1. Pour the batter into the prepared loaf pan and smooth the top.
  2. Bake for 50 to 60 minutes, or until a toothpick comes out clean or with a few crumbs.
  3. Cool the bread in the pan for 10 minutes before transferring to a rack to cool completely.

To avoid dense bread, don’t overmix the batter. Tent with foil if the top browns too quickly during baking.

Breakfast, Snack
American
banana bread, Easy Recipe, moist bread, quick snack, sourdough discard