Maple Balsamic Roasted Asparagus

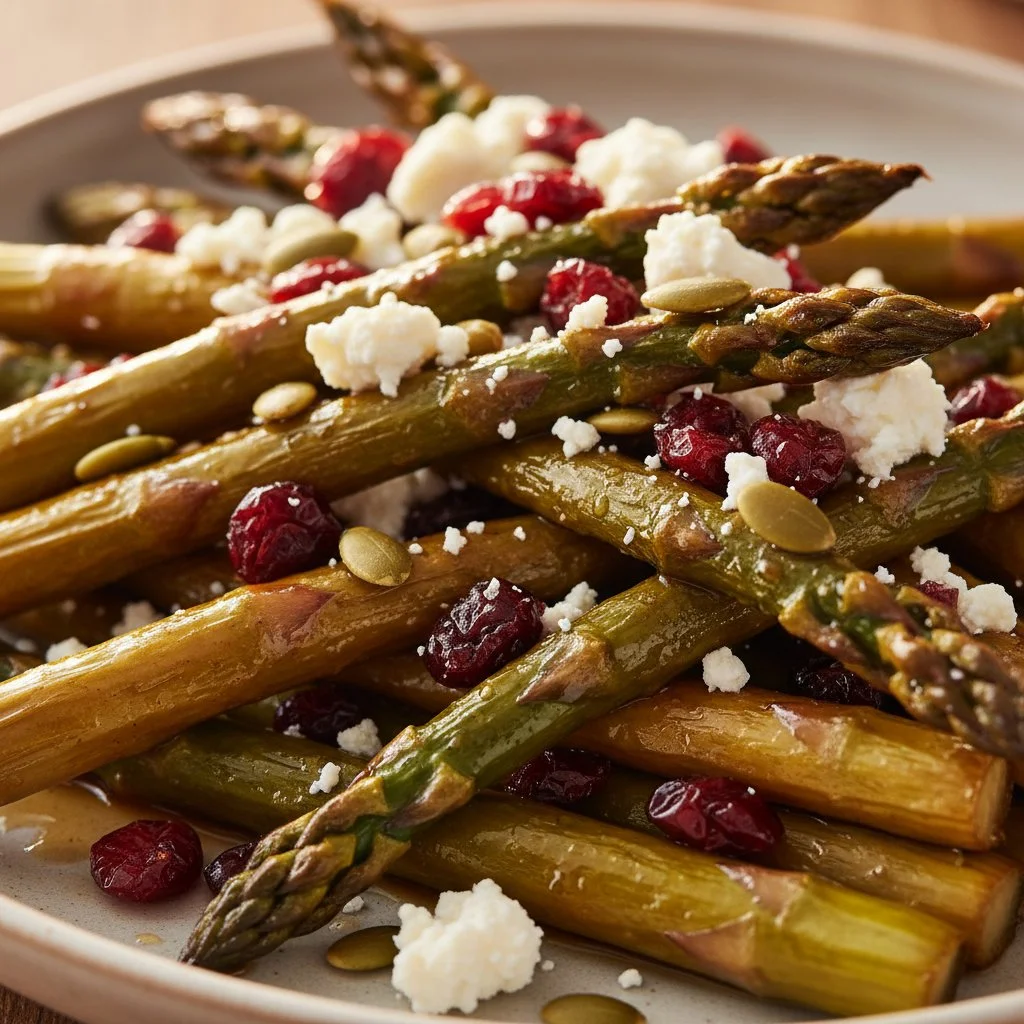
Plate of Maple Balsamic Roasted Asparagus garnished and ready to serve.

How to Prepare Maple Balsamic Roasted Asparagus

Making Maple Balsamic Roasted Asparagus is simple and fun! First, you’ll want to gather your fresh asparagus, maple syrup, balsamic vinegar, olive oil, garlic, salt, and pepper.

  1. Start by preheating your oven to 400°F (200°C).
  2. Wash the asparagus and trim the tough ends.
  3. In a bowl, mix together the maple syrup, balsamic vinegar, olive oil, minced garlic, salt, and pepper. This tasty mix will bring out the wonderful flavors of the asparagus.
  4. Toss the asparagus in the bowl with the mixture until it is well-coated.
  5. Spread the asparagus out in a single layer on a baking sheet.
  6. Roast in the oven for about 15 to 20 minutes, until the asparagus is tender and just starts to caramelize.
  7. Serve warm and enjoy!

Maple Balsamic Roasted Asparagus

Why You’ll Love Maple Balsamic Roasted Asparagus

This recipe is perfect for any occasion, whether it’s a weeknight dinner or a holiday feast. The sweetness of the maple syrup blends perfectly with the tanginess of the balsamic vinegar, creating a rich flavor that everyone will enjoy. Plus, the roasted asparagus is bright and beautiful, making it a great addition to your table. It’s simple enough for beginners, yet impressive enough to impress guests. After trying it, you’ll find yourself coming back for more!

Tips for Success

  • Make sure to use fresh asparagus for the best flavor.
  • You can adjust the amount of maple syrup and balsamic vinegar to suit your taste. If you prefer a sweeter dish, add a little more maple.
  • Keep an eye on the asparagus as it roasts, you don’t want it to get too soft.

Serving Suggestions

Maple Balsamic Roasted Asparagus pairs well with a variety of main dishes. Try it alongside grilled chicken, fish, or a hearty vegetable stew. It also makes a great addition to pasta dishes or as part of a fresh salad. Don’t forget to sprinkle some grated parmesan on top for an extra touch of flavor!

FAQs

Can I use frozen asparagus for this recipe?
While fresh asparagus is best, you can use frozen if that’s what you have. Just keep in mind that frozen asparagus may not get as crispy.

Can I prepare this dish ahead of time?
You can toss the asparagus in the maple balsamic mixture a few hours before roasting. Just keep it in the fridge until you’re ready to roast.

What can I use instead of balsamic vinegar?
If you don’t have balsamic vinegar, you can substitute with red wine vinegar or apple cider vinegar, though the flavor will be slightly different. Enjoy your cooking adventure with Maple Balsamic Roasted Asparagus!

Maple Balsamic Roasted Asparagus

Deliciously roasted asparagus coated in a sweet and tangy maple balsamic mixture, perfect as a side dish for any occasion.

Main ingredients

  • 1 bunch fresh asparagus (Trim the tough ends before use.)
  • 2 tablespoons maple syrup (Adjust for sweetness preference.)
  • 2 tablespoons balsamic vinegar (Can substitute with red wine or apple cider vinegar.)
  • 1 tablespoon olive oil
  • 2 cloves garlic, minced
  • 1 teaspoon salt (Adjust to taste.)
  • 1 teaspoon black pepper (Adjust to taste.)

Preparation

  1. Preheat your oven to 400°F (200°C).
  2. Wash the asparagus and trim the tough ends.
  3. In a bowl, mix together the maple syrup, balsamic vinegar, olive oil, minced garlic, salt, and pepper.
  4. Toss the asparagus in the bowl with the mixture until it is well-coated.

Cooking

  1. Spread the asparagus out in a single layer on a baking sheet.
  2. Roast in the oven for about 15 to 20 minutes, until the asparagus is tender and just starts to caramelize.

Serving

  1. Serve warm and enjoy!

Ensure fresh asparagus is used for the best flavor. Adjust maple syrup and balsamic vinegar to your taste. Keep an eye on the asparagus while roasting to avoid it getting too soft.

Side Dish, Vegetable
American
Easy Asparagus Recipe, Maple Balsamic Roasted Asparagus, Maple Syrup, Roasted Asparagus, Vegetable Side Dish

Caprese Roasted Asparagus: Easy, Flavorful Side Dish with a Twist

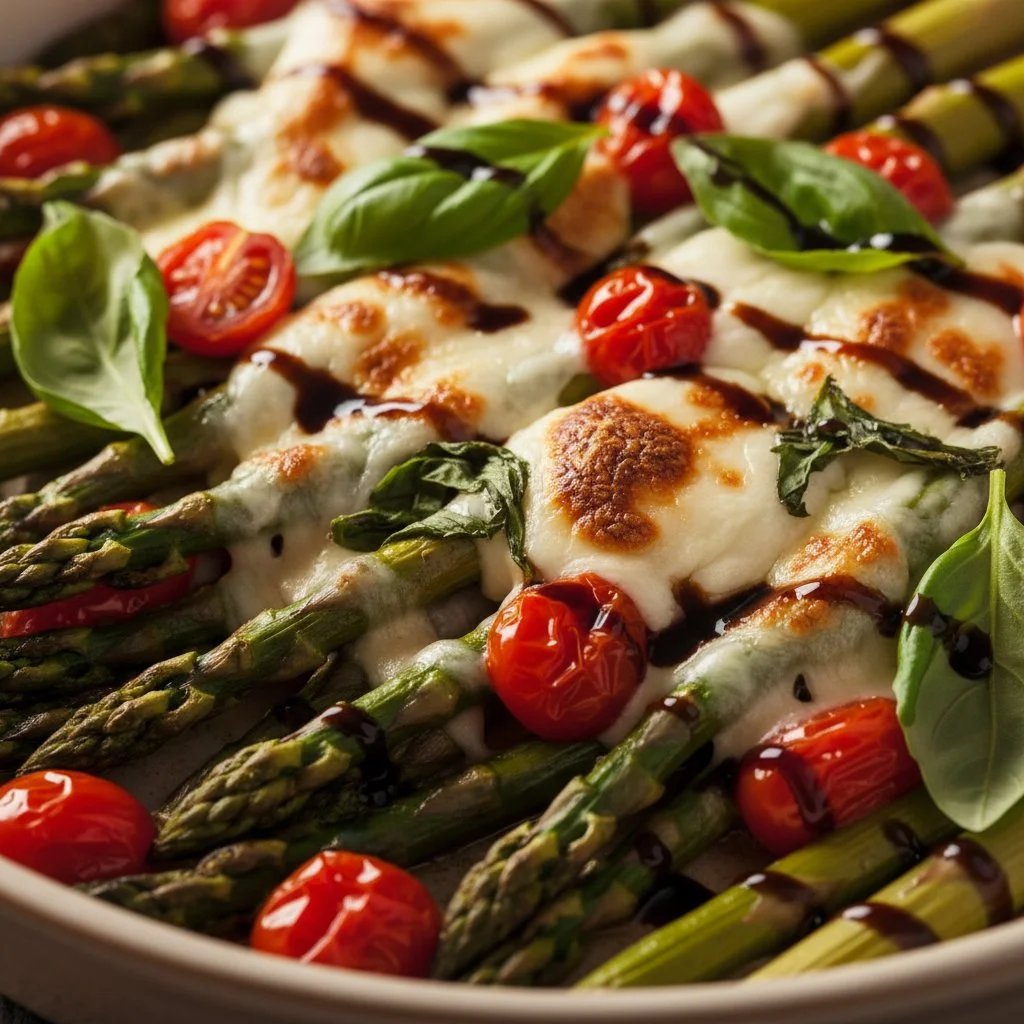
Plated Caprese Roasted Asparagus with tomatoes, mozzarella, and balsamic drizzle.

How to Prepare Caprese Roasted Asparagus

If you are looking for an easy and tasty side dish, look no further than Caprese Roasted Asparagus. This simple recipe combines fresh asparagus with the classic flavors of a Caprese salad. You will love how the juicy tomatoes, creamy mozzarella, and fragrant basil come together to elevate the humble asparagus. Plus, it looks beautiful on your plate, making it a perfect dish for both casual dinners and festive gatherings.

To start making this delightful side dish, gather these ingredients:

Ingredients

  • 1 pound asparagus, trimmed
  • 1 cup cherry tomatoes, halved
  • 1 cup mozzarella balls, halved or torn
  • 2 tablespoons olive oil
  • 1 teaspoon balsamic vinegar
  • Salt and pepper, to taste
  • Fresh basil leaves, for garnish

Now let’s dive into the steps to prepare Caprese Roasted Asparagus:

  1. Preheat your oven to 400°F (200°C).
  2. On a large baking sheet, lay out the asparagus. Add the cherry tomatoes and mozzarella.
  3. Drizzle olive oil and balsamic vinegar over the vegetables. Season with salt and pepper, then toss everything together to ensure all ingredients are well-coated.
  4. Roast in the oven for 15 to 20 minutes, or until the asparagus is tender and slightly crispy.
  5. Remove from the oven, and top with fresh basil leaves before serving.

Now you’re ready to enjoy your delicious Caprese Roasted Asparagus!

Caprese Roasted Asparagus: Easy, Flavorful Side Dish with a Twist

Why You’ll Love Caprese Roasted Asparagus

This dish is a true crowd-pleaser, bursting with flavor and color. The combination of roasted asparagus with fresh tomatoes and mozzarella creates a delightful contrast that makes each bite exciting. It’s not just a side dish, it is a delightful experience.

Whether you’re serving it at a family dinner or a holiday feast, Caprese Roasted Asparagus is sure to impress. Its bright flavors and vibrant look will leave everyone asking for seconds. Plus, it’s quick to prepare, which means you can spend less time in the kitchen and more time enjoying precious moments with your loved ones. It’s the perfect recipe to add a delicious twist to your meal!

Tips for Success

  • Choose fresh asparagus: Look for bright green stalks that are firm but not woody.
  • Don’t overcrowd the pan: Give the asparagus enough space on the baking sheet to roast perfectly.
  • Adjust cooking time: If your asparagus is thicker or thinner, adjust the roasting time accordingly to ensure it’s cooked just right.

Serving Suggestions

Caprese Roasted Asparagus pairs wonderfully with a variety of main dishes. Try serving it alongside grilled chicken or fish for a light and balanced meal. You can also mix it into pasta or serve it as part of a fresh salad. This dish can even stand alone as a light lunch with some crusty bread on the side.

FAQs

Can I use regular mozzarella instead of mozzarella balls?
Yes, you can use regular mozzarella cheese, just cut it into small cubes to maintain the dish’s texture.

Is it possible to make this dish ahead of time?
While it’s best fresh, you can roast the asparagus and tomatoes ahead of time and warm it briefly before serving. Just add the fresh basil afterward for that vibrant flavor.

Can I add other vegetables to this dish?
Absolutely! Bell peppers, zucchini, or even mushrooms would be great additions to enhance the flavor and nutrition of the dish. Feel free to get creative!

Now go ahead, give this Caprese Roasted Asparagus a try, and enjoy the delightful flavors it brings to your table!

Caprese Roasted Asparagus

A delicious and colorful side dish that combines roasted asparagus with juicy tomatoes, creamy mozzarella, and fragrant basil, perfect for any occasion.

Main ingredients

  • 1 pound asparagus, trimmed (Look for bright green stalks that are firm but not woody.)
  • 1 cup cherry tomatoes, halved
  • 1 cup mozzarella balls, halved or torn (Regular mozzarella can be used, cut into small cubes.)

Seasoning and dressing

  • 2 tablespoons olive oil
  • 1 teaspoon balsamic vinegar
  • to taste Salt and pepper
  • for garnish leaves Fresh basil

Preparation

  1. Preheat your oven to 400°F (200°C).
  2. On a large baking sheet, lay out the asparagus. Add the cherry tomatoes and mozzarella.
  3. Drizzle olive oil and balsamic vinegar over the vegetables. Season with salt and pepper, then toss everything together to ensure all ingredients are well-coated.

Cooking

  1. Roast in the oven for 15 to 20 minutes, or until the asparagus is tender and slightly crispy.
  2. Remove from the oven, and top with fresh basil leaves before serving.

This dish is best served fresh. You can roast the asparagus and tomatoes ahead of time and warm briefly before serving. Add fresh basil afterward for vibrant flavor.

Side Dish, Vegetarian
Italian
Caprese Salad, Easy Side Dish, Healthy Eating, Roasted Asparagus, Summer Recipe

Roasted Carrots and Asparagus with Honey-Balsamic Glaze

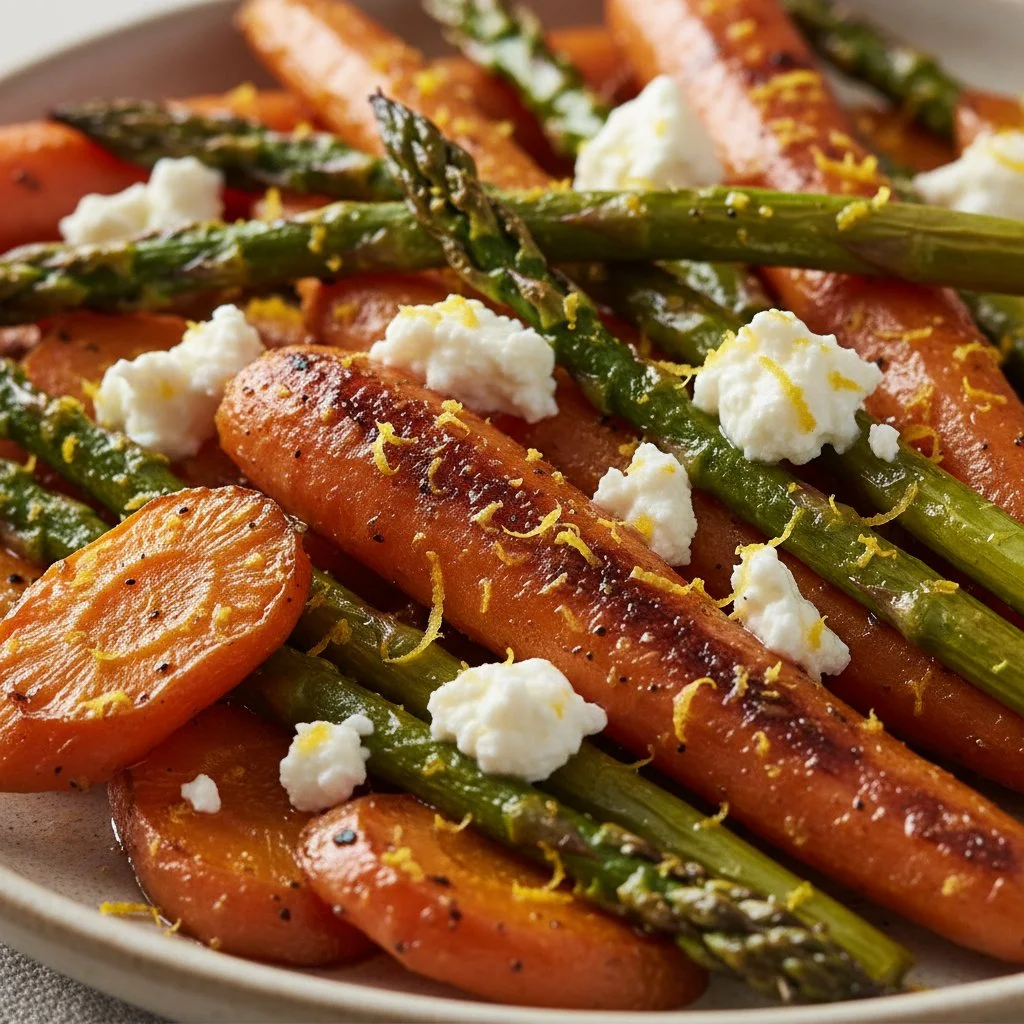
Roasted carrots and asparagus with honey-balsamic glaze on a serving plate.

How to Prepare Roasted Carrots and Asparagus with Honey-Balsamic Glaze

Roasted Carrots and Asparagus with Honey-Balsamic Glaze is truly a dish that brings joy to the table. This delightful recipe combines the natural sweetness of carrots and the fresh crunch of asparagus, all beautifully enhanced by a glossy honey-balsamic glaze. It’s easy to make and will impress anyone who takes a bite, making it a perfect choice for dinner parties or family gatherings. The glaze gives a unique twist, ensuring these veggies aren’t just good for you, but also incredibly tasty. Get ready to savor your new favorite side dish!

  1. Prepare the Vegetables: Start by washing and peeling your carrots. Cut them into uniform pieces. For the asparagus, trim the ends and cut the stalks into manageable sizes.

  2. Make the Glaze: In a small bowl, mix together honey, balsamic vinegar, olive oil, salt, and pepper. Whisk until combined.

  3. Combine Everything: Place your carrots and asparagus on a baking sheet. Drizzle the honey-balsamic glaze over the vegetables and toss to coat evenly.

  4. Roast: Preheat your oven to 425°F (220°C). Roast the vegetables for about 20-25 minutes, or until they are tender and slightly caramelized.

  5. Serve and Enjoy: Once roasted, take them out of the oven and let them cool slightly. Serve warm and enjoy the delicious flavors of your roasted carrots and asparagus!

Roasted Carrots and Asparagus with Honey-Balsamic Glaze

Why You’ll Love Roasted Carrots and Asparagus with Honey-Balsamic Glaze

This dish is not just about looks, it’s also packed with flavor. The honey-balsamic glaze offers a perfect balance of sweetness and tanginess, making every bite a pleasure. Plus, the vibrant colors of the carrots and asparagus make your plate pop, bringing brightness to any meal. Whether you’re serving it on a busy weeknight or at a festive gathering, this recipe is sure to be a hit.

Tips for Success

  • Vary the Veggies: Feel free to add other vegetables like bell peppers or red onions for extra flavor.
  • Cut Evenly: Make sure to cut your vegetables into similar sizes to ensure they cook evenly.
  • Don’t Overcrowd the Pan: Give the veggies space on the baking sheet for even roasting.

Serving Suggestions

Roasted Carrots and Asparagus with Honey-Balsamic Glaze pairs well with a variety of main dishes. You can serve it alongside grilled chicken, fish, or even a hearty grain salad. It also makes a great addition to a festive holiday feast, providing a colorful and healthy option for guests.

FAQs

1. Can I make this dish ahead of time?
Yes, you can prepare the vegetables and glaze ahead of time. Just toss them together and roast them right before serving for the best taste.

2. What can I substitute for honey?
If you’re looking for a vegan option, maple syrup is a great substitute for honey. It will add a different, but equally delicious flavor.

3. How do I store leftovers?
Store any leftover roasted vegetables in an airtight container in the fridge for up to three days. Just reheat them in the oven or a skillet before serving again.

Get ready to enjoy the simple, yet exquisite flavors of Roasted Carrots and Asparagus with Honey-Balsamic Glaze. Happy cooking!

Roasted Carrots and Asparagus with Honey-Balsamic Glaze

A delightful side dish featuring roasted carrots and asparagus drizzled with a honey-balsamic glaze, perfect for dinner parties or family gatherings.

Vegetables

  • 1 pound carrots, peeled and cut (Cut into uniform pieces)
  • 1 pound asparagus, trimmed and cut (Cut into manageable sizes)

Honey-Balsamic Glaze

  • 3 tablespoons honey (Can be substituted with maple syrup for a vegan option)
  • 2 tablespoons balsamic vinegar
  • 2 tablespoons olive oil
  • 1/2 teaspoon salt
  • 1/4 teaspoon black pepper

Preparation

  1. Start by washing and peeling your carrots. Cut them into uniform pieces.
  2. For the asparagus, trim the ends and cut the stalks into manageable sizes.

Make the Glaze

  1. In a small bowl, mix together honey, balsamic vinegar, olive oil, salt, and pepper. Whisk until combined.

Combine Everything

  1. Place your carrots and asparagus on a baking sheet.
  2. Drizzle the honey-balsamic glaze over the vegetables and toss to coat evenly.

Roasting

  1. Preheat your oven to 425°F (220°C).
  2. Roast the vegetables for about 20-25 minutes, or until they are tender and slightly caramelized.

Serving

  1. Once roasted, take them out of the oven and let them cool slightly.
  2. Serve warm and enjoy the delicious flavors of your roasted carrots and asparagus!

Feel free to add other vegetables like bell peppers or red onions for extra flavor. Make sure to cut your vegetables into similar sizes to ensure they cook evenly. Don’t overcrowd the pan for even roasting. Store any leftover roasted vegetables in an airtight container in the fridge for up to three days.

Side Dish
American
Asparagus, Carrots, Healthy Side Dish, Honey-Balsamic Glaze, Roasted Vegetables

Smoky-Sweet Sausage Shrimp Kabobs

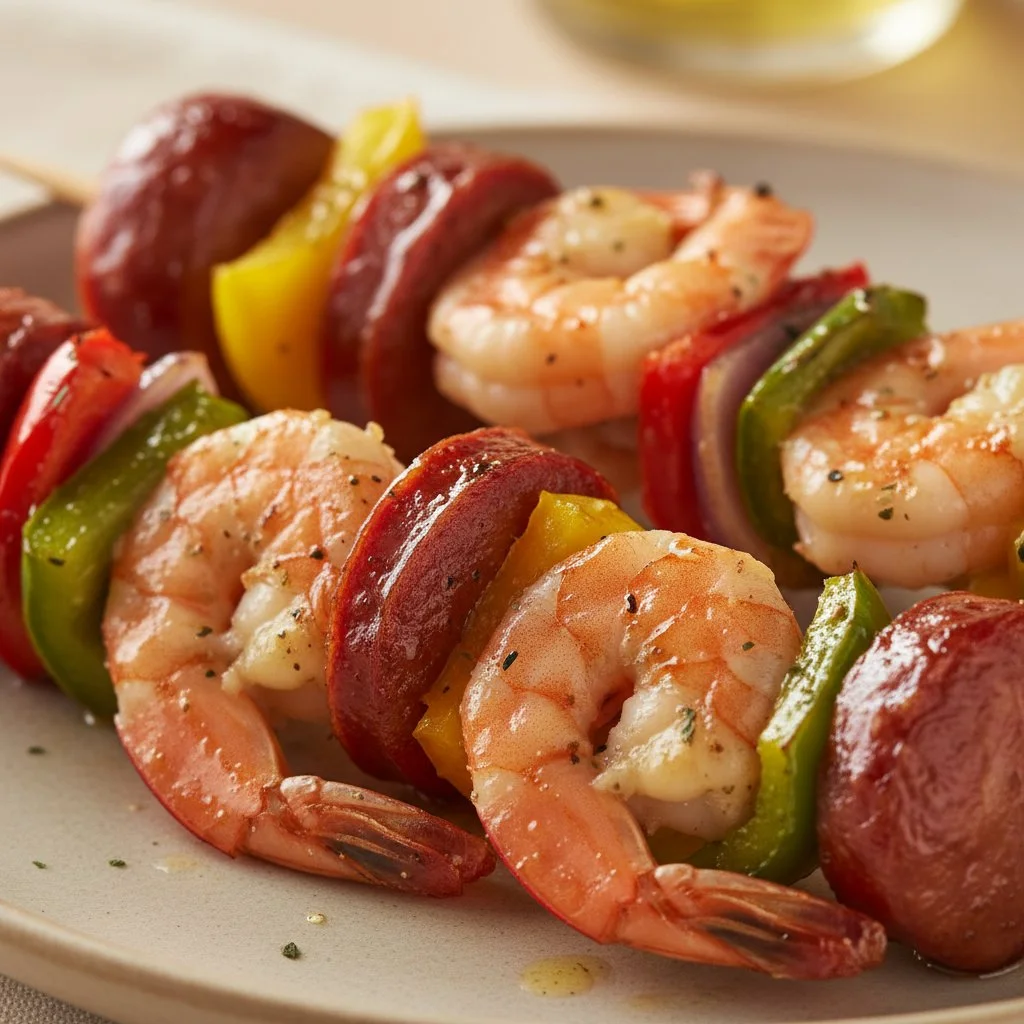
Smoky-sweet sausage shrimp kabobs on a grill, ready to enjoy.

Smoky-Sweet Sausage Shrimp Kabobs are a fun and tasty treat that brings together the best of both worlds: juicy shrimp and flavorful sausage. These kabobs are a hit for gatherings, barbecues, or just a fun family dinner. With their smoky and sweet glaze, each bite packs a punch of deliciousness that is sure to keep everyone coming back for more. Perfectly grilled and bursting with flavor, these kabobs are your ticket to delighting your taste buds and impressing your guests. So, are you ready to fire up the grill?

how to prepare Smoky-Sweet Sausage Shrimp Kabobs

Gather your ingredients and start your cooking adventure. Here’s how to prepare these delicious kabobs:

  1. Ingredients Needed:

    • Sausage (your favorite type)
    • Shrimp, peeled and deveined
    • Bell peppers, chopped
    • Red onion, chopped
    • Olive oil
    • Honey
    • Smoked paprika
    • Garlic powder
    • Salt and pepper
    • Skewers (wooden or metal)
  2. Prepare the Marinade:
    In a bowl, mix olive oil, honey, smoked paprika, garlic powder, salt, and pepper. This marinade gives the kabobs their special flavor.

  3. Assemble the Kabobs:
    Begin threading the sausage, shrimp, bell peppers, and red onion onto the skewers. Alternate the ingredients for a colorful and appealing look.

  4. Marinate:
    Brush the marinade all over the assembled kabobs. Let them sit for a bit to soak up those yummy flavors.

  5. Grill:
    Preheat the grill to medium heat. Place the kabobs on the grill, cooking for about 10-12 minutes. Turn them occasionally until the shrimp are pink and the sausage is cooked through.

  6. Serve:
    Remove the kabobs from the grill and enjoy them hot!

Smoky-Sweet Sausage Shrimp Kabobs

Why You’ll Love Smoky-Sweet Sausage Shrimp Kabobs

These kabobs are incredibly versatile and will appeal to everyone. They are perfect for a summertime barbecue or even as a quick weeknight dinner. The combination of smoky sausage and sweet shrimp creates a mesmerizing taste that’s hard to resist. Plus, they are fun to eat and can be served with your favorite dipping sauces. Everyone will love gathering around a plate of these kabobs, laughing and enjoying each other’s company.

tips for success

  • Soak Wooden Skewers: If you’re using wooden skewers, soak them in water for at least 30 minutes before grilling. This prevents them from burning on the grill.
  • Even Sizes: Cut sausage, peppers, and onion into similar sizes for even cooking. This way, all ingredients cook perfectly together.
  • Don’t Overcrowd: Give your kabobs some space on the grill, don’t overcrowd them or they may not cook evenly.

Serving Suggestions

Serve these Smoky-Sweet Sausage Shrimp Kabobs with a side of fresh salad, grilled corn on the cob, or even a zesty dipping sauce. They also pair well with rice or quinoa for a complete meal. A refreshing drink or lemonade on the side makes it an even better feast!

FAQs

Q: Can I use different vegetables in the kabobs?
A: Absolutely! Feel free to mix in your favorite veggies like zucchini, cherry tomatoes, or mushrooms.

Q: What type of sausage is best for this recipe?
A: You can use any type of sausage you like, such as Italian, chorizo, or even chicken sausage for a healthier option.

Q: Can I make these kabobs ahead of time?
A: Yes, you can assemble the kabobs ahead of time and marinate them in the fridge. Just grill them fresh when you’re ready to eat!

Now that you have the steps to create these delicious Smoky-Sweet Sausage Shrimp Kabobs, it’s time to get started in the kitchen and impress your friends and family. Happy cooking!

Smoky-Sweet Sausage Shrimp Kabobs

Juicy shrimp and flavorful sausage skewered with vibrant vegetables, perfectly grilled with a smoky-sweet glaze.

Main Ingredients

  • 1 lb Sausage (your favorite type)
  • 1 lb Shrimp, peeled and deveined
  • 2 cups Bell peppers, chopped
  • 1 cup Red onion, chopped
  • 1 tbsp Olive oil
  • 2 tbsp Honey
  • 1 tbsp Smoked paprika
  • 1 tsp Garlic powder
  • 1 tsp Salt
  • 1 tsp Pepper
  • 6 pieces Skewers (wooden or metal) (Soak wooden skewers in water for at least 30 minutes before grilling)

Preparation

  1. In a bowl, mix olive oil, honey, smoked paprika, garlic powder, salt, and pepper to create the marinade.
  2. Thread the sausage, shrimp, bell peppers, and red onion onto the skewers, alternating the ingredients.
  3. Brush the marinade all over the assembled kabobs and let them sit to soak up the flavors.

Grilling

  1. Preheat the grill to medium heat.
  2. Place the kabobs on the grill and cook for about 10-12 minutes, turning occasionally until the shrimp are pink and the sausage is cooked through.

Serving

  1. Remove the kabobs from the grill and enjoy them hot.

Serve with a side of fresh salad, grilled corn, or dipping sauce. Pairs well with rice or quinoa.

Appetizer, Main Course
American, Barbecue
Barbecue Recipes, Grilled Kabobs, Sausage Kabobs, Shrimp Kabobs, Summer Recipes

Perfect Asparagus Risotto: Creamy & Flavorful

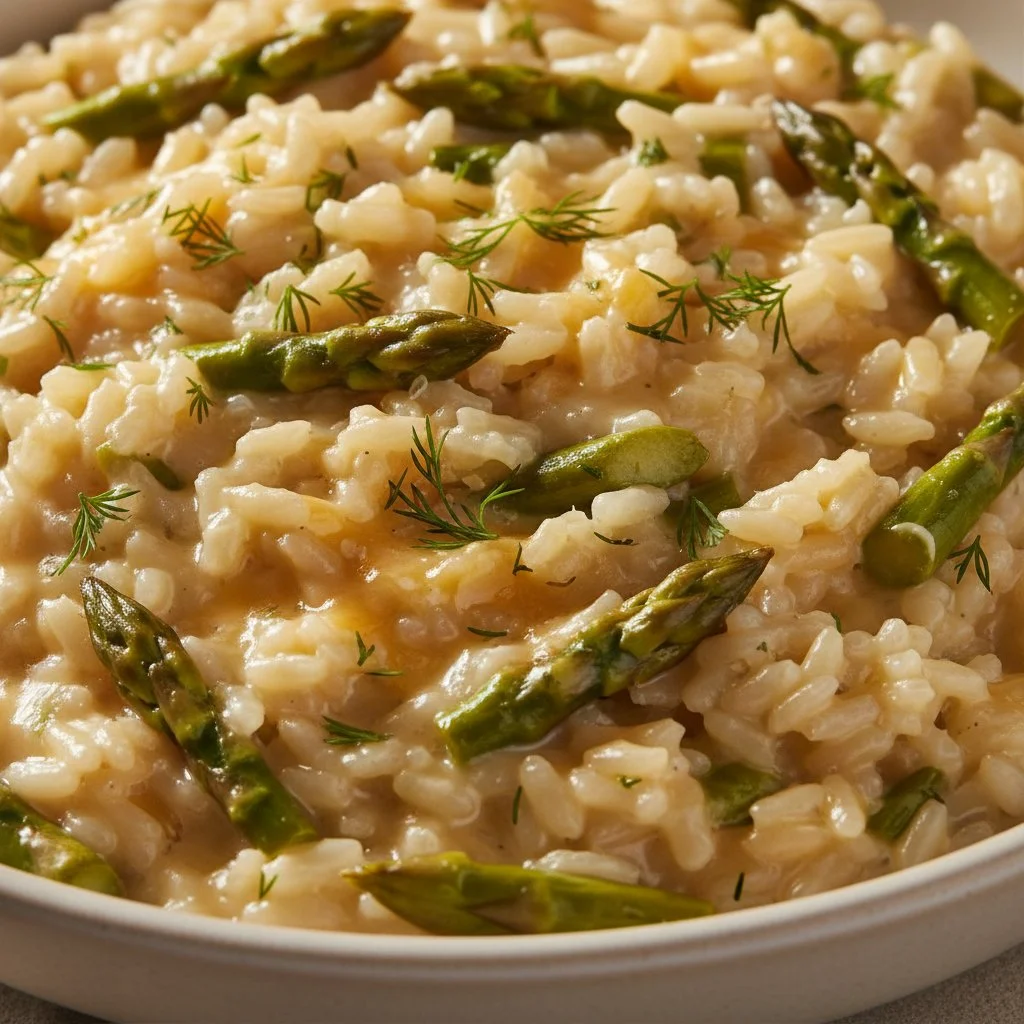
Creamy asparagus risotto served in a bowl with fresh herbs

How to Prepare Perfect Asparagus Risotto: Creamy & Flavorful

Making Perfect Asparagus Risotto is easier than you think. Here’s what you’ll need to do:

  1. Ingredients:

    • 1 cup Arborio rice
    • 1 bunch fresh asparagus, trimmed and cut into 1-inch pieces
    • 4 cups chicken or vegetable broth
    • 1 small onion, chopped
    • 2 cloves garlic, minced
    • 1 cup dry white wine
    • 1 cup grated Parmesan cheese
    • 2 tablespoons butter
    • Salt and pepper to taste
    • Olive oil
  2. Directions:

    1. In a pot, heat the broth over low heat. Keep it warm but not boiling.
    2. In a large pan, heat a bit of olive oil over medium heat. Add the onion and garlic, cooking until soft.
    3. Stir in the Arborio rice, coating it well. Cook for about 1 minute until the rice is slightly translucent.
    4. Pour in the white wine and stir until it’s mostly absorbed by the rice.
    5. Begin adding the warm broth, one ladle at a time, stirring frequently. Wait for the liquid to be absorbed before adding more.
    6. After about 15 minutes, add the asparagus pieces to the risotto.
    7. Continue stirring and adding broth until the rice is creamy and cooked to al dente, about 20-25 minutes total.
    8. Stir in the butter and Parmesan cheese, mixing until smooth. Season with salt and pepper to taste.
    9. Serve hot and enjoy your creamy risotto!

Perfect Asparagus Risotto: Creamy & Flavorful

Why You’ll Love Perfect Asparagus Risotto

This Perfect Asparagus Risotto is a standout dish that captivates your taste buds. The creamy texture of the risotto paired with fresh asparagus makes it both comforting and delightful. Each bite is filled with rich flavor, making it a fantastic choice for dinner parties or family meals. Plus, it’s a great way to showcase seasonal asparagus, bringing a touch of spring to your table.

Tips for Success

  • Use Fresh Asparagus: Fresh asparagus makes a big difference in flavor and texture, so try to choose the best quality available.
  • Keep the Broth Warm: Keeping the broth warm ensures that the cooking process isn’t interrupted when you add it to the rice.
  • Stir Often: Regular stirring helps to release the starches from the rice, giving you that creamy texture everyone loves.

Serving Suggestions

For a complete meal, serve your Perfect Asparagus Risotto with a light salad or grilled chicken. You can also pair it with a glass of white wine for added elegance. If you want a little extra flavor, sprinkle some toasted pine nuts or fresh herbs on top before serving.

FAQs

Can I make this risotto ahead of time?
Risotto is best served fresh, but you can prepare it a few hours ahead. Just reheat gently with a little extra broth or water to loosen it.

What other vegetables can I add?
Feel free to mix in other vegetables like peas, spinach, or mushrooms for added color and nutrition.

Can I use brown rice instead of Arborio rice?
While brown rice is healthier, it won’t give you the same creamy texture. If you’re in love with the health benefits, consider cooking them separately and adding them to the finished dish.

Now that you know how to make this creamy and flavorful Perfect Asparagus Risotto, it’s time to grab your apron and get cooking! Enjoy!

Asparagus Risotto

A creamy and flavorful asparagus risotto that is easy to prepare and perfect for any occasion.

Main Ingredients

  • 1 cup Arborio rice (Specialty rice for risotto.)
  • 1 bunch fresh asparagus, trimmed and cut into 1-inch pieces (Use fresh asparagus for best flavor.)
  • 4 cups chicken or vegetable broth (Keep warm while cooking.)
  • 1 small onion, chopped (For flavor base.)
  • 2 cloves garlic, minced (For added flavor.)
  • 1 cup dry white wine (Adds depth to the risotto.)
  • 1 cup grated Parmesan cheese (For creaminess and flavor.)
  • 2 tablespoons butter (For richness.)
  • Salt and pepper to taste (To season.)
  • Olive oil (For cooking the onion and garlic.)

Preparation

  1. In a pot, heat the broth over low heat. Keep it warm but not boiling.
  2. In a large pan, heat a bit of olive oil over medium heat. Add the onion and garlic, cooking until soft.
  3. Stir in the Arborio rice, coating it well. Cook for about 1 minute until the rice is slightly translucent.
  4. Pour in the white wine and stir until it’s mostly absorbed by the rice.
  5. Begin adding the warm broth, one ladle at a time, stirring frequently. Wait for the liquid to be absorbed before adding more.
  6. After about 15 minutes, add the asparagus pieces to the risotto.
  7. Continue stirring and adding broth until the rice is creamy and cooked to al dente, about 20-25 minutes total.
  8. Stir in the butter and Parmesan cheese, mixing until smooth. Season with salt and pepper to taste.
  9. Serve hot and enjoy your creamy risotto.

Use fresh asparagus for best results. Keep broth warm for a smoother cooking process. Stir often for that creamy texture.

Dinner, Main Course
Italian
Asparagus Risotto, Comfort Food, Creamy Risotto, Spring Recipe, Vegetarian Dish

Thick Chocolate Chip Cookies

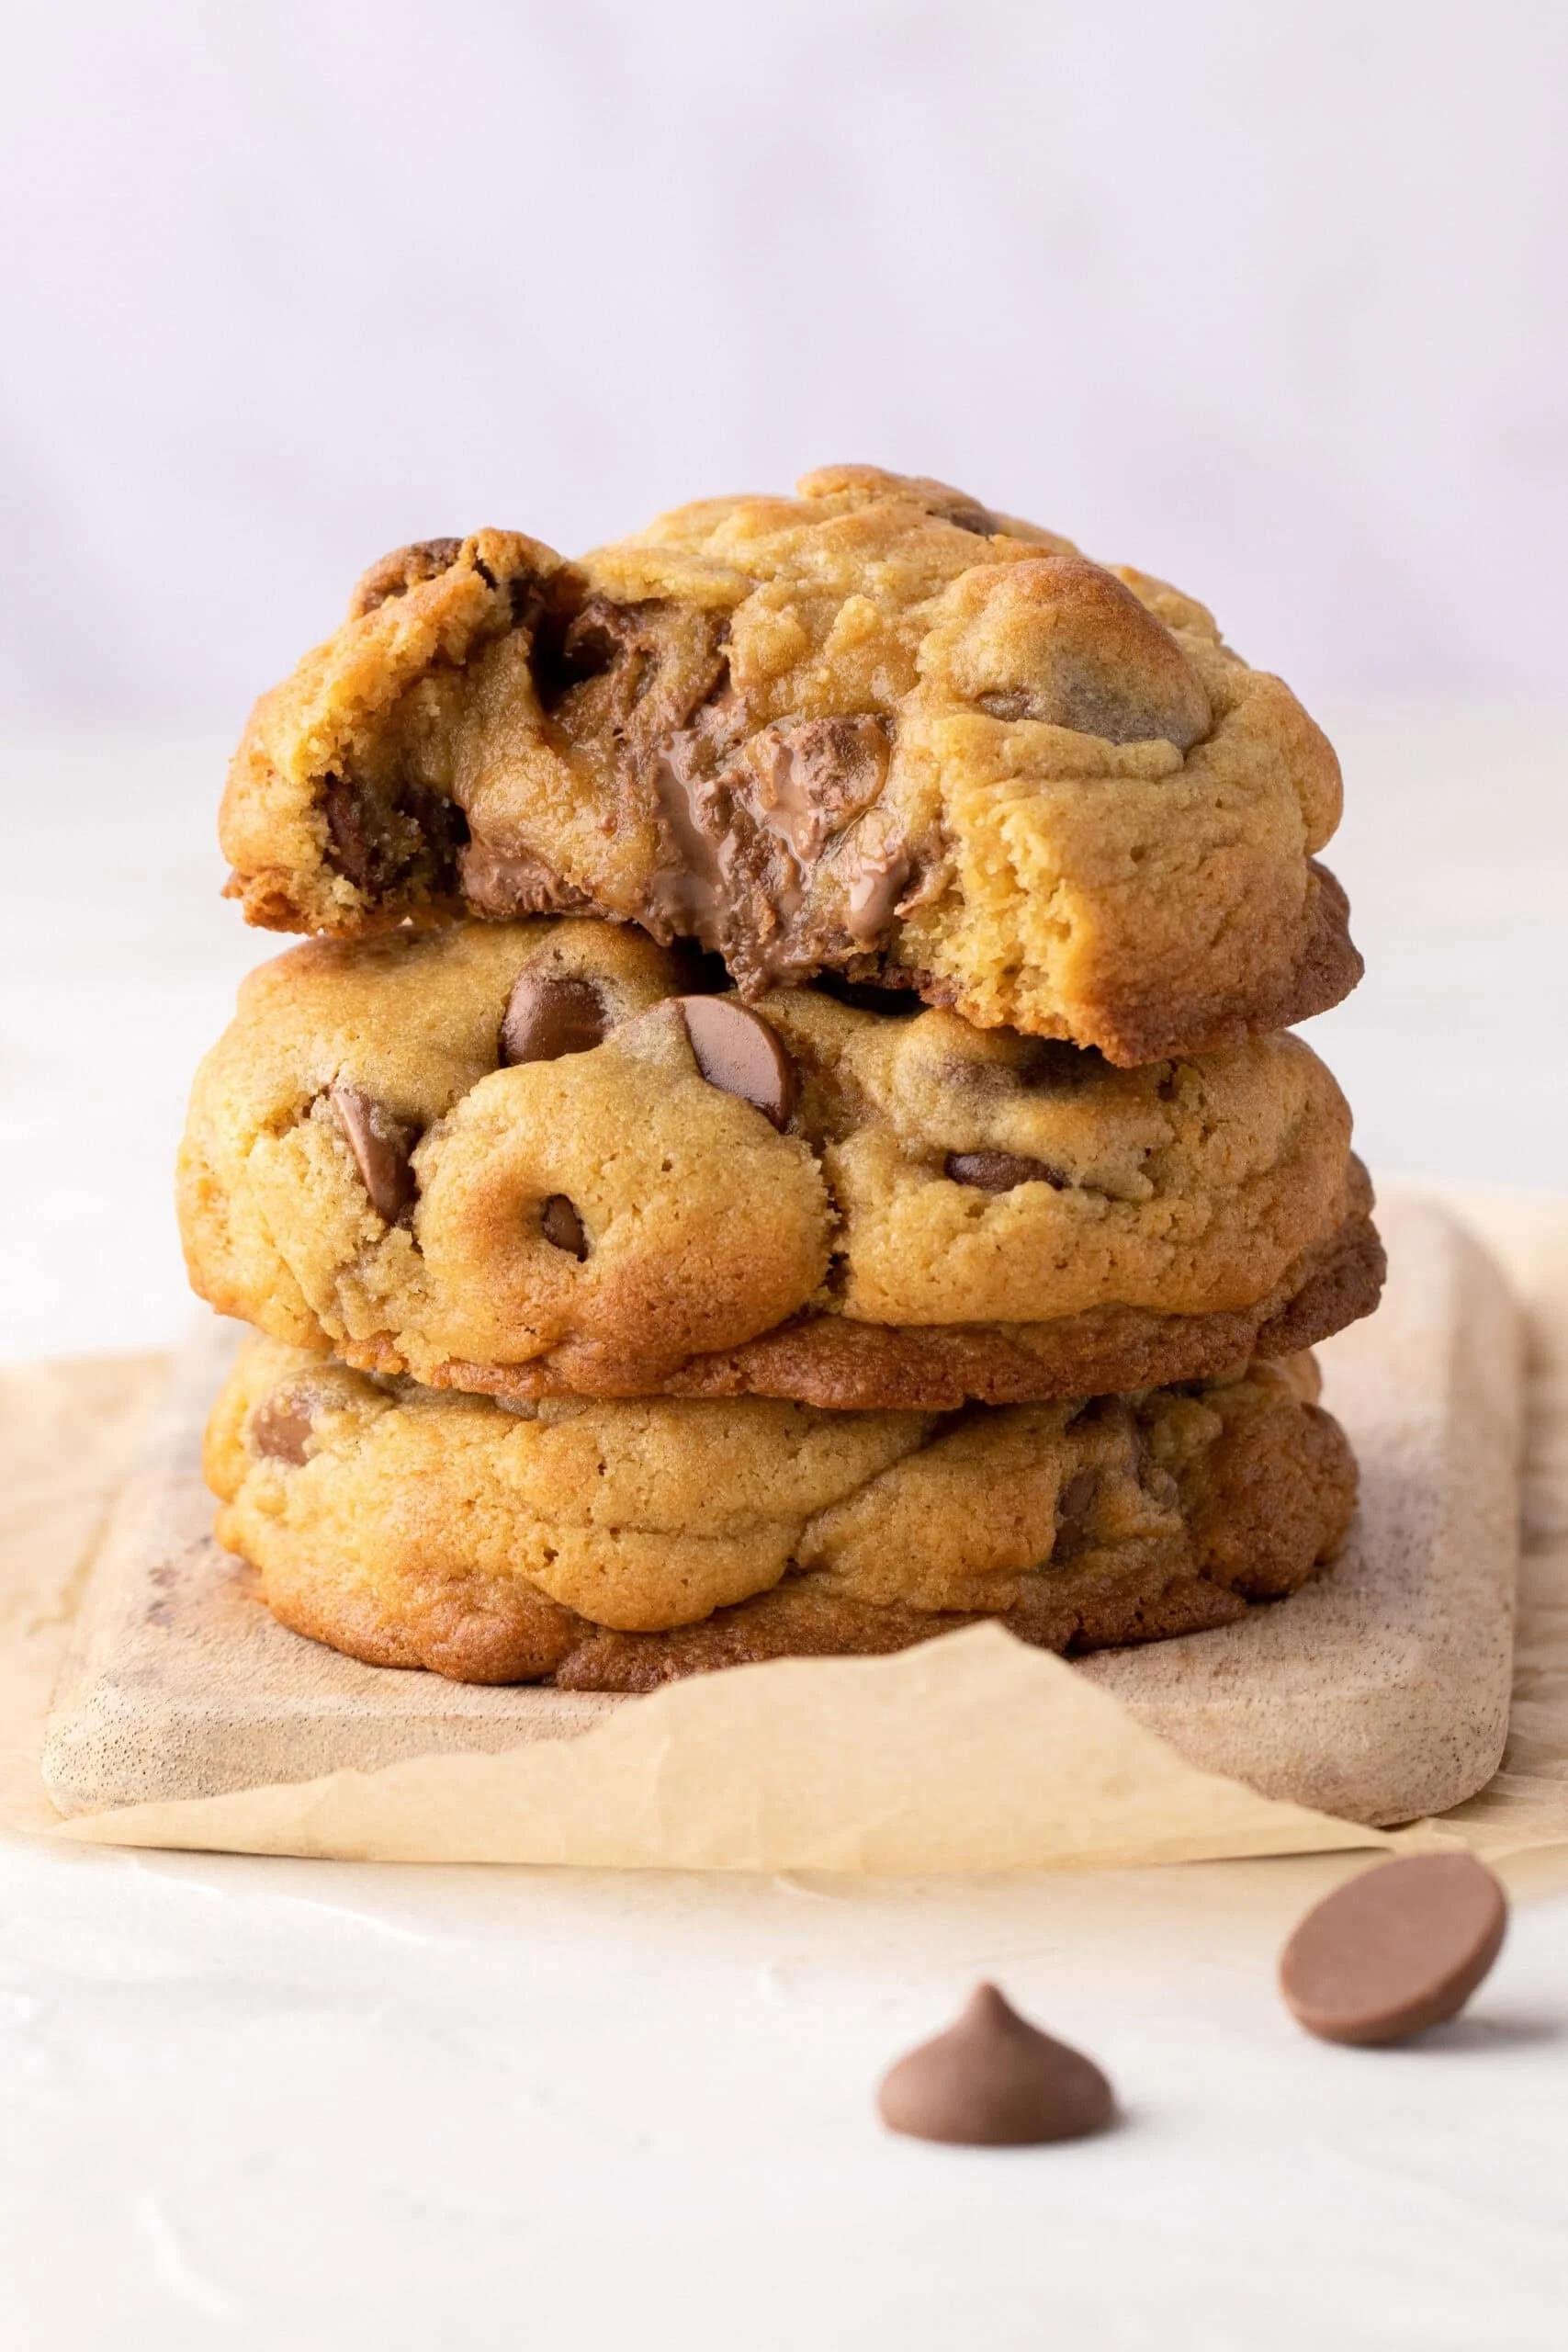
Thick, homemade chocolate chip cookies with melted chocolate chunks.

Thick Chocolate Chip Cookies are a classic treat that can warm anyone’s heart. There’s something special about biting into a soft, chewy cookie filled with gooey chocolate chips. These cookies are perfect for sharing with friends and family or enjoying all by yourself, maybe with a glass of cold milk. With their rich flavor and satisfying texture, it’s no wonder why they are a crowd-pleaser. Baking a batch of these cookies is an exciting experience that fills your kitchen with mouthwatering aromas. So grab your apron, and let’s get ready to whip up some delicious Thick Chocolate Chip Cookies!

how to prepare Thick Chocolate Chip Cookies

Start by gathering your ingredients. You will need all-purpose flour, baking soda, brown sugar, granulated sugar, salt, unsalted butter, vanilla extract, and chocolate chips. Here’s how to make them:

  1. Preheat your oven to 350°F (175°C).
  2. In a bowl, mix together the flour and baking soda, then set it aside.
  3. In a large mixing bowl, cream together the butter, brown sugar, and granulated sugar until it’s light and fluffy.
  4. Add in the vanilla extract and eggs, mixing well.
  5. Gradually add the dry ingredients to the wet ingredients, stirring until just combined.
  6. Fold in the chocolate chips.
  7. Scoop tablespoons of cookie dough onto a baking sheet lined with parchment paper.
  8. Bake for about 10-12 minutes, or until the edges are golden brown.
  9. Let them cool for a few minutes on the baking sheet before transferring to a wire rack to cool completely.

Thick Chocolate Chip Cookies

Why You’ll Love Thick Chocolate Chip Cookies

There are many reasons to love these cookies. The texture is chewy on the inside and slightly crispy on the edges. Each bite is packed with melted chocolate goodness that makes you want to reach for another cookie (or two!). These cookies are also incredibly easy to make. You don’t need fancy techniques or hard-to-find ingredients. Plus, the satisfaction of baking your treats is unmatched. Whether you’re baking for a special occasion or just because, these cookies will win everyone’s heart.

tips for success

  1. Use Room Temperature Ingredients: Make sure your butter and eggs are at room temperature as it helps in achieving a smooth dough.
  2. Don’t Overmix: Once you add the dry ingredients, mix until just combined. Overmixing can lead to tough cookies.
  3. Chill the Dough: For thicker cookies, chill the dough for about 30 minutes before baking. This helps them hold their shape better.
  4. Experiment with Chocolate: Feel free to mix in different types of chocolate chips, like dark chocolate or white chocolate, for extra flavor.

Serving Suggestions

Thick Chocolate Chip Cookies are great on their own, but you can take them to the next level! Serve them warm with a scoop of vanilla ice cream for a delicious dessert. Pair them with a cup of coffee or tea for an afternoon snack. You can also pack them up in a pretty box as a thoughtful gift for friends or family.

FAQs

  1. Can I use whole wheat flour?
    Yes, you can substitute some of the all-purpose flour with whole wheat flour, but it might change the texture slightly.

  2. How should I store the cookies?
    Store them in an airtight container at room temperature for up to a week. You can also freeze them for longer storage.

  3. Can I add nuts to the recipe?
    Absolutely! Feel free to add chopped nuts like walnuts or pecans to the dough for added crunch and flavor.

Baking Thick Chocolate Chip Cookies is a delightful way to spend your day. So gather your ingredients and get ready to indulge in these yummy bites of joy!

Thick Chocolate Chip Cookies

Deliciously soft and chewy cookies filled with gooey chocolate chips, perfect for sharing or enjoying alone.

Dry Ingredients

  • 2 cups all-purpose flour (Sifted for best results)
  • 1 teaspoon baking soda
  • 1 teaspoon salt

Wet Ingredients

  • 1 cup unsalted butter (At room temperature)
  • 3/4 cup brown sugar (Packed)
  • 3/4 cup granulated sugar
  • 1 teaspoon vanilla extract
  • 2 large eggs (At room temperature)

Add-ins

  • 2 cups chocolate chips (Use semi-sweet or your favorite type)

Preparation

  1. Preheat your oven to 350°F (175°C).
  2. In a bowl, mix together the flour and baking soda, then set aside.
  3. In a large mixing bowl, cream together the butter, brown sugar, and granulated sugar until light and fluffy.
  4. Add in the vanilla extract and eggs, mixing well.
  5. Gradually add the dry ingredients to the wet ingredients, stirring until just combined.
  6. Fold in the chocolate chips.
  7. Scoop tablespoons of cookie dough onto a baking sheet lined with parchment paper.

Baking

  1. Bake for about 10-12 minutes, or until the edges are golden brown.
  2. Let them cool for a few minutes on the baking sheet before transferring to a wire rack to cool completely.

For thicker cookies, chill the dough for about 30 minutes before baking. Feel free to mix in different types of chocolate chips or chopped nuts for extra flavor.

Dessert, Snack
American
Baking, Chocolate Chip Cookies, Cookies, Dessert, Sweet Treats

Creamy Salmon Asparagus Pasta

Creamy salmon asparagus pasta garnished with fresh herbs in a bowl.

Making Creamy Salmon Asparagus Pasta is easier than you might think! Start by boiling your favorite pasta according to the package instructions. While that cooks, sauté fresh asparagus in a bit of olive oil until tender. Add pieces of cooked salmon and let them warm through. Now, for the creamy part, mix together heavy cream, garlic, lemon juice, and some grated Parmesan cheese in a separate bowl. Once the pasta is done, drain it, and then toss everything together in the pan. You can adjust the seasoning with salt and pepper. In just a short time, you’ll have a delicious and creamy pasta dish to share!

Creamy Salmon Asparagus Pasta

Why You’ll Love Creamy Salmon Asparagus Pasta

This dish is truly a crowd-pleaser! The creamy sauce pairs perfectly with the tender asparagus and flaky salmon, creating a wonderful mix of flavors. It’s rich, comforting, and feels fancy enough for a special dinner or date night. Plus, it’s packed with protein and veggies, making it a balanced meal. Who wouldn’t love a plate of this delightful pasta? It’s a comforting hug in a bowl that you’ll want to make again and again.

Tips for Success

To make sure your Creamy Salmon Asparagus Pasta turns out perfect, here are a few tips. First, don’t overcook the pasta; it should have a slight bite to it, known as al dente. Second, use fresh asparagus for the best texture and flavor. If you like a bit of spice, add some red pepper flakes to the sauce. Finally, feel free to swap the salmon for another fish or even grilled chicken if you prefer.

Serving Suggestions

Serve your Creamy Salmon Asparagus Pasta with a simple green salad for a fresh contrast. A slice of crusty bread or garlic bread would be great, too, to mop up any leftover sauce. And don’t forget a glass of white wine, like a crisp Sauvignon Blanc, to elevate your meal!

FAQs

Can I use canned salmon?

Yes, canned salmon works well too. Just drain it and flake it into the pasta towards the end of cooking.

Can I make this pasta ahead of time?

While it’s best enjoyed fresh, you can prepare the sauce ahead and store it in the fridge. Just heat it up before mixing it with the pasta.

What can I substitute for heavy cream?

If you’re looking for a lighter option, you can use half-and-half or a dairy-free cream alternative, but the sauce will be less rich.

Get ready to enjoy a plate of deliciousness with this Creamy Salmon Asparagus Pasta! It’s tasty, satisfying, and simply fun to make. Grab your ingredients and let’s get cooking!

Creamy Salmon Asparagus Pasta

A rich and comforting pasta dish featuring creamy sauce, fresh asparagus, and flaky salmon, perfect for a special dinner or date night.

Pasta and Veggies

  • 8 ounces pasta (your choice) (Cook according to package instructions)
  • 1 bunch fresh asparagus (Trimmed and cut into pieces)
  • 1 tablespoon olive oil (For sautéing asparagus)

Creamy Sauce

  • 1 cup heavy cream (Can substitute with half-and-half or dairy-free cream alternative)
  • 2 cloves garlic (Minced)
  • 2 tablespoons lemon juice (Freshly squeezed)
  • 1/2 cup grated Parmesan cheese (For added creaminess and flavor)

Salmon

  • 2 cups cooked salmon (Flaked or in pieces)

Seasoning

  • salt to taste
  • pepper to taste
  • red pepper flakes (optional) (For added spice)

Cooking the Pasta and Asparagus

  1. Boil pasta according to package instructions until al dente.
  2. While the pasta cooks, heat olive oil in a pan and sauté asparagus until tender.

Preparing the Sauce

  1. In a separate bowl, mix together heavy cream, minced garlic, lemon juice, and grated Parmesan cheese.

Combining Ingredients

  1. Once the pasta is cooked, drain it and add it to the pan with the asparagus.
  2. Add the cooked salmon and creamy sauce to the pan, tossing everything together.
  3. Adjust seasoning with salt, pepper, and red pepper flakes if desired.

For best results, serve immediately. You can store the sauce in the fridge and reheat before adding to pasta. Enjoy with a fresh salad and crusty bread.

Dinner, Main Course
Italian
Asparagus Dish, Comfort Food, Creamy Pasta, Easy Dinner, Salmon Pasta

Fluffy Honey Butter Pull-Apart Rolls with Browned Butter Glaze

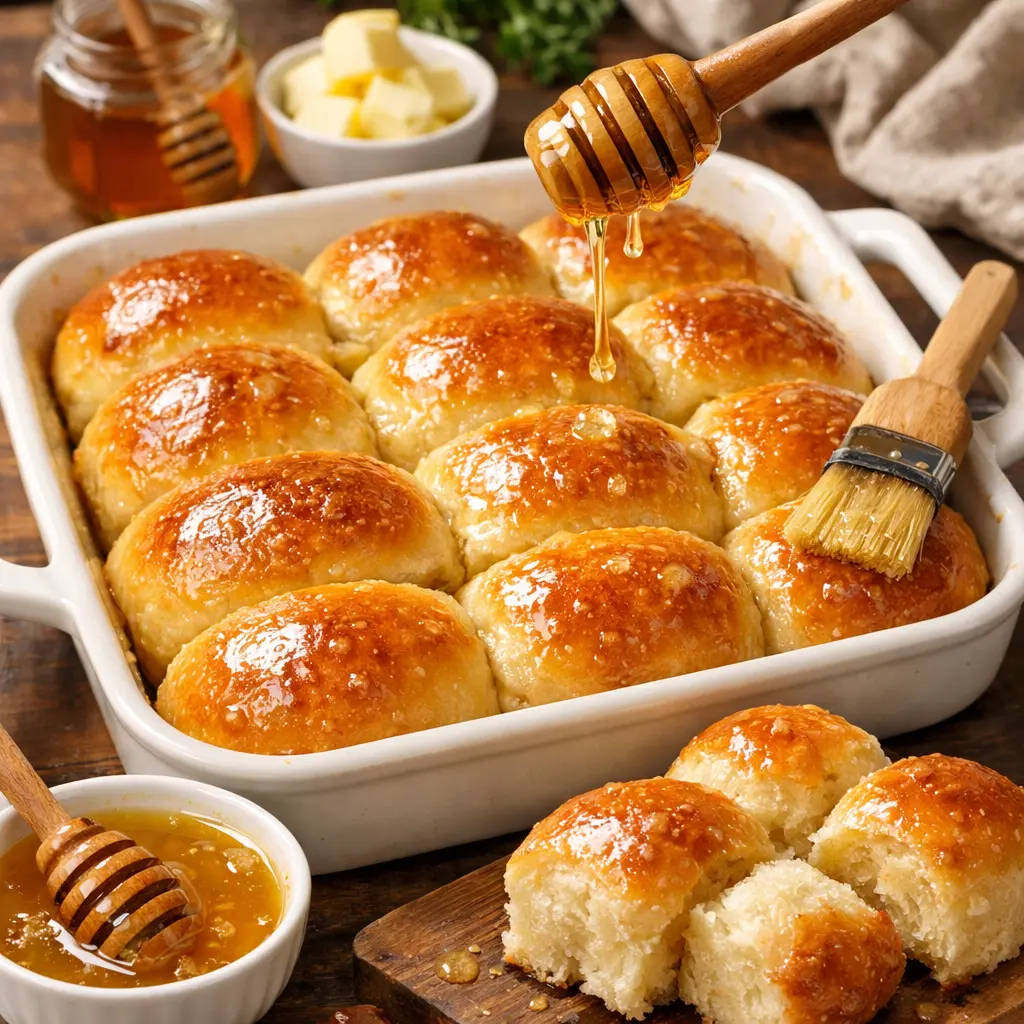
honey butter

Honey Butter Pull-Apart Rolls are a warm, comforting treat that comes together quickly and delivers incredible flavor. Light, airy, and infused with the sweetness of honey and the richness of butter, these rolls easily become the highlight of any meal. Fresh from the oven, they are soft to the touch and wonderfully fragrant, making them almost impossible to resist. They are perfect for family dinners, holiday tables, or relaxed evenings at home. Their pull-apart style also makes them fun to share, allowing everyone to grab a piece. Whether you’re an experienced baker or just starting out in the kitchen, this recipe is simple, satisfying, and guaranteed to impress.

How to Prepare Honey Butter Pull-Apart Rolls

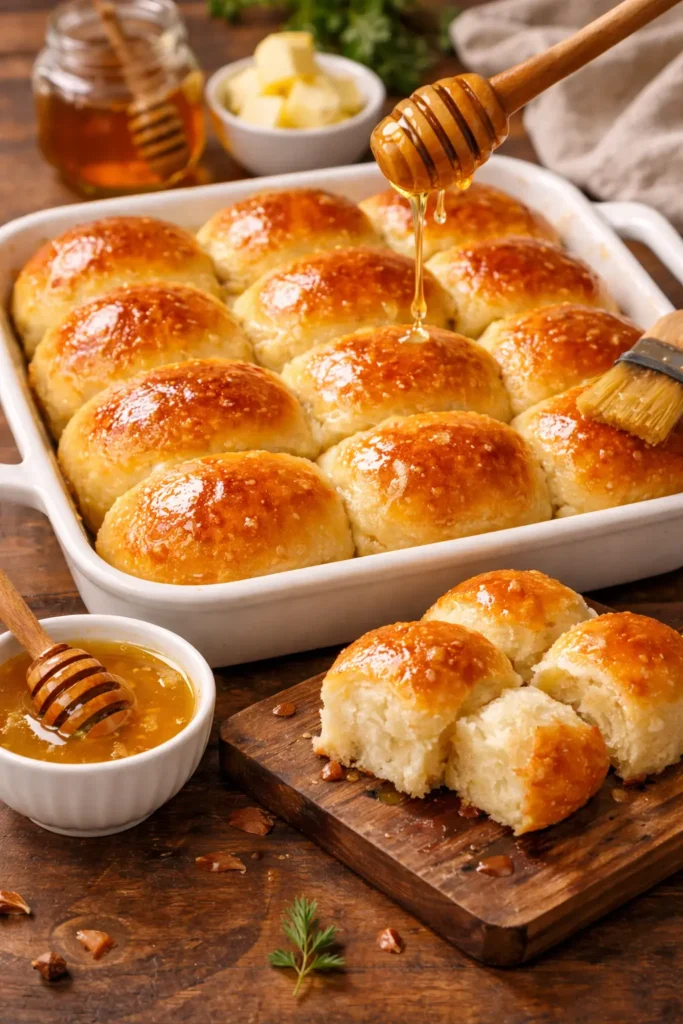
honey butter dinner

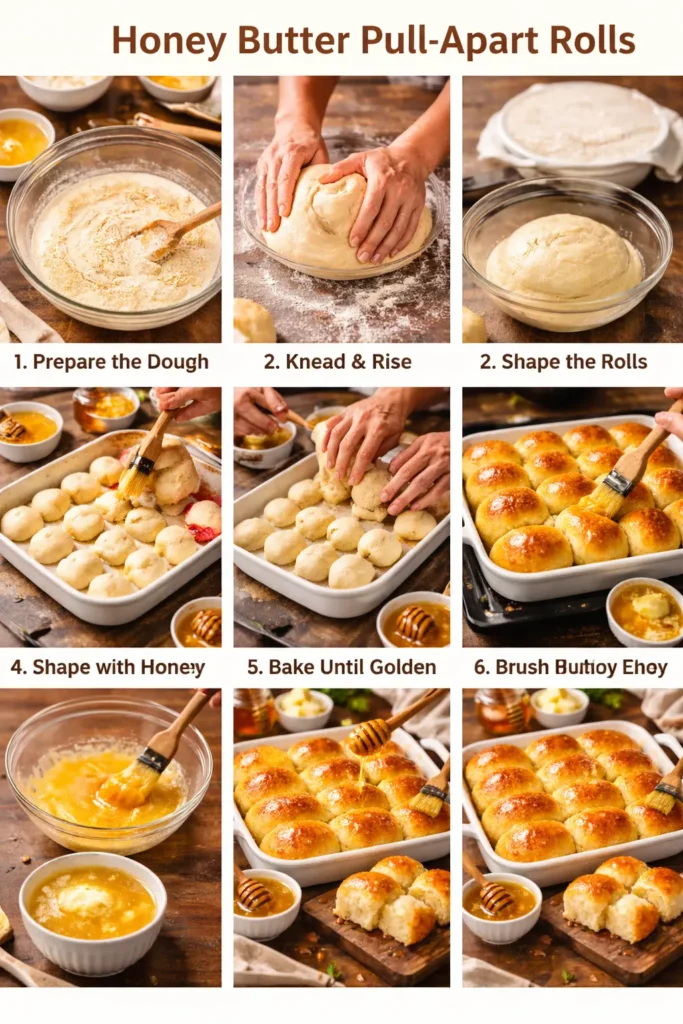
Begin by gathering all the ingredients you’ll need: warm milk, sugar, active dry yeast, butter, flour, and salt. In a mixing bowl, stir together the warm milk and sugar, then sprinkle the yeast over the top. Allow the yeast to activate for about five minutes until it becomes slightly foamy. Melt the butter and add it to the yeast mixture.

Gradually mix in the flour and salt until a soft dough forms. Transfer the dough to a lightly floured surface and knead it for about 5–7 minutes, until it becomes smooth and elastic. Place the dough into a greased bowl, cover it, and let it rise for about one hour or until it doubles in size.

After the dough has risen, gently punch it down and divide it into small, even balls. Arrange the dough balls in a greased baking dish. To prepare the honey butter topping, melt butter and stir in honey, then brush the mixture generously over the rolls. Cover the dish and allow the rolls to rise again for about 30 minutes.

Bake in a preheated oven at 350°F (180°C) for 25–30 minutes, or until the tops turn golden brown. Let the rolls cool slightly before serving, and brush them with an additional layer of honey butter for extra flavor and shine.

Honey Butter Pull-Apart Rolls: 5 Steps to Deliciousness

Why You’ll Love Honey Butter Pull-Apart Rolls

These rolls are a wonderful addition to almost any meal. They are incredibly soft and fluffy, with a delightful balance of sweetness from honey and richness from butter. Their texture makes them easy to pull apart, which adds a playful, shareable element to the dish.

Another reason people love these rolls is their versatility. They complement savory dishes beautifully but are just as enjoyable on their own. The comforting aroma that fills the kitchen while they bake is another bonus, instantly creating a warm and welcoming atmosphere. Whether served at family dinners, gatherings with friends, or holiday meals, they are always a crowd favorite.

Tips for Success

For the best results, a few simple tips can make all the difference. Start by making sure your milk is warm but not too hot. If the milk is too hot, it can deactivate the yeast and prevent the dough from rising. Ideally, it should feel warm to the touch.

Kneading the dough properly is also important because it develops gluten, which helps create the soft and airy texture these rolls are known for. Take your time with this step to ensure the dough becomes smooth and elastic.

Allowing the dough to rise in a warm environment will help it double in size and create light, fluffy rolls. Patience during the rising stages is key to achieving the perfect texture. Finally, brushing the rolls with honey butter immediately after baking gives them a beautiful glossy finish and enhances their sweet, buttery flavor.

Serving Suggestions

Honey Butter Pull-Apart Rolls are incredibly versatile and pair well with many types of meals. They make an excellent side dish for roasted chicken, beef stew, or a hearty vegetable soup. Their soft texture and sweet flavor complement savory foods perfectly.

For a lighter option, serve them alongside a fresh salad for lunch. They can also be part of a breakfast or brunch spread, paired with scrambled eggs or used as a base for eggs Benedict.

These rolls also work wonderfully as a simple snack. A drizzle of extra honey or a spoonful of fruit jam can turn them into a sweet treat. No matter how you serve them, their warm, buttery taste is sure to be a hit.

FAQs

Can I prepare the dough in advance?
Yes, you can make the dough ahead of time. After the first rise, cover the dough and refrigerate it overnight. When ready to bake, let it come to room temperature before shaping and baking the rolls.

Can these rolls be frozen?
Yes. Once baked and completely cooled, wrap the rolls tightly in foil or store them in freezer bags. When ready to serve, thaw them overnight in the refrigerator and warm them in the oven.

Can I customize the flavor?
Absolutely. You can add herbs or spices to the dough for a savory variation, or mix in shredded cheese. For a different sweet twist, you can substitute maple syrup in place of honey.

These Honey Butter Pull-Apart Rolls are simple, comforting, and full of flavor—perfect for sharing and guaranteed to become a favorite in your kitchen.

Honey Butter Pull-Apart Rolls

Warm, fluffy rolls infused with honey and butter, perfect for any meal and fun to share.

Dough Ingredients

  • 1 cup warm milk (Should be warm to the touch, not hot.)
  • 2 tbsp sugar
  • 2 tsp active dry yeast
  • 1/4 cup butter, melted (For the dough and for topping.)
  • 3 cups flour (All-purpose flour recommended.)
  • 1 tsp salt

Honey Butter Topping

  • 1/4 cup butter, melted (For topping the rolls.)
  • 1/4 cup honey

Preparation of Dough

  1. In a mixing bowl, stir together the warm milk and sugar. Sprinkle the yeast over the top and allow to activate for about five minutes until foamy.
  2. Melt the butter and add it to the yeast mixture.
  3. Gradually mix in the flour and salt until a soft dough forms.
  4. Transfer the dough to a lightly floured surface and knead for 5–7 minutes until smooth and elastic.
  5. Place the dough into a greased bowl, cover, and let rise for about one hour or until doubled in size.

Shaping and Second Rise

  1. After the dough has risen, gently punch it down and divide into small, even balls.
  2. Arrange the dough balls in a greased baking dish.
  3. Melt butter for topping and stir in honey, then brush generously over the rolls.
  4. Cover the dish and allow the rolls to rise again for about 30 minutes.

Baking

  1. Preheat the oven to 350°F (180°C).
  2. Bake rolls for 25–30 minutes or until tops are golden brown.
  3. Let cool slightly before serving, and brush with additional honey butter for extra flavor.

Kneading the dough properly is crucial for developing gluten, leading to a fluffy texture. Brush rolls with honey butter immediately after baking for a glossy finish.

Side Dish, Snack
American
Baking, Comfort Food, dinner rolls, Honey Butter Rolls, Pull-Apart Rolls

Pesto Grilled Cheese Sandwich with crispy Basil Flavor

Pesto Grilled Cheese Sandwich

Pesto grilled cheese sandwich is simple comfort food. Bread, butter, and melted cheese create a warm and crispy bite. When you add pesto, the sandwich changes in a great way. The basil, garlic, and olive oil give it a fresh taste that pairs well with melted cheese.

I first tried a pesto grilled cheese on a rainy afternoon when I wanted something quick but special. I spread pesto on sourdough bread, added cheese, and grilled it slowly in a pan. The result surprised me. The bread turned golden and crisp, while the pesto gave the sandwich a rich herbal flavor.

This guide shows you how to make a perfect pesto grilled cheese sandwich at home. You will also learn the best bread, cheese choices, helpful cooking tips, and tasty variations.

What Is a Pesto Grilled Cheese Sandwich?

A pesto grilled cheese sandwich is a twist on the classic grilled cheese. It includes pesto sauce along with cheese between slices of bread. The sandwich cooks in a pan until the bread turns crisp and the cheese melts.

The pesto adds a bold taste made from basil, garlic, olive oil, nuts, and parmesan. This simple change makes the sandwich more flavorful while still easy to cook. Many recipes use only a few ingredients and take about 15 minutes to prepare.

Why This Sandwich Works So Well

The pesto grilled cheese sandwich works because of balance.

  • Crispy bread gives texture
  • Melted cheese adds creaminess
  • Pesto brings fresh herbal flavor

Each bite has crunch, warmth, and rich taste. The basil also cuts through the richness of the cheese, so the sandwich never feels heavy.

Another reason people love this recipe is its simplicity. Most kitchens already have the ingredients.

Ingredients for Pesto Grilled Cheese Sandwich

You only need a few ingredients to make this sandwich.

Basic Ingredients

  • 2 slices of bread (sourdough, white, or Italian)
  • 2 tablespoons pesto
  • 2 slices cheese (mozzarella, provolone, or cheddar)
  • 1–2 tablespoons butter

Optional Add-Ins

  • Sun-dried tomatoes
  • Fresh tomato slices
  • Turkey slices
  • Avocado
  • Spinach or arugula

Some recipes also include sun-dried tomatoes for extra flavor and texture.

Best Bread for Pesto Grilled Cheese

The bread plays a big role in the final taste. You want bread that becomes crisp but stays soft inside.

1. Sourdough

Sourdough is a favorite choice. Its mild tang pairs well with pesto and cheese.

2. Italian Bread

Italian bread has a light texture and grills nicely.

3. Rustic White Bread

A thick slice of bakery bread also works well.

Bread Tip

Slice bread about ½ inch thick. Thin slices can burn before the cheese melts.

Best Cheese for This Sandwich

The cheese should melt smoothly and pair well with pesto.

Mozzarella

Mozzarella melts well and gives a creamy texture.

Provolone

Provolone adds a mild but rich flavor.

Cheddar

Cheddar brings a sharper taste and strong melt.

Cheese Mix

Some cooks mix two cheeses for better flavor and melt. For example:

  • Mozzarella + cheddar
  • Provolone + mozzarella

How to Make a Pesto Grilled Cheese Sandwich

 Pesto Grilled Cheese Sandwich

Follow these steps for a crispy and cheesy sandwich.

Step 1: Prepare the Bread

Spread butter on one side of each slice of bread. The butter helps the bread brown and become crisp.

Step 2: Add the Pesto

Turn the bread over and spread pesto on the inside surface.

Step 3: Add Cheese

Place cheese slices on top of the pesto.

If using extra ingredients like tomatoes or turkey, place them over the cheese.

Step 4: Heat the Pan

Place a skillet on medium heat.

Step 5: Cook the Sandwich

Place the sandwich in the pan with the butter side down.

Cook for 3–5 minutes until the bottom becomes golden brown.

Step 6: Flip Carefully

Flip the sandwich with a spatula and cook the other side.

The cheese should melt while the bread becomes crisp.

Step 7: Slice and Serve

Remove from the pan. Let it rest for one minute, then slice and serve warm.

Homemade Basil Pesto (Quick Recipe)

Store-bought pesto works well, but homemade pesto tastes even better.

Ingredients

  • 1 cup fresh basil leaves
  • ¼ cup olive oil
  • ¼ cup parmesan cheese
  • 2 tablespoons pine nuts or walnuts
  • 2 garlic cloves
  • Salt and pepper

Instructions

  1. Place all ingredients in a food processor.
  2. Blend until smooth.
  3. Taste and adjust salt.

This pesto keeps in the fridge for about 3–4 days.

Helpful Cooking Tips

Small tricks can make your sandwich much better.

Use Low to Medium Heat

High heat burns the bread before the cheese melts.

Press the Sandwich Lightly

Press gently with a spatula while cooking. This helps the cheese melt evenly.

Use Soft Butter

Soft butter spreads easily and helps the bread cook evenly.

Shred Cheese for Faster Melt

Shredded cheese melts faster than thick slices.

Delicious Pesto Grilled Cheese Variations

You can change this sandwich in many ways.

1. Tomato Pesto Grilled Cheese

Add fresh tomato slices for a bright flavor.

2. Turkey Pesto Grilled Cheese

Add sliced turkey for extra protein and a heartier sandwich.

3. Sun-Dried Tomato Version

Sun-dried tomatoes add sweetness and a deep tomato flavor.

4. Avocado Pesto Grilled Cheese

Add avocado slices for a creamy texture.

5. Chicken Pesto Grilled Cheese

Add grilled chicken pieces for a filling meal.

What to Serve With Pesto Grilled Cheese

This sandwich pairs well with simple sides.

Tomato Soup

Tomato soup and grilled cheese are a classic match.

Fresh Salad

A light salad balances the rich sandwich.

Roasted Vegetables

Roasted broccoli, carrots, or peppers add color and flavor.

Chips or Fries

For a casual meal, serve with potato chips or fries.

Common Mistakes to Avoid

Many people rush grilled cheese and miss great flavor.

Cooking on High Heat

This burns the bread and leaves cheese unmelted.

Too Much Pesto

Too much pesto can make the sandwich greasy.

Thin Bread

Thin bread can break when flipping.

Not Letting It Rest

Let the sandwich rest for one minute before cutting so the cheese stays inside.

Nutrition Overview

Nutrition will depend on the bread and cheese used.

A typical pesto grilled cheese sandwich contains:

  • Calories: 350–500
  • Protein: 15–20 g
  • Fat: 20–30 g
  • Carbohydrates: 30–40 g

Adding turkey or chicken increases the protein.

Why This Recipe Is Perfect for Quick Meals

The pesto grilled cheese sandwich is great for busy days.

Reasons people love it:

  • Ready in about 15 minutes
  • Uses simple ingredients
  • Works for lunch or dinner
  • Easy to adjust with extra ingredients

Many quick recipes use only five ingredients, which makes the sandwich simple but full of flavor.

Storage and Reheating Tips

Grilled cheese tastes best fresh, but you can store leftovers.

Storage

Wrap the sandwich and keep it in the fridge for up to 2 days.

Reheating

Reheat in a skillet over low heat until warm.

Avoid microwaving because the bread becomes soft.

Final Thoughts

The pesto grilled cheese sandwich turns a simple comfort meal into something more exciting. The mix of crispy bread, melted cheese, and basil pesto creates a sandwich that feels both cozy and flavorful.

It works well for lunch, dinner, or even a quick late-night snack. You can keep it classic with only cheese and pesto or add ingredients like turkey, tomatoes, or avocado.

Once you try this sandwich, it may become a regular favorite in your kitchen. The recipe is quick, easy, and full of flavor in every bite.

Pesto Grilled Cheese Sandwich

  • small bowl
  • Paper towels
  • Cutting board
  • spatula
  • 2 slices bread
  • 2 tablespoons pesto
  • 2 slices mozzarella cheese
  • 1 tablespoon butter
  1. Prepare Your Pesto Aioli

  2. In a small bowl, whisk together the 4 heaped tablespoons of Pesto, 2 tablespoons of Mayonnaise, and 1 teaspoon of Fresh Lemon Juice until the mixture is smooth and creamy. This special internal spread is the key to our unique twist and incredible texture.
  3. Prep Your Ingredients
  4. Ensure your Fresh Mozzarella slices are patted thoroughly dry with paper towels. Cook and dice your Bacon according to your preference. Pat dry and dice your Sun Dried Tomatoes. Having all your ingredients ready and prepped before you start cooking ensures a smooth and enjoyable process.
  5. Set Up Your Pan
  6. Place two slices of Sourdough Bread, or four if your frying pan is large enough, directly into a cold frying pan with the heat OFF. This allows the bread to heat evenly as the pan warms up. Spread one side of each bread slice generously with Butter, then flip them so the buttered sides are now facing down in the pan.
  7. Assemble the First Layer
  8. On the unbuttered side of each bread slice, thinly and evenly spread a generous layer of your prepared Pesto Aioli. This unique twist is what will give us ultimate crispiness and a burst of flavor inside your pesto grilled cheese sandwich.
  9. Build Your Sandwich
  10. Top the aioli-spread bread with approximately 3-4 thin slices of Fresh Mozzarella. If desired, you can add 1 heaped tablespoon of the remaining Pesto over the mozzarella, or just rely on the aioli for your pesto flavor. Scatter the diced Sun Dried Tomatoes and diced Bacon evenly over the pesto. Add another layer of Mozzarella slices; this helps to bind all the delicious fillings together. Finally, gently place the second slice of bread on top, with its aioli-side facing down onto the cheese.
  11. The Squish & Butter
  12. Gently but firmly “squish down” each sandwich with your hands. This important step ensures that all the filling ingredients make good contact with each other and the bread, promoting even melting and preventing a loose, messy sandwich. Now, spread the top slice of each sandwich generously with Butter.
  13. Grill to Golden Perfection
  14. Turn the heat to a precise medium-low, aiming for a temperature range of approximately 275-300°F or 135-150°C. Fry both sides until each is beautifully golden-brown and wonderfully crispy. The Fresh Mozzarella should be completely melted through the center and delightfully gooey. This usually takes about 3-5 minutes per side. Watch closely for visual cues such as a deep golden color and the cheese bubbling slightly at the edges.
  15. Serve Immediately
  16. Carefully transfer the cooked sandwiches to a cutting board. Allow them to rest for just a minute or two. This brief rest helps the cheese set slightly and prevents all the gooey goodness from spilling out. Then, slice and serve your hot pesto grilled cheese sandwich right away.

lunch, sandwich
American

Overnight Eggs Benedict Casserole

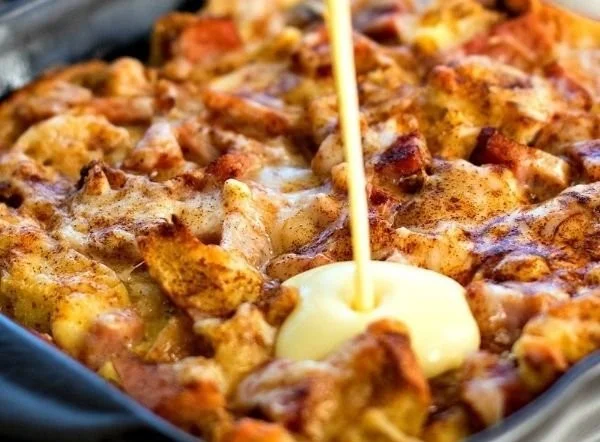
Deliciously baked Overnight Eggs Benedict Casserole ready to serve

Making Overnight Eggs Benedict Casserole is simple and rewarding. Start by gathering your ingredients: bread, eggs, milk, heavy cream, and a few spices. You’ll also need Canadian bacon and hollandaise sauce for that classic Eggs Benedict flavor.

Begin by tearing your bread into pieces and placing it in a greased baking dish. Next, cook the Canadian bacon until it’s slightly crispy, then layer it over the bread. In a bowl, whisk together eggs, milk, heavy cream, salt, and pepper. Pour this mixture over the bread and bacon, ensuring even coverage. Cover the dish with plastic wrap or foil and refrigerate it overnight, allowing the flavors to meld.

When you’re ready to bake, preheat your oven and remove the cover from the dish. Bake until the top is golden and the casserole is set, which usually takes about 45 minutes. Meanwhile, prepare your hollandaise sauce on the stovetop, stirring gently until it’s creamy.

Serve your casserole warm, drizzling the rich hollandaise sauce on top. Each bite is a delightful mix of flavors that will transport you straight to brunch heaven.

Why You’ll Love Overnight Eggs Benedict Casserole

Overnight Eggs Benedict Casserole is an absolute delight for anyone who enjoys a hearty breakfast. It combines all the classic flavors of traditional Eggs Benedict but in an easy-to-make casserole form. The creamy eggs and savory Canadian bacon create a satisfying dish that’s perfect for any occasion.

This casserole is not only delicious but also incredibly convenient. You prepare it the night before, so you can spend your morning relaxing rather than cooking. Plus, it’s a fantastic way to impress guests at brunch or family gatherings. With one dish, you can serve a crowd without the stress. Who wouldn’t love that?

Tips for Success

To ensure your Overnight Eggs Benedict Casserole turns out perfect, follow some simple tips. First, use day-old bread to help it absorb the egg mixture better. This helps create a nice, custardy texture. If you don’t have Canadian bacon, regular bacon or ham work just fine.

Don’t be afraid to add other ingredients, like spinach or tomatoes, for extra flavor and nutrients. Make sure to let the casserole sit in the refrigerator for at least eight hours. This allows the bread to soak up the egg mixture fully. Finally, keep an eye on it while baking; every oven is a little different. Bake until it’s lightly golden and set in the middle.

Serving Suggestions

Overnight Eggs Benedict Casserole is versatile and pairs wonderfully with a range of side dishes. For a brunch spread, consider serving it alongside fresh fruit, like berries or melons. You could also provide sides of crispy breakfast potatoes for added crunch.

A light salad dressed with lemon vinaigrette could complement the meal beautifully, bringing a refreshing touch to the table. For drinks, coffee, mimosas, or fresh juice would be fantastic options that enhance your brunch experience. Whatever you choose to pair with it, this casserole is sure to be the star of the meal.

FAQs

  1. Can I make this casserole ahead of time?
    Yes, it’s designed to be prepared the night before. Simply cover it and refrigerate until you’re ready to bake.
  2. Can I use different types of bread?
    Absolutely, different breads like croissants or sourdough can add a unique flavor and texture to your casserole.
  3. What if I don’t have hollandaise sauce?
    You can serve it with another sauce or enjoy it plain. However, hollandaise adds that classic touch to the dish.
  4. How long does it take to bake?
    Bake the casserole for about 45 minutes at 350°F, or until it is nicely golden and set.
  5. Can I freeze leftovers?
    Yes, you can freeze leftovers in an airtight container. Just reheat them in the oven when you’re ready to enjoy them again.

Overnight Eggs Benedict Casserole

A make-ahead breakfast casserole that combines the classic flavors of Eggs Benedict in a warm, comforting dish perfect for brunch or family gatherings.

Main Ingredients

  • 12 large eggs (Use fresh eggs for the best flavor.)
  • 2 cups milk
  • 1 teaspoon salt
  • 1 teaspoon pepper
  • 4 large English muffins, sliced (Feel free to substitute with other types of bread.)
  • 2 cups diced ham (Use high-quality ham for the best taste.)

For Serving

  • 1 cup hollandaise sauce (Use your favorite recipe or a store-bought version.)
  • 1 tablespoon chopped chives or parsley (For garnishing.)

Preparation

  1. Grease a large baking dish.
  2. In a bowl, whisk together eggs, milk, salt, and pepper.
  3. Layer slices of English muffins in the dish, followed by diced ham.
  4. Pour the egg mixture over the muffins and ham, ensuring everything is well coated.
  5. Cover the dish and let it sit in the fridge overnight.

Baking

  1. In the morning, preheat your oven to 350°F (175°C).
  2. Bake the casserole for about 35-40 minutes until it’s set and golden.
  3. While it’s baking, prepare your favorite hollandaise sauce.
  4. Once done, drizzle the sauce over the baked casserole and serve warm.

Let the casserole soak overnight to meld flavors. Customize with different meats or vegetables. For serving, pair with fresh fruit or a light salad, and mimosas for an extra treat.

Breakfast, Brunch
American
Brunch Recipe, Eggs Benedict, Make-Ahead Breakfast, Overnight Casserole