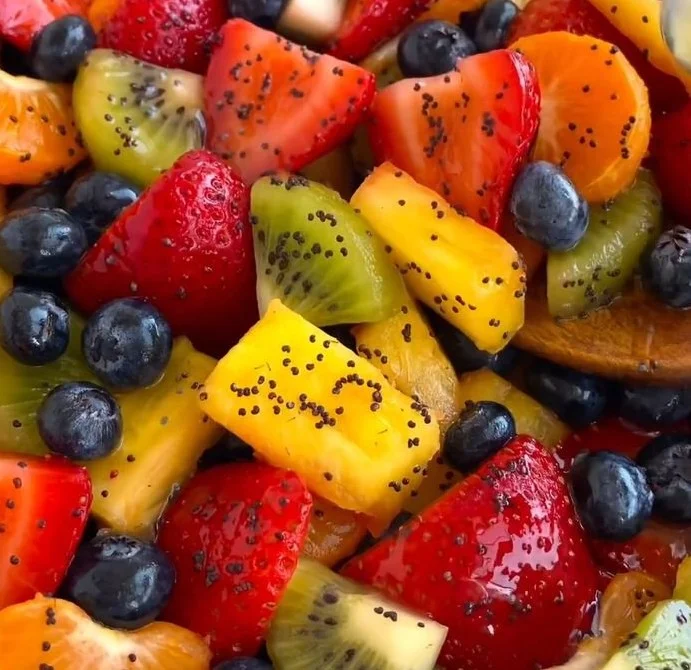
Honey Lime fruit salad(the best)

A vibrant Honey Lime fruit salad featuring assorted fresh fruits in a bowl

Honey Lime Fruit Salad is my absolute Favorite fruit salad. I’ve been making it for years, and it’s always a hit. It works for potlucks, barbecues, family gatherings, weeknight meals, and more.

Do you have a go-to recipe? I have an aunt who hosts all kinds of family events, weddings, baby showers, and more, and there are certain dishes she makes that I always look forward to. A few of her salads and meals show up often, and I can never get enough. I think about them long after the event.

I wouldn’t say I have a signature dish, but this salad is one I turn to again and again. It’s what I bring when taking dinner to a friend, going to a potluck, a picnic, or a favorite things party. It’s reliable, crowd-pleasing, and works for both kids and adults, no matter their preferences.

Honey Lime Fruit Salad checks every box, colorful, full of flavor, sweet, tangy, and beautiful.

A lot of fruit salads feel like a random mix where the ingredients don’t really complement each other or stand out. This one is different. The honey lime dressing ties everything together perfectly, helping the flavors come together in a balanced way while keeping everything working well as a whole.

If you like easy salads, you might also enjoy this paleo grilled chicken cobb salad with honey dijon dressing as a savory option.

How to prepare Honey Lime fruit salad

Ingredients:

  • 2 cups strawberries, hulled and halved
  • 2 cups pineapple, diced
  • 2 kiwis, peeled and sliced
  • 1 cup grapes, halved
  • 1 mango, diced
  • 2 cups seedless watermelon or cantaloupe, cubed
  • 2 tablespoons fresh lime juice
  • 1 tablespoon honey (more to taste)
  • 1 teaspoon poppy seeds
  • Optional, fresh mint leaves for garnish

Directions:

  1. Wash and cut all fruit into bite size pieces. Put fruit in a large bowl.
  2. In a small bowl, mix lime juice and honey until smooth.
  3. Stir in poppy seeds, then taste and add more honey if you like it sweeter.
  4. Pour the dressing over the fruit and toss gently to coat.
  5. Chill the salad for 20 to 30 minutes, this helps the flavors blend.
  6. Garnish with mint leaves, if you want, and serve cold.

Fresh Fruit Salad with Honey Lime Poppy Seed Dressing

Why You’ll Love Honey Lime fruit salad

  • It is full of fresh fruit, so it tastes bright and natural.
  • The honey lime dressing adds sweet and tangy flavors, it is mild and tasty.
  • Poppy seeds add a small, nice texture and look pretty on top.
  • It is easy to change the fruit to what you have on hand.
  • It works as a side dish, snack, or a light dessert.

Tips for success

  • Use ripe fruit for the best flavor. Ripe fruit is sweeter and softer.
  • Cut fruit to similar sizes so each bite is balanced.
  • Make the dressing just before serving to keep fruit fresh and firm.
  • Chill the salad for a short time, do not leave very long or fruit may get watery.
  • If you plan to store it, keep dressing separate and toss right before serving.

Serving Suggestions

  • Serve this salad with plain yogurt or a scoop of vanilla ice cream for a dessert.
  • Pair it with grilled chicken or fish for a light meal.
  • Use it as a topping for pancakes or waffles in the morning.
  • Put it in a mason jar for an easy picnic treat.

Fresh Fruit Salad with Honey Lime Poppy Seed Dressing

FAQs

Q: How long will this fruit salad stay fresh in the fridge? A: It is best the same day, but it will keep well for 1 to 2 days if kept cold and covered.

Q: Can I make the dressing ahead of time? A: Yes, you can make the dressing a day ahead. Keep it in a small jar in the fridge and stir before using.

Q: What fruits work best in this salad? A: Berries, melons, mango, pineapple, grapes, and kiwi work great. Use what is fresh and in season.

Q: Can I use a sweetener other than honey? A: Yes, you can use maple syrup or agave syrup if you prefer.

Q: Is this salad good for kids? A: Yes, most kids like the sweet taste and colorful look. Cut fruit into small pieces for young children.

Conclusion

This Fresh Fruit Salad with Honey Lime is simple, bright, and loved by many for its fresh taste and easy prep. For a full recipe reference and more tips, see Fresh Fruit Salad with Honey-Lime Poppy Seed Dressing.

Honey Lime Fruit Salad

A colorful and flavorful fruit salad dressed with a sweet and tangy honey lime dressing, perfect for any gathering.

Fruits

  • 2 cups strawberries, hulled and halved
  • 2 cups pineapple, diced
  • 2 kiwis peeled and sliced
  • 1 cup grapes, halved
  • 1 unit mango, diced
  • 2 cups seedless watermelon or cantaloupe, cubed

Dressing

  • 2 tablespoons fresh lime juice
  • 1 tablespoon honey (more to taste)
  • 1 teaspoon poppy seeds
  • optional unit fresh mint leaves for garnish

Preparation

  1. Wash and cut all fruit into bite size pieces. Put fruit in a large bowl.
  2. In a small bowl, mix lime juice and honey until smooth.
  3. Stir in poppy seeds, then taste and add more honey if you like it sweeter.
  4. Pour the dressing over the fruit and toss gently to coat.
  5. Chill the salad for 20 to 30 minutes to help the flavors blend.
  6. Garnish with mint leaves if desired, and serve cold.

Use ripe fruit for the best flavor. Cut fruit to similar sizes for balanced bites. Make the dressing just before serving to keep fruit fresh and firm. Chill for a short time; do not leave very long, or the fruit may get watery. Keep dressing separate if storing and toss right before serving.

Dessert, Salad
American
Fresh Fruit Salad, Fruit Salad, Healthy Salad, Honey Lime Fruit Salad, summer salad

Cucumber Caprese Salad

Cucumber Caprese Salad with fresh tomatoes and mozzarella on a plate

This Cucumber Caprese Salad is light, bright, and full of fresh taste. It uses crisp cucumber, soft mozzarella, and sweet tomatoes, with fresh basil and a splash of balsamic. People love it as a quick side or a simple lunch, and it works well for picnics and potlucks. If you like other cucumber dishes, you might enjoy a spicier take like the Asian spicy cucumber salad for a bold contrast. This recipe is a crowd-pleaser, easy to make, and tastes like summer in a bowl, so you will want to make it again and again.

How to prepare Cucumber Caprese Salad

Ingredients

  • 2 large cucumbers, thinly sliced
  • 1 cup cherry tomatoes, halved
  • 8 oz fresh mozzarella, small balls or sliced
  • A handful of fresh basil leaves, torn
  • 2 tbsp extra virgin olive oil
  • 1 tbsp balsamic vinegar or glaze
  • Salt and black pepper to taste

Directions

  1. Wash and slice the cucumbers and tomatoes.
  2. Place cucumber slices on a serving plate.
  3. Add mozzarella and tomato pieces on top.
  4. Sprinkle torn basil over the salad.
  5. Drizzle olive oil and balsamic vinegar evenly.
  6. Season with salt and black pepper, taste, and adjust.
  7. Serve right away for best crunch, or chill for 10 minutes.

Cucumber Caprese Salad

Why You’ll Love Cucumber Caprese Salad

You will love this salad because it feels fresh and clean. The cucumber gives a cool crunch, the mozzarella adds soft cream, and basil brings a fresh herb note. It comes together fast with simple ingredients you likely have on hand. It is healthy, low in work, and looks bright on the plate.

Tips for success

  • Use fresh mozzarella for best texture and mild taste.
  • Slice cucumbers thin so each bite has a mix of cucumber, tomato, and cheese.
  • Pat cucumber slices dry if they are very wet, so dressing does not get watery.
  • Let the salad sit 5 to 10 minutes after dressing so flavors meld, but do not wait too long or cucumbers get soggy.
  • Try a little lemon juice with olive oil if you do not have balsamic.

Serving Suggestions

  • Serve with grilled bread or crostini for a light meal.
  • Pair with grilled chicken or fish for a fuller main meal.
  • Add a few olives or a sprinkle of toasted pine nuts for extra flavor.
  • Offer as a side at summer barbecues, potlucks, or simple weeknight dinners.

Cucumber Caprese Salad

FAQs

Q, Can I make this salad ahead of time? A, You can prepare the ingredients ahead, but dress the salad just before serving to keep cucumbers crisp.

Q, What type of cucumber works best? A, English cucumbers work well because they have fewer seeds and thin skin, but any cucumber will work.

Q, Can I use a different cheese? A, Yes, burrata or a soft fresh goat cheese are good swaps, though the classic is fresh mozzarella.

Q, How long will leftovers keep? A, Keep leftovers in the fridge up to 1 day, but the cucumbers will soften over time.

Conclusion

Try this easy Cucumber Caprese Salad for a quick fresh side dish, and learn another simple version by visiting Cucumber Caprese Salad – Lemon Tree Dwelling for another take on this fresh favorite.

Cucumber Caprese Salad

A light and refreshing salad featuring crisp cucumbers, soft mozzarella, and sweet tomatoes, perfect for picnics and potlucks.

Main Ingredients

  • 2 large large cucumbers, thinly sliced (English cucumbers preferred for fewer seeds)
  • 1 cup cherry tomatoes, halved
  • 8 oz fresh mozzarella, small balls or sliced (Fresh mozzarella recommended for best texture)
  • a handful fresh basil leaves, torn (Adds freshness)

Dressing

  • 2 tbsp extra virgin olive oil
  • 1 tbsp balsamic vinegar or glaze (Alternatively, try lemon juice with olive oil)
  • Salt and black pepper to taste (Adjust seasoning as needed)

Preparation

  1. Wash and slice the cucumbers and tomatoes.
  2. Place cucumber slices on a serving plate.
  3. Add mozzarella and tomato pieces on top.
  4. Sprinkle torn basil over the salad.
  5. Drizzle olive oil and balsamic vinegar evenly.
  6. Season with salt and black pepper, taste, and adjust.
  7. Serve right away for best crunch, or chill for 10 minutes.

Pat cucumber slices dry if very wet to prevent watery dressing. Let salad sit for 5-10 minutes after dressing for flavor melding, but serve quickly to avoid sogginess.

Salad, Side Dish
Italian, Mediterranean
Caprese, Cucumber Salad, Easy Recipe, Fresh Salad, Light Meal

Mediterranean Chicken Stuffed Bell Peppers

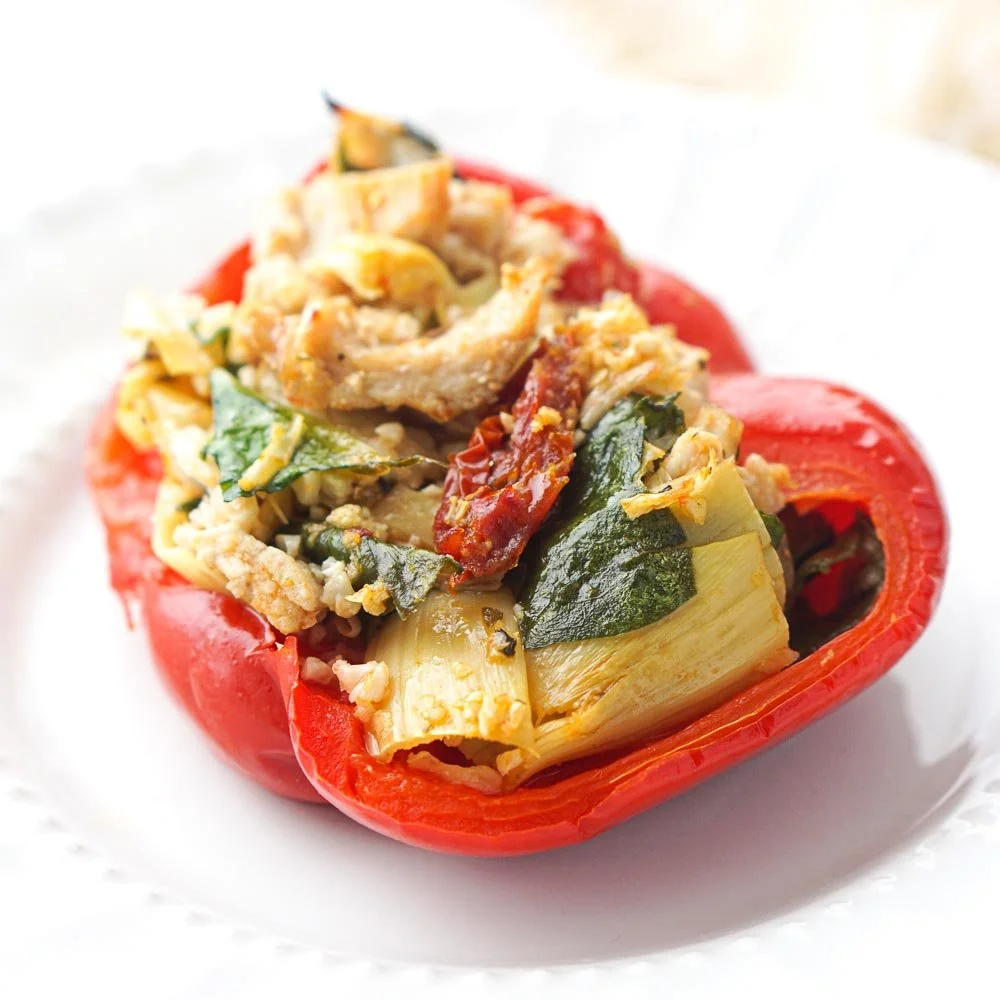
Mediterranean Chicken Stuffed Bell Peppers garnished with herbs

chicken stuffed bell peppers brings a bright Mediterranean flavors to your table. The mix of juicy chicken, soft bell peppers, tangy feta, and salty olives feels fresh and homey. It makes dinner easy and looks nice on the plate, so family and friends will love it. If you like stuffed peppers, you may also enjoy a savory stuffed bell peppers recipe that uses beef for a different twist. This Mediterranean Chicken Stuffed Bell Peppers recipe is a crowd-pleaser that tastes great and is easy to make, you will want to make it again and again.

How to prepare Mediterranean Chicken Stuffed Bell Peppers

  1. Preheat the oven to 375°F, cut the tops off the bell peppers, and scoop out the seeds. Place peppers in a baking dish, cut side up.
  2. Heat a bit of olive oil in a pan, cook diced onion and minced garlic until soft. Add ground or shredded chicken and cook until no longer pink.
  3. Stir in chopped tomatoes, chopped kalamata olives, cooked rice or quinoa, dried oregano, salt, and pepper. Cook a few minutes to blend flavors.
  4. Remove from heat and fold in crumbled feta and chopped fresh parsley or basil. Taste and add salt or pepper if needed.
  5. Spoon the chicken mix into each bell pepper. Top with a little extra feta or a sprinkle of breadcrumbs for crunch.
  6. Pour a small amount of water into the pan around the peppers, cover with foil, and bake 30 to 35 minutes, until peppers are tender. Remove foil and bake 5 more minutes to brown the tops.
  7. Let rest a few minutes, then serve warm.

Mediterranean Chicken Stuffed Bell Peppers

Why You’ll Love Mediterranean Chicken Stuffed Bell Peppers

This dish is full of bright, fresh flavors and soft, roasted peppers. It is simple to make and feeds a family. You can change the mix, add rice or quinoa, or use leftover chicken. The feta and olives give a nice salt and tang, and the herbs make it taste like a Mediterranean meal. It is healthy, colorful, and fits weeknight cooking or a casual dinner with friends.

Tips for success

  • Use ripe, firm bell peppers so they hold shape while baking.
  • Cook the chicken mix well and taste before stuffing, so you can fix the salt or herbs.
  • If you like a softer pepper, cook covered a bit longer with some water in the dish.
  • Leftover cooked rice or quinoa works great and saves time.
  • For more flavor, add a squeeze of lemon or a pinch of red pepper flakes.

Serving Suggestions

  • Serve with a side salad of greens, cucumber, and cherry tomatoes.
  • Add warm pita bread or a slice of crusty bread to soak up juices.
  • A dollop of plain Greek yogurt or tzatziki on the side adds creaminess.
  • Pair with roasted potatoes or a simple grain pilaf for a fuller meal.

Mediterranean Chicken Stuffed Bell Peppers

FAQs

Q: Can I make these ahead of time?

A: Yes, you can stuff the peppers and keep them covered in the fridge for a few hours. Bake when ready, you may need a few extra minutes.

Q: Can I use ground turkey or beef instead of chicken?

A: Yes, ground turkey or beef works well. Cook it the same way and check seasoning.

Q: Are these peppers freezer friendly?

A: Yes, bake the peppers, let cool, then wrap and freeze. Reheat in the oven from frozen or thaw first and bake until hot.

Q: How do I make the filling vegetarian?

A: Swap the chicken for cooked lentils, chickpeas, or extra rice and vegetables. Add more herbs and feta for flavor.

Conclusion

If you want another version with similar Mediterranean taste, check out this detailed recipe for Greek Chicken Stuffed Peppers with Feta & Quinoa – fANNEtastic food, it offers a nice twist and useful tips.

Mediterranean Chicken Stuffed Bell Peppers

This dish brings bright Mediterranean flavors to your table with juicy chicken, soft bell peppers, tangy feta, and salty olives, making dinner easy and enjoyable.

Main Ingredients

  • 4 pieces bell peppers (Use ripe, firm peppers.)
  • 1 tablespoon olive oil (For sautéing.)
  • 1 cup diced onion (For the filling.)
  • 2 cloves minced garlic (For flavor.)
  • 1 pound ground or shredded chicken (Can substitute with turkey or beef.)
  • 1 cup chopped tomatoes (Fresh or canned.)
  • 1/2 cup chopped kalamata olives (For Mediterranean flavor.)
  • 1 cup cooked rice or quinoa (Use leftovers if available.)
  • 1 teaspoon dried oregano (For seasoning.)
  • 1 teaspoon salt (Adjust to taste.)
  • 1/2 teaspoon black pepper (Adjust to taste.)
  • 1/2 cup crumbled feta cheese (For stuffing and topping.)
  • 1/4 cup chopped fresh parsley or basil (Your choice of herb.)

For Baking

  • 1/2 cup water (To keep peppers moist during baking.)

Preparation

  1. Preheat the oven to 375°F (190°C). Cut the tops off the bell peppers and scoop out the seeds. Place the peppers in a baking dish, cut side up.
  2. Heat olive oil in a pan over medium heat. Add diced onion and minced garlic, sauté until soft.
  3. Add the ground or shredded chicken to the pan and cook until no longer pink.
  4. Stir in chopped tomatoes, kalamata olives, cooked rice or quinoa, dried oregano, salt, and pepper. Cook for a few minutes to blend flavors.
  5. Remove from heat. Fold in crumbled feta and chopped parsley or basil. Taste and adjust seasoning if needed.

Assembly

  1. Spoon the chicken mixture into each bell pepper, filling them well. Top with extra feta or a sprinkle of breadcrumbs for crunch.

Baking

  1. Pour water into the pan around the peppers. Cover with foil and bake for 30 to 35 minutes, until peppers are tender.
  2. Remove the foil and bake for an additional 5 minutes to brown the tops.

Serving

  1. Let the stuffed peppers rest for a few minutes, then serve warm.

Use ripe, firm bell peppers to hold shape while baking. Leftover cooked rice or quinoa is a great time-saver. For more flavor, consider adding a squeeze of lemon or a pinch of red pepper flakes.

Dinner, Main Course
Mediterranean
Comfort Food, Easy Recipe, Healthy Dinner, Mediterranean Chicken Stuffed Peppers, Stuffed Peppers

Healthy Oats Khichdi Weight Loss Khichdi Recipe

Healthy Oats Khichdi bowl garnished with vegetables and herbs

I love simple, warm meals that make you feel good, and oats khichdi is one of those. This healthy weight loss khichdi uses oats instead of rice, so it cooks fast, fills you up, and keeps the meal light. It tastes mild, a little nutty from the oats, and well spiced with cumin and turmeric. It is a great crowd-pleaser, easy to make any day of the week, and kind to your stomach. Ready to try a new comfort food that helps your weight goals? Let’s make it together and enjoy a cozy bowl.

How to prepare Oats Khichdi Recipe | Healthy Weight Loss Khichdi Recipe

Ingredients (simple list)

  • 1 cup rolled oats
  • 1/4 cup moong dal, washed (optional, for protein)
  • 1 small carrot, chopped
  • 1 small potato, chopped (optional)
  • 1 small tomato, chopped
  • 1/2 cup peas or mixed vegetables
  • 1 tsp cumin seeds
  • 1/4 tsp turmeric powder
  • 1/2 tsp ginger, grated
  • 1 green chili, slit (optional)
  • 1 tbsp oil or ghee
  • Salt to taste
  • 3 cups water
  • Fresh coriander for garnish
    Directions
  1. Heat oil or ghee in a pan. Add cumin seeds and let them crackle.
  2. Add grated ginger and green chili, sauté for a few seconds.
  3. Add chopped vegetables, and sauté for 2 to 3 minutes.
  4. Add washed moong dal, turmeric, and salt. Mix well.
  5. Pour in water and bring to a gentle boil.
  6. Lower the heat, add oats, and stir. Cook for 4 to 6 minutes until oats and dal are soft. Stir often to avoid sticking.
  7. Turn off heat. Let it sit for a minute, then garnish with fresh coriander.
  8. Serve hot, with a drizzle of ghee if you like.

Oats Khichdi Recipe | Healthy Weight Loss Khichdi Recipe

Why You’ll Love Oats Khichdi Recipe | Healthy Weight Loss Khichdi Recipe

  • Simple and quick to cook, perfect for busy days.
  • Light on the stomach, yet filling, so it helps with weight control.
  • Uses oats, which add fiber and a nutty taste.
  • Mild spices make it friendly for kids and adults.
  • Easy to change with any vegetables you have, so it never gets boring.

Tips for success

  • Use rolled oats, not instant flavored oats, for best texture.
  • Rinse the dal well if using, and soak for 15 minutes to cut cooking time.
  • Keep the water ratio right, about 3 cups water for 1 cup oats and dal, adjust for your preferred thickness.
  • Stir while cooking to prevent the oats from sticking to the bottom.
  • Add lemon or a spoon of ghee at the end for extra flavor, if you want.

Serving Suggestions

  • Serve hot in a bowl, with plain yogurt or a small salad on the side.
  • Top with roasted nuts or a spoon of ghee for extra taste.
  • Pair with a light pickle or steamed vegetables for a fuller meal.
  • Great as a breakfast, lunch, or easy dinner for weight loss plans.

Oats Khichdi Recipe | Healthy Weight Loss Khichdi Recipe

FAQs

Q: Can I make oats khichdi without dal?
A: Yes, you can make it only with oats and vegetables, it will still be filling and light.

Q: Can I use instant oats?
A: Instant oats get mushy fast, they work but the texture will be softer. Rolled oats give a better bite.

Q: How long does it keep in the fridge?
A: Store in an airtight container for up to 2 days. Reheat with a splash of water.

Q: Is this good for weight loss?
A: Yes, it is low in calories, high in fiber, and keeps you full, which helps control hunger.

Conclusion

If you want a tested recipe and more tips for making this healthy dish, check this Oats Khichdi Recipe, it has a clear method and variations you can try. Enjoy your warm, healthy bowl and have fun cooking.

Oats Khichdi

A comforting and nutritious dish made with rolled oats, vegetables, and mild spices, perfect for weight loss.

Main Ingredients

  • 1 cup rolled oats (Use rolled oats for best texture.)
  • 1/4 cup moong dal, washed (Optional, for added protein.)
  • 1 small carrot, chopped
  • 1 small potato, chopped (Optional.)
  • 1 small tomato, chopped
  • 1/2 cup peas or mixed vegetables
  • 1 tsp cumin seeds
  • 1/4 tsp turmeric powder
  • 1/2 tsp ginger, grated
  • 1 unit green chili, slit (Optional.)
  • 1 tbsp oil or ghee
  • to taste unit Salt
  • 3 cups water
  • to garnish unit Fresh coriander

Cooking Instructions

  1. Heat oil or ghee in a pan. Add cumin seeds and let them crackle.
  2. Add grated ginger and green chili, sauté for a few seconds.
  3. Add chopped vegetables, and sauté for 2 to 3 minutes.
  4. Add washed moong dal, turmeric, and salt. Mix well.
  5. Pour in water and bring to a gentle boil.
  6. Lower the heat, add oats, and stir. Cook for 4 to 6 minutes until oats and dal are soft. Stir often to avoid sticking.
  7. Turn off heat. Let it sit for a minute, then garnish with fresh coriander.
  8. Serve hot, with a drizzle of ghee if you like.

Use rolled oats, not instant flavored oats, for best texture. Rinse the dal well if using, and soak for 15 minutes to cut cooking time. Keep the water ratio right, about 3 cups water for 1 cup oats and dal, adjust for your preferred thickness. Stir while cooking to prevent the oats from sticking to the bottom. Add lemon or a spoon of ghee at the end for extra flavor, if desired. Serve hot in a bowl, with plain yogurt or a small salad on the side. Top with roasted nuts or a spoon of ghee for extra taste. Pair with a light pickle or steamed vegetables for a fuller meal. Great as a breakfast, lunch, or easy dinner for weight loss plans.

Dinner, lunch, Main Course
Indian
Healthy Recipe, Oats Khichdi, Weight Loss

Asian Spicy Cucumber Salad

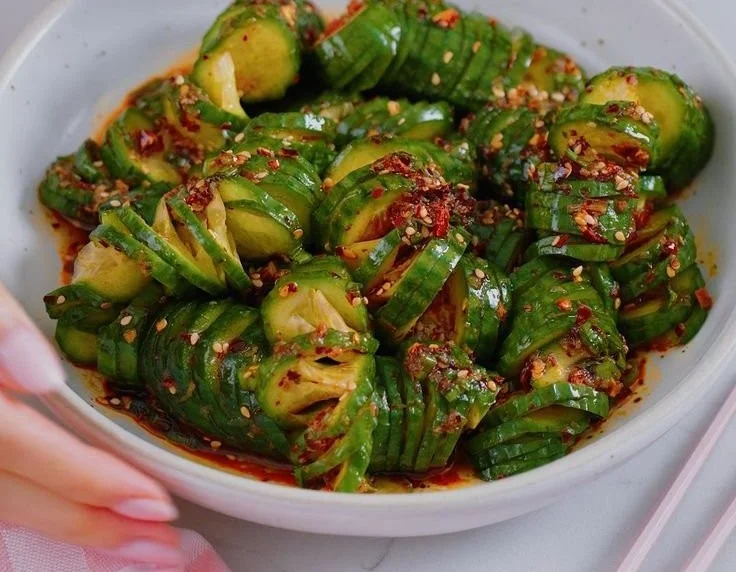
Asian Spicy Cucumber Salad with chili and sesame oil

This Asian Spicy Cucumber Salad is light, fresh, and full of bold flavor. The crisp cucumber meets a tangy soy and rice vinegar dressing, with a kick from chili and a warm hint of sesame. It is a crowd-pleaser at barbecues, weeknight dinners, and potlucks, because people love the crunch and the bright, spicy taste.

The featured recipe is easy and fast to make, and it works as a side, a snack, or a quick lunch. It brings Asian flavors with simple pantry ingredients, and it stays refreshing even when made ahead. Get ready to toss some cucumbers and make something everyone will ask for again.

How to prepare Asian Spicy Cucumber Salad

  1. Wash 2 large cucumbers, slice them thin, or cut into bite sized pieces. If the cucumbers are very watery, scoop seeds out.
  2. Sprinkle a little salt on the cucumber slices, let sit 10 minutes, then drain any liquid. This keeps the salad crisp.
  3. In a bowl, mix 2 tablespoons soy sauce, 2 tablespoons rice vinegar, 1 tablespoon sesame oil, 1 teaspoon sugar or honey, 1 clove minced garlic, and 1 teaspoon chili flakes or to taste.
  4. Add 1 chopped green onion and 1 teaspoon toasted sesame seeds to the dressing.
  5. Toss the cucumbers in the dressing until well coated. Taste and add more vinegar, soy, or chili if you like.
  6. Let the salad sit 10 to 20 minutes so the flavors blend. Serve cold or at room temperature.

Asian Spicy Cucumber Salad

Why You’ll Love Asian Spicy Cucumber Salad

  • It is fast to make, ready in about 15 minutes.
  • The salad is crisp, cool, and spicy, a nice mix in every bite.
  • It uses simple ingredients like soy sauce, sesame oil, and rice vinegar, so you can make it any time.
  • It is low in calories and works well for light meals, side dishes, or picnics.
  • You can change the heat level, make it vegan, or add herbs for variety.

Tips for success

  • Salt and drain the cucumbers to avoid a watery salad.
  • Smash or thin slice cucumbers, this helps them soak up the dressing.
  • Toast sesame seeds in a dry pan for better flavor.
  • Adjust chili flakes little by little, you can always add more heat.
  • Make the dressing ahead, toss cucumbers right before serving for best crunch.
  • Use rice vinegar for a mild tang, white vinegar will be too sharp.

Serving Suggestions

  • Serve with grilled chicken, fish, or tofu for a light meal.
  • Pair it with steamed rice or cold noodles for a simple dinner.
  • Add to a sandwich or wrap for extra crunch and spice.
  • Bring to picnics or potlucks, it travels well and stays fresh.
  • Top with fresh cilantro or mint for a bright twist.

Asian Spicy Cucumber Salad

FAQs

Q: Can I make this less spicy? A: Yes, reduce or skip the chili flakes, use a small pinch at first, then add more if you want heat.

Q: How long will the salad keep in the fridge? A: Eat it within 2 to 3 days for best texture, the cucumbers get softer over time.

Q: Can I use other types of cucumber? A: Yes, Persian or English cucumbers work well, they have fewer seeds and are less watery.

Q: How can I make it gluten free? A: Use a gluten free soy sauce or tamari and check other labels, then the salad is gluten free.

Conclusion

If you want another version or more tips, try this trusted recipe for a start, Spicy Asian Cucumber Salad – RecipeTin Eats.

Asian Spicy Cucumber Salad

A light and fresh cucumber salad dressed in a tangy soy and rice vinegar dressing with a spicy kick.

Cucumbers

  • 2 large large cucumbers (Wash, slice thin, or cut into bite-sized pieces)

Dressing

  • 2 tablespoons soy sauce (Use gluten-free if needed)
  • 2 tablespoons rice vinegar (Rice vinegar gives a mild tang)
  • 1 tablespoon sesame oil (Adds a warm hint)
  • 1 teaspoon sugar or honey (Can be adjusted to taste)
  • 1 clove minced garlic (Adds flavor depth)
  • 1 teaspoon chili flakes (Adjust to taste for heat)
  • 1 chopped green onion (For freshness)
  • 1 teaspoon toasted sesame seeds (For garnish)

Preparation

  1. Wash and slice cucumbers thinly or cut into bite-sized pieces. If watery, scoop out seeds.
  2. Sprinkle salt on cucumber slices, let sit for 10 minutes, then drain any liquid.
  3. In a bowl, mix soy sauce, rice vinegar, sesame oil, sugar or honey, minced garlic, and chili flakes.
  4. Add chopped green onion and toasted sesame seeds to the dressing.
  5. Toss cucumbers in the dressing until well coated.
  6. Let salad sit for 10 to 20 minutes to blend flavors. Serve cold or at room temperature.

Adjust the heat level with chili flakes, and make the dressing ahead. For best crunch, toss cucumbers right before serving.
Salad, Side Dish
Asian
Asian Recipes, Cucumber Salad, Healthy Salad, Quick Salad, Spicy Salad

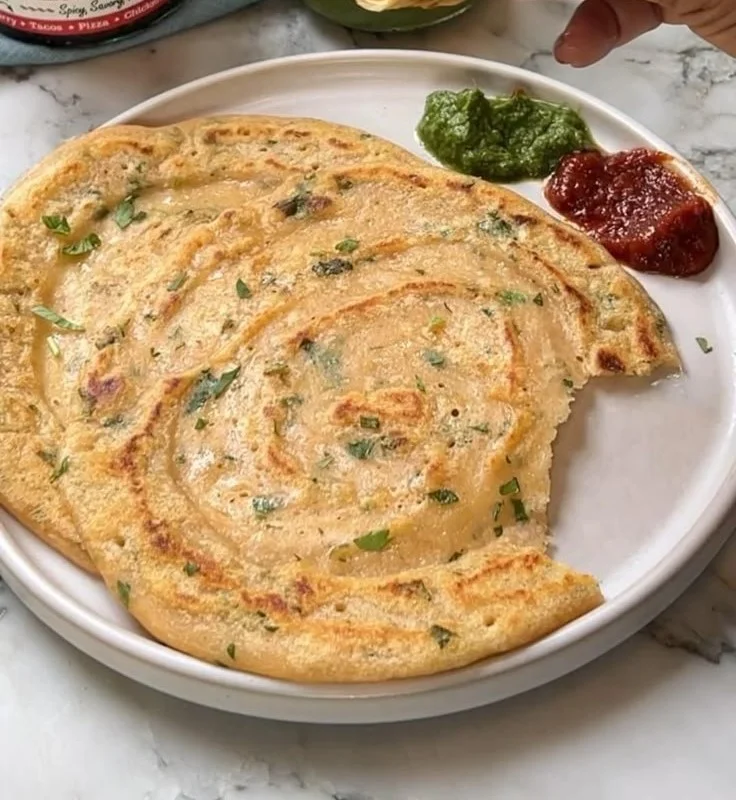
Red Lentil Pancake

Delicious red lentil pancake served with toppings

Red Lentil Pancake is a warm, tasty dish that feels simple and bright. It uses red lentils, a few spices, and fresh herbs to make a thin, savory pancake. This recipe is easy to make, healthy, and works for breakfast, lunch, or a light dinner. It is a crowd-pleaser because it is crispy at the edges, soft inside, and full of good flavor. Think of it as a red lentil crepe, a masoor dal chilla, or a protein-rich vegan pancake that everyone can enjoy. Get ready to make something comfy and fun, you will want to make this again and again!

How to prepare Red Lentil Pancake

Ingredients

  • 1 cup red lentils (masoor dal), rinsed
  • 1 small onion, finely chopped
  • 1 small tomato, finely chopped
  • 1 green chili, finely chopped, optional
  • 1/4 cup fresh cilantro, chopped
  • 1/2 tsp cumin seeds or ground cumin
  • 1/2 tsp salt, or to taste
  • 1/4 tsp turmeric, optional
  • 1/2 tsp baking soda or a pinch of baking powder (for lightness)
  • 1 to 1 1/4 cups water, to blend
  • Oil for cooking

Directions

  1. Soak the red lentils for 20 to 30 minutes if you have time, then drain. You can skip soaking for very soft lentils, but soaking makes a smoother batter.
  2. Put the lentils in a blender with 1 cup water. Blend to a smooth, pourable batter, like pancake batter. Add more water if needed.
  3. Pour the batter into a bowl. Mix in onion, tomato, green chili, cilantro, cumin, salt, turmeric, and baking soda. Stir well.
  4. Heat a nonstick pan over medium heat. Add a little oil and spread it.
  5. Pour a ladle of batter on the pan and spread lightly to a thin circle, like a crepe. Cook 2 to 3 minutes until the bottom is golden and crisp.
  6. Flip and cook the other side 1 to 2 minutes. Press gently with a spatula for even cooking.
  7. Remove and keep warm. Repeat with the rest of the batter. Serve hot.

Red Lentil Pancake

Why You’ll Love Red Lentil Pancake

  • High in plant protein, it keeps you full and satisfied.
  • Gluten-free if you use only lentils, great for many diets.
  • Fast to make, and the batter stores in the fridge for a day.
  • Versatile, you can change spices, add veggies, or make it plain.
  • Crispy outside and soft inside, it has a lovely texture that people enjoy.

Tips for success

  • Blend to a smooth batter for even cooking and good texture.
  • If batter is too thick, add small amounts of water until it pours easily.
  • Use a hot pan and a bit of oil for a crisp edge.
  • Do not overcook, lower the heat if the pancake browns too fast.
  • Add baking soda right before cooking, it helps make the pancake light.
  • For more flavor, add a pinch of garam masala or finely grated ginger.

Serving Suggestions

  • Serve with plain yogurt or a yogurt-mint sauce for a cool contrast.
  • Pair with a simple chutney, like mint or tamarind, for brightness.
  • Top with fresh salad, avocado slices, or a squeeze of lemon.
  • Make a savory roll, fill the pancake with spiced potatoes or greens.
  • Serve as part of a brunch spread with roasted vegetables and tea.

Red Lentil Pancake

FAQs

Q: Can I make this gluten-free? A: Yes, red lentils are naturally gluten-free. Avoid cross-contamination if you need strict gluten-free.

Q: How do I store leftover batter and pancakes? A: Store batter in a sealed container in the fridge for up to 24 hours. Cooked pancakes keep in the fridge 2 to 3 days, reheat in a pan for best texture.

Q: Can I make these ahead for a party? A: Yes, cook them ahead and keep warm in a low oven. Re-crisp in a hot pan before serving.

Q: Can I swap red lentils for other lentils? A: Red lentils cook fast and give a smooth batter. Other lentils need longer soaking and may not blend as smoothly, but you can try yellow split peas with care.

Q: Are these pancakes vegan? A: Yes, this recipe is vegan when you use oil and no dairy. Serve with vegan sides to keep it plant-based.

Conclusion

For a clear, classic version of this idea, check a related Masoor Dal Chilla recipe for extra tips and variations, like simple spice mixes and frying methods, at Masoor Dal Chilla recipe on Ministry of Curry.

Red Lentil Pancake

A warm, tasty dish featuring red lentils, spices, and fresh herbs, perfect for breakfast, lunch, or dinner. Crispy at the edges and soft inside, these pancakes are a protein-rich vegan delight.

For the Pancake Batter

  • 1 cup red lentils (masoor dal), rinsed
  • 1 small onion, finely chopped
  • 1 small tomato, finely chopped
  • 1 piece green chili, finely chopped (optional) (For added heat)
  • 1/4 cup fresh cilantro, chopped
  • 1/2 tsp cumin seeds or ground cumin
  • 1/2 tsp salt, or to taste
  • 1/4 tsp turmeric (optional)
  • 1/2 tsp baking soda or a pinch of baking powder (for lightness)
  • 1 to 1 1/4 cups water, to blend
  • as needed for cooking oil (For cooking the pancakes)

Preparation

  1. Soak the red lentils for 20 to 30 minutes if you have time, then drain.
  2. Put the lentils in a blender with 1 cup of water. Blend to a smooth, pourable batter, adding more water if needed.
  3. Pour the batter into a bowl and mix in onion, tomato, green chili, cilantro, cumin, salt, turmeric, and baking soda. Stir well.

Cooking

  1. Heat a nonstick pan over medium heat and add a little oil.
  2. Pour a ladle of batter on the pan and spread lightly to form a thin circle. Cook for 2 to 3 minutes until the bottom is golden and crisp.
  3. Flip and cook the other side for 1 to 2 minutes. Press gently with a spatula for even cooking.
  4. Remove and keep warm. Repeat with the rest of the batter. Serve hot.

For a crisp pancake, blend to a smooth batter. Adjust the water if the batter is too thick. Add baking soda right before cooking for a lighter texture. Serve with yogurt or chutney for added flavor.

Breakfast, Dinner, lunch
Indian, Vegan
Gluten-Free, Healthy Breakfast, Lentil Pancake, Red Lentil, Vegan Recipe

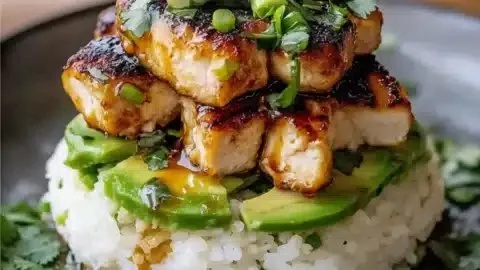
Delicious Honey Lime Chicken Avocado Rice Stack Recipe

Honey Lime Chicken served with Avocado Rice Stack on a plate

This recipe blends sweet honey, bright lime, and creamy avocado into one fun meal. It feels fresh and simple, but it looks special on the plate. The stack is easy to make for family dinners, or to impress friends without fuss.

Meet the Delicious Honey Lime Chicken & Avocado Rice Stack Recipe, a crowd-pleaser that tastes zesty, sweet, and a little creamy all at once. The honey lime chicken gives a nice glaze, the avocado keeps each bite smooth, and the rice makes it filling. Give it a try, you might make it your new go-to weeknight favorite, and yes, it is as tasty as it sounds.

How to prepare Honey Lime Chicken & Avocado Rice Stack Recipe

Ingredients

  • 2 boneless, skinless chicken breasts
  • 2 tablespoons honey
  • 2 tablespoons lime juice, fresh
  • 1 clove garlic, minced
  • 1 tablespoon olive oil
  • 1/2 teaspoon salt
  • 1/4 teaspoon black pepper
  • 1 cup cooked rice, warm (white or brown)
  • 1 ripe avocado, diced or mashed
  • 2 tablespoons chopped cilantro
  • 1 green onion, thinly sliced
  • 1/4 teaspoon ground cumin, optional
  • Lime wedges, for serving

Directions

  1. Mix honey, lime juice, garlic, olive oil, salt, pepper, and cumin in a bowl. This is your honey lime marinade.
  2. Put chicken in the bowl, coat well, and let it sit for 15 to 30 minutes. If you have more time, marinate up to 2 hours in the fridge.
  3. Heat a skillet over medium heat. Cook chicken 5 to 7 minutes per side, or until done. Let chicken rest for 5 minutes, then slice thin.
  4. If rice is not warm, heat it now. Stir in a little lime juice and a pinch of salt for extra flavor.
  5. Prepare avocado, cilantro, and green onion. You can mash the avocado with a fork, or leave it diced for texture.
  6. To stack, place a ring mold or clean small bowl on a plate. Add a layer of rice, press gently. Add a layer of avocado, then top with sliced chicken. Repeat if you like taller stacks.
  7. Sprinkle cilantro and green onion on top. Add a lime wedge on the side.
  8. Serve the stack warm, squeeze lime over it, and enjoy.


Delicious Honey Lime Chicken & Avocado Rice Stack Recipe

Why You’ll Love Honey Lime Chicken & Avocado Rice Stack Recipe

  • Quick to make, great for weeknight dinner.
  • Fresh flavors, bright lime and sweet honey.
  • Easy to change, add beans, corn, or salsa if you like.
  • Looks nice on the plate, great for guests.
  • Healthy balance of protein, healthy fat, and carbs.

tips for success

  • Use fresh lime juice for the best zesty flavor.
  • Do not skip the resting time after cooking the chicken, it stays juicier.
  • Warm the rice before stacking, it helps the stack hold.
  • If you do not have a ring mold, use a small bowl and invert it on the plate.
  • Taste and adjust salt and lime before serving, small changes make big difference.

Serving Suggestions

  • Serve with a simple green salad or mixed greens.
  • Add a side of roasted corn or black beans for a fuller meal.
  • Top with a drizzle of plain yogurt mixed with lime for a creamy kick.
  • Offer lime wedges and extra cilantro at the table.


Delicious Honey Lime Chicken & Avocado Rice Stack Recipe

FAQs

Q: Can I make this ahead of time? A: You can cook the chicken and rice ahead, but stack just before serving. Avocado turns brown, so prepare it last.

Q: Can I use brown rice or cauliflower rice? A: Yes, brown rice works fine, and cauliflower rice is a low-carb option that still tastes good.

Q: Is there an easy way to keep the stack from falling apart? A: Press each layer gently when using a ring mold, and keep layers compact. Serve soon after stacking.

Q: Can I use lime zest in the recipe? A: Yes, a little lime zest adds bright flavor. Add it to the marinade or to the rice.

Q: How spicy is this dish? A: It is mild as written. Add sliced jalapeno or a pinch of chili flakes if you want heat.

Conclusion

If you want another version or the original write up for this dish, see the full recipe on the NorthEast Nosh website at original Honey Lime Chicken & Avocado Rice Stack – NorthEast Nosh.

Honey Lime Chicken & Avocado Rice Stack

This recipe blends sweet honey, bright lime, and creamy avocado into one fun meal that is fresh, simple, and visually appealing.

For the Chicken Marinade

  • 2 pieces boneless, skinless chicken breasts
  • 2 tablespoons honey
  • 2 tablespoons lime juice, fresh (Use fresh for best flavor.)
  • 1 clove garlic, minced
  • 1 tablespoon olive oil
  • 1/2 teaspoon salt
  • 1/4 teaspoon black pepper
  • 1/4 teaspoon ground cumin, optional

For the Stack

  • 1 cup cooked rice, warm (white or brown) (Warm before stacking.)
  • 1 ripe avocado, diced or mashed
  • 2 tablespoons chopped cilantro
  • 1 piece green onion, thinly sliced
  • Lime wedges, for serving

Preparation

  1. Mix honey, lime juice, garlic, olive oil, salt, pepper, and cumin in a bowl. This is your honey lime marinade.
  2. Put chicken in the bowl, coat well, and let it sit for 15 to 30 minutes. If you have more time, marinate up to 2 hours in the fridge.

Cooking

  1. Heat a skillet over medium heat. Cook the chicken for 5 to 7 minutes per side, or until done. Let the chicken rest for 5 minutes, then slice thin.
  2. If rice is not warm, heat it now. Stir in a little lime juice and a pinch of salt for extra flavor.
  3. Prepare avocado, cilantro, and green onion. You can mash the avocado with a fork or leave it diced for texture.

Assembly

  1. To stack, place a ring mold or clean small bowl on a plate. Add a layer of rice, press gently. Add a layer of avocado, then top with sliced chicken. Repeat if you like taller stacks.
  2. Sprinkle cilantro and green onion on top. Add a lime wedge on the side.
  3. Serve the stack warm, squeeze lime over it, and enjoy.

Use fresh lime juice for the best zesty flavor. Do not skip the resting time after cooking the chicken; it stays juicier. Warm the rice before stacking; it helps the stack hold. If you do not have a ring mold, use a small bowl and invert it on the plate. Taste and adjust salt and lime before serving; small changes make a big difference.

Dinner, Main Course
American, Mexican
Avocado Rice Stack, Healthy Recipe, Honey Lime Chicken, Quick Dinner, Weeknight Meal

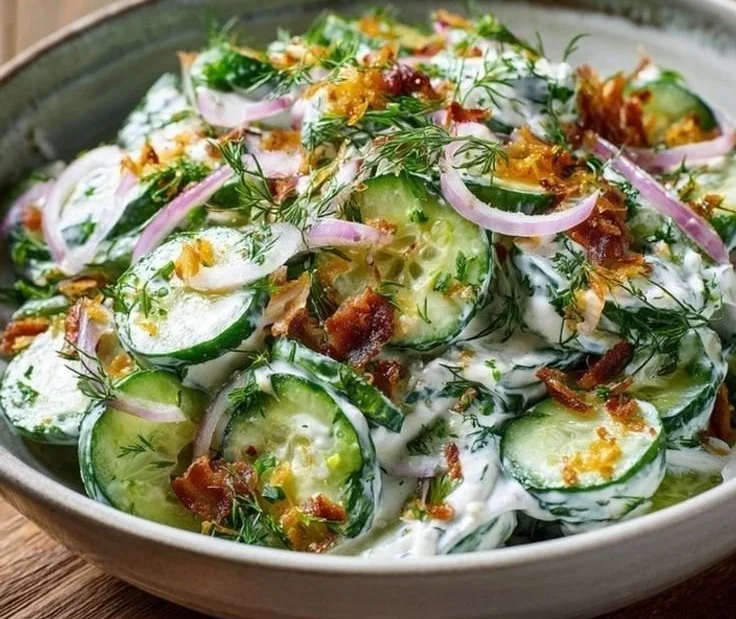
Cucumber Ranch Crack Salad

Delicious Cucumber Ranch Salad with fresh cucumbers and creamy ranch dressing

This Cucumber Ranch Crack Salad is light, creamy, and fresh, a perfect side for warm days or busy weeknights. It mixes crisp cucumber with rich ranch flavor, so each bite feels cool and satisfying. People love it at potlucks, picnics, and family dinners because it tastes great and comes together fast. You will smile when you taste the cool cucumber and creamy ranch, it is simple and so good, you might make it again tonight.

How to prepare Cucumber Ranch Crack Salad

  1. Wash and slice 3 to 4 medium cucumbers thin, you can peel if you like.
  2. Slice 1 small red onion thin, soak in cold water 5 minutes to take away some bite, then drain.
  3. In a bowl, mix 1 cup ranch dressing, 1/2 cup sour cream, 2 tablespoons mayonnaise, 1 teaspoon dried dill or 1 tablespoon fresh chopped dill, salt and pepper to taste.
  4. Add cucumbers and onion to the dressing, toss until everything is coated.
  5. Chill at least 30 minutes so the flavors mix and the salad gets cold.
  6. Before serving, stir in 2 chopped green onions or fresh herbs, and sprinkle a little paprika or cracked black pepper on top if you like.


Cucumber Ranch Crack Salad

Why You’ll Love Cucumber Ranch Crack Salad

  • Easy to make with simple ingredients, like cucumber and ranch dressing.
  • Bright, fresh flavor from cucumber and herbs, with a creamy ranch base.
  • Fast to prepare, great as a quick side dish or for a summer salad.
  • Versatile, you can add bacon, feta, or tomatoes to change it up.
  • Keeps well chilled, so it is handy for picnics and potlucks.

tips for success

  • Use firm, fresh cucumbers for best crunch.
  • Salt the cucumber lightly and let sit 10 minutes if you want less water in the salad, then drain.
  • Chill the salad so flavors blend, at least 30 minutes.
  • Taste and adjust salt and pepper before serving, ranch dressings can vary in salt.
  • If you use dried dill, use less, it is stronger than fresh dill.

Serving Suggestions

  • Serve with grilled chicken or burgers for a light meal.
  • Bring it to barbecues, it pairs well with smoky flavors.
  • Spoon over mixed greens to make a quick creamy cucumber salad bowl.
  • Put it in sandwiches or wraps for a cool crunch.
  • Add feta or chopped tomatoes to make it a fuller side dish.


Cucumber Ranch Crack Salad

FAQs

Q: Can I use Greek yogurt instead of sour cream or mayo?

A: Yes, Greek yogurt works well, it makes the salad a bit tangier and lighter.

Q: How long will this salad keep in the fridge?

A: Store in a sealed container up to 3 days, it stays good but gets softer over time.

Q: Can I make this ahead for a party?

A: Yes, make it a few hours ahead and keep it chilled, toss once before serving.
Q: Do I need to peel the cucumbers?

A: You do not have to, leave the skin on for color and extra crunch, or peel if you prefer.

Q: Can I add other vegetables?

A: Yes, chopped tomatoes, bell pepper, or radish all work well and add color.

Conclusion

If you want a clear, trusted recipe to try right away, check this Cucumber Ranch Salad recipe for a handy guide and extra tips, Cucumber Ranch Salad Recipe – An Affair from the Heart.

Cucumber Ranch Crack Salad

A light, creamy, and fresh salad mixing crisp cucumber with rich ranch flavor, perfect for warm days or busy weeknights.

Main Ingredients

  • 3-4 medium medium cucumbers (Wash and slice thin, peel if desired.)
  • 1 small red onion (Soak in cold water for 5 minutes, then drain.)
  • 1 cup ranch dressing (Choose your favorite brand.)
  • 1/2 cup sour cream (Can substitute with Greek yogurt.)
  • 2 tablespoons mayonnaise (Optional for added creaminess.)
  • 1 teaspoon dried dill (Or 1 tablespoon fresh chopped dill.)
  • to taste salt and pepper (Adjust according to preference.)
  • 2 chopped green onions (Can use fresh herbs instead.)
  • to taste paprika or cracked black pepper (Optional garnish.)

Preparation

  1. Wash and slice 3-4 medium cucumbers thin; peel if desired.
  2. Slice 1 small red onion thin, soak in cold water for 5 minutes to reduce bite, then drain.
  3. In a bowl, mix 1 cup ranch dressing, 1/2 cup sour cream, 2 tablespoons mayonnaise, 1 teaspoon dried dill (or 1 tablespoon fresh chopped dill), and salt and pepper to taste.
  4. Add cucumbers and onion to the dressing; toss until everything is coated.
  5. Chill the salad for at least 30 minutes to let flavors mix and cool.
  6. Before serving, stir in 2 chopped green onions or fresh herbs, and sprinkle with paprika or cracked black pepper if desired.

For best crunch, use firm, fresh cucumbers. Lightly salt the cucumbers and let sit for 10 minutes to reduce water content. Chill salad for flavor blending. Adjust seasoning as ranch dressing varies in salt content. Consider adding bacon, feta, or tomatoes for variety.

Salad, Side Dish
American
Cucumber Salad, Quick Salad, Ranch Salad, summer salad

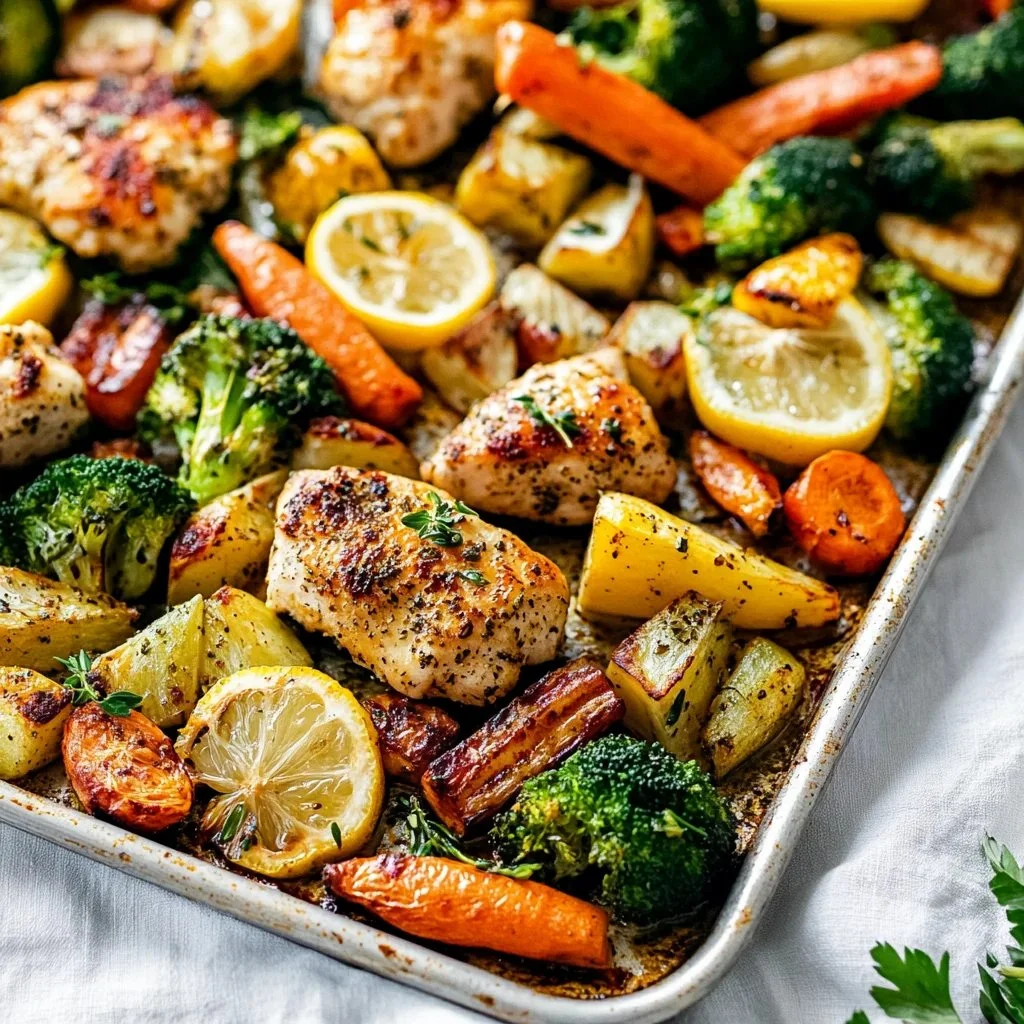
Sheet Pan Lemon Herb Chicken and Vegetables

Sheet Pan Lemon Herb Chicken with fresh vegetables

This is a warm, easy talk about Sheet Pan Lemon Herb Chicken and Vegetables. It is a friendly meal for busy nights when you want good food without a lot of steps. The lemon gives a fresh, bright taste, and the herbs add a homey, savory note. Roasted veggies and chicken cook together so flavors mix, and the pan stays simple to clean.

The featured recipe is a true crowd-pleaser. It tastes fresh and cozy at the same time. People like it because it feels special but takes little time. It makes your kitchen smell like home, and it looks colorful on the plate.

You will want to make it again and again, and you might smile when you see how easy it is to get a tasty dinner on the table.

How to prepare Sheet Pan Lemon Herb Chicken and Vegetables

This simple sheet pan meal cooks the chicken and vegetables together for an easy, tasty dinner. Here is an easy way to make it, step by step.

Ingredients

  • 4 boneless, skinless chicken thighs or breasts
  • 1 pound small potatoes, halved
  • 2 carrots, cut into sticks
  • 1 red bell pepper, cut into pieces
  • 1 small red onion, cut into wedges
  • 2 zucchini, sliced
  • 3 tablespoons olive oil
  • 2 tablespoons lemon juice, plus extra lemon wedges to serve
  • 3 cloves garlic, minced
  • 1 teaspoon dried thyme or 1 tablespoon fresh
  • 1 teaspoon dried rosemary or 1 tablespoon fresh, chopped
  • Salt and black pepper to taste
  • Fresh parsley, chopped, for garnish (optional)

Directions

  1. Preheat the oven to 425°F (220°C). Line a large sheet pan with foil or parchment for easy clean up.
  2. In a large bowl, mix the olive oil, lemon juice, garlic, thyme, rosemary, salt, and pepper.
  3. Add the chicken to the bowl and turn to coat well in the lemon herb mix. Let sit for 5 minutes if you can.
  4. Put the potatoes, carrots, bell pepper, and onion on the sheet pan. Toss them with a little salt, pepper, and a bit of the oil mix.
  5. Push the vegetables to the sides and place the chicken pieces in the center. Add the zucchini around the chicken in the last 10 minutes of cooking so it does not get too soft.
  6. Roast for 25 to 35 minutes, until the chicken reaches 165°F (74°C) and the vegetables are tender. If you like a bit of color, broil for 2–3 minutes at the end.
  7. Let the chicken rest for 5 minutes. Squeeze fresh lemon over everything and sprinkle with chopped parsley.

Serve warm. This one-pan roast makes clean up easy and gives you a bright lemon herb taste with roasted vegetables.

Sheet Pan Lemon Herb Chicken and Vegetables

Why You’ll Love Sheet Pan Lemon Herb Chicken and Vegetables

You will love this sheet pan meal because it is quick, bright, and full of flavor. The lemon and herbs lift the chicken, and the roasted vegetables add a sweet, caramelized taste. It is a great weeknight dinner, a low fuss one-pan meal, and a crowd-pleaser for simple family meals. The recipe gives soft potatoes, tender chicken, and crisp edges on the vegetables, all in one pan.

tips for success

  • Use similar size pieces for the vegetables, so they cook evenly.
  • Pat the chicken dry before you toss in the oil mix, this helps the outside brown.
  • If you use chicken breasts, check early to avoid drying them out.
  • Add zucchini and delicate veg later in the bake time, they cook fast.
  • Taste and add a little more lemon or salt at the end to brighten the dish.
  • Use a meat thermometer to check chicken for safe doneness, 165°F (74°C).

Serving Suggestions

  • Serve with lemon wedges and extra chopped parsley for a fresh look.
  • Add a simple green salad or steamed green beans for more veg.
  • Spoon warm quinoa, rice, or couscous beside the chicken for a fuller meal.
  • Leftovers work well in wraps or over a bed of greens for lunch.

Sheet Pan Lemon Herb Chicken and Vegetables

FAQs

Q: Can I use bone-in chicken for this recipe? A: Yes, bone-in chicken works. It may need more time to cook. Check the thickest part for 165°F, and allow 5 to 10 more minutes if needed.

Q: What vegetables work best for a sheet pan dinner? A: Root vegetables like potatoes, carrots, and beets hold up well. Peppers, onions, and zucchini also work, add tender veg later so they do not overcook.

Q: Can I make this gluten free? A: Yes, this recipe is naturally gluten free. Just check any store bought seasonings or marinades to be sure they are labeled gluten free.

Q: How long can I store leftovers? A: Keep leftovers in an airtight container in the fridge for 3 to 4 days. Reheat in the oven or a hot skillet to keep the veggies from getting too soft.

Q: Can I freeze this dish? A: You can freeze cooked chicken and vegetables for up to 2 months. Thaw in the fridge overnight before reheating.

Conclusion

For a full, bright take on this easy weeknight meal, you can read more tips and a similar recipe at Lemon Herb Chicken Sheet Pan – Something Nutritious.

Sheet Pan Lemon Herb Chicken and Vegetables

A simple and flavorful sheet pan meal featuring roasted chicken and colorful vegetables, all seasoned with fresh lemon and herbs. Perfect for busy weeknights!

Main Ingredients

  • 4 pieces boneless, skinless chicken thighs or breasts
  • 1 pound small potatoes, halved
  • 2 pieces carrots, cut into sticks
  • 1 piece red bell pepper, cut into pieces
  • 1 small red onion, cut into wedges
  • 2 pieces zucchini, sliced

Seasoning and Oil

  • 3 tablespoons olive oil
  • 2 tablespoons lemon juice, plus extra lemon wedges to serve
  • 3 cloves garlic, minced
  • 1 teaspoon dried thyme or 1 tablespoon fresh
  • 1 teaspoon dried rosemary or 1 tablespoon fresh, chopped
  • to taste salt and black pepper

Garnish

  • to taste fresh parsley, chopped ((optional))

Preparation

  1. Preheat the oven to 425°F (220°C). Line a large sheet pan with foil or parchment for easy clean up.
  2. In a large bowl, mix the olive oil, lemon juice, garlic, thyme, rosemary, salt, and pepper.
  3. Add the chicken to the bowl and turn to coat well in the lemon herb mix. Let sit for 5 minutes if you can.
  4. Put the potatoes, carrots, bell pepper, and onion on the sheet pan. Toss them with a little salt, pepper, and a bit of the oil mix.
  5. Push the vegetables to the sides and place the chicken pieces in the center. Add the zucchini around the chicken in the last 10 minutes of cooking so it does not get too soft.

Cooking

  1. Roast for 25 to 35 minutes, until the chicken reaches 165°F (74°C) and the vegetables are tender. If you like a bit of color, broil for 2–3 minutes at the end.
  2. Let the chicken rest for 5 minutes. Squeeze fresh lemon over everything and sprinkle with chopped parsley.

Use vegetables of similar size to ensure even cooking. Pat the chicken dry before tossing in the oil mix to enhance browning. Adjust seasoning to taste, adding more lemon or salt at the end if desired.

Dinner, Main Course
American
Easy Dinner, Lemon Herb Chicken, One Pan Meal, Roasted Vegetables, Sheet Pan Chicken


Sheet Pan Lemon Herb Chicken and Vegetables

A simple and flavorful sheet pan meal featuring roasted chicken and colorful vegetables, all seasoned with fresh lemon and herbs. Perfect for busy weeknights!

Main Ingredients

  • 4 pieces boneless, skinless chicken thighs or breasts
  • 1 pound small potatoes, halved
  • 2 pieces carrots, cut into sticks
  • 1 piece red bell pepper, cut into pieces
  • 1 small red onion, cut into wedges
  • 2 pieces zucchini, sliced (Add in the last 10 minutes of cooking)

Seasoning and Oil

  • 3 tablespoons olive oil
  • 2 tablespoons lemon juice, plus extra lemon wedges to serve
  • 3 cloves garlic, minced
  • 1 teaspoon dried thyme or 1 tablespoon fresh
  • 1 teaspoon dried rosemary or 1 tablespoon fresh, chopped
  • to taste salt and black pepper

Garnish

  • to taste fresh parsley, chopped (optional)

Preparation

  1. Preheat the oven to 425°F (220°C). Line a large sheet pan with foil or parchment for easy clean up.
  2. In a large bowl, mix the olive oil, lemon juice, garlic, thyme, rosemary, salt, and pepper.
  3. Add the chicken to the bowl and turn to coat well in the lemon herb mix. Let sit for 5 minutes if you can.
  4. Put the potatoes, carrots, bell pepper, and onion on the sheet pan. Toss them with a little salt, pepper, and a bit of the oil mix.
  5. Push the vegetables to the sides and place the chicken pieces in the center.
  6. Add the zucchini around the chicken in the last 10 minutes of cooking so it does not get too soft.

Cooking

  1. Roast for 25 to 35 minutes, until the chicken reaches 165°F (74°C) and the vegetables are tender. If you like a bit of color, broil for 2–3 minutes at the end.
  2. Let the chicken rest for 5 minutes. Squeeze fresh lemon over everything and sprinkle with chopped parsley.

Use vegetables of similar size to ensure even cooking. Pat the chicken dry before tossing in the oil mix to enhance browning. Adjust seasoning to taste, adding more lemon or salt at the end if desired.

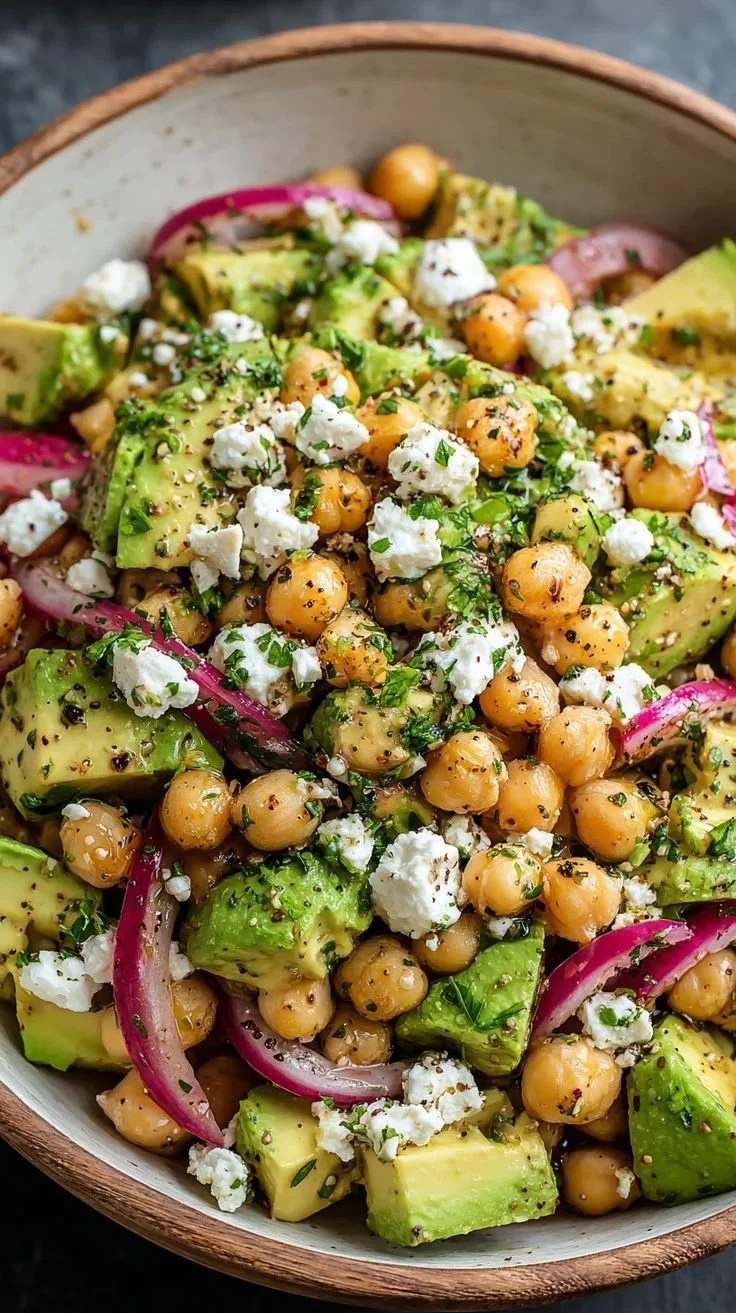
Chickpea Feta Avocado Salad

Chickpea Feta Avocado Salad in a bowl with fresh vegetables

This Chickpea Feta Avocado Salad feels like sunshine in a bowl. It mixes creamy avocado, salty feta, and tender chickpeas for a simple, healthy meal. The salad tastes fresh, light, and a little tangy from lemon and olive oil. It makes a great lunch, potluck dish, or side for a warm night.

This featured recipe is a crowd-pleaser, easy to toss together, and fills you up without feeling heavy. The mix of textures, from soft avocado to crumbly feta and firm chickpeas, keeps every bite interesting. Give it a try and you might find yourself making it again and again, maybe even twice in one week.

how to prepare Chickpea Feta Avocado Salad

Ingredients

  • 1 can (15 oz) chickpeas, drained and rinsed
  • 1 large ripe avocado, diced
  • 1 cup cherry tomatoes, halved
  • 1/2 small red onion, finely chopped
  • 1/2 cucumber, diced
  • 1/3 cup crumbled feta cheese
  • 2 tablespoons chopped fresh parsley or cilantro
  • 2 tablespoons olive oil
  • 1 tablespoon lemon juice, or to taste
  • Salt and black pepper to taste

Directions

  1. Rinse and drain the chickpeas, then place them in a large bowl.
  2. Chop the avocado, tomatoes, onion, and cucumber into bite-size pieces. Add to the bowl with chickpeas.
  3. Add the crumbled feta and chopped herbs.
  4. In a small cup, whisk olive oil, lemon juice, salt, and pepper.
  5. Pour the dressing over the salad and toss gently, so the avocado does not mash.
  6. Taste and add more lemon, salt, or pepper if needed. Serve right away or chill for 15 minutes for cooler flavor.

Chickpea Feta Avocado Salad

Why You’ll Love Chickpea Feta Avocado Salad

  • It’s quick to make, under 15 minutes.
  • It combines protein from chickpeas with healthy fats from avocado.
  • The feta adds a salty, tangy note that brightens the whole salad.
  • It works as a filling lunch, a healthy side, or a light dinner.
  • The salad holds up well for a few hours, so it is great for picnics and meal prep.

tips for success

  • Use a ripe but firm avocado, so it holds shape when tossed.
  • Don’t overdress, start with less lemon and oil then add more if needed.
  • Rinse canned chickpeas well to cut sodium and improve flavor.
  • Chop ingredients to similar size for even bites.
  • Add herbs like parsley, cilantro, or basil for fresh taste.
  • If making ahead, add avocado just before serving to avoid browning.

Serving Suggestions

  • Serve on a bed of mixed greens for extra crunch.
  • Spoon onto toast for a quick open-faced sandwich.
  • Pair with grilled chicken or fish for a fuller meal.
  • Serve with pita bread or crackers for a picnic.
  • Add a spoonful of Greek yogurt or a dollop of hummus for more creaminess.

Chickpea Feta Avocado Salad

FAQs

Q: Can I use dried chickpeas instead of canned? A: Yes, cook dried chickpeas until tender, then cool before using. Canned is faster.

Q: How long will the salad keep in the fridge? A: It keeps 1 to 2 days. Add avocado right before serving to keep it fresh.

Q: Can I make this salad vegan? A: Yes, skip the feta or use a vegan feta alternative.

Q: What other add-ins work well? A: Olives, roasted red pepper, or cooked corn add good flavor and color.

Q: Is this salad gluten free? A: Yes, the recipe is naturally gluten free.

Conclusion

For a tested, easy version of this salad idea, you can see a similar recipe at Chickpea, Avocado, & Feta Salad – Two Peas & Their Pod, which offers more tips and variations to try.

Chickpea Feta Avocado Salad

This Chickpea Feta Avocado Salad mixes creamy avocado, salty feta, and tender chickpeas for a simple, healthy meal.

Main Ingredients

  • 1 can (15 oz) chickpeas, drained and rinsed
  • 1 large ripe avocado, diced (Use a ripe but firm avocado.)
  • 1 cup cherry tomatoes, halved
  • 1/2 small red onion, finely chopped
  • 1/2 cucumber, diced
  • 1/3 cup crumbled feta cheese (Can use vegan feta for a vegan option.)
  • 2 tablespoons chopped fresh parsley or cilantro

Dressing

  • 2 tablespoons olive oil
  • 1 tablespoon lemon juice, or to taste (Add more lemon to taste.)
  • Salt and black pepper to taste (Adjust to preference.)

Preparation

  1. Rinse and drain the chickpeas, then place them in a large bowl.
  2. Chop the avocado, tomatoes, onion, and cucumber into bite-size pieces. Add to the bowl with chickpeas.
  3. Add the crumbled feta and chopped herbs.
  4. In a small cup, whisk olive oil, lemon juice, salt, and pepper.
  5. Pour the dressing over the salad and toss gently, so the avocado does not mash.
  6. Taste and add more lemon, salt, or pepper if needed. Serve right away or chill for 15 minutes for cooler flavor.

Chop ingredients to similar size for even bites. Add herbs like parsley, cilantro, or basil for fresh taste. If making ahead, add avocado just before serving to avoid browning.

lunch, Salad, Side Dish
Healthy, Mediterranean
Avocado Salad, Chickpea Salad, Feta Salad, Healthy Recipe, Quick Meal