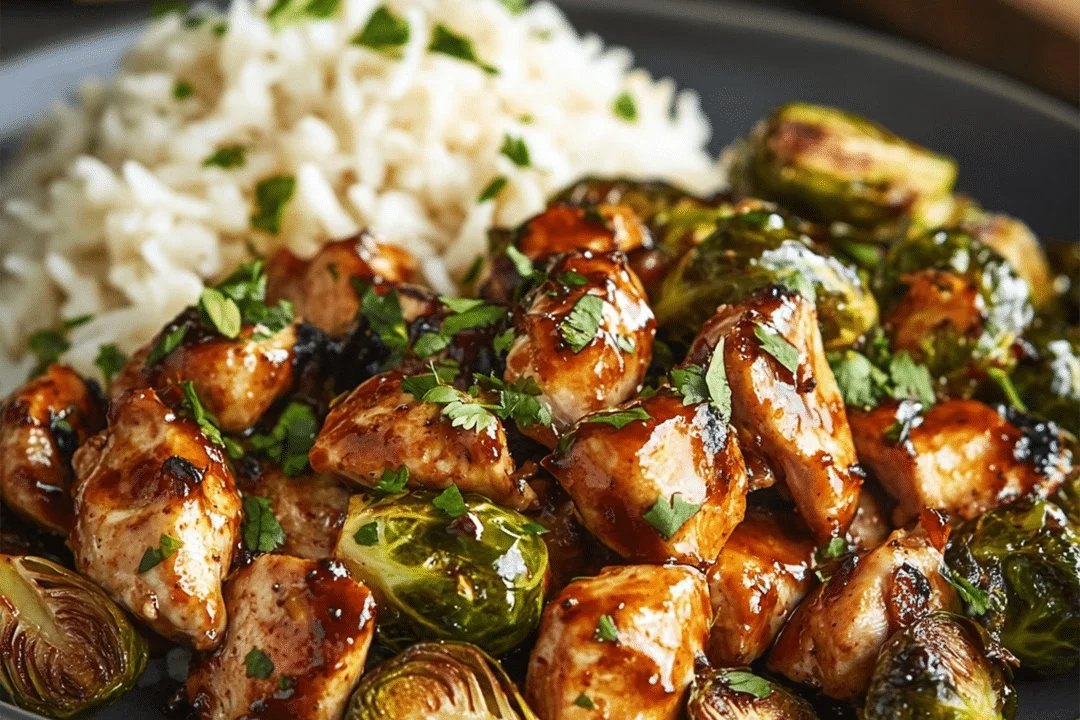
Ground Turkey Skillet Casserole

If you’re looking for a delicious dinner option that’s easy to make and loved by everyone, Ground Turkey Skillet Casserole is sure to be your new go-to dish. This one-pan wonder combines the hearty flavors of ground turkey with a melty, cheesy topping, creating a meal that is both satisfying and comforting. It’s the perfect dish for busy weeknights or when you have friends over. Imagine gathering around the table, diving into this delightful casserole, and enjoying every last bite. It’s a crowd-pleaser that will have everyone asking for seconds!

How to prepare Ground Turkey Skillet Casserole

Cooking up this tasty casserole is as easy as pie. Here’s how you can whip it up in no time:

  1. Start by browning a pound of ground turkey in a large skillet over medium heat. Stir it occasionally until it’s cooked through.
  2. Once the turkey is ready, you can add chopped onions, bell peppers, and garlic to the skillet. These vegetables will add a lovely flavor to the dish.
  3. After sautéing the vegetables until they are soft, mix in some diced tomatoes and your favorite seasonings. Trust me, this combination is what makes the casserole pop!
  4. Allow everything to simmer for a few minutes, letting those flavors meld together beautifully.
  5. Finally, pour in some cooked pasta and top with shredded cheese. Cover the skillet until the cheese melts, and voila, you have a delicious Ground Turkey Skillet Casserole!

Ground Turkey Skillet Casserole

Why You’ll Love Ground Turkey Skillet Casserole

There are so many reasons to love this dish! It’s not only quick and easy to prepare, but the flavors and textures are simply delightful. The ground turkey is lean, making this casserole a healthier option without sacrificing taste. In addition, it’s packed with colorful veggies, so you can feel good about what you’re serving. Plus, the melted cheese on top brings everything together with a comforting touch. You can also customize the recipe by adding your favorite ingredients such as different vegetables or spices, allowing you to make it your own. If you’re in the mood for more turkey dishes, check out this ground turkey and zucchini skillet recipe for inspiration!

Tips for success

To get the best from your Ground Turkey Skillet Casserole, consider these helpful tips. First, make sure to drain any excess grease from the ground turkey after cooking. This will keep your dish light and healthy. Also, feel free to experiment with different types of cheese on top; cheddar and mozzarella work great! For a bit of crunch, try adding some breadcrumbs before baking. Lastly, don’t be afraid to include more veggies; this dish is flexible, and you can add what you love!

Ground Turkey Skillet Casserole

Serving Suggestions

Ground Turkey Skillet Casserole is fantastic on its own, but there are several fun ways to serve it. You can pair it with a simple garden salad for a refreshing contrast or serve it alongside some garlic bread for a cozy night in. For a hint of heat, sprinkle some red pepper flakes on top or serve with sliced jalapeños. Enjoying this casserole with a side of your favorite dipping sauce can also add an extra layer of flavor!

FAQs

1. Can I make Ground Turkey Skillet Casserole ahead of time?

Yes, you can prepare it a day ahead. Just store it in the fridge before baking, and when it’s time to eat, bake it right before serving!

2. Is it possible to freeze leftovers?

Absolutely! Allow the casserole to cool, then place in an airtight container and freeze for up to three months. To reheat, just bake from frozen or thaw in the fridge overnight before reheating.

3. What can I substitute for ground turkey?

You can easily swap ground turkey for ground chicken, beef, or even plant-based meat alternatives if you prefer a vegetarian option.

Ground Turkey Skillet Casserole

A delicious and easy one-pan casserole combining ground turkey, colorful veggies, and a melty cheese topping, perfect for busy weeknights or gatherings.

Main Ingredients

  • 1 lb ground turkey (Lean meat for a healthier option.)
  • 1 medium onion, chopped
  • 1 medium bell pepper, chopped
  • 2 cloves garlic, minced (Add more for additional flavor.)
  • 1 can diced tomatoes (Use your favorite variety.)
  • 2 cups cooked pasta (Any type of pasta works.)
  • 1 cup shredded cheese (Cheddar or mozzarella recommended.)

Preparation

  1. Brown the ground turkey in a large skillet over medium heat, stirring occasionally until cooked through.
  2. Add chopped onion, bell pepper, and garlic to the skillet and sauté until the vegetables are soft.
  3. Mix in diced tomatoes and your favorite seasonings, then let simmer for a few minutes.
  4. Pour in the cooked pasta and top with shredded cheese. Cover the skillet until the cheese melts.

Drain excess grease from the turkey for a lighter dish. Use different cheeses or add breadcrumbs for crunch. Feel free to include more vegetables.

Dinner, Main Course
American
Casserole, Easy Dinner, Ground Turkey, One-Pan Meal, Skillet Recipe

Ground Turkey Taco Casserole

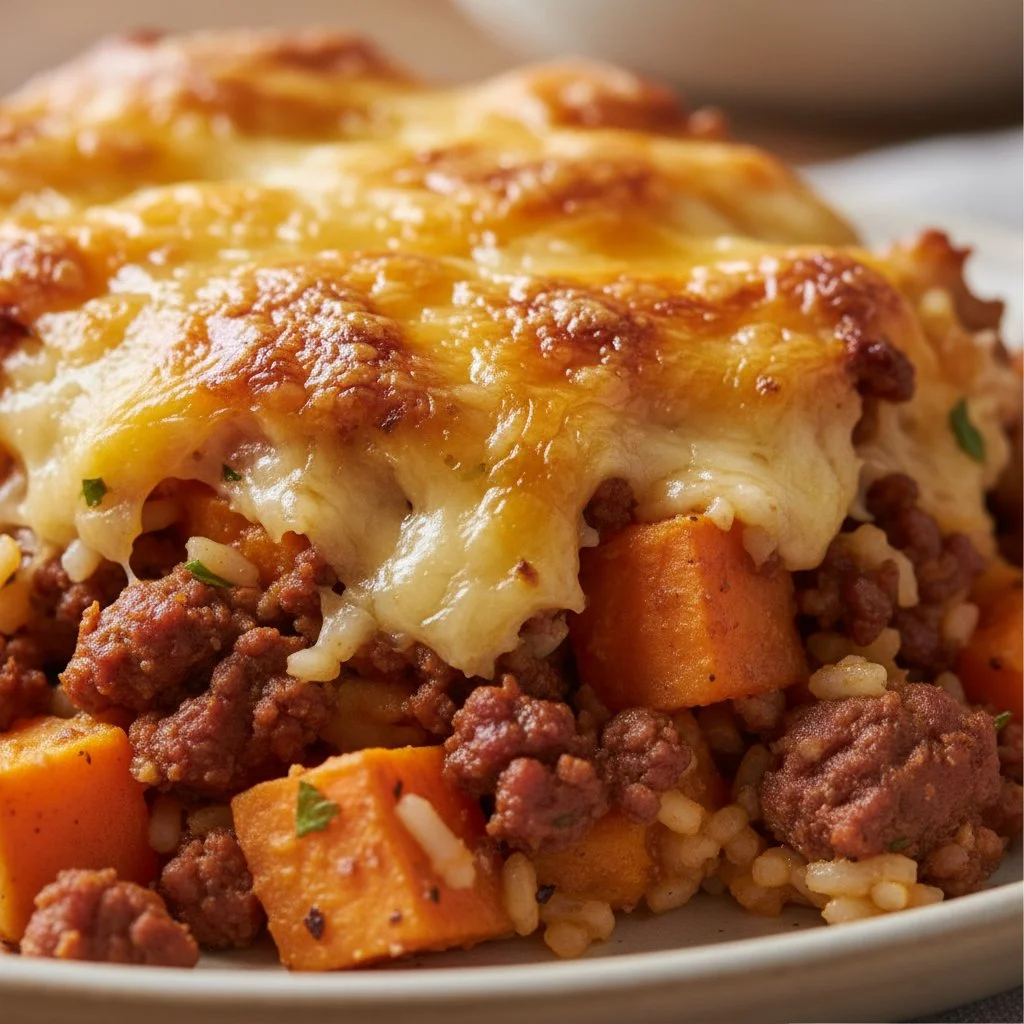
Ground Turkey Taco Casserole is one of those meals that makes everyone feel right at home. This dish blends the hearty flavors of tacos with the comforting goodness of a casserole, making it a staple for family dinners and get-togethers. It’s easy to prepare, full of flavor, and packed with healthy ingredients. No wonder it’s a crowd-pleaser at any table! The delightful combination of spices, tender ground turkey, and cheesy goodness makes it irresistible. Trust us, once you savor a bite, you’ll be excited to share it with your family and friends.

Ground Turkey Taco Casserole

How to Prepare Ground Turkey Taco Casserole

Creating this delicious casserole is simple and fun. Follow these easy steps to whip up your very own Ground Turkey Taco Casserole:

  1. Ingredients: Gather your ingredients including ground turkey, taco seasoning, black beans, corn, diced tomatoes, and cheese. You’ll also need tortillas for the layers and some toppings like avocado and cilantro.
  2. Ground Turkey Taco Casserole
  3. Preheat the Oven: Start by preheating your oven to 350°F (175°C).
  4. Cook the Turkey: In a skillet, brown the ground turkey until it’s fully cooked. Add in taco seasoning and mix well.
  5. Layering: In a casserole dish, start layering your ingredients. Begin with tortillas, followed by the turkey mixture, black beans, corn, diced tomatoes, and cheese. Repeat the layers until all ingredients are used, finishing with a layer of cheese on top.
  6. Bake: Place the casserole in the preheated oven and bake for about 25-30 minutes, or until the cheese is bubbly and golden brown.
  7. Serve: Remove from the oven and let it cool for a few minutes before serving. Top with fresh avocado, cilantro, or your favorite taco toppings.

{image_2}

Why You’ll Love Ground Turkey Taco Casserole

This Ground Turkey Taco Casserole is not only delicious but also versatile. You can easily adapt the recipe to fit your preferences by swapping out ingredients or adding your favorite toppings. Using ground turkey makes this dish a healthier alternative, providing lean protein without sacrificing taste. Plus, it’s perfect for meal prep! You can prepare it in advance and store it in the fridge or freezer, making weeknight dinners a breeze. Your family will love it, and you’ll appreciate how easy it is to make.

Tips for Success

  1. Spice Level: Adjust the spice level by using mild or hot taco seasoning based on your family’s preference.
  2. Vegetable Additions: Feel free to sneak in some veggies, like bell peppers or zucchini, for extra nutrition.
  3. Storage: Leftovers can be stored in an airtight container in the fridge for up to three days. Reheat in the oven or microwave before serving.
  4. Cheese Choices: Experiment with different types of cheese, like pepper jack or cheddar, for a unique flavor.

Serving Suggestions

Serve your Ground Turkey Taco Casserole with a side of simple green salad or some homemade guacamole. You can also offer tortilla chips and salsa for an extra crunch. These additions bring out the festive taco vibe and make your meal feel complete!

FAQs

  1. Can I use ground beef instead of turkey? Yes, you can definitely substitute ground beef if you prefer. Just remember that it will alter the flavor and fat content slightly.
  2. Can I make this dish vegetarian? Absolutely! You can replace the ground turkey with a mixture of beans, lentils, or even a meat substitute for a delicious vegetarian version.
  3. How can I freeze the casserole? Prepare the casserole up to baking, cover it tightly with foil, and freeze for up to three months. When you’re ready to enjoy, thaw it overnight in the fridge and bake as directed.

Whether it’s a cozy family night or a gathering with friends, Ground Turkey Taco Casserole is your ticket to a satisfying meal. Enjoy the delightful taste and have fun creating your own twist!

Ground Turkey Taco Casserole

A comforting blend of hearty tacos and cheesy casserole, packed with healthy ingredients and perfect for family dinners.

Main Ingredients

  • 1 lb ground turkey (Use lean ground turkey for a healthier option.)
  • 1 pkg taco seasoning (Adjust spiciness to preference.)
  • 1 can black beans (Drained and rinsed.)
  • 1 cup corn (Use frozen or fresh corn.)
  • 1 can diced tomatoes (With or without green chilies, based on preference.)
  • 2 cups cheese (Shredded cheese for topping (e.g., cheddar, pepper jack).)
  • 6 pieces tortillas (Flour or corn tortillas can be used.)

Toppings

  • 1 whole avocado (Diced, for serving.)
  • 1/4 cup cilantro (Chopped, for serving.)

Preparation

  1. Preheat your oven to 350°F (175°C).
  2. In a skillet, brown the ground turkey until fully cooked, then add taco seasoning and mix well.

Layering

  1. In a casserole dish, begin layering tortillas, followed by the turkey mixture, black beans, corn, diced tomatoes, and cheese.
  2. Repeat the layers until all ingredients are used, finishing with a layer of cheese on top.

Baking

  1. Place the casserole in the preheated oven and bake for about 25-30 minutes, or until the cheese is bubbly and golden brown.

Serving

  1. Remove from the oven and let cool for a few minutes before serving. Top with fresh avocado, cilantro, or your favorite taco toppings.

Feel free to add bell peppers or zucchini for extra veggies. Leftovers can be stored in the fridge for up to three days.

Dinner, Main Course
American, Mexican
Easy Casserole, Family Meal, Ground Turkey Taco Casserole, Healthy Dinner, Taco Casserole

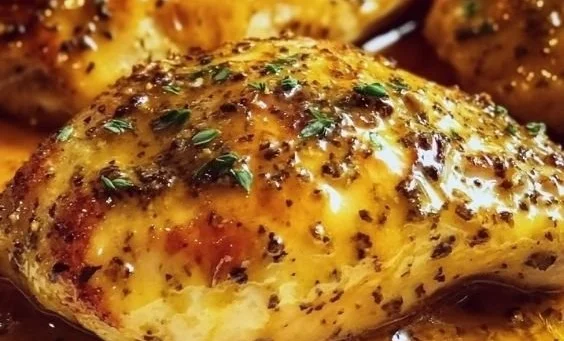
Easy Baked Honey Dijon Chicken

Easy baked honey dijon chicken recipe on a plate

If you’re looking for a simple yet delicious dinner idea, look no further than Easy Baked Honey Dijon Chicken. This dish combines the sweet richness of honey with the tangy flavor of Dijon mustard, creating a delightful taste that everyone will love. Perfect for busy weeknights or casual gatherings, this recipe is sure to become a family favorite. With its easy preparation and tantalizing aroma wafting through your kitchen, you’ll be eager to whip this up time and again.

Why You’ll Love Easy Baked Honey Dijon Chicken

What’s not to love about this chicken? It’s moist, flavorful, and incredibly easy to make. The honey and Dijon glaze caramelizes beautifully in the oven, giving the chicken a nice golden finish. Plus, it pairs well with a variety of side dishes, making it a versatile option for any meal. If you’re looking for dishes that bring smiles to the dinner table, this chicken recipe definitely hits the mark!

Tips for success

To achieve the best results with your Easy Baked Honey Dijon Chicken, consider these helpful tips:

  • Marinate for Extra Flavor: Allow the chicken to marinate in the honey Dijon mixture for at least 30 minutes. This will enhance the flavors and tenderness of the meat.
  • Use Fresh Ingredients: Fresh honey and Dijon mustard make a noticeable difference in taste.
  • Adjust Cooking Time: Depending on the size of your chicken pieces, be mindful of the cooking time to ensure they are cooked through. A meat thermometer should read 165°F (75°C) to confirm they are safe to eat.

Serving Suggestions

This flavorful chicken dish goes well with many sides. Consider pairing it with steamed vegetables, roasted potatoes, or a fresh salad. You can also serve it with rice or quinoa for a complete meal. For a delightful twist, try drizzling some additional honey over the chicken right before serving.

Easy Baked Honey Dijon Chicken

FAQs

Can I use other types of chicken?

Yes, you can use other cuts, such as chicken thighs or drumsticks. Just ensure they are cooked through to the right temperature.

How do I store leftovers?

Store any leftovers in an airtight container in the refrigerator for up to three days. You can reheat them in the oven or microwave.

Can I freeze this dish?

Absolutely! You can freeze the uncooked marinated chicken for up to three months. Just remember to thaw it completely before baking.

For another delicious chicken option, check out this easy hot honey chicken thighs recipe!

Easy Baked Honey Dijon Chicken

Easy Baked Honey Dijon Chicken

A simple yet delicious chicken dish combining honey and Dijon mustard for a flavorful glaze, perfect for busy weeknights and gatherings.

For the marinade

  • 1/4 cup honey (Use fresh honey for best flavor.)
  • 1/4 cup Dijon mustard (Use fresh Dijon mustard.)

Main ingredients

  • 4 pieces chicken breasts (Can substitute with chicken thighs or drumsticks.)

Preparation

  1. In a bowl, mix honey and Dijon mustard to create the marinade.
  2. Place chicken breasts in a resealable bag or dish and pour the marinade over them.
  3. Marinate the chicken in the refrigerator for at least 30 minutes.

Cooking

  1. Preheat the oven to 375°F (190°C).
  2. Remove the chicken from the marinade and place it in a baking dish.
  3. Bake in the preheated oven for about 30 minutes, or until chicken reaches an internal temperature of 165°F (75°C).

For added flavor, drizzle extra honey over the chicken before serving. Store leftovers in an airtight container in the refrigerator for up to three days. Can freeze marinated chicken for up to three months.

Dinner, Main Course
American
Baked Chicken, easy chicken recipe, Family Favorite, Honey Dijon Chicken, Simple Dinner

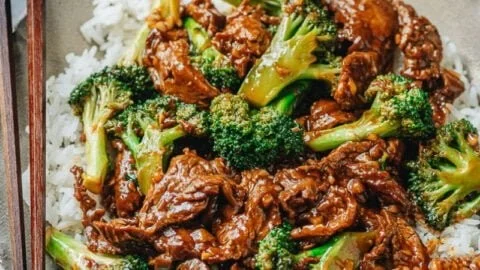
Easy Beef and Broccoli

Delicious Chinese Beef and Broccoli dish served in a bowl

Beef and Broccoli is a beloved dish that brings the taste of restaurant-quality  cooking right into your home. There are many reasons to try this recipe. First, it is simple to make, requiring just a few ingredients and a quick cooking time. Busy weeknights can be stressful, and this dish provides a delicious meal in about 30 minutes!

Another great reason to make this dish is its balanced flavor. The tender beef pairs perfectly with crunchy broccoli, creating a delightful contrast. The sauce, typically made from soy sauce, garlic, and ginger, adds a savory taste that pleases many palates.

Additionally, cooking at home allows you to control the ingredients. You can use high-quality beef, fresh vegetables, and avoid unwanted additives. Plus, it’s a great way to incorporate more veggies into your diet. The combination of protein and fiber in this dish makes it satisfying and filling.

Lastly, preparing food like this can be a fun and rewarding experience. By following the recipe, you can impress family or friends with your cooking skills. It’s a perfect dish for gatherings or family dinners, making it a winner in many households. Enjoying a hearty meal, made with love, always feels good!

How to Make Beef and Broccoli

Making Beef and Broccoli is easy and straightforward. Start by gathering your ingredients: thinly sliced beef (like flank steak), fresh broccoli florets, soy sauce, garlic, ginger, and a bit of cornstarch.

Begin by marinating the beef. In a bowl, mix a tablespoon of soy sauce with a teaspoon of cornstarch, garlic, and ginger. Toss the beef in this mixture and let it sit for about 15 minutes. While the beef is marinating, prepare the broccoli. Steam it lightly until it is bright green and slightly tender, but still crisp.

Next, heat a large pan or wok over medium-high heat. Add a bit of oil and let it heat up. Once hot, add the marinated beef. Stir-fry it until it begins to brown and is cooked through, which should take about 3 to 4 minutes. Then, add the steamed broccoli to the pan. Pour in a bit more soy sauce to add flavor and continue cooking for another 2 to 3 minutes.

Stir everything well to combine the flavors, making sure the beef and broccoli are well coated in the sauce. Once everything is heated through, it’s ready to serve. You can enjoy this dish with rice or noodles for a complete meal.

How to Serve Beef and Broccoli

Serving Beef and Broccoli is simple and enjoyable. It’s best to serve the dish hot and fresh from the pan. You can place it directly on a large serving platter for everyone to help themselves, or serve it on individual plates.

One of the most common sides for this dish is steamed white rice. The rice absorbs the delicious sauce, which enhances the overall flavor. You can also use fried rice for a nice twist. If you’re looking for something lighter, consider offering a side of quinoa.

You can garnish the dish with some sesame seeds or chopped green onions to add a touch of color and extra flavor. If you have some chili flakes, a sprinkle can add a nice kick for those who enjoy spicier food.

This dish is versatile, and you can serve it alongside other dishes for a full meal experience. Consider pairing it with spring rolls or hot and sour soup for a delightful dinner that’s sure to impress everyone at the table.

How to Store Beef and Broccoli

If you have leftovers of Beef and Broccoli, storing it correctly is important to maintain its flavor. Allow the dish to cool completely at room temperature. Once cooled, transfer the leftovers into an airtight container.

You can store the dish in the fridge for up to three days. When you’re ready to eat again, simply reheat the dish on the stovetop or in the microwave. If reheating in a pan, add a splash of water or broth to keep the beef and broccoli moist.

For longer storage, consider freezing the dish. Place the cooled meal in a freezer-safe container. It can last for about two to three months in the freezer. When you want to eat it, thaw it overnight in the fridge before reheating.

Take note that the texture of broccoli may change slightly after freezing and reheating, but it will still be tasty! Enjoy your leftovers as a quick meal on busy days.

Tips to Make Beef and Broccoli

Here are some helpful tips to ensure your Beef and Broccoli turns out great each time. First, choose the right cut of beef. Flank steak or sirloin works best, as they are tender and cook quickly. Make sure to slice the beef thinly against the grain for better texture.

Second, do not overcook the broccoli. Aim for that perfect crunch by steaming it just until it turns bright green. This keeps the nutrients intact and maintains the vibrant color.

Third, use high-quality soy sauce. The flavor greatly impacts the dish, so opt for low-sodium soy sauce if you want to reduce salt intake. You can also add oyster sauce for an extra depth of flavor!

Fourth, don’t hesitate to experiment. You can add other vegetables like bell peppers, carrots, or snap peas to enhance the dish.

Lastly, always taste and adjust the seasoning to your preference. Everyone’s palate is different, so using your own taste buds to guide you can create a dish that you will love. Happy cooking!

Variation

You can customize Beef and Broccoli in a few ways. One popular variation is to add different proteins. Chicken or tofu can be excellent substitutes if you prefer. You can also try adding more spices, such as black pepper or crushed red pepper, for added heat. For a sweeter flavor, include some sugar or honey in the marinade.

Another variation includes changing the vegetables. Instead of just broccoli, try using bok choy, snow peas, or bell peppers. This will create a colorful and varied dish! Cooking methods can also vary; grilling the beef for a smoky taste or using a slow cooker for a deeply flavored result can be great adaptations. Experimenting is part of the fun!

FAQs

1. Can I make this dish gluten-free?
Yes! Use gluten-free soy sauce or tamari to keep the dish gluten-free while still enjoying that savory flavor.

2. How do I make it vegan or vegetarian?
You can replace the beef with tofu or seitan and use vegetable broth or soy sauce for the sauce. It will still be delicious!

3. Can I use frozen broccoli instead of fresh?
Yes, you can use frozen broccoli. Just make sure to thaw it beforehand and drain any excess water to prevent the dish from becoming too watery.

[tasty-recipe id=”4689″]

Beef and Broccoli

A simple yet delicious dish that brings the flavors of restaurant-quality beef and broccoli to your home in about 30 minutes.

For the Marinade

  • 1 tablespoon soy sauce (Use low-sodium soy sauce if desired)
  • 1 teaspoon cornstarch (Helps to tenderize the beef)
  • 3 cloves garlic, minced (Adds flavor)
  • 1 teaspoon ginger, minced (Adds a savory taste to the marinade)

Main Ingredients

  • 1 pound flank steak, thinly sliced (A tender cut ideal for quick cooking)
  • 4 cups broccoli florets (Fresh florets preferred for best texture)
  • 2 tablespoons oil (For stir-frying)
  • 2 tablespoons soy sauce, to taste (For additional flavor when cooking)

Preparation

  1. In a bowl, mix the soy sauce, cornstarch, garlic, and ginger.
  2. Toss the sliced beef in the mixture and let it marinate for about 15 minutes.
  3. While the beef is marinating, steam the broccoli until bright green and slightly tender.

Cooking

  1. Heat a large pan or wok over medium-high heat and add oil.
  2. Once hot, add the marinated beef and stir-fry until browned and cooked through (about 3 to 4 minutes).
  3. Add the steamed broccoli to the pan and pour in additional soy sauce.
  4. Continue cooking for another 2 to 3 minutes, stirring well to combine.

Serving

  1. Serve the Beef and Broccoli hot with rice, noodles, or quinoa.
  2. Garnish with sesame seeds or chopped green onions if desired.

For variations, consider adding other vegetables like bell peppers or using chicken or tofu as protein. Adjust seasoning to personal taste.

Dinner, Main Course
Asian, Chinese
Beef and Broccoli, Easy Recipe, Healthy Meal, Quick Dinner, Stir-Fry

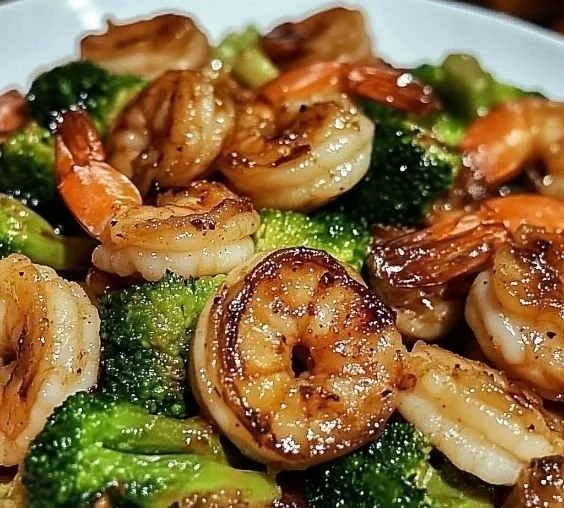
High-Protein Honey Garlic Shrimp

Delicious high-protein honey garlic shrimp served on a plate with vegetables

High-Protein Honey Garlic Shrimp is a simple dish that feels like a treat. Bright garlic and sweet honey meet juicy shrimp, and the sauce coats each bite. This high protein shrimp recipe is great for busy weeknights, meal prep, or a fast dinner that still feels special. It’s a crowd-pleaser because it is tasty, quick to make, and pairs well with many sides. Get ready to make a meal that tastes like you spent hours, even when you did not.

How to prepare High-Protein Honey Garlic Shrimp

Ingredients (simple, basic)

  • 1 lb (450 g) shrimp, peeled and deveined
  • 2 tbsp olive oil or avocado oil
  • 4 garlic cloves, minced
  • 3 tbsp honey
  • 3 tbsp low-sodium soy sauce or tamari
  • 1 tbsp rice vinegar or lemon juice
  • 1 tsp cornstarch mixed with 1 tbsp water (optional, for thicker sauce)
  • Salt and pepper to taste
  • Chopped green onion or parsley for garnish

Directions

  1. Pat the shrimp dry and season with a little salt and pepper.
  2. Mix honey, soy sauce, garlic, and vinegar in a small bowl.
  3. Heat oil in a large pan over medium-high heat. Add shrimp in a single layer. Cook 1 to 2 minutes per side, until pink and cooked through. Remove shrimp to a plate.
  4. Lower the heat to medium. Add the honey garlic mix to the pan. Let it bubble for 30 seconds, then add the cornstarch slurry if you like a thicker sauce. Stir until the sauce thickens, about 1 minute.
  5. Return the shrimp to the pan and toss to coat in the sauce. Cook another 30 seconds so flavors combine.
  6. Serve hot, garnish with green onion or parsley. Enjoy with rice, salad, or vegetables.

High-Protein Honey Garlic Shrimp

Why You’ll Love High-Protein Honey Garlic Shrimp

  • It is high in protein, thanks to the shrimp, so you feel full longer.
  • The flavor is bold but simple, sweet honey and savory garlic work well together.
  • It cooks in minutes, so it is perfect for fast dinners or when you want an easy healthy shrimp recipe.
  • It fits many diets, low carb if you skip the starch, and high protein for muscle fuel.

Tips for success

  • Use fresh or fully thawed shrimp so they cook evenly.
  • Don’t overcook the shrimp, they go from perfect to rubbery fast.
  • Taste the sauce before adding shrimp back, adjust honey or soy sauce to your liking.
  • If you want more protein, serve over quinoa, edamame, or a bed of greens.
  • For a bit of heat, add red pepper flakes or a dash of sriracha to the sauce.

Serving Suggestions

  • Serve over steamed rice or quinoa for a filling meal.
  • Toss with zucchini noodles or whole grain pasta for a lighter option.
  • Add steamed broccoli or snap peas on the side for color and crunch.
  • Make bowls with mixed greens, avocado, and a squeeze of lemon for a fresh, high-protein lunch.

High-Protein Honey Garlic Shrimp

FAQs

Q: How long does shrimp take to cook?
A: Shrimp cooks fast, usually 1 to 2 minutes per side depending on size. When it turns pink and opaque, it is done.

Q: Can I make this ahead and reheat it?
A: Yes, you can make it ahead. Store in the fridge for up to 2 days. Reheat gently in a pan so shrimp does not overcook.

Q: Is this recipe low carb?
A: Yes, it can be low carb if you skip the cornstarch and serve over greens or low-carb sides.

Q: Can I use frozen shrimp?
A: Yes, just thaw fully and pat dry before cooking for best results.

Q: What can I use instead of soy sauce?
A: Use tamari for gluten-free, or coconut aminos for a milder, slightly sweet flavor.

Conclusion

If you want another simple take on this flavor combo, check this recipe for ideas and notes on honey garlic shrimp: Honey Garlic Shrimp – Wholesome Yum.

High-Protein Honey Garlic Shrimp

This High-Protein Honey Garlic Shrimp is a quick and simple dish that combines bright garlic and sweet honey with juicy shrimp, perfect for busy weeknights or a fast dinner.

Main ingredients

  • 1 lb shrimp, peeled and deveined (Use fresh or fully thawed for best results.)
  • 2 tbsp olive oil or avocado oil
  • 4 cloves garlic, minced
  • 3 tbsp honey
  • 3 tbsp low-sodium soy sauce or tamari (Use tamari for gluten-free option.)
  • 1 tbsp rice vinegar or lemon juice
  • 1 tsp cornstarch mixed with 1 tbsp water (Optional, for thicker sauce.)
  • to taste Salt and pepper
  • garnish Chopped green onion or parsley

Preparation

  1. Pat the shrimp dry and season with a little salt and pepper.

Making the sauce

  1. Mix honey, soy sauce, garlic, and vinegar in a small bowl.

Cooking the shrimp

  1. Heat oil in a large pan over medium-high heat. Add shrimp in a single layer. Cook 1 to 2 minutes per side, until pink and cooked through. Remove shrimp to a plate.

Finishing the dish

  1. Lower the heat to medium. Add the honey garlic mix to the pan. Let it bubble for 30 seconds, then add the cornstarch slurry if you like a thicker sauce. Stir until the sauce thickens, about 1 minute.
  2. Return the shrimp to the pan and toss to coat in the sauce. Cook another 30 seconds so flavors combine.
  3. Serve hot, garnish with green onion or parsley. Enjoy with rice, salad, or vegetables.

Use fresh or fully thawed shrimp for even cooking. Don’t overcook the shrimp to avoid a rubbery texture. Adjust honey or soy sauce in the sauce to your liking. For added protein, serve over quinoa or greens, and for heat, add red pepper flakes or sriracha.

Dinner, Main Course
Asian
Easy Shrimp Recipe, Healthy Recipe, High-Protein Shrimp, Honey Garlic Shrimp, Quick Dinner

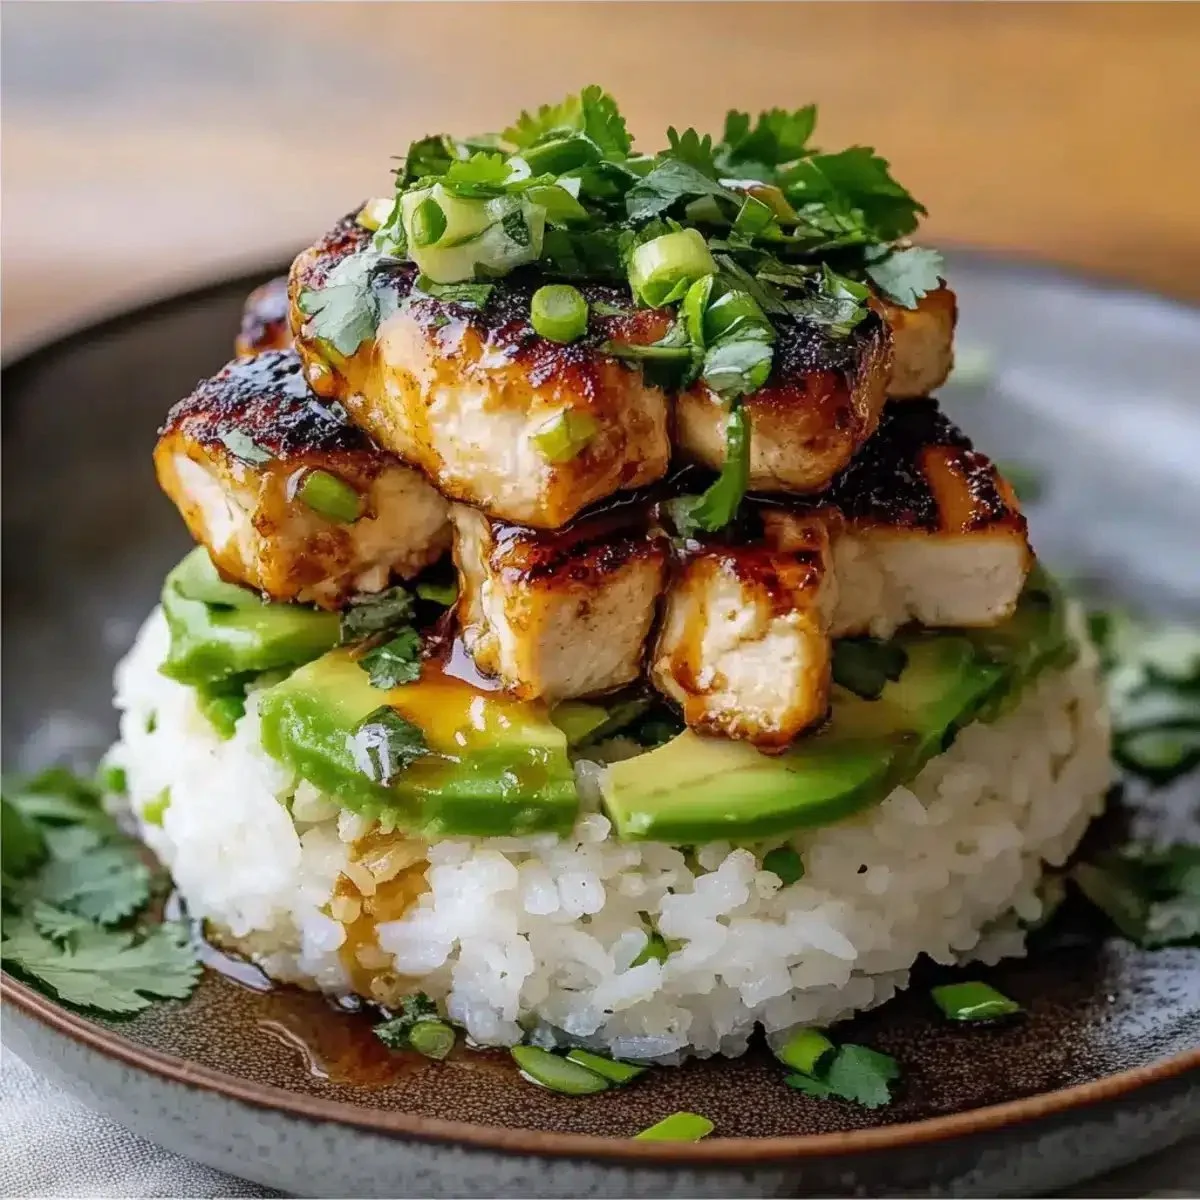
Delicious Honey Lime Chicken & Avocado Rice Stack Recipe

Honey Lime Chicken served on a bed of Avocado Rice Stack

This dish brings bright, fresh flavors and simple cooking together. The honey lime chicken is sweet and tangy, and the creamy avocado adds a soft, rich layer. The avocado rice stack looks pretty on the plate, and it tastes even better. It is an easy weeknight dinner that feels a little special. Give it a try, and enjoy a meal that will make everyone smile, you might want seconds.

How to prepare Delicious Honey Lime Chicken & Avocado Rice Stack Recipe

Ingredients

  • 2 boneless, skinless chicken breasts
  • 3 tablespoons honey
  • 2 tablespoons lime juice
  • 1 teaspoon lime zest
  • 1 clove garlic, minced
  • 1 tablespoon olive oil
  • Salt and pepper to taste
  • 2 cups cooked white or brown rice
  • 1 ripe avocado
  • 1 tablespoon lime juice for avocado
  • 2 tablespoons chopped fresh cilantro
  • Optional, chopped green onion or red pepper for garnish

Directions

  1. Make the honey lime marinade, mix honey, lime juice, lime zest, minced garlic, olive oil, salt, and pepper in a bowl.
  2. Put the chicken in the bowl, coat well, and let it sit for at least 15 minutes, or up to 1 hour in the fridge.
  3. Cook the chicken in a hot skillet over medium heat, about 5 to 7 minutes per side, until done. Let it rest, then slice or chop.
  4. Warm the cooked rice. Press the rice into a small bowl or ring mold to make a neat rice cake.
  5. Mash the avocado with 1 tablespoon lime juice, a pinch of salt, and some chopped cilantro.
  6. To build the stack, place the rice cake on a plate, add a layer of avocado mash, then top with sliced honey lime chicken.
  7. Sprinkle extra cilantro, green onion, or red pepper over the top. Serve warm.

Delicious Honey Lime Chicken & Avocado Rice Stack Recipe

Why You’ll Love Delicious Honey Lime Chicken & Avocado Rice Stack Recipe

  • Fresh flavors, the lime and honey give the chicken a lively taste.
  • Creamy avocado pairs well with warm rice and savory chicken.
  • Easy to make, good for a quick meal or for guests.
  • Versatile, you can use brown rice, quinoa, or add beans for more protein.
  • Eye catching, the stack looks like a restaurant plate but is simple to make.

Tips for success

  • Pat the chicken dry before adding the marinade, the sauce will stick better.
  • Don’t overcook the chicken, check with a thermometer or cut a small piece to test.
  • Use a ripe but firm avocado, it will mash smooth and hold shape on the stack.
  • Press rice firmly into a mold or small bowl to make tidy rice cakes.
  • Taste and adjust salt and lime at the end, a little extra lime brightens the dish.

Serving Suggestions

  • Serve with a light green salad for a fresh side.
  • Offer lime wedges and extra cilantro on the side.
  • Add a spoon of salsa or pico de gallo for more color and kick.
  • Pair with a cold beer or a simple iced tea for a relaxed meal.

Delicious Honey Lime Chicken & Avocado Rice Stack Recipe

FAQs

Q: Can I use chicken thighs instead of breasts? A: Yes, chicken thighs work well. They stay juicy and add more flavor. Cook until they reach a safe internal temperature.

Q: How can I make this dish vegetarian? A: Swap the chicken for grilled tofu or a mix of beans and roasted vegetables, and keep the honey lime sauce for a bright flavor.

Q: Can I make parts ahead of time? A: Yes, cook the rice and chicken ahead. Store separately in the fridge. Mash the avocado just before serving to keep it bright and green.

Q: What if I do not have a mold for the rice stack? A: Use a small bowl or cup to press the rice, then turn it out onto the plate. A spoon can help shape the stack too.

Conclusion

If you want the original recipe page and more notes, check the full write up at Honey Lime Chicken & Avocado Rice Stack – NorthEast Nosh Recipes, it has helpful tips and photos.

Honey Lime Chicken & Avocado Rice Stack

This dish brings bright, fresh flavors and simple cooking together. The honey lime chicken is sweet and tangy, and the creamy avocado adds a soft, rich layer, making it an easy weeknight dinner that feels a little special.

For the Marinade

  • 3 tablespoons honey
  • 2 tablespoons lime juice
  • 1 teaspoon lime zest
  • 1 clove garlic, minced
  • 1 tablespoon olive oil
  • Salt and pepper to taste

For the Rice Stack

  • 2 cups cooked white or brown rice
  • 1 ripe avocado
  • 1 tablespoon lime juice for avocado
  • 2 tablespoons chopped fresh cilantro
  • Optional, chopped green onion or red pepper for garnish

Preparation

  1. Make the honey lime marinade by mixing honey, lime juice, lime zest, minced garlic, olive oil, salt, and pepper in a bowl.
  2. Put the chicken in the bowl, coat well, and let it sit for at least 15 minutes, or up to 1 hour in the fridge.
  3. Cook the chicken in a hot skillet over medium heat, about 5 to 7 minutes per side, until done. Let it rest, then slice or chop.
  4. Warm the cooked rice.
  5. Mash the avocado with 1 tablespoon lime juice, a pinch of salt, and some chopped cilantro.

Assembly

  1. Press the rice into a small bowl or ring mold to make a neat rice cake.
  2. To build the stack, place the rice cake on a plate, add a layer of avocado mash, then top with sliced honey lime chicken.
  3. Sprinkle extra cilantro, green onion, or red pepper over the top. Serve warm.

Pat the chicken dry before adding the marinade for better adherence. Don’t overcook the chicken; check with a thermometer. Use a ripe but firm avocado for mashing. Firmly press rice into the mold for neatness. Adjust salt and lime for brightness.

Dinner, Main Course
American, Mexican
Avocado Rice Stack, Easy Dinner, Flavorful Chicken, Honey Lime Chicken, Weeknight Meal

Air Fryer Chicken Parmesan

Plate of crispy Air Fryer Chicken Parmesan garnished with herbs

Air Fryer Chicken Parmesan is a warm, cheesy, and crunchy meal that works for weeknights and guests. This recipe gives you golden breaded chicken, melted mozzarella, and tangy marinara without frying in oil. It’s a crowd-pleaser because it tastes like restaurant food, but you make it faster and cleaner at home. If you like quick air fryer meals, check another fun idea like air fryer grilled cheese hot dogs. You will smile while baking this, and your kitchen will smell amazing, so get ready to dig in.

how to prepare Air Fryer Chicken Parmesan

  1. Pat chicken breasts dry, slice in half if thick, and season with salt and pepper.
  2. Set three shallow bowls, one with flour, one with beaten egg, one with breadcrumbs mixed with grated parmesan and a little Italian seasoning.
  3. Dredge each chicken piece in flour, dip in egg, then press into the breadcrumb mix until well coated.
  4. Spray the air fryer basket with a little oil spray. Place chicken in a single layer, do not crowd.
  5. Cook at 380°F (190°C) for 8 minutes, flip, spray the top lightly with oil, then cook 6–8 more minutes until golden and cooked through.
  6. Spoon marinara over each piece, add a slice or sprinkle of mozzarella, then air fry 2–3 minutes more until cheese melts.
  7. Serve with extra parmesan and fresh basil if you like.

Air Fryer Chicken Parmesan

Why You’ll Love Air Fryer Chicken Parmesan

  • It is crispy outside and tender inside.
  • It uses less oil than pan frying, so it feels lighter.
  • Cheese and marinara make it comforting and familiar.
  • It cooks fast, perfect for busy nights.
  • You can make larger or smaller portions easily.

tips for success

  • Pound thick pieces to even thickness so they cook the same.
  • Press breadcrumbs firmly on the chicken so the crust stays put.
  • Do not crowd the basket, cook in batches if needed.
  • Use a meat thermometer, chicken should reach 165°F (74°C).
  • Spray the top of the chicken lightly with oil for extra browning.
  • Warm the marinara a bit before adding, so cheese melts faster.

Serving Suggestions

  • Serve over cooked pasta with extra marinara.
  • Make a salad with greens, tomatoes, and a light vinaigrette.
  • Serve on toasted rolls for chicken parmesan sandwiches.
  • Pair with roasted vegetables or steamed broccoli.

Air Fryer Chicken Parmesan

FAQs

Q: Can I use chicken thighs,

A: Yes, boneless thighs work well, adjust cooking time until they reach 165°F, they may need a few more minutes.

Q: Can I freeze breaded chicken before air frying,

A: Yes, flash freeze on a tray then store in a bag, cook from frozen but add a few extra minutes in the air fryer.

Q: What is the best breadcrumb to use,

A: Panko gives extra crunch, plain breadcrumbs also work, mix with parmesan for more flavor.

Q: Can I use pre-shredded mozzarella,

A: Yes, pre-shredded melts fine, fresh sliced mozzarella gives a creamier melt.

Q: Do I need to preheat the air fryer,

A: Many air fryers work well without preheat, but preheating for 2-3 minutes helps get a crisp start.

Conclusion

For another take on air fryer dinners and ideas for quick comfort food, see this recipe for Air Fryer Chicken Parmesan – Healthy Dinner! – Julie’s Eats & Treats ®. For a different method and tips from a major food site, check this Best Air Fryer Chicken Parmesan Recipe – Delish. Enjoy your crispy, cheesy meal and have fun cooking.

Air Fryer Chicken Parmesan

A warm, cheesy, and crunchy meal that offers golden breaded chicken, melted mozzarella, and tangy marinara without the mess of frying in oil. Perfect for weeknights and gatherings.

Chicken Preparation

  • 4 pieces boneless chicken breasts (Pat dry and slice in half if thick.)
  • 1 tsp salt (For seasoning.)
  • 1 tsp black pepper (For seasoning.)

Breading Station

  • 1 cup all-purpose flour (For dredging the chicken.)
  • 2 large eggs (Beaten, for dipping.)
  • 1 cup breadcrumbs (Panko is preferred for extra crunch.)
  • 1/2 cup grated parmesan cheese (Mixed into breadcrumbs.)
  • 1 tsp Italian seasoning (Mix with breadcrumbs for flavor.)

Toppings

  • 1 cup marinara sauce (Warm before adding to chicken.)
  • 1 cup mozzarella cheese (Sliced or shredded to top chicken.)

Garnish (optional)

  • 1/4 cup fresh basil (For serving.)
  • 1/4 cup extra parmesan cheese (For serving.)

Preparation

  1. Pat the chicken breasts dry and slice in half if they are thick. Season with salt and pepper.
  2. Set up three shallow bowls: one with flour, one with beaten egg, and one with breadcrumbs mixed with grated parmesan and Italian seasoning.
  3. Dredge each chicken piece in flour, dip in the egg, then press into the breadcrumb mix until well coated.

Cooking

  1. Spray the air fryer basket with oil spray. Place the chicken in a single layer, without crowding.
  2. Cook at 380°F (190°C) for 8 minutes. Flip the chicken, spray the top lightly with oil, and cook for another 6-8 minutes until golden and cooked through.
  3. Spoon marinara over each piece of chicken, add a slice or sprinkle of mozzarella, and air fry for an additional 2-3 minutes until the cheese melts.

Serving

  1. Serve with extra parmesan and fresh basil if desired.

To ensure even cooking, pound thick pieces to a uniform thickness. Firmly press breadcrumbs onto the chicken to keep the crust intact. Use a meat thermometer to check that the chicken reaches 165°F (74°C). Preheating the air fryer for 2-3 minutes can help achieve a crispier result.

Dinner, Main Course
Italian
Air Fryer Chicken Parmesan, Cheesy Chicken, Comfort Food, easy chicken recipe, Quick Dinner

Air Fryer Sweet Chili Chicken and Brussels Sprouts

Plate of Air Fryer Sweet Chili Chicken and Brussels Sprouts

This Air Fryer Sweet Chili Chicken and Brussels Sprouts recipe is warm, friendly, and easy. It mixes sweet, sticky chili sauce with tender chicken, and crispy, caramelized Brussels sprouts. The flavors are bright, a little sweet, and a little spicy, and the air fryer makes them both quick and nicely crisp.

If you like simple air fryer dinners, try another easy idea, air fryer grilled cheese hot dogs for more quick meal inspiration. This recipe is a crowd-pleaser, great for weeknights, and fun to share. You will want to make it again and again, and maybe lick the plate, no shame there.

how to prepare Air Fryer Sweet Chili Chicken and Brussels Sprouts

Ingredients

  • 1 pound boneless chicken breasts or thighs, cut into bite-size pieces
  • 1 pound Brussels sprouts, trimmed and halved
  • 3 tablespoons sweet chili sauce
  • 1 tablespoon soy sauce or tamari
  • 1 tablespoon olive oil
  • 1 teaspoon garlic powder
  • Salt and pepper to taste
  • Optional, sesame seeds and sliced green onion for garnish

Directions

  1. In a bowl, mix sweet chili sauce, soy sauce, olive oil, garlic powder, salt, and pepper.
  2. Add chicken pieces, toss to coat, and let sit 5 to 10 minutes.
  3. Toss Brussels sprouts with a little oil, salt, and pepper.
  4. Preheat the air fryer to 400°F (200°C) for a few minutes.
  5. Place Brussels sprouts in the basket in one layer. Cook 5 minutes.
  6. Add the chicken pieces on top of the Brussels sprouts in one layer. Cook 10 to 12 more minutes, shake basket or stir halfway, until chicken is cooked and sprouts are crisp.
  7. If you want more glaze, toss the cooked chicken with a little extra sweet chili sauce.
  8. Garnish with sesame seeds and green onion, serve hot.

Air Fryer Sweet Chili Chicken and Brussels Sprouts

Why You’ll Love Air Fryer Sweet Chili Chicken and Brussels Sprouts

  • Fast, cooks in about 20 minutes from start to finish.
  • Uses one air fryer basket, so cleanup is quick.
  • Bright sweet chili flavor that both kids and adults enjoy.
  • Crisp sprouts and juicy chicken, great mix of textures.
  • Healthy dinner option with protein and veggies.

tips for success

  • Cut chicken into similar size pieces so it cooks evenly.
  • Don’t crowd the basket, shake or stir halfway for even browning.
  • If your air fryer heats hot, lower temp to 380°F and add 2 to 4 minutes.
  • Taste sauce before cooking, add a splash of soy or a pinch of salt if needed.
  • Use dried garlic or fresh minced garlic for stronger flavor, add with the sauce.

Serving Suggestions

  • Serve over steamed rice or cauliflower rice for a full meal.
  • Add a side of pickled cucumber or a simple salad to balance the sweet sauce.
  • Wrap leftovers in a tortilla for a quick lunch wrap.
  • Garnish with lime wedges for a fresh squeeze of juice.

Air Fryer Sweet Chili Chicken and Brussels Sprouts

FAQs

Q: Can I use frozen Brussels sprouts?

A: Yes, but thaw and pat dry first, they crisp better if not wet.

Q: Can I make this with thighs instead of breasts?

A: Yes, thighs work well and stay juicy. Cut into even pieces.

Q: Is sweet chili sauce spicy?

A: It is mildly spicy and sweet, adjust by adding more soy or a little hot sauce if you want heat.

Q: Can I double the recipe?

A: You can, but cook in batches or use a larger air fryer, do not overcrowd the basket.

Q: How do I store leftovers?

A: Cool, place in an airtight container, and keep in the fridge up to 3 days.

Conclusion

This recipe is a quick, tasty weeknight winner that gives you crisp Brussels sprouts and sticky sweet chili chicken with very little fuss. For another version focused on roasted sprouts with sweet chili flavor, see this take on Sweet Chili Roasted Brussels Sprouts – Easy Side Dish. If you want to compare a different method that still uses the air fryer for fast meals, check out this Air Fryer Sweet Chili Chicken and Brussels Sprouts – Mason Woodruff write-up for more tips.

Air Fryer Sweet Chili Chicken and Brussels Sprouts

This quick and easy Air Fryer Sweet Chili Chicken and Brussels Sprouts recipe features tender chicken and crispy Brussels sprouts coated in a sweet and spicy chili sauce.

Main Ingredients

  • 1 pound boneless chicken breasts or thighs, cut into bite-size pieces (Thighs work well and stay juicy.)
  • 1 pound Brussels sprouts, trimmed and halved (Can use frozen but must thaw and pat dry.)

Sauce and Seasoning

  • 3 tablespoons sweet chili sauce (Adjust for more spice.)
  • 1 tablespoon soy sauce or tamari (Add a splash to taste.)
  • 1 tablespoon olive oil
  • 1 teaspoon garlic powder (Use fresh minced garlic for stronger flavor.)
  • to taste Salt and pepper

Optional Garnish

  • as needed sesame seeds (Optional)
  • as needed sliced green onion (Optional)

Preparation

  1. In a bowl, mix sweet chili sauce, soy sauce, olive oil, garlic powder, salt, and pepper.
  2. Add chicken pieces, toss to coat, and let sit for 5 to 10 minutes.
  3. Toss Brussels sprouts with a little oil, salt, and pepper.
  4. Preheat the air fryer to 400°F (200°C) for a few minutes.

Cooking

  1. Place Brussels sprouts in the basket in one layer. Cook for 5 minutes.
  2. Add the chicken pieces on top of the Brussels sprouts in one layer. Cook for an additional 10 to 12 minutes, shaking the basket or stirring halfway, until chicken is cooked and sprouts are crisp.
  3. If you want more glaze, toss the cooked chicken with a little extra sweet chili sauce.

Serving

  1. Garnish with sesame seeds and green onion, serve hot.

Cut chicken into similar size pieces for even cooking. Avoid overcrowding the basket for even browning.

Dinner, Main Course
American, Asian
Air Fryer Chicken, Brussels Sprouts, Easy Recipe, Quick Dinner, Sweet Chili Chicken

Ultimate Ground Turkey Sweet Potato Casserole

Healthy ground turkey sweet potato casserole ready to serve

Ultimate Ground Turkey Sweet Potato Casserole is a delightful dish that brings comfort and joy to your family table. This casserole is not only hearty but also nutritious, combining lean ground turkey with the sweet, earthy flavor of sweet potatoes, all baked to perfection. It’s a dish everyone loves, whether it’s a busy weeknight dinner or a special weekend gathering. The blend of spices and textures creates an unforgettable experience, making it a true crowd-pleaser. So, if you’re craving something delicious and easy to prepare, you’re in for a treat!

How to Prepare Ultimate Ground Turkey Sweet Potato Casserole

Preparing this Ultimate Ground Turkey Sweet Potato Casserole is quite simple. Start by cooking the ground turkey in a skillet until it’s browned. Next, mix it with diced onions, garlic, and your favorite seasonings to pump up the flavor. In another bowl, mash cooked sweet potatoes with a little butter, salt, and pepper until smooth. Layer the turkey mixture in a baking dish, spread the sweet potato mash on top, and finish it off with cheese. Bake it until everything is heated through and the cheese is golden. This dish is as functional as it is tasty!

Ultimate Ground Turkey Sweet Potato Casserole

Why You’ll Love Ultimate Ground Turkey Sweet Potato Casserole

You’re going to adore this casserole for many reasons! First, it’s packed with protein and vitamins, thanks to the turkey and sweet potatoes. It’s a balanced meal in one dish, making dinner prep super easy for busy nights. Plus, the flavors blend beautifully, making each bite a wonderful explosion of taste. The creamy sweet potatoes paired with the savory turkey will leave everyone going back for seconds. It’s the kind of meal that not only satisfies those hunger pangs but also warms your heart.

Tips for Success

  1. Choose Fresh Ingredients: The quality of your ground turkey and sweet potatoes will make a big difference in taste.
  2. Don’t Overcook the Turkey: Make sure not to overcook the turkey, as it can become dry. Cook it just until it’s no longer pink.
  3. Customize Your Spices: Feel free to add your favorite herbs or spices to make the dish your own, such as cumin or paprika for a little kick.
  4. Mash the Sweet Potatoes Smoothly: Ensure your sweet potatoes are well-mashed so they spread easily on top of the turkey mixture. Adding a splash of milk can help achieve a creamy texture.

Serving Suggestions

This casserole pairs well with a simple side salad or steamed vegetables for added crunch and freshness. You can also serve it with a dollop of Greek yogurt or sour cream on top for a creamy finish. Don’t forget some crusty bread on the side for extra comfort!

FAQs

Can I make this casserole ahead of time?
Yes, you can prepare the casserole a day in advance. Just assemble it, cover it in the fridge, and bake it when you’re ready.

What can I substitute for ground turkey?
You can easily swap out ground turkey for ground chicken, lean beef, or even plant-based meat alternatives if you want a vegetarian option.

How long can I store leftovers?
Leftovers can be stored in the fridge for up to 3 days. Make sure to cover it tightly to keep it fresh!

Get ready to bring Ultimate Ground Turkey Sweet Potato Casserole into your kitchen, and watch as it becomes a delightful favorite for everyone who tries it! Enjoy your cooking adventure, and have fun savoring each bite!

Ultimate Ground Turkey Sweet Potato Casserole

A hearty and nutritious casserole combining lean ground turkey and sweet potatoes, perfect for weeknight dinners or special gatherings.

Main Ingredients

  • 1 lb ground turkey (Choose lean ground turkey for a healthier option.)
  • 2 medium sweet potatoes (Cooked and mashed.)
  • 1 medium onion (Diced.)
  • 2 cloves garlic (Minced.)
  • 1 cup cheddar cheese (Shredded, for topping.)
  • 2 tbsp butter (For mashing the sweet potatoes.)
  • to taste salt
  • to taste pepper
  • optional spices (like cumin or paprika) (Customize to your liking.)

Preparation

  1. In a skillet over medium heat, cook the ground turkey until browned.
  2. Add diced onions, minced garlic, and your favorite seasonings, and stir until fragrant.
  3. In a separate bowl, mash the cooked sweet potatoes with butter, salt, and pepper until smooth.

Assembly

  1. Layer the turkey mixture in a baking dish.
  2. Spread the sweet potato mash on top of the turkey mixture.
  3. Sprinkle shredded cheddar cheese over the sweet potato layer.

Baking

  1. Bake in a preheated oven until heated through and cheese is golden, about 25-30 minutes.

The casserole can be prepared a day in advance and stored in the fridge before baking. Leftovers can be stored for up to 3 days.

Dinner, Main Course
American
Casserole, Comfort Food, Ground Turkey, Healthy Dinner, Sweet Potato