Greek Yogurt Cookie Dough

Making Greek Yogurt Cookie Dough is a delightful way to enjoy a classic treat with a healthier twist. This cookie dough is creamy, sweet, and packed with flavor, making it a hit for both kids and adults. The use of Greek yogurt adds a hint of tanginess and moisture, while still allowing that yummy cookie dough taste to shine through. Plus, it’s simple to whip up, perfect for when those cravings strike.

This featured recipe is not just a treat for the taste buds, it’s also a crowd-pleaser at gatherings. Imagine serving this indulgent Greek Yogurt Cookie Dough at your next party, where everyone will appreciate its unique texture and delicious flavor. It’s a guaranteed hit, and you’ll find yourself savoring every bite. So grab your mixing bowl and let’s get started on this scrumptious creation!

How to prepare Greek Yogurt Cookie Dough

  1. In a large bowl, combine 1 cup of whole wheat flour, 1/2 teaspoon of baking soda, and a pinch of salt.
  2. In another bowl, mix together 1/2 cup of Greek yogurt, 1/4 cup of brown sugar, and 1/4 cup of granulated sugar until smooth.
  3. Gradually add the dry ingredients to the wet mixture and stir to combine.
  4. Fold in 1/2 cup of chocolate chips, or your favorite add-ins like nuts or dried fruit.
  5. Chill the dough in the refrigerator for about 30 minutes before serving.

Greek Yogurt Cookie Dough

Why You’ll Love Greek Yogurt Cookie Dough

You’ll love Greek Yogurt Cookie Dough because it feels indulgent while being a bit healthier than traditional cookie dough. The Greek yogurt provides a source of protein, making you feel good about snacking on it. The dough is incredibly versatile; add whatever mix-ins you prefer, and you can even adjust the sweetness to your liking. Plus, it’s super simple to make, which means you can enjoy this treat whenever the mood strikes!

Tips for success

  • Measure your flour correctly. Too much flour can make the dough dry, so spoon and level for accuracy.
  • Chill the dough before serving. This step helps the flavors meld together and makes it easier to scoop.
  • Play with different mix-ins. Try nuts, dried fruit, or even a swirl of peanut butter for a fun twist.

Greek Yogurt Cookie Dough

Serving Suggestions

Serve your Greek Yogurt Cookie Dough plain, or scoop it onto a graham cracker for a fun snack. You can also pair it with fresh fruit or a dollop of nut butter for a more filling treat. Feel free to add it to ice cream or yogurt for a delightful dessert experience!

FAQs

What can I use instead of Greek yogurt?

If you don’t have Greek yogurt, regular yogurt or cottage cheese can work, but the texture might change slightly.

Can I freeze the cookie dough?

Yes, you can freeze the dough! Just scoop it into small balls and freeze them on a baking sheet before transferring them to a bag. They can be enjoyed later, too!

Is this cookie dough safe to eat raw?

Yes! This Greek Yogurt Cookie Dough is safe to eat raw since it does not contain raw eggs. Enjoy without worry!

Greek Yogurt Cookie Dough

This Greek Yogurt Cookie Dough is a creamy and decadent treat with a healthier twist, perfect for both kids and adults.

Dry Ingredients

  • 1 cup whole wheat flour
  • 1/2 teaspoon baking soda
  • a pinch salt

Wet Ingredients

  • 1/2 cup Greek yogurt
  • 1/4 cup brown sugar
  • 1/4 cup granulated sugar

Mix-ins

  • 1/2 cup chocolate chips (or your favorite add-ins like nuts or dried fruit)

Preparation

  1. In a large bowl, combine whole wheat flour, baking soda, and a pinch of salt.
  2. In another bowl, mix together Greek yogurt, brown sugar, and granulated sugar until smooth.
  3. Gradually add the dry ingredients to the wet mixture and stir to combine.
  4. Fold in chocolate chips or your preferred mix-ins.
  5. Chill the dough in the refrigerator for about 30 minutes before serving.

Measure your flour correctly to avoid a dry dough. Chill the dough before serving to enhance flavors and make scooping easier. Experiment with various mix-ins for unique flavors.
Dessert, Snack
American, Greek
Dessert Snack, Greek Yogurt Cookie Dough, Healthy Cookie Dough, Homemade Cookie Dough, Protein Snack

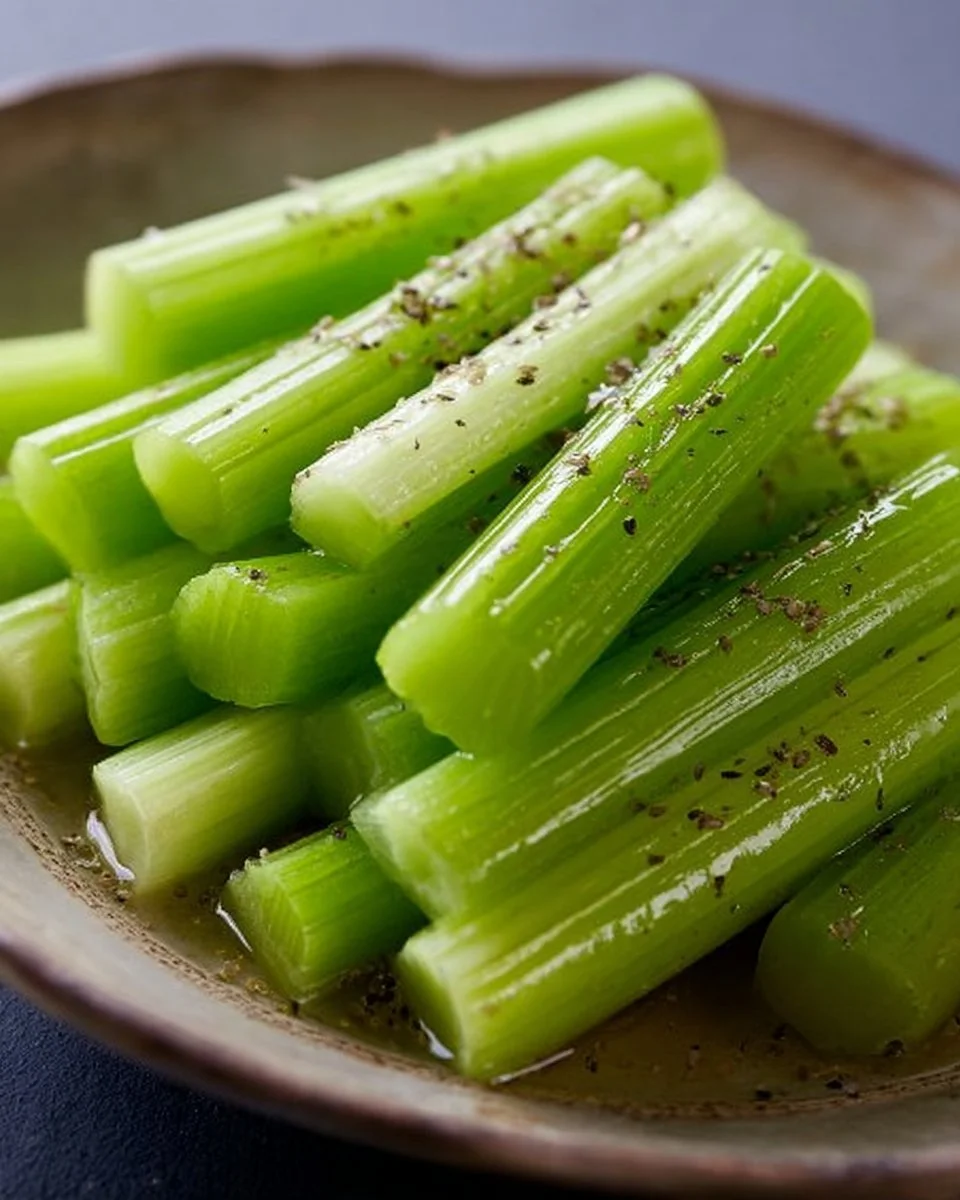
Easy Fermented Celery Sticks

Easy fermented celery sticks in a jar with spices and herbs

Fermented foods are a fantastic way to boost your gut health while enjoying delicious flavors. If you’re looking for a simple recipe that packs a punch, you’ll love these Easy Fermented Celery Sticks. This recipe is not just nutritious; it’s also a crowd-pleaser that combines the refreshing crunch of celery with a tangy twist. Their vibrant taste and satisfying crunch make them a perfect snack or a great side dish for meals. Trust me, once you try making these, you’ll wonder why you didn’t start earlier!

How to prepare Easy Fermented Celery Sticks

Making fermented celery sticks is straightforward and fun. Start by gathering your ingredients. You’ll need fresh celery, water, salt, and optional spices like garlic or dill for extra flavor.

  1. First, wash and cut the celery into sticks.
  2. Next, prepare a brine by mixing water and salt until the salt dissolves.
  3. Place the celery sticks in a clean jar, packing them tightly.
  4. Pour the brine over the celery, ensuring they are fully submerged.
  5. If you’re using spices, add them in before sealing the jar.
  6. Cover the jar with a lid or a cloth and let it sit at room temperature for about 5-7 days.
  7. Taste them after a few days to see if they are to your liking.
  8. Once fermented, store them in the fridge to enjoy later!

Easy Fermented Celery Sticks

Why You’ll Love Easy Fermented Celery Sticks

These fermented celery sticks are not only easy to make but also incredibly tasty. The lively crunch and zesty flavor elevate any snack time. Plus, you can customize them with various spices to fit your taste. They are perfect as a quick snack, delicious on a cheese platter, or even as a crunchy addition to salads. With benefits for your digestive health and an addictive taste, these little snacks will quickly become a staple in your kitchen!

Tips for success

  • Ensure your celery is fresh, as this will enhance the final flavor and texture.
  • Use filtered water if possible to promote better fermentation.
  • Don’t hesitate to experiment with different spices and herbs until you find your perfect combination.

Easy Fermented Celery Sticks

Serving Suggestions

Serve your Easy Fermented Celery Sticks as a healthy appetizer or alongside your favorite dips like hummus or ranch dressing. They can also be a delightful addition to sandwiches or salads, adding crunch and flavor. Enjoy them alone for a quick snack or share them with friends at your next gathering!

FAQs

How long do fermented celery sticks last?

Fermented celery sticks can last several weeks in the fridge as long as they are fully submerged in the brine.

Can I use other vegetables?

Absolutely! You can ferment a variety of vegetables like carrots, cucumbers, or radishes using the same method.

Is it necessary to ferment for a whole week?

Not necessarily, you can ferment for a shorter period, but letting them sit longer gives you a stronger flavor. Taste them every few days to find what you like best!

Easy Fermented Celery Sticks

A simple and delicious recipe to make tangy and crunchy fermented celery sticks, perfect as a snack or side dish.

Main Ingredients

  • 1 bunch Fresh celery (Ensure it’s fresh for the best flavor and texture.)
  • 4 cups Filtered water (Use filtered water for better fermentation.)
  • 2 tablespoons Salt (Non-iodized salt is preferred.)

Optional Spices

  • 2 cloves Garlic (Crushed or whole for added flavor.)
  • 1 tablespoon Dill (For a herby twist.)

Preparation

  1. Wash and cut the celery into sticks.
  2. Prepare a brine by mixing water and salt until the salt dissolves.
  3. Place the celery sticks in a clean jar, packing them tightly.
  4. Pour the brine over the celery, ensuring they are fully submerged.
  5. If using spices, add them in before sealing the jar.
  6. Cover the jar with a lid or a cloth and let it sit at room temperature for about 5-7 days.
  7. Taste them after a few days to see if they are to your liking.
  8. Once fermented, store them in the fridge to enjoy later.

Experiment with different spices and herbs until you find your perfect combination. Fermented celery sticks can last several weeks in the fridge if fully submerged in brine.

Appetizer, Snack
American
Celery Sticks, Easy Recipes, Fermented Foods, Gut Health, Healthy Snacks

Greek Yogurt Pizza Dough

Greek Yogurt Pizza Dough

There’s something magical about pizza that brings people together. Now, imagine a pizza made with a dough that’s not just delicious but also healthy. Greek Yogurt Pizza Dough is a fantastic choice for anyone looking for a simple yet tasty base for their favorite toppings. This recipe is a crowd-pleaser, offering a delightful blend of flavors and a wonderful texture that pairs perfectly with whatever ingredients you choose. You’ll find that it bakes up beautifully, with a light and fluffy crust that everyone will enjoy. Get ready to impress your family or friends and have fun making your own delicious pizza!

Greek Yogurt Pizza Dough

How to prepare Greek Yogurt Pizza Dough

To make Greek Yogurt Pizza Dough, you’ll need just a few simple ingredients. Here is a quick rundown of what you’re going to need:

Ingredients

  • 1 cup Greek yogurt
  • 1 cup all-purpose flour (plus extra for dusting)
  • 1 teaspoon baking powder
  • ½ teaspoon salt

Directions

  1. In a mixing bowl, combine Greek yogurt, flour, baking powder, and salt.
  2. Stir until a dough starts to form.
  3. Sprinkle flour on a clean surface, then knead the dough for about 2-3 minutes, adding more flour as needed until not sticky.
  4. Roll out the dough into your desired shape and thickness.
  5. Preheat your oven to 450°F (230°C).
  6. Place your rolled-out dough on a baking sheet or pizza stone, add your favorite sauce, cheese, and toppings.
  7. Bake in the oven for about 10-12 minutes or until the crust is golden brown.

{image_2}

Greek Yogurt Pizza Dough

Why You’ll Love Greek Yogurt Pizza Dough

Greek Yogurt Pizza Dough is not only easy to make, but it also provides a nutritious twist on traditional pizza dough. The use of Greek yogurt adds a boost of protein, making it a healthier option. Plus, it’s a great way to sneak in some extra nutrients without sacrificing flavor. The combination of ingredients results in a perfectly chewy and airy crust that holds up well under any toppings you can dream up. Whether you’re having a cozy family night or a lively pizza party, this dough will surely make your pizza a hit!

Tips for success

  1. Use full-fat Greek yogurt for the best flavor and texture, but low-fat can work in a pinch.
  2. Knead the dough gently to avoid overworking it, which can lead to a tough crust.
  3. Experiment with herbs and spices in the dough for extra flavor—think garlic powder or Italian seasoning.
  4. Don’t forget to preheat your oven, as a hot oven is key to achieving a nice crust.
  5. Adjust your baking time, as ovens can vary—keep an eye on your pizza to get it just right.

{image_1}

Serving Suggestions

Greek Yogurt Pizza Dough is versatile, making it perfect for any topping combination. Consider classic margherita with fresh basil and mozzarella, or try a loaded veggie pizza with bell peppers, onions, and olives. If you are feeling adventurous, why not make a dessert pizza topped with Nutella and fruits? The options are endless, giving you the chance to create something special every time!

FAQs

Can I freeze Greek Yogurt Pizza Dough?

Yes, you can freeze the dough! Wrap it tightly in plastic wrap and place it in a freezer bag. Thaw it in the fridge before using.

How long does the pizza dough last in the fridge?

When stored in an airtight container, it can last up to 3 days in the fridge.

Can I use whole wheat flour instead?

Absolutely! Whole wheat flour can be a healthier option, but it may change the texture slightly. You might need to adjust the amount of yogurt.

Now that you have everything you need, why not gather your ingredients and get started on making your very own Greek Yogurt Pizza Dough? Enjoy the process and, more importantly, enjoy your delicious creation!

Greek Yogurt Pizza Dough

A healthy and delicious pizza dough recipe made with Greek yogurt, perfect for any topping combination.

Main Ingredients

  • 1 cup Greek yogurt (Use full-fat for best flavor and texture.)
  • 1 cup all-purpose flour (Plus extra for dusting.)
  • 1 teaspoon baking powder
  • ½ teaspoon salt

Preparation

  1. In a mixing bowl, combine Greek yogurt, flour, baking powder, and salt.
  2. Stir until a dough starts to form.
  3. Sprinkle flour on a clean surface, then knead the dough for about 2-3 minutes, adding more flour as needed until not sticky.
  4. Roll out the dough into your desired shape and thickness.

Baking

  1. Preheat your oven to 450°F (230°C).
  2. Place your rolled-out dough on a baking sheet or pizza stone, add your favorite sauce, cheese, and toppings.
  3. Bake in the oven for about 10-12 minutes or until the crust is golden brown.

Knead the dough gently to avoid overworking it. Experiment with herbs and spices in the dough for extra flavor. Preheating your oven is key to achieving a nice crust.

Dinner, Main Course
Mediterranean
easy pizza, Greek yogurt, Healthy Recipes, Homemade Pizza, Pizza Dough

Asian Chicken Kabobs

Asian Chicken Kabobs on skewers with colorful vegetables and sauces

Asian Chicken Kabobs are the perfect blend of juicy chicken, vibrant vegetables, and a medley of mouthwatering flavors that will leave everyone wanting more. These kabobs are not only delicious but also incredibly easy to make, making them a fantastic choice for family dinners, backyard barbecues, or entertaining guests. Just imagine succulent pieces of chicken marinated in a savory sauce, threaded onto skewers with colorful veggies, and then grilled to perfection. It’s a dish that looks just as good as it tastes, and it’s sure to be a crowd-pleaser. So, roll up your sleeves and get ready to create this delightful dish that brings a taste of Asia right to your kitchen!

How to prepare Asian Chicken Kabobs

Preparing Asian Chicken Kabobs is straightforward, and you’ll love how quickly you can bring this dish together. Here’s how to do it:

  1. Ingredients:
  • 1 pound chicken breast, cut into cubes
  • 2 bell peppers, cut into chunks
  • 1 onion, cut into wedges
  • 1/4 cup soy sauce
  • 2 tablespoons sesame oil
  • 2 tablespoons honey
  • 1 teaspoon garlic powder
  • 1 teaspoon ginger powder
  • Salt and pepper to taste
  • Skewers (wooden or metal)
  1. Marinate the Chicken: In a mixing bowl, combine soy sauce, sesame oil, honey, garlic powder, ginger powder, salt, and pepper. Add the chicken cubes to the marinade and let them sit for at least 30 minutes to absorb all the delicious flavors.
  2. Assemble the Kabobs: Thread the marinated chicken, bell peppers, and onion onto the skewers, alternating between each ingredient for a colorful presentation.
  3. Grill the Kabobs: Preheat your grill to medium heat. Place the skewers on the grill and cook for about 10-12 minutes, turning occasionally, until the chicken is cooked through and has a nice char.
  4. Serve and Enjoy: Once done, remove the kabobs from the grill and serve them hot, garnished with sesame seeds or fresh herbs if desired.

Asian Chicken Kabobs

Why You’ll Love Asian Chicken Kabobs

Asian Chicken Kabobs are not just tasty; they are also versatile. You can customize them according to your preferences by adding different vegetables or even swapping chicken for tofu or shrimp. Their marinated flavor is a delightful mix of sweet and savory, and the combination of spices adds a nice kick. Furthermore, they are easy to make, which means you can whip them up for any occasion without stress. Plus, cooking them on the grill creates that wonderful smoky flavor that is perfect for summertime gatherings. If you love a simple yet flavorful recipe, these kabobs won’t disappoint.

Tips for success

To ensure your Asian Chicken Kabobs turn out amazing every time, here are a few tips:

  • Soak Wooden Skewers: If using wooden skewers, soak them in water for about 30 minutes before grilling to prevent burning.
  • Cut Uniformly: Make sure to cut the chicken and veggies into uniform sizes so they cook evenly.
  • Watch The Grill: Keep an eye on your kabobs while they grill to avoid overcooking. Chicken is safe to eat when it reaches an internal temperature of 165°F.
  • Experiment with Marinades: Don’t hesitate to try out different marinades or sauces for a unique twist each time you make your kabobs.

Asian Chicken Kabobs

Serving Suggestions

Asian Chicken Kabobs pair wonderfully with steamed rice, quinoa, or a fresh green salad. You could also serve them with a side of dipping sauce, such as sweet chili sauce or additional soy sauce, for added flavor. For a fun touch, try making a mini kabob platter with various types of skewers, letting everyone customize their plate with their favorite ingredients. This makes for a colorful, interactive meal.

FAQs

Can I use chicken thighs instead of chicken breast? Yes, chicken thighs are often juicier and can make for a delicious swap!

How long can I marinate the chicken? You can marinate the chicken for up to 4 hours in the refrigerator for even more flavor.

Can I make these kabobs in the oven? Absolutely! If you don’t have a grill, you can bake them in the oven at 400°F for about 20-25 minutes, turning halfway through.

Don’t miss the chance to try out this delightful recipe, which not only is full of flavor but also brings a little bit of Asian cuisine to your dining table!

Asian Chicken Kabobs

These Asian Chicken Kabobs offer a delightful blend of juicy chicken, vibrant vegetables, and a perfect medley of sweet and savory flavors. Easy to make, they’re a fantastic choice for any gathering.

For the marinade

  • 1 pound chicken breast, cut into cubes (You can also use chicken thighs for a juicier option.)
  • 1/4 cup soy sauce
  • 2 tablespoons sesame oil
  • 2 tablespoons honey
  • 1 teaspoon garlic powder
  • 1 teaspoon ginger powder
  • Salt and pepper to taste

For the kabobs

  • 2 bell peppers, cut into chunks (Use a mix of colors for a vibrant presentation.)
  • 1 onion, cut into wedges
  • Skewers (wooden or metal) (Soak wooden skewers in water for 30 minutes before grilling.)

Preparation

  1. In a mixing bowl, combine soy sauce, sesame oil, honey, garlic powder, ginger powder, salt, and pepper.
  2. Add the chicken cubes to the marinade and let them sit for at least 30 minutes to absorb all the delicious flavors.

Assembly

  1. Thread the marinated chicken, bell peppers, and onion onto the skewers, alternating between each ingredient.

Cooking

  1. Preheat your grill to medium heat.
  2. Place the skewers on the grill and cook for about 10-12 minutes, turning occasionally, until the chicken is cooked through and has a nice char.

Serving

  1. Remove the kabobs from the grill and serve them hot, garnished with sesame seeds or fresh herbs if desired.

Serve with steamed rice, quinoa, or a fresh green salad. Pair with dipping sauces like sweet chili sauce or soy sauce for added flavor.

Dinner, Main Course
Asian, Grilled
Asian Chicken Kabobs, Chicken Skewers, Easy Kabobs, grilled chicken, Healthy Dinner

Hawaiian Chicken Sheet Pan

Hawaiian chicken sheet pan with colorful vegetables and pineapple slices

Hawaiian Chicken Sheet Pan is the perfect dish for family dinners or easy weeknight gatherings. This delightful recipe brings together the vibrant flavors of chicken, pineapple, and colorful veggies all roasted together on one pan. It’s a dish that appeals to everyone, with its sweet and savory notes making it a real crowd-pleaser. The combination of tender chicken infused with Hawaiian-inspired flavors will have your taste buds dancing. Plus, the ease of cleanup makes it even more appealing. Who wouldn’t want to dive into this deliciousness?

How to prepare Hawaiian Chicken Sheet Pan

To whip up this scrumptious Hawaiian Chicken Sheet Pan, start by gathering your ingredients. You’ll need chicken thighs or breasts, fresh pineapple chunks, bell peppers, onions, garlic, soy sauce, brown sugar, and some spices for the perfect flavor blend. Begin by preheating your oven, then marinate the chicken in soy sauce and brown sugar while you chop the veggies.

Arrange everything on a large sheet pan, making sure to distribute the ingredients evenly. This helps everything cook beautifully together. Roast in the oven and let the wonderful aroma fill your kitchen. Just wait until it’s time to dig in!

Hawaiian Chicken Sheet Pan

Why You’ll Love Hawaiian Chicken Sheet Pan

One of the best things about the Hawaiian Chicken Sheet Pan is how versatile it is. You can swap in your favorite veggies, and even adjust the sweetness to your liking. It’s not just a meal; it’s a whole experience. This dish loves to please and is bound to be a hit at any dinner table. Plus, it takes hardly any time to prepare, making it an ideal choice for those bustling weeknights.

Tips for success

  1. Use fresh ingredients: Opt for fresh pineapple and colorful vegetables to enhance the dish’s vibrant flavors.
  2. Marinate well: Allow your chicken to marinate in the soy sauce and brown sugar for at least 20-30 minutes for the best flavor absorption.
  3. Watch the timing: Keep an eye on the cooking time depending on the size of your chicken pieces to ensure they don’t overcook.

Hawaiian Chicken Sheet Pan

Serving Suggestions

For the best experience, serve your Hawaiian Chicken Sheet Pan over a bed of fluffy rice or quinoa. You can also top it with some chopped green onions or sesame seeds for an extra crunch. Pair it with a fresh side salad or some steamed broccoli to complete your meal.

FAQs

Can I use chicken breasts instead of thighs?

Yes, you can! Just ensure that the cooking time is adjusted as chicken breasts may cook faster.

What can I substitute for soy sauce?

If you’re looking for a soy-free option, try using coconut aminos or tamari as a great alternative.

Can I prepare this dish ahead of time?

Absolutely! You can marinate the chicken and chop the veggies a day in advance. Just store everything in the fridge until you’re ready to cook.

To explore more easy recipes, check out this Parmesan Crusted Chicken Sheet Pan Dinner. It’s another fantastic option for quick weeknight meals!

Hawaiian Chicken Sheet Pan

A delightful one-pan dish featuring chicken, pineapple, and colorful veggies, perfect for family dinners or easy weeknight gatherings.

Main ingredients

  • 1 lbs chicken thighs or breasts (Use your preference for taste.)
  • 1 cup fresh pineapple chunks (Fresh pineapple enhances flavor.)
  • 2 cups bell peppers, chopped (Any color of bell pepper can be used.)
  • 1 medium onion, sliced (Yellow or red onions work well.)
  • 3 cloves garlic, minced
  • 1/4 cup soy sauce (Can substitute with coconut aminos or tamari.)
  • 2 tablespoons brown sugar (Adjust sweetness to taste.)

Preparation

  1. Preheat your oven.
  2. Marinate the chicken in soy sauce and brown sugar for at least 20-30 minutes.
  3. Chop the vegetables while the chicken marinating.

Cooking

  1. Arrange chicken, pineapple, and veggies on a large sheet pan, distributing evenly.
  2. Roast in the preheated oven until the chicken is cooked through and veggies are tender.

For serving, plate over rice or quinoa, topped with green onions or sesame seeds. Pair with a fresh salad or steamed broccoli. Adjust cooking time based on chicken size to prevent overcooking.

Dinner, Main Course
Asian, Hawaiian
Easy Weeknight Meal, Family Dinner, Hawaiian Chicken, One Pan Meal, Sheet Pan Dinner

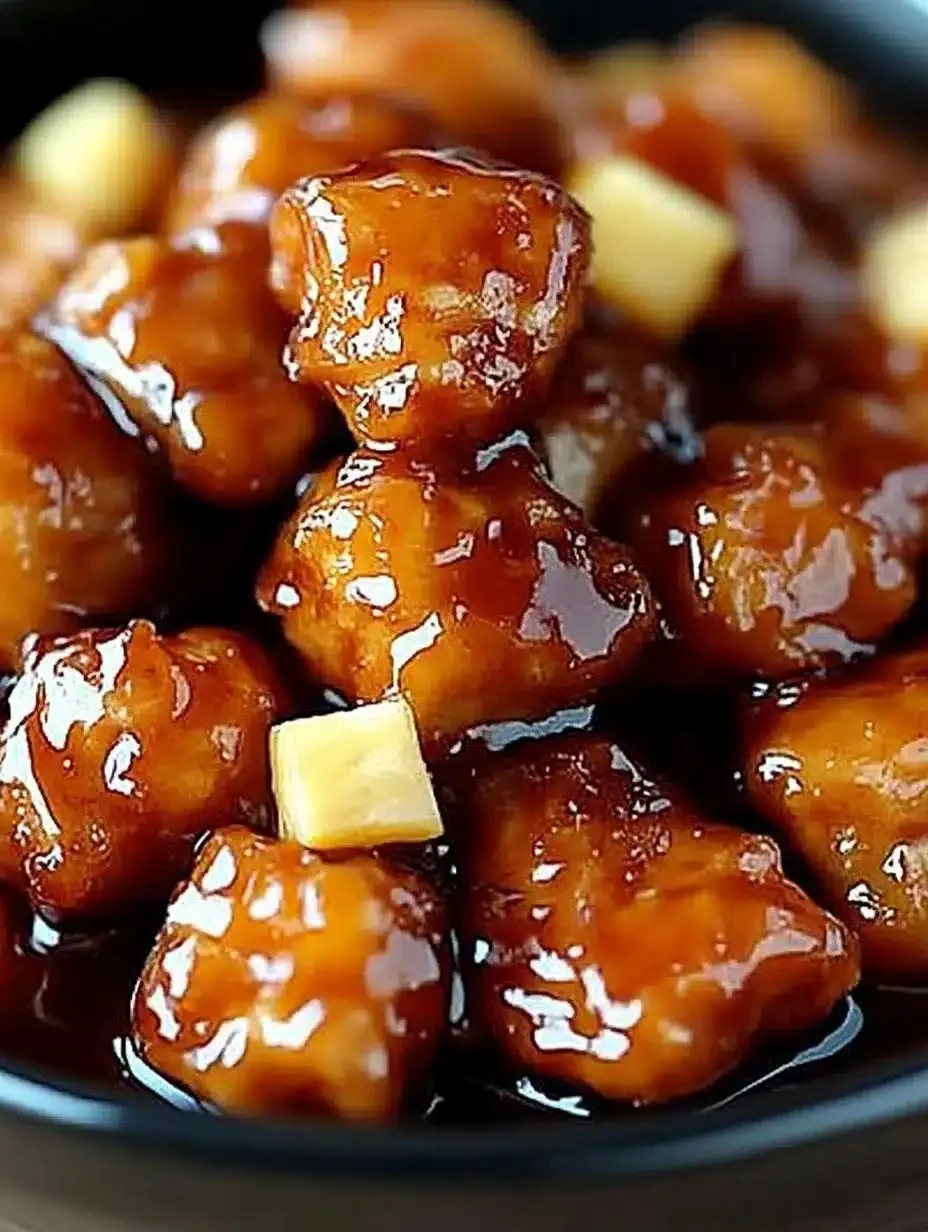
Brown Sugar Pineapple Chicken

Delicious Brown Sugar Pineapple Chicken served on a plate with fresh herbs.

Brown Sugar Pineapple Chicken is a delightful dish that combines sweet and savory flavors in a way that makes your taste buds dance. This recipe features tender chicken coated in a luscious sauce made from brown sugar, soy sauce, pineapple juice, and fresh pineapple chunks. The results are irresistible and perfect for any occasion.

Why You’ll Love Brown Sugar Pineapple Chicken

There are so many reasons to love this dish. For starters, the sweet brown sugar perfectly balances the savory soy sauce, creating a rich flavor profile that everyone will enjoy. Plus, the juicy pineapple adds a tropical touch that brightens the dish, making it a great choice for summer cookouts or family dinners. You will find that this recipe is not only easy to prepare but also a great way to impress your guests!

Brown Sugar Pineapple Chicken

Tips for success

To make sure your Brown Sugar Pineapple Chicken turns out perfectly, consider these helpful tips:

  1. Use Fresh Ingredients: Fresh pineapple will give the best flavor, but canned pineapple can also work in a pinch.
  2. Marinate the Chicken: Allowing the chicken to marinate in the sauce for at least 30 minutes will enhance its flavor.
  3. Cook on Medium Heat: Cooking over medium heat helps to caramelize the brown sugar without burning it.
  4. Serve Immediately: This dish tastes best when served right after cooking, making it a great option for those special meal times.

Brown Sugar Pineapple Chicken

Serving Suggestions

Pair your Brown Sugar Pineapple Chicken with fluffy rice to soak up that delicious sauce. You could also serve it with a crisp green salad or steamed vegetables to add some crunch to your meal. If you are looking to transport your taste buds further, consider serving it with a side of sweet potato fries for a fun twist!

FAQs

Can I use chicken thighs instead of chicken breast?

Yes, chicken thighs will work wonderfully and may even add a bit more flavor and juiciness to the dish.

Can I make this recipe gluten-free?

Absolutely! Simply use a gluten-free soy sauce to ensure the rest of the ingredients are gluten-free as well.

How should I store leftovers?

Store any leftover Brown Sugar Pineapple Chicken in an airtight container in the fridge for up to three days. You can reheat it in the microwave or on the stovetop.

This Brown Sugar Pineapple Chicken is just the kind of dish that brings warmth and smiles to the table. With its delightful combination of flavors, it truly is a crowd-pleaser that you’ll want to make again and again!

Brown Sugar Pineapple Chicken

A delightful dish that combines sweet and savory flavors with tender chicken coated in a luscious brown sugar and pineapple sauce.

Main Ingredients

  • 4 pieces Chicken breasts (Or chicken thighs can be used for more flavor.)
  • 1/2 cup Brown sugar (For the sauce.)
  • 1/4 cup Soy sauce (Use gluten-free if needed.)
  • 1/2 cup Pineapple juice (Freshly squeezed is best.)
  • 1 cup Fresh pineapple chunks (For added flavor and texture.)

Preparation

  1. Marinate the chicken in a mixture of brown sugar, soy sauce, pineapple juice, and pineapple chunks for at least 30 minutes.

Cooking

  1. In a skillet over medium heat, cook the marinated chicken until it’s browned and cooked through, about 20 minutes.
  2. Ensure the sauce thickens and caramelizes without burning.

Serving

  1. Serve the chicken immediately with fluffy rice, a crisp salad, or steamed vegetables.

Use fresh ingredients for best flavor. Store leftovers in an airtight container in the fridge for up to three days.

Dinner, Main Course
American, Tropical
Brown Sugar Pineapple Chicken, Chicken Recipe, Easy Dinner, Summer Recipe, Tropical Chicken

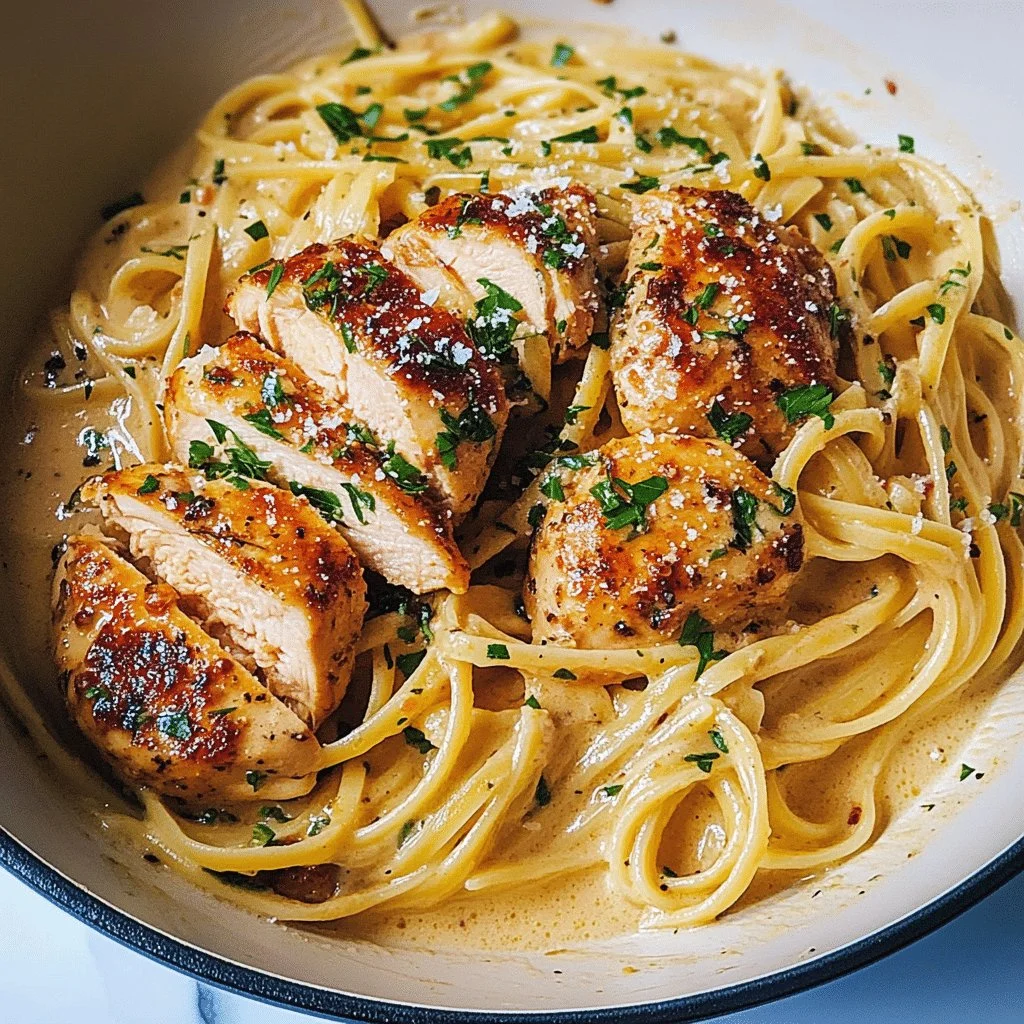
Best-Ever Chicken Carbonara

Delicious Chicken Carbonara served with a creamy sauce and crispy bacon

Imagine a dish that wraps you in warmth, with creamy sauce, tender chicken, and just the right amount of cheese. That’s what Best-Ever Chicken Carbonara brings to your table. This recipe is a real crowd-pleaser that combines the comfort of pasta with the savory goodness of chicken and crispy bacon. Perfect for family dinners or gatherings with friends, this dish is sure to impress everyone. The flavors meld beautifully, creating a satisfying meal that’s hard to resist. Trust me, once you make this, you’ll want to whip it up again and again!

How to prepare Best-Ever Chicken Carbonara

Cooking Best-Ever Chicken Carbonara is easier than you might think. Here’s a simple guide to get you started.

  1. Ingredients:
  • 8 ounces of spaghetti
  • 1 tablespoon olive oil
  • 1 pound chicken breast, cooked and diced
  • 4 slices of bacon, chopped
  • 2 cloves garlic, minced
  • 2 large eggs
  • 1 cup grated Parmesan cheese
  • Salt and pepper to taste
  • Fresh parsley, chopped (for garnish)
  1. Directions:
  2. Boil a large pot of salted water and cook the spaghetti according to package instructions.
  3. In a large skillet, heat the olive oil over medium heat. Add the chopped bacon and cook until crispy.
  4. Stir in the minced garlic and cook for about 1 minute, avoiding browning it.
  5. Add the cooked chicken to the skillet and combine well with the bacon and garlic.
  6. In a bowl, whisk together the eggs and Parmesan cheese.
  7. Once the spaghetti is cooked, reserve some pasta water and drain the rest.
  8. Quickly add the spaghetti to the skillet and remove it from the heat. Pour the egg and cheese mixture over the pasta, mixing everything quickly.
  9. If the sauce is too thick, add reserved pasta water a little at a time until creamy.
  10. Season with salt and pepper, and garnish with fresh parsley.

Best-Ever Chicken Carbonara

Why You’ll Love Best-Ever Chicken Carbonara

You’ll fall in love with Best-Ever Chicken Carbonara for so many reasons! First, it’s quick to make, making it perfect for busy weeknights. The creamy texture and robust flavors will make it a hit with anyone, young or old. Plus, it’s a versatile recipe; you can customize it to suit your taste by adding vegetables or making it a bit spicier. And if you’re looking for more delicious ideas, you might want to check out this air fryer Cajun chicken recipe.

Tips for success

  1. Use fresh ingredients: Fresh garlic and quality cheese can elevate the dish.
  2. Monitor heat: It’s important to mix the egg mixture quickly off the heat. This helps to prevent scrambling the eggs.
  3. Adjust the creaminess: Feel free to adjust the amount of pasta water to get the perfect creamy consistency.
  4. Cook pasta al dente: This keeps it firm and gives the dish a nice bite.

Best-Ever Chicken Carbonara

Serving Suggestions

Serve Best-Ever Chicken Carbonara with a light salad or steamed vegetables for a balanced meal. You can also add a sprinkle of extra Parmesan on top for added flavor. If you want to enjoy it even more, a side of garlic bread can make it a complete feast! This dish pairs wonderfully with a glass of white wine.

FAQs

Can I use different types of pasta?

Absolutely! You can use penne, fettuccine, or any pasta you prefer.

Can I make this dish in advance?

While it’s best enjoyed fresh, you can prepare the chicken and sauce ahead of time, then combine with pasta just before serving.

What if I don’t have bacon?

You can substitute it with pancetta, or even turkey bacon for a healthier option.

Best-Ever Chicken Carbonara is a delightful recipe that promises comfort and joy in every bite. It’s simple enough for anyone to make and delicious enough to become a staple in your kitchen. Enjoy!

Chicken Carbonara

A creamy, comforting pasta dish featuring tender chicken, crispy bacon, and cheesy goodness, perfect for family dinners.

Pasta and Sauce Ingredients

  • 8 ounces spaghetti
  • 1 tablespoon olive oil (For cooking)
  • 1 pound chicken breast, cooked and diced
  • 4 slices bacon, chopped (For crispy texture)
  • 2 cloves garlic, minced (Fresh garlic adds flavor)
  • 2 large eggs (For the creamy sauce)
  • 1 cup grated Parmesan cheese (Add more for serving if desired)
  • Salt and pepper to taste
  • Fresh parsley, chopped (for garnish) (For finishing touches)

Preparation

  1. Boil a large pot of salted water and cook the spaghetti according to package instructions.
  2. In a large skillet, heat the olive oil over medium heat. Add the chopped bacon and cook until crispy.
  3. Stir in the minced garlic and cook for about 1 minute, avoiding browning.
  4. Add the cooked chicken to the skillet and combine well with the bacon and garlic.
  5. In a bowl, whisk together the eggs and Parmesan cheese.

Combining

  1. Once the spaghetti is cooked, reserve some pasta water and drain the rest.
  2. Quickly add the spaghetti to the skillet and remove it from the heat. Pour the egg and cheese mixture over the pasta, mixing quickly.
  3. If the sauce is too thick, add reserved pasta water a little at a time until creamy.
  4. Season with salt and pepper, and garnish with fresh parsley.

Use fresh ingredients for the best flavor. It’s important to mix the egg mixture quickly off the heat to prevent scrambling. Adjust the creaminess by adding pasta water to your liking. Cook pasta al dente for optimal texture.

Dinner, Main Course
Italian
Chicken Carbonara, Comfort Food, Creamy Pasta, Easy Dinner, Pasta

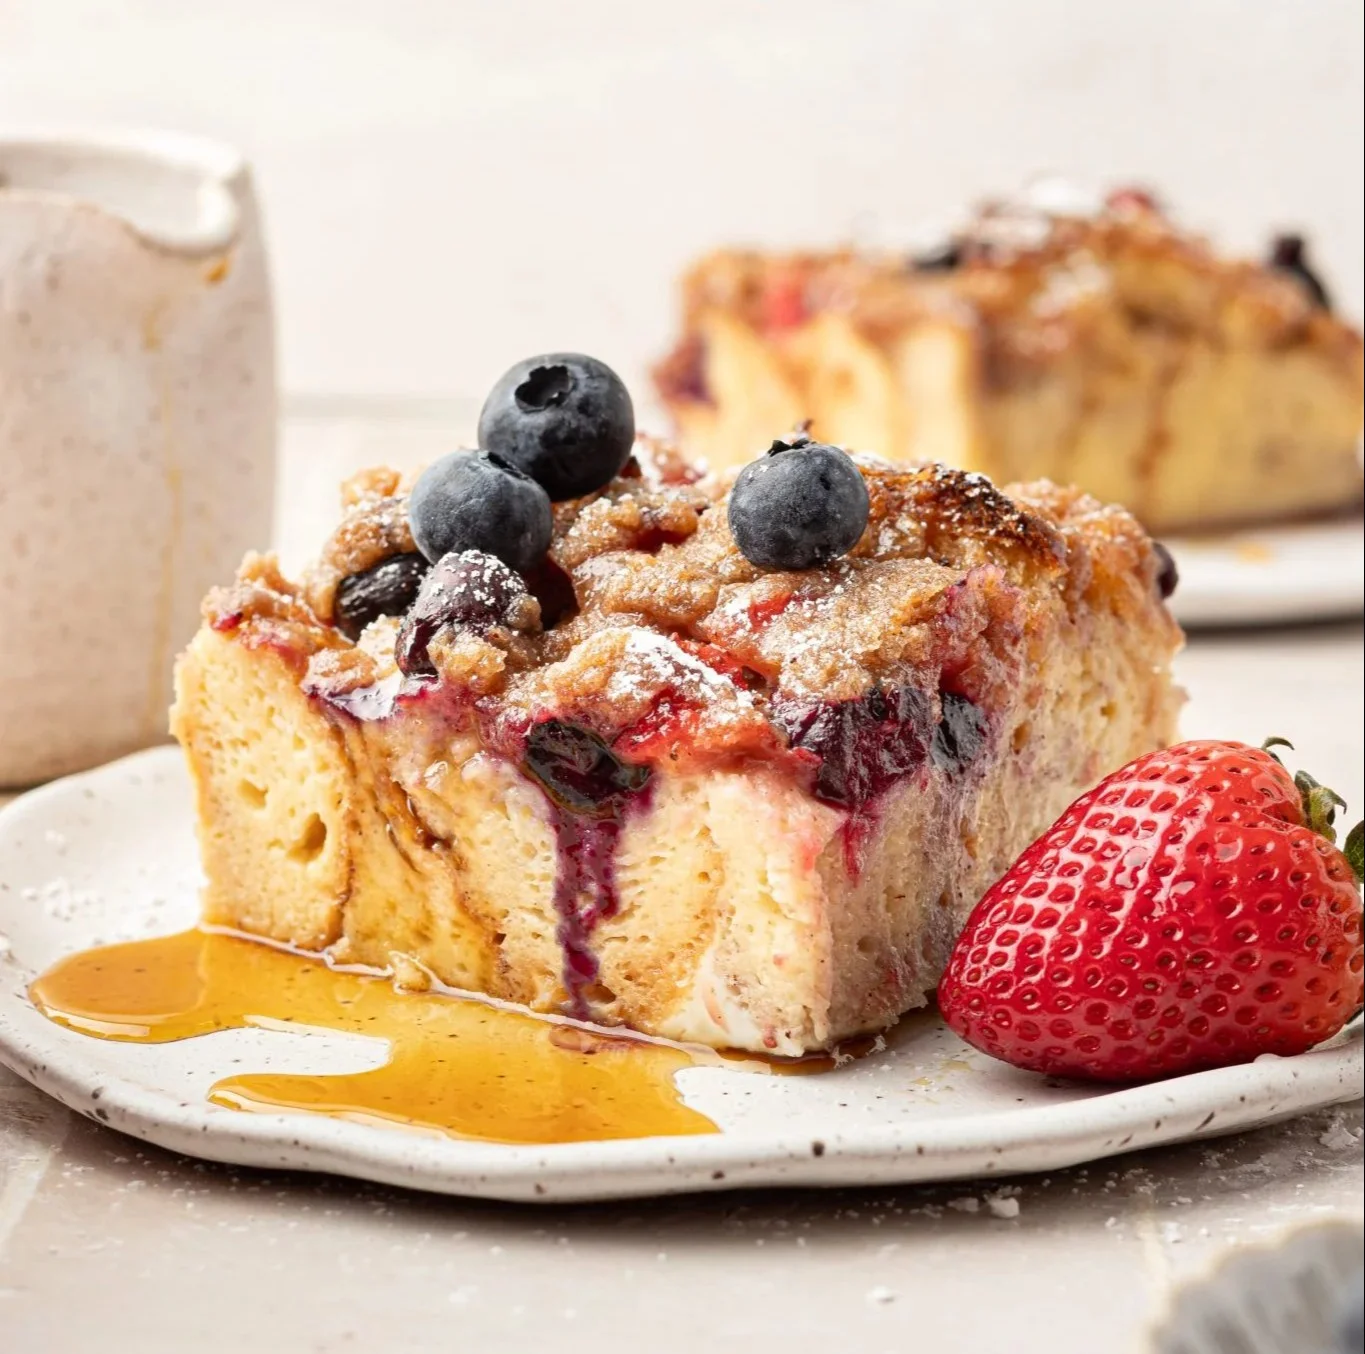
Berry French Toast Casserole

Delicious Berry French Toast Casserole with fresh berries on top

Berry French Toast Casserole is a cozy make-ahead on a classic French toast. Bread cubes are layered in a baking dish, soaked in a rich sweetened egg custard, topped with berries then oven baked to perfection. You can prepare it the night before and pop it in the oven in the morning, making it a hassle-free option for busy weekends or festive occasions. Trust me, once you try this crowd-pleaser, you’ll want to make it on repeat!

How to prepare Berry French Toast Casserole

To get started on this delicious Berry French Toast Casserole, you’ll need the following simple ingredients:

  • 1 loaf of bread, preferably French or challah
  • 2 cups of mixed berries (strawberries, blueberries, raspberries)
  • 4 large eggs
  • 2 cups of milk
  • 1/2 cup of sugar
  • 1 teaspoon of vanilla extract
  • 1 teaspoon of ground cinnamon
  • A pinch of salt
  • Butter, for greasing the baking dish
  • Powdered sugar, for serving

Directions

  1. Preheat the oven to 350°F (175°C) and grease a 9×13-inch baking dish with butter.
  2. Cut the loaf of bread into cubes and place half of the cubes in the greased baking dish.
  3. Spread the mixed berries over the bread cubes, and then top with the remaining cubes of bread.
  4. In a bowl, whisk together the eggs, milk, sugar, vanilla extract, cinnamon, and salt until combined.
  5. Pour the egg mixture evenly over the bread and berries. Press down gently to make sure all the bread is soaked.
  6. Allow it to sit for about 15 minutes to soak in the flavors.

  7. Bake in the preheated oven for 30-35 minutes or until the top is golden brown and a knife comes out clean.
  8. Let it cool for a few minutes before serving. Dust with powdered sugar and enjoy!

Berry French Toast Casserole

Why You’ll Love Berry French Toast Casserole

There are many reasons to fall in love with this Berry French Toast Casserole. For one, it’s an easy recipe that requires minimal effort but delivers maximum flavor. The combination of juicy berries with a custard-y bread mixture creates a perfect blend of textures and tastes. Additionally, this casserole is a great way to feed a crowd, making it ideal for brunch parties, holiday breakfasts, or family gatherings. Plus, you can customize it with any berries you have on hand or even add nuts for extra crunch.

Tips for success

  • Use day-old bread for the best texture; it will soak up the custard mixture better.
  • Let the casserole sit overnight in the fridge for even more flavor.
  • Experiment with different fruits or even chocolate chips if you want to add a sweet twist.
  • Make sure to keep an eye on it while baking to avoid overcooking, as ovens can vary.

Berry French Toast Casserole

Serving Suggestions

Serve your Berry French Toast Casserole warm, topped with a sprinkle of powdered sugar. You can also add a drizzle of maple syrup or a dollop of whipped cream for extra indulgence. A side of fresh fruit or crispy bacon complements this dish beautifully, balancing the sweetness perfectly.

FAQs

Can I prepare the Berry French Toast Casserole the night before?

Absolutely! This dish is perfect for making ahead of time. Simply assemble it the night before, and let it sit in the fridge overnight.

Can I use frozen berries?

Yes, you can use frozen berries. Just ensure you thaw and drain them before adding to the casserole to prevent excess moisture.

How do I store leftovers?

Store any leftovers in an airtight container in the fridge. It can be reheated in the oven or microwave, but the texture may change slightly.

Now that you know how easy and delicious this Berry French Toast Casserole can be, why not try making it yourself? It’s a recipe that’s sure to impress and create lovely breakfast memories!

Berry French Toast Casserole

A cozy, make-ahead casserole layered with bread cubes and mixed berries, soaked in a sweet egg custard and baked to perfection.

Main ingredients

  • 1 loaf loaf of bread, preferably French or challah (Use day-old bread for best texture.)
  • 2 cups mixed berries (strawberries, blueberries, raspberries) (You can also use frozen berries; thaw and drain them before use.)
  • 4 large eggs
  • 2 cups milk
  • 1/2 cup sugar
  • 1 teaspoon vanilla extract
  • 1 teaspoon ground cinnamon
  • a pinch salt
  • Butter, for greasing the baking dish
  • Powdered sugar, for serving

Preparation

  1. Preheat the oven to 350°F (175°C) and grease a 9×13-inch baking dish with butter.
  2. Cut the loaf of bread into cubes and place half of the cubes in the greased baking dish.
  3. Spread the mixed berries over the bread cubes, then top with the remaining cubes of bread.
  4. In a bowl, whisk together the eggs, milk, sugar, vanilla extract, cinnamon, and salt until combined.
  5. Pour the egg mixture evenly over the bread and berries, and press down gently to ensure all the bread is soaked.
  6. Allow it to sit for about 15 minutes to soak in the flavors.
Baking

  1. Bake in the preheated oven for 30-35 minutes or until the top is golden brown and a knife comes out clean.
  2. Let it cool for a few minutes before serving. Dust with powdered sugar and enjoy!

This casserole is a great way to feed a crowd, ideal for brunch parties or holiday breakfasts. Customize with any berries or add nuts for extra crunch.

Breakfast, Brunch
American
Berry French Toast Casserole, Brunch Recipe, Easy Casserole, Make-Ahead Breakfast, oven baked French toast

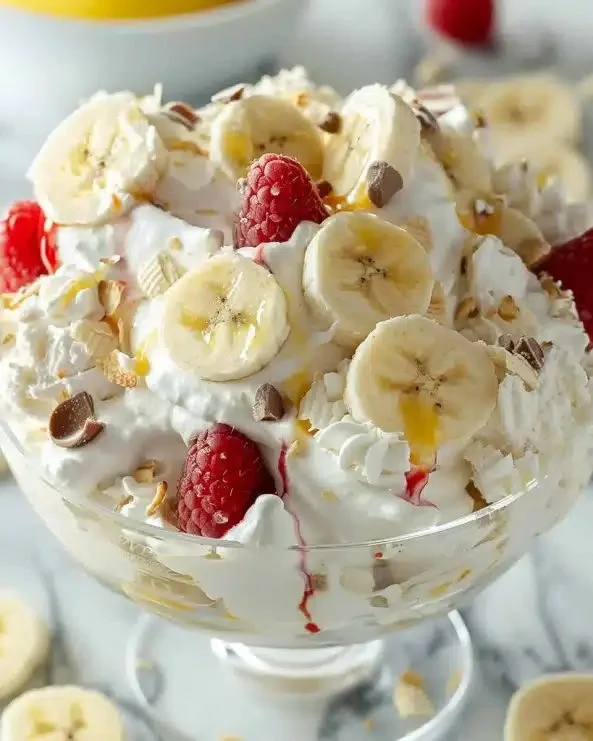
Banana Split Fluff

Delicious Banana Split Fluff dessert with bananas, whipped cream, and chocolate sauce

Banana Split Fluff is a fun and delightful treat that takes all the vivacious flavors of a classic banana split and transforms them into an easy, fluffy dessert. It’s a perfect addition to any picnic, party, or family gathering because it appeals to both kids and adults alike. With its creamy texture, fresh fruit flavors, and delightful sweetness, Banana Split Fluff is sure to be a hit. You’ll love how simple it is to make, and it will definitely have everyone coming back for more!

How to prepare Banana Split Fluff

To make this mouthwatering treat, gather all the necessary ingredients and follow these straightforward steps. You won’t need to be a professional chef; just a little enthusiasm will do!

Ingredients

  • 1 cup of mini marshmallows
  • 1 cup of sliced bananas
  • 1 cup of crushed pineapple, drained
  • 1 cup of whipped topping
  • ½ cup of chopped strawberries
  • ½ cup of chocolate syrup
  • Chopped nuts for topping (optional)

Directions

  1. In a mixing bowl, combine the mini marshmallows, sliced bananas, and crushed pineapple.
  2. Gently fold in the whipped topping until everything is well mixed.
  3. Add in the chopped strawberries and mix once again.
  4. Drizzle chocolate syrup throughout the fluff, carefully folding it in for a marbled effect.
  5. Once everything is combined, transfer it to a serving bowl.
  6. Top with chopped nuts if desired.
  7. Chill for at least an hour before serving to let the flavors meld together.

Banana Split Fluff

Why You’ll Love Banana Split Fluff

You’ll love Banana Split Fluff for its delightful combination of flavors and textures. The creamy whipped topping mixes beautifully with the fresh fruits and sweet marshmallows. This dessert is not only delicious but also super easy to prepare. It’s a fantastic way to enjoy the taste of a banana split without the fuss of traditional ice cream. Plus, it’s a great way to use up extra fruits you may have lying around! It’s definitely a dessert that will warm hearts and put smiles on faces.

Tips for success

  • Make sure to drain the crushed pineapple well, so it doesn’t make the fluff soggy.
  • For added flavor, you can sprinkle some extra chocolate syrup on top just before serving.
  • If you want to get creative, feel free to mix in other fruits or toppings based on your preference!

Serving Suggestions

Banana Split Fluff is best served chilled, making it a perfect refreshing dessert for hot days. You can scoop it into individual cups for easy serving or place it in a big bowl for everyone to enjoy. Pair it with a scoop of vanilla ice cream for an extra indulgent treat. Whether it’s a picnic, a birthday party, or a casual get-together, this fluff is sure to impress your guests!

Banana Split Fluff

FAQs

What can I do with leftovers?

Leftovers can be stored in the fridge for up to two days. Just make sure to cover it tightly to keep it fresh.

Can I use other fruits?

Absolutely! Feel free to experiment with fruits like blueberries, peaches, or raspberries to create your own twist on this classic dessert.

Is this recipe suitable for kids?

Yes, it is a fun and kid-friendly dessert! Kids can even help with mixing and assembling, making it a great bonding activity.

Banana Split Fluff is not just a delicious dessert but also a nostalgic favorite for many. If you’re looking to try out this fluffy treat, check out this Banana Split Fluff Salad Recipe for more inspiration. Enjoy making this delightful treat, and watch it disappear at your next gathering!

Banana Split Fluff

Banana Split Fluff is a fun and delightful treat that captures all the flavors of a classic banana split in a fluffy dessert, perfect for any gathering.

Main Ingredients

  • 1 cup mini marshmallows
  • 1 cup sliced bananas
  • 1 cup crushed pineapple, drained
  • 1 cup whipped topping
  • 1/2 cup chopped strawberries
  • 1/2 cup chocolate syrup
  • Chopped nuts for topping (optional)

Preparation

  1. In a mixing bowl, combine the mini marshmallows, sliced bananas, and crushed pineapple.
  2. Gently fold in the whipped topping until everything is well mixed.
  3. Add in the chopped strawberries and mix once again.
  4. Drizzle chocolate syrup throughout the fluff, carefully folding it in for a marbled effect.
  5. Once everything is combined, transfer it to a serving bowl.
  6. Top with chopped nuts if desired.
  7. Chill for at least an hour before serving to let the flavors meld together.

Make sure to drain the crushed pineapple well to avoid sogginess. For added flavor, sprinkle some extra chocolate syrup on top just before serving. Feel free to mix in other fruits or toppings based on your preference.

Dessert
American
Banana Split Fluff, easy dessert, fluffy dessert, No-Bake Dessert, Party dessert

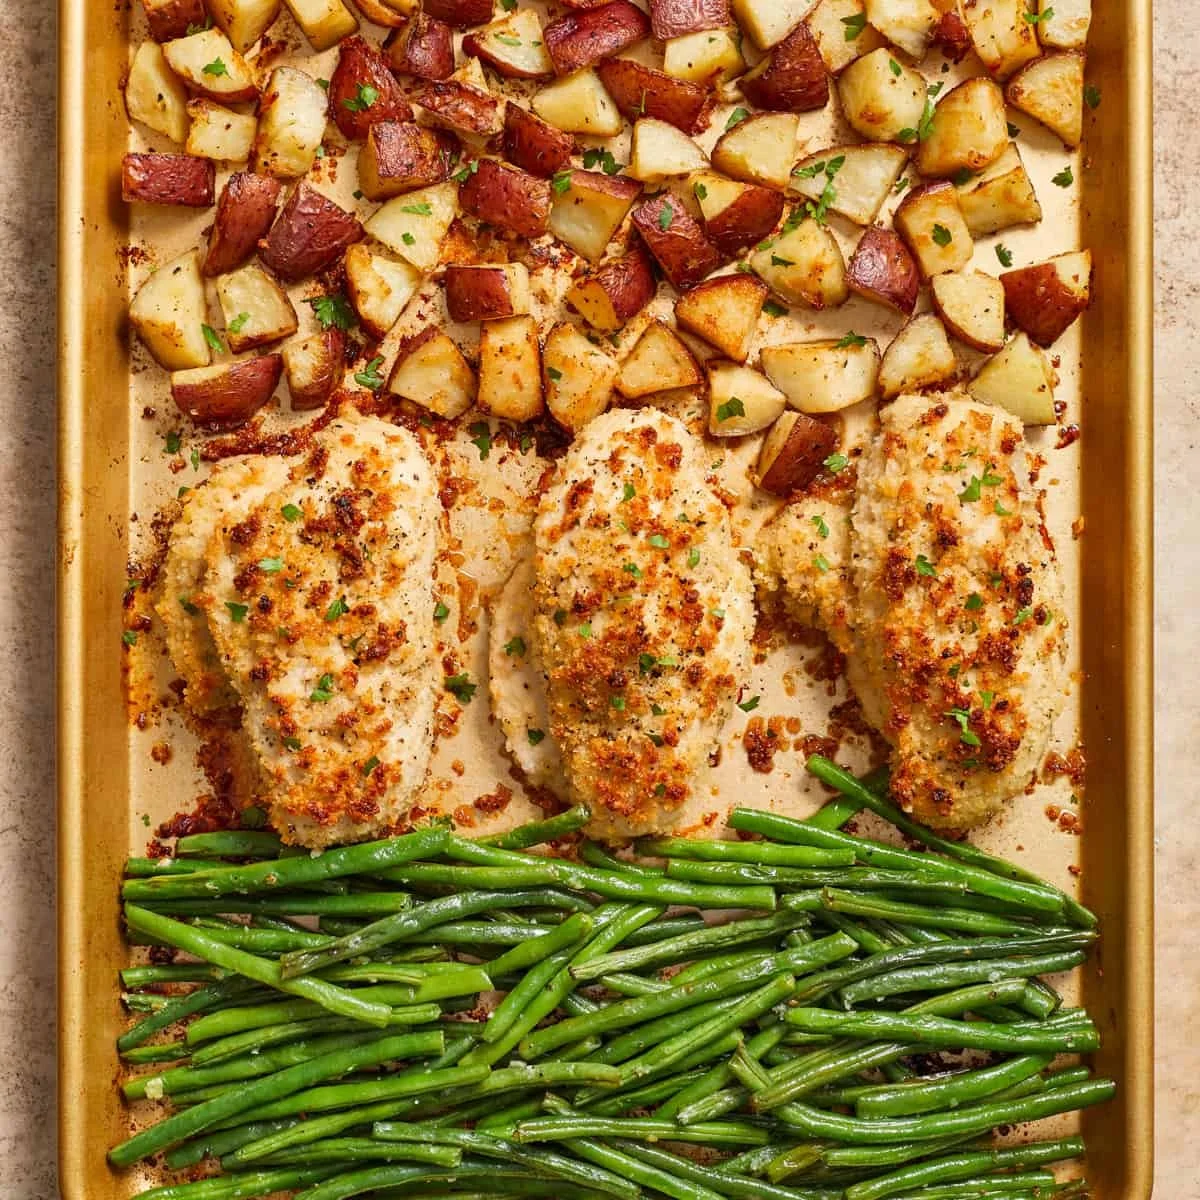
Parmesan Crusted Chicken Sheet Pan Dinner

Parmesan Crusted Chicken on a sheet pan with vegetables, ready for dinner.

Parmesan Crusted Chicken Sheet Pan Dinner is the perfect solution for busy weeknights when you want something delicious without spending hours in the kitchen. This meal combines crispy, cheesy chicken with roasted vegetables, all cooked on one pan. It’s a crowd-pleaser that everyone will love, from kids to adults. The rich flavor of parmesan cheese adds a delightful twist, making each bite a treat. If you’re looking for a simple yet satisfying dish that makes cleanup a breeze, this recipe is just what you need. Get ready to impress your family with this fantastic meal!

How to prepare Parmesan Crusted Chicken Sheet Pan Dinner

Preparing this tasty dish is simple and quick. Here’s how you can whip it up in no time:

  1. Preheat your oven to 400°F (200°C).
  2. Begin by preparing your chicken breasts. Use a meat mallet to gently pound them to an even thickness. This helps them cook evenly.
  3. In a bowl, combine breadcrumbs, grated parmesan cheese, garlic powder, salt, and pepper. Mix well.
  4. Dip each chicken breast into the breadcrumb mixture, making sure to coat it evenly.
  5. Place the chicken on a large sheet pan.
  6. Now, chop your favorite vegetables, like broccoli, bell peppers, or carrots. Toss them in olive oil, salt, and pepper, then scatter them around the chicken on the sheet pan.
  7. Bake everything in the preheated oven for about 25-30 minutes or until the chicken is cooked through and the veggies are tender.
  8. Serve hot and enjoy!

Parmesan Crusted Chicken Sheet Pan Dinner

Why You’ll Love Parmesan Crusted Chicken Sheet Pan Dinner

You will love this recipe because it combines simplicity with fantastic flavor. The parmesan crust makes the chicken crispy on the outside while keeping it juicy on the inside. Plus, you can customize the vegetables to suit your family’s taste. It’s a one-pan meal, which means easy preparation and cleanup. Enjoying a hearty dinner while spending minimal time in the kitchen is something everyone appreciates!

Tips for success

  • For extra flavor, marinate the chicken in olive oil and lemon juice for an hour before coating it with breadcrumbs.
  • Use panko breadcrumbs for an even crispier texture.
  • Don’t overcrowd the pan; give each ingredient some space to roast properly.
  • Feel free to swap the vegetables with whatever you have on hand or prefer!

Serving Suggestions

Serve your Parmesan Crusted Chicken with a fresh side salad, crusty bread, or even a light pasta to balance the meal. This dish pairs nicely with a lemon wedge for a fresh squeeze that brightens the flavors.

FAQs

Can I use bone-in chicken for this recipe?

Yes, but cooking time will be longer. A meat thermometer should read 165°F (75°C) for safety.

What vegetables work best with this dish?

You can use any vegetables like zucchini, asparagus, or Brussels sprouts. Just adjust the cooking time based on the veggies you choose.

Can I make this ahead of time?

Yes, you can prepare the chicken and coat it with breadcrumbs in advance. Just store it in the fridge until you’re ready to bake it.

Creating meals that taste great and are easy to clean up is possible with the right recipe. The Parmesan Crusted Chicken Sheet Pan Dinner is not only a delightful meal, but it also brings the family together around the table. For more details, you can visit Parmesan Crusted Chicken Sheet Pan Dinner – Lemons & Zest. Why not give it a try tonight? Happy cooking!

Parmesan Crusted Chicken Sheet Pan Dinner

A simple, one-pan meal featuring crispy, cheesy chicken and roasted vegetables that everyone will love.

For the Chicken

  • 4 pieces chicken breasts (Pounded to even thickness)
  • 1 cup breadcrumbs (Panko breadcrumbs recommended for crispiness)
  • 1/2 cup grated parmesan cheese (For a rich flavor)
  • 1 teaspoon garlic powder
  • 1 teaspoon salt
  • 1/2 teaspoon pepper

For the Vegetables

  • 2 cups mixed vegetables (e.g., broccoli, bell peppers, carrots) (Chopped and tossed in olive oil, salt, and pepper)
  • 2 tablespoons olive oil (For tossing the vegetables)

Preparation

  1. Preheat your oven to 400°F (200°C).
  2. Use a meat mallet to gently pound the chicken breasts to an even thickness.
  3. In a bowl, combine breadcrumbs, grated parmesan cheese, garlic powder, salt, and pepper. Mix well.
  4. Dip each chicken breast into the breadcrumb mixture, making sure to coat it evenly.
  5. Place the coated chicken on a large sheet pan.
  6. Chop your favorite vegetables (such as broccoli, bell peppers, or carrots). Toss them in olive oil, salt, and pepper, then scatter them around the chicken on the sheet pan.

Cooking

  1. Bake everything in the preheated oven for about 25-30 minutes or until the chicken is cooked through and the veggies are tender.

Serving

  1. Serve hot and enjoy!

For extra flavor, marinate the chicken in olive oil and lemon juice for an hour before coating it with breadcrumbs. Don’t overcrowd the pan; give each ingredient some space to roast properly. Feel free to swap the vegetables with whatever you have on hand or prefer.

Dinner, Main Course
American
Easy Dinner, One Pan Meal, Parmesan Chicken, quick recipes, Sheet Pan Dinner