Sheet Pan Chicken Pitas with Herby Ranch Recipe

Delicious Sheet Pan Chicken Pitas served with Herby Ranch dressing

Sheet pan meals make weeknights easier, and this one does not disappoint. You get juicy chicken, warm pitas, crisp veggies, and a bright herby ranch all in one simple meal. It smells great, looks fresh, and comes together fast.

This Sheet Pan Chicken Pitas with Herby Ranch Recipe is a real crowd-pleaser. The chicken roasts with peppers and onions on one pan, you warm the pitas, and a cool herby ranch ties it all together. The flavors are bright, a little tangy, and very fresh. It works for family dinner, a casual lunch, or meal prep for the week. You will love how easy it is to make and how good it tastes, so grab your sheet pan and get ready for a tasty, simple meal that everyone will ask for again.

How to prepare Sheet Pan Chicken Pitas with Herby Ranch Recipe

  1. Preheat your oven to 425°F (220°C).
  2. Cut chicken into strips or bite-sized pieces. Toss with olive oil, salt, pepper, and a little paprika or garlic powder.
  3. Slice bell peppers and red onion. Toss them with olive oil, salt, and pepper.
  4. Spread the chicken and veggies on a sheet pan in a single layer. Roast for 18 to 25 minutes, until the chicken is cooked and the veg are soft at the edges. Stir once halfway through for even cook.
  5. While the pan cooks, mix the herby ranch. Stir plain ranch or Greek yogurt with chopped parsley, dill, chives, a squeeze of lemon, salt, and pepper. Taste and add more lemon or herbs as you like.
  6. Warm the pitas in the oven for 2 to 3 minutes or in a skillet, so they are soft and slightly toasted.
  7. Toss the cooked chicken and veggies with a little lemon juice or a splash of olive oil, if you like. Slice the chicken thin if needed.
  8. Fill each pita with chicken and veggies, top with herby ranch, and add any extra toppings like lettuce, cucumber, or shredded carrot. Serve right away.


Sheet Pan Chicken Pitas with Herby Ranch Recipe

Why You’ll Love Sheet Pan Chicken Pitas with Herby Ranch Recipe

  • It is fast to make, and cleanup is easy, because you use one pan.
  • The herby ranch adds a fresh, tangy flavor that lifts the whole dish.
  • It works for families, parties, or quick meal prep for lunches.
  • The recipe is flexible, use different veggies or add a quick slaw for crunch.
  • It makes tasty, portable chicken pitas that kids and adults enjoy.

tips for success

  • Cut chicken into even pieces so it cooks the same time.
  • Don’t overcrowd the sheet pan, give items room to brown.
  • Use fresh herbs in the ranch for the best bright flavor.
  • If pitas get soft when stored, toast them quickly before serving.
  • Check chicken with a thermometer, it should reach 165°F (74°C).

Serving Suggestions

  • Serve with a simple cucumber tomato salad for more freshness.
  • Add pickled red onion or a quick cabbage slaw for extra crunch.
  • Offer hot sauce, lemon wedges, or extra ranch for people to customize.
  • Pair with roasted potatoes or a simple grain salad for a fuller meal.


Sheet Pan Chicken Pitas with Herby Ranch Recipe

FAQs

Q: Can I make the herby ranch ahead of time?

A: Yes, mix the ranch and keep it in the fridge for up to 3 days. Stir before using.

Q: Can I use chicken thighs instead of breasts?

A: Yes, thighs stay juicy and work great. Cut them into pieces so they cook evenly.

Q: How do I make this gluten free?

A: Use gluten free pitas or serve the chicken and veggies over rice or greens.

Q: Can I cook the chicken on the grill instead of the oven?

A: Yes, grill the chicken and veggies, then assemble the pitas the same way.

Q: Will this reheat well for meal prep?

A: Yes, store chicken and veg in one container, keep pitas and ranch separate. Reheat chicken and veg, then build pitas when ready.

Conclusion

For a full written version and slaw idea, see the Sheet Pan Chicken Pitas with Herby Ranch Slaw recipe on the Wandering Chickpea site: Sheet Pan Chicken Pitas with Herby Ranch Slaw.

Sheet Pan Chicken Pitas with Herby Ranch

A simple and delicious meal featuring juicy chicken, crisp veggies, and a refreshing herby ranch, all roasted together on a single sheet pan.

For the Chicken and Veggies

  • 1 lb boneless, skinless chicken breasts (Cut into strips or bite-sized pieces)
  • 2 tbsp olive oil (For tossing chicken and veggies)
  • 1 tsp salt
  • 1 tsp black pepper
  • 1 tsp paprika or garlic powder (Optional seasoning)
  • 1 red bell pepper (Sliced)
  • 1 yellow bell pepper (Sliced)
  • 1 small red onion (Sliced)

For the Herby Ranch

  • 1 cup plain ranch dressing or Greek yogurt
  • 1 tbsp fresh parsley (Chopped)
  • 1 tbsp fresh dill (Chopped)
  • 1 tbsp fresh chives (Chopped)
  • 1 tbsp lemon juice (Freshly squeezed)

To Serve

  • 4 pieces pitas (Warmed in the oven or skillet)
  • Extra toppings (lettuce, cucumber, shredded carrot) (Optional)

Preparation

  1. Preheat your oven to 425°F (220°C).
  2. Cut chicken into strips or bite-sized pieces. Toss with olive oil, salt, pepper, and a little paprika or garlic powder.
  3. Slice bell peppers and red onion. Toss them with olive oil, salt, and pepper.

Cooking

  1. Spread the chicken and veggies on a sheet pan in a single layer.
  2. Roast for 18 to 25 minutes, until the chicken is cooked and the veggies are soft at the edges. Stir once halfway through for even cooking.
  3. While the pan cooks, mix the herby ranch by stirring together ranch or Greek yogurt with chopped parsley, dill, chives, a squeeze of lemon, salt, and pepper. Taste and adjust lemon or herbs as necessary.
  4. Warm the pitas in the oven for 2 to 3 minutes or in a skillet to make them soft and slightly toasted.
  5. Toss the cooked chicken and veggies with a little lemon juice or a splash of olive oil if desired. Slice the chicken thin if needed.

Assembly

  1. Fill each pita with chicken and veggies, top with herby ranch, and add any extra toppings like lettuce, cucumber, or shredded carrot.
  2. Serve right away.

Cut chicken into even pieces for uniform cooking. Don’t overcrowd the pan, allow room for browning. Fresh herbs in the ranch enhance flavor. If pitas get soft in storage, toast quickly before serving. Check chicken with a thermometer, it should reach 165°F (74°C).
Dinner, lunch, Main Course
American
Chicken Pitas, Easy Dinner, Herby Ranch, Meal Prep, Sheet Pan Meal

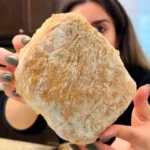
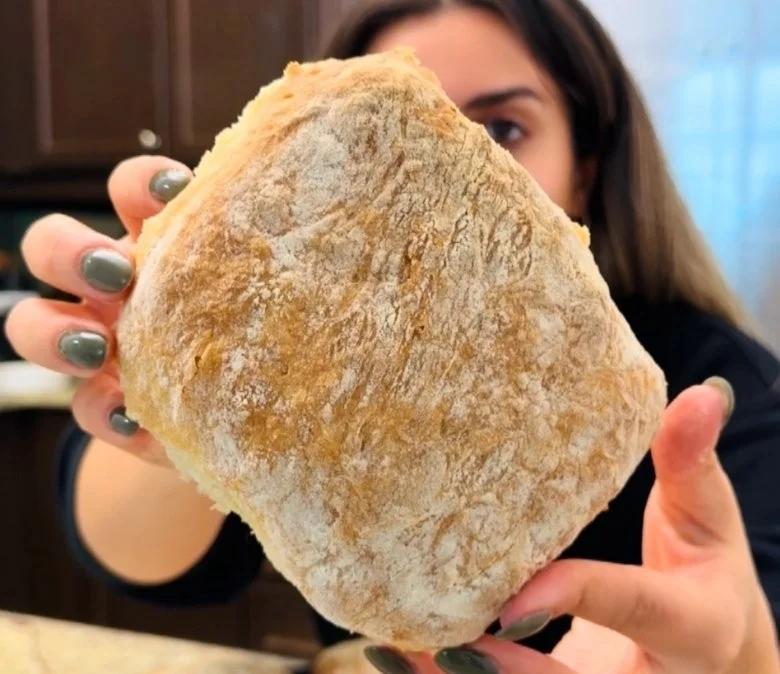
5-Ingredient Crusty Panini Bread

Homemade crusty panini bread made with only 5 ingredients

This simple no-knead bread feels like a small kitchen win. It uses only five everyday ingredients and asks for patience, not hard work. You wake up to a tangy, crusty loaf that makes perfect panini and warm sandwiches.

The featured recipe, 5-Ingredient Crusty Panini Bread (No Knead), is a crowd-pleaser. It has a crisp crust, a soft inside, and a mild flavor that matches any filling. Kids and guests love it, and it makes store-bought bread seem heavy. Give it time, and you get a great loaf with little effort.

Try it once, and you will want to make panini every week.

How to prepare 5-Ingredient Crusty Panini Bread (No Knead)

Ingredients:

  • 3 cups all-purpose flour
  • 1 teaspoon salt
  • 1 teaspoon instant yeast
  • 1 1/2 cups warm water
  • 1 tablespoon olive oil

Directions:

  1. In a large bowl, mix flour, salt, and yeast. Stir well.
  2. Add warm water and olive oil. Mix until you have a shaggy dough.
  3. Cover the bowl with plastic wrap or a towel. Let the dough rest at room temperature for 12 to 18 hours, until bubbly.
  4. Dust a work surface with flour. Gently shape the dough into a round loaf by folding the edges under. Do not knead hard.
  5. Place the dough on a parchment paper-lined baking sheet or in a Dutch oven. Cover and let rise for 1 to 2 hours.
  6. Preheat your oven to 450°F (230°C). If using a Dutch oven, heat it empty while the oven preheats.

  7. If using a Dutch oven, place the dough inside it on the parchment, cover, and bake 30 minutes. Remove the lid and bake 10 to 15 more minutes, until golden and crusty. If baking on a sheet, bake 35 to 40 minutes until crusty and brown.
  8. Cool on a rack for at least 20 minutes before slicing. Slice thin for panini or thicker for sandwiches.


5-Ingredient Crusty Panini Bread (No Knead)

Why You’ll Love 5-Ingredient Crusty Panini Bread (No Knead)

  • Easy, no-knead method, great for busy cooks.
  • Uses only five common ingredients, cheap and simple.
  • Crispy outside, soft inside, perfect for panini and sandwiches.
  • Makes a rustic, bakery-style loaf at home without fancy tools.

tips for success

  • Use warm, not hot, water to wake the yeast, about 100°F (38°C).
  • Let the dough rest long enough, the slow rise builds flavor.
  • Do not over-handle the dough, gentle folds keep air pockets.
  • If your kitchen is cool, let it rise in a slightly warm spot, like an oven with just the light on.
  • Use a Dutch oven for the best crust, it traps steam and makes the bread crisp.
  • Cool the loaf before slicing, this keeps the crumb from getting squished.

Serving Suggestions

  • Make classic panini with mozzarella, tomato, and basil.
  • Use it for grilled cheese, sliced thin and buttered.
  • Turn it into a hearty sandwich with turkey, pesto, and roasted peppers.
  • Toast slices and serve with soup or salad for a simple meal.


5-Ingredient Crusty Panini Bread (No Knead)

FAQs

Q: Can I use whole wheat flour? A: Yes, you can replace up to half the flour with whole wheat. The bread will be denser. Add a bit more water if the dough feels dry.

Q: How long can I store this bread? A: Store at room temperature in a bread bag or wrapped for 2 to 3 days. For longer storage, slice and freeze.

Q: Do I have to use a Dutch oven? A: No, you can bake on a baking sheet. A Dutch oven gives a better crust, but a hot tray and a pan of water in the oven can help too.

Q: Can I make smaller loaves? A: Yes, divide the dough into two and bake each smaller. Adjust the bake time down by about 10 to 15 minutes.

Q: What if my dough is sticky after rising? A: Lightly flour your hands and work surface. The dough should be soft and slightly sticky, not sloppy.

Conclusion

If you want another simple no-knead idea for sandwich bread, check this No-Knead Sandwich Bread – Emma Fontanella recipe for more tips and a close variation.

5-Ingredient Crusty Panini Bread (No Knead)

A simple no-knead bread with a crisp crust and soft inside, perfect for panini and warm sandwiches.

Main Ingredients

  • 3 cups all-purpose flour
  • 1 teaspoon salt
  • 1 teaspoon instant yeast
  • 1.5 cups warm water (Around 100°F (38°C))
  • 1 tablespoon olive oil

Preparation

  1. In a large bowl, mix flour, salt, and yeast. Stir well.
  2. Add warm water and olive oil. Mix until you have a shaggy dough.
  3. Cover the bowl with plastic wrap or a towel. Let the dough rest at room temperature for 12 to 18 hours, until bubbly.

Shaping and Rising

  1. Dust a work surface with flour. Gently shape the dough into a round loaf by folding the edges under. Do not knead hard.
  2. Place the dough on a parchment paper-lined baking sheet or in a Dutch oven. Cover and let rise for 1 to 2 hours.

Baking

  1. Preheat your oven to 450°F (230°C). If using a Dutch oven, heat it empty while the oven preheats.
  2. If using a Dutch oven, place the dough inside it on the parchment, cover, and bake for 30 minutes. Remove the lid and bake for 10 to 15 more minutes, until golden and crusty.
  3. If baking on a sheet, bake for 35 to 40 minutes until crusty and brown.
  4. Cool on a rack for at least 20 minutes before slicing. Slice thin for panini or thicker for sandwiches.

Use a Dutch oven for the best crust; it traps steam and makes the bread crisp. Cool the loaf before slicing to keep the crumb from getting squished.

Bread, Snack
American
Easy Bread Recipe, Homemade Bread, No Knead Bread, Panini Bread, Quick Bread

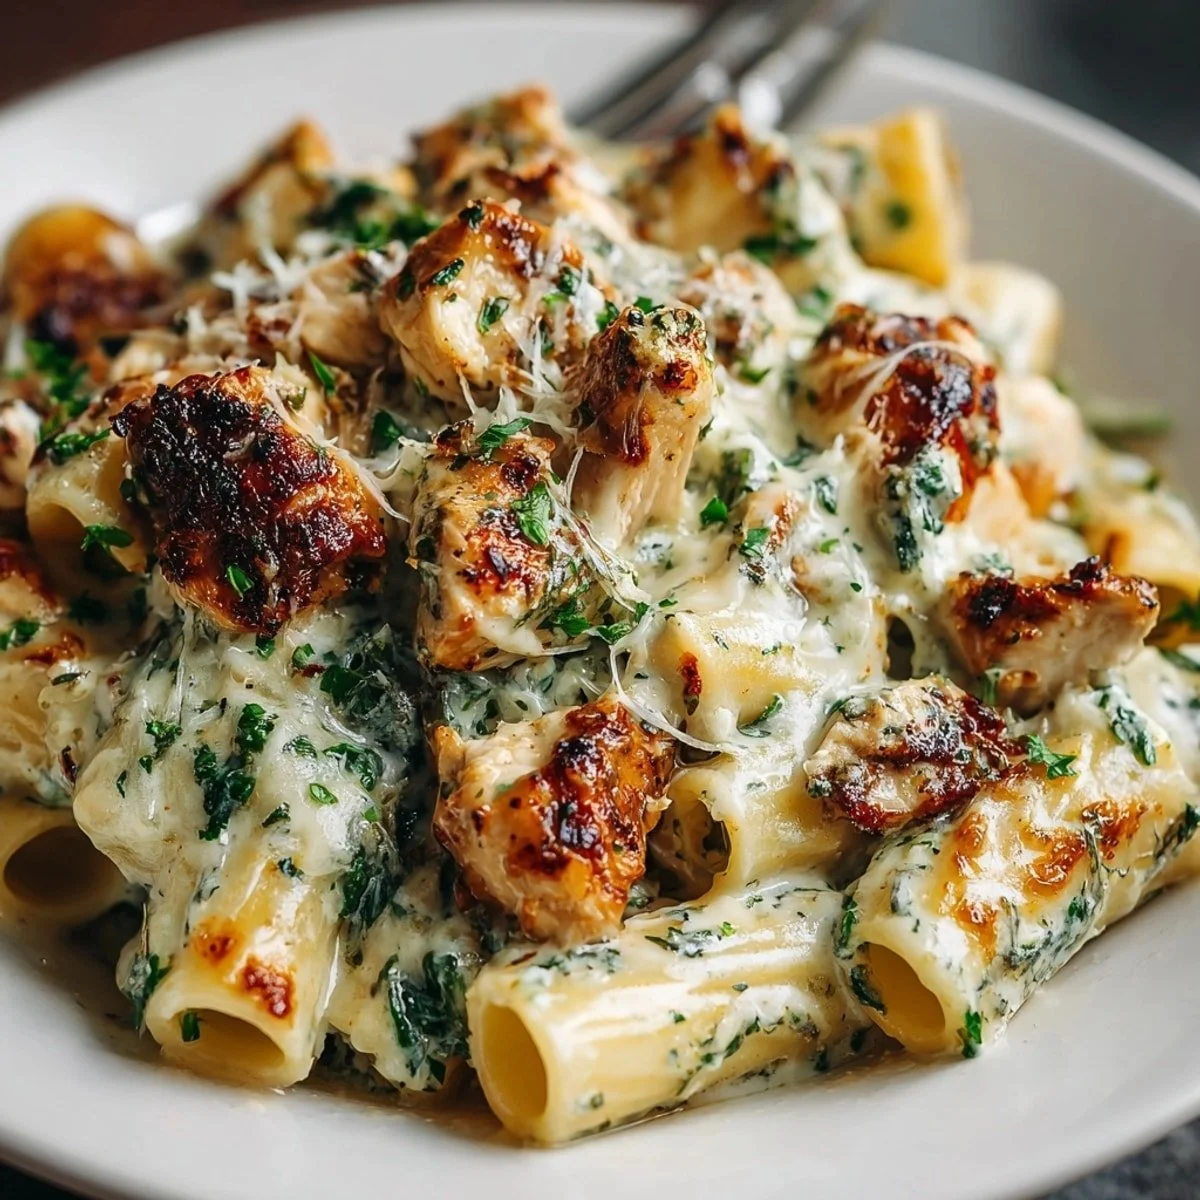
Creamy Pesto Chicken Pasta

Creamy pesto chicken pasta garnished with basil and parmesan cheese

Creamy Pesto Chicken Pasta is a warm, friendly dish that tastes like comfort and fresh herbs at the same time. It mixes tender chicken, rich cream, and bright basil pesto with pasta for a sauce that clings to every bite. This recipe is a real crowd-pleaser, easy enough for weeknights, and tasty enough for guests.

The featured recipe, Creamy Pesto Chicken Pasta, brings simple ingredients together fast. It has a silky sauce, savory chicken, and the green, fresh flavor of pesto. It feels a little special, but you can make it without fuss. Get ready to make a plate that will have everyone asking for seconds, and maybe a little extra bread to soak up the sauce.

how to prepare Creamy Pesto Chicken Pasta

Ingredients (simple list)

  • 8 oz pasta, like penne or fusilli
  • 2 chicken breasts, cut into bite size pieces
  • 1 cup basil pesto, store bought or homemade
  • 1 cup heavy cream or half and half
  • 2 tbsp olive oil
  • 1 cup grated Parmesan cheese
  • Salt and pepper to taste
  • Optional, cherry tomatoes or spinach for color

Directions, step by step

  1. Cook the pasta in salted water according to package directions, drain and set aside.
  2. Season the chicken with salt and pepper. In a large pan, heat olive oil over medium heat. Cook the chicken until browned and cooked through, about 5 to 7 minutes. Remove chicken and set aside.
  3. In the same pan, lower the heat and add the cream. Stir in the pesto until smooth and warmed.
  4. Add the cooked chicken and pasta to the pan. Toss gently so the sauce coats everything.
  5. Stir in the Parmesan cheese. Taste and add more salt or pepper if needed. If the sauce is too thick, add a splash of pasta water to loosen it.
  6. Add optional spinach or halved cherry tomatoes, cook briefly until wilted or warmed. Serve right away.


Creamy Pesto Chicken Pasta

Why You’ll Love Creamy Pesto Chicken Pasta

  • Fast and simple, ready in about 30 minutes.
  • Rich, creamy sauce with bright basil flavor.
  • Uses pantry staples and just a few fresh items.
  • Great for weeknight dinners, but pretty enough for guests.
  • Easy to change, add veggies or swap cream for a lighter option.

tips for success

  • Cook pasta a minute less than package time, it will finish in the sauce and stay firm.
  • Save a cup of pasta water, it helps thin the sauce and make it silky.
  • Use good quality pesto for the best fresh basil taste.
  • Don’t overcook the chicken, keep it juicy by browning then finishing in the sauce if needed.
  • If you want lighter sauce, use half and half or a mix of Greek yogurt and milk, stir in off heat to avoid curdling.

Serving Suggestions

  • Serve with a green salad and a simple vinaigrette for balance.
  • Pair with garlic bread or crusty bread to soak up extra sauce.
  • Top with extra grated Parmesan and a few basil leaves for color.
  • Add a side of roasted vegetables for a full meal.


Creamy Pesto Chicken Pasta

FAQs

Q: Can I use rotisserie chicken instead of cooking fresh chicken?

A: Yes, shredded rotisserie chicken works great. Add it to the sauce at the end to warm through.

Q: How can I make this dairy free?

A: Use a dairy free cream or full fat coconut milk and a dairy free Parmesan style sprinkle. The pesto may contain cheese, so check labels or use a vegan pesto.

Q: Can I make this ahead and reheat?

A: You can make it ahead, but the sauce may thicken in the fridge. Add a splash of water or milk when reheating and warm gently on the stove.

Q: Is pesto safe to freeze?

A: Pesto freezes well. Freeze in small jars or ice cube trays for easy portions. Thaw before mixing into the cream sauce.

Conclusion

If you want another simple, one pot idea similar to this, check the One Pot Creamy Pesto Chicken Pasta Recipe – Budget Bytes for a slightly different take and helpful tips.

Creamy Pesto Chicken Pasta

A warm, friendly dish that combines tender chicken, rich cream, and bright basil pesto with pasta for a comforting and crowd-pleasing meal.

Main Ingredients

  • 8 oz pasta, like penne or fusilli
  • 2 pieces chicken breasts, cut into bite size pieces
  • 1 cup basil pesto, store bought or homemade
  • 1 cup heavy cream or half and half (Use half and half for a lighter option.)
  • 2 tbsp olive oil
  • 1 cup grated Parmesan cheese (Top with extra if desired.)
  • Salt and pepper to taste
  • Optional, cherry tomatoes or spinach for color (Add for extra color.)

Cooking Pasta and Chicken

  1. Cook the pasta in salted water according to package directions, drain and set aside.
  2. Season the chicken with salt and pepper. In a large pan, heat olive oil over medium heat. Cook the chicken until browned and cooked through, about 5 to 7 minutes. Remove chicken and set aside.

Making the Sauce

  1. In the same pan, lower the heat and add the cream. Stir in the pesto until smooth and warmed.
  2. Add the cooked chicken and pasta to the pan. Toss gently so the sauce coats everything.
  3. Stir in the Parmesan cheese. Taste and add more salt or pepper if needed. If the sauce is too thick, add a splash of pasta water to loosen it.
  4. Add optional spinach or halved cherry tomatoes, cook briefly until wilted or warmed. Serve right away.

For best results, cook pasta a minute less than package time; it will finish in the sauce and stay firm. Save a cup of pasta water; it helps thin the sauce and make it silky. Use good quality pesto for the best flavor, and don’t overcook the chicken to keep it juicy.

Dinner, Main Course
Italian
Comfort Food, Creamy Pesto Chicken, Easy Recipe, Pasta, Quick Dinner

Low-Calorie Fudgy Brownies

Delicious low-calorie fudgy brownies topped with chocolate drizzle.

These Low-Calorie Fudgy Brownies make it easy to enjoy a chocolate treat without the guilt. They keep the classic fudgy texture you love, while using lighter ingredients to cut calories. This recipe is a crowd-pleaser because it tastes like a real brownie, not a diet version, and it pairs well with coffee, fruit, or a scoop of light ice cream. Get ready to bake a batch that will disappear fast, and enjoy the sweet reward with less worry.

how to prepare Low-Calorie Fudgy Brownies

Ingredients

  • 1/2 cup unsweetened applesauce
  • 1/2 cup plain nonfat Greek yogurt
  • 1/3 cup light brown sugar or a sugar substitute to taste
  • 2 large egg whites
  • 1 tsp vanilla extract
  • 1/3 cup unsweetened cocoa powder
  • 3/4 cup whole wheat flour or almond flour for lower carbs
  • 1/2 tsp baking powder
  • 1/8 tsp salt
  • 2 tbsp melted dark chocolate or 2 tbsp mini dark chocolate chips, optional

Directions

  1. Preheat your oven to 350 F, and lightly grease an 8×8 inch pan or line it with parchment paper.
  2. In a bowl, mix the applesauce, Greek yogurt, and sugar until smooth. Add the egg whites and vanilla, stir well.
  3. Sift in the cocoa powder, then add the flour, baking powder, and salt. Fold until just mixed, do not overmix.
  4. If you like extra fudgy bites, fold in the melted dark chocolate or chocolate chips.
  5. Pour the batter into the prepared pan, smooth the top with a spatula.
  6. Bake 18 to 22 minutes, until the top looks set but a toothpick comes out with a few moist crumbs. Do not overbake, you want a fudgy center.
  7. Cool in the pan for 15 minutes, then move to a wire rack to cool more. Cut into 9 or 12 squares and enjoy.


Low-Calorie Fudgy Brownies

Why You’ll Love Low-Calorie Fudgy Brownies

  • They are fudgy, not dry, so you get real brownie texture with fewer calories.
  • Greek yogurt adds moisture and protein, making these healthier brownies.
  • Simple pantry ingredients, no special items needed.
  • Quick bake time means you can have a treat in under an hour.
  • They work well as a light dessert or an after-lunch snack.

tips for success

  • Measure flour by spooning it into the cup and leveling, do not pack, this keeps brownies tender.
  • Use nonfat Greek yogurt for lower calories and a moist crumb.
  • Do not overbake, check early, a few moist crumbs mean fudgy brownies.
  • Let brownies cool before cutting, this helps clean slices.
  • For extra chocolate flavor, add a teaspoon of instant espresso powder to the dry mix.
  • If using a sugar substitute, check how it swaps by volume to keep sweetness right.

Serving Suggestions

  • Warm a square and top with a spoon of light whipped cream or fat free yogurt.
  • Serve with fresh berries for a fresh contrast to the rich chocolate.
  • Pair with a small scoop of low-calorie vanilla ice cream for a classic treat.
  • Cut small squares to serve at a party, they make a great reduced calorie dessert option.
  • Wrap chilled pieces for a portable snack, good for lunch boxes.


Low-Calorie Fudgy Brownies

FAQs

Q: Are these brownies really low calorie?

A: Yes, they use applesauce and Greek yogurt to cut fat and calories, so one square is much lower in calories than a traditional brownie.

Q: Can I use whole eggs instead of egg whites?

A: Yes, you can use one whole egg, but calories and fat will rise a bit, and texture may be slightly richer.

Q: Can I make these gluten free?

A: Yes, swap the whole wheat flour for a 1 to 1 gluten free flour or almond flour, but baking time may change slightly.

Q: How do I store leftovers?

A: Keep brownies in an airtight container at room temperature for 2 days, or in the fridge for up to 5 days.

Q: Can I add nuts or fruit?

A: Yes, fold in a small handful of chopped nuts or dried fruit, but note this adds calories.

Conclusion

If you want another low-calorie brownie idea that uses Greek yogurt for a moist, fudgy result, check this recipe for Greek Yogurt Brownies (Under 100 Calories!) – The Big Man’s World, it has a similar light twist you may enjoy.

Low-Calorie Fudgy Brownies

These Low-Calorie Fudgy Brownies offer a guilt-free chocolate treat with a fudgy texture and lighter ingredients, making them a crowd-pleaser.

Brownie Base

  • 1/2 cup unsweetened applesauce
  • 1/2 cup plain nonfat Greek yogurt (For lower calories and added moisture)
  • 1/3 cup light brown sugar or a sugar substitute to taste
  • 2 large egg whites
  • 1 tsp vanilla extract
  • 1/3 cup unsweetened cocoa powder
  • 3/4 cup whole wheat flour or almond flour for lower carbs (Use almond flour for lower carbs)
  • 1/2 tsp baking powder
  • 1/8 tsp salt
  • 2 tbsp melted dark chocolate or mini dark chocolate chips, optional (For extra fudginess)

Preparation

  1. Preheat your oven to 350 F and lightly grease an 8×8 inch pan or line it with parchment paper.
  2. In a bowl, mix the applesauce, Greek yogurt, and sugar until smooth. Add the egg whites and vanilla, stir well.
  3. Sift in the cocoa powder, then add the flour, baking powder, and salt. Fold until just mixed, do not overmix.
  4. If you like extra fudgy bites, fold in the melted dark chocolate or chocolate chips.
  5. Pour the batter into the prepared pan and smooth the top with a spatula.

Baking

  1. Bake for 18 to 22 minutes, until the top looks set but a toothpick comes out with a few moist crumbs. Do not overbake for a fudgy center.
  2. Cool in the pan for 15 minutes, then move to a wire rack to cool more.
  3. Cut into 9 or 12 squares and enjoy.

Measure flour carefully by spooning it into the cup and leveling to keep brownies tender. For extra chocolate flavor, add a teaspoon of instant espresso powder to the dry mix.

Dessert, Snack
American
Fudgy Brownies, Healthy Desserts, Low-Calorie Brownies

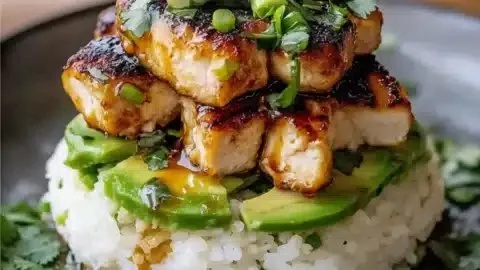
Delicious Honey Lime Chicken Avocado Rice Stack Recipe

Honey Lime Chicken served with Avocado Rice Stack on a plate

This recipe blends sweet honey, bright lime, and creamy avocado into one fun meal. It feels fresh and simple, but it looks special on the plate. The stack is easy to make for family dinners, or to impress friends without fuss.

Meet the Delicious Honey Lime Chicken & Avocado Rice Stack Recipe, a crowd-pleaser that tastes zesty, sweet, and a little creamy all at once. The honey lime chicken gives a nice glaze, the avocado keeps each bite smooth, and the rice makes it filling. Give it a try, you might make it your new go-to weeknight favorite, and yes, it is as tasty as it sounds.

How to prepare Honey Lime Chicken & Avocado Rice Stack Recipe

Ingredients

  • 2 boneless, skinless chicken breasts
  • 2 tablespoons honey
  • 2 tablespoons lime juice, fresh
  • 1 clove garlic, minced
  • 1 tablespoon olive oil
  • 1/2 teaspoon salt
  • 1/4 teaspoon black pepper
  • 1 cup cooked rice, warm (white or brown)
  • 1 ripe avocado, diced or mashed
  • 2 tablespoons chopped cilantro
  • 1 green onion, thinly sliced
  • 1/4 teaspoon ground cumin, optional
  • Lime wedges, for serving

Directions

  1. Mix honey, lime juice, garlic, olive oil, salt, pepper, and cumin in a bowl. This is your honey lime marinade.
  2. Put chicken in the bowl, coat well, and let it sit for 15 to 30 minutes. If you have more time, marinate up to 2 hours in the fridge.
  3. Heat a skillet over medium heat. Cook chicken 5 to 7 minutes per side, or until done. Let chicken rest for 5 minutes, then slice thin.
  4. If rice is not warm, heat it now. Stir in a little lime juice and a pinch of salt for extra flavor.
  5. Prepare avocado, cilantro, and green onion. You can mash the avocado with a fork, or leave it diced for texture.
  6. To stack, place a ring mold or clean small bowl on a plate. Add a layer of rice, press gently. Add a layer of avocado, then top with sliced chicken. Repeat if you like taller stacks.
  7. Sprinkle cilantro and green onion on top. Add a lime wedge on the side.
  8. Serve the stack warm, squeeze lime over it, and enjoy.


Delicious Honey Lime Chicken & Avocado Rice Stack Recipe

Why You’ll Love Honey Lime Chicken & Avocado Rice Stack Recipe

  • Quick to make, great for weeknight dinner.
  • Fresh flavors, bright lime and sweet honey.
  • Easy to change, add beans, corn, or salsa if you like.
  • Looks nice on the plate, great for guests.
  • Healthy balance of protein, healthy fat, and carbs.

tips for success

  • Use fresh lime juice for the best zesty flavor.
  • Do not skip the resting time after cooking the chicken, it stays juicier.
  • Warm the rice before stacking, it helps the stack hold.
  • If you do not have a ring mold, use a small bowl and invert it on the plate.
  • Taste and adjust salt and lime before serving, small changes make big difference.

Serving Suggestions

  • Serve with a simple green salad or mixed greens.
  • Add a side of roasted corn or black beans for a fuller meal.
  • Top with a drizzle of plain yogurt mixed with lime for a creamy kick.
  • Offer lime wedges and extra cilantro at the table.


Delicious Honey Lime Chicken & Avocado Rice Stack Recipe

FAQs

Q: Can I make this ahead of time? A: You can cook the chicken and rice ahead, but stack just before serving. Avocado turns brown, so prepare it last.

Q: Can I use brown rice or cauliflower rice? A: Yes, brown rice works fine, and cauliflower rice is a low-carb option that still tastes good.

Q: Is there an easy way to keep the stack from falling apart? A: Press each layer gently when using a ring mold, and keep layers compact. Serve soon after stacking.

Q: Can I use lime zest in the recipe? A: Yes, a little lime zest adds bright flavor. Add it to the marinade or to the rice.

Q: How spicy is this dish? A: It is mild as written. Add sliced jalapeno or a pinch of chili flakes if you want heat.

Conclusion

If you want another version or the original write up for this dish, see the full recipe on the NorthEast Nosh website at original Honey Lime Chicken & Avocado Rice Stack – NorthEast Nosh.

Honey Lime Chicken & Avocado Rice Stack

This recipe blends sweet honey, bright lime, and creamy avocado into one fun meal that is fresh, simple, and visually appealing.

For the Chicken Marinade

  • 2 pieces boneless, skinless chicken breasts
  • 2 tablespoons honey
  • 2 tablespoons lime juice, fresh (Use fresh for best flavor.)
  • 1 clove garlic, minced
  • 1 tablespoon olive oil
  • 1/2 teaspoon salt
  • 1/4 teaspoon black pepper
  • 1/4 teaspoon ground cumin, optional

For the Stack

  • 1 cup cooked rice, warm (white or brown) (Warm before stacking.)
  • 1 ripe avocado, diced or mashed
  • 2 tablespoons chopped cilantro
  • 1 piece green onion, thinly sliced
  • Lime wedges, for serving

Preparation

  1. Mix honey, lime juice, garlic, olive oil, salt, pepper, and cumin in a bowl. This is your honey lime marinade.
  2. Put chicken in the bowl, coat well, and let it sit for 15 to 30 minutes. If you have more time, marinate up to 2 hours in the fridge.

Cooking

  1. Heat a skillet over medium heat. Cook the chicken for 5 to 7 minutes per side, or until done. Let the chicken rest for 5 minutes, then slice thin.
  2. If rice is not warm, heat it now. Stir in a little lime juice and a pinch of salt for extra flavor.
  3. Prepare avocado, cilantro, and green onion. You can mash the avocado with a fork or leave it diced for texture.

Assembly

  1. To stack, place a ring mold or clean small bowl on a plate. Add a layer of rice, press gently. Add a layer of avocado, then top with sliced chicken. Repeat if you like taller stacks.
  2. Sprinkle cilantro and green onion on top. Add a lime wedge on the side.
  3. Serve the stack warm, squeeze lime over it, and enjoy.

Use fresh lime juice for the best zesty flavor. Do not skip the resting time after cooking the chicken; it stays juicier. Warm the rice before stacking; it helps the stack hold. If you do not have a ring mold, use a small bowl and invert it on the plate. Taste and adjust salt and lime before serving; small changes make a big difference.

Dinner, Main Course
American, Mexican
Avocado Rice Stack, Healthy Recipe, Honey Lime Chicken, Quick Dinner, Weeknight Meal

Amish White Bread Recipe

Freshly baked Amish white bread loaf on a wooden table

Amish White Bread is a simple, homemade loaf that many families enjoy. It has a soft crust, tender crumb, and a mild, buttery taste. This recipe is a crowd-pleaser, easy to make, and fits well with everyday meals or Sunday dinners. If you like simple breads, you might also enjoy trying a sweet twist like the Amish apple fritter bread for dessert. Get ready to bake a loaf that will disappear fast, and have fun making it yourself.

how to prepare Amish White Bread Recipe

Ingredients

  • 2 cups warm water (about 110°F)
  • 1/3 cup sugar
  • 1 tablespoon active dry yeast
  • 1/4 cup melted butter or oil
  • 1 tablespoon salt
  • 6 to 7 cups all-purpose flour

Directions

  1. In a large bowl, stir the warm water and sugar until the sugar dissolves. Sprinkle the yeast on top, wait 5 minutes until foamy.
  2. Add melted butter, salt, and 3 cups of flour. Stir to combine.
  3. Add remaining flour, a cup at a time, until dough is soft and slightly sticky.
  4. Turn dough onto a floured surface and knead for 8 to 10 minutes until smooth and elastic.
  5. Place dough in a lightly greased bowl, cover with a clean towel, and let it rise in a warm place until doubled, about 1 hour.
  6. Punch down the dough and divide it into two loaves. Shape each into a loaf and place in greased 9×5-inch pans.
  7. Cover and let rise again until doubled, about 30 to 45 minutes.
  8. Preheat oven to 375°F. Bake 25 to 30 minutes until the tops are golden and the loaves sound hollow when tapped.
  9. Remove from pans and cool on a rack before slicing.


Amish White Bread Recipe

Why You’ll Love Amish White Bread Recipe

  • Simple ingredients you likely already have, this is an easy bread recipe.
  • Soft crust and tender crumb make it perfect for sandwiches and toast.
  • Works well as a side for soups, stews, or family dinners.
  • The mild flavor appeals to picky eaters and children.

tips for success

  • Use water that is warm, not hot, to avoid killing the yeast.
  • Measure flour by spooning it into the cup and leveling, avoid packing it down.
  • If dough seems too sticky, add a little flour, a tablespoon at a time.
  • Let the dough rise in a warm, draft-free place for best results.
  • Test for doneness by tapping the bottom of the loaf, it should sound hollow.

Serving Suggestions

  • Slice for sandwiches, grilled cheese, or PB&J.
  • Toast with butter and jam for breakfast.
  • Serve warm with soup or a salad for a simple meal.
  • Make french toast with slightly stale slices for a tasty breakfast treat.


Amish White Bread Recipe

FAQs

Q: Can I use bread flour instead of all-purpose flour? A: Yes, bread flour will give a slightly chewier texture and good rise.

Q: How long will this bread stay fresh? A: Store at room temperature in a bread box or plastic bag for 2 to 3 days, or freeze slices for longer storage.

Q: Can I make this in a bread machine? A: Yes, add ingredients to the machine in the order recommended by your machine and use the basic white bread setting.

Q: Can I make one large loaf instead of two smaller loaves? A: Yes, you can bake one large loaf but watch the baking time, it may need a bit longer in the oven.

Conclusion

If you want another easy version to compare, you can check this classic Amish White Bread Recipe – Allrecipes for tips and variations.

Amish White Bread

A simple, homemade loaf with a soft crust and mild, buttery taste, perfect for sandwiches and everyday meals.

Dough Ingredients

  • 2 cups warm water (about 110°F) (Make sure the water is warm, not hot.)
  • 1/3 cup sugar
  • 1 tablespoon active dry yeast
  • 1/4 cup melted butter or oil
  • 1 tablespoon salt
  • 6 to 7 cups all-purpose flour (Use spooned flour to avoid packing.)

Preparation

  1. In a large bowl, stir the warm water and sugar until the sugar dissolves. Sprinkle the yeast on top and wait 5 minutes until foamy.
  2. Add melted butter, salt, and 3 cups of flour to the mixture. Stir to combine.
  3. Gradually add the remaining flour, a cup at a time, until the dough is soft and slightly sticky.
  4. Turn the dough onto a floured surface and knead for 8 to 10 minutes until smooth and elastic.
  5. Place the dough in a lightly greased bowl, cover with a clean towel, and let it rise in a warm place until doubled, about 1 hour.
  6. Punch down the dough and divide it into two loaves. Shape each into a loaf and place in greased 9×5-inch pans.
  7. Cover and let rise again until doubled, about 30 to 45 minutes.

Baking

  1. Preheat oven to 375°F.
  2. Bake for 25 to 30 minutes until the tops are golden and the loaves sound hollow when tapped.
  3. Remove from pans and cool on a rack before slicing.

For best results, let the dough rise in a warm, draft-free place. Measure flour carefully and use water at the right temperature.

Bread, Side Dish
American
Amish White Bread, Classic Bread, Easy Bread Recipe, Homemade Bread

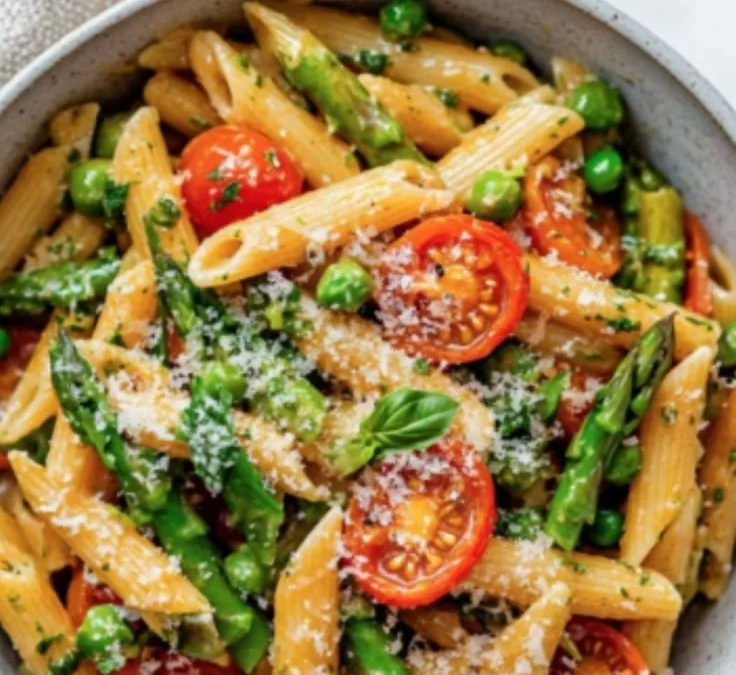
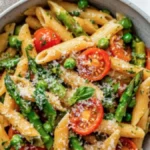
Spring Vegetable Pasta

Spring vegetable pasta dish with fresh seasonal vegetables and herbs

I love spring vegetable pasta because it tastes like the season, clean and bright. This recipe mixes tender pasta with crisp asparagus, sweet peas, garlic, and a touch of lemon. It feels fresh, not heavy, and most people enjoy it, even picky eaters.

The featured Spring Vegetable Pasta is a crowd-pleaser. It blends fresh vegetables, simple herbs, and a light sauce that coats every bite. The flavor is fresh, slightly tangy from lemon, and a little buttery or creamy, if you like. It looks colorful on the plate, and it smells great while you cook it.

You will feel proud serving this dish, and you may even hear, I need that recipe, from friends. Now go wash the veggies and get ready, this one is fun to make.

How to prepare Spring Vegetable Pasta

Ingredients (simple list you can use)

  • 12 ounces pasta, like penne or farfalle
  • 1 bunch asparagus, trimmed and cut into 1-inch pieces
  • 1 cup fresh or frozen peas
  • 2 tablespoons olive oil
  • 2 cloves garlic, minced
  • 1 lemon, zested and juiced
  • 1/4 cup grated Parmesan, plus more to serve
  • 2 tablespoons butter or 1/4 cup cream, optional
  • Salt and black pepper to taste
  • Fresh basil or parsley to finish

Steps

  1. Bring a large pot of salted water to a boil and cook the pasta until al dente, follow package time. Save about 1 cup of pasta cooking water, then drain pasta.
  2. While pasta cooks, heat olive oil in a large skillet over medium heat. Add garlic and cook 30 to 60 seconds, until fragrant.
  3. Add asparagus pieces and cook 3 to 5 minutes, until bright green and just tender. Add peas and stir 1 to 2 minutes to heat through.
  4. Add the drained pasta to the skillet. Toss with lemon zest, lemon juice, Parmesan, and butter or cream if you use it. Add a splash of the saved pasta water to make a light sauce, toss to coat.
  5. Taste and season with salt and pepper. Add fresh herbs and extra Parmesan to serve.


Spring Vegetable Pasta

Why You’ll Love Spring Vegetable Pasta

  • It uses fresh seasonal vegetables, so it tastes bright and clean.
  • The dish is quick, ready in about 25 to 30 minutes.
  • It works as a simple weeknight meal or a pretty dish for guests.
  • You can make it vegetarian, or add chicken or shrimp if you want more protein.
  • It pairs well with lemon and herbs, giving a fresh spring flavor.

tips for success

  • Cook pasta one minute less than package time for the best texture, it will finish in the pan.
  • Save pasta water, it helps make a smooth sauce without cream.
  • Use fresh lemon zest for bright flavor, not bottled lemon.
  • Don’t overcook asparagus, keep it slightly firm for good texture.
  • Taste and adjust salt and lemon at the end, small changes lift the whole dish.

Serving Suggestions

  • Serve with extra grated Parmesan and a drizzle of olive oil.
  • Add a simple green salad and crusty bread for a full meal.
  • Top with toasted pine nuts for crunch, or add fresh peas and mint for a spring twist.
  • Pair with a light white wine, like Pinot Grigio or Sauvignon Blanc.


Spring Vegetable Pasta

FAQs

Q: Can I use frozen vegetables?

A: Yes, frozen peas work well. For frozen asparagus, thaw and pat dry before cooking, or cook a little longer.

Q: Can I make this ahead?

A: You can cook the pasta and vegetables a few hours ahead. Toss them together just before serving, add a little pasta water if the sauce is dry.

Q: How do I make it dairy free?

A: Skip the butter and Parmesan, use olive oil and a bit more lemon or nutritional yeast for a cheesy note.

Q: Can I add protein?

A: Yes, cooked chicken, shrimp, or white beans fit well and make the dish more filling.

Q: What pasta shape is best?

A: Short shapes like penne, farfalle, or rotini hold the sauce and bits of vegetables well.

Conclusion

For another bright, creamy take on spring vegetable pasta ideas, see this tasty recipe, Creamy Lemon Spring Vegetable Pasta – Two Peas & Their Pod, it has a lovely lemon cream twist you may enjoy.

Spring Vegetable Pasta

A light and fresh pasta dish featuring spring vegetables like asparagus and peas, with a hint of lemon and Parmesan.

Pasta and Vegetables

  • 12 ounces pasta, like penne or farfalle
  • 1 bunch asparagus, trimmed and cut into 1-inch pieces
  • 1 cup fresh or frozen peas

Sauce and Seasoning

  • 2 tablespoons olive oil
  • 2 cloves garlic, minced
  • 1 each lemon, zested and juiced
  • 1/4 cup grated Parmesan, plus more to serve
  • 2 tablespoons butter or 1/4 cup cream, optional (Use butter or cream to enhance creaminess.)
  • Salt and black pepper to taste

Garnish

  • Fresh basil or parsley to finish

Cooking the Pasta

  1. Bring a large pot of salted water to a boil and cook the pasta until al dente, following package time. Save about 1 cup of pasta cooking water, then drain pasta.

Preparing the Vegetables

  1. While pasta cooks, heat olive oil in a large skillet over medium heat. Add garlic and cook for 30 to 60 seconds, until fragrant.
  2. Add asparagus pieces and cook for 3 to 5 minutes, until bright green and just tender. Then add peas and stir for 1 to 2 minutes to heat through.

Combining Ingredients

  1. Add the drained pasta to the skillet. Toss with lemon zest, lemon juice, Parmesan, and butter or cream if using. Add a splash of the saved pasta water to make a light sauce, and toss to coat.
  2. Taste and season with salt and pepper. Add fresh herbs and extra Parmesan to serve.

Tips for success: Cook pasta one minute less than package time for the best texture, keep asparagus slightly firm for good texture, and adjust seasoning at the end for optimal flavor.

Dinner, Main Course
Italian, Mediterranean
Fresh Vegetables, Healthy Dinner, Lemon Pasta, Pasta, Spring Vegetable Pasta

Pineapple Chicken and Rice

Delicious pineapple chicken served over rice with vibrant colors and flavors.

Pineapple Chicken and Rice is a warm, bright dish that mixes sweet fruit and savory chicken with soft rice. It feels like a hug on a plate, but with a tropical twist. This recipe is easy, fast, and great for family meals or a small gathering. The sauce is sweet and tangy, the chicken stays juicy, and the rice soaks up all the flavor. It’s a real crowd-pleaser, and you will love how simple it is to make. Give it a try, and get ready to hear, “Can I have seconds?”

How to prepare Pineapple Chicken and Rice

Ingredients (serves 4):

  • 1 lb (450 g) boneless, skinless chicken breasts, cut into bite size pieces
  • 1 cup long grain rice, rinsed
  • 1 can (8 oz) pineapple chunks, drained, reserve juice
  • 1 small onion, chopped
  • 1 bell pepper, chopped
  • 2 garlic cloves, minced
  • 2 tbsp soy sauce
  • 2 tbsp brown sugar or honey
  • 1 tbsp rice vinegar or white vinegar
  • 1 cup chicken broth
  • 2 tbsp oil for cooking
  • Salt and pepper to taste
  • Optional, chopped green onion or sesame seeds for garnish

Steps:

  1. Season the chicken with a little salt and pepper. Heat 1 tablespoon oil in a large pan over medium high heat. Add chicken and cook until brown and just cooked through, about 4 to 6 minutes. Remove chicken from the pan and set aside.
  2. In the same pan, add the other tablespoon of oil. Stir in the onion and bell pepper, cook until soft, about 3 minutes. Add the garlic and cook 30 seconds more.
  3. Stir in the rice and toast it for 1 minute with the vegetables. Add the chicken broth and the reserved pineapple juice, bring to a boil. Lower the heat, cover, and simmer until rice is tender, about 15 minutes.
  4. While rice cooks, in a small bowl mix soy sauce, brown sugar, and vinegar. Add pineapple chunks.
  5. When the rice is done, return the cooked chicken to the pan. Pour the sauce and pineapple over the rice and chicken. Stir gently to combine and warm through, 2 to 3 minutes. Taste and add salt or pepper if needed.
  6. Serve hot, garnish with green onion or sesame seeds if you like.


Pineapple Chicken and Rice

Why You’ll Love Pineapple Chicken and Rice

  • It mixes sweet pineapple and savory chicken in a simple way.
  • One pan or one pot options cut down on cleanup.
  • The flavors are bright, family friendly, and kid approved.
  • Rice soaks up the sauce, giving each bite good flavor.
  • It works for weeknight dinners and casual meals with friends.

tips for success

  • Rinse rice well to remove extra starch, it keeps rice fluffy.
  • Use medium heat so the chicken stays juicy, do not overcook.
  • Save a bit of the pineapple juice for the rice, it adds nice flavor.
  • Taste the sauce before you add it, adjust sugar or soy sauce to your liking.
  • If you like more sauce, add a little extra chicken broth or pineapple juice.

Serving Suggestions

  • Serve with steamed greens, like broccoli or snap peas.
  • Add a side salad for a fresh contrast.
  • Top with chopped green onions or cilantro, for color and fresh taste.
  • Pair with simple stir fried vegetables for a full plate.


Pineapple Chicken and Rice

FAQs

Q: Can I use brown rice instead of white rice?

A: Yes, you can. Use more liquid and cook longer, about 40 to 45 minutes, until tender.

Q: Can I make this with frozen pineapple?

A: Yes, frozen pineapple works fine. Thaw or add a little extra cooking time so it heats through.

Q: How do I store leftovers?

A: Cool and put in an airtight container, store in the fridge for up to 3 days. Reheat on the stove or in the microwave until hot.

Q: Can I use thighs instead of breasts?

A: Yes, boneless skinless thighs add more flavor and stay moist. Adjust cook time until fully cooked.

Q: Is this recipe gluten free?

A: It can be, use gluten free soy sauce or tamari to make it gluten free.

Conclusion

This Pineapple Chicken and Rice recipe is an easy, tasty way to bring sweet and savory flavors to your table. For a quick variation that uses coconut rice and a bright sauce, try this version from Half Baked Harvest, 30 Minute Pineapple Chicken with Coconut Rice – Half Baked Harvest. Enjoy cooking, and have fun sharing this simple meal with the people you love.

Pineapple Chicken and Rice

A warm, bright dish that combines sweet pineapple and savory chicken with soft rice, perfect for family meals or small gatherings.

Main Ingredients

  • 1 lb boneless, skinless chicken breasts, cut into bite size pieces
  • 1 cup long grain rice, rinsed
  • 1 can (8 oz) pineapple chunks, drained, reserve juice
  • 1 small onion, chopped
  • 1 piece bell pepper, chopped
  • 2 cloves garlic, minced
  • 2 tbsp soy sauce
  • 2 tbsp brown sugar or honey
  • 1 tbsp rice vinegar or white vinegar
  • 1 cup chicken broth
  • 2 tbsp oil for cooking
  • Salt and pepper to taste (Adjust to personal preference)
  • Optional, chopped green onion or sesame seeds for garnish

Preparation

  1. Season the chicken with a little salt and pepper.
  2. Heat 1 tablespoon oil in a large pan over medium high heat.
  3. Add chicken and cook until brown and just cooked through, about 4 to 6 minutes. Remove chicken from the pan and set aside.
  4. In the same pan, add the other tablespoon of oil. Stir in the onion and bell pepper, cook until soft, about 3 minutes.
  5. Add the garlic and cook 30 seconds more.

Cooking

  1. Stir in the rice and toast it for 1 minute with the vegetables.
  2. Add the chicken broth and the reserved pineapple juice, bring to a boil.
  3. Lower the heat, cover, and simmer until rice is tender, about 15 minutes.

Combining

  1. While rice cooks, in a small bowl mix soy sauce, brown sugar, and vinegar. Add pineapple chunks.
  2. When the rice is done, return the cooked chicken to the pan.
  3. Pour the sauce and pineapple over the rice and chicken. Stir gently to combine and warm through, 2 to 3 minutes.
  4. Taste and add salt or pepper if needed.

Serving

  1. Serve hot, garnish with green onion or sesame seeds if you like.

Rinse rice well to remove extra starch, it keeps rice fluffy. Use medium heat so the chicken stays juicy, do not overcook. Save a bit of the pineapple juice for the rice, it adds nice flavor. Taste the sauce before you add it, adjust sugar or soy sauce to your liking. If you like more sauce, add a little extra chicken broth or pineapple juice.

Dinner, Main Course
American, Tropical
Easy Dinner, Family Recipe, One Pot Meal, Pineapple Chicken, Savory and Sweet

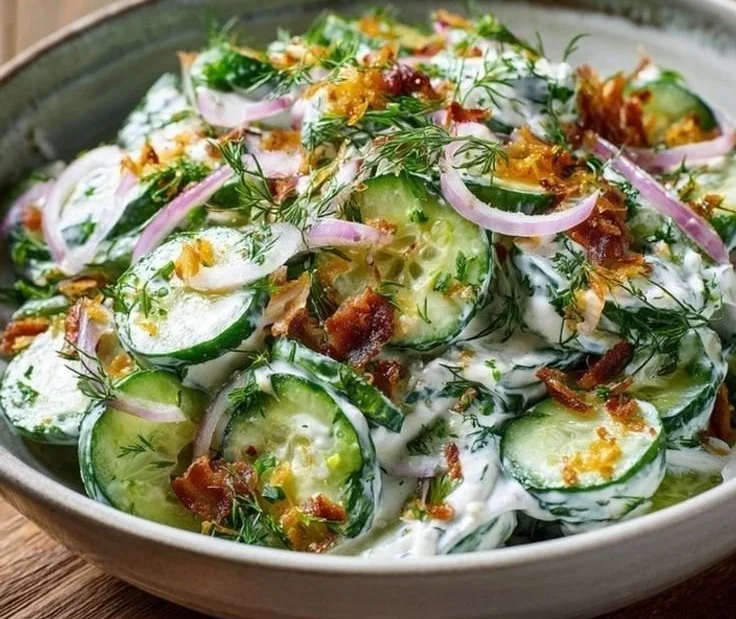
Cucumber Ranch Crack Salad

Delicious Cucumber Ranch Salad with fresh cucumbers and creamy ranch dressing

This Cucumber Ranch Crack Salad is light, creamy, and fresh, a perfect side for warm days or busy weeknights. It mixes crisp cucumber with rich ranch flavor, so each bite feels cool and satisfying. People love it at potlucks, picnics, and family dinners because it tastes great and comes together fast. You will smile when you taste the cool cucumber and creamy ranch, it is simple and so good, you might make it again tonight.

How to prepare Cucumber Ranch Crack Salad

  1. Wash and slice 3 to 4 medium cucumbers thin, you can peel if you like.
  2. Slice 1 small red onion thin, soak in cold water 5 minutes to take away some bite, then drain.
  3. In a bowl, mix 1 cup ranch dressing, 1/2 cup sour cream, 2 tablespoons mayonnaise, 1 teaspoon dried dill or 1 tablespoon fresh chopped dill, salt and pepper to taste.
  4. Add cucumbers and onion to the dressing, toss until everything is coated.
  5. Chill at least 30 minutes so the flavors mix and the salad gets cold.
  6. Before serving, stir in 2 chopped green onions or fresh herbs, and sprinkle a little paprika or cracked black pepper on top if you like.


Cucumber Ranch Crack Salad

Why You’ll Love Cucumber Ranch Crack Salad

  • Easy to make with simple ingredients, like cucumber and ranch dressing.
  • Bright, fresh flavor from cucumber and herbs, with a creamy ranch base.
  • Fast to prepare, great as a quick side dish or for a summer salad.
  • Versatile, you can add bacon, feta, or tomatoes to change it up.
  • Keeps well chilled, so it is handy for picnics and potlucks.

tips for success

  • Use firm, fresh cucumbers for best crunch.
  • Salt the cucumber lightly and let sit 10 minutes if you want less water in the salad, then drain.
  • Chill the salad so flavors blend, at least 30 minutes.
  • Taste and adjust salt and pepper before serving, ranch dressings can vary in salt.
  • If you use dried dill, use less, it is stronger than fresh dill.

Serving Suggestions

  • Serve with grilled chicken or burgers for a light meal.
  • Bring it to barbecues, it pairs well with smoky flavors.
  • Spoon over mixed greens to make a quick creamy cucumber salad bowl.
  • Put it in sandwiches or wraps for a cool crunch.
  • Add feta or chopped tomatoes to make it a fuller side dish.


Cucumber Ranch Crack Salad

FAQs

Q: Can I use Greek yogurt instead of sour cream or mayo?

A: Yes, Greek yogurt works well, it makes the salad a bit tangier and lighter.

Q: How long will this salad keep in the fridge?

A: Store in a sealed container up to 3 days, it stays good but gets softer over time.

Q: Can I make this ahead for a party?

A: Yes, make it a few hours ahead and keep it chilled, toss once before serving.

Q: Do I need to peel the cucumbers?

A: You do not have to, leave the skin on for color and extra crunch, or peel if you prefer.

Q: Can I add other vegetables?

A: Yes, chopped tomatoes, bell pepper, or radish all work well and add color.

Conclusion

If you want a clear, trusted recipe to try right away, check this Cucumber Ranch Salad recipe for a handy guide and extra tips, Cucumber Ranch Salad Recipe – An Affair from the Heart.

Cucumber Ranch Crack Salad

A light, creamy, and fresh salad mixing crisp cucumber with rich ranch flavor, perfect for warm days or busy weeknights.

Main Ingredients

  • 3-4 medium medium cucumbers (Wash and slice thin, peel if desired.)
  • 1 small red onion (Soak in cold water for 5 minutes, then drain.)
  • 1 cup ranch dressing (Choose your favorite brand.)
  • 1/2 cup sour cream (Can substitute with Greek yogurt.)
  • 2 tablespoons mayonnaise (Optional for added creaminess.)
  • 1 teaspoon dried dill (Or 1 tablespoon fresh chopped dill.)
  • to taste salt and pepper (Adjust according to preference.)
  • 2 chopped green onions (Can use fresh herbs instead.)
  • to taste paprika or cracked black pepper (Optional garnish.)

Preparation

  1. Wash and slice 3-4 medium cucumbers thin; peel if desired.
  2. Slice 1 small red onion thin, soak in cold water for 5 minutes to reduce bite, then drain.
  3. In a bowl, mix 1 cup ranch dressing, 1/2 cup sour cream, 2 tablespoons mayonnaise, 1 teaspoon dried dill (or 1 tablespoon fresh chopped dill), and salt and pepper to taste.
  4. Add cucumbers and onion to the dressing; toss until everything is coated.
  5. Chill the salad for at least 30 minutes to let flavors mix and cool.
  6. Before serving, stir in 2 chopped green onions or fresh herbs, and sprinkle with paprika or cracked black pepper if desired.

For best crunch, use firm, fresh cucumbers. Lightly salt the cucumbers and let sit for 10 minutes to reduce water content. Chill salad for flavor blending. Adjust seasoning as ranch dressing varies in salt content. Consider adding bacon, feta, or tomatoes for variety.

Salad, Side Dish
American
Cucumber Salad, Quick Salad, Ranch Salad, summer salad

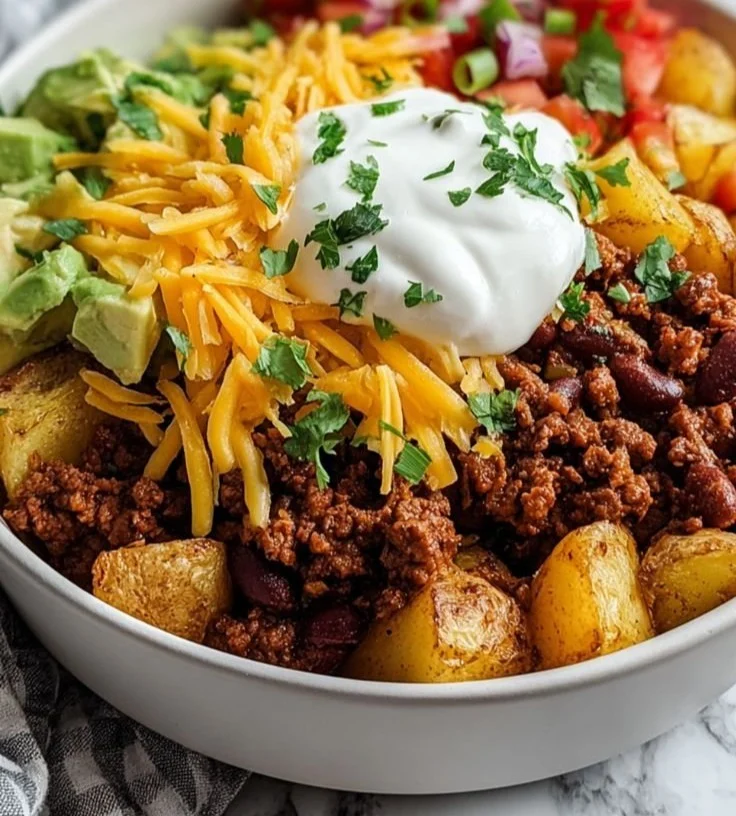
Loaded Potato Taco Bowl

Delicious Loaded Potato Taco Bowl with toppings and garnishes

This Loaded Potato Taco Bowl brings together two favorites, baked potato and taco flavors. It makes a warm, comforting meal that tastes bright and fresh. The crispy potato, savory taco meat, and creamy toppings please a crowd and make a simple weeknight dinner feel special. Give it a try, and enjoy the fun of piling on all your favorite taco toppings, one bite at a time.

How to prepare Loaded Potato Taco Bowl

  1. Preheat your oven to 400°F (200°C). Wash the potatoes, dry them, and rub with a little oil and salt.
  2. Bake whole potatoes for 45 to 60 minutes, until a fork goes in easily, or roast small diced potatoes for 30 to 40 minutes, until tender and slightly crisp.
  3. While potatoes cook, heat a skillet over medium heat. Add a little oil, then add 1 pound ground beef or turkey, or use plant protein for a vegetarian version.
  4. Cook the meat, breaking it up with a spoon, until brown. Drain extra fat if needed.
  5. Stir in 1 to 2 tablespoons taco seasoning and 1/4 cup water, simmer for 2 to 3 minutes until the sauce thickens and flavors coat the meat.
  6. Warm canned black beans and corn in a small pot, or drain and rinse before heating.
  7. When potatoes are ready, cut them open or mash the roasted pieces a little to make a bowl shape.
  8. Fill each potato or bowl of potatoes with taco meat, then add black beans, corn, shredded cheese, sour cream, salsa, chopped tomatoes, green onions, avocado, and cilantro.
  9. Finish with lime juice and a little hot sauce if you like it spicy.
  10. Serve right away while the potato is warm and the cheese is melty.


Loaded Potato Taco Bowl

Why You’ll Love Loaded Potato Taco Bowl

  • It mixes comfort food and Mexican flavors in one bowl, with filling roasted potato, seasoned meat, and fresh toppings.
  • It is easy to change for picky eaters, use beef, turkey, or a vegetarian protein.
  • It feeds a group or works as a quick family meal, and everyone can pick their own toppings.
  • The textures work well together, soft potato, crunchy toppings, and melty cheese, all in a single bowl.

tips for success

  • Use medium to large russet potatoes for a fluffy inside and crispy skin.
  • Dry the potato skin well and rub with oil, it helps to get a nice crisp outside.
  • Don’t overcook the meat, just brown it and add taco seasoning toward the end for best flavor.
  • Warm the toppings slightly, cheese melts better and the bowl stays hot.
  • If you roast diced potatoes, toss them in oil and salt so they crisp up.
  • Taste and adjust salt, lime, and spices before serving.

Serving Suggestions

  • Serve with a simple green salad or a cabbage slaw for a fresh bite.
  • Add tortilla chips or warm tortillas on the side for dipping and scooping.
  • Offer lime wedges, extra salsa, and hot sauce so people can customize heat and tang.
  • Top with pickled red onion or jalapeños for an extra bright note.


Loaded Potato Taco Bowl

FAQs

Q: Can I make this dish vegetarian? A: Yes, use black beans, pinto beans, seasoned lentils, or crumbled tofu in place of meat. Add extra spices and a splash of soy or tamari for depth.

Q: How do I store and reheat leftovers? A: Store components in an airtight container in the fridge for 3 to 4 days. Reheat the potato and filling in the oven at 350°F (175°C) until hot, or microwave in short bursts until warm.

Q: Can I make the bowls ahead of time? A: You can roast potatoes and cook the meat a day ahead, then store separately. Assemble and add fresh toppings just before serving so greens and avocado stay fresh.

Q: Can I freeze these bowls? A: Freeze the cooked meat or beans in a freezer bag for up to 2 months. Potatoes can lose texture when frozen, so freeze them only if needed and reheat slowly.

Conclusion

For a full recipe and extra notes on making this dish, see the Loaded Potato Taco Bowl Recipe – Simple Home Edit.

Loaded Potato Taco Bowl

A comforting bowl combining baked potatoes and taco flavors, topped with savory meat and fresh ingredients.

For the potatoes

  • 4 medium medium to large russet potatoes (For a fluffy inside and crispy skin.)

For the taco meat

  • 1 pound ground beef or turkey (Or plant protein for a vegetarian version.)
  • 1-2 tablespoons taco seasoning (Adjust to taste.)
  • 1/4 cup water (To thicken the sauce.)

Toppings

  • 1 can black beans (Warm before serving.)
  • 1 can corn (Warm before serving.)
  • 1 cup shredded cheese (Use your favorite type.)
  • 1/2 cup sour cream (Optional.)
  • 1/2 cup salsa (Adjust to taste.)
  • 1 cup chopped tomatoes
  • 1/4 cup chopped green onions
  • 1 medium avocado
  • 1/4 cup fresh cilantro (For garnish.)
  • 1 tablespoon lime juice (Add more to taste.)
  • to taste hot sauce (Optional for spice.)

Preparation

  1. Preheat your oven to 400°F (200°C). Wash the potatoes, dry them, and rub with a little oil and salt.
  2. Bake whole potatoes for 45 to 60 minutes, until a fork goes in easily, or roast small diced potatoes for 30 to 40 minutes, until tender and slightly crisp.

Cooking the Meat

  1. While potatoes cook, heat a skillet over medium heat. Add a little oil, then add the ground meat.
  2. Cook the meat, breaking it up with a spoon, until brown. Drain extra fat if needed.
  3. Stir in the taco seasoning and water, and simmer for 2 to 3 minutes until the sauce thickens.

Assembling the Bowls

  1. Warm the canned black beans and corn in a small pot, or drain and rinse before heating.
  2. When potatoes are ready, cut them open or mash the roasted pieces a little to make a bowl shape.
  3. Fill each potato or bowl of potatoes with taco meat, then add black beans, corn, cheese, sour cream, salsa, tomatoes, green onions, avocado, and cilantro.
  4. Finish with lime juice and hot sauce if desired.

Serving

  1. Serve right away while the potato is warm and the cheese is melty.

For best results, dry potato skins well and rub with oil. Warm toppings for better melting and heat retention. Adjust lime, salt, and spices before serving.

Dinner, Main Course
Comfort Food, Mexican
Comfort Food, Loaded Potato Taco Bowl, Quick Dinner, Taco Bowl, Vegetarian Option