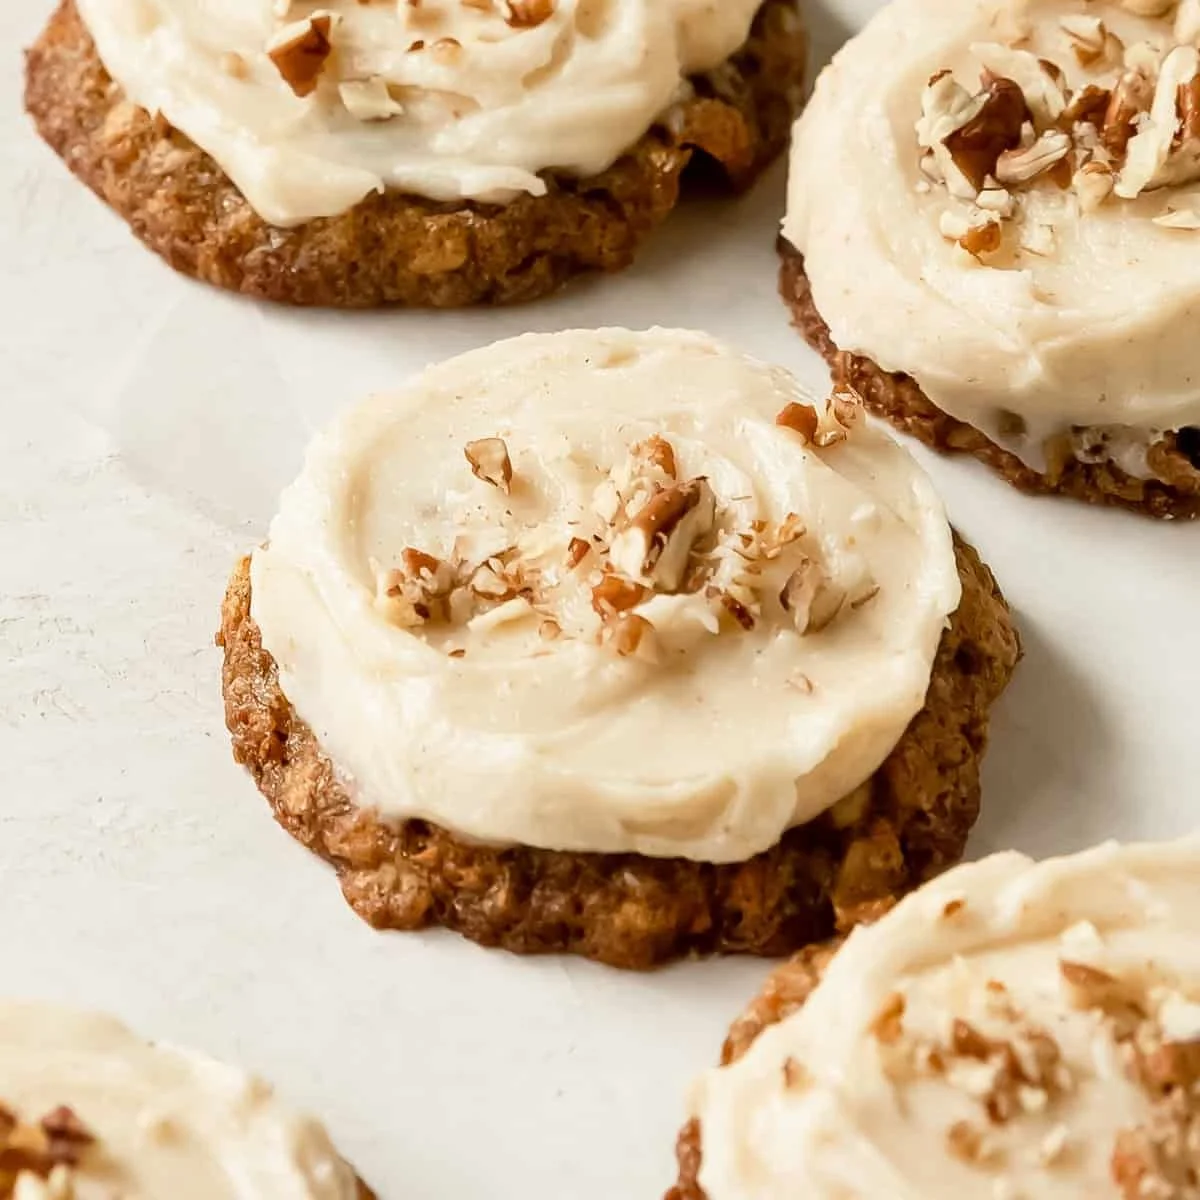
Carrot Cake Cookies Recipe

Freshly baked carrot cake cookies on a cooling rack

Carrot cake cookies bring the warm flavors of carrot cake into a small, fun cookie. They are soft, slightly spiced, and have bits of carrot and sometimes nuts or pineapple. People love them at parties, as a snack, or with a cup of tea. This recipe is simple and makes a lot, so it works well when you want to share. For an extra set of tips and a similar version, check this helpful page, a similar carrot cake cookies guide. Get ready to bake and enjoy a sweet, cozy treat everyone will ask for again.

How to prepare Carrot Cake Cookies

Ingredients

  • 1 cup all-purpose flour
  • 1/2 teaspoon baking soda
  • 1/2 teaspoon baking powder
  • 1/2 teaspoon ground cinnamon
  • 1/4 teaspoon salt
  • 1/2 cup unsalted butter, softened
  • 1/2 cup brown sugar, packed
  • 1/4 cup granulated sugar
  • 1 large egg
  • 1 teaspoon vanilla extract
  • 1 cup finely shredded carrots
  • 1/2 cup crushed pineapple, drained (optional)
  • 1/3 cup chopped walnuts or pecans (optional)
  • 1/3 cup raisins (optional)
  • 1/2 cup cream cheese frosting, for topping (optional)

Directions

  1. Preheat the oven to 350°F (175°C). Line a baking sheet with parchment paper.
  2. In a bowl, mix flour, baking soda, baking powder, cinnamon, and salt.
  3. In another bowl, beat butter with brown sugar and granulated sugar until smooth.
  4. Add the egg and vanilla, beat until mixed.
  5. Stir in the shredded carrots and drained pineapple, then add nuts or raisins if you like.
  6. Add the dry mix to the wet mix. Stir until just combined, do not overmix.
  7. Use a spoon to drop rounded tablespoons of dough onto the baking sheet, about 2 inches apart.
  8. Bake 10 to 12 minutes, until the edges are set and the centers are soft.
  9. Let the cookies cool on the sheet for 5 minutes, then move to a wire rack to cool completely.
  10. If you want, spread a little cream cheese frosting on top once the cookies are cool.

Carrot Cake Cookies Recipe

Why You’ll Love Carrot Cake Cookies

  • They taste like carrot cake, but in a quick cookie form.
  • They stay soft for days if you store them right.
  • You can add nuts, pineapple, or raisins to make them your own.
  • The cream cheese frosting makes them feel special without much fuss.

Tips for success

  • Shred carrots finely so the dough blends well and cookies stay soft.
  • Measure flour by spooning into the cup and leveling, do not pack it.
  • Do not overbake, take them out when centers look slightly soft.
  • Cool cookies on a rack before frosting, or the frosting will melt.
  • If dough is sticky, chill for 15 minutes, it will be easier to scoop.

Serving Suggestions

  • Serve warm with a small dollop of cream cheese frosting.
  • Pair with coffee, tea, or milk.
  • Pack them in a lunch box for a sweet midday treat.
  • Arrange on a platter for holiday parties or potlucks.

Carrot Cake Cookies Recipe

FAQs

Q: Can I make the dough ahead of time? A: Yes, cover the dough and chill for up to 48 hours, or freeze for up to 1 month.

Q: Can I make these gluten free? A: Yes, use a 1-to-1 gluten free flour blend and watch the texture, you may need one or two tablespoons more liquid.

Q: How do I store the cookies? A: Keep them in an airtight container at room temperature for 3 days, or refrigerate up to 1 week. For longer storage, freeze.

Q: Can I skip the sugar or use a substitute? A: You can try a sugar substitute made for baking, but the texture and browning may change.

Q: Are these safe for kids? A: Yes, they are a kid-friendly treat, just watch for nut allergies if you add nuts.

Conclusion

If you want another idea or the original inspiration, see this version of Carrot Cake Cookies, Carrot Cake Cookies – Creme De La Crumb.

Carrot Cake Cookies

These soft and slightly spiced cookies capture the warm flavors of carrot cake, making them a perfect treat for parties or a cozy snack with tea.

Dry Ingredients

  • 1 cup all-purpose flour (Measure by spooning into the cup and leveling.)
  • 1/2 teaspoon baking soda
  • 1/2 teaspoon baking powder
  • 1/2 teaspoon ground cinnamon (Add more for extra spice.)
  • 1/4 teaspoon salt

Wet Ingredients

  • 1/2 cup unsalted butter, softened (Should be at room temperature.)
  • 1/2 cup brown sugar, packed
  • 1/4 cup granulated sugar
  • 1 large egg
  • 1 teaspoon vanilla extract

Mix-Ins (optional)

  • 1 cup finely shredded carrots (Shred finely for best texture.)
  • 1/2 cup crushed pineapple, drained (Optional addition.)
  • 1/3 cup chopped walnuts or pecans (Optional for added crunch.)
  • 1/3 cup raisins (Optional.)
  • 1/2 cup cream cheese frosting, for topping (Add after cooling if desired.)

Preparation

  1. Preheat the oven to 350°F (175°C) and line a baking sheet with parchment paper.
  2. In a bowl, mix together the flour, baking soda, baking powder, cinnamon, and salt.
  3. In another bowl, beat the butter with the brown sugar and granulated sugar until smooth.
  4. Add the egg and vanilla extract, and beat until mixed well.
  5. Stir in the shredded carrots and drained pineapple. If desired, add the nuts or raisins.
  6. Add the dry mix to the wet mix and stir until just combined. Do not overmix.
  7. Use a spoon to drop rounded tablespoons of dough onto the prepared baking sheet, about 2 inches apart.

Baking

  1. Bake for 10 to 12 minutes, until the edges are set and the centers are soft.
  2. Let the cookies cool on the sheet for 5 minutes, then move them to a wire rack to cool completely.
  3. Spread cream cheese frosting on top of the cookies once they are cool, if desired.

Shred carrots finely for best results. For sticky dough, chill for 15 minutes before scooping. Stores well in an airtight container.
Dessert, Snack
American
Baking, Carrot Cake Cookies, Cookies, sweet treat

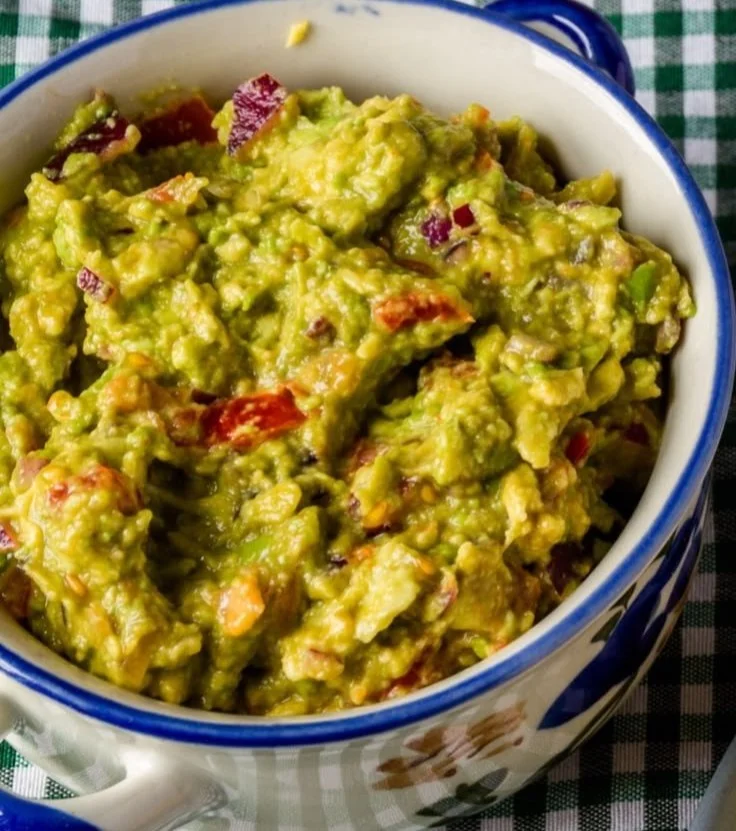
Best-ever Grilled Guacamole recipe

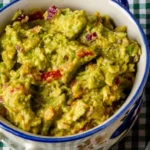
Delicious grilled guacamole served with tortilla chips and fresh herbs

Grilled guacamole feels fresh, smoky, and bright all at once. It uses ripe avocados that get a little char on the grill, which brings out a deep, nutty flavor. This recipe mixes charred avocados with lime, onion, and cilantro for a crowd-pleasing snack or party appetizer. If you like easy grill treats, try another simple grill twist with this air fryer grilled cheese hot dogs recipe to keep the fun going. This grilled guacamole is creamy, a bit smoky, and ready fast, you will want to make it again and again.

How to prepare Grilled Guacamole

Ingredients

  • 3 ripe avocados
  • 1 small red onion, finely chopped
  • 1 small tomato, seeded and diced
  • 1 jalapeño, seeded and finely chopped, optional
  • 1/4 cup fresh cilantro, chopped
  • 2 tablespoons lime juice, or to taste
  • 1 tablespoon olive oil
  • 1/2 teaspoon salt, more to taste
  • Freshly ground black pepper, to taste
  • Optional, crumbled cotija or feta for topping

Directions

  1. Heat a grill or grill pan to medium-high. Brush avocado halves lightly with olive oil.
  2. Cut each avocado in half and remove the pit. Place cut side down on the hot grill for 2 to 3 minutes, just until you see light char marks. The flesh should warm and get a little smoky.
  3. Remove avocados and let cool 1 minute. Scoop the flesh into a bowl.
  4. Add lime juice, salt, and pepper. Mash with a fork to your desired texture, a few chunky bits are nice.
  5. Fold in red onion, tomato, jalapeño if using, and cilantro. Taste and adjust salt and lime.
  6. Transfer to a serving bowl, top with crumbled cotija or feta if you like, and serve with chips or grilled bread.

Grilled Guacamole

Why You’ll Love Grilled Guacamole

  • The grill adds a smoky, deep taste you do not get from raw avocados.
  • It stays creamy and bright because of the lime and fresh cilantro.
  • It is quick to make, great for last-minute parties or a simple weeknight snack.
  • It works as a dip, a toast spread, or a topping for grilled meats and tacos.

Tips for success

  • Use ripe avocados, they should give a little when you press.
  • Do not over-char, just a quick sear brings the best flavor.
  • Add lime little by little, you can always add more, you can’t take it out.
  • Chop onions and cilantro small so every bite has a mix of flavors.
  • Make it right before serving for the freshest taste, avocado browns fast.

Serving Suggestions

  • Serve with tortilla chips or pita chips for an easy snack.
  • Spread on grilled bread for simple avocado toast with a smoky twist.
  • Use as a topping for grilled chicken, fish, or tacos for extra flavor.
  • Add crumbled cotija or feta and extra lime wedges for a salty, tangy finish.

Grilled Guacamole

FAQs

Q: Can I make grilled guacamole ahead of time?

A: You can mix most parts ahead, but keep avocado mash and add lime just before serving to slow browning. Cover with plastic so the surface touches the guacamole.

Q: What if I do not have a grill?

A: Use a hot grill pan or cast iron skillet on the stove to get char marks and the smoky flavor.

Q: How do I keep the guacamole from turning brown?

A: Press plastic wrap on the surface or add extra lime juice, both help slow browning for a short time.

Q: Can I add other mix-ins?

A: Yes, try roasted corn, diced mango, or chopped roasted peppers for new flavors.

Conclusion

Grilled guacamole is an easy, tasty way to bring smoky flavor to a classic dip. It works for small snacks and big gatherings, and you can tweak it to match your taste. For another grilled guacamole idea with a salty cheese twist, see this Grilled Guacamole with Cotija Cheese on How Sweet Eats.

Grilled Guacamole

This grilled guacamole combines charred avocados with lime, onion, and cilantro for a fresh, smoky, and creamy dip that’s perfect for parties or a simple snack.

Main ingredients

  • 3 ripe avocados (Use ripe avocados for best flavor.)
  • 1 small red onion, finely chopped
  • 1 small tomato, seeded and diced
  • 1 jalapeño, seeded and finely chopped (optional) (Can be omitted for less heat.)
  • 1/4 cup fresh cilantro, chopped
  • 2 tablespoons lime juice, or to taste (Add more if desired.)
  • 1 tablespoon olive oil (For brushing avocados.)
  • 1/2 teaspoon salt, more to taste
  • Freshly ground black pepper, to taste
  • Optional, crumbled cotija or feta for topping

Preparation

  1. Heat a grill or grill pan to medium-high.
  2. Brush avocado halves lightly with olive oil.
  3. Cut each avocado in half and remove the pit.
  4. Place cut side down on the hot grill for 2 to 3 minutes until light char marks appear.
  5. Remove avocados and let cool for 1 minute.
  6. Scoop the flesh into a bowl.
  7. Add lime juice, salt, and pepper, and mash with a fork to desired texture.
  8. Fold in red onion, tomato, jalapeño (if using), and cilantro.
  9. Taste and adjust salt and lime as necessary.
  10. Transfer to a serving bowl and top with crumbled cotija or feta if desired.
  11. Serve with chips or grilled bread.

For the best taste, make it right before serving as avocado browns quickly. You can use a hot grill pan if you don’t have an outdoor grill. Make sure avocados are ripe for the best texture.

Appetizer, Snack
Mexican
Avocado, Dip, Grilled Guacamole, Guacamole, Party Appetizer

Cheddar Bay Biscuits

Freshly baked Cheddar Bay Biscuits served with melted butter and herbs

Cheddar Bay Biscuits are warm, cheesy, and soft, with a light garlic butter on top. They melt in your mouth and please a crowd at dinner or a party. This Cheddar Bay Biscuits recipe is easy to make at home and tastes like a restaurant favorite, full of cheddar cheese and garlic flavor. If you enjoy rich, cheesy bread, you might also like a hearty soup, such as this bacon cheddar gnocchi soup, which pairs well with biscuits. Get ready to bake, because these biscuits are fun to make and even more fun to eat.

How to prepare Cheddar Bay Biscuits

Ingredients

  • 2 cups all-purpose flour
  • 1 tablespoon baking powder
  • 1 teaspoon salt
  • 1 teaspoon garlic powder
  • 1/2 cup cold butter, cut into cubes
  • 1 cup shredded sharp cheddar cheese
  • 3/4 cup milk or buttermilk
  • 1 egg, lightly beaten

Garlic butter topping

  • 1/4 cup melted butter
  • 1/2 teaspoon garlic powder
  • 1 tablespoon chopped fresh parsley, or 1 teaspoon dried parsley
  • Pinch of salt

Directions

  1. Preheat the oven to 425°F (220°C). Line a baking sheet with parchment paper.
  2. In a large bowl, mix the flour, baking powder, salt, and garlic powder.
  3. Add the cold butter. Use your fingers or a pastry cutter to work the butter into the flour until the mix looks like coarse crumbs.
  4. Stir in the shredded cheddar cheese.
  5. In a small bowl, mix the milk and beaten egg. Pour this into the dry mix and stir until just combined, do not overmix. The dough will be sticky.
  6. Drop spoonfuls of dough onto the baking sheet, about 12 biscuits. Space them so they can rise.
  7. Bake for 12 to 15 minutes, until the tops are golden and the centers are set.
  8. While the biscuits bake, mix the melted butter, garlic powder, parsley, and a pinch of salt for the topping.
  9. When the biscuits come out of the oven, brush them with the garlic butter right away so the butter soaks in. Serve warm.

Cheddar Bay Biscuits

Why You’ll Love Cheddar Bay Biscuits

  • They are cheesy and soft, with a light garlic butter that adds big flavor.
  • The biscuits bake fast, so you can make them for weeknight meals or guests.
  • Kids and adults both enjoy their mild, savory taste.
  • They go with many dishes, from soup to grilled chicken, making them a great side.

Tips for success

  • Use cold butter, it makes the biscuits flaky and tender.
  • Do not overmix the dough, overmixing makes biscuits tough.
  • Freshly shredded cheddar melts better than pre-shredded cheese.
  • Brush the garlic butter right after baking, while biscuits are hot, so they absorb the flavor.
  • If you like, add a pinch of cayenne or a little chopped chive for extra flavor.

Serving Suggestions

  • Serve warm with soup, like tomato or chicken soup.
  • Pair with grilled or roasted chicken for a full meal.
  • Offer butter, honey, or a little jam on the side for a sweet contrast.
  • Use the biscuits to make small sandwiches with ham or turkey.

Cheddar Bay Biscuits

FAQs

Q: Can I use self-rising flour instead of all-purpose?
A: Yes, you can. If you use self-rising flour, skip the baking powder and salt in the recipe.

Q: Can I freeze the biscuit dough?
A: Yes, scoop the dough onto a tray, freeze until firm, then move to a bag. Bake from frozen, add a few minutes to the bake time.

Q: How do I store leftover biscuits?
A: Keep leftovers in an airtight container at room temperature for up to 2 days, or freeze for up to 1 month. Reheat in the oven for best texture.

Q: Can I make these without garlic?
A: Yes, leave out the garlic powder and garlic butter, or use plain melted butter instead.

Conclusion

If you want a tried and loved copycat recipe that brings that Red Lobster feeling home, this Red Lobster Cheddar Bay Biscuits Copycat – Caroline Chambers page is a helpful reference for another easy version to try.

Cheddar Bay Biscuits

Warm, cheesy, and soft biscuits topped with a light garlic butter, perfect for dinner or parties.

Main Ingredients

  • 2 cups all-purpose flour
  • 1 tablespoon baking powder
  • 1 teaspoon salt
  • 1 teaspoon garlic powder
  • 1/2 cup cold butter, cut into cubes (Use cold butter for flaky biscuits.)
  • 1 cup shredded sharp cheddar cheese (Freshly shredded melts better.)
  • 3/4 cup milk or buttermilk
  • 1 egg lightly beaten

Garlic Butter Topping

  • 1/4 cup melted butter
  • 1/2 teaspoon garlic powder
  • 1 tablespoon chopped fresh parsley or 1 teaspoon dried parsley
  • 1 pinch salt

Preparation

  1. Preheat the oven to 425°F (220°C). Line a baking sheet with parchment paper.
  2. In a large bowl, mix the flour, baking powder, salt, and garlic powder.
  3. Add the cold butter. Use your fingers or a pastry cutter to work the butter into the flour until the mix looks like coarse crumbs.
  4. Stir in the shredded cheddar cheese.
  5. In a small bowl, mix the milk and beaten egg. Pour this into the dry mix and stir until just combined, do not overmix. The dough will be sticky.
  6. Drop spoonfuls of dough onto the baking sheet, about 12 biscuits. Space them so they can rise.

Baking

  1. Bake for 12 to 15 minutes, until the tops are golden and the centers are set.
  2. While the biscuits bake, mix the melted butter, garlic powder, parsley, and a pinch of salt for the topping.
  3. When the biscuits come out of the oven, brush them with the garlic butter right away so the butter soaks in. Serve warm.

For best results, use cold butter, do not overmix the dough, and brush with garlic butter immediately after baking. Variations include adding cayenne or chive for extra flavor.

Side Dish, Snack
American
Biscuit Recipe, Cheddar Bay Biscuits, Cheddar Biscuits, Easy Biscuits, Garlic Biscuits

Buffalo Chicken Zucchini Boats Recipe

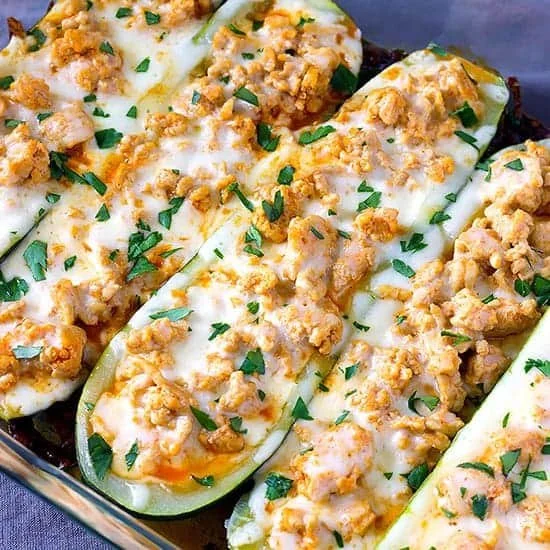
Buffalo Chicken Zucchini Boats garnished and ready to serve

These buffalo chicken zucchini boats are a fun, tasty meal. They mix spicy buffalo chicken with soft baked zucchini and melty cheese. People love them as a low carb main or a crowd pleasing appetizer. They are quick to make and full of bold flavor, so they fit weeknight dinners or game day snacks. If you like easy dinner ideas and simple swaps, try this recipe, and you might also enjoy an air fryer honey butter garlic chicken tenders recipe for another tasty meal. Get ready to smile when you take that first bite, it is fun and tasty.

How to prepare Buffalo Chicken Zucchini Boats

Ingredients

  • 4 medium zucchini
  • 2 cups cooked chicken, shredded
  • 1/2 cup hot sauce, like Frank’s
  • 1/2 cup cream cheese, softened
  • 1/2 cup shredded cheddar or mozzarella
  • 1/4 cup ranch or blue cheese dressing
  • 1 small celery stalk, finely chopped, optional
  • 1 tablespoon olive oil
  • Salt and pepper to taste

Directions

  1. Preheat oven to 400°F, line a baking sheet with foil or parchment.
  2. Wash zucchini and cut each in half lengthwise.
  3. Scoop out the seeds and some flesh to make a boat, leave a thin wall so they hold shape.
  4. Brush the inside with olive oil, sprinkle with salt and pepper.
  5. Bake zucchini boats for 8 to 10 minutes to soften, remove and set aside.
  6. In a bowl, mix shredded chicken, hot sauce, cream cheese, half the shredded cheese, chopped celery if using, and ranch or blue cheese dressing. Stir until smooth and creamy.
  7. Spoon the buffalo chicken mix into each zucchini boat, fill evenly.
  8. Sprinkle the remaining cheese on top.
  9. Bake for 10 to 12 minutes more, until cheese melts and tops bubble.
  10. Let cool for a few minutes, then garnish with extra ranch or chopped green onion if you like.

Buffalo Chicken Zucchini Boats Recipe

Why You’ll Love Buffalo Chicken Zucchini Boats

  • Low carb and keto friendly, they fit many diets.
  • Classic buffalo chicken taste without bread or heavy carbs.
  • Easy to make and easy to change, add more heat or mild flavor.
  • Great for meal prep or quick weeknight dinners.
  • Kids and adults both like the cheesy, spicy mix.

Tips for success

  • Scoop out enough zucchini flesh, but keep the walls thick enough so they do not fall apart.
  • Pat the zucchini dry before baking to avoid extra water.
  • Use warm cooked chicken, it mixes easier with cream cheese.
  • Taste the filling before stuffing, add more hot sauce or dressing if you want more flavor.
  • If you like extra crisp, broil for 1 to 2 minutes at the end, watch closely so it does not burn.

Serving Suggestions

  • Serve with ranch or blue cheese dressing for dipping.
  • Add a side salad or roasted veggies for a full low carb meal.
  • For a heartier plate, pair with cauliflower rice or a simple green slaw.
  • Offer celery sticks on the side to keep the buffalo theme.

Buffalo Chicken Zucchini Boats Recipe

FAQs

Q: Can I make these ahead of time? A: Yes, mix the filling and store in the fridge. Scoop the zucchini and bake just before serving, or bake everything and reheat in the oven.

Q: Can I use ground chicken or turkey? A: Yes, cooked ground chicken or turkey works well. Cook it first, then mix with the other filling ingredients.

Q: Are these spicy? A: They are as spicy as you make them. Use less hot sauce for mild flavor, or add more for heat.

Q: Can I freeze the boats? A: You can freeze the filled boats before baking. Thaw in the fridge and bake until hot. Texture of zucchini may change slightly.

Q: What cheese is best? A: Cheddar or mozzarella melt well. Use a mix if you like sharp flavor and good melt.

Conclusion

If you want more ideas and a keto friendly version, you can read a full guide for similar recipes at Buffalo Chicken Zucchini Boats – The Best Keto Recipes, it has tips and variations to try.

Buffalo Chicken Zucchini Boats

These buffalo chicken zucchini boats are a fun, low-carb meal that mixes spicy buffalo chicken with soft baked zucchini and melty cheese, perfect for weeknight dinners or game day snacks.

Zucchini Boats

  • 4 medium medium zucchini (Washed and cut in half lengthwise)
  • 1 tablespoon olive oil (For brushing zucchini)
  • to taste Salt and pepper (For seasoning)

Buffalo Chicken Filling

  • 2 cups cooked chicken, shredded (Use warm cooked chicken for easier mixing with cream cheese)
  • 1/2 cup hot sauce, like Frank’s (Adjust to taste according to desired spiciness)
  • 1/2 cup cream cheese, softened
  • 1/2 cup shredded cheddar or mozzarella (Use a mix for sharper flavor)
  • 1/4 cup ranch or blue cheese dressing (For added creaminess)
  • 1 small celery stalk, finely chopped (Optional for extra crunch)

Preparation

  1. Preheat oven to 400°F and line a baking sheet with foil or parchment.
  2. Wash zucchini and cut each in half lengthwise.
  3. Scoop out the seeds and some flesh to make a boat, leaving a thin wall to hold shape.
  4. Brush the inside with olive oil and sprinkle with salt and pepper.
  5. Bake zucchini boats for 8 to 10 minutes until softened, then remove and set aside.

Mixing Filling

  1. In a bowl, mix shredded chicken, hot sauce, cream cheese, half the shredded cheese, chopped celery if using, and ranch or blue cheese dressing until smooth and creamy.

Filling Zucchini

  1. Spoon the buffalo chicken mix into each zucchini boat, filling evenly.
  2. Sprinkle the remaining cheese on top.

Baking

  1. Bake for an additional 10 to 12 minutes, until cheese melts and tops bubble.
  2. Let cool for a few minutes, then garnish with extra ranch or chopped green onion if desired.

Scoop out enough zucchini flesh but keep the walls thick enough to prevent falling apart. Pat the zucchini dry before baking to avoid extra water. Taste the filling before stuffing and adjust spicy levels to preference. For extra crisp, broil for 1 to 2 minutes at the end, watching closely to prevent burning.

Appetizer, Main Course
American
Buffalo Chicken, Easy Dinner Ideas, Game Day Snacks, Low Carb, Zucchini Boats

Cheesy Baked Tortellini Casserole With Meat Sauce

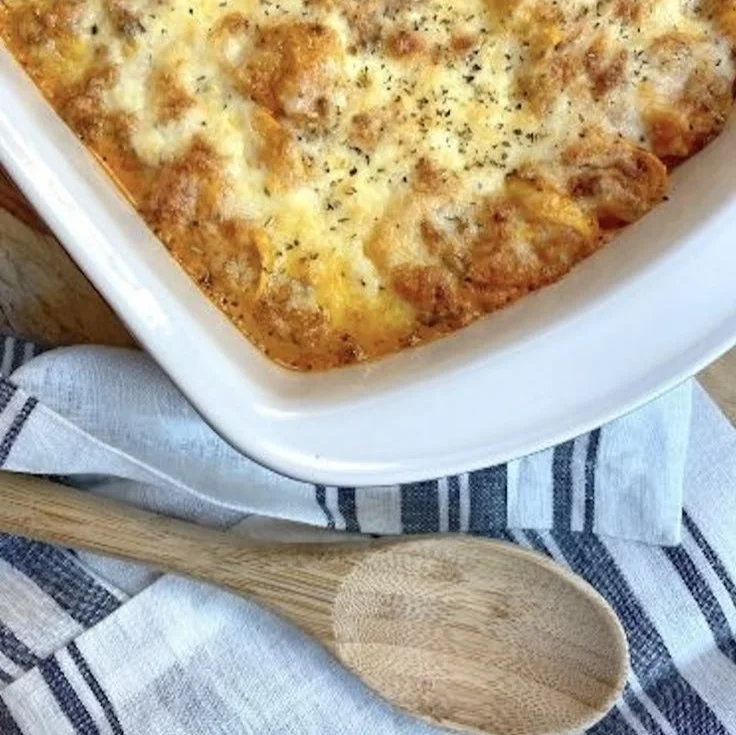
Cheesy baked tortellini casserole with meat sauce in a baking dish

This Cheesy Baked Tortellini Casserole With Meat Sauce is warm, simple, and full of flavor. It mixes tender tortellini, a rich meat sauce, and lots of melty cheese. This dish feeds a crowd and makes weeknights easy. If you like baked pasta, you may also enjoy a different dish like our baked spaghetti casserole for another easy dinner idea. Get ready for a cheesy, comforting meal that most people love, and you will smile when you serve it.

How to prepare Cheesy Baked Tortellini Casserole With Meat Sauce

  1. Preheat the oven to 375°F (190°C).
  2. Cook 1 pound of cheese tortellini in salted water just until al dente, drain well.
  3. In a large pan, brown 1 pound of ground beef or Italian sausage, drain fat. Add 1 small chopped onion and 2 cloves minced garlic, cook until soft.
  4. Stir in a 24-ounce jar of marinara sauce, a pinch of salt, pepper, and Italian seasoning. Let the sauce simmer 5 to 10 minutes.
  5. In a large bowl, mix the cooked tortellini with the meat sauce. Add 1 cup of ricotta or cottage cheese if you like it creamy.
  6. Pour half of the tortellini mixture into a 9×13 inch baking dish, sprinkle 1 cup shredded mozzarella and 1/2 cup grated Parmesan, add the rest of the pasta, then top with another 1 to 1 1/2 cups mozzarella.
  7. Cover with foil and bake 20 minutes, remove foil and bake 10 more minutes until cheese is bubbly and golden. Let sit 5 minutes before serving.
  8. Cheesy Baked Tortellini Casserole With Meat Sauce

Why You’ll Love Cheesy Baked Tortellini Casserole With Meat Sauce

  • It is easy to make, with no fancy steps.
  • The cheese and meat sauce make a rich, warm flavor that kids and adults enjoy.
  • You can make it ahead and bake when guests arrive.
  • It uses simple pantry items, so it is great for a quick comfort meal.

Tips for success

  • Do not overcook the tortellini before baking, it will keep a good texture if slightly firm.
  • Taste the sauce and adjust salt and seasoning before you mix it with pasta.
  • Use a mix of cheeses for better flavor, like mozzarella and a little Parmesan.
  • If the top browns too fast, cover with foil and finish baking until hot inside.
  • To save time, use frozen tortellini straight into the sauce, but add a few minutes to the bake time.

Serving Suggestions

  • Serve with a simple green salad and vinaigrette for a fresh contrast.
  • Warm garlic bread or a crusty loaf goes well to soak up the meat sauce.
  • Add a side of roasted vegetables, like broccoli or zucchini, for color and balance.
  • Finish with a light dessert, such as fresh fruit or a small scoop of gelato.

Cheesy Baked Tortellini Casserole With Meat Sauce

FAQs

Q: Can I use store-bought frozen tortellini?

A: Yes, frozen tortellini works well. You can cook it first or add frozen pasta to the sauce and bake a few minutes longer.

Q: Can I make this vegetarian?

A: Yes, swap the meat for cooked mushrooms, lentils, or a plant-based crumbles and use a tomato sauce without meat.

Q: How do I store leftovers?

A: Cool the casserole, cover tightly, and keep in the fridge for up to 3 days. Reheat in the oven at 350°F until warm.

Q: Can I freeze the casserole?

A: Yes, assemble in a freezer-safe dish and freeze before baking. Thaw in the fridge overnight and bake as directed, or bake from frozen adding extra time.

Conclusion

This Cheesy Baked Tortellini Casserole With Meat Sauce is a simple, crowd-pleasing meal you can make any night. For a ready idea and extra tips, see Easy Cheesy Baked Tortellini (With Meat Sauce) – Instrupix for a full recipe guide.

Cheesy Baked Tortellini Casserole With Meat Sauce

A comfort dish featuring tender tortellini, rich meat sauce, and plenty of melty cheese, perfect for feeding a crowd on busy weeknights.

Pasta and Sauce

  • 1 lb cheese tortellini (Cooked until al dente)
  • 1 lb ground beef or Italian sausage (Can use either or a mix of both)
  • 1 small onion, chopped (To be cooked with the meat)
  • 2 cloves garlic, minced (To be cooked with the meat)
  • 24 oz marinara sauce (For the meat sauce)
  • 1 cup ricotta or cottage cheese (Add for creaminess if desired)

Cheese Toppings

  • 1 cup shredded mozzarella (For layering)
  • 1/2 cup grated Parmesan (For layering)
  • 1 to 1.5 cups additional mozzarella (For the top layer)

Seasonings

  • to taste salt (For seasoning the sauce)
  • to taste pepper (For seasoning the sauce)
  • to taste Italian seasoning (For flavor enhancement in the sauce)

Preparation

  1. Preheat the oven to 375°F (190°C).
  2. Cook the tortellini in salted water just until al dente, then drain well.
  3. In a large pan, brown the ground beef or Italian sausage and drain the fat.
  4. Add the chopped onion and minced garlic to the pan and cook until soft.
  5. Stir in the marinara sauce, pinches of salt, pepper, and Italian seasoning. Let the sauce simmer for 5 to 10 minutes.
  6. In a large bowl, mix the cooked tortellini with the meat sauce and add ricotta or cottage cheese if desired.

Assembly and Baking

  1. Pour half of the tortellini mixture into a 9×13 inch baking dish.
  2. Sprinkle with 1 cup shredded mozzarella and 1/2 cup grated Parmesan.
  3. Add the rest of the pasta mixture and top with 1 to 1.5 cups of mozzarella.
  4. Cover with foil and bake for 20 minutes.
  5. Remove foil and bake for an additional 10 minutes until cheese is bubbly and golden.
  6. Let sit for 5 minutes before serving.

Do not overcook the tortellini for a better texture. Adjust salt and seasoning to taste before mixing with pasta. Use a mix of cheeses for enhanced flavor.

Dinner, Main Course
Italian
Baked Pasta, Cheesy Pasta, Comfort Food, Easy Dinner, Tortellini Casserole

Keto Cauliflower Pizza Casserole

Keto Cauliflower Pizza Casserole topped with cheese and herbs

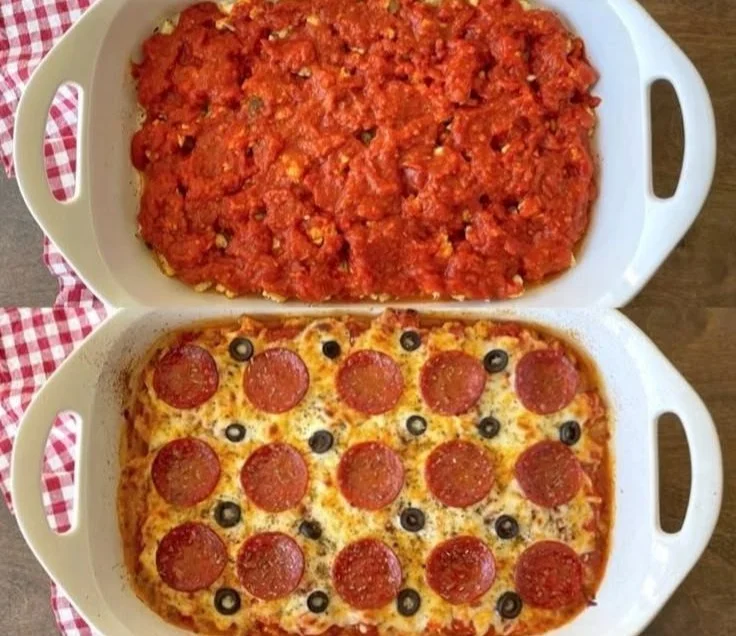
This Keto Cauliflower Pizza Casserole is warm, cheesy, and full of pizza flavor without the carbs. It feels like a comfort meal, but it fits a low carb or keto plan. The cauliflower gives a gentle bite, the sauce is tangy, and the cheese melts into a golden top. This recipe is a crowd-pleaser, easy to make, and great for busy weeknights or a casual dinner with friends. If you like a crisp cauliflower side, you might also enjoy this air fryer cauliflower recipe for a quick snack. Get ready to make a dish everyone will ask about, and have fun with the toppings when it comes out of the oven.

How to prepare Keto Cauliflower Pizza Casserole

  1. Preheat the oven to 375°F (190°C).
  2. Steam or boil about 1 large head of cauliflower until soft, then drain well and pat dry.
  3. Chop the cauliflower into small florets or pulse in a food processor until rice-like.
  4. In a bowl, mix the cauliflower with 1 cup of shredded mozzarella, 1/2 cup of grated Parmesan, 2 beaten eggs, 1/2 cup low-sugar pizza sauce, 1 teaspoon Italian seasoning, salt and pepper to taste.
  5. Spread the mixture into a greased 9×9 inch baking dish, pressing down lightly.
  6. Spoon a thin layer of pizza sauce over the top, then add more mozzarella and your favorite low-carb toppings like pepperoni, bell pepper, or olives.
  7. Bake for 20 to 25 minutes, until the top is golden and the casserole is set. Let it rest 5 minutes before serving.

Keto Cauliflower Pizza Casserole

Why You’ll Love Keto Cauliflower Pizza Casserole

  • Low carb and keto friendly, it keeps you on track without losing pizza flavor.
  • Cheesy and satisfying, yet lighter than a regular pizza crust.
  • Easy to make with simple ingredients you likely have on hand.
  • Flexible, you can change the toppings to fit your taste or what you have.

Tips for success

  • Squeeze out as much water from the cooked cauliflower as you can, this stops the casserole from getting soggy.
  • Use room temperature eggs and cheese so they blend evenly.
  • If you like a firmer texture, pulse the cauliflower a little less in the food processor.
  • Try a mix of cheeses for more flavor, like mozzarella and a bit of sharp cheddar.
  • Let it rest after baking, this helps it set and slice cleanly.

Serving Suggestions

  • Serve with a fresh green salad and a drizzle of olive oil and lemon.
  • Add a side of steamed greens, like broccoli or asparagus.
  • Top with fresh basil or a sprinkle of red pepper flakes for a flavor boost.
  • Cut into squares and serve with extra warmed pizza sauce for dipping.

Keto Cauliflower Pizza Casserole

FAQs

Q: Is this casserole good for a keto diet?

A: Yes, it is low in carbs and high in fat from the cheese, so it fits a typical keto plan.

Q: Can I make this ahead and reheat it?

A: Yes, you can make it ahead, cool it, cover, and store in the fridge. Reheat in the oven at 350°F (175°C) until warm.

Q: Can I freeze the casserole?

A: Yes, bake first or freeze unbaked in a freezer-safe dish. Thaw in the fridge before baking or reheat from frozen with extra time.

Q: What toppings work best?

A: Pepperoni, cooked sausage, mushrooms, bell peppers, olives, and spinach all work well. Keep higher-carb toppings low or skip them.

Q: Do I need to add almond flour or coconut flour to bind it?

A: Not required if you squeeze out the water well and use eggs and cheese to bind the mix. You can add a tablespoon of almond flour if you want more structure.

Conclusion

For a tested, low carb twist on pizza that feels like comfort food, try this casserole and change toppings to your liking. If you want another take on cauliflower pizza, see the Jar of Lemons’ Cauliflower Pizza Casserole (Low Carb / Keto) recipe for more ideas and tips.

Keto Cauliflower Pizza Casserole

A warm, cheesy casserole that delivers all the pizza flavor without the carbs, perfect for a low-carb or keto diet.

Cauliflower Base

  • 1 large head 1 large head of cauliflower (Steamed or boiled until soft, then drained and dried.)
  • 1 cup 1 cup of shredded mozzarella (Reserved for mixing and topping.)
  • 1/2 cup 1/2 cup of grated Parmesan
  • 2 large 2 beaten eggs (Use room temperature.)
  • 1/2 cup 1/2 cup low-sugar pizza sauce (For mixing and topping.)
  • 1 teaspoon 1 teaspoon Italian seasoning
  • to taste Salt and pepper

Toppings

  • as desired Low-carb toppings such as pepperoni, bell pepper, or olives (Add according to preference.)

Preparation

  1. Preheat the oven to 375°F (190°C).
  2. Steam or boil the cauliflower until soft, then drain well and pat dry.
  3. Chop the cauliflower into small florets or pulse in a food processor until rice-like.
  4. In a bowl, mix the cauliflower with shredded mozzarella, grated Parmesan, beaten eggs, low-sugar pizza sauce, Italian seasoning, salt, and pepper.
  5. Spread the mixture in a greased 9×9 inch baking dish, pressing down lightly.
  6. Spoon a thin layer of pizza sauce over the top, then add more mozzarella and your favorite toppings.

Baking

  1. Bake for 20 to 25 minutes, until the top is golden and the casserole is set.
  2. Let it rest for 5 minutes before serving.

Squeeze out as much water from the cooked cauliflower as you can. Use room-temperature eggs and cheese for better blending. For a firmer texture, pulse the cauliflower a little less in the food processor. Trying a mix of cheeses can enhance flavor. Let it rest after baking to set and slice cleanly.

Dinner, Main Course
Italian
Cauliflower, Comfort Food, Keto, Low Carb, Pizza Casserole

Easy Frozen Meatball Pot Roast (Slow Cooker Dinner Recipe)

Delicious slow cooker meatball pot roast served with vegetables

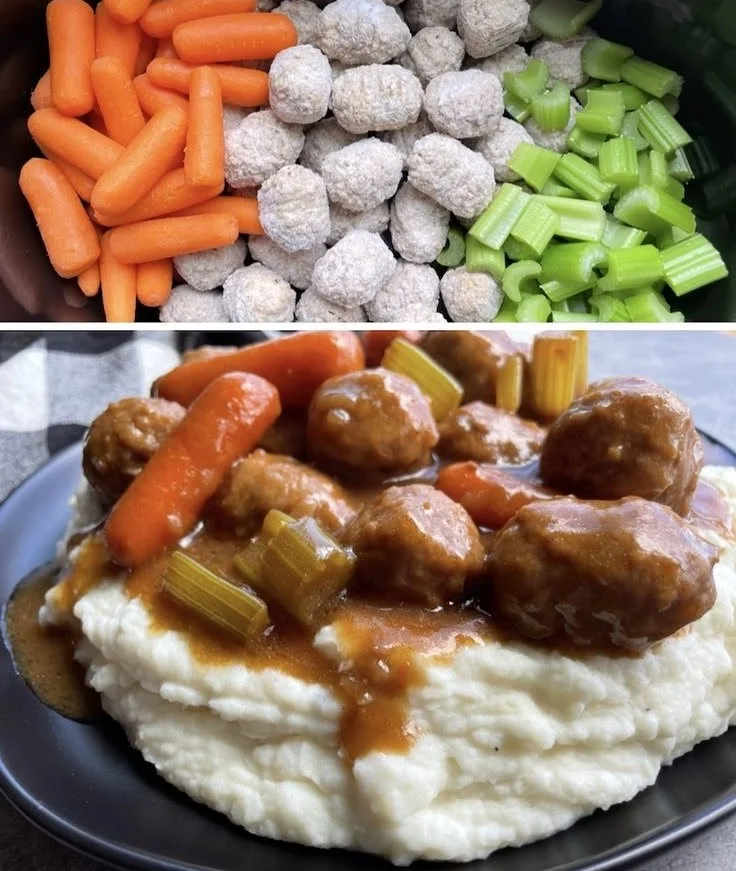
This easy Frozen Meatball Pot Roast is a simple family dinner that comes together in about 10 minutes. Just chop the celery, mix the gravy packets with water, and add everything to your slow cooker. Serve it over ready-made mashed potatoes for an even easier meal. You can also add your favorite vegetables like carrots, celery, potatoes, onions, or mushrooms. This Frozen Meatball Pot Roast is a versatile, budget-friendly dish that kids love and is perfect for busy weeknights. If you want a simple roasted veg side to go with this, try a similar easy side like autumn chicken dinner with roasted vegetables for a full, cozy plate.

How to prepare Frozen Meatball Pot Roast

  1. Put frozen meatballs in the slow cooker. No need to thaw.
  2. Add chopped onion, sliced carrots, and diced potatoes if you like. These add flavor and make it a full meal.
  3. Pour in 1 to 2 cups of beef broth, enough to come about halfway up the meatballs.
  4. Stir in a can of condensed mushroom or cream of celery soup, or use jarred gravy for a richer sauce.
  5. Add 1 to 2 tablespoons of Worcestershire sauce, 1 teaspoon garlic powder, salt and pepper to taste. Mix lightly.
  6. Cover and cook on low for 6 to 8 hours, or on high for 3 to 4 hours. The sauce will thicken and the meatballs will be tender.
  7. If the sauce is too thin at the end, whisk 1 tablespoon of cornstarch with 2 tablespoons cold water and stir into the cooker. Let it cook 10 more minutes to thicken.
  8. Taste and adjust salt and pepper, then serve.

Easy Frozen Meatball Pot Roast (Slow Cooker Dinner Recipe)

Why You’ll Love Frozen Meatball Pot Roast

  • It is simple, dump-and-go, and you do not need to thaw the meatballs first.
  • The slow cooker makes a rich, warm sauce that coats the meatballs, like a pot roast without the work.
  • It feeds a crowd or makes easy leftovers for the week.
  • The flavors are familiar and comforting, perfect as a family dinner or for guests.
  • You can change veggies and seasonings to match what you have, so it is flexible and forgiving.

Tips for success

  • Use frozen store-bought meatballs for quick work, or homemade ones if you prefer.
  • Cut veggies into similar size pieces so they cook evenly.
  • Do not lift the lid while it cooks, the slow cooker keeps the heat steady.
  • If you like a thicker gravy, mix cornstarch with cold water and add near the end.
  • Taste before serving, adjust seasonings last so salt is right.

Serving Suggestions

  • Serve over mashed potatoes, rice, or buttered egg noodles to soak up the sauce.
  • Add a green side like steamed broccoli or a simple salad for color and crunch.
  • Warm a crusty bread to dip in the gravy.
  • For a heartier meal, add extra carrots and potatoes to make it a full pot roast style dinner.

Easy Frozen Meatball Pot Roast (Slow Cooker Dinner Recipe)

FAQs

Q: Can I use a different kind of meatball?

A: Yes, beef, pork, turkey, or mixed meatballs all work. Cooking time is the same for frozen meatballs.

Q: Can I make this on the stove or in an oven?

A: You can simmer in a covered pot on low on the stove for 1 to 2 hours, or bake covered at 325°F for about 1 to 1.5 hours, until sauce thickens.

Q: How do I store leftovers?

A: Cool to room temperature, put in an airtight container, and keep in the fridge for up to 4 days. Reheat gently on the stove or in the microwave.

Q: Can I add wine or tomato sauce for a different flavor?

A: Yes, a splash of red wine or a can of diced tomatoes changes the sauce and adds depth. Adjust seasoning as needed.

Conclusion

This Easy Frozen Meatball Pot Roast (Slow Cooker Dinner Recipe) is a true comfort meal that is simple to make and big on flavor, perfect when you want a slow cooker dinner with little fuss. For the original recipe inspiration and full details, see Easy Frozen Meatball Pot Roast | Slow Cooker Dinner Recipe.

Frozen Meatball Pot Roast

This easy Frozen Meatball Pot Roast is a simple family dinner that comes together in about 10 minutes. It’s a versatile, budget-friendly dish that kids love, perfect for busy weeknights.

For the pot roast

  • 2 cups beef broth (Add enough to come about halfway up the meatballs.)
  • 1 can condensed mushroom or cream of celery soup (Alternatively, use jarred gravy for a richer sauce.)
  • 1-2 tablespoons Worcestershire sauce
  • 1 teaspoon garlic powder
  • salt and pepper (To taste.)

For the vegetables (optional)

  • 1 chopped onion
  • 2 cups sliced carrots
  • 2 cups diced potatoes (These enhance the flavor and make it a full meal.)

For thickening (optional)

  • 1 tablespoon cornstarch (Whisk with cold water to thicken sauce if it is too thin.)
  • 2 tablespoons cold water (To mix with cornstarch.)

Preparation

  1. Put frozen meatballs in the slow cooker. No need to thaw.
  2. Add chopped onion, sliced carrots, and diced potatoes if using.
  3. Pour in 1 to 2 cups of beef broth.
  4. Stir in a can of condensed mushroom or cream of celery soup, or jarred gravy.
  5. Add Worcestershire sauce, garlic powder, salt, and pepper. Mix lightly.

Cooking

  1. Cover and cook on low for 6 to 8 hours, or on high for 3 to 4 hours.
  2. If sauce is too thin, whisk cornstarch with cold water and add to the cooker. Cook for an additional 10 minutes.
  3. Taste and adjust salt and pepper before serving.

The dish feeds a crowd and makes easy leftovers for the week. You can easily modify the veggies and seasonings to your preference.

Dinner, Main Course
American
Comfort Food, Easy Dinner, Family Meal, Frozen Meatball Pot Roast, Slow Cooker

Cheddar Bay Biscuits

Freshly baked Cheddar Bay Biscuits served on a plate with herbs

Cheddar Bay Biscuits are warm, cheesy, and soft, with a light garlic butter on top. They melt in your mouth and please a crowd at dinner or a party. This Cheddar Bay Biscuits recipe is easy to make at home and tastes like a restaurant favorite, full of cheddar cheese and garlic flavor. If you enjoy rich, cheesy bread, you might also like a hearty soup, such as this bacon cheddar gnocchi soup, which pairs well with biscuits. Get ready to bake, because these biscuits are fun to make and even more fun to eat.

How to prepare Cheddar Bay Biscuits

Ingredients

  • 2 cups all-purpose flour
  • 1 tablespoon baking powder
  • 1 teaspoon salt
  • 1 teaspoon garlic powder
  • 1/2 cup cold butter, cut into cubes
  • 1 cup shredded sharp cheddar cheese
  • 3/4 cup milk or buttermilk
  • 1 egg, lightly beaten

Garlic butter topping

  • 1/4 cup melted butter
  • 1/2 teaspoon garlic powder
  • 1 tablespoon chopped fresh parsley, or 1 teaspoon dried parsley
  • Pinch of salt

Directions

  1. Preheat the oven to 425°F (220°C). Line a baking sheet with parchment paper.
  2. In a large bowl, mix the flour, baking powder, salt, and garlic powder.
  3. Add the cold butter. Use your fingers or a pastry cutter to work the butter into the flour until the mix looks like coarse crumbs.
  4. Stir in the shredded cheddar cheese.
  5. In a small bowl, mix the milk and beaten egg. Pour this into the dry mix and stir until just combined, do not overmix. The dough will be sticky.
  6. Drop spoonfuls of dough onto the baking sheet, about 12 biscuits. Space them so they can rise.
  7. Bake for 12 to 15 minutes, until the tops are golden and the centers are set.
  8. While the biscuits bake, mix the melted butter, garlic powder, parsley, and a pinch of salt for the topping.
  9. When the biscuits come out of the oven, brush them with the garlic butter right away so the butter soaks in. Serve warm.

Cheddar Bay Biscuits

Why You’ll Love Cheddar Bay Biscuits

  • They are cheesy and soft, with a light garlic butter that adds big flavor.
  • The biscuits bake fast, so you can make them for weeknight meals or guests.
  • Kids and adults both enjoy their mild, savory taste.
  • They go with many dishes, from soup to grilled chicken, making them a great side.

Tips for success

  • Use cold butter, it makes the biscuits flaky and tender.
  • Do not overmix the dough, overmixing makes biscuits tough.
  • Freshly shredded cheddar melts better than pre-shredded cheese.
  • Brush the garlic butter right after baking, while biscuits are hot, so they absorb the flavor.
  • If you like, add a pinch of cayenne or a little chopped chive for extra flavor.

Serving Suggestions

  • Serve warm with soup, like tomato or chicken soup.
  • Pair with grilled or roasted chicken for a full meal.
  • Offer butter, honey, or a little jam on the side for a sweet contrast.
  • Use the biscuits to make small sandwiches with ham or turkey.

Cheddar Bay Biscuits

FAQs

Q: Can I use self-rising flour instead of all-purpose?

A: Yes, you can. If you use self-rising flour, skip the baking powder and salt in the recipe.

Q: Can I freeze the biscuit dough?

A: Yes, scoop the dough onto a tray, freeze until firm, then move to a bag. Bake from frozen, add a few minutes to the bake time.

Q: How do I store leftover biscuits?

A: Keep leftovers in an airtight container at room temperature for up to 2 days, or freeze for up to 1 month. Reheat in the oven for best texture.

Q: Can I make these without garlic?

A: Yes, leave out the garlic powder and garlic butter, or use plain melted butter instead.

Conclusion

If you want a tried and loved copycat recipe that brings that Red Lobster feeling home, this Red Lobster Cheddar Bay Biscuits Copycat – Caroline Chambers page is a helpful reference for another easy version to try.

Cheddar Bay Biscuits

Warm, cheesy, and soft Cheddar Bay Biscuits topped with light garlic butter, perfect for dinner or parties.

Dry Ingredients

  • 2 cups all-purpose flour
  • 1 tablespoon baking powder
  • 1 teaspoon salt
  • 1 teaspoon garlic powder

Wet Ingredients

  • 1/2 cup cold butter, cut into cubes (Important for achieving flaky biscuits.)
  • 3/4 cup milk or buttermilk
  • 1 large egg, lightly beaten

Cheddar Cheese

  • 1 cup shredded sharp cheddar cheese (Freshly shredded melts better.)

Garlic Butter Topping

  • 1/4 cup melted butter
  • 1/2 teaspoon garlic powder
  • 1 tablespoon chopped fresh parsley, or 1 teaspoon dried parsley
  • 1 pinch salt

Preparation

  1. Preheat the oven to 425°F (220°C) and line a baking sheet with parchment paper.
  2. In a large bowl, mix the flour, baking powder, salt, and garlic powder.
  3. Add the cold butter and use your fingers or a pastry cutter to work it into the flour until the mix looks like coarse crumbs.
  4. Stir in the shredded cheddar cheese.
  5. In a small bowl, mix the milk and beaten egg, then pour into the dry mix and stir until just combined. Do not overmix; the dough will be sticky.
  6. Drop spoonfuls of dough onto the baking sheet, making about 12 biscuits, spaced for rising.

Baking

  1. Bake for 12 to 15 minutes until the tops are golden and the centers are set.
  2. While the biscuits bake, mix the melted butter, garlic powder, parsley, and pinch of salt for the topping.
  3. When the biscuits come out of the oven, brush them with the garlic butter immediately to allow it to soak in.
  4. Serve warm.

Use cold butter for flaky biscuits and avoid overmixing. Freshly shredded cheddar is recommended.

Side Dish, Snack
American
Cheddar Bay Biscuits, Cheesy Bread, Garlic Biscuits

Easy Slow Cooker Pot Roast With Vegetables

Easy slow cooker pot roast with fresh vegetables in a cozy kitchen setting.

This Easy Slow Cooker Pot Roast With Vegetables is simple, and full of flavor dish. It cooks low and slow so the meat gets very tender, and the vegetables soak up the rich sauce. People love this dish at family dinners, potlucks, or a quiet Sunday supper. It smells great while it cooks, and it makes the house feel like home.

If you want a bright side to go with it, try the fresh flavors in Caprese roasted asparagus, a flavorful side dish. This roast is a crowd-pleaser, with deep beef flavor, soft carrots and potatoes, and a gravy that ties it all together. You will want to tuck into this one right away, and you might even want seconds.

How to prepare Slow Cooker Pot Roast With Vegetables

Ingredients

  • 3 to 4 lb beef chuck roast
  • Salt and pepper
  • 2 tbsp olive oil
  • 1 large onion, cut into chunks
  • 3 carrots, peeled and cut into large pieces
  • 3 large potatoes, cut into chunks
  • 2 stalks celery, cut into pieces
  • 3 cloves garlic, minced
  • 1 cup beef broth
  • 1/2 cup red wine or more beef broth
  • 2 tbsp tomato paste
  • 1 tbsp Worcestershire sauce
  • 1 tsp dried thyme or 1 sprig fresh
  • 1 tsp dried rosemary or 1 sprig fresh
  • 1 bay leaf, optional
  • 1 tbsp cornstarch mixed with 2 tbsp cold water, optional for thickening

Directions

  1. Pat the roast dry and rub with salt and pepper. Heat olive oil in a skillet over medium-high heat. Brown the roast on all sides, 2 to 3 minutes per side. This step adds flavor, but you can skip it if you are short on time.
  2. Place onions, carrots, potatoes, and celery in the slow cooker. Put the browned roast on top of the vegetables.
  3. In a bowl, mix beef broth, wine, tomato paste, Worcestershire sauce, garlic, thyme, rosemary, and bay leaf. Pour the mix over the roast and vegetables.
  4. Cover and cook on low for 8 hours, or on high for 4 to 5 hours, until the meat is fork tender.
  5. Remove the roast and vegetables to a serving plate. If you want thicker gravy, pour the cooking liquid into a pan, bring to a simmer, and stir in the cornstarch mix. Cook until the sauce thickens, stir and season to taste.
  6. Slice or shred the roast and serve with the vegetables and gravy.

Easy Slow Cooker Pot Roast Recipe With Vegetables

Why You’ll Love Slow Cooker Pot Roast With Vegetables

  • It is hands-off, put it in and let it cook while you do other things.
  • The meat becomes very tender and rich in flavor.
  • Vegetables cook with the meat and absorb the savory juices.
  • It makes tasty gravy for spooning over meat, potatoes, or bread.
  • It feeds many people and is great for leftovers.

Tips for success

  • Trim excess fat from the roast, but leave a little for flavor.
  • Browning the meat first gives a deeper taste, do not skip if you can.
  • Cut vegetables in large pieces so they do not turn mushy.
  • Cook low and slow for the best tenderness.
  • Check the liquid level, add more broth if it looks too dry during cooking.
  • Let the roast rest 10 minutes before slicing, this keeps it juicy.

Serving Suggestions

  • Serve with the slow cooker gravy over the roast and vegetables.
  • Offer warm bread or dinner rolls to soak up the sauce.
  • A simple green salad or steamed greens make a light side.
  • Mashed potatoes or egg noodles also pair well if you want extra starch.

Easy Slow Cooker Pot Roast Recipe With Vegetables

FAQs

Q: Can I use a different cut of beef?

A: Yes, chuck roast works best, but brisket or rump roast can also work. Choose a cut with some fat for flavor.

Q: Can I freeze leftovers?

A: Yes, cool completely, then place in airtight containers and freeze for up to 3 months. Thaw in the fridge before reheating.

Q: How do I reheat the roast without drying it out?

A: Reheat gently in a pan with a splash of broth or in the slow cooker on low until warm.

Q: Can I add other vegetables, like parsnips or turnips?

A: Yes, root vegetables work well. Add them with the other vegetables so they cook evenly.

Q: Can I make this in the oven instead of a slow cooker?

A: Yes, brown the roast, place in a covered Dutch oven with vegetables and liquid, and bake at 325 F for about 3 to 4 hours, until tender.

Conclusion

If you want another slow cooker method and more tips for pot roast, see Perfect Slow Cooker Pot Roast – Cooking Classy. Give this recipe a try on a busy day, and enjoy a warm, simple meal that fills the house with good smells and full bellies.

Slow Cooker Pot Roast With Vegetables

A simple and flavorful dish of tender beef chuck roast and hearty vegetables, slow-cooked to perfection with a rich gravy.

Main ingredients

  • 3 to 4 lb beef chuck roast (Choose a cut with some fat for flavor.)
  • 1 tbsp salt (For seasoning.)
  • 1 tbsp pepper (For seasoning.)
  • 2 tbsp olive oil (For browning the meat.)
  • 1 large onion, cut into chunks
  • 3 large carrots, peeled and cut into large pieces
  • 3 large potatoes, cut into chunks
  • 2 stalks celery, cut into pieces
  • 3 cloves garlic, minced
  • 1 cup beef broth
  • 1/2 cup red wine or more beef broth
  • 2 tbsp tomato paste
  • 1 tbsp Worcestershire sauce
  • 1 tsp dried thyme or 1 sprig fresh
  • 1 tsp dried rosemary or 1 sprig fresh
  • 1 leaf bay leaf, optional
  • 1 tbsp cornstarch mixed with 2 tbsp cold water, optional for thickening

Preparation

  1. Pat the roast dry and rub with salt and pepper.
  2. Heat olive oil in a skillet over medium-high heat. Brown the roast on all sides, 2 to 3 minutes per side.
  3. Place onions, carrots, potatoes, and celery in the slow cooker. Put the browned roast on top of the vegetables.
  4. In a bowl, mix beef broth, wine, tomato paste, Worcestershire sauce, garlic, thyme, rosemary, and bay leaf.
  5. Pour the mix over the roast and vegetables.

Cooking

  1. Cover and cook on low for 8 hours, or on high for 4 to 5 hours, until the meat is fork tender.

Serving

  1. Remove the roast and vegetables to a serving plate.
  2. If you want thicker gravy, pour the cooking liquid into a pan, bring to a simmer, and stir in the cornstarch mix. Cook until the sauce thickens, then season to taste.
  3. Slice or shred the roast and serve with the vegetables and gravy.

Trim excess fat from the roast, but leave a little for flavor. Browning the meat first gives a deeper taste. Cut vegetables in large pieces to avoid mushiness. Check the liquid level, adding more broth if necessary. Let the roast rest for 10 minutes before slicing to keep it juicy.

Dinner, Main Course
American
Beef Roast, Comfort Food, Family Dinner, Hearty Meal, Slow Cooker Pot Roast

Egg Muffins with Smashed Tater Tot Crust

Delicious egg muffins with a crispy smashed tater tot crust garnished with herbs.

If breakfast had a personality, these Tater Tot Egg Cups would be the fun, dependable friend who always shows up with snacks. They’re crispy, cheesy, packed with bacon, and incredibly easy to make. Think brunch-worthy flavor that also works perfectly for busy weekday mornings a total win.

This recipe came together one Sunday when I was looking at a bag of tater tots and a nearly empty carton of eggs, wondering how to turn them into something special. It worked better than expected, and now I always keep a batch in my fridge or freezer. Whether you’re meal prepping, feeding a group, or just trying to make mornings easier, these little bites do the job.If you enjoy other egg muffin ideas, try a similar twist like egg muffins with spinach and feta.

How to prepare Egg Muffins with Smashed Tater Tot Crust

  1. Preheat your oven to 400°F (200°C). Lightly grease a 12-cup muffin tin.
  2. Place frozen tater tots on a plate to thaw a little, or use them straight from frozen. Put 3 tater tots in each muffin cup. Press them down with a spoon or the bottom of a glass to form a thin crust on the bottom and up the sides.
  3. Bake the pressed tater tot shells for 10 minutes, until they start to brown and set. Remove the tin from the oven.
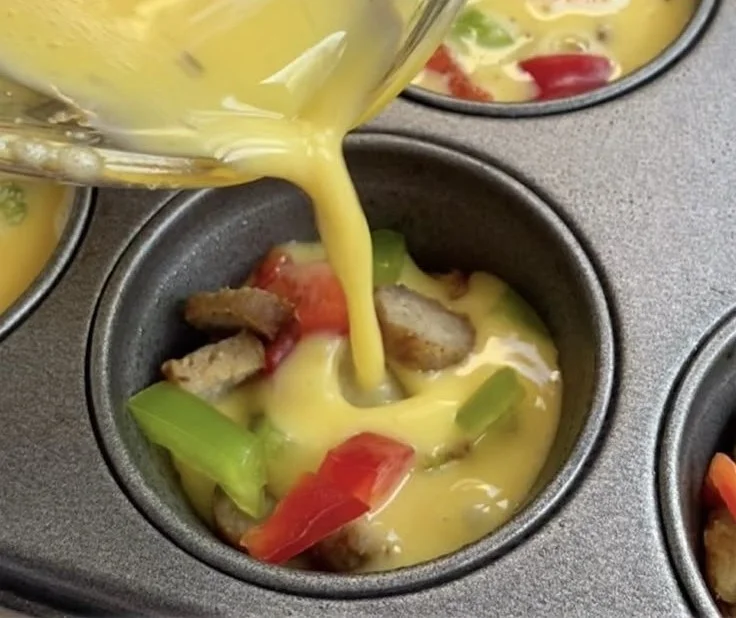
  4. In a bowl, whisk 8 large eggs with 1/4 cup milk or cream, 1/2 teaspoon salt, and 1/4 teaspoon black pepper. Stir in 1 cup shredded cheddar cheese and any cooked add-ins like chopped cooked bacon, cooked sausage, or sautéed peppers and onions.
  5. Spoon the egg mix into each tater tot cup, filling about 3/4 full. The eggs will rise as they bake.
  6. Bake for 12 to 18 minutes, until the eggs are set in the center and a toothpick comes out clean. Let the muffins cool in the tin for 5 minutes, then run a knife around each and lift them out. Serve warm.

Egg Muffins with Smashed Tater Tot Crust

Why You’ll Love Egg Muffins with Smashed Tater Tot Crust

  • Easy to make, with simple steps and few tools.
  • Crispy outside, soft inside, great texture in every bite.
  • Flexible, you can use any cheese, meat, or veggies you like.
  • Make ahead and reheat, perfect for busy mornings.
  • Kid friendly, and good for brunch with friends.

Tips for success

  • Press the tater tots well into the tin so the crust holds the egg mix.
  • Par-bake the crust so it stays crispy and does not get soggy.
  • Use a metal muffin tin for better browning.
  • Let muffins cool a little before removing, they hold shape better.
  • For easy clean up, use a little oil or spray in the tin, or use silicone liners.

Serving Suggestions

  • Serve with ketchup, hot sauce, or salsa on the side.
  • Add a green salad for a light lunch or brunch.
  • Pair with fresh fruit or roasted potatoes for a full breakfast plate.
  • Pack them in a lunchbox with a small cooler for a morning on the go.

Egg Muffins with Smashed Tater Tot Crust

FAQs

Q: Can I make these ahead and freeze them?

A: Yes, cool them fully, wrap in foil or a bag, and freeze. Reheat in the oven or microwave until hot.

Q: Can I use fresh potatoes instead of tater tots?

A: You can, but tater tots give the best crunch. For fresh potatoes, grate and squeeze out water, then press and par-bake the crust.

Q: How long do they keep in the fridge?

A: Store in an airtight container for 3 to 4 days. Reheat in the oven or microwave.

Q: Can I make them dairy free?

A: Use dairy free cheese or skip the cheese and add more herbs and veggies for flavor.

Q: What oven time works best for a full muffin tin?

A: If your tin is full, check at 12 minutes and add a few more minutes until eggs are set.

Conclusion

If you want another take on mini egg muffins with a tater tot crust, check this recipe for more ideas and a step by step guide, Mini Breakfast Omelets (Egg Muffins With A Tater Tot Crust) – Instrupix.

Tater Tot Egg Cups

Crispy, cheesy, and packed with bacon, these Tater Tot Egg Cups are perfect for breakfast or brunch. Easy to make and great for meal prep.

For the Tater Tot Crust

  • 36 pieces 36 frozen tater tots (You can use them straight from frozen.)

For the Egg Mixture

  • 8 large large eggs
  • 1/4 cup milk or cream (Can substitute with dairy-free options.)
  • 1/2 teaspoon salt
  • 1/4 teaspoon black pepper
  • 1 cup shredded cheddar cheese (Feel free to use any cheese you like.)
  • cooked add-ins (like chopped cooked bacon, cooked sausage, or sautéed peppers and onions) (Optional, adjust quantity to preference.)

Preparation

  1. Preheat your oven to 400°F (200°C) and lightly grease a 12-cup muffin tin.
  2. Place frozen tater tots on a plate to thaw a little. Put 3 tater tots in each muffin cup and press them down to form a thin crust.

Baking the Crust

  1. Bake the pressed tater tot shells for 10 minutes until they start to brown and set. Remove the tin from the oven.

Preparing the Egg Mixture

  1. In a bowl, whisk together the eggs, milk or cream, salt, and pepper.
  2. Stir in the shredded cheese and any cooked add-ins.

Final Baking

  1. Spoon the egg mixture into each tater tot cup, filling about 3/4 full.
  2. Bake for 12 to 18 minutes until the eggs are set and a toothpick comes out clean.
  3. Let the muffins cool in the tin for 5 minutes, then run a knife around each and lift them out. Serve warm.

Press the tater tots well into the tin and par-bake them for better texture. Use a metal muffin tin for more even browning and allow muffins to cool a bit for easier removal.

Breakfast, Brunch
American
Breakfast Muffins, Easy Egg Recipe, Egg Muffins, Make Ahead Breakfast, Tater Tot Egg Cups