Loaded Potato Taco Bowl

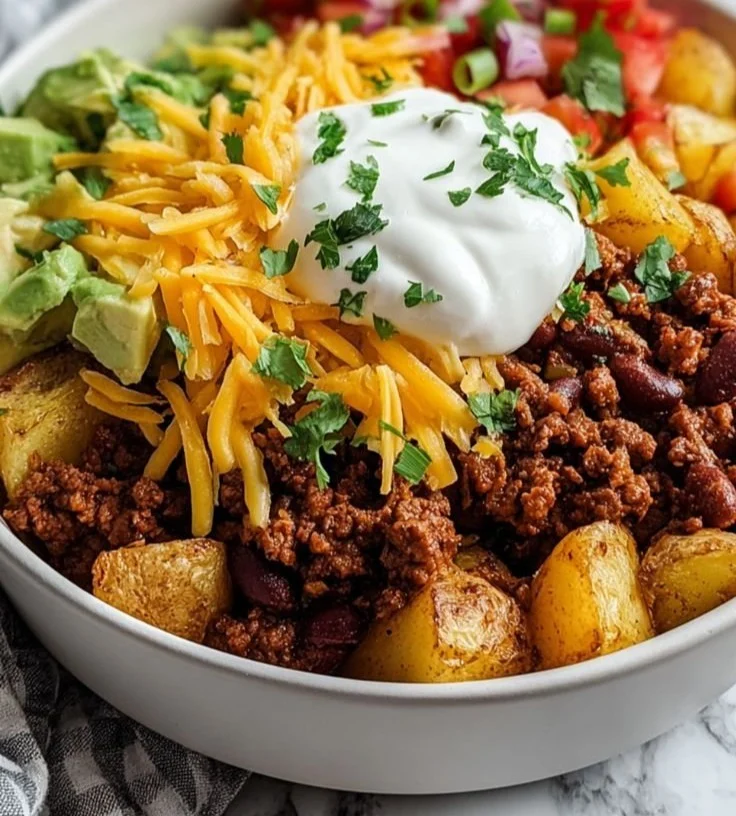
Delicious Loaded Potato Taco Bowl with toppings and garnishes

This Loaded Potato Taco Bowl brings together two favorites, baked potato and taco flavors. It makes a warm, comforting meal that tastes bright and fresh. The crispy potato, savory taco meat, and creamy toppings please a crowd and make a simple weeknight dinner feel special. Give it a try, and enjoy the fun of piling on all your favorite taco toppings, one bite at a time.

How to prepare Loaded Potato Taco Bowl

  1. Preheat your oven to 400°F (200°C). Wash the potatoes, dry them, and rub with a little oil and salt.
  2. Bake whole potatoes for 45 to 60 minutes, until a fork goes in easily, or roast small diced potatoes for 30 to 40 minutes, until tender and slightly crisp.
  3. While potatoes cook, heat a skillet over medium heat. Add a little oil, then add 1 pound ground beef or turkey, or use plant protein for a vegetarian version.
  4. Cook the meat, breaking it up with a spoon, until brown. Drain extra fat if needed.
  5. Stir in 1 to 2 tablespoons taco seasoning and 1/4 cup water, simmer for 2 to 3 minutes until the sauce thickens and flavors coat the meat.
  6. Warm canned black beans and corn in a small pot, or drain and rinse before heating.
  7. When potatoes are ready, cut them open or mash the roasted pieces a little to make a bowl shape.
  8. Fill each potato or bowl of potatoes with taco meat, then add black beans, corn, shredded cheese, sour cream, salsa, chopped tomatoes, green onions, avocado, and cilantro.
  9. Finish with lime juice and a little hot sauce if you like it spicy.
  10. Serve right away while the potato is warm and the cheese is melty.


Loaded Potato Taco Bowl

Why You’ll Love Loaded Potato Taco Bowl

  • It mixes comfort food and Mexican flavors in one bowl, with filling roasted potato, seasoned meat, and fresh toppings.
  • It is easy to change for picky eaters, use beef, turkey, or a vegetarian protein.
  • It feeds a group or works as a quick family meal, and everyone can pick their own toppings.
  • The textures work well together, soft potato, crunchy toppings, and melty cheese, all in a single bowl.

tips for success

  • Use medium to large russet potatoes for a fluffy inside and crispy skin.
  • Dry the potato skin well and rub with oil, it helps to get a nice crisp outside.
  • Don’t overcook the meat, just brown it and add taco seasoning toward the end for best flavor.
  • Warm the toppings slightly, cheese melts better and the bowl stays hot.
  • If you roast diced potatoes, toss them in oil and salt so they crisp up.
  • Taste and adjust salt, lime, and spices before serving.

Serving Suggestions

  • Serve with a simple green salad or a cabbage slaw for a fresh bite.
  • Add tortilla chips or warm tortillas on the side for dipping and scooping.
  • Offer lime wedges, extra salsa, and hot sauce so people can customize heat and tang.
  • Top with pickled red onion or jalapeños for an extra bright note.


Loaded Potato Taco Bowl

FAQs

Q: Can I make this dish vegetarian? A: Yes, use black beans, pinto beans, seasoned lentils, or crumbled tofu in place of meat. Add extra spices and a splash of soy or tamari for depth.

Q: How do I store and reheat leftovers? A: Store components in an airtight container in the fridge for 3 to 4 days. Reheat the potato and filling in the oven at 350°F (175°C) until hot, or microwave in short bursts until warm.

Q: Can I make the bowls ahead of time? A: You can roast potatoes and cook the meat a day ahead, then store separately. Assemble and add fresh toppings just before serving so greens and avocado stay fresh.

Q: Can I freeze these bowls? A: Freeze the cooked meat or beans in a freezer bag for up to 2 months. Potatoes can lose texture when frozen, so freeze them only if needed and reheat slowly.

Conclusion

For a full recipe and extra notes on making this dish, see the Loaded Potato Taco Bowl Recipe – Simple Home Edit.

Loaded Potato Taco Bowl

A comforting bowl combining baked potatoes and taco flavors, topped with savory meat and fresh ingredients.

For the potatoes

  • 4 medium medium to large russet potatoes (For a fluffy inside and crispy skin.)

For the taco meat

  • 1 pound ground beef or turkey (Or plant protein for a vegetarian version.)
  • 1-2 tablespoons taco seasoning (Adjust to taste.)
  • 1/4 cup water (To thicken the sauce.)

Toppings

  • 1 can black beans (Warm before serving.)
  • 1 can corn (Warm before serving.)
  • 1 cup shredded cheese (Use your favorite type.)
  • 1/2 cup sour cream (Optional.)
  • 1/2 cup salsa (Adjust to taste.)
  • 1 cup chopped tomatoes
  • 1/4 cup chopped green onions
  • 1 medium avocado
  • 1/4 cup fresh cilantro (For garnish.)
  • 1 tablespoon lime juice (Add more to taste.)
  • to taste hot sauce (Optional for spice.)

Preparation

  1. Preheat your oven to 400°F (200°C). Wash the potatoes, dry them, and rub with a little oil and salt.
  2. Bake whole potatoes for 45 to 60 minutes, until a fork goes in easily, or roast small diced potatoes for 30 to 40 minutes, until tender and slightly crisp.

Cooking the Meat

  1. While potatoes cook, heat a skillet over medium heat. Add a little oil, then add the ground meat.
  2. Cook the meat, breaking it up with a spoon, until brown. Drain extra fat if needed.
  3. Stir in the taco seasoning and water, and simmer for 2 to 3 minutes until the sauce thickens.

Assembling the Bowls

  1. Warm the canned black beans and corn in a small pot, or drain and rinse before heating.
  2. When potatoes are ready, cut them open or mash the roasted pieces a little to make a bowl shape.
  3. Fill each potato or bowl of potatoes with taco meat, then add black beans, corn, cheese, sour cream, salsa, tomatoes, green onions, avocado, and cilantro.
  4. Finish with lime juice and hot sauce if desired.

Serving

  1. Serve right away while the potato is warm and the cheese is melty.

For best results, dry potato skins well and rub with oil. Warm toppings for better melting and heat retention. Adjust lime, salt, and spices before serving.
Dinner, Main Course
Comfort Food, Mexican
Comfort Food, Loaded Potato Taco Bowl, Quick Dinner, Taco Bowl, Vegetarian Option

Fluffy Banana Cottage Cheese Pancakes

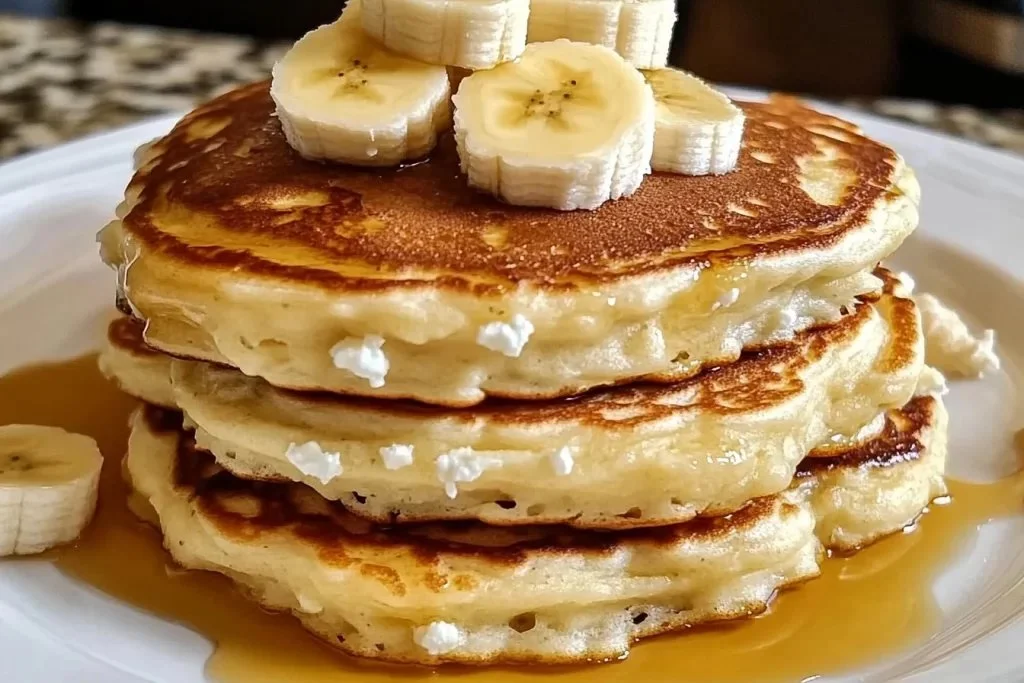
Fluffy banana pancakes made with cottage cheese served on a plate

These Fluffy Banana Cottage Cheese Pancakes are soft, light, and full of real banana flavor. They mix mashed banana and creamy cottage cheese with a bit of flour and eggs to make a batter that cooks up into tender, fluffy pancakes. This recipe is a crowd-pleaser, great for busy mornings, a simple weekend brunch, or when you want a tasty, protein-packed breakfast.

This featured recipe is easy to make, smells wonderful while it cooks, and tastes like warm banana bread in pancake form. People love them for their soft texture, mild sweetness, and the extra boost from cottage cheese. Get ready to flip pancakes that hold their shape, stay moist, and make the whole kitchen smell amazing, you will want to make them again and again.

How to prepare Fluffy Banana Cottage Cheese Pancakes

Ingredients

  • 2 ripe bananas, mashed
  • 1 cup cottage cheese
  • 3 large eggs
  • 3/4 cup all purpose flour
  • 1 teaspoon baking powder
  • 1/2 teaspoon vanilla extract
  • Pinch of salt
  • Butter or oil for the pan

Directions

  1. In a bowl, mash the bananas until mostly smooth.
  2. Add the cottage cheese, eggs, and vanilla, stir until combined.
  3. In another bowl, mix flour, baking powder, and salt.
  4. Add the dry mix to the wet mix, stir gently until just combined, do not overmix.
  5. Heat a nonstick pan over medium low heat, add a small knob of butter or a little oil.
  6. Spoon batter onto the pan, use about 1/4 cup per pancake.
  7. Cook until bubbles form on the surface and the edges look set, about 2 to 3 minutes.
  8. Flip and cook the other side until golden, about 1 to 2 minutes more.
  9. Keep pancakes warm on a plate and repeat with the rest of the batter.
  10. Serve warm with toppings you love.

Fluffy Banana Cottage Cheese Pancakes

Why You’ll Love Fluffy Banana Cottage Cheese Pancakes

  • They are very soft and light, the texture is fluffy not dense.
  • Cottage cheese adds protein and keeps pancakes moist, so they do not dry out.
  • The banana gives natural sweetness, so you can use less syrup.
  • The recipe is quick and simple, great for a busy morning or a relaxed brunch.
  • These pancakes are a tasty way to add more protein to breakfast without changing the flavor much.

Tips for success

  • Use ripe bananas for the best flavor and natural sweetness.
  • Do not overmix the batter, a few lumps are fine, this keeps pancakes fluffy.
  • Cook on medium low heat, slow cooking gives a soft center and even color.
  • Measure flour by spooning into the cup and leveling, do not pack it down.
  • If batter is too thin, add a tablespoon of flour at a time, if too thick, add a little milk or water.
  • Warm your oven to low, about 90 C (200 F), and keep finished pancakes there so they stay hot while you make the rest.

Serving Suggestions

  • Top with fresh banana slices, a drizzle of maple syrup, and a sprinkle of chopped nuts.
  • Add a spoonful of Greek yogurt or extra cottage cheese for more creaminess.
  • Serve with fresh berries and a dusting of powdered sugar for a bright touch.
  • Make a stack with a smear of nut butter between layers for a more filling meal.
  • These pancakes pair well with coffee, tea, or a glass of milk for a full breakfast.

Fluffy Banana Cottage Cheese Pancakes

FAQs

Q: Can I use low fat cottage cheese,
A: Yes, low fat cottage cheese works fine, pancakes may be a bit lighter but still tasty.

Q: Can I make the batter ahead of time,
A: You can mix batter and store in the fridge for up to 24 hours, give it a gentle stir before cooking.

Q: Are these pancakes gluten free,
A: Not with all purpose flour, but you can swap in a 1 to 1 gluten free flour blend and cook the same way.

Q: Can I freeze these pancakes,
A: Yes, cool completely, stack with parchment between layers, freeze in a bag, reheat in the toaster or oven.

Q: How do I make them dairy free,
A: Replace cottage cheese with a dairy free yogurt or silken tofu, texture and flavor will change a bit but still work.

Conclusion

If you like cottage cheese pancakes and want more ideas, try this related recipe for more protein packed banana pancakes: Cottage Cheese Banana Oatmeal Protein Pancakes. These fluffy banana cottage cheese pancakes make a simple, tasty breakfast that feels special, enjoy cooking and sharing them with family and friends.

Fluffy Banana Cottage Cheese Pancakes

These pancakes are soft, light, and packed with banana flavor, making them a perfect protein-rich breakfast choice.

Main ingredients

  • 2 ripe bananas, mashed (Use ripe bananas for the best flavor.)
  • 1 cup cottage cheese (Low fat cottage cheese can be used.)
  • 3 large eggs
  • 3/4 cup all purpose flour (Measure flour by spooning into the cup and leveling.)
  • 1 teaspoon baking powder
  • 1/2 teaspoon vanilla extract
  • 1 pinch salt
  • as needed Butter or oil for the pan (Use to grease the pan.)

Preparation

  1. In a bowl, mash the bananas until mostly smooth.
  2. Add the cottage cheese, eggs, and vanilla, then stir until combined.
  3. In another bowl, mix flour, baking powder, and salt.
  4. Add the dry mix to the wet mix and stir gently until just combined; do not overmix.

Cooking

  1. Heat a nonstick pan over medium low heat, and add a small knob of butter or a little oil.
  2. Spoon about 1/4 cup of batter onto the pan for each pancake.
  3. Cook until bubbles form on the surface and the edges look set, about 2 to 3 minutes.
  4. Flip and cook the other side until golden, about 1 to 2 minutes more.
  5. Keep pancakes warm on a plate and repeat with the rest of the batter.
  6. Serve warm with your favorite toppings.

If the batter is too thin, add a tablespoon of flour at a time, if too thick, add a little milk or water. Keep finished pancakes in a low oven (~90 C or 200 F) to stay hot while making the rest.

Breakfast
American
Banana Pancakes, Breakfast Recipes, Cottage Cheese Pancakes, Fluffy Pancakes, Protein Pancakes

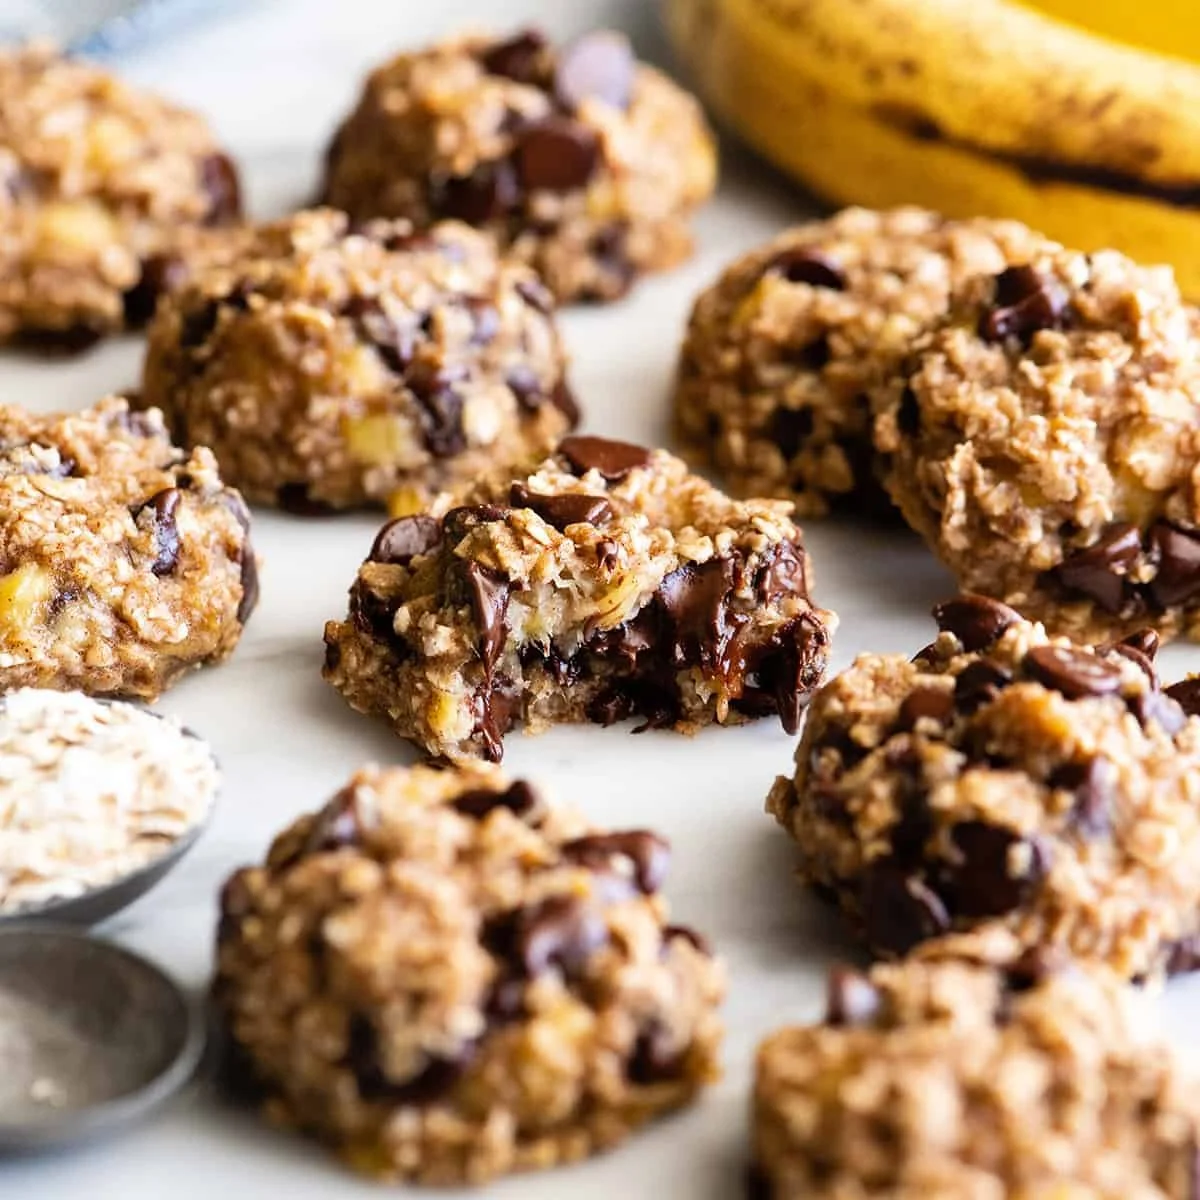
Banana Oatmeal Cookies

Delicious Banana Oatmeal Cookies on a wooden table

Banana Oatmeal Cookies are warm, simple, and full of good flavor. They bring sweet banana taste and a soft, chewy texture from oats. This recipe is a crowd pleaser, easy to make, and works for snacks, lunch boxes, or a quick breakfast. You will love how the cookies smell while they bake, and how they taste with a cup of tea or milk. Ready to make a batch and share with friends, or keep them all for yourself?

How to prepare Banana Oatmeal Cookies

  1. Preheat your oven to 350°F, line a baking sheet with parchment paper.
  2. Mash 2 ripe bananas in a bowl until smooth.
  3. Stir in 1 cup of rolled oats, mix until you have a thick batter.
  4. Add a pinch of salt and a little cinnamon, if you like. You can also fold in a few chocolate chips or chopped nuts.
  5. Drop spoonfuls of batter onto the prepared baking sheet. Press each one down a bit so they look like small cookies.
  6. Bake for 12 to 15 minutes, until the edges turn light golden. Let cool a few minutes on the sheet, then move to a rack to finish cooling.

Banana Oatmeal Cookies

Why You’ll Love Banana Oatmeal Cookies

  • They are very easy to make, using simple ingredients you likely have at home.
  • The cookies are naturally sweet from ripe bananas, so you need little or no added sugar.
  • Oats give them a great chew and a wholesome feel, perfect for a healthy snack.
  • You can change them fast, by adding chocolate chips, raisins, or spices, so they never get boring.

Tips for success

  • Use very ripe bananas, they mash easily and add more sweet flavor.
  • If the batter is too wet, add a little more oats, one tablespoon at a time.
  • Do not overbake, they stay soft when you take them out just as the edges turn light gold.
  • Use rolled oats for best texture, quick oats make them softer.
  • Press cookies flat before baking, so they cook evenly.

Serving Suggestions

  • Serve warm with a glass of milk or a cup of coffee.
  • Pair with yogurt and fresh fruit for a simple breakfast.
  • Spread a little peanut butter or almond butter on top for extra protein.
  • Pack them in lunch boxes, they travel well and make a good snack.

Banana Oatmeal Cookies

FAQs

Q, Can I make these without eggs or butter?
A, Yes, this recipe uses no eggs or butter, it is a simple vegan style cookie when you skip dairy add-ins.

Q, How long do they keep fresh?
A, Store in a covered container at room temperature for 2 to 3 days, or in the fridge for up to a week.

Q, Can I freeze the cookies?
A, Yes, freeze in a sealed bag for up to 2 months. Thaw at room temperature or warm a bit in the oven.

Q, Can I add other ingredients, like chocolate chips or nuts?
A, Yes, you can add a few tablespoons of chocolate chips, raisins, or chopped nuts to change the flavor.

Conclusion

If you want a quick, healthy cookie idea and more ways to make banana oatmeal cookies, see this simple guide for inspiration, Healthy 3-Ingredient Banana Oatmeal Cookies – Skinnytaste. Enjoy baking, and have fun trying new mix-ins to make the cookies your own.

Banana Oatmeal Cookies

Warm, simple, and flavorful cookies made with ripe bananas and rolled oats. Perfect for snacks, lunch boxes, or a quick breakfast.

Main Ingredients

  • 2 pieces ripe bananas, mashed (Use very ripe bananas for better sweetness.)
  • 1 cup rolled oats (Rolled oats provide the best texture.)
  • pinch salt
  • optional spices cinnamon (Add a little if desired.)
  • optional tablespoons chocolate chips or chopped nuts (Fold in for added flavor.)

Preparation

  1. Preheat your oven to 350°F and line a baking sheet with parchment paper.
  2. Mash the ripe bananas in a bowl until smooth.
  3. Stir in the rolled oats until you have a thick batter.
  4. Add a pinch of salt and cinnamon, if desired. Fold in chocolate chips or nuts if you like.
  5. Drop spoonfuls of batter onto the prepared baking sheet and press them down slightly.

Baking

  1. Bake for 12 to 15 minutes, until the edges turn light golden.
  2. Let cool on the baking sheet for a few minutes, then move to a wire rack to finish cooling.

Store cookies in a covered container at room temperature for 2 to 3 days, or in the fridge for up to a week. They can be frozen in a sealed bag for up to 2 months.

Dessert, Snack
American
Banana Cookies, Easy Cookie Recipe, Healthy Cookies, Oatmeal Cookies, Vegan Cookies

Cheesecake Bites

Delicious cheesecake bites perfect for dessert lovers

Cheesecake Bites are small, creamy, and sweet treats that everyone will love. They feel special, but they are easy to make. These little cheesecakes have a crunchy base, a soft cream cheese center, and you can top them with fruit, chocolate, or jam. They work well for parties, snacks, or a simple dessert after dinner.

The recipe here is a crowd-pleaser, with a rich, smooth taste and a light, bite-sized shape. You get all the flavor of a full cheesecake, in small pieces that are easy to share. Ready to bake a tray of smiles, and maybe sneak one or two before guests arrive?

How to prepare Cheesecake Bites

  1. Preheat your oven to 325°F, and line a mini muffin tin with paper liners or spray with pan spray.
  2. Make the crust by crushing about 1 cup graham crackers into fine crumbs, mix with 2 tablespoons sugar, and 3 tablespoons melted butter. Press a small spoonful into the bottom of each mini cup.
  3. In a bowl, beat 8 ounces room temperature cream cheese until smooth. Add 1/3 cup sugar and 1 teaspoon vanilla, beat until creamy. Add one egg, and mix until just combined.
  4. Spoon about a tablespoon of filling over each crust, filling cups almost to the top. Tap the pan gently to remove air bubbles.
  5. Bake 12 to 18 minutes, until edges are set and centers still jiggle a little. Let cool on a rack for 30 minutes.
  6. Chill in the fridge for at least 2 hours before removing from the tin. Top with fresh berries, jam, or chocolate before serving.

Cheesecake Bites

Why You’ll Love Cheesecake Bites

  • They are small and easy to eat, perfect for parties and kids.
  • The rich cream cheese filling tastes like classic cheesecake, but in a quick bite.
  • You can change the toppings, use different crusts, and make them your own.
  • They store well in the fridge, so you can make them ahead and save time.

Tips for success

  • Use room temperature cream cheese, it mixes smooth and makes no lumps.
  • Press the crust firmly into the cups so it holds when you serve.
  • Do not overbake, the centers should still jiggle a little when you take them out. They set more as they cool.
  • Chill well before serving, cold cheesecake holds shape and tastes best.
  • If you want no-bake, skip the oven and chill the filling on a crumb crust until firm.

Serving Suggestions

  • Top with fresh strawberries, blueberries, or raspberries.
  • Drizzle with chocolate sauce or caramel.
  • Add a small spoon of lemon curd or fruit jam for extra flavor.
  • Serve on a small platter for parties, or pack a few in a lunch box for a sweet treat.

Cheesecake Bites

FAQs

Q: Can I make Cheesecake Bites ahead of time?
A: Yes, make them a day ahead and keep them covered in the fridge.

Q: Can I freeze them?
A: Yes, freeze in a single layer on a tray, then store in a container. Thaw in the fridge before serving.

Q: Can I use low-fat cream cheese?
A: Yes, you can, but the texture and flavor will be slightly different, and they may be less rich.

Q: How long do they last in the fridge?
A: They stay good for 3 to 5 days when covered.

Conclusion

If you want another simple take on mini cheesecakes, try this helpful guide for small portions at Cheesecake Bites (in mini muffin tins) – Danas Table.

Cheesecake Bites

These Cheesecake Bites are small, creamy, and sweet treats with a crunchy base and soft cream cheese center, perfect for parties and snacks.

For the crust

  • 1 cup graham cracker crumbs (Crushed graham crackers)
  • 2 tablespoons sugar
  • 3 tablespoons melted butter

For the filling

  • 8 ounces cream cheese (Room temperature)
  • 1/3 cup sugar
  • 1 teaspoon vanilla extract
  • 1 large egg

Toppings

  • Fresh berries (Strawberries, blueberries, or raspberries)
  • Chocolate sauce (For drizzling)
  • Caramel sauce (For drizzling)
  • Fruit jam (Optional for extra flavor)

Preparation

  1. Preheat your oven to 325°F (163°C), and line a mini muffin tin with paper liners or spray with pan spray.
  2. Make the crust by crushing about 1 cup of graham crackers into fine crumbs, mix with 2 tablespoons of sugar, and 3 tablespoons of melted butter.
  3. Press a small spoonful of the crust mixture into the bottom of each mini cup.
  4. In a bowl, beat 8 ounces of room temperature cream cheese until smooth.
  5. Add 1/3 cup of sugar and 1 teaspoon of vanilla, beat until creamy.
  6. Add one egg, and mix until just combined.
  7. Spoon about a tablespoon of filling over each crust, filling cups almost to the top.
  8. Tap the pan gently to remove air bubbles.

Baking

  1. Bake for 12 to 18 minutes, until edges are set and centers still jiggle a little.
  2. Let cool on a rack for 30 minutes.

Chilling

  1. Chill in the fridge for at least 2 hours before removing from the tin.
  2. Top with fresh berries, jam, or chocolate before serving.

Use room temperature cream cheese for smooth mixing. Press the crust firmly into the cups so it holds when you serve. Do not overbake, the centers should still jiggle a little when you take them out. Chill well before serving as cold cheesecake holds shape and tastes best.

Dessert, Party
American
Cheesecake Bites, easy dessert, Mini Cheesecakes, No-Bake Option, Party Treats

Garlic Bread Rolls

Freshly baked garlic bread rolls served warm with herbs and butter

Garlic Bread Rolls are a simple, cozy bread that people love at dinner and parties. They have soft dough, buttery garlic, and a crisp outside. This recipe is a crowd-pleaser, and it pairs well with pasta, soup, or a salad. If you like easy home breads, you might also enjoy Amish apple fritter bread as a different kitchen treat. These garlic rolls taste rich, smell great, and feel like a small celebration every time you pull them from the oven, so you will want to make them again and again.

how to prepare Garlic Bread Rolls

  1. Preheat oven to 375°F (190°C). Line a baking sheet with parchment paper.
  2. If you use store dough, roll it into small balls, about the size of a golf ball. If you make dough from scratch, divide into 12 equal pieces and shape.
  3. In a small bowl, mix 1/2 cup softened butter, 3 cloves minced garlic, 1 tablespoon chopped parsley, and a pinch of salt. Mix until smooth.
  4. Flatten each dough ball a little, spread a little garlic butter inside, then roll up and seal the edges. Place seam side down on the sheet.
  5. Brush the top of each roll with more garlic butter. For a golden top, brush with a little milk or beaten egg.
  6. Bake 15 to 20 minutes, until the rolls are puffed and light brown on top.
  7. Remove from oven and brush once more with garlic butter. Let cool a few minutes, then serve warm.


Garlic Bread Rolls

Why You’ll Love Garlic Bread Rolls

  • They smell amazing, and the kitchen smells like garlic and butter.
  • The rolls are soft inside and have a light crust outside.
  • You can make them fast with store-bought dough, or show off with homemade dough.
  • They work as a side dish, snack, or party appetizer, and almost everyone loves them.

tips for success

  • Use fresh garlic for the best flavor, not garlic powder.
  • Don’t overfill the rolls, or the butter can leak out while baking.
  • Brush with butter right after baking to keep them soft and shiny.
  • If you want extra herbs, add a little oregano or basil to the garlic butter.
  • Check the oven early, all ovens bake a bit differently.

Serving Suggestions

  • Serve with pasta, like spaghetti or lasagna, for a classic combo.
  • Use them with soup, especially tomato or minestrone.
  • Turn them into small sandwiches with slices of cheese or ham.
  • Offer a small dish of marinara or garlic dip for guests to dunk the rolls.


Garlic Bread Rolls

FAQs

Q: Can I make these ahead of time?

A: Yes, shape the rolls and chill them in the fridge. Bake within 24 hours, adding a few minutes to bake time.

Q: Can I freeze Garlic Bread Rolls?

A: Yes, freeze baked rolls in a sealed bag. Reheat in the oven at 350°F (175°C) until warm. You can also freeze unbaked shaped rolls on a tray, then move to a bag.

Q: How do I reheat the rolls?

A: Warm them in the oven at 350°F (175°C) for 8 to 10 minutes. For a quick fix, microwave for 15 to 20 seconds, then crisp in a toaster oven if you like the top crunchy.

Q: Can I make these without butter?

A: You can use olive oil instead of butter, but the taste will change. Butter gives the classic rich flavor.

Conclusion

If you want a similar idea or a different shape of garlic bread, this Garlic-Swirl Rolls Recipe – The Kitchn shows another way to enjoy garlic bread in a swirl form. Try the rolls warm, and share them with friends for a simple, tasty crowd-pleaser.

Garlic Bread Rolls

These cozy Garlic Bread Rolls are soft and buttery, featuring a rich garlic flavor and a crisp outer crust. Perfect for dinner or parties, they pair beautifully with pasta, soup, or salads.

Dough ingredients

  • 12 12 pieces of dough (store-bought or homemade) (If using homemade dough, divide into 12 equal pieces.)

Garlic butter mixture

  • 1/2 cup softened butter (Use fresh, softened butter for easy mixing.)
  • 3 cloves minced garlic (Fresh garlic is recommended for the best flavor.)
  • 1 tablespoon chopped parsley (For garnish and added flavor.)
  • 1 pinch salt

Preparation

  1. Preheat oven to 375°F (190°C) and line a baking sheet with parchment paper.
  2. If using store dough, roll it into small balls, about the size of a golf ball. If making dough from scratch, divide it into 12 equal pieces and shape them.
  3. In a small bowl, mix the softened butter, minced garlic, chopped parsley, and a pinch of salt until smooth.

Assembly

  1. Flatten each dough ball slightly, spread a little garlic butter inside, then roll up and seal the edges. Place seam side down on the baking sheet.
  2. Brush the top of each roll with additional garlic butter. For a golden top, brush with a little milk or a beaten egg.

Baking

  1. Bake the rolls for 15 to 20 minutes, until they are puffed and light brown on top.
  2. Remove from the oven and brush once more with garlic butter. Let cool for a few minutes before serving warm.

Use fresh garlic for the best flavor. Don’t overfill the rolls to prevent butter from leaking out. Brush with butter after baking for extra softness and shine. You may add oregano or basil for additional flavor. Check the oven early as baking times can vary.

Appetizer, Side Dish, Snack
American
Bread Rolls, Comfort Food, Easy Recipe, Garlic Bread, Party Food

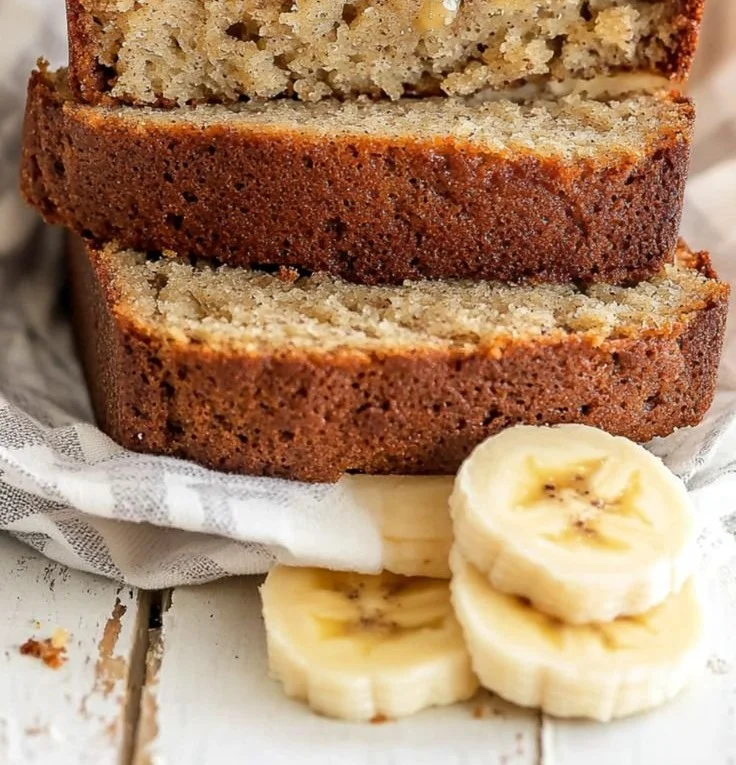
Easy Banana Bread

Loaf of easy banana bread with sliced pieces on a wooden table

Banana Bread is the kind of baking that feels like a hug. It uses ripe bananas, a few pantry staples, and a quick mix, so you end up with a moist, sweet loaf that fills the kitchen with a lovely smell. This crowd-pleaser is soft on the inside, lightly golden on the outside, and perfect for breakfast, snack time, or a quick dessert. If you like trying small twists, you might enjoy the banana bread cookies soft chewy easy recipe as a fun variation. Get ready to bake a simple, tasty loaf that everyone will ask for again.

how to prepare Easy Banana Bread

Ingredients

  • 3 ripe bananas, mashed
  • 1/3 cup melted butter
  • 3/4 cup sugar
  • 1 egg, beaten
  • 1 teaspoon vanilla extract
  • 1 teaspoon baking soda
  • Pinch of salt
  • 1 1/2 cups all purpose flour
  • Optional, 1/2 cup chopped nuts or chocolate chips

Directions

  1. Preheat oven to 350 F, grease a 9×5 inch loaf pan.
  2. In a bowl, mash the bananas with a fork until smooth.
  3. Stir in the melted butter, then mix in the sugar, egg, and vanilla.
  4. Sprinkle the baking soda and salt over the mix, then fold in the flour gently.
  5. Stir in nuts or chocolate chips if you use them.
  6. Pour the batter into the loaf pan and level the top.
  7. Bake for 55 to 65 minutes, or until a toothpick comes out clean.
  8. Cool in the pan for 10 minutes, then move to a rack to finish cooling.


Easy Banana Bread

Why You’ll Love Easy Banana Bread

This banana bread is very easy to make, and it uses ripe bananas so you do not waste fruit. The bread stays moist for days, and it has a warm, sweet banana taste that many people love. It works as quick bread for breakfast, a snack with coffee, or a simple dessert that kids enjoy. You can change it, add chocolate chips, or keep it plain, and it still bakes up well.

tips for success

  • Use very ripe bananas, they give the best flavor and moisture.
  • Do not overmix after you add flour, mix until just combined.
  • Check the loaf at 50 minutes, oven times can change, use a toothpick to test.
  • Let the bread cool a little before slicing, it will cut cleaner.
  • If top browns too fast, cover loosely with foil for the last 10 minutes.

Serving Suggestions

  • Slice and toast slightly, spread with butter for breakfast.
  • Serve warm with a spoon of yogurt or a scoop of vanilla ice cream for dessert.
  • Cut into squares for school snacks or to pack in a lunch.
  • Add a smear of peanut butter for a more filling treat.


Easy Banana Bread

FAQs

Q: Can I freeze banana bread? A: Yes, wrap slices or the whole loaf well in plastic and freeze up to 3 months. Thaw in the fridge or at room temperature.

Q: Can I use less sugar? A: Yes, you can reduce sugar by a little, the bananas add natural sweetness. The texture is best if you keep some sugar.

Q: What if I only have one or two bananas? A: You can make a smaller batch or add a little applesauce to make up moisture, but two bananas usually still work in a smaller pan.

Q: Can I use whole wheat flour? A: Yes, you can use part whole wheat flour, but the bread may be a bit denser. Try half all purpose and half whole wheat.

Conclusion

If you want a reliable guide and a slightly different take with a video, see the full step by step at Banana Bread Recipe (With Video).

Easy Banana Bread

A simple, moist banana bread that perfectly combines ripe bananas and pantry staples, creating a delicious loaf ideal for breakfast, snacks, or dessert.

Main Ingredients

  • 3 pieces ripe bananas, mashed (Use very ripe bananas for the best flavor.)
  • 1/3 cup melted butter
  • 3/4 cup sugar (You can reduce sugar slightly if desired.)
  • 1 piece egg, beaten
  • 1 teaspoon vanilla extract
  • 1 teaspoon baking soda
  • 1 pinch salt
  • 1 1/2 cups all purpose flour (Can substitute part with whole wheat flour.)
  • 1/2 cup chopped nuts or chocolate chips (Optional.)

Preparation

  1. Preheat oven to 350°F (175°C) and grease a 9×5 inch loaf pan.
  2. In a bowl, mash the bananas with a fork until smooth.
  3. Stir in the melted butter, then mix in the sugar, egg, and vanilla.
  4. Sprinkle the baking soda and salt over the mixture, then fold in the flour gently.
  5. Stir in nuts or chocolate chips if using.
  6. Pour the batter into the loaf pan and level the top.

Baking

  1. Bake for 55 to 65 minutes, or until a toothpick comes out clean.
  2. Cool in the pan for 10 minutes, then move to a rack to finish cooling.

Let the bread cool a little before slicing for cleaner cuts. If the top browns too fast, cover loosely with foil for the last 10 minutes.

Breakfast, Dessert, Snack
American
Baking, banana bread, Banana Recipe, Easy Banana Bread, Quick Bread

Easy Cheesy Garlic Bread

Delicious easy cheesy garlic bread fresh out of the oven

Easy cheesy garlic bread is warm, gooey, and full of flavor. It smells like comfort and brings people together. This Easy Cheesy Garlic Bread recipe is a simple crowd pleaser, with a crunchy outside, soft inside, lots of cheese, and bright garlic butter on every bite. It is the kind of side dish that makes a weeknight meal feel special and a party table feel complete. If you like quick bakes, try another easy treat with this soft chewy banana bread cookies recipe. Get ready to make a pan of cheesy garlic bread that everyone will ask for again.

how to prepare Easy Cheesy Garlic Bread

Ingredients

  • 1 loaf French bread or Italian bread
  • 1 stick (115 g) unsalted butter, softened
  • 3 to 4 garlic cloves, minced
  • 1 to 1 1/2 cups shredded mozzarella cheese
  • 1/4 cup grated Parmesan cheese
  • 1 tablespoon chopped fresh parsley or 1 teaspoon dried parsley
  • Salt to taste, a pinch
  • Optional, a pinch of red pepper flakes

Directions

  1. Preheat your oven to 375°F (190°C). Line a baking sheet with foil.
  2. Slice the loaf in half lengthwise, open it like a book, or cut into thick slices without cutting all the way through.
  3. In a bowl, mix the softened butter, minced garlic, parsley, and a pinch of salt until smooth.
  4. Spread the garlic butter evenly on the cut sides of the bread.
  5. Sprinkle mozzarella over the butter, then add Parmesan on top for extra flavor.
  6. Place the bread on the baking sheet, cheese side up.
  7. Bake for 10 to 12 minutes, until the cheese is melted and bubbling and the edges are golden.
  8. For a crisp, brown top, put the bread under the broiler for 1 to 2 minutes. Watch closely so it does not burn.
  9. Let cool for a minute, slice, and serve warm.


Easy Cheesy Garlic Bread

Why You’ll Love Easy Cheesy Garlic Bread

  • It is fast, ready in about 15 minutes, and uses simple ingredients.
  • The garlic butter and melted cheese make each bite rich and savory.
  • This cheesy garlic bread pairs with many dishes, from pasta to soup.
  • It is kid friendly and great for guests, a true crowd pleaser.
  • You can change the cheese or add herbs to match your taste.

tips for success

  • Use room temperature butter so you can mix garlic evenly.
  • Grate your own cheese for the best melt and flavor.
  • Don’t skip the broil step if you want a golden, bubbly top.
  • If bread gets soggy, toast it a little longer or switch to a firmer loaf.
  • Add chopped fresh herbs after baking for a bright finish.

Serving Suggestions

  • Serve with spaghetti, meatballs, or a simple tomato sauce for dipping.
  • Pair with a bowl of warm soup, like tomato or minestrone.
  • Cut into small pieces and offer on a party platter with olives and sliced meats.
  • Add a simple salad on the side to balance the richness.


Easy Cheesy Garlic Bread

FAQs

Q: Can I make this ahead and reheat it? A: Yes, bake the bread and reheat in a 350°F oven for 8 to 10 minutes. Cover with foil if you want to keep it soft.

Q: Can I use other cheeses? A: Yes, cheddar, provolone, or a mix works well. Use cheeses that melt easily.

Q: How do I make it less garlicky for kids? A: Use 1 or 2 garlic cloves instead of 3 to 4, and add more butter or cheese to keep it tasty.

Q: Can I make this with a baguette? A: Yes, a baguette is a good choice. Adjust bake time for size and thickness.

Q: Is there a way to make it dairy free? A: Use dairy free butter and dairy free shredded cheese. Bake the same way.

Conclusion

Easy Cheesy Garlic Bread is a simple, tasty side that lifts any meal. It brings warm, melty cheese, bright garlic flavor, and a golden crust to your table, making it a favorite for family dinners and parties. For another take on cheesy garlic bread ideas and tips, see World’s Best Cheesy Garlic Bread Recipe – Easy Peasy Meals.

Easy Cheesy Garlic Bread

This Easy Cheesy Garlic Bread is a quick and delightful recipe featuring warm, gooey cheese and bright garlic butter, making it the perfect side dish for any meal.

Bread Ingredients

  • 1 loaf French bread or Italian bread

Butter and Garlic Mixture

  • 1 stick unsalted butter, softened (115 g)
  • 3 to 4 cloves garlic, minced
  • 1 tablespoon chopped fresh parsley (or 1 teaspoon dried parsley)
  • a pinch Salt to taste
  • optional a pinch of red pepper flakes

Cheese Ingredients

  • 1 to 1 1/2 cups shredded mozzarella cheese
  • 1/4 cup grated Parmesan cheese

Preparation

  1. Preheat your oven to 375°F (190°C). Line a baking sheet with foil.
  2. Slice the loaf in half lengthwise, open it like a book, or cut into thick slices without cutting all the way through.
  3. In a bowl, mix the softened butter, minced garlic, parsley, and a pinch of salt until smooth.
  4. Spread the garlic butter evenly on the cut sides of the bread.
  5. Sprinkle mozzarella over the butter, then add Parmesan on top for extra flavor.
  6. Place the bread on the baking sheet, cheese side up.

Baking

  1. Bake for 10 to 12 minutes, until the cheese is melted and bubbling and the edges are golden.
  2. For a crisp, brown top, put the bread under the broiler for 1 to 2 minutes. Watch closely so it does not burn.
  3. Let cool for a minute, slice, and serve warm.

Use room temperature butter for easier mixing, and consider grating your own cheese for the best melt and flavor. Don’t skip the broil step for a golden, bubbly top.

Appetizer, Side Dish
American, Italian
Cheesy Bread, Comfort Food, Easy Recipe, Garlic Bread, Quick Side Dish

Cheesy Bread

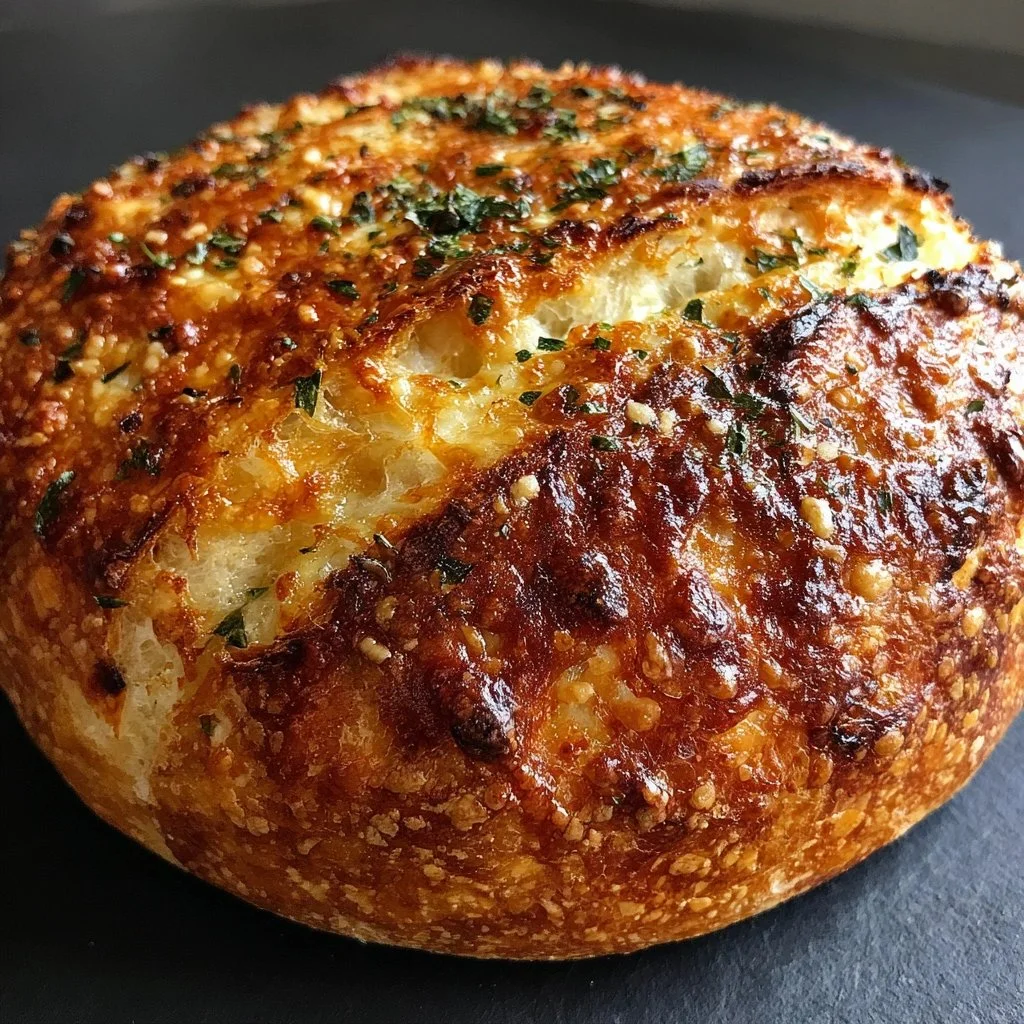
Freshly baked cheesy bread with melted cheese and herbs

Warm, cheesy bread makes any meal feel like a small party. This Cheesy Bread is soft inside, crisp on top, and full of melting cheese and garlic flavor. It is easy to share, and people love tearing off warm pieces. I’ll show you a simple way to make it at home, and you will see why it is a go-to snack for friends and family. If you like simple breads and baked treats, try this and enjoy, it will make you smile.

I also like pairing different breads, like the Amish Apple Fritter Bread when I want a sweet side for a savory table.

how to prepare Cheesy Bread

Ingredients

  • 1 loaf of French bread or baguette
  • 1/2 cup (1 stick) butter, softened
  • 2 cups shredded mozzarella cheese
  • 1 cup shredded cheddar cheese
  • 2 cloves garlic, minced
  • 2 tablespoons fresh parsley, chopped, or 1 tablespoon dried parsley
  • Salt and pepper, a pinch each

Directions

  1. Preheat the oven to 375°F (190°C). Line a baking sheet with foil or use a baking dish.
  2. Slice the loaf lengthwise in half, or make deep cuts across the top for a pull-apart style.
  3. Mix the softened butter, minced garlic, parsley, salt, and pepper in a small bowl.
  4. Spread the garlic butter evenly over both halves, getting into the cuts if you made them.
  5. Sprinkle the mozzarella and cheddar cheese on top, press the cheese slightly into the bread.
  6. Place the halves on the baking sheet, cheese side up. Bake 10 to 15 minutes, until the cheese melts and the top is golden.
  7. For a crispier top, switch the oven to broil for 1 to 2 minutes, watch it closely so it does not burn.
  8. Let cool for 2 to 3 minutes, slice if needed, then serve warm.

Cheesy Bread

Why You’ll Love Cheesy Bread

  • It is quick and easy, ready in about 20 minutes.
  • The cheese melts into the bread for soft, tasty bites.
  • It works as a snack, side, or party food.
  • You can change the cheese or add herbs to make it your own.
  • Kids and adults both enjoy the warm, cheesy pull-apart texture.

tips for success

  • Use room temperature butter for easy mixing and spreading.
  • Grate your own cheese if you can, it melts better than pre-shredded cheese.
  • Don’t walk away when broiling, it goes from golden to burnt very fast.
  • If you want extra garlic flavor, mix a little garlic powder into the butter as well.
  • For a lighter top, use less cheddar and more mozzarella, or vice versa for stronger flavor.

Serving Suggestions

  • Serve with marinara sauce for dipping, it pairs very well.
  • Offer alongside soups, salads, or pasta for a simple meal.
  • Add sliced olives or chopped tomatoes on top before baking for a twist.
  • Cut into small pieces and serve as a party snack with toothpicks.

Cheesy Bread

FAQs

Q: Can I use frozen bread? A: Yes, but thaw it first and warm it a little so the butter spreads well.

Q: Can I make this ahead of time? A: You can prep the butter and cheese and store them in the fridge, then spread and bake when ready.

Q: How do I keep the bread from getting soggy? A: Use a hot oven and bake on a rack or baking sheet. Broil briefly at the end to crisp the top.

Q: Can I add herbs or spices? A: Yes, oregano, basil, or a pinch of red pepper flakes work well.

Q: Is this recipe good for big groups? A: Yes, make multiple loaves or use a large baguette and cut into pieces before serving.

Conclusion

If you want another take on a yummy bread idea, you can see a related Cheesy Bread recipe at Simply Recipes Cheesy Bread, it has useful tips and a good step by step guide.

Cheesy Bread

This Cheesy Bread is warm, soft inside, and crispy on top, filled with melting cheese and garlic flavor, making it an excellent snack or party food.

Main Ingredients

  • 1 loaf loaf of French bread or baguette
  • 0.5 cup butter, softened ((1 stick))
  • 2 cups shredded mozzarella cheese
  • 1 cup shredded cheddar cheese
  • 2 cloves garlic, minced
  • 2 tablespoons fresh parsley, chopped (or 1 tablespoon dried parsley)
  • 1 pinch Salt
  • 1 pinch Pepper

Preparation

  1. Preheat the oven to 375°F (190°C). Line a baking sheet with foil or use a baking dish.
  2. Slice the loaf lengthwise in half, or make deep cuts across the top for a pull-apart style.
  3. Mix the softened butter, minced garlic, parsley, salt, and pepper in a small bowl.
  4. Spread the garlic butter evenly over both halves, getting into the cuts if you made them.
  5. Sprinkle the mozzarella and cheddar cheese on top, press the cheese slightly into the bread.

Baking

  1. Place the halves on the baking sheet, cheese side up. Bake for 10 to 15 minutes, until the cheese melts and the top is golden.
  2. For a crispier top, switch the oven to broil for 1 to 2 minutes, watching closely to avoid burning.

Serving

  1. Let cool for 2 to 3 minutes, slice if needed, then serve warm.

Use room temperature butter for easy mixing and spreading. Grate your own cheese if possible, it melts better than pre-shredded cheese. Mix in garlic powder for extra flavor. Adjust cheese types for personal taste.

Appetizer, Snack
American, Italian
Bread, Cheesy Bread, Easy Recipe, Garlic Bread, Party Snack

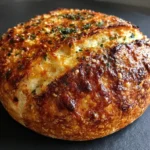
Italian Herbs and Cheese Bread

Freshly baked Italian Herbs Cheese Bread with aromatic herbs and cheese.

I love how this bread fills the kitchen with a cozy, herby smell. The crust gets golden and the cheese bubbles, and everyone asks for a slice. If you like easy, tasty bread that pairs with many meals, you will enjoy this Italian Herbs and Cheese Bread. For another cheesy party bite, try the baked beef and cheese sliders for a fun side or snack idea.

Why You’ll Love Italian Herbs and Cheese Bread

This bread mixes soft dough, Italian seasoning, and melted cheese for a warm, tasty loaf. It smells like garlic and herbs, and it makes any meal feel special. It is simple to make, and many people love the crunchy top and soft inside. This recipe is a real crowd pleaser for snacks, soup nights, or a quick side.

how to prepare Italian Herbs and Cheese Bread

  1. Mix warm water, sugar, and yeast in a bowl. Let sit until it bubbles, about 5 minutes.
  2. Stir in oil, salt, and some Italian seasoning. Add flour a little at a time and mix until a soft dough forms.
  3. Knead the dough on a floured surface for 5 to 8 minutes, until smooth and elastic.
  4. Place dough in a greased bowl, cover, and let rise in a warm place until doubled, about 1 hour.
  5. Punch down the dough and shape it into a loaf or divide for rolls. Put on a baking sheet or in a loaf pan.
  6. Brush the top with garlic butter or olive oil, then sprinkle chopped herbs and grated cheese on top.
  7. Let the shaped dough rest for 15 minutes, then bake in a preheated 375°F oven for 20 to 30 minutes, until golden and the cheese is melted.
  8. Cool a few minutes, slice, and serve warm.

Italian Herbs and Cheese Bread

tips for success

  • Use fresh yeast or check the date on active dry yeast, so the dough rises well.
  • Warm the water, not hot, about 105°F to 115°F, to wake the yeast, not kill it.
  • Measure flour by spooning it into the cup and leveling, do not pack it down.
  • Let the bread cool a little before cutting, this keeps the cheese from sliding off.
  • Add extra herbs or garlic to the butter for more flavor on top.

Serving Suggestions

  • Serve warm with soup, like tomato or minestrone.
  • Make a garlic bread side for pasta, it pairs great with red sauce.
  • Use slices for sandwiches, the cheesy crust adds a nice crunch.
  • Offer for a party with dips like marinara or herbed olive oil.

Italian Herbs and Cheese Bread

FAQs

Q: Can I use instant yeast instead of active dry yeast?

A: Yes, use a little less instant yeast and mix it with the flour, it works fine.

Q: Can I make this bread ahead and freeze it?

A: Yes, bake and cool fully, then wrap tight and freeze. Thaw and warm in the oven before serving.

Q: What cheese works best on top?

A: Mozzarella and Parmesan mix well, use shredded cheese you like for a good melt and flavor.

Q: Can I add garlic inside the dough?

A: Yes, you can add minced garlic or garlic powder to the dough for more flavor.

Q: How do I get a crispier crust?

A: Brush with olive oil and bake at a slightly higher temp for a few extra minutes, watch so it does not burn.

Conclusion

This Italian Herbs and Cheese Bread is easy and full of flavor, it makes any meal better and people will ask for seconds. For another take on herby, cheesy bread inspired recipes, see this detailed copycat option, Subway Bread Recipe (Italian Herb and Cheese Copycat).

Italian Herbs and Cheese Bread

A warm, tasty loaf combining soft dough, Italian herbs, and melted cheese, perfect for any meal or gathering.

For the dough

  • 1 cup warm water (105°F to 115°F to activate yeast)
  • 1 tbsp sugar (to feed the yeast)
  • 2 tsp active dry yeast (or instant yeast)
  • 2 tbsp olive oil (for flavor)
  • 1 tsp salt (to enhance flavor)
  • 3 cups all-purpose flour (spooned into the cup and leveled)

For the topping

  • 2 tbsp garlic butter (or olive oil for brushing)
  • 1 cup grated cheese (mozzarella and Parmesan recommended, or any preferred shredded cheese)
  • 2 tbsp chopped herbs (like parsley or Italian seasoning for extra flavor)

Preparation

  1. Mix warm water, sugar, and yeast in a bowl. Let sit until it bubbles, about 5 minutes.
  2. Stir in olive oil, salt, and some Italian seasoning. Add flour gradually and mix until a soft dough forms.
  3. Knead the dough on a floured surface for 5 to 8 minutes, until smooth and elastic.
  4. Place dough in a greased bowl, cover, and let rise in a warm place until doubled, about 1 hour.
  5. Punch down the dough and shape it into a loaf or divide for rolls. Put on a baking sheet or in a loaf pan.
  6. Brush the top with garlic butter or olive oil, then sprinkle chopped herbs and grated cheese on top.
  7. Let the shaped dough rest for 15 minutes.
  8. Bake in a preheated 375°F oven for 20 to 30 minutes, until golden and the cheese is melted.
  9. Cool for a few minutes, slice, and serve warm.

Use fresh yeast for best results. Measure flour accurately and let bread cool slightly before cutting to prevent cheese from sliding off. Add garlic or herbs to butter for more flavor.

Bread, Side Dish, Snack
Italian
Cheesy Bread, Easy Bread Recipe, Homemade Bread, Italian Herbs and Cheese Bread, snack ideas

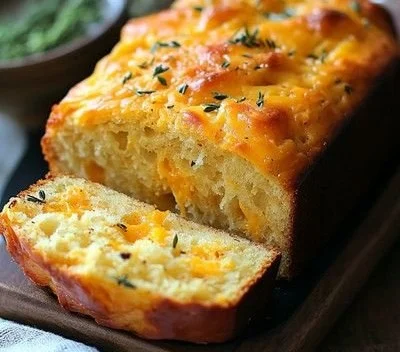
Irresistibly Easy Cheddar Cheese Quick Bread

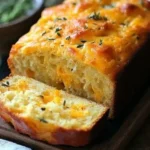
Easy cheddar cheese quick bread fresh out of the oven

This cheddar cheese quick bread feels like a warm hug from the oven. It smells of toast and melted cheese, and it is simple to make. This loaf has a golden crust, soft crumb, and a strong cheddar taste that makes it a crowd-pleaser at weekday dinners and holiday tables.

I am sharing the Irresistibly Easy Cheddar Cheese Quick Bread, a recipe that mixes quick bread ease with bold, savory flavor. It bakes fast, needs no yeast, and pairs well with soup, salads, or a simple pasta night. If you enjoy quick, cheesy bakes, you might also like this banana bread cookies recipe for another easy treat.

Get ready to warm the kitchen and impress friends, even if you call yourself a busy baker.

how to prepare Irresistibly Easy Cheddar Cheese Quick Bread

Ingredients,

  • 2 cups all purpose flour
  • 1 tablespoon baking powder
  • 1 teaspoon salt
  • 1/4 teaspoon baking soda
  • 1/2 teaspoon black pepper, optional
  • 1 cup sharp cheddar cheese, grated
  • 1/2 cup butter, melted and cooled, or 1/2 cup oil
  • 1 cup milk or buttermilk
  • 2 large eggs
  • 1 to 2 tablespoons chopped fresh chives or green onion, optional

Directions,

  1. Preheat the oven to 350°F (175°C). Grease a 9×5 inch loaf pan.
  2. In a bowl, mix flour, baking powder, salt, baking soda, and pepper.
  3. Stir in the grated cheddar, tossing it in the dry mix so the cheese does not sink.
  4. In another bowl, beat the eggs, then add milk and melted butter. Mix until smooth.
  5. Pour the wet mix into the dry mix and stir just until you see no dry flour. Do not overmix.
  6. Fold in chives if you use them. Spoon the batter into the prepared loaf pan and smooth the top.
  7. Bake 45 to 55 minutes, until a toothpick in the center comes out clean and the top is golden.
  8. Let the loaf cool 10 minutes in the pan, then turn it out onto a rack to cool more. Slice and serve warm or at room temp.

Irresistibly Easy Cheddar Cheese Quick Bread

Why You’ll Love Irresistibly Easy Cheddar Cheese Quick Bread

  • Fast and simple, it rises without yeast, so you can make it any day.
  • Cheddar gives a rich, tangy flavor that works with many meals.
  • The crumb is moist and holds up to butter, jam, or a slice of ham.
  • You can change the cheese type, add herbs, or mix in cooked bacon for variety.
  • It is great warm from the oven, and it keeps well for a day or two.

tips for success

  • Grate the cheese fresh for better melt and flavor.
  • Do not overmix the batter, or the bread can turn dense. Mix until the flour disappears.
  • If you use pre-shredded cheese, expect a tiny change in texture because of anti clump agents.
  • Use buttermilk for extra tang and a tender crumb.
  • Check the loaf at 45 minutes, ovens vary, and test with a toothpick.

Serving Suggestions

  • Serve warm with butter or a smear of cream cheese.
  • Pair with tomato soup, chili, or a green salad for an easy meal.
  • Make halves into sandwiches with sliced turkey or ham.
  • Offer as a side at brunch with scrambled eggs and fruit.

Irresistibly Easy Cheddar Cheese Quick Bread

FAQs

Q: Can I make this bread ahead of time,

A: Yes, bake and cool fully, then wrap in foil. It stays good at room temp for one day, or in the fridge for three days. Warm it before serving.

Q: Can I freeze the bread,

A: Yes, wrap slices or the whole loaf tight in plastic and foil, freeze up to three months. Thaw in the fridge or at room temp and reheat.

Q: Can I add mix ins like bacon or jalapeno,

A: Yes, cooked bacon, diced jalapeno, or cooked onion work well. Fold them in gently so the batter stays light.

Q: Can I make muffins instead of a loaf,

A: Yes, divide batter into a greased muffin tin and bake 18 to 22 minutes until a toothpick is clean.

Conclusion

This Irresistibly Easy Cheddar Cheese Quick Bread is a simple, savory loaf that lifts any meal with cheddar flavor and quick bread ease. For another savory twist that uses bacon and dried fruit, see the Bacon-Cheddar Quick Bread with Dried Pears recipe for inspiration and a delicious variation.

Cheddar Cheese Quick Bread

This cheddar cheese quick bread bakes fast and features a golden crust, soft crumb, and a bold cheddar flavor, making it a perfect side for any meal.

Dry Ingredients

  • 2 cups all purpose flour
  • 1 tablespoon baking powder
  • 1 teaspoon salt
  • 1/4 teaspoon baking soda
  • 1/2 teaspoon black pepper (optional)
  • 1 cup sharp cheddar cheese, grated (freshly grated for better melt and flavor)

Wet Ingredients

  • 1/2 cup butter, melted and cooled (or 1/2 cup oil)
  • 1 cup milk or buttermilk (buttermilk adds extra tang)
  • 2 large eggs
  • 1 to 2 tablespoons chopped fresh chives or green onion (optional)

Preparation

  1. Preheat the oven to 350°F (175°C). Grease a 9×5 inch loaf pan.
  2. In a bowl, mix flour, baking powder, salt, baking soda, and pepper.
  3. Stir in the grated cheddar, tossing it in the dry mix so the cheese does not sink.
  4. In another bowl, beat the eggs, then add milk and melted butter. Mix until smooth.
  5. Pour the wet mix into the dry mix and stir just until you see no dry flour. Do not overmix.
  6. Fold in chives if using. Spoon the batter into the prepared loaf pan and smooth the top.
Baking

  1. Bake for 45 to 55 minutes, until a toothpick in the center comes out clean and the top is golden.
  2. Let the loaf cool for 10 minutes in the pan, then turn it out onto a rack to cool more.
  3. Slice and serve warm or at room temperature.

Grate the cheese fresh for better melt and flavor. Do not overmix the batter, or the bread can turn dense. If using pre-shredded cheese, expect a slight change in texture due to anti-clump agents. Can be served warm with butter or as a sandwich with turkey or ham.

Bread, Side Dish
American
Cheddar Cheese Bread, Comfort Food, Easy Bread, Quick Bread, Savory Bread