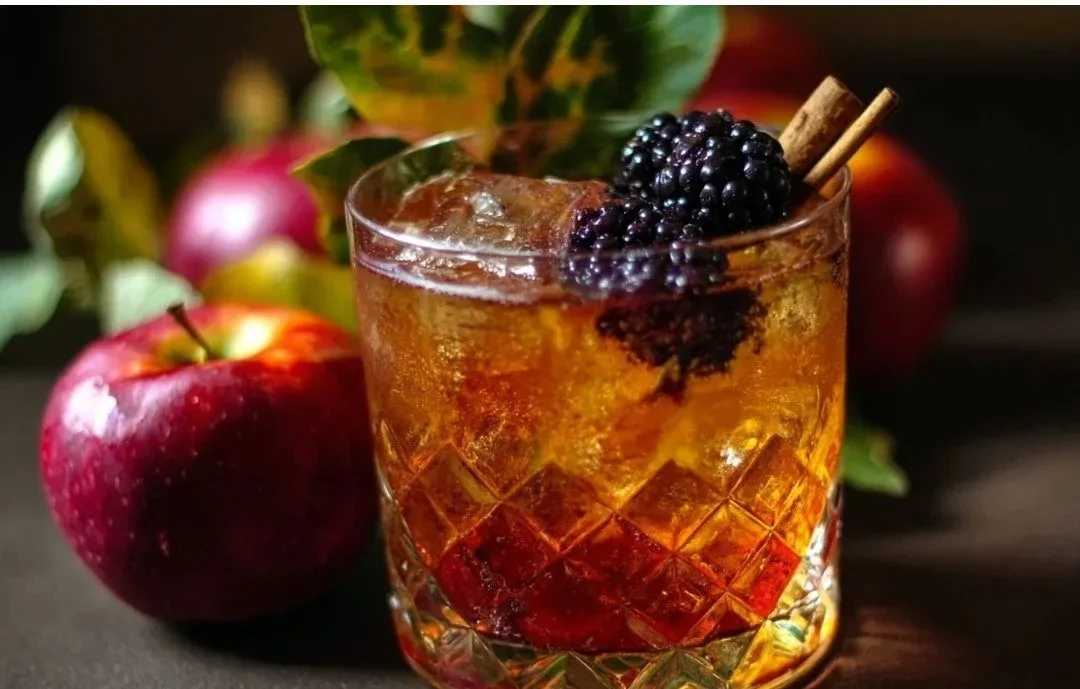
This Poisoned Apple Cider Cocktail is a festive drink perfect for autumn gatherings and Halloween parties. Combining the warmth of apple cider with a hint of spice, this cocktail is sure to impress your guests. The vibrant color and inviting aroma make it a delightful addition to any fall celebration. Simple to make and easy to adjust for everyone’s taste, this cocktail can bring a cheerful spirit to any get-together. With ingredients that evoke the essence of the season, this drink not only tastes great but also looks stunning when served.
Why make this recipe
Creating Poisoned Apple Cider Cocktail is an excellent choice for several reasons. First, it embraces the flavors of fall with warm apple cider, making it comforting and cozy. The combination of sweet and tart flavors from the apple cider pairs beautifully with the kick of alcohol, appealing to a wide range of palates. This cocktail is also visually appealing; the rich, deep color makes it a standout at any gathering.
It’s also a versatile drink. You can easily adjust the ingredients to suit your preferences or dietary needs. Want it sweeter? Add more cider or a splash of simple syrup. Prefer a bolder flavor? A bit of extra cinnamon or a different spirit can change things up. The drink is easy to prepare in batches, which is perfect for parties. It can be served warm or cold, making it a flexible choice for whatever autumn weather you may encounter.
Lastly, making this cocktail allows you to embrace the spirit of the season, celebrating everything that autumn offers. It’s a fun and exciting drink that can create lasting memories with friends and family.
How to make Poisoned Apple Cider Cocktail
To make your own Poisoned Apple Cider Cocktail, you will need a few simple ingredients. Gather fresh apple cider, your choice of whiskey or rum, and a sprinkle of cinnamon. You will also want to have some ice, apple slices for garnish, and optional ingredients like ginger ale for fizz or caramel syrup for sweetness.
Start by heating your apple cider in a pot on the stove. You want it warm but not boiling. This is where the comforting aroma fills your kitchen! Once warm, remove it from the heat. In a cocktail shaker, combine a good measure of your chosen whiskey or rum with a sprinkle of cinnamon and ice. Shake well to mix the flavors.
Next, take a glass and fill it about halfway with the warm apple cider. Then, pour the shaken mixture over the cider. This will create a wonderful blend of flavors. For a touch of sweetness, consider drizzling a bit of caramel syrup into the glass or adding ginger ale for a fizzy twist. Finally, garnish with apple slices or a cinnamon stick for a beautiful finish. Enjoy your delicious Poisoned Apple Cider Cocktail!
How to serve Poisoned Apple Cider Cocktail
Serving your Poisoned Apple Cider Cocktail can be as delightful as making it. First, choose a glass that complements your drink—mugs or decorative glasses work well. If you’re preparing for a party, consider pre-making a large batch in a punch bowl, allowing guests to serve themselves easily.
Warm servings are amazing for chilly evenings; pour the cocktail into pre-warmed glasses to keep the drink hot. If you’re serving it cold, arrange the glasses on a tray with ice for a refreshing option.
For a fun touch, you can rimmer the glasses with cinnamon sugar. To do this, simply moisten the rim with a bit of lemon juice and dip it into a mixture of sugar and ground cinnamon. When serving, always remember to add the apple slices or cinnamon sticks as garnish to enhance the drink’s appearance. It adds a nice aesthetic and invites your guests to enjoy the delightful flavors of the season.
How to store Poisoned Apple Cider Cocktail
If you have leftovers of your Poisoned Apple Cider Cocktail, it’s essential to store it correctly to maintain its flavor. You can keep it in an airtight pitcher or jar in the refrigerator. If the cocktail was made warm, allow it to cool to room temperature before refrigerating to avoid condensation which can dilute the drink.
When stored correctly, your cocktail can last for about 2-3 days in the fridge. However, for the best taste experience, try to consume it within the first day or two. If you need to store it longer, consider separating the apple cider and the alcohol, mixing them fresh later on; this prevents any alterations in taste from ingredients sitting together too long. Always remember to give it a gentle stir or shake before serving again to combine any settled ingredients.
Tips to make Poisoned Apple Cider Cocktail
Making the perfect Poisoned Apple Cider Cocktail comes with a few handy tips. Start with quality apple cider; the fresher it is, the better your drink will taste. If possible, choose a cider that is unfiltered for a more robust apple flavor.
If you enjoy spice, feel free to experiment with adding other spices such as nutmeg or cloves to your cocktail. A fun twist could be adding a splash of cranberry juice to enhance the color and add a bit of tartness.
For garnishing, consider using fresh herbs like rosemary or mint alongside the apple slices; they can bring an unexpected twist to the aroma. Have fun with your serving style! You can use fun cocktail picks for the apple slices or cinnamon sticks to make it more engaging for your guests.
Lastly, don’t forget to taste as you go! Adjusting flavors based on your preference will ensure everyone enjoys this seasonal delight.
Variation
You can create a non-alcoholic version of the Poisoned Apple Cider Cocktail by simply omitting the whiskey or rum. Instead, you can enhance the flavor by adding ginger ale for some fizz or a splash of sparkling water. This makes it a wonderful family-friendly option, while still embracing those delightful autumn flavors.
FAQs
1. Can I make this cocktail ahead of time?
Yes, you can prepare the apple cider portion ahead of time and store it in the refrigerator. Just add the alcohol and any mixers right before serving for the best taste.
2. Is it okay to use store-bought apple cider?
Absolutely! Store-bought apple cider is perfectly fine and can save you time. Just look for a brand that uses natural ingredients for the best flavor.
3. Can I use other spirits instead of whiskey or rum?
Yes, you can experiment with other spirits such as bourbon or spiced rum for a different flavor. Each spirit will give the cocktail its unique twist.
[tasty-recipe id=”4902″]
Poisoned Apple Cider Cocktail

A festive and versatile drink perfect for autumn gatherings, combining apple cider with spices and alcohol for a warm or cold cocktail experience.
Main Ingredients
- 4 cups apple cider (Use fresh, quality cider for the best flavor.)
- 1 cup whiskey or rum (Choose based on your preference.)
- 1 teaspoon ground cinnamon (Add more for a bolder flavor.)
- ice ice (For shakin’ mix and chilling the drink.)
- 1 each apple, sliced (For garnish.)
Optional Ingredients
- 1 cup ginger ale (For a fizzy twist.)
- 2 tablespoons caramel syrup (For sweetness.)
Preparation
- Heat the apple cider in a pot on the stove until warm, but not boiling.
- In a cocktail shaker, combine whiskey or rum with ground cinnamon and ice. Shake well.
Assembly
- Fill glasses about halfway with warm apple cider.
- Pour the shaken mixture over the cider.
- Optional: Drizzle caramel syrup or add ginger ale for sweetness and fizz.
- Garnish with apple slices or a cinnamon stick.
To serve warm, use pre-warmed glasses. For cold servings, arrange glasses with ice. Rimming glasses with cinnamon sugar is a fun optional touch.