Strawberry Shortcake Cookies

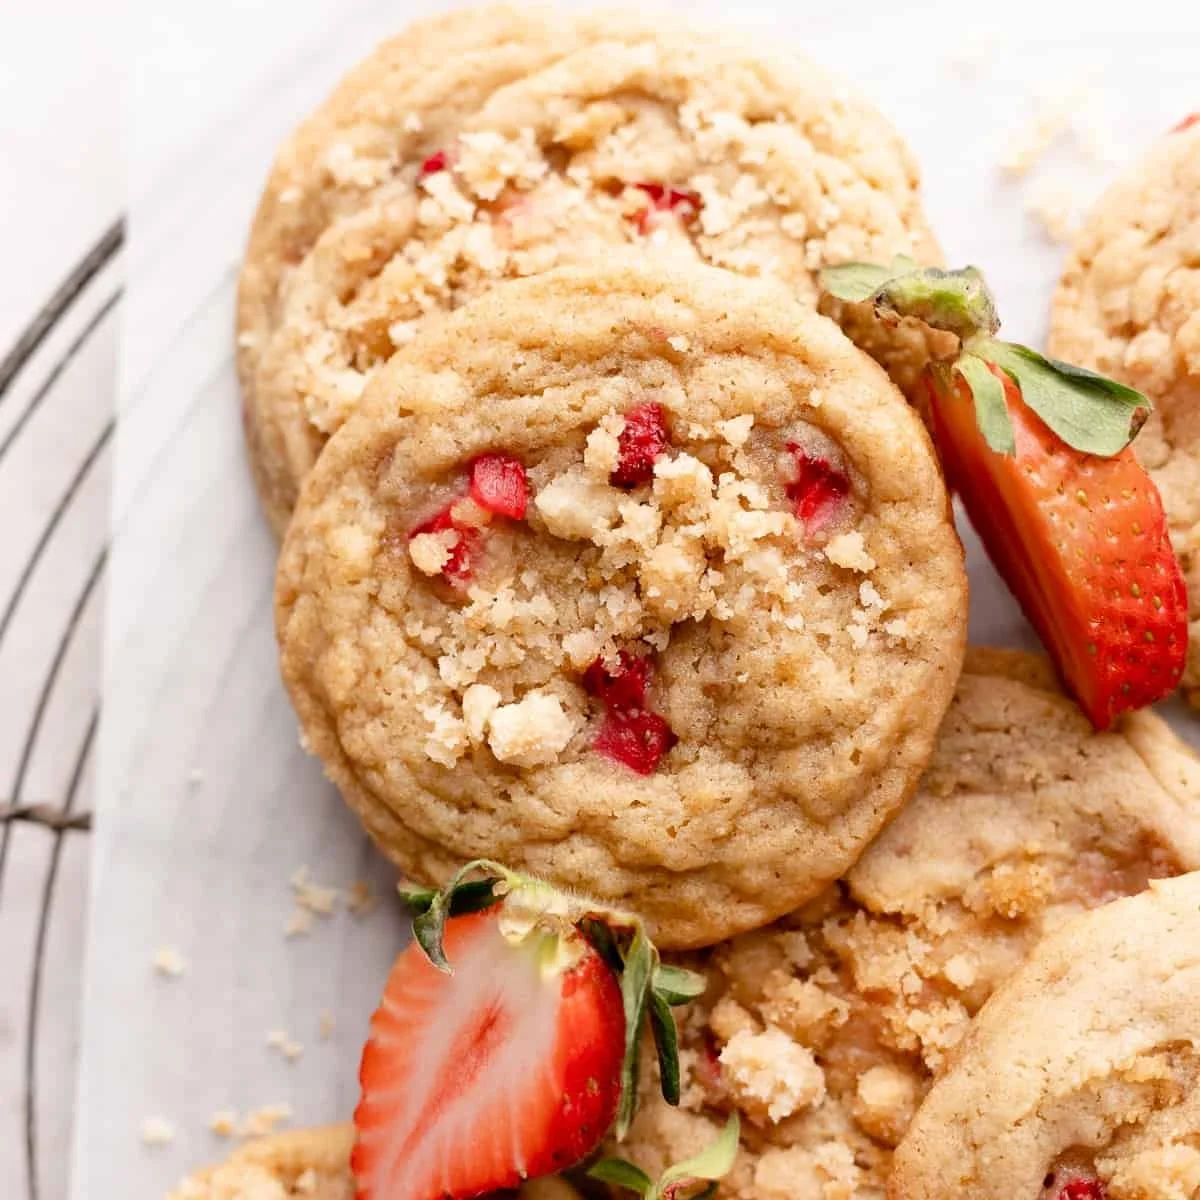
Homemade strawberry shortcake cookies with fresh strawberries and whipped cream

Strawberry Shortcake Cookies are soft, sweet cookies with bright strawberry taste. They feel like a little shortcake in every bite, with a mild vanilla base and real strawberry bits or powder inside. The cookie is gentle, tender, and made for warm afternoons, picnics, or a quick dessert after dinner. If you enjoy other strawberry treats, you might also like the strawberry charlotte cake, and these cookies give a fast, easy way to enjoy that fresh fruit taste. This featured recipe is a crowd-pleaser, sweet but not too sweet, soft, and full of strawberry flavor, and it makes your kitchen smell wonderful. Get ready to bake a batch that disappears fast, and have fun making them yourself.

How to prepare Strawberry Shortcake Cookies

Ingredients

  • 1 cup (225 g) unsalted butter, softened
  • 3/4 cup granulated sugar
  • 1/4 cup powdered sugar
  • 1 large egg
  • 1 teaspoon vanilla extract
  • 2 1/2 cups (310 g) all-purpose flour
  • 1 teaspoon baking powder
  • 1/2 teaspoon salt
  • 1/2 cup freeze-dried strawberries, crushed to powder (or 1/2 cup finely chopped fresh strawberries, well drained)
  • 1/2 cup powdered sugar + 1 tablespoon strawberry jam and a splash of milk for glaze, optional

Directions

  1. Preheat the oven to 350°F (175°C). Line a baking sheet with parchment paper.
  2. In a bowl, cream the softened butter with granulated sugar and powdered sugar until smooth and light.
  3. Beat in the egg and vanilla until mixed well.
  4. In another bowl, whisk flour, baking powder, and salt.
  5. Add the dry mix to the wet mix in two parts, stirring until just combined.
  6. Fold in the crushed freeze-dried strawberries, or gently fold in the chopped fresh strawberries if using.
  7. Scoop tablespoon-sized balls of dough and place them two inches apart on the baking sheet. Flatten slightly with your palm.
  8. Bake 10 to 12 minutes, until the edges look set and the tops stay pale for a soft, shortcake texture.
  9. Let the cookies cool on the sheet for 5 minutes, then move to a rack to cool completely.
  10. If you want a glaze, whisk 1/2 cup powdered sugar with 1 tablespoon strawberry jam and a splash of milk until smooth, then drizzle on cooled cookies.

Strawberry Shortcake Cookies

Why You’ll Love Strawberry Shortcake Cookies

  • Soft, tender texture, like a mini shortcake, not crunchy.
  • Bright strawberry taste from real fruit or freeze-dried powder.
  • Easy to make with simple pantry ingredients.
  • Great for summer picnics, bake sales, or a quick treat any day.
  • They pair well with tea, milk, or a scoop of vanilla ice cream.

Tips for success

  • Use freeze-dried strawberries for strong color and flavor without extra moisture.
  • If you use fresh strawberries, drain them well and pat dry, dry them in a paper towel to avoid soggy dough.
  • Chill dough 15 minutes if it feels too soft for shaping.
  • Do not overbake, bake until set but still pale for the best soft texture.
  • Measure flour by spooning into the cup and leveling, do not pack it down, this keeps cookies tender.
  • Cool fully before glazing so the glaze does not melt off.

Serving Suggestions

  • Serve with a cup of tea or cold milk.
  • Stack two cookies with a thin spread of strawberry jam and a small spoon of whipped cream for a sandwich treat.
  • Top warm cookies with a scoop of vanilla ice cream for a quick dessert.
  • Pack in a picnic box with fresh berries for a pretty summer treat.

Strawberry Shortcake Cookies

FAQs

Q: Can I use fresh strawberries instead of freeze-dried? A: Yes, you can. Chop them small and pat dry. Fresh strawberries add moisture, so dough may be softer. Use sparingly and chill dough if needed.

Q: How long do these cookies keep? A: Store in an airtight container at room temperature for 2 to 3 days, or refrigerate up to a week. Freeze baked cookies for up to 2 months.

Q: Can I make the dough ahead? A: Yes, you can make dough and chill it for up to 48 hours, or freeze shaped dough for up to 1 month. Bake from frozen, add a minute or two to baking time.

Q: Can I make these gluten free? A: Use a 1:1 gluten free flour blend that includes xanthan gum for the best result. Texture may vary slightly but should still be good.

Q: How do I make a stronger strawberry flavor? A: Add a bit more freeze-dried strawberry powder, or swirl a small amount of strawberry jam into the dough before baking.

Conclusion

If you want a quick, soft, and fruity cookie that tastes like strawberry shortcake, this recipe is a winner and great for family and friends. For another take on strawberry desserts and more ideas, check this detailed Strawberry Shortcake Cookies – Kitchen Confidante® recipe.

Strawberry Shortcake Cookies

Soft, sweet cookies bursting with bright strawberry flavor, reminiscent of strawberry shortcake, perfect for warm afternoons and picnics.

For the cookies

  • 1 cup unsalted butter, softened
  • 3/4 cup granulated sugar
  • 1/4 cup powdered sugar
  • 1 large egg
  • 1 teaspoon vanilla extract
  • 2 1/2 cups all-purpose flour
  • 1 teaspoon baking powder
  • 1/2 teaspoon salt
  • 1/2 cup freeze-dried strawberries, crushed to powder (or finely chopped fresh strawberries, well drained)

For the glaze (optional)

  • 1/2 cup powdered sugar
  • 1 tablespoon strawberry jam
  • a splash milk (for thin consistency)

Preparation

  1. Preheat the oven to 350°F (175°C). Line a baking sheet with parchment paper.
  2. In a bowl, cream the softened butter with granulated sugar and powdered sugar until smooth and light.
  3. Beat in the egg and vanilla until well mixed.
  4. In another bowl, whisk together flour, baking powder, and salt.
  5. Add the dry mix to the wet mix in two parts, stirring until just combined.
  6. Fold in the crushed freeze-dried strawberries or gently fold in the chopped fresh strawberries if using.

Baking

  1. Scoop tablespoon-sized balls of dough and place them two inches apart on the baking sheet. Flatten slightly with your palm.
  2. Bake for 10 to 12 minutes, until the edges look set and the tops stay pale for a soft, shortcake texture.
  3. Let the cookies cool on the sheet for 5 minutes, then move to a rack to cool completely.

Glazing (optional)

  1. If you want a glaze, whisk together 1/2 cup powdered sugar with 1 tablespoon strawberry jam and a splash of milk until smooth, then drizzle on cooled cookies.

Use freeze-dried strawberries for strong color and flavor without extra moisture. Chill dough 15 minutes if it feels too soft for shaping. Do not overbake for the best soft texture.
Dessert, Snack
American
Easy Cookies, picnic treat, shortcake cookies, strawberry cookies, Summer Dessert

Oatmeal Cream Pie Bars

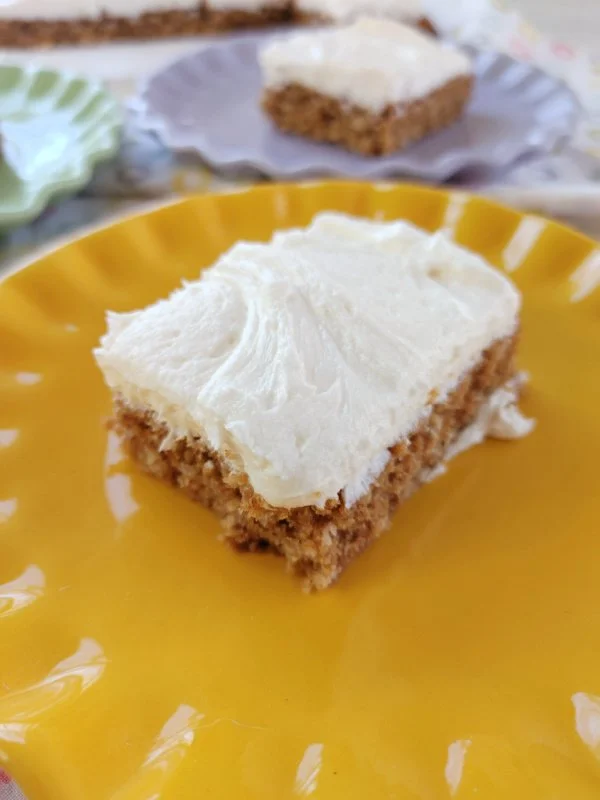
Delicious Oatmeal Cream Pie Bars on a plate

I love a treat that feels like a hug, and these Oatmeal Cream Pie Bars do just that. They mix soft, chewy oatmeal cookie flavor with a sweet, creamy filling, all in one easy bar. This recipe turns a classic sandwich cookie into a pan-friendly dessert that feeds a crowd and makes everyone smile. If you enjoy sweet, soft bars with a creamy center, you might also like this no-bake chocolate cream pie. Get ready, these bars are simple, comforting, and fun to share.

How to prepare Oatmeal Cream Pie Bars.

Ingredients

  • 1 cup (2 sticks) unsalted butter, softened
  • 1 cup packed brown sugar
  • 1/2 cup granulated sugar
  • 2 large eggs
  • 1 teaspoon vanilla extract
  • 1 1/2 cups all-purpose flour
  • 1 teaspoon baking soda
  • 1/2 teaspoon salt
  • 3 cups old-fashioned rolled oats

For the filling

  • 1/2 cup (1 stick) unsalted butter, softened
  • 1 1/2 cups powdered sugar
  • 1 teaspoon vanilla extract
  • 3/4 cup marshmallow fluff, or whipped cream cheese for a tangy version

Directions

  1. Preheat your oven to 350°F (175°C). Line a 9×13 inch pan with parchment paper, leaving an overhang to lift the bars later.
  2. In a large bowl, beat the butter and sugars until creamy. Add eggs and vanilla, beat until smooth.
  3. In a separate bowl, stir together flour, baking soda, and salt. Add the dry mix to the wet mix and stir until just combined. Fold in the oats.
  4. Press about half of the oat dough evenly into the prepared pan to form the base. Bake for 10 to 12 minutes, until lightly golden at the edges. Remove from oven and let cool slightly.
  5. While the base cools, make the filling. Beat the softened butter with powdered sugar and vanilla until smooth. Fold in the marshmallow fluff until you have a smooth, spreadable cream.
  6. Spread the filling evenly over the warm base. Crumble the remaining oat dough on top and press gently so it sticks to the filling.
  7. Return the pan to the oven and bake 12 to 15 minutes, until the top is lightly golden. Cool completely in the pan, then lift out using the parchment overhang and cut into bars. Chill a bit for cleaner slices, if you like.

Oatmeal Cream Pie Bars

Why You’ll Love Oatmeal Cream Pie Bars.

  • They taste like the classic oatmeal cream pie, but in an easy pan dessert form.
  • The oats make the bars chewy, the filling stays soft and sweet.
  • You can bake once and serve many, great for parties, school lunches, or a simple snack.
  • You can change the filling to marshmallow, cream cheese, or simple buttercream to match your taste.

Tips for success

  • Press the base evenly into the pan, that helps bars hold together.
  • If the top dough is too soft to crumble, chill it for 10 minutes before topping.
  • Let the pan cool fully before slicing, or use a warm, clean knife for neater cuts.
  • Use old-fashioned oats for texture, quick oats make it too soft.
  • Store bars in an airtight container, they keep well at room temperature for 2 days, or in the fridge for a week.

Serving Suggestions

  • Serve with a glass of cold milk, coffee, or tea.
  • Cut small squares for a party platter, or larger bars for dessert.
  • Add a sprinkle of cinnamon or a light dusting of powdered sugar on top.
  • Pair with fresh fruit for a balanced plate.

Oatmeal Cream Pie Bars

FAQs

Q: Can I make these gluten free?

A: Yes, use a 1-to-1 gluten free flour blend and make sure your oats are certified gluten free.

Q: Can I freeze the bars?

A: Yes, wrap tightly and freeze up to 2 months. Thaw in the fridge before serving.

Q: Can I use a different filling?

A: Yes, you can swap marshmallow fluff for a simple buttercream or a cream cheese frosting for a tangy twist.

Q: How long do they keep fresh?

A: At room temperature in an airtight container, about 2 days. In the fridge, about one week.

Q: Can I make them in a smaller pan?

A: Yes, reduce bake time slightly for a thicker bar, check doneness with a light golden top.

Oatmeal Cream Pie Bars

These Oatmeal Cream Pie Bars are a delightful blend of soft, chewy oatmeal cookies with a creamy filling, perfect for sharing with a crowd.

For the oatmeal cookie base

  • 1 cup unsalted butter, softened (2 sticks)
  • 1 cup packed brown sugar
  • 1/2 cup granulated sugar
  • 2 large eggs
  • 1 teaspoon vanilla extract
  • 1 1/2 cups all-purpose flour
  • 1 teaspoon baking soda
  • 1/2 teaspoon salt
  • 3 cups old-fashioned rolled oats

For the filling

  • 1/2 cup unsalted butter, softened (1 stick)
  • 1 1/2 cups powdered sugar
  • 1 teaspoon vanilla extract
  • 3/4 cup marshmallow fluff (or whipped cream cheese for a tangy version)

Preparation

  1. Preheat your oven to 350°F (175°C). Line a 9×13 inch pan with parchment paper, leaving an overhang to lift the bars later.
  2. In a large bowl, beat the butter and sugars until creamy. Add eggs and vanilla, beat until smooth.
  3. In a separate bowl, stir together flour, baking soda, and salt. Add the dry mix to the wet mix and stir until just combined. Fold in the oats.
  4. Press about half of the oat dough evenly into the prepared pan to form the base. Bake for 10 to 12 minutes, until lightly golden at the edges. Remove from oven and let cool slightly.

Filling and Assembly

  1. While the base cools, make the filling. Beat the softened butter with powdered sugar and vanilla until smooth. Fold in the marshmallow fluff until you have a smooth, spreadable cream.
  2. Spread the filling evenly over the warm base. Crumble the remaining oat dough on top and press gently so it sticks to the filling.
  3. Return the pan to the oven and bake 12 to 15 minutes, until the top is lightly golden. Cool completely in the pan, then lift out using the parchment overhang and cut into bars. Chill a bit for cleaner slices, if you like.

Press the base evenly into the pan to help the bars hold together. If the top dough is too soft to crumble, chill it for 10 minutes before topping. Let the pan cool fully before slicing, or use a warm, clean knife for neater cuts. Use old-fashioned oats for texture, quick oats make it too soft. Store bars in an airtight container, they keep well at room temperature for 2 days, or in the fridge for a week.

Dessert, Snack
American
Baking, Comfort Food, Dessert Bars, Oatmeal Cream Pie Bars

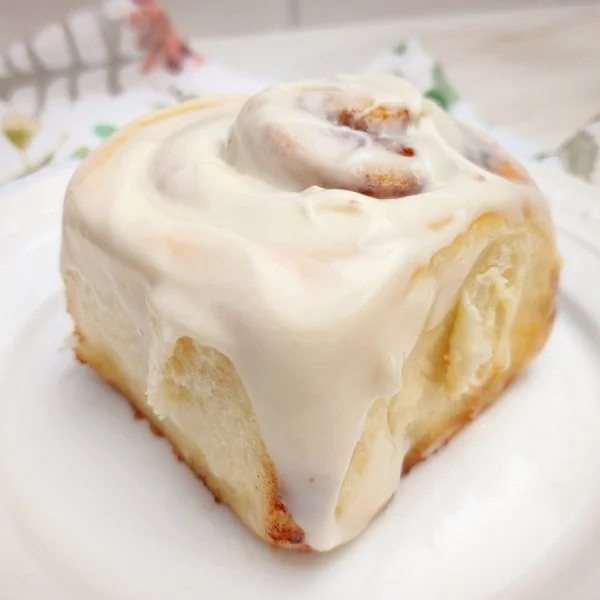
Delicious Cinnamon Rolls with Cream Cheese Icing

Delicious cinnamon rolls drizzled with cream cheese icing on a wooden table

I love the warm smell of cinnamon in the morning, and these rolls make the whole house feel cozy. Soft dough, sweet cinnamon, and a tangy cream cheese icing come together in a simple way, thanks to the bread machine. This version, The BEST Bread Machine Cinnamon Rolls with Cream Cheese Icing, is easy to make and will please a crowd, whether you bake them for a Sunday breakfast or a special treat. If you like cream cheese desserts, try the easy baked cream cheese rangoon rolls recipe for another tasty idea. Get ready to roll, bake, and enjoy a sticky, gooey bite that makes mornings better.

How to prepare Cinnamon Rolls with Cream Cheese Icing

Ingredients

  • 1 cup warm milk (about 110°F, warm to touch)
  • 1/3 cup butter, melted
  • 1 egg
  • 4 cups all purpose flour
  • 1/3 cup sugar
  • 1 teaspoon salt
  • 2 1/4 teaspoons active dry yeast (one packet)
  • Filling, 1/2 cup butter soft, 3/4 cup brown sugar, 2 tablespoons ground cinnamon
  • Cream cheese icing, 4 oz cream cheese soft, 1/4 cup butter soft, 1 cup powdered sugar, 1/2 teaspoon vanilla, 1-2 tablespoons milk

Directions

  1. Add dough ingredients to the bread machine pan in the order your machine suggests, usually liquids first, then flour, then yeast. Start the dough cycle.
  2. When the dough cycle finishes, remove dough to a lightly floured surface. Roll into a rectangle about 15×10 inches.
  3. Spread the softened 1/2 cup butter over the dough. Mix brown sugar and cinnamon, sprinkle evenly over the butter.
  4. Tightly roll the dough from the long side into a log. Pinch the seam to seal.
  5. Cut into 12 equal pieces with a sharp knife or dental floss. Place rolls in a greased 9×13 inch pan.
  6. Cover with a clean towel, let rise in a warm place until puffy, about 30 to 45 minutes.
  7. Preheat the oven to 350°F. Bake rolls for 20 to 25 minutes, until golden and cooked through.
  8. While rolls bake, beat cream cheese and butter until smooth. Add powdered sugar and vanilla, mix. Add milk as needed for spreadable texture.
  9. Remove rolls from oven, let cool 5 minutes, then spread cream cheese icing over warm rolls. Serve warm.

The BEST Bread Machine Cinnamon Rolls with Cream Cheese Icing

Why You’ll Love Cinnamon Rolls with Cream Cheese Icing

  • Easy, the bread machine does the hard work of mixing and rising the dough.
  • Soft and tender rolls with a sweet cinnamon center.
  • Cream cheese icing adds a tangy, rich finish that cuts the sweetness.
  • Great for guests, they look bakery-made but take less effort.
  • You can make them ahead, freeze, or bake fresh for a warm treat.

Tips for success

  • Use warm, not hot, milk, about 105 to 115°F, so yeast wakes up without dying.
  • Measure flour by spooning it into the cup and leveling, avoid packing.
  • Make sure your yeast is fresh, it should foam when mixed with warm liquid and sugar if you test it.
  • Roll the dough evenly so all rolls bake the same.
  • If rolls brown too fast, cover loosely with foil for last 5 to 10 minutes.
  • For thicker icing, add less milk, for thinner icing, add more a teaspoon at a time.

Serving Suggestions

  • Serve warm with a cup of coffee or hot tea.
  • Add sliced fruit on the side, like berries or orange segments, to balance the sweet roll.
  • Make mini rolls for a party, or bake in a muffin tin for single servings.
  • Pair with bacon or sausage for a full breakfast plate.
  • Leftovers warm well in a microwave for 10 to 15 seconds.

The BEST Bread Machine Cinnamon Rolls with Cream Cheese Icing

FAQs

Q, Can I use a stand mixer or mix by hand instead of a bread machine?

A, Yes, you can. Mix and knead the dough until smooth, then follow the same rise and bake steps.

Q, Can I freeze the rolls?

A, Yes, freeze before the second rise or after baking. Thaw before baking or reheating, then add icing when warm.

Q, How long do they stay fresh?

A, Keep in an airtight container at room temperature for 2 days, or refrigerate up to 4 days. Warm before serving.

Q, Can I use instant yeast?

A, Yes, you can use instant yeast. You may add it directly to the flour and use the dough cycle as usual.

Q, Can I make smaller or larger rolls?

A, Yes, change the number of cuts for size. Baking time will change, check often to avoid overbaking.

Cinnamon Rolls with Cream Cheese Icing

These soft dough cinnamon rolls with sweet cinnamon filling and tangy cream cheese icing are easy to make in a bread machine and perfect for any occasion.

Dough Ingredients

  • 1 cup warm milk (about 110°F, warm to touch) (Use warm milk, not hot, to activate yeast.)
  • 1/3 cup butter, melted
  • 1 egg
  • 4 cups all purpose flour (Measure by spooning into the cup and leveling.)
  • 1/3 cup sugar
  • 1 teaspoon salt
  • 2 1/4 teaspoons active dry yeast (one packet) (Ensure yeast is fresh and foams with warm liquid.)

Filling Ingredients

  • 1/2 cup butter, soft (Spread over the dough.)
  • 3/4 cup brown sugar
  • 2 tablespoons ground cinnamon

Cream Cheese Icing

  • 4 oz cream cheese, soft
  • 1/4 cup butter, soft
  • 1 cup powdered sugar
  • 1/2 teaspoon vanilla
  • 1-2 tablespoons milk (Add as needed for spreadable texture.)

Preparation

  1. Add dough ingredients to the bread machine pan in the order your machine suggests, usually liquids first, then flour, then yeast. Start the dough cycle.
  2. When the dough cycle finishes, remove the dough to a lightly floured surface. Roll into a rectangle about 15 x 10 inches.
  3. Spread the softened 1/2 cup of butter over the dough. Mix brown sugar and cinnamon, sprinkle evenly over the butter.
  4. Tightly roll the dough from the long side into a log. Pinch the seam to seal.
  5. Cut into 12 equal pieces with a sharp knife or dental floss. Place rolls in a greased 9 x 13 inch pan.
  6. Cover with a clean towel, let rise in a warm place until puffy, about 30 to 45 minutes.

Baking

  1. Preheat the oven to 350°F. Bake rolls for 20 to 25 minutes, until golden and cooked through.

Icing

  1. While rolls bake, beat cream cheese and butter until smooth. Add powdered sugar and vanilla, mix. Add milk as needed for spreadable texture.
  2. Remove rolls from oven, let cool for 5 minutes, then spread cream cheese icing over warm rolls. Serve warm.

These rolls are great for guests and can be made ahead. Store in an airtight container for 2 days at room temperature or refrigerate for up to 4 days.

Breakfast, Snack
American
Baked Goods, Bread Machine, Cinnamon Rolls, Cream Cheese Icing, Easy Recipe

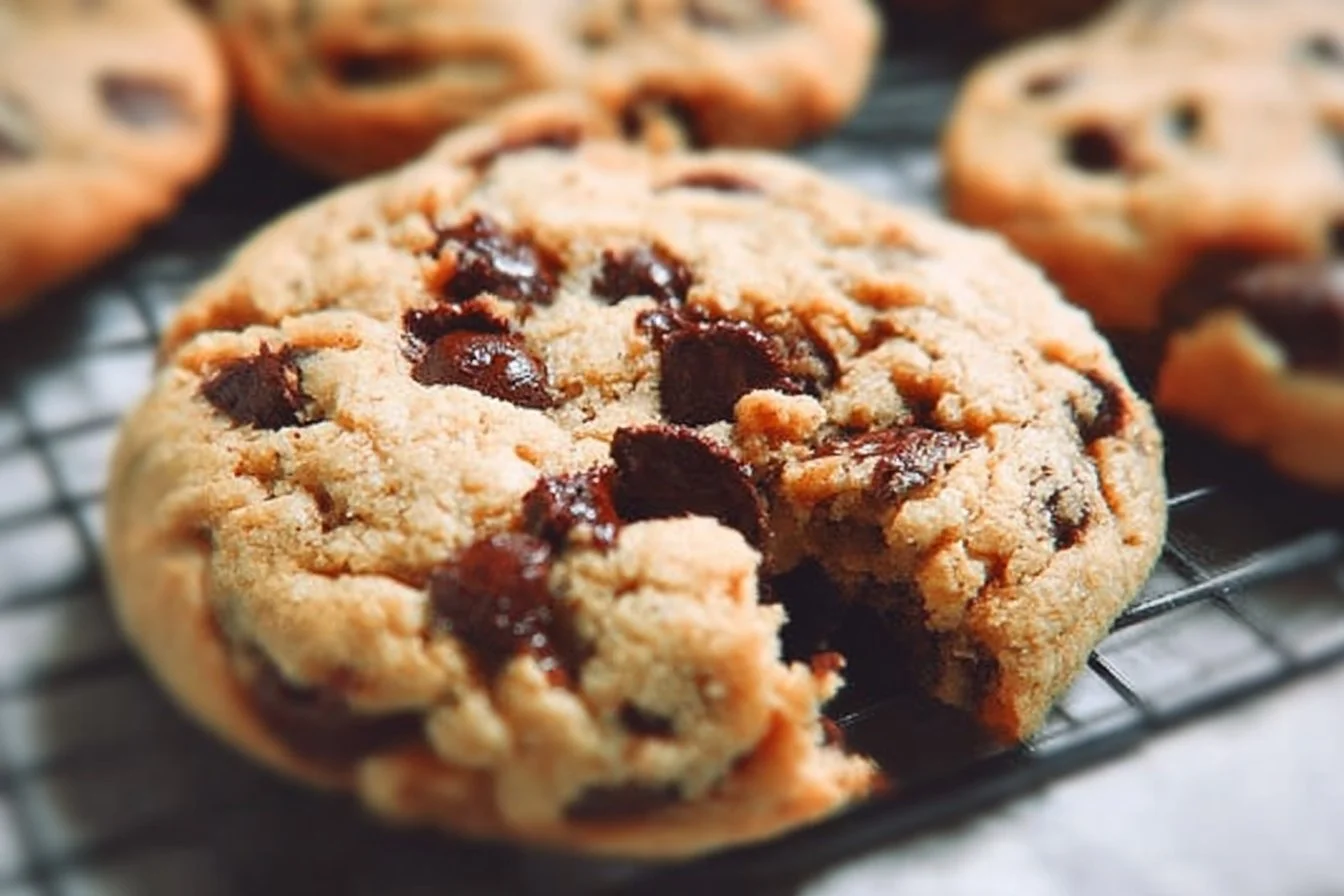
Soft Chocolate Chip Cookies

Deliciously soft chocolate chip cookies stacked on a plate

Soft Chocolate Chip Cookies are truly a timeless classic that brings joy to any gathering. With their warm, gooey centers and slightly crisp edges, these cookies appeal to both kids and adults alike. The rich aroma of melting chocolate combined with buttery goodness fills your kitchen and warms your heart. This recipe is a real crowd-pleaser, perfect for cookie lovers everywhere. Whether you need a sweet treat for a party or just want to indulge yourself, these cookies are the way to go. Get ready to dive into the deliciousness of Soft Chocolate Chip Cookies, and prepare to make some sweet memories!

How to Prepare Soft Chocolate Chip Cookies

To prepare Soft Chocolate Chip Cookies, start by gathering your ingredients. You will need 2 ¼ cups of all-purpose flour, 1 teaspoon of baking soda, ½ teaspoon of salt, 1 cup of unsalted butter (softened), ¾ cup of granulated sugar, ¾ cup of brown sugar, 1 teaspoon of vanilla extract, and 2 large eggs. Don’t forget the star of the show, 2 cups of semi-sweet chocolate chips!

First, preheat your oven to 350°F (175°C) and line a baking sheet with parchment paper. In a bowl, combine the flour, baking soda, and salt. In another bowl, beat the softened butter, granulated sugar, brown sugar, and vanilla until creamy. Add the eggs, one at a time, mixing well. Gradually add the flour mixture to the butter mix, then fold in the chocolate chips.

Using a spoon, scoop out dough balls and place them on the prepared baking sheet, spacing them about 2 inches apart. Bake for 10-12 minutes, or until the edges are golden and the centers are soft. Let them cool for a few minutes before transferring them to a wire rack. Enjoy the soft, melty goodness of your Soft Chocolate Chip Cookies.

Why You’ll Love Soft Chocolate Chip Cookies

You will absolutely love Soft Chocolate Chip Cookies for their irresistible texture and taste. The chewy centers are packed with delightful pockets of gooey chocolate. Each bite is a sweet combination of buttery flavor and crunchy edges. They are perfect for sharing, but beware, they are so good that you might want to keep them all to yourself! Plus, they are super easy to make. Even novice bakers can whip them up quickly. These cookies warm up beautifully, making them a perfect choice for any occasion, from cozy family nights to exciting gatherings with friends.

Tips for Success

To ensure your Soft Chocolate Chip Cookies turn out perfectly every time, here are some handy tips. First, make sure your butter is really soft but not melted; this will help create the perfect texture. When measuring flour, spoon it into your measuring cup and level it off for accuracy. Avoid overmixing the dough, as this can lead to tougher cookies. For extra softness, consider chilling the dough for at least 30 minutes before baking. This helps prevent spreading and keeps the cookies nice and thick. Lastly, remember to let the cookies cool slightly on the baking sheet before moving them to a wire rack. Following these tips will help you create delectable Soft Chocolate Chip Cookies that everyone will rave about!

Serving Suggestions

Soft Chocolate Chip Cookies are versatile and can be enjoyed in various ways. Serve them warm with a scoop of vanilla ice cream for an indulgent dessert. If you want a fun twist, try making ice cream sandwiches using two cookies and your favorite ice cream flavor. Pair the cookies with a glass of cold milk or a cup of hot coffee for a delightful treat any time of day. Want to impress your friends? Serve the cookies alongside fresh fruit or chocolate-covered strawberries for an elegant touch. There’s no wrong way to enjoy these cookies, so get creative and have fun!

FAQs

1. Can I use dark chocolate chips instead of semi-sweet?

Yes! Dark chocolate chips will add a richer flavor to your cookies, and they will still be delicious.

2. How do I store Soft Chocolate Chip Cookies?

Store the cookies in an airtight container at room temperature for up to a week. If you want to keep them longer, freeze them in a freezer-safe bag for up to three months.

3. Can I add nuts to the cookie dough?

Absolutely! Chopped walnuts or pecans make a great addition to your Soft Chocolate Chip Cookies for some extra crunch. Just fold them in with the chocolate chips.

Chocolate Chip Cookies

Delightfully soft and chewy chocolate chip cookies with a rich and gooey center, perfect for any gathering or a treat at home.

Dry Ingredients

  • 2 1/4 cups all-purpose flour
  • 1/2 teaspoon baking soda
  • 1 teaspoon salt

Wet Ingredients

  • 1 cup unsalted butter, softened (Make sure it is at room temperature)
  • 3/4 cup granulated sugar
  • 3/4 cup brown sugar, packed
  • 1 teaspoon vanilla extract
  • 2 large eggs (Make sure they are at room temperature)

Add-ins

  • 2 cups chocolate chips (Use semi-sweet or dark chocolate chips based on preference)

Preparation

  1. Preheat your oven to 350°F (175°C).
  2. In a bowl, whisk together the flour and baking soda, then set aside.
  3. In a separate large bowl, cream the softened butter, granulated sugar, brown sugar, and salt until smooth.
  4. Add the vanilla extract and eggs, mixing until well combined.
  5. Gradually mix in the dry ingredients, then fold in the chocolate chips.
  6. Drop rounded tablespoons of dough onto a baking sheet lined with parchment paper.

Baking

  1. Bake for 10-12 minutes, or until the edges are lightly golden.
  2. Let the cookies cool on the baking sheet for a few minutes before transferring them to a wire rack.

For success, ensure room temperature ingredients, avoid overbaking, and chill the dough for thicker cookies.

Dessert, Snack
American
Baking, Chocolate Chip Cookies, dessert recipe, Easy Cookies, soft batch cookies

Cheesecake Bites

Delicious cheesecake bites perfect for dessert lovers

Cheesecake Bites are small, creamy, and sweet treats that everyone will love. They feel special, but they are easy to make. These little cheesecakes have a crunchy base, a soft cream cheese center, and you can top them with fruit, chocolate, or jam. They work well for parties, snacks, or a simple dessert after dinner.

The recipe here is a crowd-pleaser, with a rich, smooth taste and a light, bite-sized shape. You get all the flavor of a full cheesecake, in small pieces that are easy to share. Ready to bake a tray of smiles, and maybe sneak one or two before guests arrive?

How to prepare Cheesecake Bites

  1. Preheat your oven to 325°F, and line a mini muffin tin with paper liners or spray with pan spray.
  2. Make the crust by crushing about 1 cup graham crackers into fine crumbs, mix with 2 tablespoons sugar, and 3 tablespoons melted butter. Press a small spoonful into the bottom of each mini cup.
  3. In a bowl, beat 8 ounces room temperature cream cheese until smooth. Add 1/3 cup sugar and 1 teaspoon vanilla, beat until creamy. Add one egg, and mix until just combined.
  4. Spoon about a tablespoon of filling over each crust, filling cups almost to the top. Tap the pan gently to remove air bubbles.
  5. Bake 12 to 18 minutes, until edges are set and centers still jiggle a little. Let cool on a rack for 30 minutes.
  6. Chill in the fridge for at least 2 hours before removing from the tin. Top with fresh berries, jam, or chocolate before serving.

Cheesecake Bites

Why You’ll Love Cheesecake Bites

  • They are small and easy to eat, perfect for parties and kids.
  • The rich cream cheese filling tastes like classic cheesecake, but in a quick bite.
  • You can change the toppings, use different crusts, and make them your own.
  • They store well in the fridge, so you can make them ahead and save time.

Tips for success

  • Use room temperature cream cheese, it mixes smooth and makes no lumps.
  • Press the crust firmly into the cups so it holds when you serve.
  • Do not overbake, the centers should still jiggle a little when you take them out. They set more as they cool.
  • Chill well before serving, cold cheesecake holds shape and tastes best.
  • If you want no-bake, skip the oven and chill the filling on a crumb crust until firm.

Serving Suggestions

  • Top with fresh strawberries, blueberries, or raspberries.
  • Drizzle with chocolate sauce or caramel.
  • Add a small spoon of lemon curd or fruit jam for extra flavor.
  • Serve on a small platter for parties, or pack a few in a lunch box for a sweet treat.

Cheesecake Bites

FAQs

Q: Can I make Cheesecake Bites ahead of time?
A: Yes, make them a day ahead and keep them covered in the fridge.

Q: Can I freeze them?
A: Yes, freeze in a single layer on a tray, then store in a container. Thaw in the fridge before serving.

Q: Can I use low-fat cream cheese?
A: Yes, you can, but the texture and flavor will be slightly different, and they may be less rich.

Q: How long do they last in the fridge?
A: They stay good for 3 to 5 days when covered.

Conclusion

If you want another simple take on mini cheesecakes, try this helpful guide for small portions at Cheesecake Bites (in mini muffin tins) – Danas Table.

Cheesecake Bites

These Cheesecake Bites are small, creamy, and sweet treats with a crunchy base and soft cream cheese center, perfect for parties and snacks.

For the crust

  • 1 cup graham cracker crumbs (Crushed graham crackers)
  • 2 tablespoons sugar
  • 3 tablespoons melted butter

For the filling

  • 8 ounces cream cheese (Room temperature)
  • 1/3 cup sugar
  • 1 teaspoon vanilla extract
  • 1 large egg

Toppings

  • Fresh berries (Strawberries, blueberries, or raspberries)
  • Chocolate sauce (For drizzling)
  • Caramel sauce (For drizzling)
  • Fruit jam (Optional for extra flavor)

Preparation

  1. Preheat your oven to 325°F (163°C), and line a mini muffin tin with paper liners or spray with pan spray.
  2. Make the crust by crushing about 1 cup of graham crackers into fine crumbs, mix with 2 tablespoons of sugar, and 3 tablespoons of melted butter.
  3. Press a small spoonful of the crust mixture into the bottom of each mini cup.
  4. In a bowl, beat 8 ounces of room temperature cream cheese until smooth.
  5. Add 1/3 cup of sugar and 1 teaspoon of vanilla, beat until creamy.
  6. Add one egg, and mix until just combined.
  7. Spoon about a tablespoon of filling over each crust, filling cups almost to the top.
  8. Tap the pan gently to remove air bubbles.

Baking

  1. Bake for 12 to 18 minutes, until edges are set and centers still jiggle a little.
  2. Let cool on a rack for 30 minutes.

Chilling

  1. Chill in the fridge for at least 2 hours before removing from the tin.
  2. Top with fresh berries, jam, or chocolate before serving.

Use room temperature cream cheese for smooth mixing. Press the crust firmly into the cups so it holds when you serve. Do not overbake, the centers should still jiggle a little when you take them out. Chill well before serving as cold cheesecake holds shape and tastes best.

Dessert, Party
American
Cheesecake Bites, easy dessert, Mini Cheesecakes, No-Bake Option, Party Treats

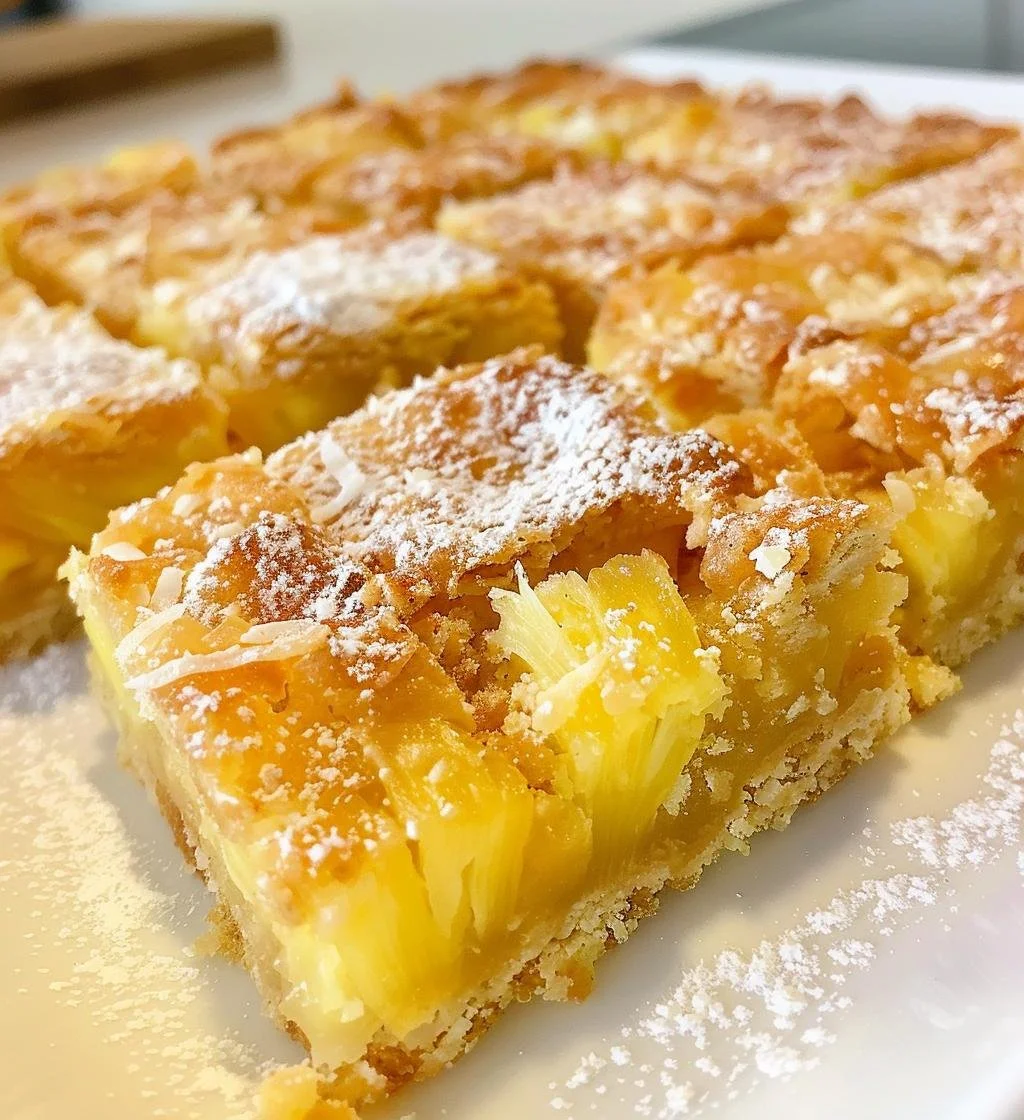
Pineapple Bliss Bars: 7 Sweet Reasons to Indulge Today

Delicious Pineapple Bliss Bars showcasing a tropical dessert delight

How to Prepare Pineapple Bliss Bars

Making Pineapple Bliss Bars is quick and easy! Here’s how to whip up these delicious treats in no time. You’ll need some simple ingredients like crushed pineapple, butter, and sugar. Just follow these steps:

  1. Preheat your oven to 350°F (175°C).
  2. In a bowl, combine crushed pineapple, melted butter, and sugar. Mix well.
  3. Add in flour, baking powder, and a pinch of salt. Stir until everything is combined.
  4. Pour the mixture into a greased baking pan and spread it evenly.
  5. Bake for about 25-30 minutes or until golden brown.
  6. Let it cool, then cut into bars and enjoy!

Pineapple Bliss Bars: 7 Sweet Reasons to Indulge Today

Why You’ll Love Pineapple Bliss Bars

Pineapple Bliss Bars are more than just a dessert, they’re a burst of sunshine in your mouth! With their sweet pineapple flavor and buttery texture, every bite feels like a mini vacation. Plus, they are super easy to share at parties or potlucks, making them a perfect crowd-pleaser. If you love tropical treats, this recipe is a must-try — you won’t regret it!

Tips for Success

  1. Use Fresh Pineapple: If you prefer, you can use fresh pineapple instead of canned. Just chop it finely and make sure to drain excess moisture.
  2. Don’t Overmix: When combining the ingredients, mix just until everything is nicely incorporated. Overmixing can make the bars tough.
  3. Cool Completely: Let the bars cool fully before cutting them. This helps them hold together nicely.

Serving Suggestions

Pineapple Bliss Bars can be enjoyed in many ways! Serve them with a scoop of vanilla ice cream for a delightful dessert. You can also dust them with powdered sugar for a pretty touch. For a tropical twist, add a dollop of whipped cream or fresh fruit on top. Enjoy them at breakfast, as an afternoon snack, or after dinner, they’re good any time of the day!

FAQs

Can I use other fruits?
Definitely! While pineapple is the star here, you can try using mashed bananas or other fruits if you prefer.

How should I store the bars?
Store them in an airtight container at room temperature for up to a week. You can also refrigerate them for longer freshness.

Can I freeze Pineapple Bliss Bars?
Yes, you can freeze them! Wrap individual bars in plastic wrap and then place them in a freezer bag. They should stay fresh for up to 3 months.

Indulging in Pineapple Bliss Bars is just a recipe away, so gather your ingredients and get ready to whip up this sweet delight!

Pineapple Bliss Bars

A delightful tropical treat with sweet pineapple flavor and buttery texture, perfect for any occasion.

Main Ingredients

  • 1 can crushed pineapple, drained (Use fresh pineapple if preferred, chopped finely.)
  • 1/2 cup butter, melted (Melted for easy mixing.)
  • 1 cup sugar
  • 1 cup all-purpose flour
  • 1 teaspoon baking powder
  • 1 pinch salt

Preparation

  1. Preheat your oven to 350°F (175°C).
  2. In a bowl, combine crushed pineapple, melted butter, and sugar. Mix well.
  3. Add in flour, baking powder, and a pinch of salt. Stir until everything is combined.
  4. Pour the mixture into a greased baking pan and spread it evenly.
  5. Bake for about 25-30 minutes or until golden brown.
  6. Let it cool, then cut into bars and enjoy!

Use fresh pineapple for a better flavor. Don’t overmix the batter to avoid tough bars. Let bars cool completely before cutting for the best texture.

Dessert, Snack
American, Tropical
bars, easy dessert, party treat, Pineapple Bliss Bars, tropical dessert

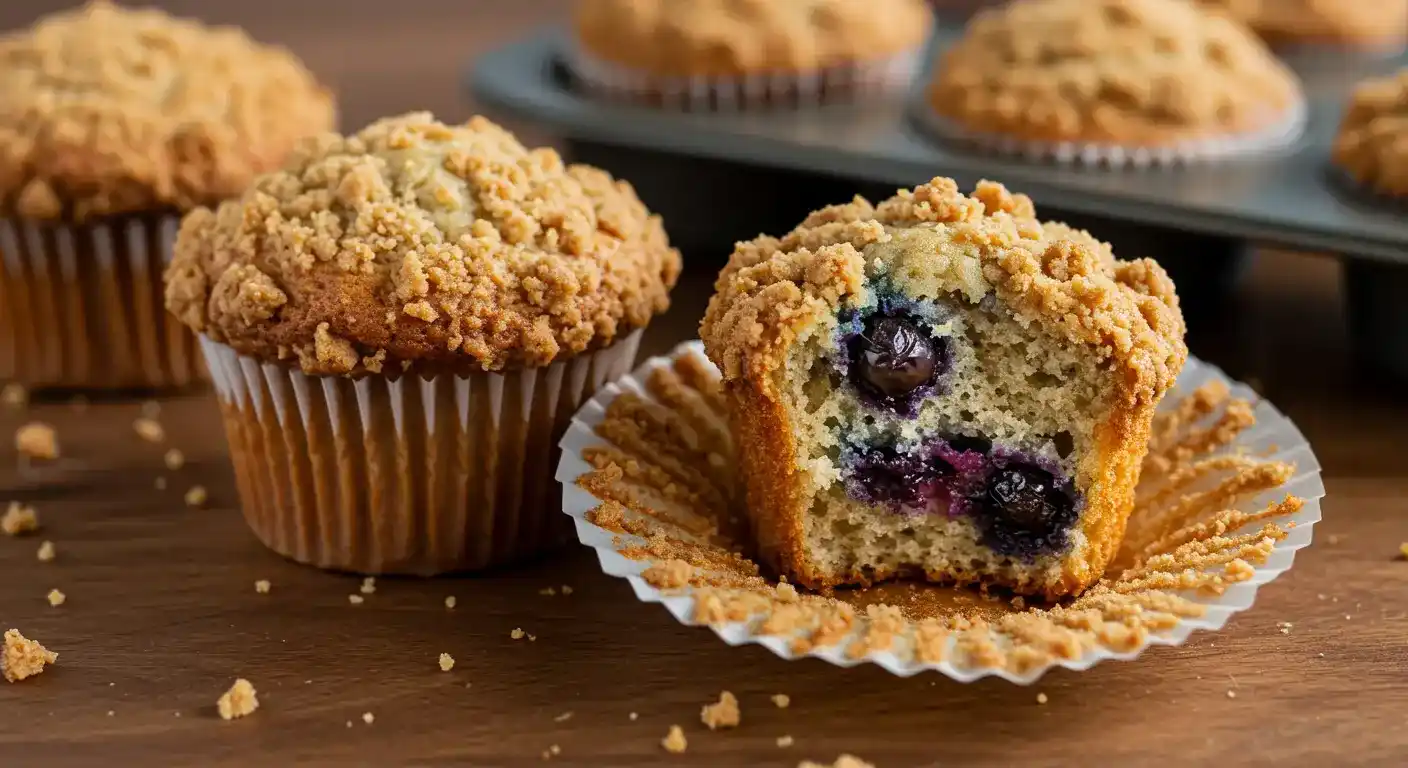
Blueberry Muffins With Streusel Crumb Topping

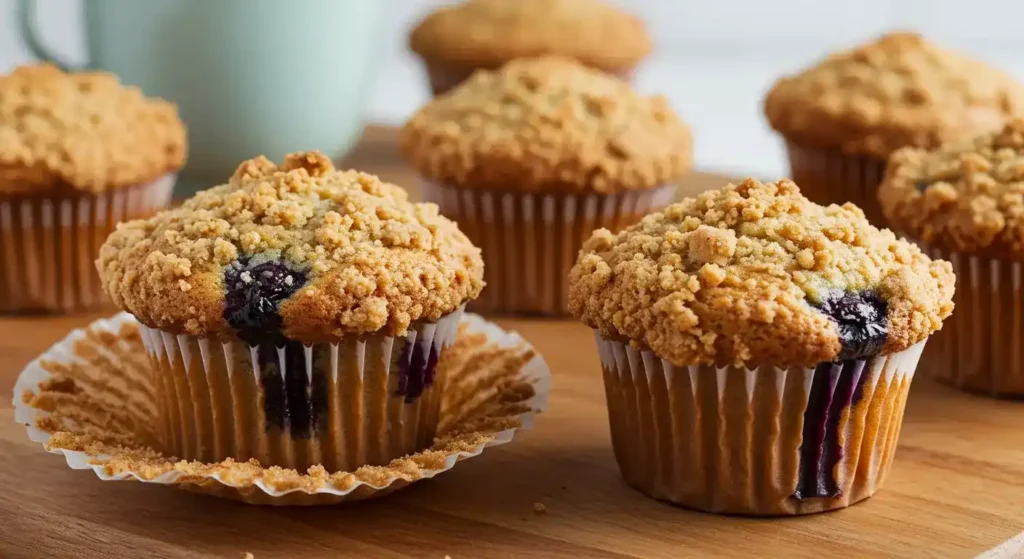
blueberry muffins

Ever since I was a kid, blueberry muffins have been my comfort food—especially the kind with a sweet, crumbly topping. I still remember waking up to the smell of my mom’s blueberry muffins filling the kitchen, the streusel on top always perfectly golden and just a little crispy. These homemade muffins bring back that same warm feeling. They’re soft, fluffy, packed with juicy blueberries, and finished with a buttery cinnamon streusel that makes them feel straight from a bakery. Whether it’s for a lazy weekend breakfast or a midweek pick-me-up, these muffins are a little taste of home in every bite.

why make this recipe

Blueberry muffins with streusel crumb topping are a delightful treat for breakfast or a snack. They are simple to make and offer a delicious blend of flavors. The juicy blueberries paired with a sweet, crumbly topping make these muffins irresistible. Whether you’re using fresh or frozen blueberries, this recipe ensures that you have a tasty bite every time.

how to make Blueberry Muffins With Streusel Crumb Topping

Ingredients

  • 2 cups all-purpose flour
  • 3 teaspoons baking powder
  • 1/2 teaspoon salt
  • 2 large eggs (or 3 small)
  • 1 cup granulated sugar
  • 1 cup yogurt
  • 1/2 cup canola oil
  • 1 teaspoon vanilla extract
  • 2 1/3 cups blueberries – fresh or frozen (thawed) – divided (1 cup goes in the batter and 1 1/3 cup for topping)
  • 1-2 tablespoons flour
  • 1 cup all-purpose flour (for streusel)
  • 2/3 cup granulated sugar (for streusel)
  • 1 stick salted butter – melted (for streusel)
  • 1 teaspoon cinnamon (for streusel)

Directions

  1. Preheat oven to 400°F and line a standard muffin pan with paper liners. Set aside.
  2. To make the crumb topping, whisk together flour, sugar, and cinnamon in a small bowl. Add the melted butter and stir with a fork until crumbly. Set aside.
  3. For the muffins, stir together 2 cups of flour, baking powder, and salt in a large bowl. Set aside.
  4. In a medium bowl, whisk together eggs and granulated sugar until combined. Then whisk in yogurt, oil, and vanilla extract. The mixture should be pale and yellow.
  5. Fold the wet ingredients into the dry ingredients and mix everything together by hand.
  6. In a small bowl, sprinkle 1 cup of blueberries with 1-2 tablespoons of flour. Toss them until all blueberries are coated with a thin layer of flour. Gently fold them into the batter.
  7. Spoon the batter into prepared muffin tins, filling about 2/3 of each cup. Cover the batter with the remaining blueberries and generously cover them with the streusel topping.
  8. Place them in the oven, reduce the heat to 375°F, and bake for about 18-20 minutes or until a toothpick inserted in the center comes out clean.
  9. Cool for 5 minutes in the pan, then remove muffins and cool on a wire rack.

How to Serve Blueberry Muffins With Streusel Crumb Topping.

blueberry muffins

Blueberry muffins with streusel crumb topping are already a delightful treat on their own. The burst of juicy berries paired with a buttery, crumbly topping makes them an irresistible choice for breakfast, brunch, or dessert. But how you serve them can take your muffins from simple to sensational. Whether you’re hosting a brunch, packing lunchboxes, or enjoying a cozy morning at home, there are so many ways to serve blueberry muffins that add charm, flavor, and even a touch of elegance.

Let’s dive into different ways you can serve these delicious muffins to impress your family, guests, or even yourself.

Serve Warm, Straight From the Oven

The absolute best time to serve blueberry muffins is while they’re still warm. Fresh out of the oven, the muffin crumb is tender, the blueberries are slightly jammy, and the streusel topping is perfectly crisp.

How to serve warm:

  • Let muffins cool for 5–10 minutes on a wire rack.

  • Serve them on a platter lined with a tea towel or napkin to keep them warm.

  • Add a pat of softened butter or a drizzle of honey on the side for guests to spread.

Pro Tip: If the muffins are made ahead of time, reheat them in a 300°F (150°C) oven for 5–7 minutes to revive their just-baked freshness.

Pair with Spreads and Toppings

Even though the muffins already have a crumb topping, pairing them with complementary spreads adds a fun twist and deepens the flavor profile.

Perfect pairings:

  • Honey butter: Sweet and creamy, it melts beautifully into a warm muffin.

  • Lemon curd: The tartness contrasts perfectly with the sweet streusel.

  • Cream cheese spread: Whip it with a touch of vanilla or maple syrup.

  • Berry preserves or blueberry compote: Intensifies the fruity flavors.

Set up a small spread bar with these options in ramekins and let guests choose their favorites.

Make It a Brunch Showstopper

Blueberry muffins with streusel can be the centerpiece of a beautiful brunch table.

How to serve at brunch:

  • Arrange muffins on a tiered cake stand with fresh blueberries and mint leaves for garnish.

  • Surround them with fresh fruit, yogurt parfaits, quiche slices, and scrambled eggs.

  • Offer coffee, tea, and mimosas to round out the spread.

The muffins’ rustic golden tops and pops of blueberry color make them visually inviting in any brunch setting.

Serve With Ice Cream or Whipped Cream

Yes, muffins can double as dessert! Especially when topped with something creamy and cold.

Try this dessert-style serving:

  • Slice a muffin in half and warm it up.

  • Top with a scoop of vanilla or lemon ice cream.

  • Add a dollop of whipped cream and a few fresh berries.

  • Drizzle with warm blueberry sauce or maple syrup.

This transforms your humble muffin into a gourmet dessert that guests will rave about.

Offer Them as a Grab-and-Go Treat

For casual gatherings or busy mornings, keep things simple by serving muffins individually wrapped or in cupcake liners.

Ideas for grab-and-go serving:

  • Use parchment paper muffin wraps and place each in a paper bag with a napkin and note.

  • Pack them in a basket lined with cloth for picnics or road trips.

  • Serve with takeaway cups of coffee or fresh juice for a breakfast-on-the-run combo.

This option is especially great for school events, work meetings, or road trip snacks.

Create a Muffin Board

Charcuterie boards aren’t just for meats and cheeses anymore. A muffin board is a creative and social way to enjoy blueberry muffins.

How to make a muffin board:

  • Arrange mini muffins or full-sized ones on a wooden board.

  • Add small bowls of different spreads: jams, nut butters, lemon butter, or flavored honey.

  • Include sides like fresh blueberries, sliced bananas, granola clusters, and Greek yogurt.

  • Add spoons, small plates, and napkins so guests can build their ideal muffin plate.

This makes for a highly visual and interactive serving experience, perfect for brunch parties or casual get-togethers.

Serve with Beverages That Complement the Flavor

Beverages matter! The right drink can enhance the flavor of your muffin.

Beverage pairings:

  • Coffee: Classic black coffee or flavored blends (vanilla, hazelnut).

  • Tea: Earl Grey, chamomile, or a fruity herbal tea like hibiscus.

  • Milk or almond milk: Especially great for kids or to mellow the sweetness.

  • Fresh juice: Orange, blueberry, or apple juice works well for breakfast settings.

Present the drinks with matching cups or mugs, and consider offering cinnamon sticks, honey, or lemon wedges for extra flair.

Serve these blueberry muffins warm with a cup of coffee or tea. They also taste great on their own. You can enjoy them as a quick breakfast or a sweet afternoon snack.

how to store Blueberry Muffins With Streusel Crumb Topping

To store the muffins, let them cool completely. Then, place them in an airtight container at room temperature for up to 3 days. If you want to keep them longer, consider freezing the muffins. Wrap each muffin tightly in plastic wrap and store them in a freezer bag for up to 3 months.

tips to make Blueberry Muffins With Streusel Crumb Topping

  • Ensure your baking powder is fresh for the best rise.
  • Gently fold the blueberries into the batter to prevent them from breaking.
  • Use room temperature eggs for better mixing.
  • You can add a sprinkle of powdered sugar on top before serving for extra sweetness.

variation

You can change up the recipe by adding nuts like walnuts or pecans for a crunchy texture. Another option is to switch the blueberries with raspberries or chocolate chips for a different flavor.

FAQs

1. Can I use frozen blueberries?
Yes, you can use frozen blueberries. Make sure to thaw them before adding to the batter.

2. What can I use instead of yogurt?
You can substitute yogurt with sour cream or buttermilk for a similar texture.

3. How do I know when the muffins are done baking?
Insert a toothpick into the center of a muffin. If it comes out clean or with just a few crumbs, the muffins are done baking!

[tasty-recipe id=”2167″]

Blueberry Muffins With Streusel Crumb Topping

Soft, fluffy blueberry muffins topped with a buttery cinnamon streusel, perfect for breakfast or as a snack.

For the Muffins

  • 2 cups all-purpose flour
  • 3 teaspoons baking powder
  • 1/2 teaspoon salt
  • 2 large eggs
  • 1 cup granulated sugar
  • 1 cup yogurt
  • 1/2 cup canola oil
  • 1 teaspoon vanilla extract
  • 2 1/3 cups blueberries – fresh or frozen (thawed) – divided

For the Streusel Topping

  • 1 cup all-purpose flour
  • 2/3 cup granulated sugar
  • 1 stick salted butter – melted
  • 1 teaspoon cinnamon
  • 1-2 tablespoons flour for coating blueberries

Preparation

  1. Preheat oven to 400°F and line a standard muffin pan with paper liners. Set aside.
  2. To make the crumb topping, whisk together flour, sugar, and cinnamon in a small bowl. Add the melted butter and stir with a fork until crumbly. Set aside.
  3. In a large bowl, stir together 2 cups of flour, baking powder, and salt. Set aside.
  4. In a medium bowl, whisk together eggs and granulated sugar until combined. Then whisk in yogurt, oil, and vanilla extract. The mixture should be pale and yellow.
  5. Gently fold the wet ingredients into the dry ingredients until combined.
  6. In a small bowl, sprinkle 1 cup of blueberries with 1-2 tablespoons of flour. Toss them until all blueberries are coated with a thin layer of flour. Gently fold them into the batter.

Baking

  1. Spoon the batter into prepared muffin tins, filling about 2/3 of each cup. Cover the batter with the remaining blueberries and generously cover them with the streusel topping.
  2. Reduce the oven temperature to 375°F and bake for about 18-20 minutes or until a toothpick inserted in the center comes out clean.

Cooling

  1. Cool for 5 minutes in the pan, then remove muffins and cool on a wire rack.

These muffins are best served warm, but can also be stored in an airtight container. Reheat leftovers in a 300°F oven for 5-7 minutes.

Breakfast, Dessert, Snack
American, Bakery
Baked Goods, Blueberry Muffins, Comfort Food, Homemade Bakery, Streusel Topping