Cranberry Orange Sour Cream Scones

Cranberry orange sour cream scones on a plate with fresh cranberries and orange zest.

Cranberry Orange Sour Cream Scones are a delightful treat perfect for breakfast or afternoon tea. With the tang of fresh cranberries and the brightness of orange zest, these scones are both sweet and savory. They are easy to make and offer a warm, comforting flavor that everyone will love. Serve them fresh out of the oven for a delightful experience!

why make this recipe

These scones are not just delicious; they are also simple to prepare. The combination of cranberries and orange zest brings a unique flavor that sets them apart from regular scones. The sour cream adds a moist texture, making them soft and tender. This recipe uses basic ingredients you probably have in your kitchen, so it’s convenient, too!

Making Cranberry Orange Sour Cream Scones allows you to enjoy a taste of homemade goodness without fuss. Whether you are entertaining guests, having family over, or simply enjoying a quiet morning at home, these scones elevate any occasion. They pair perfectly with a cup of tea or coffee, making them a perfect snack.

Another great reason to make this recipe is its versatility. You can easily tailor the sweetness according to your preference. Plus, the bright color of the cranberries gives a festive touch, making them ideal for holiday gatherings and special occasions. Enjoy baking these scones and impress your family and friends with a delightful homemade treat that brings a smile to everyone’s face!

how to make Cranberry Orange Sour Cream Scones

To make Cranberry Orange Sour Cream Scones, start by gathering your ingredients: 2 cups all-purpose flour, 1/3 cup sugar, 1 tablespoon baking powder, 1/2 teaspoon salt, 1/2 cup cold butter (cubed), 1 cup fresh cranberries (chopped), 1 tablespoon orange zest, 1/2 cup sour cream, and 1 egg.

Begin by preheating your oven to 400°F (200°C). In a large bowl, mix the flour, sugar, baking powder, and salt together. Next, add in the cold cubed butter. Use a pastry cutter or your fingers to blend until the mixture resembles coarse crumbs. Gently fold in the cranberries and orange zest until combined.

In a separate bowl, whisk together the sour cream and egg until smooth. Add this mixture to the dry ingredients and stir gently until just combined. Avoid overmixing to keep the scones light.

On a floured surface, turn the dough out and shape it into a circle about 1-inch thick. Cut it into wedges and place them on a baking sheet lined with parchment paper. Bake for 15-20 minutes or until golden brown on top. Let them cool slightly before enjoying your homemade scones warm!

how to serve Cranberry Orange Sour Cream Scones

Serving Cranberry Orange Sour Cream Scones is simple yet elegant. For a delightful breakfast treat or afternoon snack, arrange the scones on a large plate or serving platter. You can dust them lightly with powdered sugar for an extra touch of sweetness and a lovely presentation.

These scones pair wonderfully with a hot beverage, such as coffee or tea. You can also serve them with a dollop of clotted cream or butter, which complements the scones perfectly. Alternatively, a drizzle of honey or a smear of orange marmalade brings out the flavors even more.

For a festive touch, consider garnishing the plate with some fresh orange slices or whole cranberries. This not only enhances the visual appeal but also adds an aromatic element to the serving. Whether at a gathering or a simple family breakfast, these delightful scones will surely impress your guests and provide a warm, inviting atmosphere.

how to store Cranberry Orange Sour Cream Scones

Storing Cranberry Orange Sour Cream Scones properly ensures they stay fresh and enjoyable. If you are not eating them right away, let the scones cool completely on a wire rack. Once cooled, place them in an airtight container at room temperature. They can last this way for about 2-3 days.

If you want to keep them longer, consider freezing the scones. Wrap each scone in plastic wrap and place them in a freezer-safe bag or container. You can store them in the freezer for up to 2 months. To enjoy, simply thaw them in the fridge and reheat in the oven for a few minutes until warm and fresh.

Remember not to refrigerate the scones, as the cold temperature can make them dry out. Proper storage will help maintain their soft texture and delightful flavor, ensuring you can savor them at your convenience.

tips to make Cranberry Orange Sour Cream Scones

To make your Cranberry Orange Sour Cream Scones even better, here are some helpful tips. First, use cold butter directly from the fridge. Cold butter helps create flaky layers in your scones, making them light and tender.

Make sure to chop the cranberries into smaller pieces to evenly distribute their flavor throughout the scones. If you prefer a sweeter scone, you can slightly increase the sugar amount.

Another tip is to avoid over-mixing the dough. Mix it gently until just combined to keep the scones fluffy. Using fresh orange zest adds a bright flavor, so do not skip this step.

If you want to enhance the flavor further, consider adding a teaspoon of vanilla extract or a pinch of cinnamon to the dough. Finally, brush the tops of the scones with a little cream or milk before baking for a lovely golden color.

variation

You can easily adapt this scone recipe to suit your taste! For example, you can substitute cranberries with dried apricots or blueberries for different flavors. For a nutty twist, add chopped nuts like walnuts or almonds to the dough.

If you want a richer taste, try using buttermilk instead of sour cream. For those who enjoy spice, adding ground cinnamon, nutmeg, or ginger can complement the sweetness of the fruits. Experimenting with these variations can lead you to discover your perfect scone creation!

FAQs

1. Can I use dried cranberries instead of fresh ones?
Yes, you can use dried cranberries if you prefer. However, reduce the sugar slightly as dried cranberries are sweeter.

2. How can I make the scones sweeter?
You can increase the sugar slightly or add a glaze made from powdered sugar and orange juice over the cooled scones for extra sweetness.

3. What if I don’t have sour cream?
You can substitute sour cream with Greek yogurt or buttermilk for similar results. Both will keep the scones moist and flavorful.

4. Can I make the dough ahead of time?
Yes, you can prepare the dough ahead and store it in the fridge for up to 24 hours. Simply shape and bake it when you’re ready!

5. How do I know when my scones are done?
Scones should be golden brown on top and firm to touch. A toothpick inserted into the center should come out clean, indicating they are fully baked.

[tasty-recipe id=”4942″]

Cranberry Orange Sour Cream Scones

Delightful scones with fresh cranberries and orange zest, perfect for breakfast or afternoon tea.

Dry Ingredients

  • 2 cups all-purpose flour
  • 1/3 cup sugar (Adjust for sweetness preference)
  • 1 tablespoon baking powder
  • 1/2 teaspoon salt

Wet Ingredients

  • 1/2 cup cold butter (cubed) (Keep butter cold for flaky texture)
  • 1 cup fresh cranberries (chopped) (Can substitute with dried cranberries)
  • 1 tablespoon orange zest (Fresh zest recommended)
  • 1/2 cup sour cream (Can substitute with Greek yogurt or buttermilk)
  • 1 large egg

Preparation

  1. Preheat your oven to 400°F (200°C).
  2. In a large bowl, mix the flour, sugar, baking powder, and salt together.
  3. Add in the cold cubed butter and blend until the mixture resembles coarse crumbs.
  4. Gently fold in the cranberries and orange zest until combined.
  5. In a separate bowl, whisk together the sour cream and egg until smooth.
  6. Add the sour cream mixture to the dry ingredients and stir gently until just combined.
  7. On a floured surface, turn the dough out and shape it into a circle about 1-inch thick.
  8. Cut the dough into wedges and place on a baking sheet lined with parchment paper.

Baking

  1. Bake for 15-20 minutes or until golden brown on top.
  2. Let them cool slightly before serving.

Serve with powdered sugar, clotted cream, or honey. For a festive touch, add fresh orange slices or whole cranberries as garnish.
Breakfast, Dessert, Snack
American, Baked Goods
afternoon tea, Baking, Breakfast Recipes, cranberry orange scones, scone

Caramel Pecan Carrot Heaven Cake

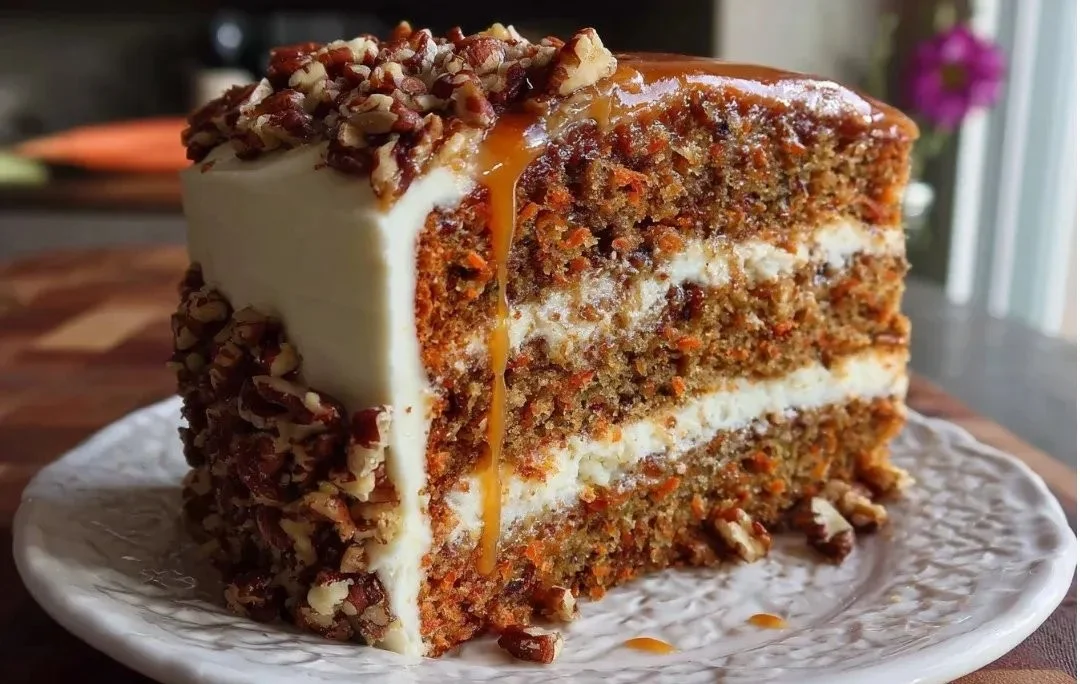
Delicious Caramel Pecan Cake with layers of caramel and pecans

Carrot cake is a beloved dessert that combines simple ingredients and a rich flavor. This Caramel Pecan Carrot Heaven Cake is a delightful twist on the traditional recipe. The addition of pecans and a luscious caramel sauce elevates this cake to new heights. The moist layers blend perfectly with the sweet caramel, making it an amazing treat for any occasion. Whether you are celebrating a birthday, hosting a holiday gathering, or simply satisfying your sweet tooth, this cake is sure to impress.

Why Make This Recipe

Making Caramel Pecan Carrot Heaven Cake is a great choice for several reasons. First, it combines familiar flavors in a way that feels both comforting and exciting. The sweetness of the carrots blends seamlessly with the crunch of pecans, creating a delightful texture. Second, the caramel sauce adds a decadent touch that can turn any ordinary day into a special occasion.

This cake is also easy to prepare, making it suitable for bakers of all levels. With straightforward ingredients, you won’t need any special skills to create this masterpiece. Plus, the aroma of baking carrot cake fills your kitchen with warmth and nostalgia, instantly lifting your spirits.

Lastly, serving this cake can bring people together. Sharing homemade treats is a joyful experience that often leads to laughter and storytelling. Whether enjoyed at a family dinner or shared with friends, this cake promises to be a favorite at any table.

In summary, this Caramel Pecan Carrot Heaven Cake is not only delicious but also a heartwarming gift to those you love.

How to Make Caramel Pecan Carrot Heaven Cake

To make Caramel Pecan Carrot Heaven Cake, start by gathering your ingredients. You will need flour, sugar, carrots, eggs, baking powder, baking soda, salt, chopped pecans, and vanilla extract. For the caramel sauce, you will need sugar, butter, and heavy cream.

Begin by preheating your oven to 350°F (175°C). In a large bowl, mix the flour, sugar, baking powder, baking soda, and salt together. Beat the eggs in a separate bowl and add them to the dry mixture along with the grated carrots and melted butter. Stir until everything is well combined.

Next, fold in the chopped pecans and vanilla extract for added flavor and texture. Grease two round cake pans and evenly distribute the batter between them. Bake for about 25-30 minutes or until a toothpick comes out clean when inserted into the center.

While the cakes are baking, prepare your caramel sauce. Melt the sugar in a saucepan over medium heat, stirring constantly until it turns a golden color. Carefully add the butter and cream, stirring until smooth. Once the cakes have cooled, layer them with caramel sauce in between and on top of the cake. Decorate with additional pecans for a beautiful finish.

How to Serve Caramel Pecan Carrot Heaven Cake

Serving Caramel Pecan Carrot Heaven Cake is as delightful as making it. Once the cake is assembled, cut it into generous slices. Place each slice on a dessert plate, as the cake looks beautiful on its own.

You can serve the cake warm or at room temperature, depending on your preference. A scoop of vanilla ice cream on the side adds an extra touch of indulgence that both kids and adults will love. Drizzling some extra caramel sauce over each slice enhances the flavor and presentation.

For a more festive touch, add a dollop of whipped cream or a sprinkle of cinnamon on top of each slice before serving. Pair it with a cup of coffee or tea for a perfect afternoon treat. This cake can also be enjoyed as a dessert at dinner parties or celebrations, making it a versatile choice for many occasions.

How to Store Caramel Pecan Carrot Heaven Cake

To store Caramel Pecan Carrot Heaven Cake, first ensure that it has fully cooled down. Place any leftover cake in an airtight container to keep it fresh. If you have not yet cut the cake, it is best to leave it whole to maintain its moisture.

You can store the cake at room temperature for up to 3 days, but if you want it to last longer, place it in the refrigerator. It will stay fresh in the fridge for about a week. Just make sure to cover it well to avoid it absorbing any odors from the refrigerator.

If you want to keep it for even longer, you can freeze the cake. Wrap it tightly in plastic wrap and then in foil to prevent freezer burn. The cake can be frozen for up to three months. When you are ready to enjoy it again, simply let it thaw in the refrigerator overnight before serving.

Tips to Make Caramel Pecan Carrot Heaven Cake

Here are some tips to make your Caramel Pecan Carrot Heaven Cake even better. First, use freshly grated carrots for the best flavor and moisture. Avoid using pre-packaged shredded carrots, as they can be dry.

Second, toast the pecans before mixing them into the batter. Toasting brings out the nuts’ natural flavors and adds a lovely crunch. Keep an eye on them while toasting, as they can quickly burn.

Third, if you want a richer caramel flavor, consider adding a pinch of salt to your caramel sauce. This will enhance the sweetness and create a more balanced taste.

Lastly, be gentle when mixing the batter. Overmixing can lead to a dense cake, so mix just until all ingredients are combined. Following these tips will help you achieve the perfect cake every time.

Variation

If you want to switch things up, consider adding crushed pineapple or raisins to the carrot cake batter for additional flavor and texture. For a healthier version, you can replace some of the sugar with honey or maple syrup. You can also experiment with different nuts, such as walnuts, for a unique twist.

FAQs

1. Can I use whole wheat flour instead of all-purpose flour?
Yes, whole wheat flour can be used. However, the texture may be denser, so you might want to combine it with all-purpose flour for a lighter cake.

2. How can I make the caramel sauce without using refined sugar?
You can try making a caramel sauce with coconut sugar or maple syrup as an alternative to refined sugar.

3. Can I make this cake ahead of time?
Absolutely! You can bake the cake a day in advance and store it in the refrigerator. Just add the caramel sauce before serving for the best results.

[tasty-recipe id=”4958″]

Caramel Pecan Carrot Heaven Cake

This delightful twist on traditional carrot cake combines moist layers with chopped pecans and a luscious caramel sauce, making it a perfect treat for any occasion.

Cake Ingredients

  • 2 cups all-purpose flour (Can substitute with whole wheat for a denser texture.)
  • 1 cup granulated sugar (You can replace some sugar with honey or maple syrup for a healthier version.)
  • 2 cups grated carrots (Use freshly grated for best flavor and moisture.)
  • 4 large eggs
  • 1 teaspoon baking powder
  • 1 teaspoon baking soda
  • 1 teaspoon salt
  • 1 cup chopped pecans (Toasted pecans work best.)
  • 1/2 cup vanilla extract
  • 1/2 cup melted butter

Caramel Sauce Ingredients

  • 1 cup granulated sugar (Consider alternatives like coconut sugar.)
  • 1/2 cup butter
  • 1/2 cup heavy cream

Preparation

  1. Preheat your oven to 350°F (175°C).
  2. In a large bowl, combine flour, sugar, baking powder, baking soda, and salt.
  3. In a separate bowl, beat the eggs and add them to the dry mixture, along with the grated carrots and melted butter. Stir until well combined.
  4. Fold in the chopped pecans and vanilla extract.
  5. Grease two round cake pans and evenly distribute the batter between them.

Baking

  1. Bake for about 25-30 minutes, or until a toothpick comes out clean when inserted into the center.

Caramel Sauce

  1. In a saucepan over medium heat, melt the sugar, stirring constantly until golden.
  2. Carefully add the butter and cream, stirring until smooth.

Assembly

  1. Once the cakes have cooled, layer them with caramel sauce in between and on top of the cake.
  2. Decorate with additional pecans.

Store any leftover cake in an airtight container. It can be kept at room temperature for 3 days, in the refrigerator for about a week, or frozen for up to 3 months.

Cake, Dessert
American
Caramel Sauce, Carrot Cake, Holiday Baking, Homemade Dessert, Pecan Cake

boiled Chicken Thighs: quick and easy recipe

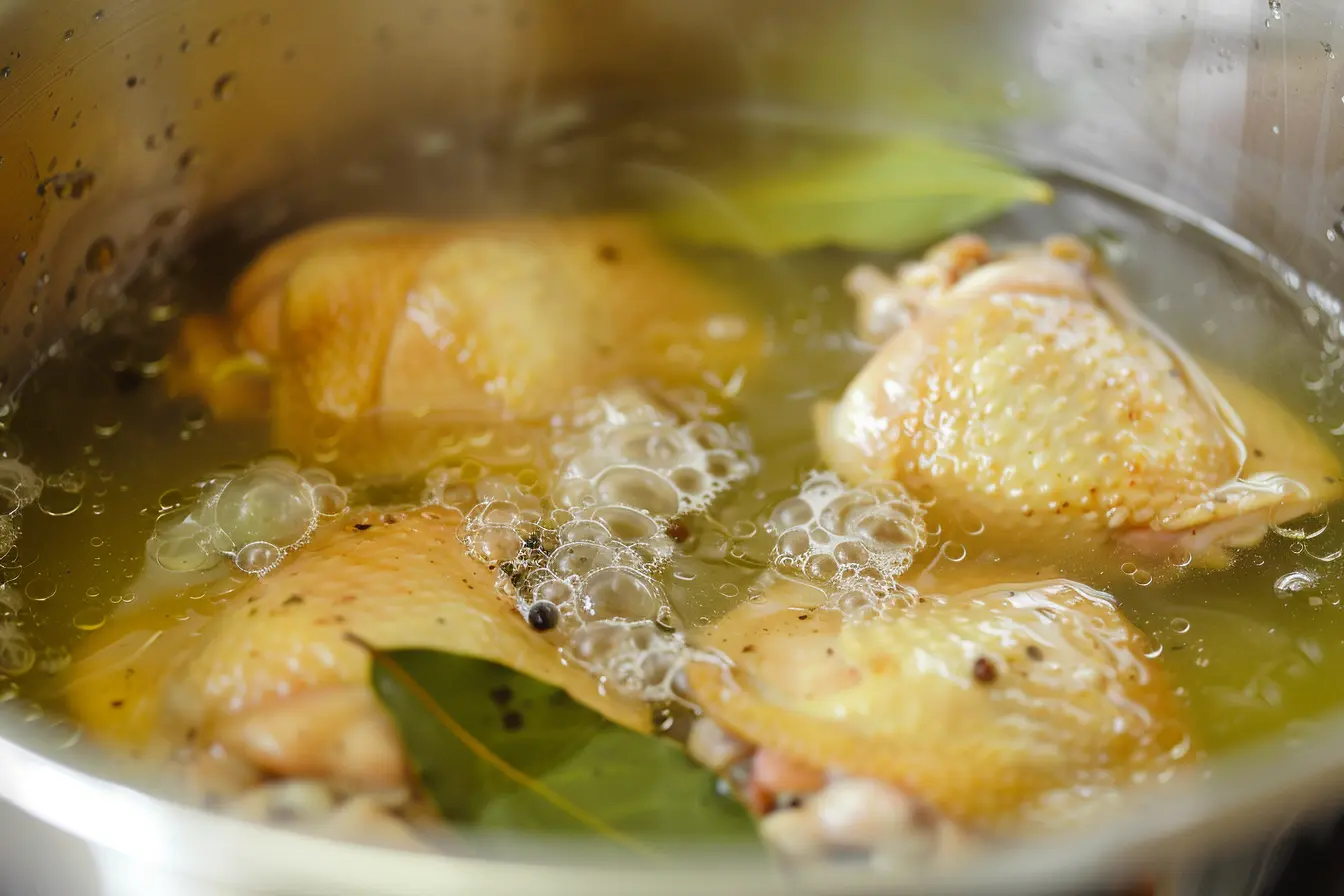
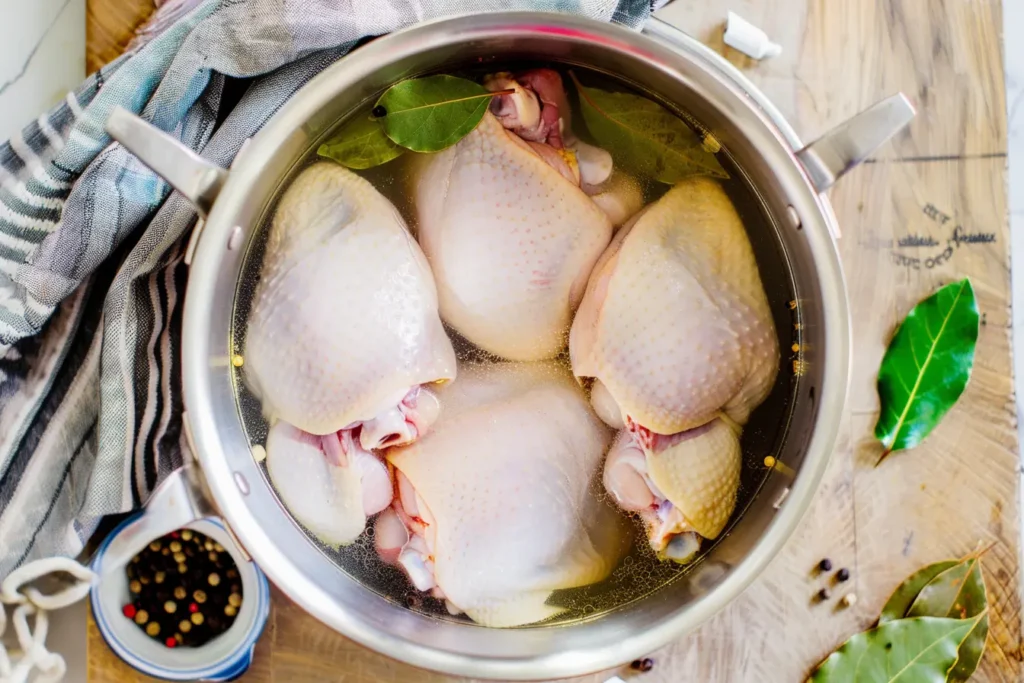
boiled chicken thighs

Ever wondered how to create perfectly tender, juicy chicken without firing up the grill or heating the oven? Boiled chicken thighs might just be your answer. While boiling might sound simple, it’s actually one of the most efficient ways to prepare chicken that’s moist, flavorful, and incredibly versatile. Whether you’re meal prepping for the week, whipping up a quick dinner, or looking for a healthy protein option, boiled chicken thighs deliver on all fronts.

But here’s the thing: not all boiled chicken is created equal. There’s a fine line between succulent, fall-off-the-bone chicken and rubbery, flavorless meat. In this comprehensive guide, we’ll walk through everything you need to know about boiling chicken thighs—from selecting the right cut to mastering the technique and exploring creative recipe ideas.

Why Choose Chicken Thighs Over Chicken Breasts?

Flavor and Juiciness

Let’s be honest, chicken breasts can be boring. They’re lean, sure, but they’re also prone to drying out faster than you can say “overcooked.” Chicken thighs, on the other hand, are the dark horse of the poultry world. Thanks to their higher fat content, they stay moist and tender even if you accidentally cook them a minute or two longer. The darker meat also packs more flavor, giving you that rich, savory taste that makes every bite satisfying.

Affordability

Your wallet will thank you for choosing thighs. Pound for pound, chicken thighs are typically less expensive than breasts, making them a budget-friendly option for families or anyone looking to stretch their grocery dollars. You get more bang for your buck without sacrificing quality or taste.

Versatility in Recipes

Chicken thighs are culinary chameleons. They absorb flavors beautifully and work in virtually any cuisine—Mexican, Asian, Mediterranean, you name it. Whether you’re shredding them for tacos, chopping them for salads, or adding them to pasta, boiled chicken thighs adapt to whatever dish you’re creating.

How Long to Boil Chicken Thighs

The cooking time for boiled chicken thighs depends on whether they’re bone-in or boneless. Bone-in chicken thighs should be boiled for 30-40 minutes at a gentle simmer, with average-sized thighs (5-6 ounces) typically requiring about 35 minutes. Boneless chicken thighs cook much faster, needing only 20-25 minutes of simmering time boneless, skinless thighs usually take 20-22 minutes, while boneless with skin may need 23-25 minutes. The key to perfectly cooked chicken thighs is maintaining a gentle simmer rather than a rolling boil after the water initially comes to a boil. Always check for doneness using a meat thermometer inserted into the thickest part of the thigh, which should read 165°F (74°C). If you don’t have a thermometer, cut into the thickest part to ensure the meat is completely opaque with no pink areas and the juices run clear. Starting with cold water and bringing it gradually to a boil, then immediately reducing to a simmer, ensures even cooking and tender, juicy results. Overcooking is the most common mistake once the chicken reaches 165°F, remove it from heat immediately to prevent it from becoming dry and rubbery. If you’re working with frozen chicken thighs, it’s best to thaw them completely in the refrigerator overnight before boiling, though frozen bone-in thighs can be boiled for 45-55 minutes and boneless for 30-35 minutes if necessary.

Nutritional Benefits of Chicken Thighs

Protein Content

Chicken thighs are protein powerhouses. A single serving provides approximately 26 grams of protein, which is essential for muscle building, tissue repair, and keeping you feeling full longer. If you’re active or trying to maintain a healthy diet, this protein punch is invaluable.

Essential Vitamins and Minerals

Beyond protein, chicken thighs deliver important nutrients like iron, zinc, selenium, and B vitamins—particularly B6 and B12. These vitamins support energy production, immune function, and brain health. Zinc and selenium act as antioxidants, protecting your cells from damage.

Healthy Fats

Yes, chicken thighs contain more fat than breasts, but don’t let that scare you. Much of this fat is monounsaturated and polyunsaturated—the heart-healthy kinds that support brain function and hormone production. If you’re watching your fat intake, you can always remove the skin before or after boiling.

How to Select the Best Chicken Thighs

boiled chicken thighs

Fresh vs. Frozen

Fresh chicken thighs are ideal if you’re cooking within a day or two of purchase. They tend to have better texture and flavor. However, frozen thighs are perfectly fine and can be more convenient. Just make sure to thaw them completely in the refrigerator before boiling to ensure even cooking.

Bone-In vs. Boneless

Bone-in thighs take longer to cook but offer more flavor since the bone adds depth to the broth. They’re also less expensive. Boneless thighs cook faster and are easier to shred or chop, making them ideal for quick meals. Your choice depends on your time constraints and flavor preferences.

Skin-On vs. Skinless

Skin-on thighs add flavor and help keep the meat moist during cooking. You can always remove the skin afterward if you’re watching calories. Skinless thighs are leaner from the start and absorb seasonings more directly, but they require careful monitoring to prevent dryness.

Preparing Chicken Thighs for Boiling

Cleaning and Trimming

Start by rinsing your chicken thighs under cold water and patting them dry with paper towels. Trim any excess fat or loose skin—you want enough fat for flavor but not so much that it makes your broth greasy. Check for any remaining bone fragments if you’re using boneless thighs.

Marinating Options

While not necessary for boiling, a quick marinade can infuse extra flavor. Try a simple mixture of olive oil, lemon juice, garlic, and herbs for 30 minutes to an hour. Even a basic salt and pepper rub works wonders. Just remember that the boiling liquid will also contribute significant flavor.

Step-by-Step Guide to Boiling Chicken Thighs

Ingredients You’ll Need

For basic boiled chicken thighs, you’ll need:

  • 4-6 chicken thighs (bone-in or boneless)
  • Water or chicken broth (enough to cover the chicken)
  • 1-2 teaspoons salt
  • 1 teaspoon black pepper
  • 2-3 garlic cloves (optional)
  • 1 bay leaf (optional)
  • Fresh herbs like thyme or rosemary (optional)
  • 1 small onion, quartered (optional)

The Boiling Process

Bringing Water to a Boil

Place your chicken thighs in a large pot and add enough cold water or broth to cover them by about an inch. Add your salt, pepper, and any aromatics you’re using. Starting with cold water allows the chicken to cook more evenly. Place the pot over high heat and bring it to a rolling boil.

Cooking Time and Temperature

Once the water reaches a boil, immediately reduce the heat to low or medium-low. You want a gentle simmer, not an aggressive boil. Aggressive boiling can make the meat tough and stringy. For bone-in thighs, simmer for 30-35 minutes. Boneless, skinless thighs need only 20-25 minutes. The key is maintaining that gentle bubbling throughout.

Testing for Doneness

The safest way to check if your chicken is done is with a meat thermometer. Insert it into the thickest part of the thigh without touching bone, it should read 165°F (74°C). No thermometer? Cut into the thickest part; the juices should run clear, and the meat should be opaque throughout with no pink remaining.

Flavoring Your Boiled Chicken Thighs

Herbs and Spices

Don’t settle for bland chicken. Common herbs like parsley, thyme, rosemary, and oregano add wonderful aromatics. Spices like cumin, paprika, or coriander can give your chicken an international flair. Add these at the beginning of the boiling process for maximum flavor infusion.

Aromatics

Onions, garlic, celery, and carrots are classic aromatics that transform plain boiling water into a flavorful cooking liquid. These vegetables release their essences into the broth, which then permeates the chicken. Think of it as building flavor from the ground up.

Broth Variations

Instead of plain water, use chicken broth, vegetable broth, or even bone broth as your cooking liquid. This immediately elevates the flavor profile. You can also add a splash of white wine, soy sauce, or apple cider vinegar for complexity and depth.

Common Mistakes to Avoid When Boiling Chicken Thighs

Overcooking

It’s easy to think “longer is better,” but overcooking makes chicken dry and rubbery. Set a timer and check for doneness at the minimum cooking time. Remember, residual heat continues cooking the meat even after you remove it from the water.

Using High Heat

Boiling chicken at a rolling boil might seem efficient, but it’s actually counterproductive. High heat causes the proteins to contract rapidly, squeezing out moisture and making the meat tough. Always reduce to a simmer once the water boils.

Skipping the Seasoning

Plain water produces plain chicken. Even if you’re planning to use the chicken in a heavily seasoned dish later, starting with a well-seasoned cooking liquid makes a noticeable difference. Don’t be shy with salt, herbs, and aromatics.

Creative Ways to Use Boiled Chicken Thighs

Salads and Sandwiches

Shred or chop your boiled chicken and toss it into green salads, pasta salads, or grain bowls. It’s also perfect for chicken salad sandwiches—mix with mayo, celery, grapes, and walnuts for a classic lunch option.

Soups and Stews

Boiled chicken thighs are soup’s best friend. Add them to chicken noodle soup, tortilla soup, or Asian-inspired ramen. The meat absorbs the soup’s flavors while contributing its own richness. Plus, you can use the boiling liquid as your soup base.

Tacos and Wraps

Shredded boiled chicken is taco filling gold. Season it with cumin, chili powder, and lime juice, then pile it into tortillas with your favorite toppings. It also works beautifully in wraps, quesadillas, and burritos.

Pasta Dishes

Chop your boiled chicken and toss it with pasta, olive oil, vegetables, and Parmesan for a quick dinner. It pairs wonderfully with Alfredo sauce, pesto, or a simple garlic and olive oil preparation.

Storing and Reheating Boiled Chicken Thighs

Refrigeration Tips

Store your boiled chicken in an airtight container in the refrigerator for up to four days. Keep it in its cooking liquid if possible—this helps maintain moisture. If you’ve removed the chicken from the liquid, store them separately and you can use the broth for other recipes.

Freezing Guidelines

Boiled chicken thighs freeze exceptionally well. Let them cool completely, then place them in freezer-safe bags or containers. Remove as much air as possible to prevent freezer burn. Properly stored, they’ll maintain quality for up to three months. Label with the date so you know when to use them.

Best Reheating Methods

For refrigerated chicken, reheat gently in the microwave with a splash of water or broth to prevent drying. You can also warm it in a covered skillet over low heat. For frozen chicken, thaw overnight in the refrigerator before reheating. Never refreeze previously frozen chicken that’s been thawed.

Health Considerations

Calorie Count

A 3-ounce serving of boiled, skinless chicken thigh contains approximately 170-180 calories, with about 9 grams of fat and 22 grams of protein. If you keep the skin on, expect the calories to increase to around 210-220 per serving. For those counting macros, chicken thighs offer a balanced protein source with reasonable fat content.

Dietary Restrictions

Boiled chicken thighs are naturally gluten-free, dairy-free, and compatible with most diets including keto, paleo, and Whole30 (when prepared without added sugars or processed ingredients). They’re also suitable for low-carb diets since they contain virtually no carbohydrates.

Conclusion

Boiled chicken thighs are proof that simple cooking methods can yield delicious results. They’re economical, nutritious, and incredibly versatile—perfect for meal prep, quick dinners, or any recipe that calls for cooked chicken. By following the techniques outlined in this guide, you’ll consistently produce tender, flavorful chicken that serves as the foundation for countless meals. The secret lies in gentle simmering, proper seasoning, and not rushing the process. So next time you’re wondering what to make for dinner, reach for those chicken thighs and give boiling a try. Your taste buds—and your schedule—will thank you.


FAQs

1. Can I boil chicken thighs from frozen?

While it’s technically possible, it’s not recommended. Boiling frozen chicken results in uneven cooking—the outside may overcook while the inside remains underdone. For best results, thaw your chicken thighs completely in the refrigerator overnight before boiling. If you’re in a pinch, use the defrost setting on your microwave first.

2. How long can I keep the broth from boiled chicken thighs?

The cooking liquid makes an excellent base for soups and sauces. Store it in an airtight container in the refrigerator for up to four days, or freeze it for up to three months. Skim any fat from the surface once it cools if you prefer a leaner broth.

3. Should I remove the skin before or after boiling chicken thighs?

It depends on your preference. Leaving the skin on during boiling adds flavor and helps keep the meat moist, though it makes the broth fattier. You can easily remove it after cooking if you want the flavor benefits without the extra calories. For a leaner result from the start, remove it before boiling.

4. Why is my boiled chicken tough and rubbery?

This usually happens from boiling at too high a temperature or cooking for too long. Remember to reduce the heat to a gentle simmer after the water boils, and use a meat thermometer to avoid overcooking. Chicken should reach 165°F internally—no higher is necessary.

5. Can I use the same method for chicken breasts?

Absolutely, though you’ll need to adjust the cooking time. Boneless, skinless chicken breasts typically need only 15-18 minutes of gentle simmering since they’re leaner and cook faster. Be extra careful not to overcook them, as breasts dry out more quickly than thighs.

[tasty-recipe id=”5255″]

Boiled Chicken Thighs

Learn how to boil chicken thighs to achieve tender, juicy, and flavorful chicken. This simple method is perfect for meal prep and versatile in various recipes.

Main Ingredients

  • 4-6 pieces chicken thighs (bone-in or boneless)
  • 1-2 teaspoons salt (Adjust to taste)
  • 1 teaspoon black pepper
  • 2-3 pieces garlic cloves (optional) (Optional for flavor)
  • 1 leaf bay leaf (optional) (Optional for flavor)
  • 1 small onion, quartered (optional) (Optional for flavor)
  • Enough to cover liquid water or chicken broth (Use enough liquid to cover the chicken)

Preparation

  1. Rinse the chicken thighs under cold water and pat them dry with paper towels.
  2. Trim any excess fat or loose skin.
  3. Place the chicken thighs in a large pot and cover them with cold water or broth.
  4. Add salt, pepper, and any aromatics you’re using.

Cooking

  1. Bring the pot to a rolling boil over high heat.
  2. Once boiling, reduce the heat to low or medium-low to maintain a gentle simmer.
  3. For bone-in thighs, simmer for 30-35 minutes; for boneless thighs, simmer for 20-25 minutes.
  4. Check for doneness using a meat thermometer, which should read 165°F (74°C).

Flavoring

  1. Consider adding herbs and spices like parsley, thyme, or cumin for added flavor.

Store boiled chicken in an airtight container for up to 4 days. It can be frozen for up to 3 months. When reheating, add a splash of water to keep it moist.

Dinner, Main Course
American
boiled chicken, Chicken Thighs, easy chicken recipe, healthy protein, Meal Prep

Slow Cooker Honey Garlic Chicken

Delicious slow cooker honey garlic chicken served with vegetables

This Slow Cooker Honey Garlic Chicken is a warm, simple meal that feels like a hug on a plate. The sauce is sweet, garlicky, and a little sticky, and the chicken comes out tender and full of flavor. It is a real crowd-pleaser for weeknights and easy family dinners. If you like a quick twist or another method, check out the air fryer honey butter garlic chicken tenders recipe for a faster, crispier version. Get ready, this dish is easy to make and fun to share with friends and family.

How to prepare Slow Cooker Honey Garlic Chicken

Ingredients

  • 2 pounds boneless chicken thighs or breasts
  • 1/2 cup honey
  • 1/2 cup low sodium soy sauce
  • 1/4 cup ketchup or tomato sauce
  • 3 to 4 garlic cloves, minced
  • 2 tablespoons brown sugar (optional)
  • 1 tablespoon rice vinegar or apple cider vinegar
  • 1/2 teaspoon black pepper
  • 1 tablespoon cornstarch mixed with 2 tablespoons water, for thickening
  • Sesame seeds and chopped green onions for garnish

Directions

  1. Put the chicken in the slow cooker in a single layer.
  2. In a bowl, mix honey, soy sauce, ketchup, minced garlic, vinegar, brown sugar, and pepper until smooth.
  3. Pour the sauce over the chicken, make sure it is covered.
  4. Cook on low for 4 to 5 hours, or on high for 2 to 3 hours, until the chicken is very tender.
  5. Remove the chicken to a plate. Stir the cornstarch mixture into the sauce in the slow cooker.
  6. Turn the slow cooker to high, let the sauce thicken for 5 to 10 minutes, stirring once or twice.
  7. Put the chicken back into the thickened sauce, spoon the sauce over the chicken to coat.
  8. Garnish with sesame seeds and green onions, serve warm.

Slow Cooker Honey Garlic Chicken

Why You’ll Love Slow Cooker Honey Garlic Chicken

  • It uses simple ingredients you likely have on hand, like honey and garlic.
  • The slow cooker makes the chicken very tender, so it falls apart and soaks up the sauce.
  • The sauce is sweet and savory, it sticks to rice, noodles, or bread.
  • It is a great make-ahead meal, you can cook it in the morning and eat it later.
  • It makes good leftovers and works well for meal prep.

Tips for success

  • Use thighs for more flavor and juiciness, breasts work too if you prefer lean meat.
  • Trim excess fat from the chicken to keep the sauce clean and not greasy.
  • Do not overcook, even in a slow cooker, check at the lower time range if your slow cooker runs hot.
  • If the sauce is too thin, mix cornstarch and cold water, then stir in and cook until thick.
  • Taste the sauce before serving, add a little more honey if you want it sweeter, or a splash of vinegar for more tang.
  • For more garlic flavor, add an extra clove or use garlic paste.

Serving Suggestions

  • Serve over steamed white rice, brown rice, or cauliflower rice for a low carb option.
  • Toss with cooked noodles for a simple honey garlic chicken pasta.
  • Place on a bed of salad greens for a warm chicken salad.
  • Add steamed broccoli, snap peas, or roasted vegetables on the side.
  • Try it in a sandwich or wrap, with extra sauce for a sticky, tasty lunch. You can also try the air fryer version for a different texture, if you want something crispier.

Slow Cooker Honey Garlic Chicken

FAQs

Q: Can I use frozen chicken in the slow cooker? A: Yes, you can, but add about 1 hour to the cooking time. It is best to check the internal temperature, it should reach 165 F.

Q: How do I thicken the sauce if it is too runny? A: Mix 1 tablespoon cornstarch with 2 tablespoons cold water, stir it into the sauce, and cook on high for 5 to 10 minutes until it thickens.

Q: Can I make this gluten free? A: Yes, use a gluten free soy sauce, like tamari, and check all labels for hidden gluten.

Q: How long will leftovers last? A: Store in an airtight container in the fridge for 3 to 4 days. Reheat gently on the stove or in the microwave.

Q: Can I double the recipe for a crowd? A: Yes, you can double it, but check that your slow cooker is not overfilled. Cook time may increase a little if the slow cooker is very full.

Slow Cooker Honey Garlic Chicken

A warm, sweet, and garlicky chicken dish that is tender and perfect for family dinners.

Main Ingredients

  • 2 pounds boneless chicken thighs or breasts (Thighs are recommended for more flavor.)
  • 1/2 cup honey
  • 1/2 cup low sodium soy sauce (Use tamari for gluten-free option.)
  • 1/4 cup ketchup or tomato sauce
  • 3 to 4 cloves garlic, minced (Add more for a garlicky flavor.)
  • 2 tablespoons brown sugar (optional) (Adjust sweetness to taste.)
  • 1 tablespoon rice vinegar or apple cider vinegar
  • 1/2 teaspoon black pepper
  • 1 tablespoon cornstarch (Mixed with 2 tablespoons water for thickening.)
  • 2 tablespoons water (For mixing with cornstarch.)
  • Sesame seeds for garnish
  • Chopped green onions for garnish

Preparation

  1. Put the chicken in the slow cooker in a single layer.
  2. In a bowl, mix honey, soy sauce, ketchup, minced garlic, vinegar, brown sugar, and pepper until smooth.
  3. Pour the sauce over the chicken, ensuring it’s covered.

Cooking

  1. Cook on low for 4 to 5 hours, or on high for 2 to 3 hours, until the chicken is very tender.
  2. Remove the chicken to a plate.
  3. Stir the cornstarch mixture into the sauce in the slow cooker.
  4. Turn the slow cooker to high, let the sauce thicken for 5 to 10 minutes, stirring occasionally.
  5. Put the chicken back into the thickened sauce, spoon the sauce over to coat.

Serving

  1. Garnish with sesame seeds and green onions, and serve warm.

Use thighs for more juiciness. Trim excess fat to prevent a greasy sauce. Adjust sweetness and tang according to preference. Great leftovers for meal prep.

Dinner, Main Course
American, Asian
Easy Dinner, Family Meal, Honey Garlic Chicken, Slow Cooker, Tender Chicken

Creamy Pierogi Chicken Soup with Rosemary Bacon Bliss

Creamy pierogi chicken soup garnished with rosemary and bacon

This soup feels like a warm hug on a chilly day. Creamy Pierogi Chicken Soup with Rosemary Bacon Bliss mixes tender chicken, soft potato pierogi, fresh rosemary, and crispy bacon in a rich broth. It tastes cozy, salty, and a little fresh from the herbs, it makes a great meal for family nights and casual dinners. It is a real crowd-pleaser because it brings comfort food flavors and a fun twist with pierogi dumplings. If you love creamy, bacon-rich soups, you might also enjoy the bacon cheddar gnocchi soup for another cozy option. Get ready to cook something simple and tasty that everyone will ask for again.

How to prepare Pierogi Chicken Soup with Rosemary Bacon Bliss

  1. Cook bacon in a large pot until crisp, remove and set aside, keep the bacon fat. Add a few sprigs of fresh rosemary to the fat and cook briefly to smell the herbs.
  2. Add diced onion and carrot to the pot, cook until soft. Add garlic and cook one minute.
  3. Add boneless chicken pieces, brown lightly on both sides. Pour in chicken broth, bring to a simmer, cover and cook until chicken is done. Remove chicken, shred or chop, return to pot.
  4. Add store-bought or homemade potato pierogi, one by one, to the simmering soup. Cook until pierogi float and heat through, about 5 to 8 minutes.
  5. Stir in heavy cream or half and half, warm through but do not boil hard. Taste and add salt and pepper. If you like, stir in a little shredded cheddar for extra creaminess.
  6. Serve hot, top with crispy bacon pieces and a few rosemary leaves for scent.

Creamy Pierogi Chicken Soup with Rosemary Bacon Bliss

Why You’ll Love Creamy Pierogi Chicken Soup with Rosemary Bacon Bliss

  • It mixes familiar comfort flavors, chicken and bacon, with potato pierogi for a hearty texture.
  • The rosemary adds a bright, fresh note that keeps the soup from feeling too heavy.
  • It cooks mostly in one pot, so you spend less time cleaning and more time with family.
  • The soup is flexible, you can add veggies, cheese, or extra herbs to match what you like.

Tips for success

  • Use good quality chicken broth for the best flavor, or make quick stock from bouillon if you need speed.
  • Do not overcook the pierogi, they just need to heat through and float. Overcooked pierogi can get too soft.
  • Crisp the bacon well, drain on paper towels, then crumble just before serving to keep it crunchy.
  • If you want a thicker soup, mash one or two pierogi pieces in the pot or stir in a little flour slurry.
  • Warm the cream a little before adding, then stir gently and avoid a hard boil to stop the cream from splitting.

Serving Suggestions

  • Serve with crusty bread or garlic toast to soak up the broth.
  • A simple green salad with lemon vinaigrette cuts the richness and adds a fresh bite.
  • Top with extra shredded cheddar, chopped chives, or a lemon wedge on the side for brightness.
  • For a full meal, pair with roasted vegetables or steamed green beans.

Creamy Pierogi Chicken Soup with Rosemary Bacon Bliss

FAQs

Q: Can I use frozen pierogi?

A: Yes, frozen pierogi work fine. Add a few extra minutes to cook and watch for when they float.

Q: Can I make this soup ahead and reheat?

A: You can, but the pierogi may soak up more liquid. Keep extra broth or water to thin the soup when reheating.

Q: Can I use turkey or leftover roast chicken?

A: Yes, leftover chicken or turkey is a great choice and saves time.

Q: Is there a vegetarian option?

A: Use vegetable broth, skip the bacon, and add smoked paprika or roasted mushrooms for a smoky flavor.

Q: How do I store leftovers?

A: Cool the soup, put it in an airtight container, and refrigerate for up to 3 days. Reheat gently on the stove and add a splash of broth if it thickened.

Pierogi Chicken Soup

A cozy and creamy soup mixing chicken, potato pierogi, and crispy bacon, flavored with fresh rosemary.

For the Soup

  • 6 slices bacon (Crisped and crumbled)
  • 2 tablespoons fresh rosemary (A few sprigs for cooking)
  • 1 medium onion (Diced)
  • 1 medium carrot (Diced)
  • 2 cloves garlic (Minced)
  • 1 pound boneless chicken (Cut into pieces)
  • 4 cups chicken broth (Good quality or homemade)
  • 16 ounces potato pierogi (Store-bought or homemade)
  • 1 cup heavy cream or half and half (Warm before adding)
  • to taste salt and pepper (For seasoning)
  • optional shredded cheddar (For extra creaminess)

Preparation

  1. Cook bacon in a large pot until crisp, remove and set aside, keeping the bacon fat.
  2. Add fresh rosemary to the bacon fat and cook briefly to release the aroma.
  3. Add diced onion and carrot to the pot, cook until soft.
  4. Add minced garlic and cook for one minute.
  5. Add boneless chicken pieces, browning lightly on both sides.

Cooking

  1. Pour in chicken broth, bring to a simmer, cover, and cook until chicken is done.
  2. Remove chicken, shred or chop, and return to the pot.
  3. Add potato pierogi, cooking until they float and are heated through, about 5 to 8 minutes.
  4. Stir in heavy cream; warm through without boiling hard. Adjust seasoning with salt and pepper.
  5. Top with crispy bacon pieces and a few rosemary leaves before serving.

Use good quality chicken broth for the best flavor. Avoid overcooking the pierogi. For a thicker soup, mash some pierogi or stir in a flour slurry.

Main Course, Soup
American, Comfort Food
Bacon Soup, Comfort Food, Creamy Soups, Hearty Soups, Pierogi Chicken Soup

Soft Buttercream Bunny Cookies

Soft buttercream bunny cookies decorated for Easter celebration

Soft Buttercream Bunny Cookies are sweet, soft, and fun to make. These cookies have a tender bite and a creamy buttercream top that melts in your mouth. They look like little bunnies, so they bring smiles at parties, school treats, and holiday tables. The mix of soft cookie and smooth buttercream makes them a crowd-pleaser that kids and adults both love.

If you enjoy soft cookie recipes, try this gentle twist on spring treats and see how easy decorating can be, and for another soft cookie idea see this banana bread cookies soft chewy recipe. You will love the sweet taste, light texture, and the cute bunny look, and you might make a batch just to see everyone smile.

How to prepare Soft Buttercream Bunny Cookies

  1. Make the soft sugar cookie dough, use butter, sugar, egg, vanilla, flour, baking powder, and a pinch of salt. Mix until creamy, do not overmix.
  2. Chill the dough 30 minutes to make it easy to shape.
  3. Roll small balls, then press and shape each into a simple bunny shape with fingers or a small cookie cutter.
  4. Bake at 350°F for 8 to 10 minutes, until edges are set but cookies stay soft. Let them cool on a rack.
  5. Make a smooth buttercream with butter, powdered sugar, a little milk, and vanilla. Beat until light and fluffy.
  6. Pipe or spread buttercream on cooled cookies. Use small candies, sprinkles, or edible markers to make bunny faces and ears.
  7. Let the buttercream set a bit before stacking or serving.

Soft Buttercream Bunny Cookies

Why You’ll Love Soft Buttercream Bunny Cookies

  • They stay soft, not hard, for days when stored right.
  • The buttercream adds creamy sweetness that pairs well with the soft cookie.
  • They look cute and bring joy to kids and grownups.
  • You can change colors and decorations to match a party, holiday, or mood.
  • They use common ingredients you likely have at home.

Tips for success

  • Chill the dough, it helps keep the shape while baking.
  • Do not overbake, take cookies out when the edges look set. They will finish baking on the tray a little.
  • Use room temperature butter for smooth buttercream.
  • If buttercream is too thick, add a little milk, one teaspoon at a time.
  • Practice simple bunny faces first, then try more detail when you feel ready.
  • Store in an airtight container with a layer of parchment between rows to keep them soft.

Serving Suggestions

  • Serve with milk or a mild tea for a simple snack.
  • Put them on a platter with pastel candies for a spring table.
  • Add a few to a lunch box for a sweet surprise.
  • Use as favors in small clear bags tied with ribbon for parties.

Soft Buttercream Bunny Cookies

FAQs

Q: How long do these cookies stay soft?

A: Stored in an airtight container, they stay soft for about 3 to 4 days.

Q: Can I freeze the cookies?

A: Yes, freeze plain baked cookies in a single layer, then stack with parchment between. Thaw, then add buttercream after they are fully thawed.

Q: Can I color the buttercream?

A: Yes, use a few drops of gel food color to get bright colors without thinning the frosting.

Q: Can I make the cookies without a bunny shape?

A: Yes, you can make rounds and still add bunny faces with the buttercream, they will still be cute.

Q: What if my buttercream is too runny?

A: Chill it in the fridge for 10 to 15 minutes and then beat again, or add a little more powdered sugar until it firms up.

Soft Buttercream Bunny Cookies

Soft Buttercream Bunny Cookies are sweet, soft, and fun to make, featuring a tender bite and a creamy buttercream top that melts in your mouth. Shaped like little bunnies, they are perfect for parties and holidays.

For the Cookie Dough

  • 1 cup butter (Room temperature)
  • 1 cup sugar
  • 1 large egg
  • 2 teaspoons vanilla extract
  • 2 cups all-purpose flour
  • 2 teaspoons baking powder
  • 1 pinch salt

For the Buttercream

  • 1 cup butter (Room temperature)
  • 4 cups powdered sugar
  • 2 tablespoons milk (Add more if needed)
  • 1 teaspoon vanilla extract

For Decoration

  • Small candies, sprinkles, or edible markers (For creating bunny faces and ears)

Preparation

  1. In a mixing bowl, cream the butter and sugar together until light and fluffy.
  2. Add the egg and vanilla extract, mixing until combined.
  3. In a separate bowl, whisk together the flour, baking powder, and salt.
  4. Gradually add the dry ingredients to the wet ingredients, mixing until just combined. Do not overmix.
  5. Chill the dough for 30 minutes to make it easier to shape.

Shaping and Baking

  1. Preheat the oven to 350°F (175°C).
  2. Roll small balls of dough and shape each into a bunny shape using fingers or a cookie cutter.
  3. Place shaped cookies on a baking tray and bake for 8 to 10 minutes, until edges are set but cookies remain soft.
  4. Let cookies cool on a rack.

Buttercream Preparation

  1. In a mixing bowl, beat the butter until smooth.
  2. Gradually add the powdered sugar, vanilla, and milk, mixing until light and fluffy.

Decorating

  1. Once cookies are cooled, pipe or spread the buttercream on top.
  2. Use candies, sprinkles, or edible markers for decoration to create bunny faces and ears.
  3. Let the buttercream set briefly before stacking or serving.

Chill dough to maintain shape while baking. Do not overbake; cookies will continue to bake on the tray after removal. Store cookies in an airtight container with parchment between layers to preserve softness.

Dessert, Treat
American
Bunny Cookies, Buttercream, Kids Snacks, Soft Cookies, Spring Treats

Iconic Scooby Doo Sandwich

A delicious Scooby Doo sandwich stacked with various ingredients, inspired by the iconic cartoon.

This Iconic Scooby Doo Sandwich brings back fun, big flavors, and simple joy. It is a crowd-pleaser at parties and a favorite for kids who love a big, stacked sandwich. The mix of melty cheese, savory meats, and crunchy veggies gives a lovely bite every time. If you like hearty, slow-cooked sandwich ideas, check Crock Pot French Dip Sandwiches for another tasty idea that fits a crowd. Get ready to make a sandwich that smiles back at you.

How to prepare Iconic Scooby Doo Sandwich

Start by laying out all ingredients on the counter. Use a large loaf or two big sandwich rolls. Toast the bread a little, if you like crisp edges. Layer meats, cheeses, and any veggies in this order, so each bite is balanced.

Simple steps

  1. Spread mayo or sauce on both sides of the bread.
  2. Add a layer of cheese on the bottom slice, then add slices of ham and turkey, or other deli meats you like.
  3. Add pickles, lettuce, and thin tomato slices.
  4. Top with more cheese, then the top slice of bread. Press the sandwich gently so it holds together.
  5. Cut the sandwich into big pieces and serve.

This sandwich works as a large party sub or a big kids lunch, it is easy to make and fills many plates.

Iconic Scooby Doo Sandwich

Why You’ll Love Iconic Scooby Doo Sandwich

  • It is easy to make with simple deli ingredients.
  • The flavors are bold, cheesy, and familiar, kids love it.
  • You can make one big sandwich for a group, or smaller ones for lunches.
  • It is flexible, use the meats and veggies you have on hand.

Tips for success

  • Use day-old bread to avoid soggy slices.
  • Toast the bread lightly for better texture.
  • Slice ingredients thin so the sandwich is easy to eat.
  • Press the sandwich for a minute before cutting, it holds layers in place.
  • Keep sauces light, too much will make the bread wet.

Serving Suggestions

  • Serve with potato chips, carrot sticks, or a simple salad.
  • Offer pickles and extra sauce on the side.
  • Cut into large squares for a party tray, or into halves for lunches.
  • Pair with a cold soda or a glass of milk for kids.

Iconic Scooby Doo Sandwich

FAQs

Q: Can I make this sandwich ahead of time?

A: Yes, assemble it and wrap tight in plastic wrap. Keep in the fridge and eat within a day. For best texture, add fresh lettuce and tomato just before serving.

Q: What meats work best in a Scooby Doo sandwich?

A: Ham, turkey, roast beef, and salami all work well. Mix two or three to get a rich flavor.

Q: How do I keep the sandwich from getting soggy?

A: Toast the bread lightly and put cheese directly on the bread to form a barrier, keep wet ingredients like tomato and sauce in the middle.

Q: Is this sandwich kid-friendly?

A: Yes, kids usually love the melted cheese and familiar deli meats. Cut into fun shapes to make it more exciting.

Q: Can I make a vegetarian version?

A: Yes, use slices of grilled veggies, avocado, extra cheese, and hummus or a tasty spread instead of meat.

Iconic Scooby Doo Sandwich

This iconic sandwich brings big flavors and simple joy, making it a crowd-pleaser at parties and a favorite for kids.

For the sandwich

  • 1 large loaf large loaf of bread (You can also use two big sandwich rolls.)
  • 2 tablespoons mayo or sauce (Spread on both sides of the bread.)
  • 4 slices cheese (Use your favorite cheese, layered.)
  • 4 slices ham (Or use other deli meats as preferred.)
  • 4 slices turkey (Other deli meats like roast beef or salami work too.)
  • 1/2 cup pickles (Sliced pickles to add a crunch.)
  • 1 cup lettuce (Shredded or whole leaves.)
  • 1 medium tomato (Thinly sliced.)

Preparation

  1. Lay out all ingredients on the counter.
  2. Toast the bread lightly, if you prefer crisp edges.
  3. Spread mayo or sauce on both sides of the bread.
  4. Add a layer of cheese on the bottom slice, followed by slices of ham and turkey.
  5. Layer with pickles, lettuce, and thin tomato slices.
  6. Top with more cheese and then the top slice of bread. Press the sandwich gently to hold together.
  7. Cut the sandwich into big pieces and serve.

Use day-old bread to avoid soggy slices. Press the sandwich for a minute before cutting to keep layers in place. Serve with potato chips or carrot sticks.

lunch, Party Food
American
Deli Sandwich, Easy Sandwich, Kids Sandwich, Party Sandwich, Scooby Doo Sandwich

Gourmet Honey Feta Sweet Potato Rounds

Gourmet honey feta sweet potato rounds topped with honey and feta cheese.

Gourmet Honey Feta Sweet Potato Rounds are the perfect combination of sweet and savory. These little bites are crispy on the outside and soft on the inside, providing a delightful contrast in texture. Topped with creamy feta cheese and drizzled with sweet honey, they are a crowd-pleaser that can brighten up any gathering. Whether you are hosting a party or want to treat your family, these sweet potato rounds will impress everyone at the table. Get ready to have your taste buds tickled and your friends asking for the recipe!

How to Prepare Gourmet Honey Feta Sweet Potato Rounds

To make these delicious rounds, start by preheating your oven to 400 degrees Fahrenheit. Begin with medium sweet potatoes, washing and peeling them. Next, slice the sweet potatoes into round discs, about half an inch thick. Lay the slices on a baking sheet and drizzle olive oil over them, making sure they’re well-coated. Sprinkle salt and pepper for added flavor. Bake the sweet potato rounds for about 20-25 minutes, flipping halfway through, until they are tender and slightly golden.

While the sweet potatoes are baking, crumble some feta cheese and gather your honey. Once the rounds are done, remove them from the oven and let them cool for a minute. Top each round with a generous spoonful of feta cheese and drizzle honey over the top. You can also add some chopped fresh herbs for an extra touch. Your gourmet honey feta sweet potato rounds are now ready to serve!

Why You’ll Love Gourmet Honey Feta Sweet Potato Rounds

Gourmet Honey Feta Sweet Potato Rounds are not just tasty, but they are also visually appealing. The vibrant orange of the sweet potatoes, white of the feta, and glossy drizzle of honey create a beautiful dish that will catch everyone’s eye. These rounds are perfect for any occasion, from a casual weeknight dinner to a fancy dinner party.

They are easy to prepare, making them a go-to recipe for busy nights. Plus, they are healthy and filled with nutrients from sweet potatoes. The combination of flavors and textures is simply irresistible. Sweet, creamy, and just a little bit salty, these rounds will have you coming back for more. Trust me, once you try these, they will become your new favorite appetizer!

Tips for Success with Gourmet Honey Feta Sweet Potato Rounds

To really nail this recipe, choose sweet potatoes that are firm and free of blemishes. Cutting them into even-sized rounds ensures they cook evenly, giving you that perfect crispy edge. Keep an eye on them while baking, as every oven is different; you want them golden but not burnt.

When adding the feta cheese, consider using a high-quality cheese for the best flavor. You can also mix in some fresh herbs like thyme or rosemary before baking for added depth. For a spicy kick, a sprinkle of red pepper flakes can elevate the dish.

Finally, don’t be shy with the honey drizzle! A generous amount will enhance the flavors beautifully. If you want to prepare these ahead of time, simply bake the sweet potato rounds and add the toppings just before serving. This way, they stay fresh and delicious!

Serving Suggestions for Gourmet Honey Feta Sweet Potato Rounds

Gourmet Honey Feta Sweet Potato Rounds can stand alone as a tasty appetizer, but they also pair well with other dishes. Consider serving them alongside a fresh salad or on a charcuterie board with meats and olives. They also go beautifully with grilled chicken or fish for a complete meal.

You can add variety by serving different dips with it, such as tzatziki or a lemon herb yogurt sauce. If you want to make it more filling, pair these rounds with a hearty soup, like tomato basil or butternut squash. Overall, these versatile rounds are sure to be a hit at any table.

FAQs

Can I make these sweet potato rounds ahead of time?
Yes, you can bake the sweet potato rounds in advance, then add the feta and honey just before serving.

What can I substitute for feta cheese?
If you’re not a fan of feta, you can use goat cheese or even ricotta for a creamier texture.

Are sweet potato rounds gluten-free?
Yes, sweet potatoes are naturally gluten-free, making this recipe perfect for those with gluten sensitivities.

How do I store leftovers?
Store leftovers in an airtight container in the fridge for up to three days. Reheat them in the oven for a few minutes to regain their crispy texture.

[tasty-recipe id=”5053″]

Gourmet Honey Feta Sweet Potato Rounds

A perfect combination of sweet and savory, these crispy and creamy sweet potato bites topped with feta cheese and honey are sure to impress at any gathering.

For the Sweet Potato Rounds

  • 2 medium sweet potatoes (Firm and blemish-free)
  • 2 tablespoons olive oil (For drizzling)
  • 1 teaspoon salt
  • 1 teaspoon pepper

For the Toppings

  • 1 cup feta cheese (Crumpled)
  • 1/4 cup honey (For drizzling)
  • optional chopped fresh herbs (Such as thyme or rosemary)

Preparation and Baking

  1. Preheat your oven to 400 degrees Fahrenheit.
  2. Wash and peel the sweet potatoes.
  3. Slice the sweet potatoes into round discs, about half an inch thick.
  4. Lay the slices on a baking sheet and drizzle olive oil over them, ensuring they are well-coated.
  5. Sprinkle salt and pepper for added flavor.
  6. Bake the sweet potato rounds for about 20-25 minutes, flipping halfway through, until they are tender and slightly golden.

Topping and Serving

  1. Once done baking, remove the rounds from the oven and let them cool for a minute.
  2. Top each round with a generous spoonful of feta cheese and drizzle honey over the top.
  3. Add chopped fresh herbs for an extra touch if desired.
  4. Serve immediately.

Choose high-quality feta cheese for the best flavor. Consider adding a sprinkle of red pepper flakes for a spicy kick. Can be prepared ahead of time by baking the rounds and adding the toppings just before serving. Store leftovers in an airtight container in the fridge for up to three days.

Appetizer, Snack
American
Gourmet Appetizer, Honey Feta Bites, Party Food, Sweet Potato Rounds, Vegetarian

Spooky Stuffed Mushroom Eyeballs

Spooky stuffed mushroom eyeballs garnished for Halloween

Get ready for a Halloween treat that’s as fun to make as it is to eat! Spooky Stuffed Mushroom Eyeballs bring a playful twist to any party with their creepy appearance and delicious flavor. These little bites of goodness are stuffed with a delightful mixture, making them a crowd-pleaser that everyone will rave about. With their unique look and tasty filling, they add a special touch to your Halloween spread. Whether you’re hosting a spooky gathering or just in the mood for some festive fun, these mushroom eyeballs will surely get everyone talking. So, let’s dive into this fun recipe and get those hands dirty!

how to prepare Spooky Stuffed Mushroom Eyeballs

To start making Spooky Stuffed Mushroom Eyeballs, gather your ingredients: fresh mushrooms, cream cheese, shredded cheese, breadcrumbs, garlic, and some herbs. First, preheat your oven to 375°F (190°C). Then, clean the mushrooms by wiping them down with a damp cloth. Remove the stems carefully from each mushroom cap. In a bowl, mix softened cream cheese, shredded cheese, minced garlic, and breadcrumbs until combined. Season the mixture with your favorite herbs, like parsley or oregano, to add extra flavor.

Fill each mushroom cap with the creamy mixture and place them on a baking dish. To give them an extra spooky look, take some olives and cut them in half to represent the iris and pupil of the eyeball. Place an olive half on top of each stuffed mushroom. Bake the mushrooms in the oven for about 20 minutes, until they are golden and bubbly. Once done, let them cool slightly, and then they are ready to be enjoyed!

Why You’ll Love Spooky Stuffed Mushroom Eyeballs

Spooky Stuffed Mushroom Eyeballs are simply irresistible! Their unique look makes them a fun addition to any Halloween gathering, catching everyone’s eye from the moment they arrive. Not only do these mushroom eyeballs look amazing, but they also taste fantastic. The creamy filling combines rich flavors with a crispy texture, making every bite enjoyable.

Plus, they are easy to prepare, which means more time for you to enjoy your party! These stuffed mushrooms can be made ahead of time and just popped in the oven right before serving. The combination of spooky fun and tasty ingredients ensures your guests will be reaching for seconds. With these mushroom eyeballs on the table, laughter and excitement are sure to fill the room.

tips for success

To make your Spooky Stuffed Mushroom Eyeballs a hit, follow these handy tips. First, choose the right mushrooms. Opt for larger variety, like portobello or button mushrooms, so they hold more filling and look like real eyeballs. Make sure to clean the mushrooms gently without soaking them in water, as they can get soggy.

When preparing the filling, don’t hesitate to add your favorite seasonings for more flavor. A bit of red pepper flakes or seasoning mix can spice things up. If you want to save some time, prepare your stuffed mushrooms in advance. You can fill them and store them in the fridge until you are ready to bake.

Lastly, keep an eye on the baking time. Different ovens can vary, so watch for that golden color to ensure your mushrooms are cooked perfectly.

Serving Suggestions

When it comes to serving your Spooky Stuffed Mushroom Eyeballs, creativity is key. Arrange them on a spooky platter and garnish with some fresh herbs for a pop of color. You can also add fake spider web decorations around the dish to set the mood for your Halloween party.

Pair these mushroom eyeballs with a dipping sauce like marinara or garlic aioli to enhance their flavor. This allows your guests to customize their bites. For a fun drink option, serve them alongside a creepy punch or spooky cocktails that fit the theme.

Don’t forget to invite your friends to participate in the fun, let them assemble their own eyeballs, creating a delightful activity that brings laughter to the table!

FAQs

Can I make these stuffed mushrooms ahead of time?

Yes, you can prepare Spooky Stuffed Mushroom Eyeballs in advance. Fill them and store them in the fridge until you are ready to bake.

What mushrooms are best for this recipe?

Portobello and button mushrooms work best, as they are big enough to hold the filling and have a great flavor.

Can I use different fillings?

Absolutely! You can mix in different cheeses, cooked sausages, or even vegetables to create your perfect filling.

How do I store any leftovers?

You can store leftover stuffed mushrooms in an airtight container in the fridge for up to two days. Reheat them in the oven before serving for the best taste.

What can I serve with these stuffed mushrooms?

These mushroom eyeballs pair well with marinara sauce for dipping, fresh veggies, or even a festive punch to complete your Halloween theme.

[tasty-recipe id=”5027″]

Spooky Stuffed Mushroom Eyeballs

A fun and creepy Halloween treat filled with a delicious creamy mixture, perfect for parties.

Mushroom Filling

  • 12 large fresh mushrooms (Choose portobello or button varieties.)
  • 8 oz cream cheese, softened (For a creamy texture.)
  • 1 cup shredded cheese (Add your favorite type.)
  • 1/2 cup breadcrumbs (For texture.)
  • 2 cloves garlic, minced (For flavor.)
  • to taste herbs (e.g., parsley, oregano) (Choose to add your favorites.)

Eyeball Decoration

  • 6 whole black olives (Cut in half for eye detail.)

Preparation

  1. Preheat your oven to 375°F (190°C).
  2. Clean the mushrooms by wiping them down with a damp cloth and carefully remove the stems.
  3. In a bowl, mix the softened cream cheese, shredded cheese, minced garlic, and breadcrumbs until combined.
  4. Season the mixture with your favorite herbs.
  5. Fill each mushroom cap with the creamy mixture.
  6. Cut olives in half and place them on top of each stuffed mushroom.

Cooking

  1. Place the stuffed mushrooms on a baking dish.
  2. Bake in the oven for about 20 minutes, or until golden and bubbly.
  3. Let them cool slightly and enjoy!

These can be prepared ahead of time and stored in the fridge before baking. Serve with dipping sauces like marinara or garlic aioli.

Appetizer, Snack
American, Halloween
Easy Appetizers, Halloween Recipes, Party Food, Spooky Treats, Stuffed Mushrooms

French Onion Beef Short Rib Soup

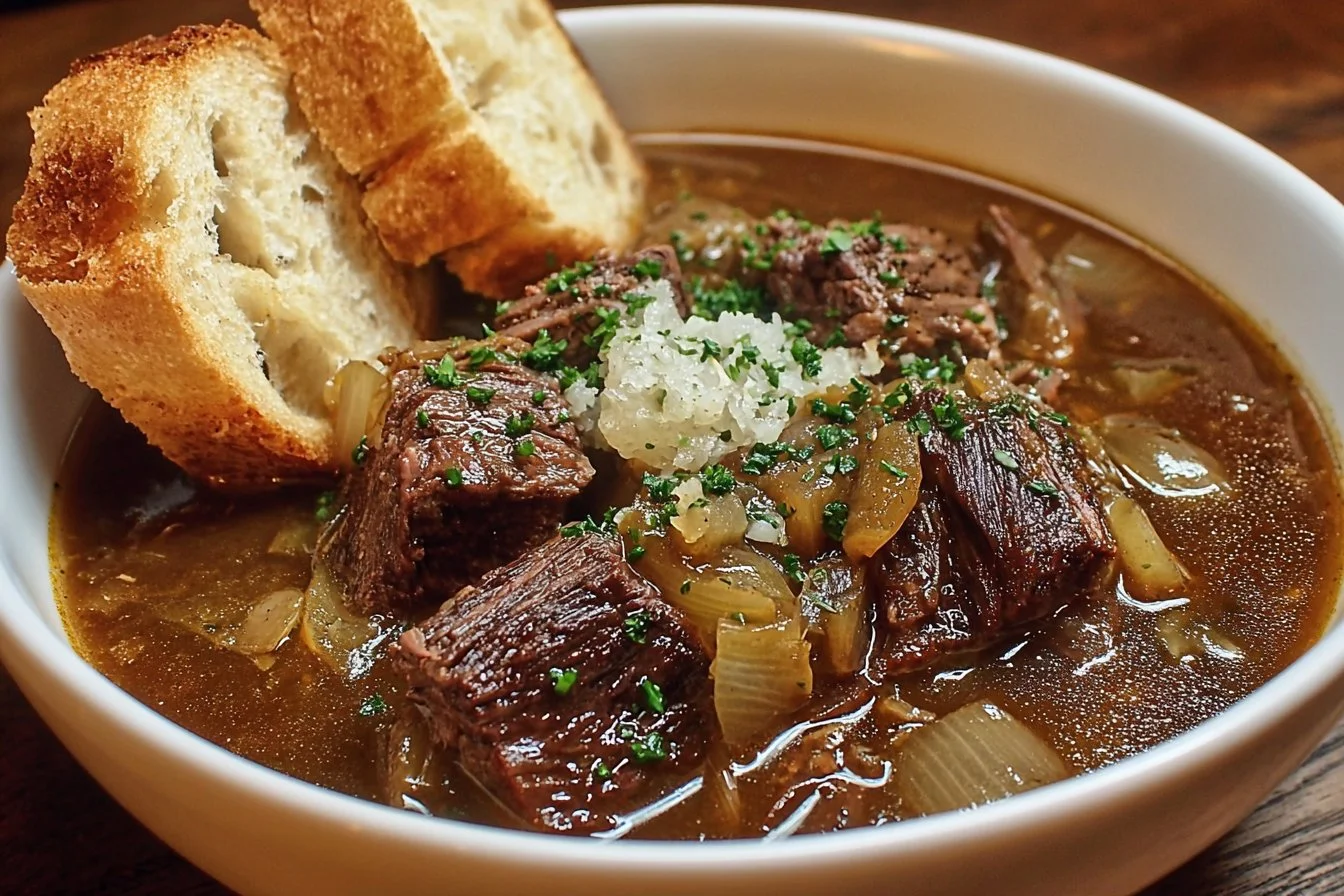
Bowl of French Onion Beef Short Rib Soup garnished with herbs and onions

A bowl of French Onion Beef Short Rib Soup is like a warm hug on a chilly day. With rich flavors and a delicious blend of tender beef and caramelized onions, this soup is both comforting and satisfying. Perfect for family gatherings or cozy dinners with friends, it’s a dish that will leave everyone asking for seconds. The hearty broth, combined with the melt-in-your-mouth short ribs, delivers a depth of flavor that’s hard to resist. Plus, who can say no to a cheesy, toasted baguette on top? Your kitchen will smell divine as it simmers away, and your taste buds will thank you for making this delightful recipe a part of your mealtime routine. So, roll up your sleeves and let’s make some magic in the kitchen!

how to prepare French Onion Beef Short Rib Soup

To begin, gather your ingredients, which include beef short ribs, onions, garlic, beef broth, red wine, thyme, bay leaves, and a baguette for topping. First, sear the short ribs in a large pot over medium heat until they’re golden brown. Remove them and set aside. In the same pot, add sliced onions and cook until they become soft and caramelized, which usually takes about 15 to 20 minutes. Once the onions are ready, add minced garlic, red wine, and let it simmer for a few minutes. After that, add the beef broth, thyme, bay leaves, and the seared short ribs back into the pot. Cover and let it cook low and slow for about two to three hours, until the beef is tender. Finally, serve hot in bowls with toasted baguette slices on top, smothered with melted cheese if you like. Enjoy the warmth!

Why You’ll Love French Onion Beef Short Rib Soup

This soup is a perfect blend of flavors and textures that will make every spoonful a delight. The tender short ribs provide a hearty base, while the sweet caramelized onions add a rich and savory touch. The use of red wine and herbs infuses the broth with complexity that dances on your palate. Whether you are enjoying it on a cold winter night or serving it at a gathering, it’s truly a crowd-pleaser. The extra cheesy topping makes it even more comforting, giving it that iconic French onion touch. This soup isn’t just a meal, it’s an experience that brings everyone around the table.

tips for success

To make sure your French Onion Beef Short Rib Soup turns out perfectly, follow these handy tips. First, take your time caramelizing the onions; patience is key, as it enhances their sweetness and flavor. Use good-quality beef broth for the best taste, and don’t skip the red wine, as it really adds depth to the dish. When cooking the short ribs, make sure they’re well-seared for that extra flavor boost. Allow the soup to simmer low and slow to ensure the beef is tender. Lastly, don’t forget to top it with cheese; a mix of Gruyère and Swiss is traditional and melts beautifully. These simple steps will elevate your soup to a restaurant-quality dish at home.

Serving Suggestions

When serving this soup, consider pairing it with a fresh, crusty baguette or some flavorful garlic bread for the perfect complement. A light salad with a simple vinaigrette would also work well to balance the richness of the soup. For a rustic touch, you can serve the soup in oven-safe bowls and place them under the broiler for a minute or two to give the cheese a bubbly, golden finish. If you’re feeling adventurous, try garnishing with fresh herbs like parsley for an added pop of color. This hearty soup is versatile, so feel free to be creative with your sides!

FAQs

1. Can I use a different cut of meat?

Yes, if you cannot find short ribs, you can use chuck roast or brisket. The key is to choose a cut that becomes tender with slow cooking.

2. How do I store leftovers?

You can keep leftovers in an airtight container in the fridge for up to three days. Reheat gently on the stove or in the microwave.

3. Can I freeze this soup?

Absolutely! Let it cool completely before transferring to a freezer-safe container. It can be frozen for up to three months. Just thaw and reheat when you’re ready to enjoy.

4. Is there a vegetarian option?

Yes, you can make a vegetarian version by using vegetable broth and omitting the meat. Replace the short ribs with hearty vegetables like mushrooms or lentils to add substance.

[tasty-recipe id=”5034″]

French Onion Beef Short Rib Soup

This comforting soup combines tender beef short ribs and caramelized onions in a rich broth, topped with melted cheese on toasted baguette slices.

Main Ingredients

  • 2 pounds beef short ribs (Choose well-marbled meat for the best flavor.)
  • 4 large onions, sliced (Yellow or sweet onions work well.)
  • 4 cloves garlic, minced
  • 6 cups beef broth (Use good-quality broth for the best taste.)
  • 1 cup red wine (Adds depth to the flavor.)
  • 1 teaspoon dried thyme
  • 2 each bay leaves
  • 1 large baguette, sliced (For topping.)
  • 1 cup Gruyère cheese, shredded (Traditional cheese topping.)
  • 1 cup Swiss cheese, shredded (For melting on top.)

Preparation

  1. Sear the beef short ribs in a large pot over medium heat until golden brown. Remove and set aside.
  2. In the same pot, add sliced onions and cook until soft and caramelized, about 15 to 20 minutes.
  3. Add minced garlic and red wine to the pot, allowing it to simmer for a few minutes.
  4. Stir in beef broth, thyme, bay leaves, and return the seared short ribs to the pot.

Cooking

  1. Cover the pot and let it cook on low heat for 2 to 3 hours, until the beef is tender.

Serving

  1. Serve the soup hot in bowls, topping with toasted baguette slices and melted cheese, if desired.

Take your time caramelizing the onions; it enhances their flavor. Use high-quality ingredients for the best results. Don’t skip the cheese topping for the authentic experience.

Main Course, Soup
French
Beef Short Rib Soup, Comfort Food, French Onion Soup, Hearty Soup, Winter Recipe