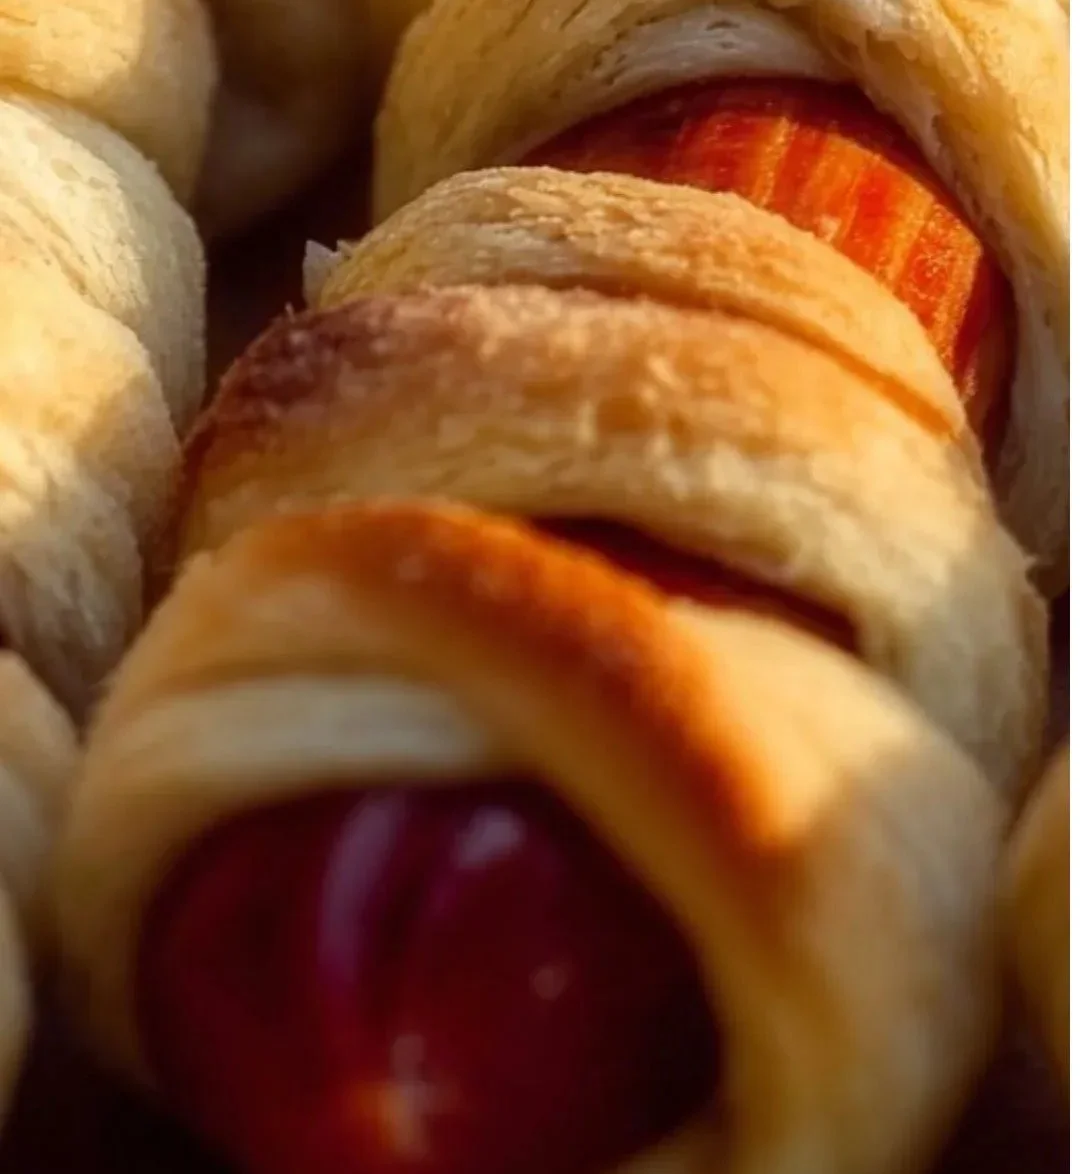
Mummy Hot Dogs are a fun and creative way to celebrate Halloween or any spooky occasion. These playful treats look like little mummies wrapped in dough, making them a hit with both kids and adults. Not only are they easy to make, but they also require minimal ingredients, ensuring that you can whip them up quickly. Whether you’re hosting a Halloween party, cooking for a family gathering, or just want to try something different, Mummy Hot Dogs are sure to steal the show. They are delicious, easy to eat, and add a festive flair to your table. Plus, they can turn a simple dinner into a fun event. So gather your ingredients, roll up your sleeves, and let’s create these delightful mummies!
Why make this recipe
Spooky Mummy Hot Dogs are a great choice for many reasons. First, they are simple and quick to prepare, needing just about 30 minutes from start to finish. This makes them perfect for those busy days when you need to put together a fun dish without spending too much time in the kitchen.
Second, this recipe is very approachable for cooks of all skill levels. Whether you are a beginner or a seasoned chef, you can easily follow the recipe and create these adorable treats. Kids will also love getting involved, making it a fantastic way to bond in the kitchen.
Also, Mummy Hot Dogs are not only cute but tasty, too. The combination of crispy, golden-brown dough and juicy hot dogs is a crowd-pleaser. Plus, you can get creative with dipping sauces like mustard, ketchup, or even some spooky green guacamole!
Finally, they are flexible! You can adapt this recipe to fit your dietary needs by using veggie dogs or gluten-free dough, making it an inclusive dish for everyone. So, whether you are planning a Halloween party or just looking for a fun snack, Mummy Hot Dogs are a great choice!
How to make Spooky Mummy Hot Dogs
To make Spooky Mummy Hot Dogs, start by gathering your ingredients. You will need hot dogs, crescent roll dough, mustard or candy eyes for decoration, and cooking spray.
Begin by preheating your oven to the temperature specified on the crescent roll dough package. While the oven heats up, unroll the crescent roll dough and cut it into thin strips. These strips will act as the “bandages” for your mummies.
Next, take a hot dog and wrap the dough strips around it, leaving a small space for the hot dog’s face to show. Make sure to overlap the strips as you wrap them to create a fun mummy look. Repeat this step with all the hot dogs.
Once wrapped, place the mummies on a baking sheet lined with parchment paper. Bake them in the preheated oven for the time specified on the dough package, usually around 10 to 15 minutes, until they are golden brown.
After baking, take the mummies out of the oven and allow them to cool slightly. Finally, use mustard or candy eyes to add spooky faces on your mummies. Serve and enjoy this festive treat!
How to serve Spooky Mummy Hot Dogs
Serving Spooky Mummy Hot Dogs can be as fun as making them. Start by presenting them on a large rustic platter or a Halloween-themed serving tray. You can place a small bowl of mustard or ketchup at the center for dipping.
For an extra spooky touch, add some fake cobwebs around the serving area. This adds to the festive spirit and makes your dish look even more attractive. You can also sprinkle some plastic spiders or mini pumpkins around the Mummy Hot Dogs for that extra Halloween flair.
Don’t forget to have fun when serving! Encourage guests to pick their favorite mummies and dip them in their chosen condiments. You can also provide little flags or markers with fun mummy names. This not only creates conversation but also makes your party more interactive. Lastly, consider pairing your Mummy Hot Dogs with other spooky treats, like ghostly cupcakes or witch broomsticks made from pretzel sticks and cheese.
How to store Spooky Mummy Hot Dogs
If you have any leftovers after your spooky celebration, storing them properly is essential to maintain their taste and texture. First, allow the Mummy Hot Dogs to cool completely. This step is crucial to prevent moisture buildup, which can lead to sogginess.
Once cooled, you can place them in an airtight container. Make sure to separate layers with parchment paper if you are stacking them. This will help keep the mummies from sticking together. You can also wrap each mummy individually in plastic wrap for easy grab-and-go snacks.
Mummy Hot Dogs can be stored in the refrigerator for about three to four days. If you want to keep them longer, consider freezing them. To freeze, place the airtight container in the freezer. You can reheat them in the oven when you’re ready to eat, keeping that yummy crispy texture intact.
Tips to make Spooky Mummy Hot Dogs
To make the best Spooky Mummy Hot Dogs, here are some useful tips. First, for an extra crispy exterior, brush some melted butter on the dough before baking. This adds flavor and enhances the color of the finished mummies.
Second, feel free to experiment with different types of dough. If you cannot find crescent roll dough, puff pastry or pizza dough can work well. These alternatives can offer different textures and tastes to your mummies.
Also, try using different types of sausages or hot dogs. Chicken, turkey, or even veggie dogs can be used, depending on your dietary preferences. Remember to cut them to the same size as the original hot dogs to ensure even cooking.
Finally, for a spooky twist, consider adding cheese inside the hot dog before wrapping it in dough. This creates a delicious surprise when your guests take a bite. These small adjustments can elevate the fun factor and taste of your Mummy Hot Dogs!
Variation
You can easily switch up this recipe by using different toppings. Instead of mustard, you can use ketchup, ranch dressing, or cheese dip for a varied dipping experience. If you’re feeling creative, try adding tiny pieces of olives or other veggies for eyes to give your mummies even more personality.
FAQs
1. Can I use a different type of dough?
Yes! You can use puff pastry or pizza dough instead of crescent roll dough for a different taste and texture.
2. How do I reheat leftovers?
You can reheat them in the oven at 350°F (175°C) for about 10 minutes, until hot and crispy again.
3. Can I make these in advance?
Yes, you can prepare the mummies ahead of time and store them in the fridge before baking. Bake them just before serving for best results.
[tasty-recipe id=”4891″]
Mummy Hot Dogs

Mummy Hot Dogs are a fun and creative treat perfect for Halloween, combining hot dogs wrapped in crescent roll dough to resemble mummies.
Main Ingredients
- 8 pieces hot dogs (You can use chicken, turkey, or veggie dogs.)
- 1 can crescent roll dough (Alternatively, use puff pastry or pizza dough.)
- 1 tablespoon cooking spray (For greasing the baking sheet.)
Decoration
- as needed mustard or candy eyes (For decorating the mummy faces.)
Preparation
- Preheat the oven according to the crescent roll dough package instructions.
- Unroll the crescent roll dough and cut it into thin strips.
- Wrap the dough strips around each hot dog, leaving space for the faces.
Baking
- Place the wrapped hot dogs on a baking sheet lined with parchment paper.
- Bake in the preheated oven for 10 to 15 minutes, or until golden brown.
Serving
- Allow the mummies to cool slightly, then decorate with mustard or candy eyes.
- Serve on a platter with dipping sauces and festive decorations.
For an extra crispy texture, brush melted butter on the dough before baking. You can prepare the mummies ahead of time and bake just before serving.