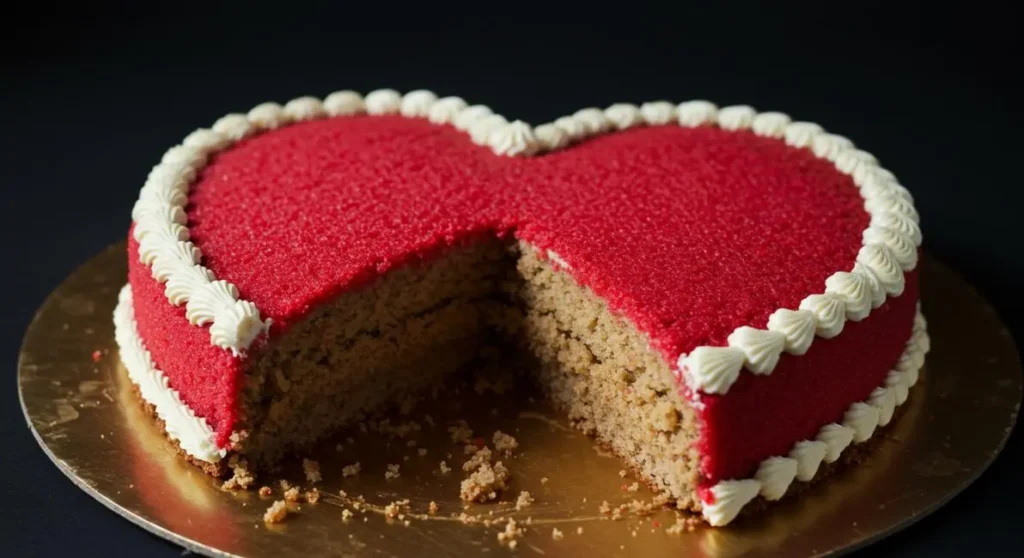
You can celebrate a special thing or make any day nicer by preparing a lovely Vintage Heart cake. This simple heart-shaped cake makes any event feel a bit older and sweeter. Having flowers, be it for an anniversary, Valentine’s Day or something else, will always bring smiles. Because it’s soft, sweet, well-frosted and beautifully decorated, everyone will enjoy it.
The best thing about this is: You can whip it up quickly using only a few elements and simple processes. In addition, you can make the decorations match your own personal style. While baking this cake, all kinds of delightful aromas fill your kitchen and you have fun coming up with new ideas. Every piece of a heart-shaped cake is special because it reminds people, no matter their age, how loved they are. Let’s begin and check out the steps for creating an adorable Vintage Cake recipe.
Ingredients for vintage heart cake
- 2 layers of chocolate or vanilla cake
- Buttercream frosting
- Food coloring (optional)
- Decorative elements (e.g. edible flowers or sprinkles)
- Heart-shaped cake cutter
Directions
- Bake the cake layers according to your preferred recipe. Let them cool completely.
- Use the heart-shaped cutter to cut out heart shapes from the cake layers.
- Stack the heart shapes and frost them with buttercream frosting.
- If desired, color the frosting with food coloring and create decorative designs.
- Top the cake with edible flowers or sprinkles for decoration.
- Serve and enjoy your Vintage Heart Cake!
You can make a vintage heart cake with these steps.
You’ll love how easy and enjoyable it’s to make your own Heart Cake! Decide which flavor you would like your cake layers to be: chocolate or vanilla. Mix up your preferred cake batter according to the recipe you like best. Give the cake enough time to cool down before cutting into it to make removing each layer simple. Proceed by using a heart-shaped cookie cutter to cut hearts out of each of the cake layers. This is the part when your cake starts to resemble the classic design. Once you’ve cut out heart shapes from each layer, arrange them on top of each other and cover them entirely with the buttercream frosting. If you want your cake to have an extra burst of color, try stirring in some food coloring with your frosting. To finish it off beautifully, decorate the cake with colorful edible flowers or sprinkles that lend a whimsical touch. This is the perfect way to give your Cake a special look.
Simple steps to present your Vintage Heart Cake beautifully.
The joy of making your Vintage Heart Cake is matched by how beautiful it looks when you serve it to guests. Once your Vintage Heart Cake is ready, present it elegantly on a pretty cake stand. Cut the cake with a sharp serrated knife along the natural contours of the heart. Every slice will display the cake’s cute heart shape and charm the eyes of your guests. Serve the cake with either vanilla ice cream or whipped cream to bring out the best in its ingredients. Matching the sweet flavors of your Vintage Heart Cake with fresh berries makes an enjoyable and beautiful addition. A great touch for celebrations would be placing a candle on the cake to let each person make a wish before slicing it. It will help make your gathering more unforgettable and enjoyable for everyone.
Keeping Your Vintage Heart Cake Fresh.
Properly storing your Vintage Heart Cake will keep it tasting its best. Cut any extra slices of Vintage Heart Cake and store them in an airtight container. You can also cover the whole cake with plastic wrap or use a cake dome. Covering it prevents it from becoming hard and stale. Keep your Vintage Heart Cake in a cool, dark location where it won’t be exposed to sunlight. To preserve the cake for more time, wrapped it well and store it in the freezer. Individual pieces or the whole cake should be first covered with plastic wrap before being wrapped in aluminum foil. Let it sit in the fridge for at least 12 hours before taking it out to serve. Don’t let the cake sit out at room temperature for extended periods to preserve its flavor and moistness.
Tips to Make Vintage Heart Cake
When making your Vintage Heart Cake, there are a few tips to enhance the result and ensure success.
- Use Fresh Ingredients: Always opt for fresh eggs, quality flour, and pure vanilla extract for the best flavor in your cake.
- Allow Cakes to Cool Completely: It’s crucial to let the cake layers cool completely before cutting out the heart shapes. Warm cakes can break easily and make frosting difficult.
- Consistent Frosting: If your buttercream frosting is too soft, refrigerate it for a little while to make it easier to work with. Conversely, if it’s too stiff, add a little milk to soften it.
- Avoid Overmixing: When mixing your cake batter, avoid overmixing after adding the flour. This will help maintain a light and fluffy texture in your cake layers.
- Decorate Wisely: When decorating, allow your creativity to shine, but remember less can be more. Too many decorations can overwhelm the beautiful heart shape of your cake.
By keeping these tips in mind, you can avoid common mistakes and make a perfect Vintage Heart Cake.
Variation
There are several variations you can try with your Vintage Heart Cake to make it more unique! For instance, if you want to introduce different flavors, experiment by adding fruit purees or flavored extracts to your cake batter. You could make a lemon-flavored heart cake by using lemon zest and juice. If you prefer a layer of jam or fruit preserves, spread a thin layer between the heart-shaped layers before frosting. This adds a delightful surprise of flavor in every bite. You can also change up the frosting by choosing cream cheese frosting, which pairs beautifully with vanilla cake, or even a chocolate ganache for chocolate cake lovers. Not limited to just one shape, you can use other cookie cutters to create fun designs. Try making mini heart cakes or even cupcakes using the same concept. The options are endless, making the Vintage Heart Cake a versatile creation for all seasons.
FAQs
A. Can I use store-bought cake mixes for the Vintage Heart Cake?
Absolutely! Store-bought cake mixes are a great way to save time. Just follow the package instructions and proceed with the cutting and frosting steps.
B. How long can I store the Vintage Heart Cake?
If stored properly in an airtight container, the cake can last about 3 to 5 days at room temperature. In the fridge, it can last around a week, and if frozen, it can keep for up to 3 months.
C. What can I use if I don’t have a heart-shaped cake cutter?
If you don’t have a heart-shaped cake cutter, you can create your own by carefully cutting out a heart shape using a sharp knife. Alternatively, you can bake a round cake and frost it, then use a knife to create a heart shape.
D. Is it possible to make a gluten-free Vintage Heart Cake?
Yes, you can make a gluten-free version by using a gluten-free cake mix or flour substitute. Just ensure all other ingredients are also gluten-free.
E. Can I make the cake ahead of time for an event?
Certainly! You can bake the cake layers ahead of time. Just store them in the fridge or freezer until you are ready to decorate and serve.
Creating a Vintage Heart Cake can be an enjoyable experience, full of creativity and flavor! Its charm and taste will surely win hearts, making any gathering a joyful celebration.
PrintVintage Heart Cake
- Total Time: 1 hour
- Yield: 1 heart-shaped cake (8–10 servings) 1x
- Diet: Vegetarian
Description
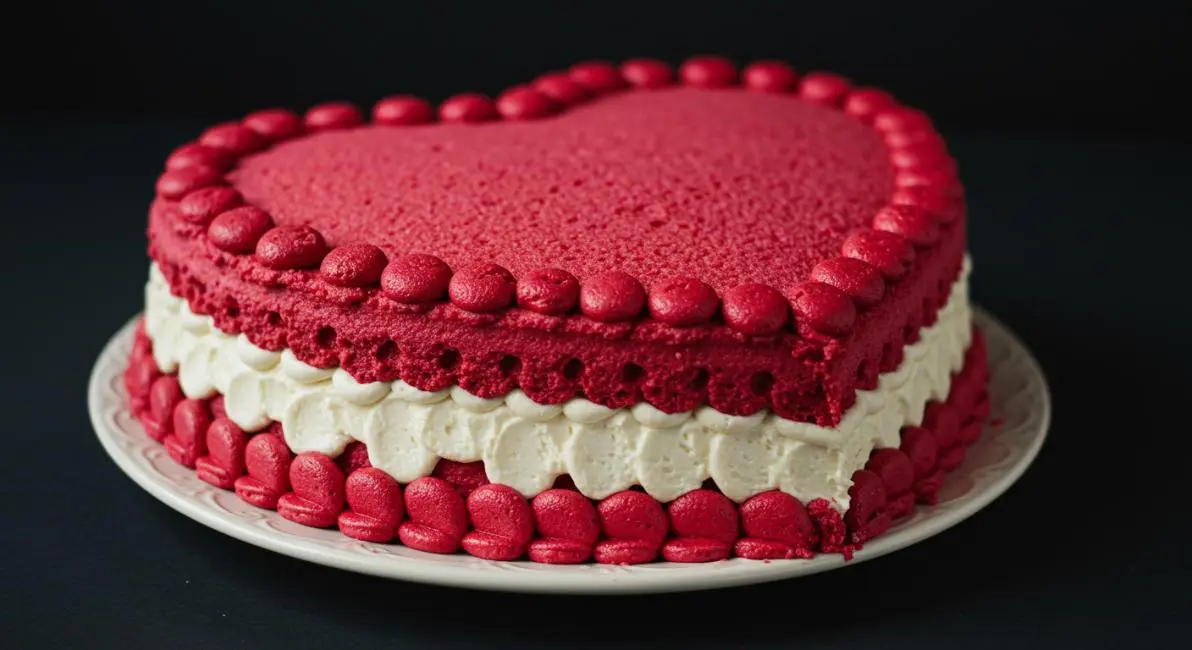
A vintage heart cake is a charming and nostalgic dessert, known for its heart shape and intricately piped buttercream decorations, perfect for romantic occasions, anniversaries, or Valentine’s Day celebrations.
Ingredients
- 1 ½ cups all-purpose flour
- 1 ½ tsp baking powder
- ¼ tsp salt
- ½ cup unsalted butter, softened
- 1 cup granulated sugar
- 2 large eggs
- 1 tsp vanilla extract
- ½ cup whole milk
- Red or pink food coloring (optional)
- 1 cup unsalted butter (for buttercream)
- 3–4 cups powdered sugar (for buttercream)
- 2–3 tbsp milk or cream (for buttercream)
- 1 tsp vanilla extract (for buttercream)
- Gel food coloring (for decorating)
Instructions
- Preheat your oven to 350°F (175°C). Grease and flour a heart-shaped cake pan.
- In a medium bowl, whisk together flour, baking powder, and salt. Set aside.
- In a large bowl, cream the butter and sugar until light and fluffy.
- Beat in the eggs one at a time, then add the vanilla extract.
- Gradually mix in the dry ingredients, alternating with the milk. Add food coloring if desired.
- Pour the batter into the prepared pan and smooth the top.
- Bake for 30–35 minutes or until a toothpick inserted into the center comes out clean.
- Let the cake cool in the pan for 10 minutes, then turn out onto a wire rack to cool completely.
- To make the buttercream, beat the butter until creamy. Gradually add powdered sugar, then milk and vanilla. Beat until smooth.
- Color the frosting as desired, then pipe decorative designs onto the cooled cake using various piping tips.
Notes
- Ensure the cake is completely cool before frosting to prevent melting.
- Use gel food coloring for more vibrant colors without altering the frosting texture.
- Decorate with vintage-style piping techniques such as shells, rosettes, and swirls for an authentic look.
- You can split the cake into layers and add filling for extra flavor.
- Prep Time: 25 minutes
- Cook Time: 35 minutes
- Category: Dessert
- Method: Baking
- Cuisine: American
Nutrition
- Serving Size: 1 slice
- Calories: 410
- Sugar: 38g
- Sodium: 120mg
- Fat: 22g
- Saturated Fat: 13g
- Unsaturated Fat: 7g
- Trans Fat: 0.5g
- Carbohydrates: 50g
- Fiber: 0.5g
- Protein: 3g
- Cholesterol: 80mg
Keywords: vintage heart cake, heart-shaped cake, Valentine's Day dessert, romantic cake, buttercream piping, retro cake design